© 2010 delmar, cengage learning chapter 4 working with links
TRANSCRIPT

© 2010 Delmar, Cengage Learning
Chapter 4
Working with Links

© 2010 Delmar Cengage Learning
Chapter 4 Lessons
1. Create external and internal links
2. Create internal links to named anchors
3. Create, modify, and copy a navigation bar
4. Create an image map
5. Manage website links
© 2010 Delmar Cengage Learning
Understanding Internal and External Links
• Web Pages contain two types of links– Internal: links to web pages in the same
website– External: links to web pages on other
websites or to e-mail addresses

© 2010 Delmar Cengage Learning
Understanding Internal and External Links• Internal and external links have two
important parts that work together:– The element that viewers see and click
on a web page (text, image, or a button)– The path, or the name and location of the
web page or file that will open when the element is clicked

© 2010 Delmar Cengage Learning
Creating Links
• Create external links– Absolute paths
• Create internal links– Relative paths

© 2010 Delmar Cengage Learning
Absolute and Relative Paths

© 2010 Delmar Cengage Learning
Creating External Links
• Select the text or object that you want to serve as a link
• Type the absolute path to the destination web page in the Link text box in the Property inspector

© 2010 Delmar Cengage Learning
Fig. 1: Example of Absolute Path

© 2010 Delmar Cengage Learning
Creating Internal Links
• Select the text element or graphic object that you want to make a link
• Use the Browse for File icon next to the Link text box in the HTML Property inspector to specify the relative path to the destination page

© 2010 Delmar Cengage Learning
Fig. 2: Example of a Relative Path

© 2010 Delmar Cengage Learning
Fig. 5: Creating an External Link
HTML buttonText for link URL for link

© 2010 Delmar Cengage Learning
Fig. 6: Creating Internal Link on Activities Page
Text to be used for linkRelative link to fishing.html
Browse for File icon

© 2010 Delmar Cengage Learning
Create Internal Links to Named Anchors
• Named anchor: specific location on a web page that has a descriptive name– Acts as a target for internal links
• Target: location on the web page that a browser displays when internal link is clicked

© 2010 Delmar Cengage Learning
Create Internal Links to Named Anchors
• Select the text or image that you want to use to make a link, and then drag the Point to File icon from the Property inspector to the named anchor icon on the page
• Select the text or image to which you want to use to make a link, then type # followed by the named anchor name (such as “#top”) in the Link text box in the Property inspector.

© 2010 Delmar Cengage Learning
Fig. 8: Using the Point to File Icon
Named Anchor button
Named anchors
Link to named anchorPoint to File icon
Text used for link to named anchor

© 2010 Delmar Cengage Learning
Fig. 9: Named Anchor Dialog Box
Name of new anchor

© 2010 Delmar Cengage Learning
Fig. 11: Dragging the Point to File Icon to a Named Anchor
Point to File iconNamed anchor name preceded by # sign
Point to File icon dragged to named anchor
Text to link to named anchor

© 2010 Delmar Cengage Learning
Create a Navigation Bar Using Images• Allows you to create a more visually
appealing method for navigation that utilizes graphics rather than text
• Can be created in many different graphics programs including Adobe Fireworks or Adobe Illustrator

© 2010 Delmar Cengage Learning
Create a Navigation Bar• Navigation bar elements can have four
possible states • A state is the condition of the element
relative to the mouse pointer• There are four possible states

© 2010 Delmar Cengage Learning
Navigation Bars
• Can place only one navigation bar on a web page using the Insert Navigation Bar dialog box
• Multiple links• Four rollover states
– Up, over, down, and over while down

© 2010 Delmar Cengage Learning
Four States
• Up Image: mouse pointer is not on top of the element
• Over Image: mouse pointer is positioned on top of the element
• Down Image: when you click the element• Over While Down Image: mouse pointer is
positioned over an element that has been clicked

© 2010 Delmar Cengage Learning
Fig. 13: NASA Website
Navigation bar with rollovers
Navigation links with rollovers
Rollover images serving as links

© 2010 Delmar Cengage Learning
Copy and Modify a Navigation Bar
• Create a navigation bar using images• Add elements to a navigation bar• Copy and paste a navigation bar
– Copy and Paste from menu bar• Customize a navigation bar
– To change orientation, you must start over
© 2010 Delmar Cengage Learning
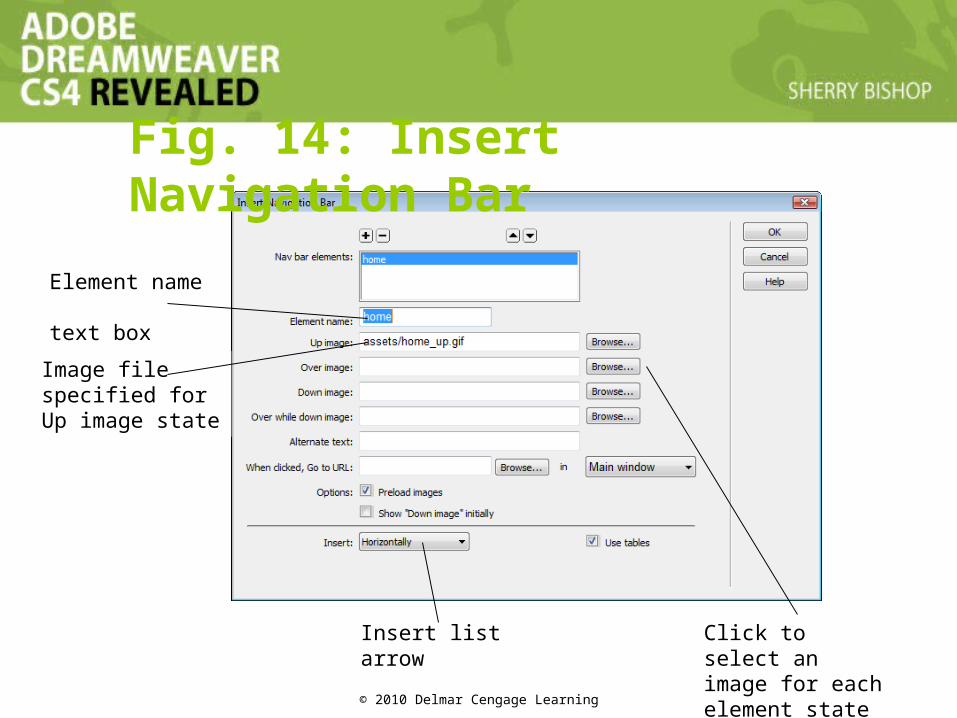
Fig. 14: Insert Navigation Bar
Insert list arrow Click to select an image for each element state
Element name text box
Image file specified for Up image state

© 2010 Delmar Cengage Learning
Table 2
© 2010 Delmar Cengage Learning
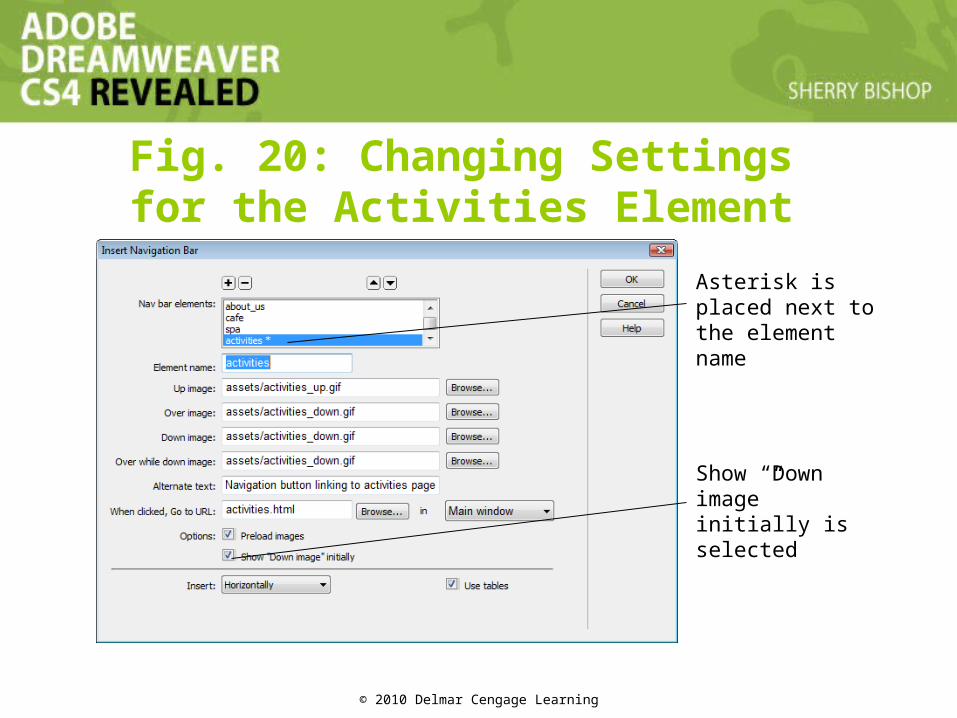
Fig. 20: Changing Settings for the Activities Element
Show “Down image” initially is selected
Asterisk is placed next to the element name

© 2010 Delmar Cengage Learning
Fig. 21: About_us Page with Modified Navigation Bar

© 2010 Delmar Cengage Learning
Create an Image Map
• Another way to create navigation links for web pages is to create an image map
• Image map: graphic that has one or more hot spots placed on top of it
• Hotspot: area on a graphic that, when clicked, links to different locations on the page or to another web page or website

© 2010 Delmar Cengage Learning
Creating an Image Map
• Include alternate text for each hotspot.• Draw the hotspot boundaries a little larger
than they need to be to cover the area you want to set as a link.
• Hotspot tools

© 2010 Delmar Cengage Learning
Fig. 22: Viewing an Image Map
National Park Service website – www.nps.gov
The pointer is over Hawaii, which causes a window with a photo and introductory text about Hawaii to display
Clicking on an individual state
will link to information about
parks in that state

© 2010 Delmar Cengage Learning
Fig. 24: Hotspot Properties
Image map name Target for hotspot Link to index page
Alternate text for the hotspot
© 2010 Delmar Cengage Learning
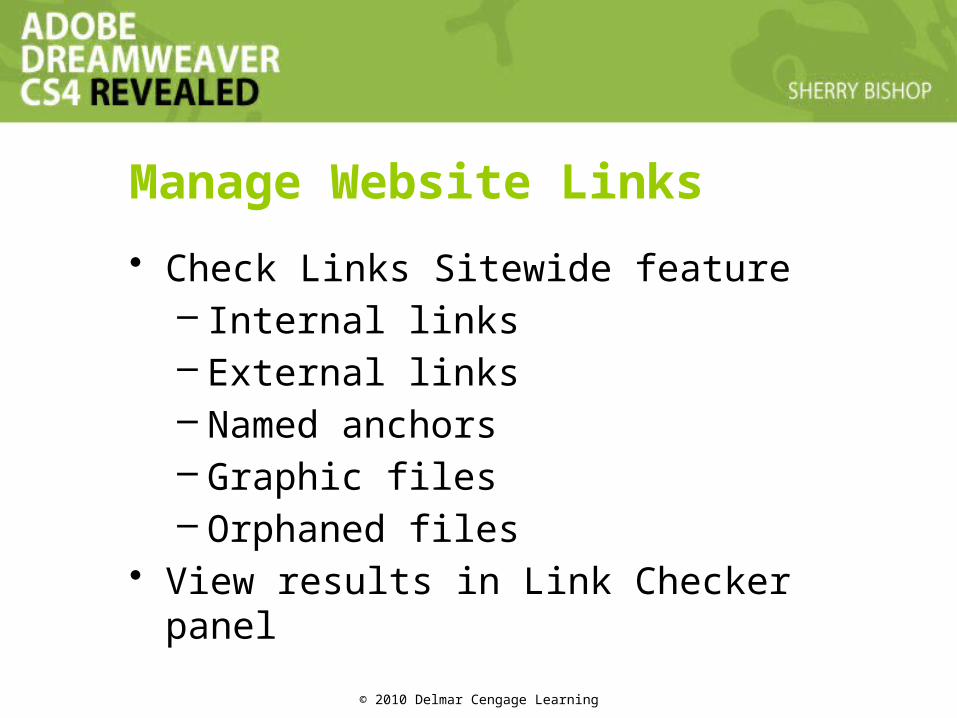
Manage Website Links
• Check Links Sitewide feature– Internal links– External links– Named anchors– Graphic files– Orphaned files
• View results in Link Checker panel

© 2010 Delmar Cengage Learning
Fig. 26: Link Checker Panel Displaying External Links
List of external links Show list arrow

© 2010 Delmar Cengage Learning
Fig. 27: Link Checker Panel Displaying No Orphaned Files
Show list arrowNo orphaned files shown

© 2010 Delmar Cengage Learning
Fig. 28: Assets Panel Displaying Links
URLs button
External links for The Striped Umbrella website