© paradigm publishing, inc. 1. 2 word 2010 level 1 unit 2enhancing and customizing documents...
TRANSCRIPT

Contents© Paradigm Publishing, Inc. 1

Contents© Paradigm Publishing, Inc. 2
Word 2010
Level 1
Unit 2 Enhancing and Customizing Documents
Chapter 5 Applying Formatting andInserting Objects

Contents© Paradigm Publishing, Inc. 3
Applying Formatting and Inserting Objects
Insert a Section Break Create Columns Hyphenate Words Create a Drop Cap Insert Symbols and Special
Characters Insert the Date and Time Use the Click and Type Feature CHECKPOINT 1
Quick Links to Presentation Contents
Vertically Align Text Insert an Image Insert and Customize a Pull Qu
ote Draw Shapes Create and Modify WordArt Tex
t Create and Insert a Screenshot CHECKPOINT 2

Contents© Paradigm Publishing, Inc. 4
Insert a Section Break
To insert a section break:1. Click the Page Layout
tab.2. Click the Breaks button
in the Page Setup group.
3. Click the desired section break type at the drop-down list.
Breaks button

Contents© Paradigm Publishing, Inc. 5
Create Columns
When preparing a document containing text, an important point to consider is the readability of the document.
To improve the readability of some documents such as newsletters or reports, you may want to set the text in columns. One common type of column is newspaper, which is typically used for text in newspapers, newsletters, and magazines.

Contents© Paradigm Publishing, Inc. 6
Create Columns…continued
To create columns:1. Click the Page Layout tab.2. Click the Columns button in
the Page Setup group.3. Click the desired number
of columns.
Columns button

Contents© Paradigm Publishing, Inc. 7
Create Columns…continued
To create columns with the Columns dialog box:1. Click the Page Layout tab.2. Click the Columns button
in the Page Setup group.3. Click the More Columns
option at the drop-down list.
4. Specify the column options in the Columns dialog box.
5. Click OK.Columns dialog box

Contents© Paradigm Publishing, Inc. 8
Create Columns…continued
To remove column formatting:1. Position the insertion
point in the section containing columns.
2. Click the Page Layout tab.
3. Click the Columns button in the Page Setup group.
4. Click the One option at the drop-down list.
One option

Contents© Paradigm Publishing, Inc. 9
Create Columns…continued
To insert a column break:1. Position the insertion point at the desired location.2. Click the Page Layout tab.3. Click the Breaks button in the Page Setup group.4. Click the Column option at the drop-down list.
Column option

Contents© Paradigm Publishing, Inc. 10
Create Columns…continued
In a document containing text formatted into columns, Word automatically lines up (balances) the last line of text at the bottom of each column, except the last page.
Text in the first column of the last page may flow to the end of the page, while the text in the second column may end far short of the end of the page.
You can balance columns by inserting a continuous section break at the end of the text.

Contents© Paradigm Publishing, Inc. 11
Hyphenate Words
To automatically hyphenate:1. Click the Page Layout tab.2. Click the Hyphenation button in the Page Setup
group.3. Click the Automatic option at the drop-down list.
Automatic option

Contents© Paradigm Publishing, Inc. 12
Hyphenate Words…continued
To manually hyphenate:1. Click the Page Layout tab.2. Click the Hyphenation button in the Page Setup
group.3. Click the Manual option at the drop-down list.4. Click Yes or No to hyphenate indicated words.5. When complete, click OK.
Manual Hyphenation dialog box

Contents© Paradigm Publishing, Inc. 13
Create a Drop Cap
To create a drop cap:1. Click the Insert tab.2. Click the Drop Cap button in the Text group.3. Click the desired type in the drop-down list.
Drop Cap button

Contents© Paradigm Publishing, Inc. 14
Create a Drop Cap…continued
To change drop cap options:1. Click the Insert tab.2. Click the Drop Cap button
in the Text group.3. Click Drop Cap Options at
the drop-down list.4. Change the desired
options in the Drop Cap dialog box.
5. Click OK. Drop Cap dialog box

Contents© Paradigm Publishing, Inc. 15
Insert Symbols and Special Characters
To insert a symbol:1. Click the Insert tab.2. Click the Symbol button
in the Symbols group.3. Click the More Symbols
option at the drop-down list.
continues on next slide…More Symbols option

Contents© Paradigm Publishing, Inc. 16
Insert Symbols and Special Characters…continued
4. Double-click the desired symbol in the Symbol dialog box.
5. Click Close.
Symbol dialog box

Contents© Paradigm Publishing, Inc. 17
Insert Symbols and Special Characters…continued
To insert a special character:1. Click the Insert tab.2. Click the Symbol button
in the Symbols group.3. Click the More Symbols
option at the drop-down list.
4. Click the Special Characters tab.
5. Double-click the desired character.
6. Click the Close button.
Special Characters tab

Contents© Paradigm Publishing, Inc. 18
Insert the Date and Time
To insert the date and time:1. Click the Insert tab.2. Click the Date and
Time button in the Text group.
3. Click the desired option in the list box.
4. Click OK.Date and Time dialog box

Contents© Paradigm Publishing, Inc. 19
Use the Click and Type Feature
To use Click and Type:1. Hover the mouse at the left margin, between the left
and right margins, or at the right margin.2. Double-click the left mouse button.
mouse pointer hovering between the left and right margin

Contents© Paradigm Publishing, Inc. 20
CHECKPOINT 11) To improve the display of line
text, consider doing this to long words.a. Splittingb. Hyphenatingc. Croppingd. Moving
3) The Special Characters tab is located in which dialog box?a. Paragraphb. Page Setupc. Fontd. Symbol
2) This is the first letter of the first word of a paragraph that is enlarged and set into the paragraph.a. cap letterb. lowered letterc. drop capd. enlarged cap
4) You can insert the date or time as this.a. fieldb. pointc. characterd. paragraph
Next Question
Next Question
Next Question
Next Slide
Answer
Answer
Answer
Answer

Contents© Paradigm Publishing, Inc. 21
Vertically Align Text
To vertically align text:1. Click the Page Layout tab.2. Click the Page Setup
group dialog box launcher.
3. Click the Layout tab.4. Click the desired
alignment.5. Click OK.
Page Setup dialog box
Contents© Paradigm Publishing, Inc. 22
Insert an Image
You can insert an image such as a picture or clip art in a Word document with buttons in the Illustrations group in the Insert tab.
Click the Picture button to display the Insert Picture dialog box where you can specify the desired picture file or click the Clip Art button and then choose from a variety of images available at the Clip Art task pane.

Contents© Paradigm Publishing, Inc. 23
Insert an Image…continued
With options in the Adjust group in the Picture Tools Format tab you can remove unwanted portions of the image, correct the brightness and contrast, change the image color, apply artistic effects, compress the size of the image file, change to a different image, and reset the image back to the original formatting.
Adjust group
Contents© Paradigm Publishing, Inc. 24
Insert an Image…continued
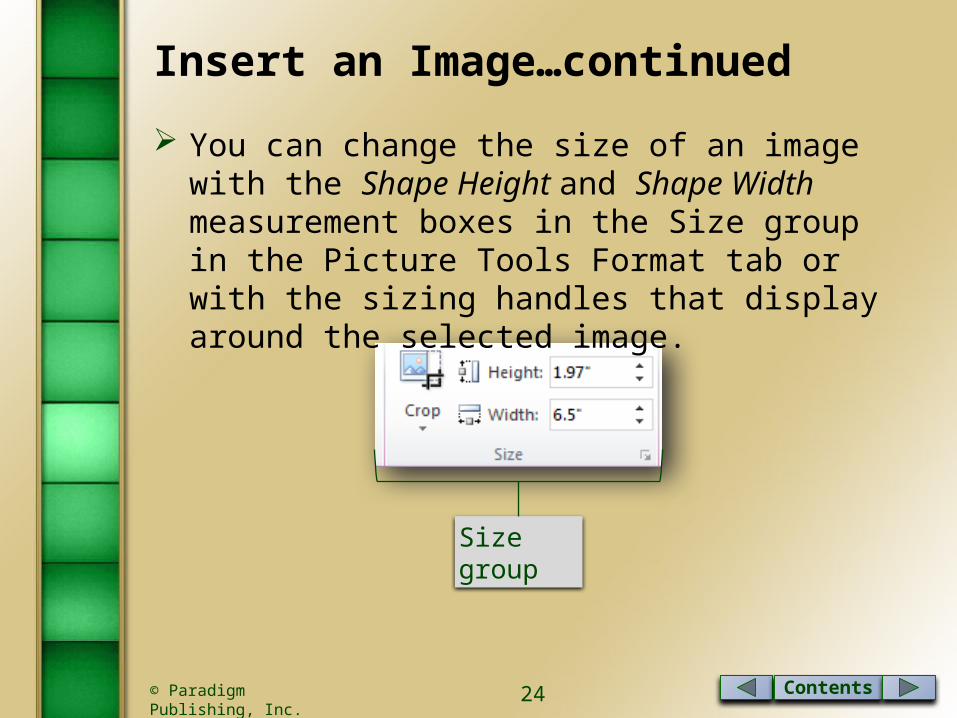
You can change the size of an image with the Shape Height and Shape Width measurement boxes in the Size group in the Picture Tools Format tab or with the sizing handles that display around the selected image.
Size group

Contents© Paradigm Publishing, Inc. 25
Insert an Image…continued
Move an image to a specific location on the page with options from the Position button drop-down gallery. You can also move the image by dragging it to the desired location.
dragging

Contents© Paradigm Publishing, Inc. 26
Insert an Image…continued
To insert a picture:1. Click the Insert tab.2. Click the Picture button in the Illustrations group.3. Double-click the desired picture in the Insert Picture
dialog box.
Picture button
Contents© Paradigm Publishing, Inc. 27
Insert an Image…continued
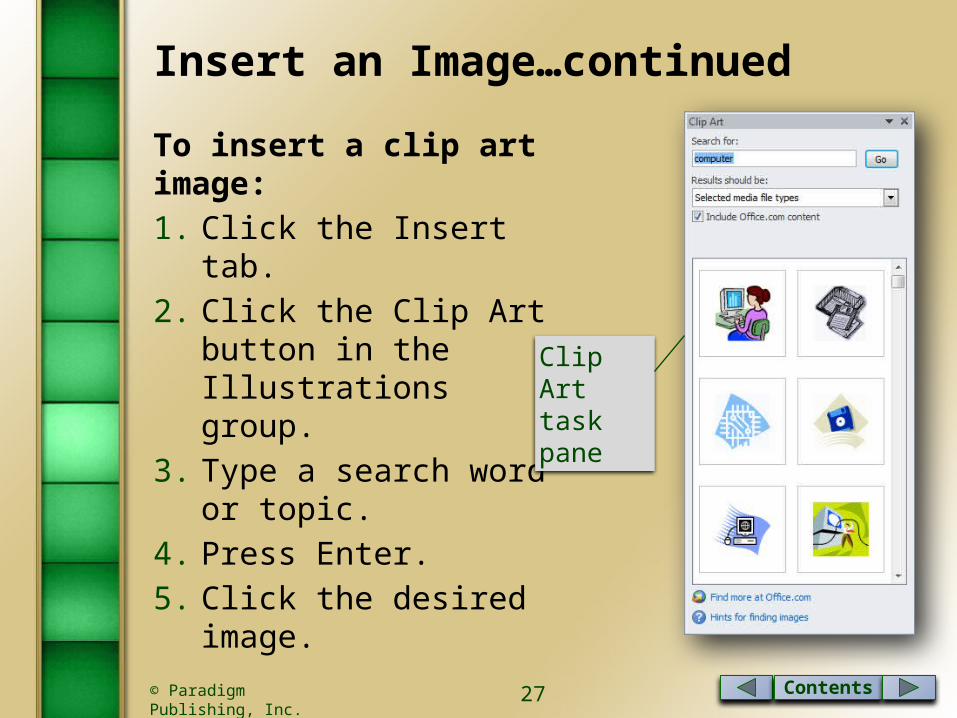
To insert a clip art image:1. Click the Insert tab.2. Click the Clip Art button in
the Illustrations group.3. Type a search word or
topic.4. Press Enter.5. Click the desired image.
Clip Art task pane

Contents© Paradigm Publishing, Inc. 28
Insert an Image…continued
Unless the Clip Art task pane default settings have been customized, the task pane displays all illustrations, photographs, videos, and audio files.
The Results should be option has a default setting of Selected media file types. Click the down-pointing arrow at the right side of this option to display media types.
To search for a specific media type, remove the check mark before all options at the drop-down list except for the desired type.

Contents© Paradigm Publishing, Inc. 29
Insert and Customize a Pull Quote
To insert a pull quote:1. Click the Insert tab.2. Click the Text Box
button in the Text group.
3. Click the desired pull quote.
Text Box button

Contents© Paradigm Publishing, Inc. 30
Insert and Customize a Pull Quote…continued
Click the Change Shape option to change the shape of the selected text box.
Click the Edit Points option and small black squares display at points around the text box.
Use the mouse on these points to increase or decrease a point of the text box.
Apply predesigned styles to a text box with options in the Shape Styles group.
You can also change the shape fill, outline, and effects. Change the formatting of the text in the text box with
options in the WordArt Styles group.

Contents© Paradigm Publishing, Inc. 31
Draw Shapes
To draw a shape:1. Click the Insert tab.2. Click the Shapes button in
the Illustrations group.3. Click the desired shape at
the drop-down list.4. Drag in the document
screen to create the shape.
Shapes button

Contents© Paradigm Publishing, Inc. 32
Draw Shapes…continued
To draw a text box:1. Click the Insert tab.2. Click the Text Box button
in the Text group.3. Click the Draw Text Box
option.4. Drag in the document
screen to create the text box.
Draw Text Box option

Contents© Paradigm Publishing, Inc. 33
Create and Modify WordArt Text
To create WordArt text:1. Click the Insert tab.2. Click the WordArt button in the Text group.3. Click the desired WordArt option at the drop-down
list.4. Type the desired WordArt text.
WordArt button
Contents© Paradigm Publishing, Inc. 34
Create and Insert a Screenshot
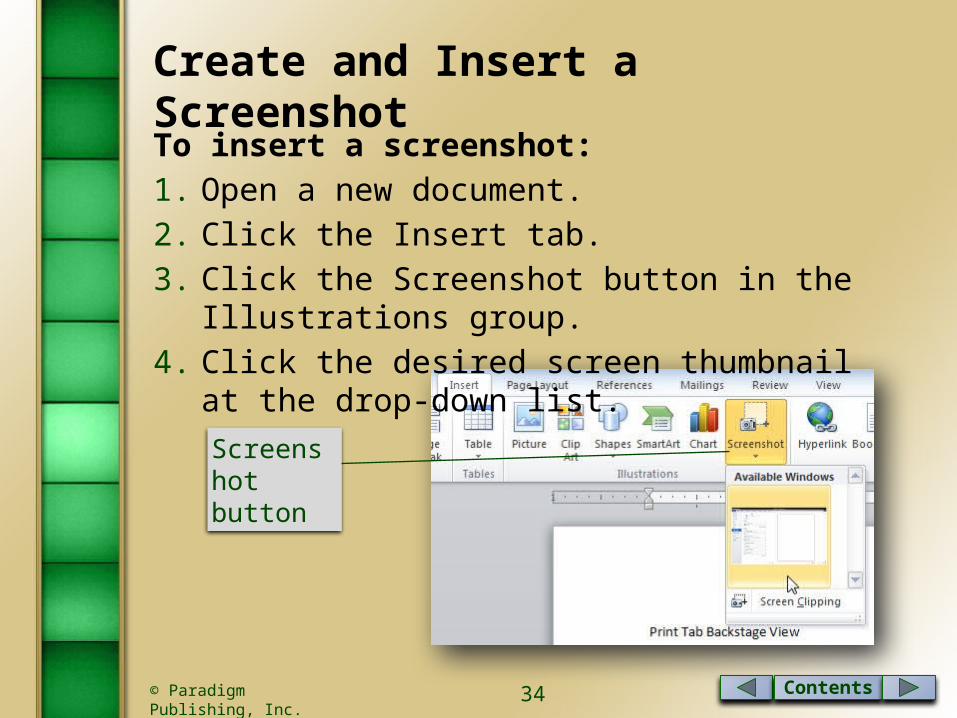
To insert a screenshot:1. Open a new document.2. Click the Insert tab.3. Click the Screenshot button in the Illustrations group.4. Click the desired screen thumbnail at the drop-down
list.
Screenshot button

Contents© Paradigm Publishing, Inc. 35
Create and Insert a Screenshot…continued
To insert a screen clipping:1. Open a new document.2. Click the Insert tab.3. Click the Screenshot button in the Illustrations group.4. Click the Screen Clipping option at the drop-down list.5. Drag to specify the area in the document to capture.
Screen Clipping option
Contents© Paradigm Publishing, Inc. 36
CHECKPOINT 21) This is the default vertical
alignment setting.a. Bottomb. Topc. Centerd. Justified
3) When you click a shape at the drop-down list, the mouse pointer displays as this.a. handb. minus signc. arrowd. crosshairs
2) You can insert this in a document which is a quote that is pulled from an article.a. quotientb. pulleyc. pull quoted. quote pull
4) With this feature, you can distort or modify text to conform to a variety of shapes.a. WordArtb. Clip Artc. SmartArtd. Text Box
Next Question
Next Question
Next Question
Next Slide
Answer
Answer
Answer
Answer
Contents© Paradigm Publishing, Inc. 37
Applying Formatting and Inserting Objects
Insert section breaks Create and format text in columns Hyphenate words automatically and manually Create a drop cap Insert symbols, special characters, and the date and
time Use the Click and Type feature Vertically align text Insert, format, and customize pictures, clip art images,
text boxes, shapes, and WordArt
Summary of Presentation Concepts