challenges.robotevents.com · web viewautodesk inventor professional 2017. we were fortunate...
TRANSCRIPT

Make It Real CAD Engineering Challenge Sponsored by Autodesk - 1010X Submission
SIDEWAYS PILLOW BLOCK
Designed in Autodesk Inventor Professional 2017
Why We Built the Sideways Pillow Block?
While
building our robots for VRC
Starstruck and In the Zone, we
constantly found ourselves looking
for pillow blocks to use for our new
build ideas but getting disappointed because the orientation of the centre hole does not match our
intended applications. For example, when we were making a hinge for our claw last year, we did not
have enough holes on the side of a channel to secure a regular pillow block for a lightweight hinge. Instead, we used the steel vex hinges, which
made our claw a lot heavier.Similarly, when we were making anti-tips for our robot last year, we had standoffs that swung out in front our
wheelbase, and for this application we had to use heavy wheel collars that frequently loosened. This led us to designing a new part to combat hinging and perpendicular attachment problems.
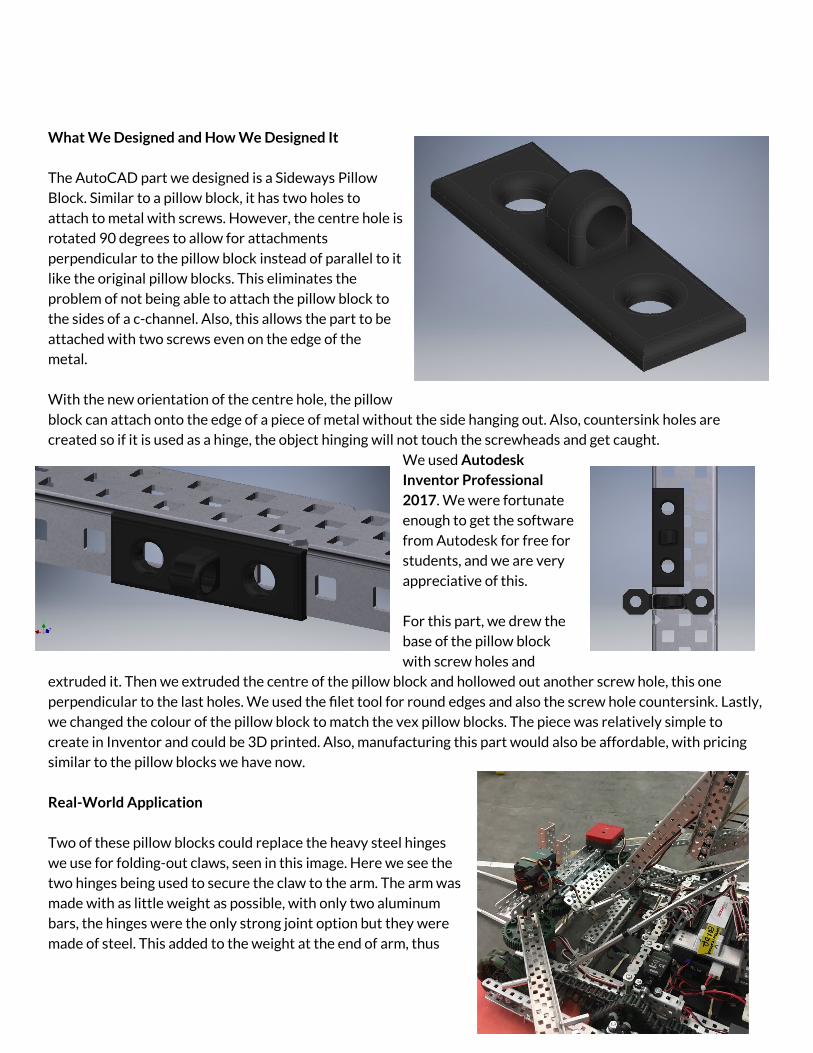
What We Designed and How We Designed It
The AutoCAD part we designed is a Sideways Pillow
Block. Similar to a pillow block, it has two holes to attach to metal with screws. However, the centre hole is
rotated 90 degrees to allow for attachments perpendicular to the pillow block instead of parallel to it
like the original pillow blocks. This eliminates the problem of not being able to attach the pillow block to
the sides of a c-channel. Also, this allows the part to be attached with two screws even on the edge of the
metal.
With the new orientation of the centre hole, the pillow block can attach onto the edge of a piece of metal without the side hanging out. Also, countersink holes are
created so if it is used as a hinge, the object hinging will not touch the screwheads and get caught.We used Autodesk Inventor Professional 2017. We were fortunate
enough to get the software from Autodesk for free for
students, and we are very appreciative of this.
For this part, we drew the
base of the pillow block with screw holes and
extruded it. Then we extruded the centre of the pillow block and hollowed out another screw hole, this one perpendicular to the last holes. We used the filet tool for round edges and also the screw hole countersink. Lastly,
we changed the colour of the pillow block to match the vex pillow blocks. The piece was relatively simple to create in Inventor and could be 3D printed. Also, manufacturing this part would also be affordable, with pricing
similar to the pillow blocks we have now.
Real-World Application
Two of these pillow blocks could replace the heavy steel hinges we use for folding-out claws, seen in this image. Here we see the
two hinges being used to secure the claw to the arm. The arm was made with as little weight as possible, with only two aluminum
bars, the hinges were the only strong joint option but they were made of steel. This added to the weight at the end of arm, thus
increasing the force required to lift the arm. This simple and lightweight pillow block would be a lightweight and simplified
replacement.

Conclusion
From this project, we learned that it is convenient and simple to design a part in Autodesk Inventor. The interface
is easy to learn and there are many quality tutorials out there. In the future we would like to take our designing up a notch and 3D print it, hopefully with the 3D printer prize for this challenge. Also, we also use Inventor to
assemble our robots for judging presentations to show special features, this helps us in competitions by greatly improving the quality of our presentation. Learning 3D design would also help us a lot in our future engineering
careers. For example, if we wanted to present our idea at meetings in our future jobs, we could show a 3D rendering of it instead of describing it with words. This would help coworkers and customers visualize the
finished project. This pillow block may seem like a simple start, yet it has inspired us to create more optimized, versatile and useful creations in the future.