0000 example using the scamper
TRANSCRIPT

Design and Discovery Curriculum Facilitator Guide
Copyright © 2004, Intel Corporation. All rights reserved.
28
Session 2
The Designed World Understanding the Design Process In This Session: This session builds appreciation for
the designed world around us and prepares students for finding a design and engineering project. Students learn to identify problems that lead to opportunities for new design solutions. They also develop skills by thinking creatively about designed things they use. The first activity, 2A: Design Opportunities Are Everywhere, involves students taking a short field trip or walking tour to practice recognizing problems and needs around them. The activity ends with students developing a list of design opportunities that interest them and could be used as the first step of their project development. The next activity, 2B: Mapping Out a Problem, introduces Activity Mapping, a technique used to help students identify problems and design opportunities. In Activity 2C: Design Improvements, students learn about and practice a seven-part creative technique for improving existing designs known as SCAMPER. The next activity, 2D: SCAMPER and Backpack, reinforces generative thinking using the SCAMPER technique with another object, a backpack. A Home Improvement activity, Improvement of Everyday Things, has students make distinctions between functional and superficial improvements with objects in their homes.
Supplies
• Water bottles in multiple styles • For each pair of students: 1 backpack (have students bring their own) • Additional backpacks with other designs • Clipboards (optional, but handy for taking notes during walking tour) • Chart paper for posters and markers
A) Design Opportunities Are Everywhere (50 minutes)
- Student Handout B) Mapping Out a
Problem (25 Minutes)
- Student Handout C) Design
Improvements (30 Minutes)
- Student Handout D) SCAMPER and
Backpack (45 Minutes)
- Student Handout Home Improvement - Student Handout
Design and Discovery Curriculum Facilitator Guide
Copyright © 2004, Intel Corporation. All rights reserved.
29
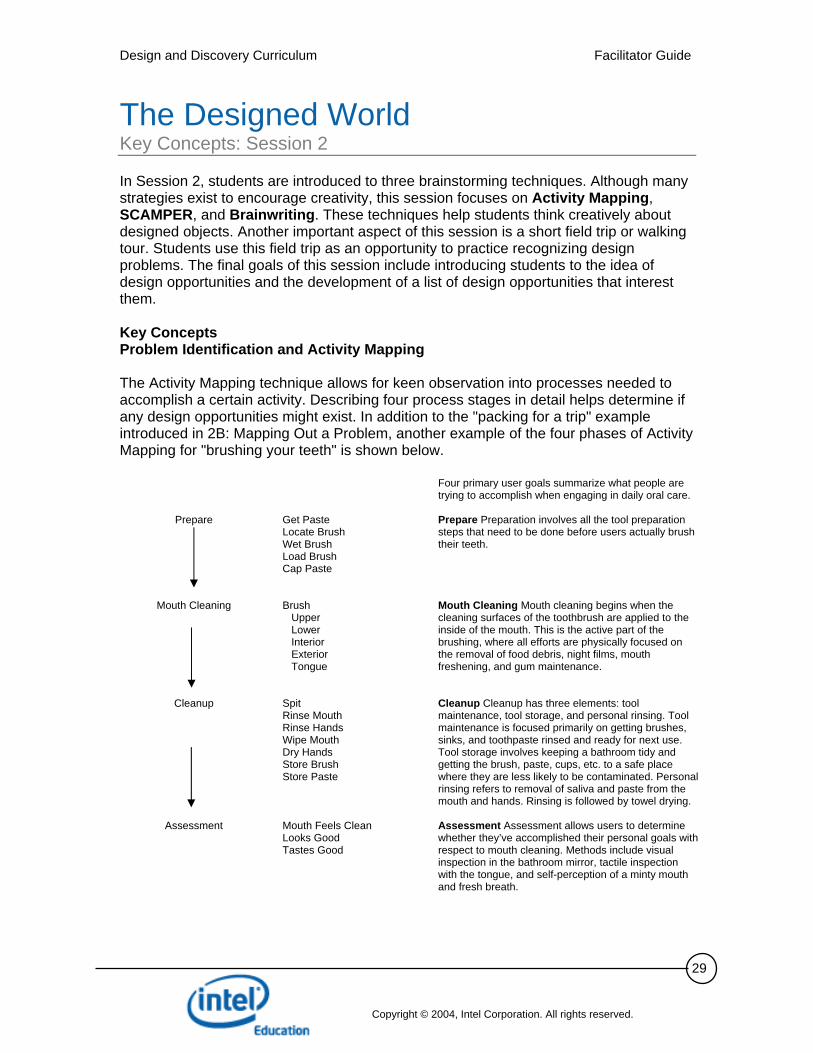
The Designed World Key Concepts: Session 2 In Session 2, students are introduced to three brainstorming techniques. Although many strategies exist to encourage creativity, this session focuses on Activity Mapping, SCAMPER, and Brainwriting. These techniques help students think creatively about designed objects. Another important aspect of this session is a short field trip or walking tour. Students use this field trip as an opportunity to practice recognizing design problems. The final goals of this session include introducing students to the idea of design opportunities and the development of a list of design opportunities that interest them. Key Concepts Problem Identification and Activity Mapping The Activity Mapping technique allows for keen observation into processes needed to accomplish a certain activity. Describing four process stages in detail helps determine if any design opportunities might exist. In addition to the "packing for a trip" example introduced in 2B: Mapping Out a Problem, another example of the four phases of Activity Mapping for "brushing your teeth" is shown below.
Prepare
Mouth Cleaning
Cleanup
Assessment
Get Paste Locate Brush Wet Brush Load Brush Cap Paste Brush Upper Lower Interior Exterior Tongue Spit Rinse Mouth Rinse Hands Wipe Mouth Dry Hands Store Brush Store Paste Mouth Feels Clean Looks Good Tastes Good
Four primary user goals summarize what people are trying to accomplish when engaging in daily oral care. Prepare Preparation involves all the tool preparation steps that need to be done before users actually brush their teeth. Mouth Cleaning Mouth cleaning begins when the cleaning surfaces of the toothbrush are applied to the inside of the mouth. This is the active part of the brushing, where all efforts are physically focused on the removal of food debris, night films, mouth freshening, and gum maintenance. Cleanup Cleanup has three elements: tool maintenance, tool storage, and personal rinsing. Tool maintenance is focused primarily on getting brushes, sinks, and toothpaste rinsed and ready for next use. Tool storage involves keeping a bathroom tidy and getting the brush, paste, cups, etc. to a safe place where they are less likely to be contaminated. Personal rinsing refers to removal of saliva and paste from the mouth and hands. Rinsing is followed by towel drying. Assessment Assessment allows users to determine whether they’ve accomplished their personal goals with respect to mouth cleaning. Methods include visual inspection in the bathroom mirror, tactile inspection with the tongue, and self-perception of a minty mouth and fresh breath.

Design and Discovery Curriculum Facilitator Guide
Copyright © 2004, Intel Corporation. All rights reserved.
30
Key Concepts Session 2 (continued) Students can look back on the processes involved with any activity (in this case, brushing your teeth) and see if any design opportunities can be identified. Students could be asked these questions to help them isolate a design challenge. What products are involved in each process? Are there problems with any of these products? What existing product could be improved or modified? What new product could be designed? SCAMPER The SCAMPER technique is a brainstorming method that builds one idea into several ideas by asking questions about the actions represented by the SCAMPER acronym. Alex Osborn, an early teacher of creativity, first introduced the idea of using questions to spur idea creation in his book Applied Imagination. This technique was later adapted by Bob Eberle and is now used often as a method for new idea generation. Students are introduced to the SCAMPER technique by examining an everyday item—water bottles. Substitute Combine Adapt Minimize/Magnify Put to other uses Eliminate/Elaborate Reverse/Rearrange Some questions to ask students as they use this technique and some examples to illustrate the concepts are shown below: Substitute: What can be used instead? What can you use instead of the materials, objects, places, or methods now used? Meatless burgers and disposable cameras are examples of products that illustrate substitution. Combine: Which parts or ideas can you blend together? What could be added? How can I combine uses with something else? Can you combine materials? Scented markers and clock radios are examples of combinations. Adapt: What else is like this? What can be copied or imitated? How can it be adjusted to fit another purpose? What else is like this? What has worked before? What would you copy? Running shoes and hiking boots are examples of adaptations. Minimize: Can it be smaller, lighter, less frequent, or divided? How can it be made smaller or shorter? How can it take less time? Mini-staplers and pocket-sized cell phones demonstrate how objects can be minimized. Magnify: Can it be stronger, larger, higher, exaggerated, or more frequent? What happens if I exaggerate a component? How can it be made larger or stronger?
Design and Discovery Curriculum Facilitator Guide
Copyright © 2004, Intel Corporation. All rights reserved.
31
Key Concepts Session 2 (continued) What can be duplicated? Repeated? Big-screen televisions and oversized floor pillows illustrate products that have been magnified. Put to Other Uses: Can it be used in a way other than how it was intended to be used? Who else might be able to us it? What other market can it be used in? What else can it be used for other than its original purpose? Old tires used as swings and drinking cups used as pen and pencil holders illustrate the idea of "put to other uses." Eliminate: What can you take away or remove? What parts aren't really necessary? Cordless telephones and wireless keyboards are examples of eliminating something. Rearrange: Can parts be exchanged or the pattern changed? Can any components be interchanged? Can it be laid out differently? Ergonomic keyboards and recumbent bicycles are examples of products that have been rearranged. Brainwriting The brainwriting technique encourages students to produce ideas by silently recording the ideas in their design notebooks. This technique gives every student a voice in generating ideas. This is especially true for students who don't naturally speak out during "talking out loud" brainstorming sessions. The goal of this technique is to encourage more idea creation through the eventual sharing of students' written ideas. Once ideas have been generated individually, they can be shared in a variety of ways. For example, students could write three of their ideas on a piece of paper (leaving room between the ideas) and pass the papers around the classroom. The other students could note suggestions, provide feedback, or ask questions relating to each of the three ideas. Students may now refine their ideas or list new ones based on the feedback and suggestions provided by others. More About Brainstorming Eberle, Bob. Scamper: Games for Imagination Development. Waco, TX: Prufrock Press, 1996. This book provides a description of SCAMPER and also activities that can be used with students to practice the technique. Eberle, Bob. Scamper On. Waco, TX: Prufrock Press, 1997. This book provides more guided activities encouraging students to think in creative ways. IDEO. IDEO Method Cards: 51 Ways to Inspire Design. San Francisco: William Stout Architectural Books, 2003. www.ideo.com/methodcards/MethodDeck/index.html* IDEO, a design firm, publishes cards illustrating methods they use to inspire innovative ideas. Sharing these methods with students will provide additional ways to look creatively at design solutions.
Design and Discovery Curriculum Facilitator Guide
Copyright © 2004, Intel Corporation. All rights reserved.
32
Key Concepts Session 2 (continued) Michalko, Michael. Cracking Creativity: The Secrets of Creative Genius. Berkeley, CA: Ten Speed Press, 1998. This book provides creative thinking strategies, stories, and exercises to use with students. Michalko, Michael. Thinkpak: A Brainstorming Card Deck. Berkeley, CA: Ten Speed Press, 1994. Thinkpak is a deck of cards focusing on the SCAMPER technique. The cards may be used to develop new and innovative ideas through the practice of the SCAMPER technique. Osborn, Alex. Applied Imagination. New York: Scribners, 1953. This book discusses the idea of brainstorming and the study of creativity. Published in 1953, this book influenced the development of creative thinking techniques and idea generation.

Design and Discovery Curriculum Facilitator Guide
Copyright © 2004, Intel Corporation. All rights reserved.
33
Session 2, Activity A
Design Opportunities are Everywhere Goal Learn to identify problems, needs, and opportunities for design improvements. Outcome Students generate a list of problems that they see as opportunities for design solutions. Description This activity helps students begin identifying problems that they could use for their own design project. Through a short field trip or walking tour, students expand their awareness into many possible opportunities for designed solutions. This outing can be as simple as a walk within the facility where you meet or a walk across the street to a park. A field trip to any convenient public place such as a department store or a mall will work well. This activity should involve mentors and other experts as resources for students to interview about problems or needs. Students collect their observations and information and begin creating a list of possible opportunities for designing new solutions. Students will revisit and refine this list of problems and begin to work on solutions in Sessions 7 and 8. Supplies Clipboards (optional, but handy for taking notes during walking tour) Preparation
1. Identify the location and make any arrangements for a walking tour of public places. As an alternative: make arrangements for a panel of guest speakers (mentors) to bring problems or needs from their lives.
2. Make arrangements for mentors to join you during or after the walking tour. 3. Review the Field Trips section in Implementation Strategies
Procedures Asking Questions
1. Introduce the field trip task using the handout. 2. Lead a warm-up discussion about students' experiences with problems or product
needs:

Design and Discovery Curriculum Facilitator Guide
Copyright © 2004, Intel Corporation. All rights reserved.
34
2A: Design Opportunities are Everywhere (continued)
• What problems are you aware of? • Think about something in the physical world that frustrated you recently.
What do you find frustrating? • Have you ever broken your arm or been in a wheelchair? If so, what was
most difficult about this experience? • Is anyone left-handed? What do you find most challenging as a left-handed
person? • What things, services, or processes that you use regularly could be
improved?
3. Point out that these same questions could be asked of anyone—friends, parents, mentors.
4. Ask students to think of other questions to ask.
Walking Tour
1. Orient students to the field trip, the location, logistics, and responsible behavior. 2. During the field trip be sure to stop, observe, and identify problems. This should be
reinforced with the entire group. Students should jot down notes as they see problems that interest them.
3. After the field trip, students complete a "brainwriting" exercise to generate
problems that interest them. Have students share a couple of their ideas with the rest of the group. Encourage students to share any ideas that were triggered as they listened to each other. For example, "That's a great idea. Have you thought about…?" The sharing of ideas may trigger other ideas.
4. Encourage students to take the list home and talk to family and friends to add to
their list of design opportunities. This list will be added to throughout Design and Discovery.
5. In the future, have students practice looking at the world differently by taking time
before an activity to ask them specifically about a designed object. It could be something as simple as a chair, pencil sharpener, or notebook. Ask them what needs are being met by the design. Have them conjecture why it was designed the way it was. This brief practice of looking at designed objects may help students find other design opportunities to add to their list.
Wrap Up End with a brief discussion about how design is all around us. Remind students to keep looking at the world as a designed environment. Have them think about what they use and interact with every day as being intentionally designed.

Design and Discovery Curriculum Facilitator Guide
Copyright © 2004, Intel Corporation. All rights reserved.
35
2A: Design Opportunities are Everywhere (continued) Follow With Activity 2B: Mapping Out a Problem introduces students to a problem identification technique called Activity Mapping.
Design and Discovery Curriculum Facilitator Guide
Copyright © 2004, Intel Corporation. All rights reserved.
36
Design Opportunities Are Everywhere Handout: Session 2, Activity A Problem identification: What makes a good problem to solve? Many important engineering and design ideas start with a problem or need. You have the capacity to solve important problems and make amazing things happen. Good ideas are inside you. Good problems often start with things you know about or have some personal connection to. Perhaps it's something that bothers you and you think about how it could be different. Maybe you have a relative or friend who struggles with something. Sometimes a problem to solve just comes from an idea of yours that sounds like a fun or easier way to do something. In this activity, you will practice identifying design opportunities. Some of these opportunities may be problems, while others may be needs or simple improvements. Who knows about problems? What kinds of problems are there? • Health problems: Doctors and nurses would know, researchers too. Safety problems:
Emergency room staff would know, firemen and police would know. • Problems of a specific group: The elderly, the very young, people in wheelchairs, left-
handed people, short people, deaf people. Try to understand through experience what it would be like to be in their shoes. Research the associations or organizations of these groups.
• Inconvenient problems: What bugs you? Always losing your keys? Make a list, in your design notebook, of the people or organizations you could call for more information about problems or things that don't work well enough. Where can you find problems to solve? The answer is: everywhere. With attention and focus on designed things you see and use wherever you go, you will see all kinds of problems just waiting for your ideas and creativity. You will be taking a trip today to observe a public place (a mall, a park, or a store). Look for problems to solve. Watch how people use things in that place. Look for problems to solve. Study a few objects and items in that place. Look for problems to solve. Take notes in your design notebook. What problems would you like to solve? They can be big problems or small problems. You decide. Creativity takes practice and patience. And it takes a few good strategies. One strategy is called "brainwriting." Brainwriting is different from brainstorming because you don't talk. You write your ideas on paper, quietly. Write down "problems" or "design opportunities" you are aware of (these may be from the field trip). Include things that exist that could use improvement. Write this list in your design notebook.

Design and Discovery Curriculum Facilitator Guide
Copyright © 2004, Intel Corporation. All rights reserved.
37
2A Handout: Design Opportunities are Everywhere (continued) Save this list. Revisit it as you work through the other Design and Discovery sessions. Add new design opportunities as you think of them.
Design and Discovery Curriculum Facilitator Guide
Copyright © 2004, Intel Corporation. All rights reserved.
38
Session 2, Activity B
Mapping Out a Problem Goal Introduce and practice Activity Mapping, a creative technique for identifying design opportunities. Outcome Learn and practice the Activity Mapping technique. Description This activity introduces a brainstorming technique, Activity Mapping, where students analyze an activity, think about the steps in this activity, and identify problems and design opportunities. Supplies None needed Procedures ZIBA Design Activity Mapping
1. Activity Mapping is used as a way to identify processes, the products used in the processes, and problems that arise in the processes. Use the Activity Mapping example below to model strategies for identifying design opportunities. Examine the processes and products involved with packing for a trip and consider if opportunities for improvement exist. This technique is used by ZIBA Design, www.ziba.com*, an international design firm that has designed products for many global companies, including FedEx, Microsoft, Intel, Fujitsu, Black & Decker, Sony, Pioneer North America, Dial, and Clorox. Students practice using Activity Mapping as a group by exploring the processes used in brushing teeth.
2. Explain that Activity Mapping has four primary user goals that summarize what
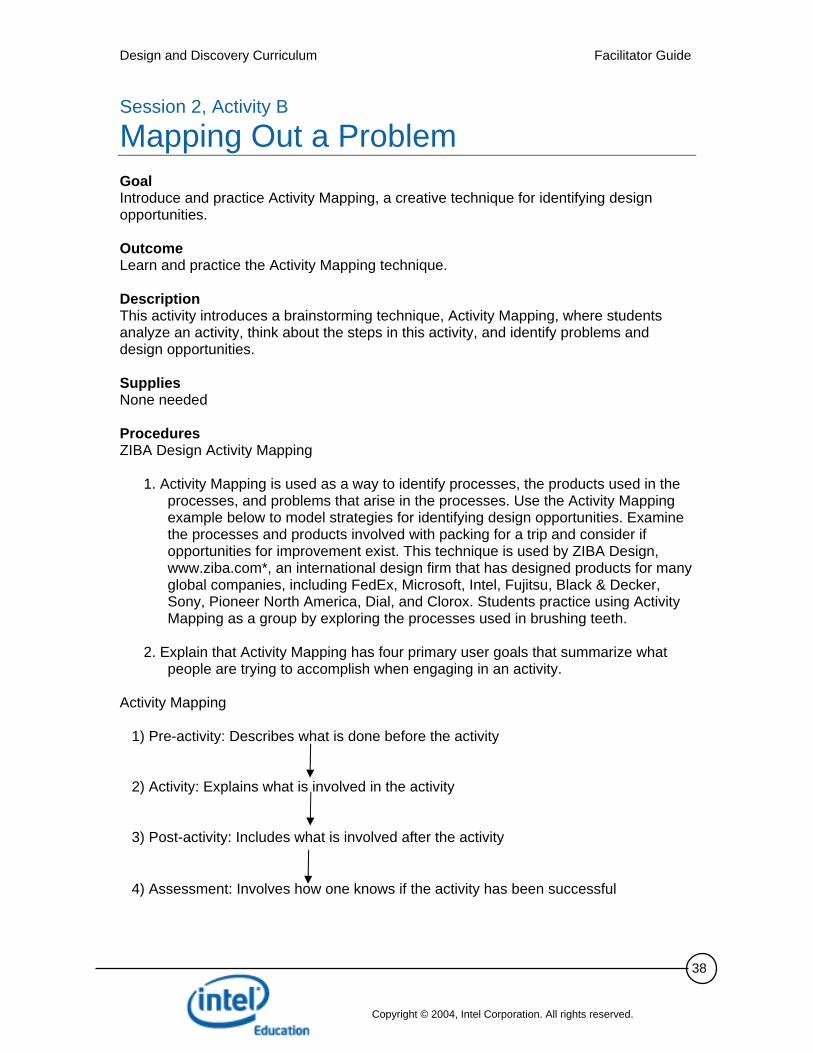
people are trying to accomplish when engaging in an activity. Activity Mapping
1) Pre-activity: Describes what is done before the activity 2) Activity: Explains what is involved in the activity 3) Post-activity: Includes what is involved after the activity 4) Assessment: Involves how one knows if the activity has been successful
Design and Discovery Curriculum Facilitator Guide
Copyright © 2004, Intel Corporation. All rights reserved.
39
2B: Mapping Out a Problem (continued)
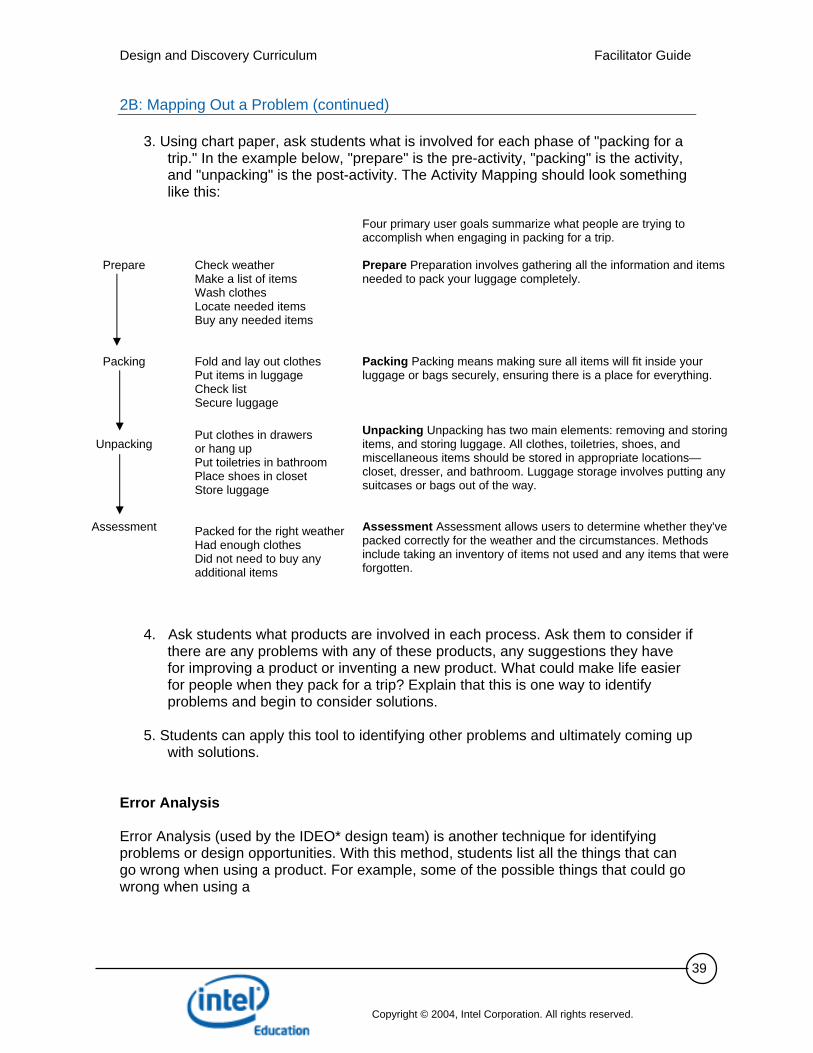
3. Using chart paper, ask students what is involved for each phase of "packing for a trip." In the example below, "prepare" is the pre-activity, "packing" is the activity, and "unpacking" is the post-activity. The Activity Mapping should look something like this:
Prepare
Packing
Unpacking
Assessment
Check weather Make a list of items Wash clothes Locate needed items Buy any needed items Fold and lay out clothes Put items in luggage Check list Secure luggage Put clothes in drawers or hang up Put toiletries in bathroom Place shoes in closet Store luggage Packed for the right weather Had enough clothes Did not need to buy any additional items
Four primary user goals summarize what people are trying to accomplish when engaging in packing for a trip. Prepare Preparation involves gathering all the information and items needed to pack your luggage completely. Packing Packing means making sure all items will fit inside your luggage or bags securely, ensuring there is a place for everything. Unpacking Unpacking has two main elements: removing and storing items, and storing luggage. All clothes, toiletries, shoes, and miscellaneous items should be stored in appropriate locations—closet, dresser, and bathroom. Luggage storage involves putting any suitcases or bags out of the way. Assessment Assessment allows users to determine whether they've packed correctly for the weather and the circumstances. Methods include taking an inventory of items not used and any items that were forgotten.
4. Ask students what products are involved in each process. Ask them to consider if
there are any problems with any of these products, any suggestions they have for improving a product or inventing a new product. What could make life easier for people when they pack for a trip? Explain that this is one way to identify problems and begin to consider solutions.
5. Students can apply this tool to identifying other problems and ultimately coming up
with solutions. Error Analysis Error Analysis (used by the IDEO* design team) is another technique for identifying problems or design opportunities. With this method, students list all the things that can go wrong when using a product. For example, some of the possible things that could go wrong when using a
Design and Discovery Curriculum Facilitator Guide
Copyright © 2004, Intel Corporation. All rights reserved.
40
2B: Mapping Out a Problem (continued) backpack include: a stuck zipper, easily torn material, or poorly adjusting shoulder straps. Any of these features could be identified as a design opportunity and researched further to come up with a solution to the problem. Wrap Up Remind students of the 10-step design process introduced in Activity 1B. Discuss how the Activity Mapping technique addresses the first step in the process—identify a design opportunity. By using the Activity Mapping technique, problems can be identified by analyzing something they have experienced personally. One of these identified design opportunities could be one they pursue for their independent project. Follow With Activity 2C: Design Improvements introduces students to SCAMPER, a brainstorming technique that helps them generate ideas for improving existing designs.
Design and Discovery Curriculum Facilitator Guide
Copyright © 2004, Intel Corporation. All rights reserved.
41
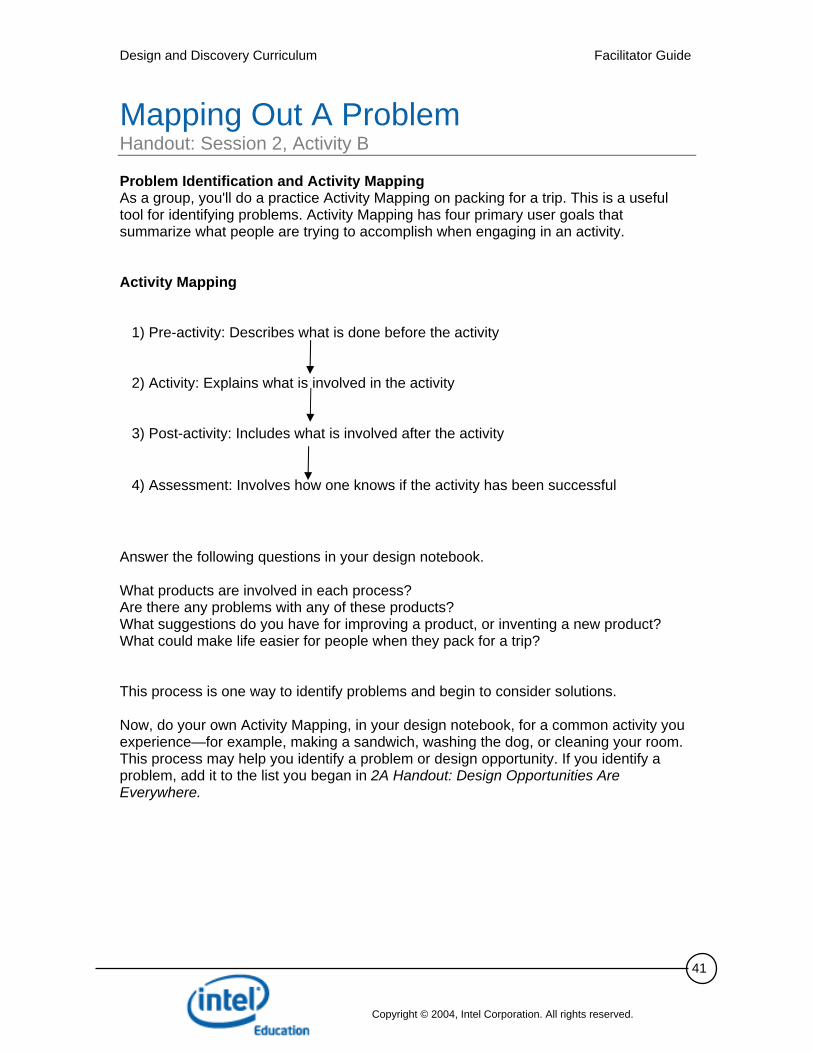
Mapping Out A Problem Handout: Session 2, Activity B Problem Identification and Activity Mapping As a group, you'll do a practice Activity Mapping on packing for a trip. This is a useful tool for identifying problems. Activity Mapping has four primary user goals that summarize what people are trying to accomplish when engaging in an activity. Activity Mapping
1) Pre-activity: Describes what is done before the activity 2) Activity: Explains what is involved in the activity 3) Post-activity: Includes what is involved after the activity 4) Assessment: Involves how one knows if the activity has been successful
Answer the following questions in your design notebook. What products are involved in each process? Are there any problems with any of these products? What suggestions do you have for improving a product, or inventing a new product? What could make life easier for people when they pack for a trip? This process is one way to identify problems and begin to consider solutions. Now, do your own Activity Mapping, in your design notebook, for a common activity you experience—for example, making a sandwich, washing the dog, or cleaning your room. This process may help you identify a problem or design opportunity. If you identify a problem, add it to the list you began in 2A Handout: Design Opportunities Are Everywhere.
Design and Discovery Curriculum Facilitator Guide
Copyright © 2004, Intel Corporation. All rights reserved.
42
Session 2, Activity C
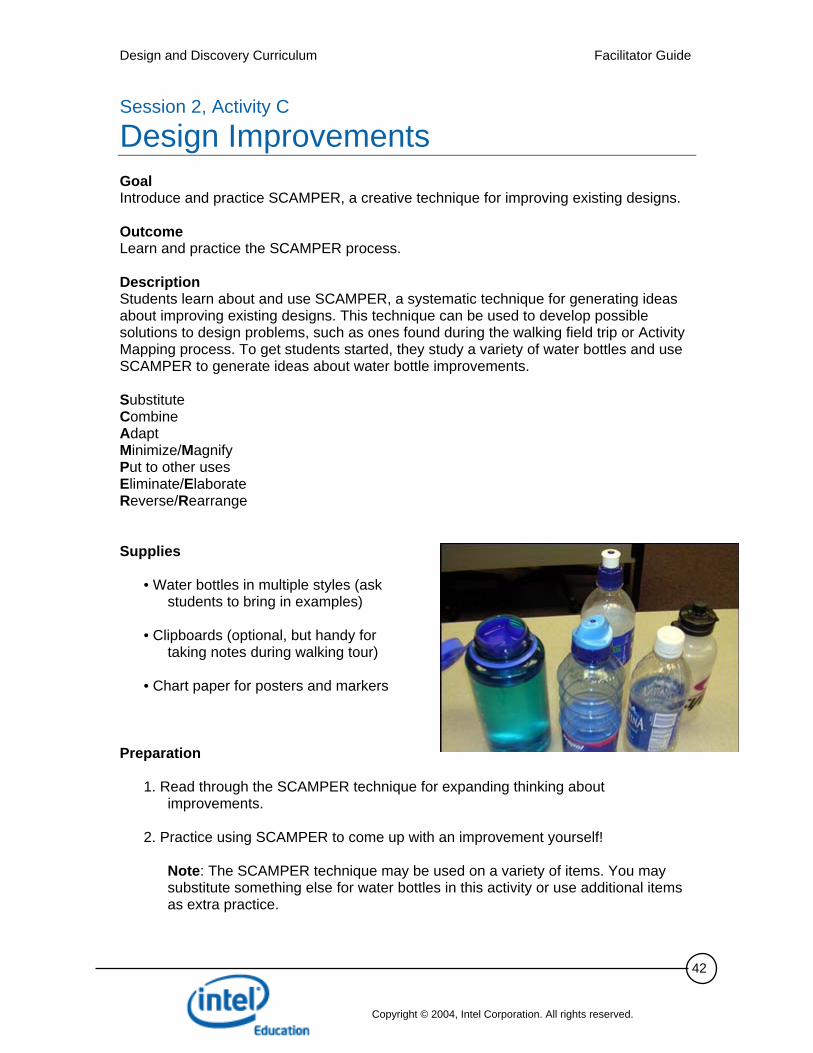
Design Improvements Goal Introduce and practice SCAMPER, a creative technique for improving existing designs. Outcome Learn and practice the SCAMPER process. Description Students learn about and use SCAMPER, a systematic technique for generating ideas about improving existing designs. This technique can be used to develop possible solutions to design problems, such as ones found during the walking field trip or Activity Mapping process. To get students started, they study a variety of water bottles and use SCAMPER to generate ideas about water bottle improvements. Substitute Combine Adapt Minimize/Magnify Put to other uses Eliminate/Elaborate Reverse/Rearrange Supplies
• Water bottles in multiple styles (ask students to bring in examples)
• Clipboards (optional, but handy for
taking notes during walking tour) • Chart paper for posters and markers
Preparation
1. Read through the SCAMPER technique for expanding thinking about improvements.
2. Practice using SCAMPER to come up with an improvement yourself!
Note: The SCAMPER technique may be used on a variety of items. You may substitute something else for water bottles in this activity or use additional items as extra practice.
Design and Discovery Curriculum Facilitator Guide
Copyright © 2004, Intel Corporation. All rights reserved.
43
2C: Design Improvements (continued) Other possible items include: headphones, shoes, wrenches, hand drills, watches, telephones, umbrellas, and coats. Procedures
1. Distribute water bottles among groups of students. 2. Present each step of the SCAMPER process using water bottles as an example.
Use the student handout to go through each step. 3. Assign a different letter of SCAMPER to seven groups and have them create and
display posters of the SCAMPER technique using the letters and keywords from the handout.
4. Provide time for groups to study different types of water bottles. Have participants
come up with additional water bottle improvements using their assigned SCAMPER step and add it to their poster—include sketches of their ideas.
5. Share posters and ideas with the whole class. 6. Together, compare two different water bottle designs and determine which step of
SCAMPER was applied. Wrap Up Discuss any other strategies for generating new ideas and approaches to existing solutions. Follow With Activity 2D: SCAMPER and Backpack applies the SCAMPER technique to another item, a backpack.
Design and Discovery Curriculum Facilitator Guide
Copyright © 2004, Intel Corporation. All rights reserved.
44
Design Improvements Handout: Session 2, Activity C Ready to SCAMPER? SCAMPER is a technique that gets you to think about improving an existing design. It is an acronym that helps you remember seven different ways to think up new improvements. It is useful for being creative in a systematic way. It generates ideas you might not have on your own. Try it! S Substitute one thing for another. C Combine with other materials, things, or functions. A Adapt: Can it be used for something else? M Minimize/Magnify: Make it larger or smaller. P Put to other uses: Can you put it to another use? In this case, use it for another
vegetable? If you make it larger, would it work for some other food? E Eliminate/Elaborate: Remove some part or material, or make one section more
detailed or refined. R Reverse/Rearrange: Flip-flop some section of the item, move parts around. Here are some improvements that can and have been made to water bottles. Can you think of any more improvements by using the SCAMPER technique?
Design and Discovery Curriculum Facilitator Guide
Copyright © 2004, Intel Corporation. All rights reserved.
45
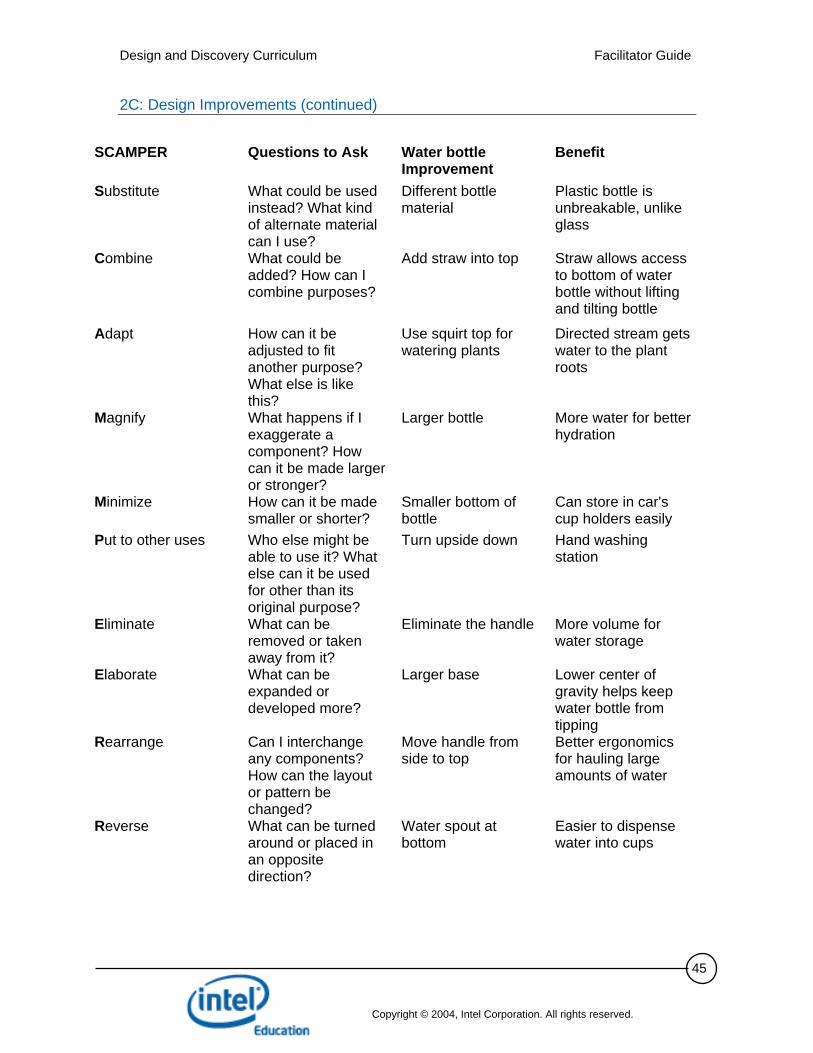
2C: Design Improvements (continued)
SCAMPER Questions to Ask Water bottle Improvement
Benefit
Substitute What could be used instead? What kind of alternate material can I use?
Different bottle material
Plastic bottle is unbreakable, unlike glass
Combine What could be added? How can I combine purposes?
Add straw into top Straw allows access to bottom of water bottle without lifting and tilting bottle
Adapt How can it be adjusted to fit another purpose? What else is like this?
Use squirt top for watering plants
Directed stream gets water to the plant roots
Magnify What happens if I exaggerate a component? How can it be made larger or stronger?
Larger bottle More water for better hydration
Minimize How can it be made smaller or shorter?
Smaller bottom of bottle
Can store in car's cup holders easily
Put to other uses Who else might be able to use it? What else can it be used for other than its original purpose?
Turn upside down Hand washing station
Eliminate What can be removed or taken away from it?
Eliminate the handle More volume for water storage
Elaborate What can be expanded or developed more?
Larger base Lower center of gravity helps keep water bottle from tipping
Rearrange Can I interchange any components? How can the layout or pattern be changed?
Move handle from side to top
Better ergonomics for hauling large amounts of water
Reverse What can be turned around or placed in an opposite direction?
Water spout at bottom
Easier to dispense water into cups

Design and Discovery Curriculum Facilitator Guide
Copyright © 2004, Intel Corporation. All rights reserved.
46
Session 2, Activity D
SCAMPER and Backpack Goal Apply the SCAMPER technique to the components of a backpack. Outcome Improve a backpack design using SCAMPER. Description Students look at the different components of a backpack and apply the SCAMPER technique to each component. They are introduced to sketching by enhancing an existing drawing with their improvements. Supplies
• For each pair of students: 1 backpack (Have students bring in their own and then make comparisons with others.)
• Additional backpacks with other designs
Procedures
1. Distribute backpacks to students. 2. Ask the students to compare the backpack to the drawing on the handout. 3. Call attention to different components of the backpack. Notice how a product can
be broken down into parts:
• Large pocket • Small outside pocket • Shoulder straps • Zippers
4. Explain the task: Use SCAMPER to improve one part or all. 5. Walk through the first two letters of SCAMPER as a group, and then continue the
process in teams. 6. As they work through the process, encourage students to sketch and make notes
about possible improvements in their design notebooks. 7. Have them draw improvements in their notebooks or on the handout that shows a
drawing of a backpack.
Design and Discovery Curriculum Facilitator Guide
Copyright © 2004, Intel Corporation. All rights reserved.
47
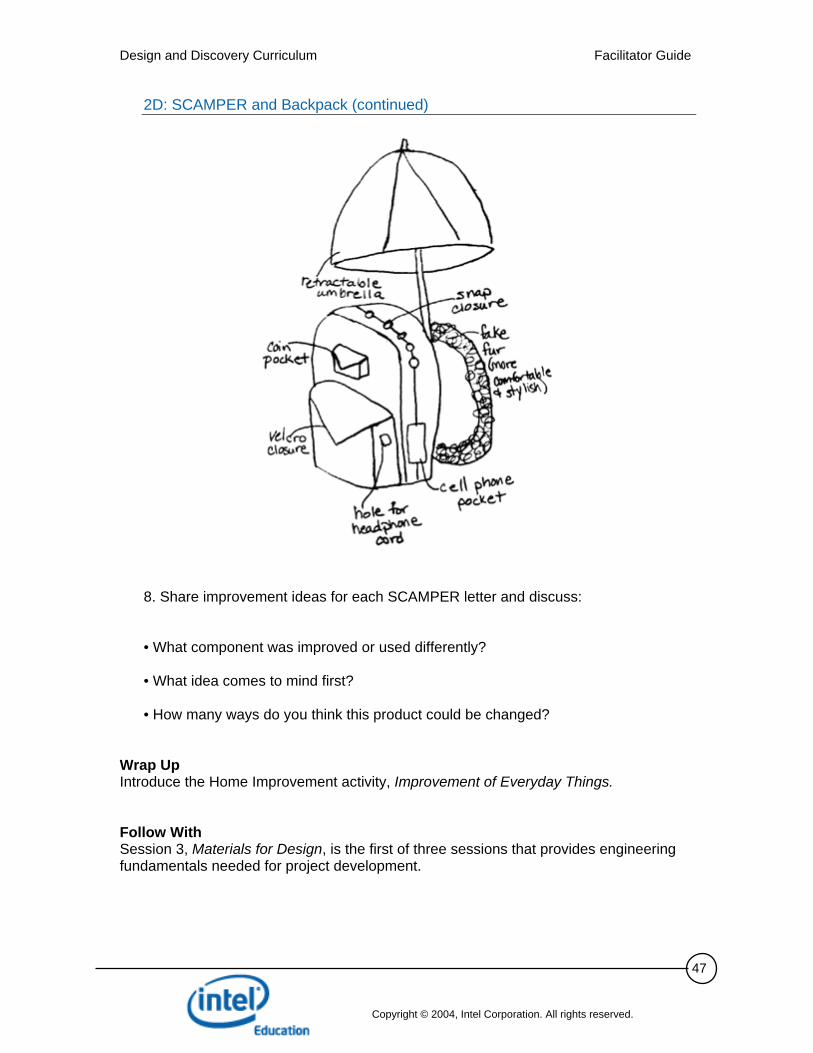
2D: SCAMPER and Backpack (continued)
8. Share improvement ideas for each SCAMPER letter and discuss:
• What component was improved or used differently? • What idea comes to mind first? • How many ways do you think this product could be changed?
Wrap Up Introduce the Home Improvement activity, Improvement of Everyday Things. Follow With Session 3, Materials for Design, is the first of three sessions that provides engineering fundamentals needed for project development.

Design and Discovery Curriculum Facilitator Guide
Copyright © 2004, Intel Corporation. All rights reserved.
48
SCAMPER and Backpack Handout: Session 2, Activity D The Backpack, Improve It! Apply SCAMPER to each of the backpack parts. Sketch and make notes about your improvement ideas. Make your drawings in your design notebook.
Design and Discovery Curriculum Facilitator Guide
Copyright © 2004, Intel Corporation. All rights reserved.
49
Improvement of Everyday Things Home Improvement: Session 2 Goal Know the difference between a superficial improvement and a functional improvement. Description Students study household objects with similar functions. They distinguish functional improvements from superficial improvements. A functional improvement is something that improves the performance of the product. A superficial improvement, such as a color change, does not affect the performance. Directions Before Going Home
1. Review the list of objects on the Home Improvement handout. 2. Discuss and add to the list as a group. Agree on three to five items that students
will bring in.
• What else could be included here? (Remember, we are trying to find familiar, everyday items that can be found anywhere.)
• Remind students that the task is to identify objects with functional
improvements. Next Day
1. Share the three things that best represent functional improvement. 2. Follow-up discussion could address the following questions:
• What is more common, functional or superficial improvement? • What examples can you think of that we couldn't bring in, but could talk
about? Example: different cars, stoves, lamps, chairs, etc.
• Did anyone find a superficial improvement that reduced the object's
function? (Form that messes up function.)
Design and Discovery Curriculum Facilitator Guide
Copyright © 2004, Intel Corporation. All rights reserved.
50
Improvement of Everyday Things Handout: Session 2, Home Improvement Where Do You See Improvement? The following list represents common items found in most household kitchens, garages, or junk drawers. These items have been specifically designed to serve one need. In some cases, the variety of these items represents improvements in functionality; in others, the variety merely represents aesthetic appeal. Functionality is an engineer's job, and it is important to recognize the difference between "appeal" factor and meaningful improvement in functionality. Bring three things from this list of items that best represent functional improvement:
• Cheese grater • Cherry pitter • Nail cutter • Cup lids for hot liquids • Candle holder • Stapler • Napkin ring • Can opener • Tooth floss container • Eraser • Key ring • Lemon peeler • Can opener • Potato peeler • Umbrella • Toothpick dispenser
Be prepared to explain the functional improvement.