1 outline 9.1introduction 9.2markup languages 9.3editing html 9.4common tags 9.5headers 9.6text...
Post on 18-Dec-2015
213 views
TRANSCRIPT

1
Outline9.1 Introduction9.2 Markup Languages9.3 Editing HTML9.4 Common Tags9.5 Headers9.6 Text Styling9.7 Linking9.8 Images9.9 Formatting Text With <FONT>9.10 Special Characters, Horizontal Rules and More Line Breaks
Introduction to HyperText Markup Language 4 (HTML 4)

2
9.1 Introduction
• HTML– HyperText Markup Language
– Not a procedural programming language like C, Fortran, Cobol or Pascal
– Markup language• Identify elements of a page so that a browser can render that
page on your computer screen
• Presentation of a document vs. structure

3
9.2 Markup Languages
• Markup language– Used to format text and information
• HTML – Marked up with elements, delineated by tags
– Tags: keywords contained in pairs of angle brackets
• HTML tags – Not case sensitive
– Good practice to keep all the letters in one case
• Forgetting to close tags is a syntax error

4
9.3 Editing HTML
• HTML files or documents – Written in source-code form using text editor
– Notepad: Start-Programs-Accessories
– HTML-Kit: http://www.chami.com/html-kit
• HTML files – .htm or .html extensions
– Name your files to describe their functionality
– File name of your home page should be index.html
• Errors in HTML – Usually not fatal

5
9.4 Common Tags
• Always include the <HTML>…</HTML> tags
• Comments placed inside <!--…--> tags
• HTML documents– HEAD section
• Info about the document
• Info in header not generally rendered in display window• TITLE element names your Web page
– BODY section• Page content
• Includes text, images, links, forms, etc.
• Elements include backgrounds, link colors and font faces• P element forms a paragraph, blank line before and after

Outline
1. HEAD section1.1 TITLE element
2. BODY section2.1 P element
1 <HTML>
2
3 <!-- Fig. 9.1: main.html -->
4 <!-- Our first Web page -->
5
6 <HEAD>
7 <TITLE>Internet and WWW How to Program - Welcome</TITLE>
8 </HEAD>
9
10 <BODY>
11
12 <P>Welcome to Our Web Site!</P>
13
14 </BODY>
15 </HTML>

7
9.5 Headers
• Headers – Simple form of text formatting
– Vary text size based on the header’s “level”
– Actual size of text of header element is selected by browser
– Can vary significantly between browsers
• CENTER element – Centers material horizontally
– Most elements are left adjusted by default

Outline
1. Varying header sizes
1.1 Level 1 is the largest, level 6 is the smallest
1 <HTML>23 <!-- Fig. 9.2: header.html -->4 <!-- HTML headers -->56 <HEAD>7 <TITLE>Internet and WWW How to Program - Headers</TITLE>8 </HEAD>910 <BODY>1112 <!-- Centers everything in the CENTER element -->13 <CENTER>14 <H1>Level 1 Header</H1> <!-- Level 1 header -->15 <H2>Level 2 header</H2> <!-- Level 2 header -->16 <H3>Level 3 header</H3> <!-- Level 3 header -->17 <H4>Level 4 header</H4> <!-- Level 4 header -->18 <H5>Level 5 header</H5> <!-- Level 5 header -->19 <H6>Level 6 header</H6> <!-- Level 6 header -->20 </CENTER>2122 </BODY>23 </HTML>

9
Header elements H1 through H6
10
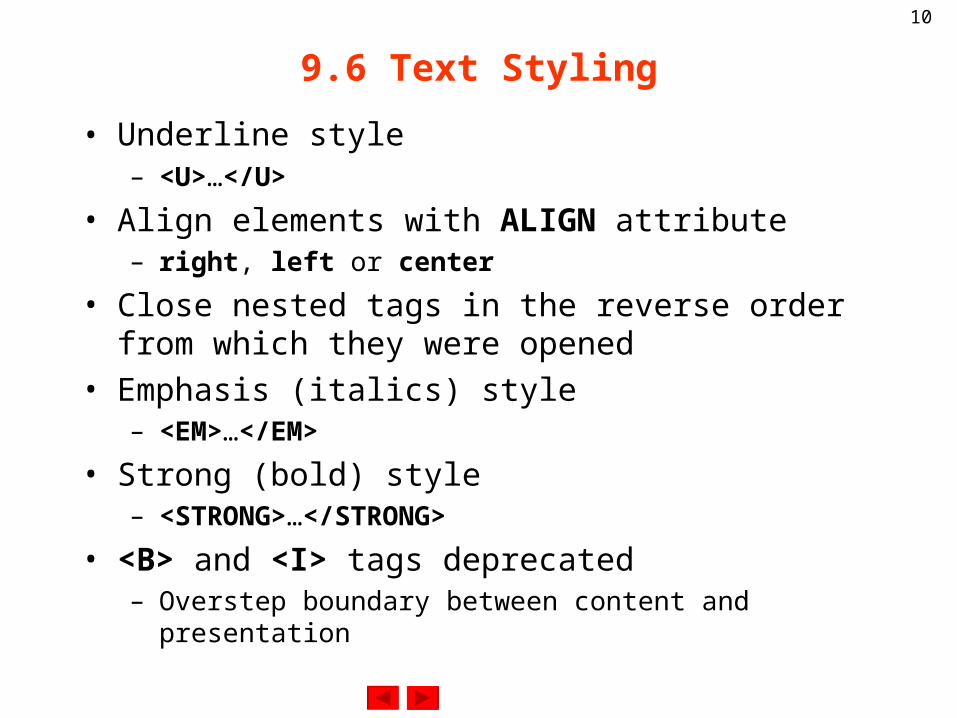
9.6 Text Styling
• Underline style– <U>…</U>
• Align elements with ALIGN attribute– right, left or center
• Close nested tags in the reverse order from which they were opened
• Emphasis (italics) style– <EM>…</EM>
• Strong (bold) style– <STRONG>…</STRONG>
• <B> and <I> tags deprecated – Overstep boundary between content and presentation
Outline
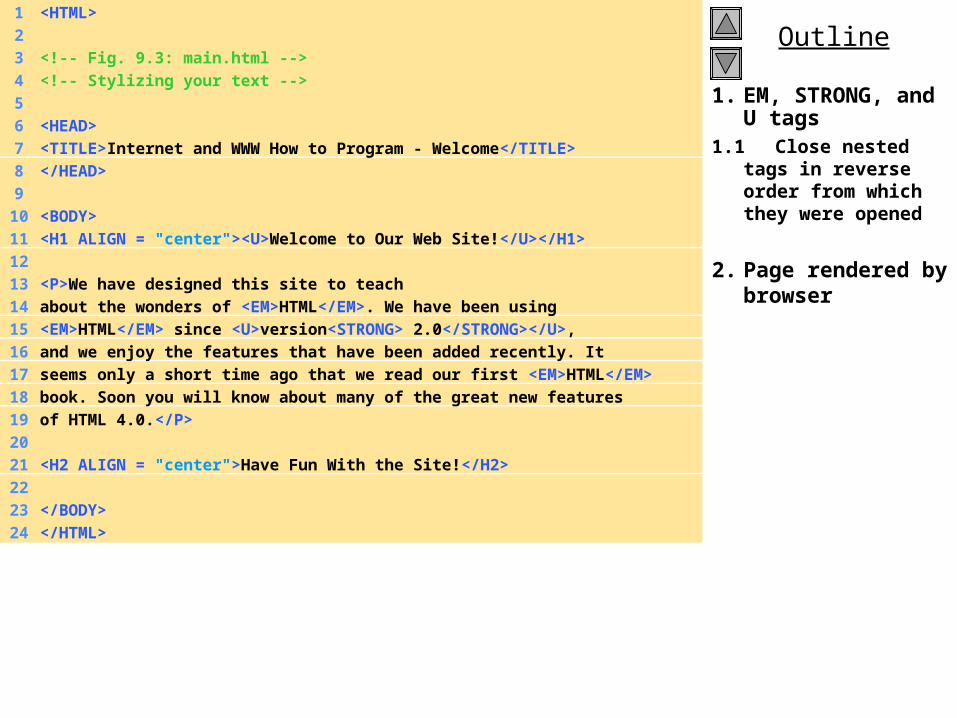
1. EM, STRONG, and U tags
1.1 Close nested tags in reverse order from which they were opened
2. Page rendered by browser
1 <HTML>
2
3 <!-- Fig. 9.3: main.html -->
4 <!-- Stylizing your text -->
5
6 <HEAD>
7 <TITLE>Internet and WWW How to Program - Welcome</TITLE>
8 </HEAD>
9
10 <BODY>
11 <H1 ALIGN = "center"><U>Welcome to Our Web Site!</U></H1>
12
13 <P>We have designed this site to teach
14 about the wonders of <EM>HTML</EM>. We have been using
15 <EM>HTML</EM> since <U>version<STRONG> 2.0</STRONG></U>,
16 and we enjoy the features that have been added recently. It
17 seems only a short time ago that we read our first <EM>HTML</EM>
18 book. Soon you will know about many of the great new features
19 of HTML 4.0.</P>
20
21 <H2 ALIGN = "center">Have Fun With the Site!</H2>
22
23 </BODY>
24 </HTML>

12
Stylizing text on Web pages

13
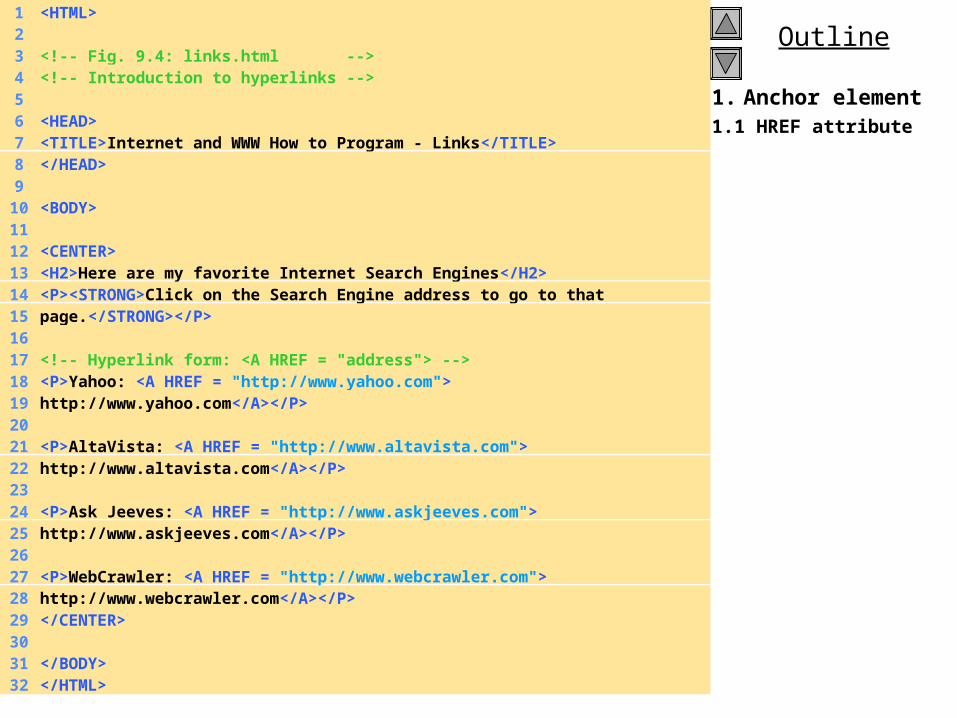
9.7 Linking
• Links inserted using the A (anchor) element– Requires HREF attribute
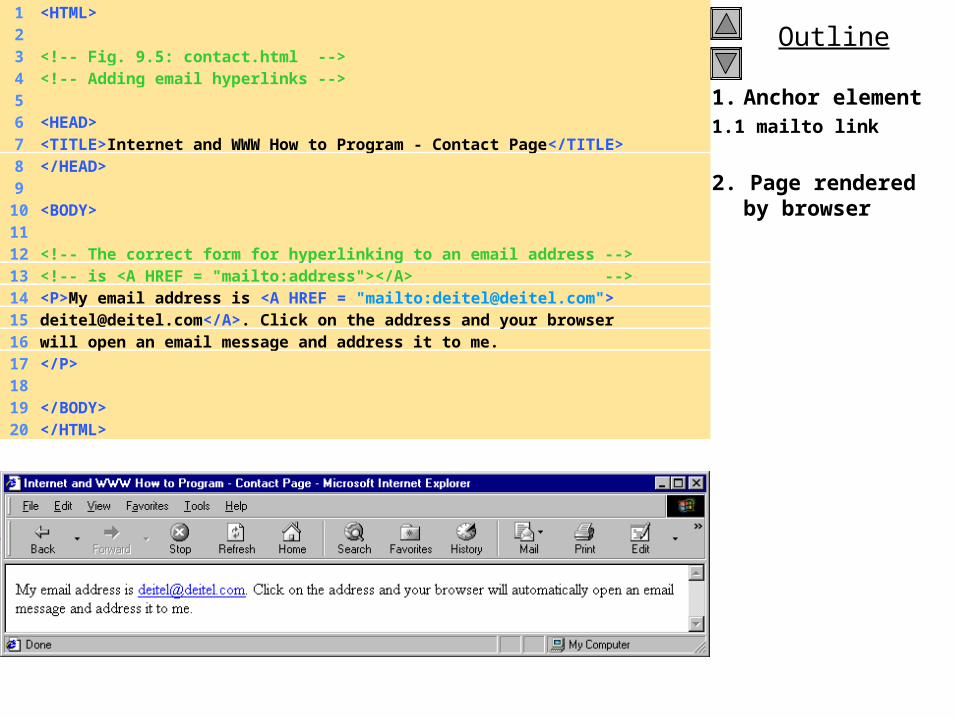
• HREF specifies the URL you would like to link to– <A HREF = “address”>…</A>– Can link to email addresses, using
<A HREF = “mailto:emailaddress”>…</A>– Note quotation mark placement
Outline
1. Anchor element1.1 HREF attribute
1 <HTML>23 <!-- Fig. 9.4: links.html -->4 <!-- Introduction to hyperlinks -->56 <HEAD>7 <TITLE>Internet and WWW How to Program - Links</TITLE>8 </HEAD>910 <BODY>1112 <CENTER>13 <H2>Here are my favorite Internet Search Engines</H2>14 <P><STRONG>Click on the Search Engine address to go to that15 page.</STRONG></P>1617 <!-- Hyperlink form: <A HREF = "address"> -->18 <P>Yahoo: <A HREF = "http://www.yahoo.com">19 http://www.yahoo.com</A></P>2021 <P>AltaVista: <A HREF = "http://www.altavista.com">22 http://www.altavista.com</A></P>2324 <P>Ask Jeeves: <A HREF = "http://www.askjeeves.com">25 http://www.askjeeves.com</A></P>2627 <P>WebCrawler: <A HREF = "http://www.webcrawler.com">28 http://www.webcrawler.com</A></P>29 </CENTER>3031 </BODY>32 </HTML>

15
Linking to other Web pages
Outline
1. Anchor element1.1 mailto link
2. Page rendered by browser
1 <HTML>23 <!-- Fig. 9.5: contact.html -->4 <!-- Adding email hyperlinks -->56 <HEAD>7 <TITLE>Internet and WWW How to Program - Contact Page</TITLE>8 </HEAD>910 <BODY>1112 <!-- The correct form for hyperlinking to an email address -->13 <!-- is <A HREF = "mailto:address"></A> -->14 <P>My email address is <A HREF = "mailto:[email protected]">15 [email protected]</A>. Click on the address and your browser16 will open an email message and address it to me.17 </P>1819 </BODY>20 </HTML>

17
9.8 Images
• Images as anchors
• Background color– Preset colors (white, black, blue, red, etc.)
– Hexadecimal code• First two characters for amount of red
• Second two characters for amount of green
• Last two characters for amount of blue• 00 is the weakest a color can get• FF is the strongest a color can get
• Ex. black = #000000

18
9.8 Images
• Image background– <BODY BACKGROUND = “background”>– Image does not need to be large as browser tiles image across and
down the screen
• Pixel– Stands for “picture element”– Each pixel represents one addressable dot of color on the screen
• Insert image into page– Use <IMG> tag
• Attributes:– SRC = “location”– HEIGHT (in pixels)– WIDTH (in pixels)– BORDER (black by default)– ALT (text description for browsers that have images turned off or
cannot view images)

Outline
1.1 Background image
1.2 IMG element1.3 IMG attributes
1. Page rendered by browser
1 <HTML>
2
3 <!-- Fig. 9.6: picture.html -->
4 <!-- Adding images with HTML -->
5
6 <HEAD>
7 <TITLE>Internet and WWW How to Program - Welcome</TITLE>
8 </HEAD>
9
10 <BODY BACKGROUND = "background.gif">
11
12 <CENTER>
13 <!-- Format for entering images: <IMG SRC = "name"> -->
14 <IMG SRC = "deitel.gif" BORDER = "1" HEIGHT = "144"
15 WIDTH = "200" ALT = "Harvey and Paul Deitel">
16 </CENTER>
17
18 </BODY>
19 </HTML>

Outline
1. Images as anchors
1.1 Format for value for SRC attribute
2. BR element
1 <HTML>23 <!-- Fig. 9.7: navigationbar.html -->4 <!-- Using images as link anchors -->56 <HEAD>7 <TITLE>Internet and WWW How to Program - Nav Bar</TITLE>8 </HEAD>910 <BODY BGCOLOR = "#CDCDCD">11 <CENTER>1213 <A HREF = "main.html">14 <IMG SRC = "buttons/about.jpg" WIDTH = "65" HEIGHT = "50" 15 BORDER = "0" ALT = "Main Page"></A><BR>1617 <A HREF = "links.html">18 <IMG SRC = "buttons/links.jpg" WIDTH = "65" HEIGHT = "50" 19 BORDER = "0" ALT = "Links Page"></A><BR>2021 <A HREF = "list.html">22 <IMG SRC = "buttons/list.jpg" WIDTH = "65" HEIGHT = "50" 23 BORDER = "0" ALT = "List Example Page"></A><BR>2425 <A HREF = "contact.html">26 <IMG SRC = "buttons/contact.jpg" WIDTH = "65" HEIGHT = "50"27 BORDER = "0" ALT = "Contact Page"></A><BR>2829 <A HREF = "header.html">30 <IMG SRC = "buttons/header.jpg" WIDTH = "65" HEIGHT = "50"

Outline
1. Page rendered by browser
31 BORDER = "0" ALT = "Header Page"></A><BR>
32
33 <A HREF = "table.html">
34 <IMG SRC = "buttons/table.jpg" WIDTH = "65" HEIGHT = "50"
35 BORDER = "0" ALT = "Table Page"></A><BR>
36
37 <A HREF = "form.html">
38 <IMG SRC = "buttons/form.jpg" WIDTH = "65" HEIGHT = "50"
39 BORDER = "0" ALT = "Feedback Form"></A><BR>
40 </CENTER>
41
42 </BODY>
43 </HTML>
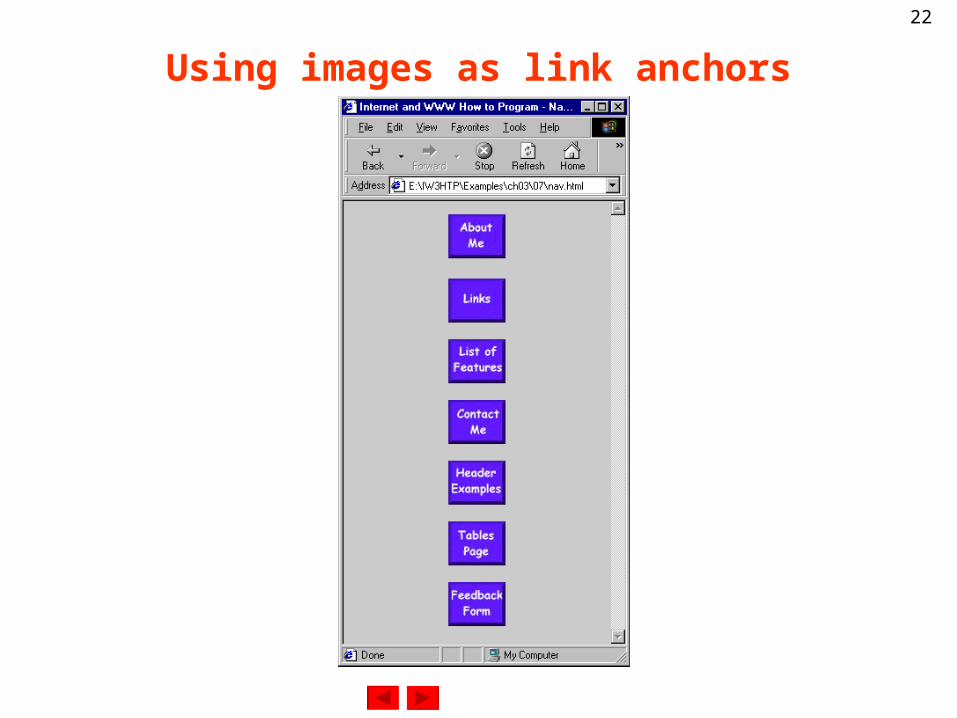
22
Using images as link anchors

23
9.9 Formatting Text With <FONT>
• FONT element– Add color and formatting to text– FONT attributes:
• COLOR
– Preset or hex color code
– Value in quotation marks
– Note: you can set font color for whole document using TEXT attribute in BODY element
24
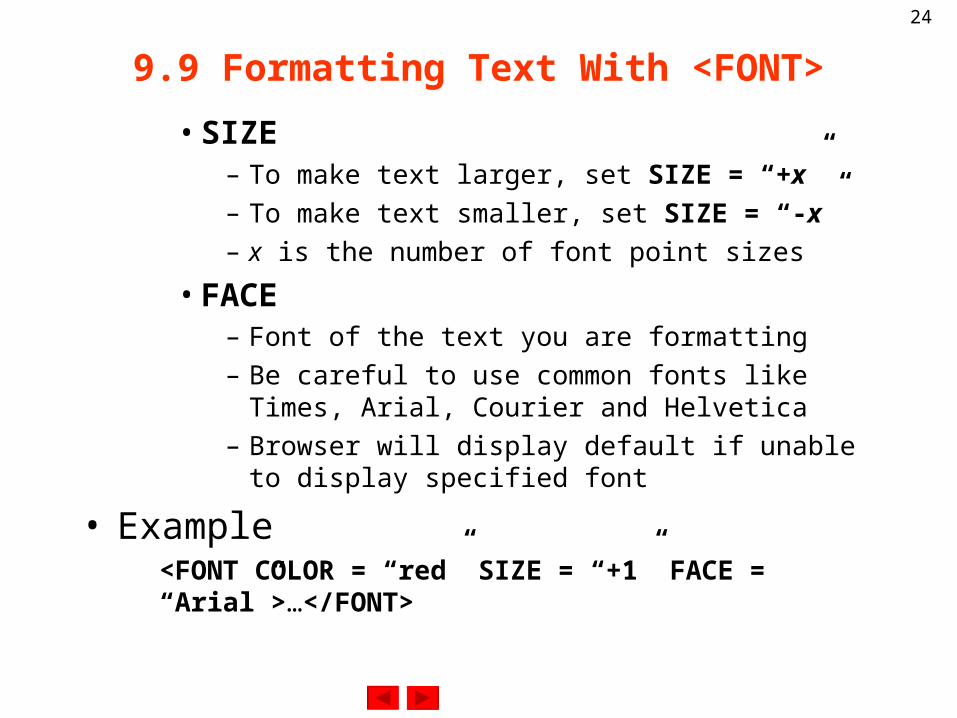
9.9 Formatting Text With <FONT>
•SIZE– To make text larger, set SIZE = “+x”– To make text smaller, set SIZE = “-x”– x is the number of font point sizes
•FACE– Font of the text you are formatting
– Be careful to use common fonts like Times, Arial, Courier and Helvetica
– Browser will display default if unable to display specified font
• Example<FONT COLOR = “red” SIZE = “+1” FACE = “Arial”>…</FONT>

Outline
1. FONT tag1.1 FONT attributes
1<HTML>23<!-- Fig. 9.8: main.html -->4<!-- Formatting text size and color -->56<HEAD>7<TITLE>Internet and WWW How to Program - Welcome</TITLE>8</HEAD>910<BODY>1112<H1 ALIGN = "center"><U>Welcome to Our Web Site!</U></H1>1314<!-- Font tags change the formatting of text they enclose -->15<P><FONT COLOR = "red" SIZE = "+1" FACE = "Arial">We have 16designed this site to teach about the wonders of 17<EM>HTML</EM>.</FONT>1819<FONT COLOR = "purple" SIZE = "+2" FACE = "Verdana">We have been20using <EM>HTML</EM> since <U>version<STRONG> 2.0</STRONG></U>,21and we enjoy the features that have been added recently.</FONT>2223<FONT COLOR = "blue" SIZE = "+1" FACE = "Helvetica">It 24seems only a short time ago that we read our first <EM>HTML</EM>25book.</FONT>2627<FONT COLOR = "green" SIZE = "+2" FACE = "Times">Soon you will28know about many of the great new feature of HTML 4.0.</FONT></P>2930<H2 ALIGN = "center">Have Fun With the Site!</H2></P>3132</BODY>33</HTML>

26
Using the FONT element to format text

27
9.10 Special Characters, Horizontal Rules and More Line Breaks
• Special characters – Inserted in code form
– Format always &code;• Ex. &
– Insert an ampersand
– Codes often abbreviated forms of the character
– Codes can be in hex form• Ex. & to insert an ampersand
• Strikethrough with DEL element• Superscript: SUP element• Subscript: SUB element
Outline
1. Special characters
1. Strikethrough
1. Superscript
1. Subscript
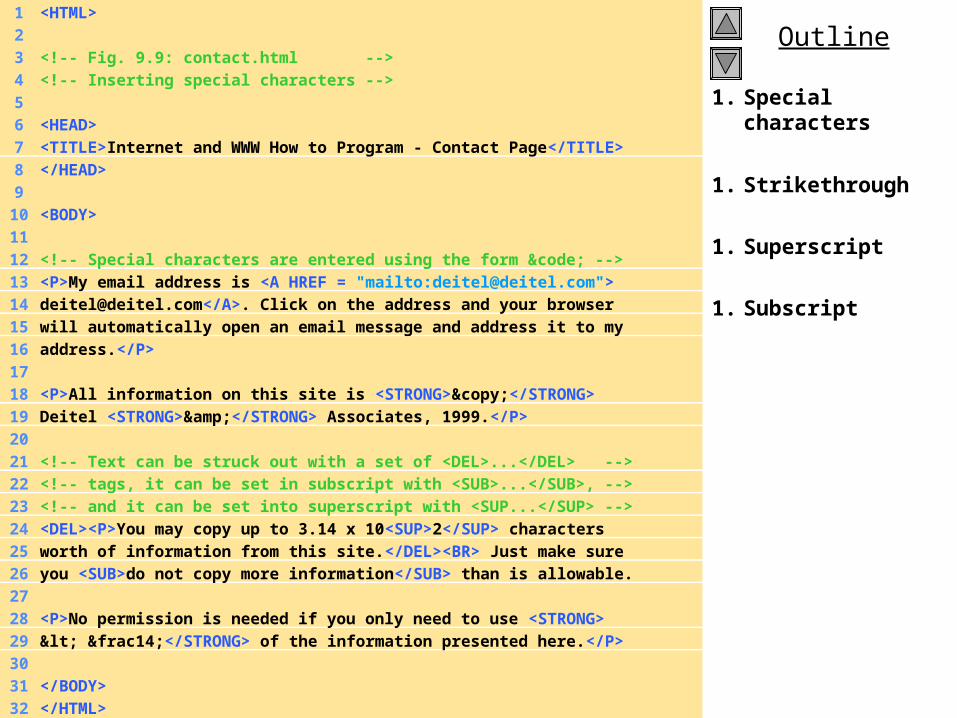
1 <HTML>23 <!-- Fig. 9.9: contact.html -->4 <!-- Inserting special characters -->56 <HEAD>7 <TITLE>Internet and WWW How to Program - Contact Page</TITLE>8 </HEAD>910 <BODY>1112 <!-- Special characters are entered using the form &code; -->13 <P>My email address is <A HREF = "mailto:[email protected]">14 [email protected]</A>. Click on the address and your browser15 will automatically open an email message and address it to my16 address.</P>1718 <P>All information on this site is <STRONG>©</STRONG>19 Deitel <STRONG>&</STRONG> Associates, 1999.</P>2021 <!-- Text can be struck out with a set of <DEL>...</DEL> -->22 <!-- tags, it can be set in subscript with <SUB>...</SUB>, -->23 <!-- and it can be set into superscript with <SUP...</SUP> -->24 <DEL><P>You may copy up to 3.14 x 10<SUP>2</SUP> characters25 worth of information from this site.</DEL><BR> Just make sure26 you <SUB>do not copy more information</SUB> than is allowable.2728 <P>No permission is needed if you only need to use <STRONG>29 < ¼</STRONG> of the information presented here.</P>3031 </BODY>32 </HTML>

29
Inserting special characters into HTML

30
9.10 Special Characters, Horizontal Rules and More Line Breaks
• Horizontal rule– <HR> tag– Inserts a line break directly below it– HR attributes:
• WIDTH– Adjusts the width of the rule– Either a number (in pixels) or a percentage
• SIZE– Determines the height of the horizontal rule– In pixels
• ALIGN– Either left, right or center
• NOSHADE– Eliminates default shading effect and displays horizontal
rule as a solid-color bar

Outline
1. Horizontal rules1.1 HR attributes
1<HTML>
2
3<!-- Fig. 9.10: header.html -->
4<!-- Line breaks and horizontal rules -->
5
6<HEAD>
7<TITLE>Internet and WWW How to Program - Horizontal Rule</TITLE>
8</HEAD>
9
10<BODY>
11<!-- Horizontal rules as inserted using the format: -->
12<!-- <HR WIDTH = ".." SIZE = ".." ALIGN = ".."> -->
13<HR WIDTH = "25%" SIZE = 1>
14<HR WIDTH = "25%" SIZE = 2>
15<HR WIDTH = "25%" SIZE = 3>
16
17<P ALIGN = "left"><STRONG>Size:</STRONG>4
18<STRONG>Width:</STRONG>75%
19<HR WIDTH = "75%" SIZE = "4" ALIGN = "left">
20
21<P ALIGN = "right"><STRONG>Size:</STRONG>12
22<STRONG>Width:</STRONG>25%
23<HR WIDTH = "25%" SIZE = "12" ALIGN = "right">
24
25<P ALIGN = "center"><STRONG>Size:</STRONG>8
26<STRONG>Width:</STRONG>50%
27<STRONG><EM>No shade...</EM></STRONG>
28<HR NOSHADE WIDTH = "50%" SIZE = "8" ALIGN = "center">
29
30</BODY>
31</HTML>

32
Using horizontal rules