10 marks - nano infotechnanoinfotechbanga.com/securearea368/upload/qp/dtp_b… · web...
TRANSCRIPT

SUBJECT: ‘Desktop Publishing Tools’ (B.Sc. IT - 2)Page 1 of 29
Note: This question-bank contains three sections.Section-A contains 1 mark Multiple Choice Objective type questions.Section-B contains 5 marks subjective questions.Section-A contains 10 marks subjective questions.
Section – A 1 Marks Questions[QUESTIONS 1 TO 65] [PAGE 1 TO 6]
MULTIPLE CHOICE OBJECTIVE TYPE QUESTION
Q1. CorelDraw is a product of ______________a) CorelDraw committee b) Microsoft b) Corel Corporation d) Corel Drewe
Q2. CorelDraw is a ______________ editor.a) Raster graphic b) Vector graphicc) Text graphic d) Image graphic
Q3. A button that opens a group of related tools is called _________a) Flyouts b) Scrapbookc) Toolbox d) Toolbar
Q4. Multiple line of text is called ______________a) Paragraph text b) Textc) Large text d) Multiline text
Q5. Which of the following is not include in CorelDraw Interface?a) New file b) New graphicc) Template d) Corel Tutor
Q6. Which of following is not a color model?a) Cymk b) RGBc) Lab d) Indexed
Q7. Extension of CorelDraw is______a) .crd b).codc) .cdr d) none of these
Q8. Latest version of CorelDraw is______________a) x3 b) x4c) x5 d) x6
Q9. Lock object is available in _____________ menu.a) File Menu b) Edit menuc) Arrange Menu d) Tools Menu
Q10. Group is available in ________ menu.a) Arrange Menu b) Edit menuc) Tools Menu d) View menu
Q11. By Default the page layout of CorelDraw Drawing page is ___________a) Latter b) Legal
Prepared By: - Vaishnoo Maa Computers, SCO 145, Chotti Baradari, Patiala.Ph. 0175-2205100, 2215100

SUBJECT: ‘Desktop Publishing Tools’ (B.Sc. IT - 2)Page 2 of 29
c) A1 d) Normal
Q12. The CMYK color model defines color using the following components:a) Cyan, Magenta, Yellow, Red b) Cyan, Magenta, Pink, Redc) Red, Green, Blue d) Cyan, Magenta, Yellow, black
Q13. The RGB color model defines color using the following components:a) Red Green Blue B) Red Gray Bluec) Red Green Brown d) Red Green black
Q14. The HSB color model defines color using the following components:a) Hue, saturation, Brown b) Hue, Saturation, Brightness c) Hue, Saturation, Black d) Hue, Saturation, Blackness
Q15. ___________ View displays an outline of the drawing by hiding fills onlya) Wireframe b) Draftc) Normal d) Simple Wireframe
Q16. _________ View displays a drawing without fills.a) Enhanced b) Draftc) Normal d) Simple Wireframe
Q17. ___________ Fill consists of a Single Solid color filled inside an object.a) Fountain b) Uniformc) Texture d) Mesh
Q18. Grids and Guideline are available in _____________ menu.a) View Menu b) Edit Menuc) Layout Menu d) Arrange Menu
Q19. Which of the following key is used for display full screen view?a) F6 b) F7 c) F8 d) F9
Q20. A line, which is drawn one segment at a time by adding nodes are, called _______a) Freehand curve b) Bezier linesc) Straight Line d) None of these
Q21. Individual adjustment of characters is called ______________a) Spacing b) Tracingc) Kerning d) Character set
Q22. Which of following is not a property / Effect of Artistic media tool?a) Preset tool b) Brush toolc) Object Sprayer tool d) Line tool
Q23. Which of the following is not a fill tool?a) Uniform Fill b) Fountain Fillc) Mesh Fill d) Plantain Fill
Q24. ____________ is not a marquee tool.a) Rectangle Tool b) Elliptical Toolc) Single Row Marquee tool d) Single Line Marquee Tool
Q25. _____________ is not a Lasso Tool.
Prepared By: - Vaishnoo Maa Computers, SCO 145, Chotti Baradari, Patiala.Ph. 0175-2205100, 2215100

SUBJECT: ‘Desktop Publishing Tools’ (B.Sc. IT - 2)Page 3 of 29
a) Lasso Tool b) Magic Lasso Toolc) Magnetic Lasso Tool d) Polygonal Lasso Tool
Q26. Extension of Photoshop is ________________a) .psp b) .ptp c) .pos d) .psd
Q27. DPI means _________________a) Dots Persqr Inches b) Dots Per Inchesc) Dynamic Program Interface d) Dynamic Program Interaction
Q28. Photoshop is developed by ______________a) Adobe System Incorporated b) Microsoft Corporation c) Corel Corporation d) None of these
Q29. Full form of JPEGa) Join Program Experts Group b) Join Photographic Experts Groupc) Join Picture Experts Gallery d) Join Photographic Experts Gallery
Q30. Full Form of GIFa) Graphic Interchange Format b) Graphic Interaction Formatc) Graphic Interchange Frame d) Graphic Internal Format
Q31. Which of the following tool is used for selects and rotates the CorelDraw objecta) Knife Tool b) Smudge Toolc) Shape Tool d) None of These
Q32. ________Command to automatically generate a Web photo gallery from a set of images.
a) Wap Photo Gallery b) Macro Photo galleryc) Web Photo Gallery d) None of These
Q33. Shortcut key for zoom in or out isa) Ctrl + +, Ctrl + - b) Alt + +, Alt - -c) Ctrl + +, Ctrl - - d) Alt + +, Alt - -
Q34. _________an object will restrict any further modification on the object.a) Blending b) Lockingc) Grouping d) None of these
Q35. ______ Fill used to apply on solid color to your image or object.a) Palette b) Fountain c) Texture d) Uniform
Q36. The maximum zoom level is ______% in CorelDraw.a) 100 b) 1400c) 500 d) 1600
Q37. Automate option is available in ___________Menu.a) File b) Edit c) Image c) Layer
Q38. Web Photo Gallery is available in ____________ Menu of Photoshop.a) ImageadjustmentsWeb Photo Gallery
Prepared By: - Vaishnoo Maa Computers, SCO 145, Chotti Baradari, Patiala.Ph. 0175-2205100, 2215100

SUBJECT: ‘Desktop Publishing Tools’ (B.Sc. IT - 2)Page 4 of 29
b) File AutomateWeb Photo Galleryc) FileExportWeb Photo Galleryd) ImagemodeWeb Photo Gallery
Q39. The _____Tool allows you to divide an image into smaller sections in Photoshop.a) Clone Stamp b) Type Toolc) Patch Tool d) Slice tool
Q40. Shortcut Key for create a new layer in Photoshop is _______a) Ctrl + n b) Alt + nc) Ctrl + Alt + n d) Ctrl + shift + n
Q41. Shortcut key for open color palette or swatches palette is_________a) F5 b) F6 c) F7 d) F8
Q42. Shortcut key for merge a layer is ________a) Ctrl + e b) Ctrl + mc) Alt + Ctrl + e d) Ctrl + Alt + m
Q43. ______ is a shortcut key of marquee tool.a) Ctrl + m b) Alt + mc) m d) Ctrl + Alt + m
Q44. The rectangular area inside the drawing window is called: - a) Drawing page b) Drawing Sheetc) Corel File d) None of these
Q45. In CorelDraw, which Key is used for Zoom In? a) F1 b) F2 c) F3 d) F4
Q46. In CorelDraw, which Key is used for Zoom Out?a) F1 b) F2 c) F3 d) F4
Q47. _____ is the measuring tools displayed in the left side and along the top of the drawing window.
a) Guidelines b) Toolbarc) Scrollbar d) Rulers
Q48. Shortcut key of Format Text Dialog box in CorelDraw is: -a) Ctrl + t b) Ctrl + mc) Ctrl + f d) Ctrl + a
Q49. Why you would use a layer mask.a) add a layer mask b) add a vector maskc) add a clipping mask d) add an adjustment layer
Q50. What happens when you choose the command Layer > Flatten image?a) Layers within layer groups are merged into a single layer.b) All layers are made visible and then combined into the background layer.c) The active layer and all visible layers below it are combined into a single layer.d) All visible layers are combined into the background layer and hidden layers are
discarded.
Prepared By: - Vaishnoo Maa Computers, SCO 145, Chotti Baradari, Patiala.Ph. 0175-2205100, 2215100

SUBJECT: ‘Desktop Publishing Tools’ (B.Sc. IT - 2)Page 5 of 29
Q51. ________ tool allows you to cut out any portion of the image you don't like or make an image smaller.
a) Crop Tool b) Gradient Toolc) History Brush Tool d) Pen Tool
Q52. Which of the following key is used for merge layers?a) Ctrl + e b) Ctrl + mc) Ctrl + n d) alt + e
Q53. Shortcut key of feathering is: -a) Alt + d b) Alt + ctrl + dc) Ctrl + d d) ctrl + f
Q54. You can hide or show layer properties from __________ menu.a) View b) Selectc) Edit c) None of these
Q55. In Photoshop, Menu bar consists of _____ menu.a) 5 b) 7c) 8 d) 9
Q56. In CorelDraw, Menu bar consists of _____ menu.a) 10 b) 11c) 12 d) 13
Q57. Which of the following in not a type of spiral in CorelDraw.a) Symmetrical Spiral b) Logarithmic Spiralc) Horizontal Spiral d) None of These
Q58. Short cut key for group an object.a) Ctrl + u b) Alt + gc) Shift +g d) None of these
Q59. Grouping and Ungrouping option in available in following menu.a) Edit menu b) View menuc) Arrange menu c) Tool menu
Q60. Ctrl + shift + I are a shortcut of: -a) Inverse b Deselectc) Select all d) None of these
Q61. Kerning text property is available in: -a) File Menu b) Format Dialog boxc) Edit Menu c) Writing Tools
Q62. Shortcut key of spell check in CorelDraw is: -a) Ctrl + F12 b) Ctrl + Sc) Alt + F12 d) Ctrl+F10
Q63. Shortcut key of change case in CorelDraw is: - a) Ctrl + C b) Ctrl + Alt + C c) Shift + F2 d) Shift +F3
Prepared By: - Vaishnoo Maa Computers, SCO 145, Chotti Baradari, Patiala.Ph. 0175-2205100, 2215100

SUBJECT: ‘Desktop Publishing Tools’ (B.Sc. IT - 2)Page 6 of 29
Q64. The lines that change their thickness according to the direction of the line are called: -
a) Calligraphic Line b) Straight Linec) Bezier Line d) Freehand Line
Q65. ____Enables you to select from several categories of online help and Instructionsa) Help Menu b) CorelTUTORc) F1 d) None of These
Answer Key
1. b 2. b 3.a 4.a 5.a 6.a 7.c 8.d 9.c 10.a 11.a 12.d13. a 14.b 15.a 16.a 17.b 18.a 19.d 20.b 21.c 22.d 23.d 24.d25. d 26.d 27.b 28.a 29.b 30.a 31.d 32.c 33.a 34.b 35.d 36.d37. a 38.b 39.d 40.d 41.b 42.a 43.c 44.a 45.c 46.d 47.d 48.a49. a 50.d 51.d 52.a 53.b 54.c 55.d 56.b 57.c 58.d 59.c 60.a61. b 62.a 63.d 64.a 65.b
Prepared By: - Vaishnoo Maa Computers, SCO 145, Chotti Baradari, Patiala.Ph. 0175-2205100, 2215100
SUBJECT: ‘Desktop Publishing Tools’ (B.Sc. IT - 2)Page 7 of 29
Section – B 5 Marks Questions[QUESTIONS 1 TO 24] [PAGE 7 TO 16]Q1. Write a short note on the followings: Rulers, Grids and Guidelines, Snap to Grid. (March.2011)Ans. 1) Rulers are the measuring tools displayed in the left side and along the top of the drawing window.
The rulers help you size and position the objects in your drawing. Rulers can help you size, align, and draw objects accurately. You can hide the rulers or move them to another position in the drawing widow. You can also customize the ruler settings to suit your needs.
2) Grids and guidelines are tools that enable you to easily position a selected object to a horizontal or vertical location, or both. Grid: - Working with the grid displayed is like working on graph paper. You can use grids to align your object to a position. The grids are not printed. Guideline: - Guidelines are non-printing lines placed to align and place the objects in your drawing. Guidelines are of two types Vertical and Horizontal. 3) Snap to Grid feature will make a grid coordinates act like magnets that attract the object you are moving. If you want to move an object to a location not on a grid coordinate, you will find it difficult with Snap to Gird turned on. To have object ‘snap to grid’: -1. Click View menu 2. Choose Snap to Grid or Press Ctrl + Y. Q2. Discuss various Artistic Media Briefly. (MARCH 2011)Ans. The Artistic media tool is used to draw curves like the freehand tool. As Freehand tool, Artistic media tool also draws a curve by clicking and then dragging. Artistic Media tool is actually a collection of many tools. Each tool has its own settings and effects. When you click on the Artistic media tool in the Curve flyout, the property bar displays these various tools. When you click on a tool, the corresponding setting and effects are displayed on the property bar.1.Preset Tool Preset line is the name given to thick lines that can be drawn using preset tool. These lines can be drawn of the different shapes according to the requirement.2.Brush tool you can apply a variety of preset brush strokes. The width and smoothness of the brushstroke can be set according to your choice. The Brush stroke list drop down menu lets you choose brush strokes ranging from strokes with arrowheads to one filled with rainbow patterns.3.Object Sprayer tool provides effects that look nothing at all like the line you will draw. By using property bar we can set the size of object to be Sprayed, Spraylist File List, Spray Order, spacing of objects, Rotation etc.4.Calligraphic tool Calligraphic lines are similar to lines drawn using a calligraphic pen. Such lines change their thickness according to the direction of the line. Lines thickness also varies depending upon the angle of the pen nib.
Q3. What do you mean by Layers? Explain Master Layer.Ans.Corel draw drawings consist of stacked objects. You can organize these objects using invisible planes called layers. Layering gives you added flexibility when organizing and editing the objects in complex drawings. You can divide a drawing into multiple layers, each containing a portion of the drawing's contents.
Prepared By: - Vaishnoo Maa Computers, SCO 145, Chotti Baradari, Patiala.Ph. 0175-2205100, 2215100
SUBJECT: ‘Desktop Publishing Tools’ (B.Sc. IT - 2)Page 8 of 29
Master Layer: - You can add a master layer to a Master Page. This layer contains information that you want to display on every page of a multipage document. You can set a layer's editing properties to make a layer active, and allow the editing of all layers or the active layer only. When you are making changes to a drawing, You can Lock a layer to prevent accidental changes to its objects. When you lock a layer you cannot select or edit it. Renaming layers can be used to indicate their contents, position in the stacking order, and relationship with other layers. Enabling the print setting of a layer lets you print the layer and its contents. If you disable a layer's print setting, the layer and its contents won't appear when you print the drawing.
Q4. What are the various fill tools in Corel draw?(MARCH 2011)Ans. Any color, shade or pattern inside an object is considered a Fill. The Interactive Fill Tool and the Fill Tool Flyout with help you to fill your objects. Corel draw provide different types of fills. The different types of fills and their description are given below: -1. Uniform It consists of a Single Solid color filled inside an object.2. Fountain A fountain fill is a smooth progression of two or more colors that adds depth to an object. There are four types of fountain fills: linear, radial, conical and square.3. Patterns The object is filled with a repeating pattern. The pattern can be a color or some bitmapped images.4. Textures Randomly generated fill that renders the object a natural look. Corel draw provide several textures for you to fill objects. Each texture has a set of attributes that can be changed as per your need.5. Mesh Fill Consisting of patches of color inside the object. When the mesh fill is applied, many nodes appear inside the object in the form of rows and columns. You can set the number of rows and columns. You can then drag and move these nodes to a new position.
Q5. Explain different views. What is the purpose of zooming and panning?Ans. Corel draw lets you display a drawing in any of the following modes: Simple Wireframe displays an outline of the drawing by hiding fills, extrusions, contours, drop shadows, and intermediate blend shapes, also displays the bitmapped images in monochrome Wireframe displays an outline of the drawing by hiding fills only Draft displays a drawing's fills and bitmapped images using a low resolution Normal displays a drawing without fills and without high-resolution bitmapped images Enhanced displays a drawing without fills
Zooming and Panning You can change the view of a drawing by zooming in to get a closer look or by zooming out to see more of the drawing. You can experiment with a variety of zoom options to see the amount of detail you want. Another way in which you can view specific areas of a drawing is by panning.
Panning lets you view areas of the drawing window that aren't displayed at the zoom level you're working with. While you are panning, you can zoom in and out.
Q6. Explain distortion effects. How we can apply distortion effects to shape objects? (MARCH 2011)Ans. Distorting objects means to distort the object to create a complex shapeTypes of distortion: -The Interactive distortion tool This tool is used to make a complex shape for your drawing. You can apply following distortions:-
Prepared By: - Vaishnoo Maa Computers, SCO 145, Chotti Baradari, Patiala.Ph. 0175-2205100, 2215100

SUBJECT: ‘Desktop Publishing Tools’ (B.Sc. IT - 2)Page 9 of 29
Push or Pull distortion: - The Push or Pull distortion lets you push the edges of an object in or pull the edges out of an object.Zipper distortion: - The Zipper distortion lets you apply a saw tooth like edge to the object.Twister distortion: - The Twister distortion twists the object. The direction and degree of twist can be adjusted according to your will.
Q7. What is the difference between vector and bitmap images?(SEP 2010)Ans: -The main difference between vector and bitmap graphic are: -
Vector images Bitmap images1) A vector image uses geometrical formulas to represent images.
1) The other way of representing graphical images is through bit-maps in which the image is made up of a pattern of dots
2) Programs that allow you to create and manipulate vector graphics are called draw programs
2) Programs that manipulate bit-map images are called paint programs.
3) In vector graphic lines, arc are used to represents images
3) In Bitmap images dots (.) are used to represent images.
4) Vector graphic is that they often require less memory than bit-maps do.
4) Vector graphic is that they often require more memory than Vector graphic
5) It is more flexible and easily resized 5) It is less flexible
Q8. How is printing and publishing achieved in Corel draw?Ans. Corel draw comes with a full set of printer options that make it easy to print business cards, labels, and other odd-sized output. Click File menu and choose Print, The Print dialog box appears. Selecting a Printer: The General option is used to select a printer, set print range area, set number of copies you want to print etc. Using Layout Styles when Printing: Corel draw gives you a lot of options to control how you document prints. Using the option in layout tab of the Print dialog box, you define the print attributes on your document. Tiling a Print job: Tiling feature is useful when you want to print a drawing, which is larger than the paper your printer can print. So using this feature, Corel draw tiles your document. You can then print these tiles and assemble them to get the document. Using Print Style: A print style is a set of saved printing options. Each print style is a separate file. This lets you move a print style from one machine to another, aback up a print style, and keep document specific styles in the same folder as the document file. You can select a print style or edit a print style and save such changes. You can also delete print styles. Print to file: The Print to file option allows you to create a file that can later be downloaded to the selected output device.
Q9. How can we create Web Photo Gallery?Ans. You use the Web Photo Gallery command to automatically generate a Web photo gallery from a set of images. A Web photo gallery is a Web site that features a home page with thumbnail images and gallery pages with full-size images. Each page contains links that allow visitors to navigate the site. For example, when a visitor clicks a thumbnail image on the home page, a gallery page with the associated full-size image loads. Photoshop provides a
Prepared By: - Vaishnoo Maa Computers, SCO 145, Chotti Baradari, Patiala.Ph. 0175-2205100, 2215100

SUBJECT: ‘Desktop Publishing Tools’ (B.Sc. IT - 2)Page 10 of 29
variety of styles for your gallery, which you can select using the Web Photo Gallery command.1) Select the files or folder you want to use from the file browser. 2) Choose File > Automate > Web Photo Gallery and select the style of Gallery3) Under Source Images, select the folder containing the images that you want to appear in the gallery, and also select the destination folder that you want to contain the images and HTML pages for the gallery.4) To set general options for the gallery photos, choose General from the Options pop-up menu
Q10. Define the following: Snap to grid, Free Transformation, Blur, Dodge and Burn Tool. (MARCH 2011)Ans. Snap to Grid: Snapping helps with precise placement of selection edges, cropping marquees, slices, shapes, and paths. However, sometimes snapping prevents you from correctly placing elements. You can enable or disable snapping using the Snap command. The grid is useful for laying out elements symmetrically. The grid appears by default as nonprinting lines but can also be displayed as dots. You cannot select snap to grid option when the grid is hidden.1) Free Transformation: You can use Edit > Free Transformation to make any of the changes. Drag the handles to rotate, skew scale, or distort as much as you want. You can also access the numeric transformations in the Tool Options Bar.2) Blur: The Blur tool, simply put, creates blurs in images. Blur is most useful to rid the background of unwanted cutter and to de-emphasize parts of the picture. Blur tool softens pixels values. Use can also set the Mode and Pressure from the toolbox.3) Dodge and Burn Tool: Dodging is accomplished by waving a Dodge tool, usually a cardboard circle on a wire, between the projected image from the enlarger and photographic paper. This blocks some of the light and makes the dodged area lighter when the print is developed. 4) Burning has the opposite effect to dodging - instead of lightening a small area, it darkens the area. Inside the tools options palette you have the three choices, these options indicate the types of pixels that the tool will affect.
Q11. What is zoom tool? How we can use zoom in, zoom out?Ans. Zoom tool is a very essential tool. It is used for viewing the images in an enlarged form With the help of this we can edit the images more precisely and accurately. You can change the view of a drawing by zooming in to get a closer look or by zooming out to see more of the drawing. There are two types of zooming: Zoom in and Zoom out.Steps for zooming in: 1) Place any object on your screen. 2) Choose the Zoom Tool and click on the object with your left mouse button. 3) The object will zoom in. 4) Repeat to zoom closer.5) Where you click will become the center of the screen when zoomedTo zoom out: 1) Click on the screen with your right mouse button.2) Note how the cursor icon changes from + to -. Click again to repeat. 3) Mouse zoom out will return you to your previous viewOR
Prepared By: - Vaishnoo Maa Computers, SCO 145, Chotti Baradari, Patiala.Ph. 0175-2205100, 2215100

SUBJECT: ‘Desktop Publishing Tools’ (B.Sc. IT - 2)Page 11 of 29
1) Select the zoom tool and hold down Alt to activate the zoom-out tool. The pointer becomes a magnifying glass with a minus sign in its center. 2) Click the center of the area of the image you want to reduce. 3) Each click reduces the view to the previous preset percentage. 4) When the file has reached its maximum reduction level, the magnifying glass appears empty. 5) Click the Zoom out button in the options bar to reduce to the previous preset percentage. When the image has reached its maximum reduction level, the command is dimmed. 6) Choose View > Zoom Out to reduce to the previous preset percentage. When the image reaches its maximum reduction level, the command is dimmed.
Q12. What do you understand by mask? What are its advantages and disadvantages? (SEP 2010)Ans. Masking is the method by which you can select a portion of the image or picture for editing and doing changes. It is selection that you make because it permits you to do something that affects only the selected area, effectively masking anything that is not selected. Masks can let you change one part of a picture without changing all of it.You can mask an image in Photoshop on your own using the Magic Wand. But, it also provides with a very easy method too. It is called Quick Mask. In this case you can see both the image and the mask at the same time. Steps:-1) You can use any selection tool to select a part of the image, which you want to mask.2) Click the Quick Mask Button at the bottom of the toolbox.3) You see a color overlay indicating the mask on the protected area, which is to say, the area not selected.4) If the mask needs editing, select an appropriate Paintbrush size and from the Brush palette and click the Paintbrush.5) When the mask is edited to you satisfaction, click at the standard mode button to return to the original image.6) Finally, press Ctrl + D to deselect the area and get rid of the mask from the image.
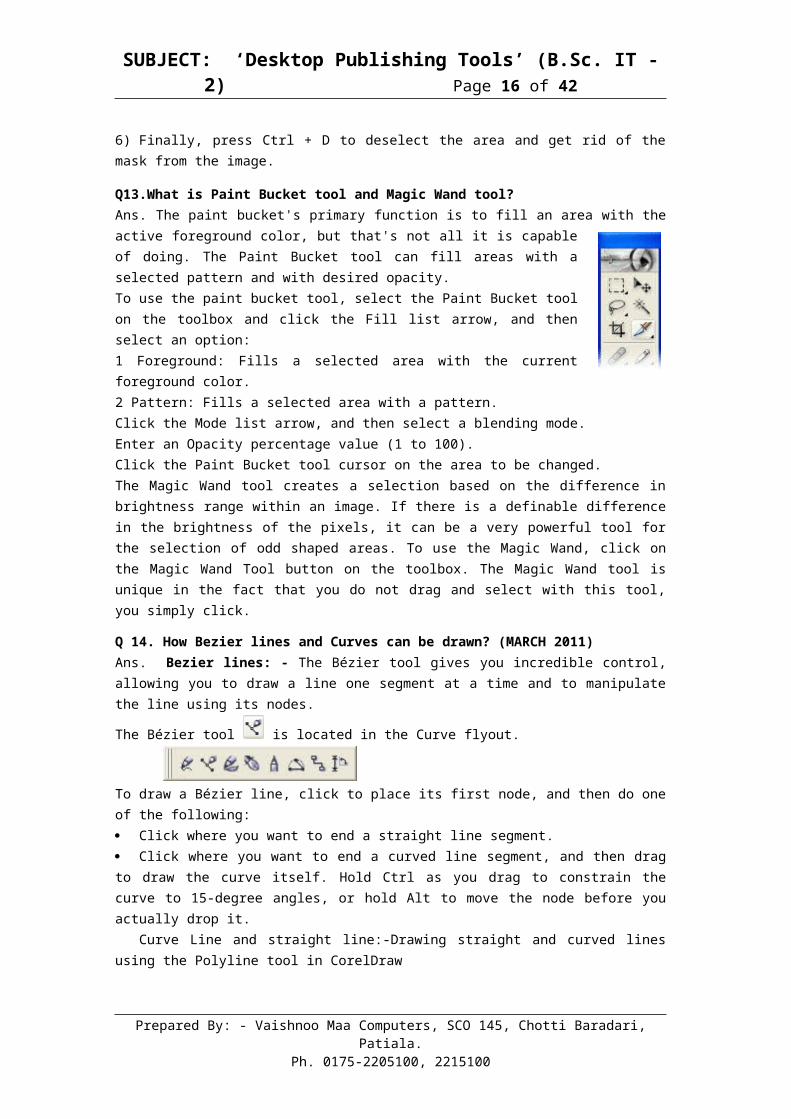
Q13.What is Paint Bucket tool and Magic Wand tool?Ans. The paint bucket's primary function is to fill an area with the active foreground color, but that's not all it is capable of doing. The Paint Bucket tool can fill areas with a selected pattern and with desired opacity.To use the paint bucket tool, select the Paint Bucket tool on the toolbox and click the Fill list arrow, and then select an option:1 Foreground: Fills a selected area with the current foreground color.2 Pattern: Fills a selected area with a pattern.Click the Mode list arrow, and then select a blending mode.Enter an Opacity percentage value (1 to 100).Click the Paint Bucket tool cursor on the area to be changed.The Magic Wand tool creates a selection based on the difference in brightness range within an image. If there is a definable difference in the brightness of the pixels, it can be a very powerful tool for the selection of odd shaped areas. To use the Magic Wand, click on the Magic Wand Tool button on the toolbox. The Magic Wand tool is unique in the fact that you do not drag and select with this tool, you simply click.
Q 14. How Bezier lines and Curves can be drawn? (MARCH 2011)
Prepared By: - Vaishnoo Maa Computers, SCO 145, Chotti Baradari, Patiala.Ph. 0175-2205100, 2215100

SUBJECT: ‘Desktop Publishing Tools’ (B.Sc. IT - 2)Page 12 of 29
Ans. Bezier lines: - The Bézier tool gives you incredible control, allowing you to draw a line one segment at a time and to manipulate the line using its nodes.
The Bézier tool is located in the Curve flyout.
To draw a Bézier line, click to place its first node, and then do one of the following: Click where you want to end a straight line segment. Click where you want to end a curved line segment, and then drag to draw the curve itself. Hold Ctrl as you drag to constrain the curve to 15-degree angles, or hold Alt to move the node before you actually drop it.
Curve Line and straight line:-Drawing straight and curved lines using the Polyline tool in CorelDraw
CorelDraw, you can draw straight and curved lines in one line using the Polyline tool.To draw line segments using the Polyline tool1. Open the Curve flyout, and click the Polyline tool.2. Click where you want to start the line segment.To draw a straight line segment1. Move the mouse and click where you want to end the straight line segment;2. CorelDraw automatically creates a straight line between the two points.3. To draw a curved line segment, drag the mouse along the path you want the curve to follow4. Click where you want to end the curved line segment.5. You can continue drawing straight and curved line segments, or you can finish the line at any time with a double-click.
Q 15.How Slicing can be done in Photoshop? (SEP 2010)Ans. The Slice tool allows you to divide an image into smaller sections. There are two tools: Slice (which creates the slices) and Slice Select (which enables you to select and modify existing slices). Sliced images are commonly used for web design work, which sometimes requires images to be broken up in this way.Using the Slice and Slice Select Tools Select the slice tool in the toolbox. Click and drag over the area you wish to make into a slice. Release the mouse button - Photoshop automatically creates the necessary number of slices, with the active slice highlighted. Using the slice select tool, you can move and resize slices by dragging inside a slice, or by dragging the handles.Note: - To exports the separate images, choose File > Save for Web from the Photoshop menu. When you save the file you will have the option to save the images and/or a new HTML page to contain the images.
Q 16.List various Line tools of Corel draw? (MARCH 2011)Ans. Lines are the basic unit of almost all drawings. In Corel draw, these are straight lines, freehand lines, calligraphic lines and Bezier lines. Straight line :- To draw a straight line:-1) Click the Curve flyout from the toolbox, and choose the freehand tool. 2) Now click the drawing window where you want to start the line. 3) Now click at a point, where you want to end it.
Prepared By: - Vaishnoo Maa Computers, SCO 145, Chotti Baradari, Patiala.Ph. 0175-2205100, 2215100

SUBJECT: ‘Desktop Publishing Tools’ (B.Sc. IT - 2)Page 13 of 29
4) A straight line will be formed, joining these two points. 5) Using Ctrl key you can draw straight line angles in increments of 15o
Freehand curve :- To draw a Freehand Curve:-1) Choose freehand tool. 2) Click and drag across the drawing page 3) Draw a curve as you want. Bezier Line : - A line, which is drawn one segment at a time by adding nodes are, called Bezier lines. Bezier lines and curves contain many nodes. These nodes can be manipulated, dragged and pulled to draw the shape you want. Thus, the advantage with Bezier lines and curves lies in the fact that they can be modified after drawing them.
Q 17.Define: -1. Grouping and Ungrouping2. Locking and Unlocking
Ans. Grouping : - A group is the name given to a set of objects that behave as a single unit. Operations performed on a group of objects are applied equally to all the objects. A nested group is a group of two or more groups that behaves as a single object. Once object are grouped, you cannot work on individual objects. Shortcut (Ctrl + g)Ungrouping: - Ungrouping means to ungroup the grouped objects. To work on an object individually, you have to ungroup them Shortcut (Ctrl + u)The Object Locking features make the selected object untouchable, even if the layer it resides on it is editable. Locking: - Locking an object will restrict any further modification on the object.1) To lock an object click the arrange menu and choose Lock Object OR Right click and choose Lock Object command from the Shortcut menu.2) The handle around the object changes to little lock symbols. Now you cannot move, resize, rotate, recolor and delete the object. Unlocking : -The object remains as it is till you unlock it. For unlock: -1) Select the object you want to unlock. 2) Click arranges menu and Choose unlock.
Q18. What do you meant by Distorting Objects? How type distortion we can do? Ans. Distorting objects means to distort the object to create a complex shapeTypes of distortion: -The Interactive distortion tool This tool is used to make a complex shape for your drawing. You can apply following distortions:-Push or Pull distortion: - The Push or Pull distortion lets you push the edges of an object in or pull the edges out of an object.Zipper distortion: - The Zipper distortion lets you apply a saw tooth like edge to the object.Twister distortion: - The Twister distortion twists the object. The direction and degree of twist can be adjusted according to your will.
Q 19. Discuss various advanced painting techniques.Ans. In Photoshop, you can either paint a picture from scratch, starting with a blank page, or you can take an existing image and convert it into a painting. This include colored pencil drawing, pastels chalk, charcoal watercolor, oil paint and much more painting techniques that you can use. 1) Watercolor :- Photoshop has a watercolor filter that coverts a picture to a watercolor, this option available under Filter > Artistic submenu. The Watercolor filter works most effectively on pictures that have large, bold areas and not a lot of detail. Because it also tends to darken
Prepared By: - Vaishnoo Maa Computers, SCO 145, Chotti Baradari, Patiala.Ph. 0175-2205100, 2215100

SUBJECT: ‘Desktop Publishing Tools’ (B.Sc. IT - 2)Page 14 of 29
backgrounds and shadows, it is to start with a picture that has al light background. Most Photoshop filters have dialog boxes and settings. Watercolor filter is one of them2) Oil Painting: Oil Paint has a very different look from watercolor, and it’s look is duplicated by Photoshop particularly well. The qualities that distinguish works in oil are the opacity of the paint, the textured canvas that adds a definite fabric grain to the image, and the thick, sometimes three-dimensional quality of the paint. To get the full effect in Photoshop, you may have to combine several different techniques.3) Pencil and Colored Pencil: Pencils are great for retouching and drawing a single pixel-width line, but difficult to use for an actual drawing. The Pencil can also serve as an eraser if you click the Auto Erase function on the Tool Options bar. The Colored Pencil filter gives you a light, somewhat more stylized drawing from your original image.4) Chalks and Charcoal: It reduces your picture to three colors, using a dark gray plus the foreground and background colors that you have set in the tool window. Chalk uses the background color and Charcoal becomes the fore ground color. Areas that aren’t colored appear in gray.
Q20. Differentiate between the Knife tools and Eraser Tool.Ans. This tool provides a freehand method of dividing object into portions. The Knife tool: - The Knife tool as the name indicated cuts the object into pieces. Knife is quick version of Trim Knife lets you trim on the fly, simply by clicking on the periphery of an object. 1. Click once on the outline of the figure using knife tool where you want to break 2. Then click at another point where you want to end the cut. A line will be drawn between these two points. 3. Click the Pick tool and drag the two pieces apart from each other.Eraser Tool: - Eraser Tool works just like the one on your pencil; you drag it around an object to eliminate the unwanted parts or we can it is used to remove the unwanted parts or pixels of an object. It is also used to draw white drawing on black background.1. To erase a part of drawing select the object on which you want to use the eraser tool.2. Click the shape edit flyout and choose the Eraser Tool.3. Drag on the line, which you do not want.4. Observe that the pixels disappear and when you stop dragging the rest of the figure become automatically closed up.
Q21.What is Paint Bucket tool and Magic Wand tool?Ans. The paint bucket's primary function is to fill an area with the active foreground color, but that's not all it is capable of doing. The Paint Bucket tool can fill areas with a selected pattern and with desired opacity.To use the paint bucket tool, select the Paint Bucket tool on the toolbox and click the Fill list arrow, and then select an option:1 Foreground: Fills a selected area with the current foreground color.2 Pattern: Fills a selected area with a pattern.Click the Mode list arrow, and then select a blending mode.Enter an Opacity percentage value (1 to 100).Click the Paint Bucket tool cursor on the area to be changed.The Magic Wand tool creates a selection based on the difference in brightness range within an image. If there is a definable difference in the brightness of the pixels, it can be a very powerful tool for the selection of odd shaped areas. To use the Magic Wand, click on the
Prepared By: - Vaishnoo Maa Computers, SCO 145, Chotti Baradari, Patiala.Ph. 0175-2205100, 2215100

SUBJECT: ‘Desktop Publishing Tools’ (B.Sc. IT - 2)Page 15 of 29
Magic Wand Tool button on the toolbox. The Magic Wand tool is unique in the fact that you do not drag and select with this tool, you simply click.
Q22. Give basic features of CorelDraw & PhotoShop. (MARCH 2011)Ans: -Features of Photoshop1. Photoshop is used to produce high quality graphic or image.2. Any website designer used Photoshop for design purpose.3. Photoshop format (PSD) is the default file format and the only format that supports most Photoshop features besides the Large Document Format (PSB). 4. Photoshop provides tools for creating and manipulating static images for use on the Web. You can divide an image into slices, add links and HTML text, optimize the slices, and save the image as a Web page.5. The new generation Camera Raw plug-in is incorporated directly into Photoshop6. Photoshop is used to repair/retouching the images7. You use the Web Photo Gallery command to automatically generate a Web photo gallery from a set of images. Each page contains links that allow visitors to navigate the site.8. Easily browse your Adobe Creative Suite and other graphics files in Adobe Bridge; present your images with features like Slideshow and Filmstrip mode; scale thumbnails to any size using a slider; and view and edit metadata.Features of CorelDraw1. CorelDraw Graphics Suite is the ideal tool for designers—novice or professional—who
want to create their own marketing material like Logos, newsletters, ads, etc.2. CorelDraw is packed with an array of powerful tools and features that provide precision
and ease of use.3. CorelDraw Graphics Suite has everything you need to create sign graphics of all shapes
and sizes. With over 100 filters for importing and exporting artwork and tools to easily create custom graphics and manipulate text.
4. You can import and edit almost all file types in CorelDraw like psd, jpeg, pdf, html, doc, ppt, xls, etc.
5. CorelDraw interface is very easy to learn and use, making CorelDraw a user friendly application.
Q23. How we can crop the images? (SEP 2010)Ans. Cropping is the process of removing portions of an image to create focus or strengthen the composition. You can crop an image using the Crop tool and the Crop command. You can also trim pixels using the Trim command.1. Select the Crop tool2. Drag over the part of the image you want to keep to create a marquee. The marquee
doesn't have to be precise--you can adjust it later.3. If necessary, adjust the cropping marquee:4. To move the marquee to another position, place the pointer inside the bounding box and
drag.5. To scale the marquee, drag a handle. To constrain the proportions, hold down Shift as
you drag a corner handle.6. To rotate the marquee, position the pointer outside the bounding box (the pointer turns
into a curved arrow), and drag. To move the center point around which the marquee rotates, drag the circle at the center of the bounding box.
Q24. How can we create Web Photo Gallery?
Prepared By: - Vaishnoo Maa Computers, SCO 145, Chotti Baradari, Patiala.Ph. 0175-2205100, 2215100
SUBJECT: ‘Desktop Publishing Tools’ (B.Sc. IT - 2)Page 16 of 29
Ans. You use the Web Photo Gallery command to automatically generate a Web photo gallery from a set of images. A Web photo gallery is a Web site that features a home page with thumbnail images and gallery pages with full-size images. Each page contains links that allow visitors to navigate the site. For example, when a visitor clicks a thumbnail image on the home page, a gallery page with the associated full-size image loads. Photoshop provides a variety of styles for your gallery, which you can select using the Web Photo Gallery command.1. Select the files or folder you want to use from the file browser. 2. Choose File > Automate > Web Photo Gallery and select the style of Gallery3. Under Source Images, select the folder containing the images that you want to appear in
the gallery, and also select the destination folder that you want to contain the images and HTML pages for the gallery.
4. To set general options for the gallery photos, choose General from the Options pop-up menu
Prepared By: - Vaishnoo Maa Computers, SCO 145, Chotti Baradari, Patiala.Ph. 0175-2205100, 2215100

SUBJECT: ‘Desktop Publishing Tools’ (B.Sc. IT - 2)Page 17 of 29
Section – C 10 Marks Questions[QUESTIONS 1 TO 15] [PAGE 17 TO 29]
Q1. Explain the followings: Title Bar, Tool Box, Property Bar, Status Bar, Flyouts and Docker Window.Ans.Title Bar: The title bar appears at the top of the Corel draw Window. The Title bar shows the name of the file you are currently working on. When the size of the window is less that the maximum size, you can move the entire window by clicking on the title bar and dragging the mouse to a new position.Toolbox: toolbox is available on the left side of the CorelDraw window. It contains tools for creating, filling, and modifying objects interactively. The drawing tools let you design a variety of objects for your drawing, and the shaping tools let you modify your drawing. The Toolbox also contains tools that let you apply a number of effects interactively. Also the Toolbox contains flyouts, which are toolbars that are accessible through one tool in the Toolbox. A small black arrow at the bottom right corner of a tool indicates that it is a flyout grouped with other tools.Property Bar: The Property Bar gives the information about any selected object in your drawing window. The property Bar changes, depending on what object you select in the Drawing window.Status Bar: The status bar is located below the Drawing Area and gives you important information about a selected object. It tells you the type of object you have selected and it’s identifies the location of the cursor in x and y coordinates on the left side of the screen. It also tells you what layer you are working with.Flyouts: Some tools have a small arrow in the lower left corner. If you click your cursor down on these tools, flyouts appears, and you can transform these tools into other tools. Some flyouts tools example are: Shape tool, Zoom, Curve, Object etc.Docker window: A Docker window contains the same type of controls as a dialog box, such as command buttons, options, and list boxes. However, unlike most dialog boxes, you can keep Docker windows open while working on a document to access the operations you use most frequently or to experiment with different effects.
Q2. What do you mean by color model? Explain all color models.(MARCH 2011)Ans. Color models provide various methods to define colors, each model defining colors through the use of specific color components. There are a range of color models to choose from when creating graphics.CMYK color model : - The CMYK color model defines color using the following components:Cyan (C) Magenta (M) Yellow (Y) Black (K)The cyan, magenta, yellow, and black components are the amounts of cyan, magenta, yellow, and black ink that a CMYK color contains and are measured in percent from 0 to 100.
The CMYK color model is a subtractive color model. Subtractive color models use reflected light to display color. Printed materials are produced using the CMYK color model. When you combine cyan, magenta, yellow, and black, so that the value of each component is 100, the result is black. When the value of each component is 0, the result is pure white.RGB color model : - The RGB color model defines color using the following components:
Red (R) Green (G) Blue (B)The red, green, and blue components are the amounts of red, green, and blue light that an RGB color contains and are measured in values ranging from 0 to 255.
Prepared By: - Vaishnoo Maa Computers, SCO 145, Chotti Baradari, Patiala.Ph. 0175-2205100, 2215100
SUBJECT: ‘Desktop Publishing Tools’ (B.Sc. IT - 2)Page 18 of 29
The RGB color model is an additive color model. Additive color models use transmitted light to display color. Monitors use the RGB color model. When you add red light, blue light, and green light together, so that the value of each component is 255, the color white displays. When the value of each component is 0, the result is pure black.HSB color model : - The HSB color model defines color using the following components:
Hue (H) Saturation (S) Brightness (B)Hue describes the pigment of a color and is measured in degrees from 0 to 359 (for example, 0 degrees is red, 60 degrees yellow, 120 degrees green, 180 degrees cyan, 240 degrees blue, and 300 degrees magenta).
Saturation describes the vividness or dullness of a color and is measured in percent from 0 to 100 (the higher the percentage, the more vivid the color).
Brightness describes the amount of white that the color contains and is measured in percent from 0 to 100 (the higher the percentage, the brighter the color).Grayscale color model : - The Grayscale color model defines color using only one component, lightness, and is measured in values ranging from 0 to 255. Each Grayscale color has equal values of the red, green, and blue components of the RGB color model.
Q3. What is the use of Fills, What are different types of it?Ans. A color, bitmap, fountain, or pattern applied to an area of an image is called Fill. Opens the Fill flyout. The Fill flyout provides preset fills, as well as various tools for setting uniform, fountain, texture, and pattern fills.1) Uniform or Solid Fill (MARCH 2011) : - A type of fill used to apply on solid color to your image or object. Uniform fills are solid colors you can choose or create using color models and color palettes.2) Fountain Fill : - A fountain fill is a smooth progression of two or more colors that adds depth to an object. There are four types of fountain fills: -a) Linear b) Radial c) Conical d) Square.
A linear fountain fill flows in a straight line across the object, a conical fountain fill creates the illusion of light hitting a cone.
A radial fountain fill radiates from the center of the object, and a square A fountain fill is dispersed in concentric squares from the center of the object.You can apply preset fountain fills, two-color fountain fills, and custom fountain fills to objects. Custom fountain fills can contain two or more colors, which you can position anywhere in the fill's progression. After you create a custom fountain fill, you can save it as a preset.3) Palette Fill : - You can fill objects with two-color, full-color, or bitmap pattern fills. A two-color pattern fill is composed of only the two colors that you choose.
A full-color pattern fill is a more complex vector graphic that can be composed of lines and fills.
A bitmap pattern fill is a bitmap image whose complexity is determined by its size and image resolution.
Corel draw provides preset pattern fills that you can apply to objects. You can also create your own pattern fills. You can change the tile size of pattern fills. You can also specify exactly where these fills begin by setting the tile origin. Corel draw also lets you offset tiles in a fill. Adjusting the horizontal or vertical position of the first pattern, relative to the top of the object, affects the rest of the fill.4) Texture Fill : - A texture fill is a randomly generated fill that you can use to give your objects a natural appearance. Corel draw provides preset textures, and each texture has a set of options that you can change. You can use colors from any color model or palette to
Prepared By: - Vaishnoo Maa Computers, SCO 145, Chotti Baradari, Patiala.Ph. 0175-2205100, 2215100

SUBJECT: ‘Desktop Publishing Tools’ (B.Sc. IT - 2)Page 19 of 29
customize texture fills. Texture fills can hold only RGB colors. You can change the tile size of texture fills. Increasing the resolution of a texture tile increases the accuracy of the fill. You can also specify exactly where these fills begin by setting the tile origin.5) Postscript texture fills : - You can apply postscript texture fills to objects. A postscript texture fill is created using the postscript language. Some textures are very complex, and large objects that contain postscript texture fills may take time to print or to update on the screen. Depending on the view mode you are using, the letters "PS" may display rather than the fill.6) Mesh Fill : - When you fill an object with a mesh fill, you can create unique effects. When you apply a mesh fill, you specify the number of columns and rows in the grid, and you specify the grid's intersecting points.
After you have created a mesh object, you can edit the mesh fill grid by adding and removing nodes or intersections. You can also remove the mesh.
A mesh fill can be applied only to closed objects or a single path.
Q4. What is Import and Export? How can importing and exporting is done in Corel draw?Ans. Importing an image: - In CorelDraw we cannot direct insert any image because in CorelDraw we can design only vector graphic. One way to insert an image into the drawing window of Corel draw is to import it. Thus, an already existing image is first imported into Corel draw and then processed or manipulated. When an image is imported into Corel draw, it gets converted into a vector graphics.
An already existing image is first imported into Corel draw and then processed or manipulated. Corel draw can import many different bitmap formats, including the heavyweights: TIFF, JPEG and Kodak Photo CD. Steps: -1) Select the image file from Import dialog box provided by FileImport menu and click OK2) Point to the location where you want to place the image and click to placed the image at this location.Exporting an image: - You can export Corel draw image to different file format. This is useful when you want an image to be visible to anyone, even if the person does not have a Corel draw compatible package. For example if we want to use an image on a web site, we will need to export image into a GIF or JPG format. Default format of Corel draw file is CDR.Steps: -1) Choose the file format in which you want to export the image using Export Dialog box, provided by FileExport menu. 2) You can also export selected portion of image by clicking Selected only check box3) Finally type the name of file and click Ok.
Q5 Discuss the option page layout? How can insert, deleting, and renaming pages in Corel draw? (MARCH 2011)Ans. This option is available under Layout menu. It predefines many popular pages sizes, and you can easily assign them to your project. It provides facility for customize or define other page layouts. Corel draw lets you choose a preset layout style for your drawing. You can choose the layout style depending on the nature of project you are working on because Corel draw can be used to design anything ranging from a newspaper, a magazine, brochure, and a business card to a Web page.
Prepared By: - Vaishnoo Maa Computers, SCO 145, Chotti Baradari, Patiala.Ph. 0175-2205100, 2215100

SUBJECT: ‘Desktop Publishing Tools’ (B.Sc. IT - 2)Page 20 of 29
For example, to design a book, click on the Book style. Other options available in Corel draw are Booklet, Tent Card, Side-fold card and Top-fold card etc.To set layout styles for the drawing window: -1) Choose Page setup from the layout menu to show Option dialog box.2) Double Click on Layout in the left side of this dialog box. 3) In the Layout drop down menu, choose a Layout style and also check the Facing pages check box, if you want the left and right pages to face each other. Insert a Page: -You can have more than one page in publication. These pages can either define properties such as page size for a selected page or for all pages. 1) Insert page is done using Insert Page option available under Layout menu.2) When we click on this option Insert Page dialog box appear3) Here we can set how many pages we want to insert and also check the Before or after radio button to specify where you want the new page(s) to appear.4) After you insert pages, you can move from page to page by clicking the page tabs as the bottom of the Corel draw window.Delete a Page: - 1) Click Layout menu and choose Delete Page. 2) The Delete Page dialog box appears In the Delete Page: list box, type the page number of the page you want to delete. 3) To delete multiple pages, click the Through to page: check box, and set the page number up to which you want to delete, in the list box.Rename a Page: - 1) Move to the page, which you want to rename, click the Layout menu2) Choose Rename Page. Rename page dialog box appears3) Type the new name for the page in Page Name box, the current page will be renamed with this new name.
Q6. List various selection modes in Photoshop.ORList various selection tools in Photoshop.(MARCH 2011,SEP 2010)Ans. The selection tools include the marquee tools, the lasso tools, and the magic wand. We use selections in Photoshop to isolate editing to specific areas in an image, or for cutting out portions of an image. 1) Marquee tool : - The marquee tools are selection tools which allow you to select rectangles, ellipses and 1-pixel rows and columns.The marquee tools are located at the top left of the Photoshop Toolbox. Click and hold your mouse over the marquee tool to see the four options:
i. Rectangle Marquee : - Make a rectangular selection. Hold the shift key down to constrain the selection to a square.
ii. Elliptical Marquee : - Make an elliptical selection. Hold the shift key down to constrain the selection to a circle.
iii. Single Row Marquee : - Make a horizontal selection 1 pixel high.
iv. Single Column Marquee : - Make a vertical selection 1 pixel wide.
Prepared By: - Vaishnoo Maa Computers, SCO 145, Chotti Baradari, Patiala.Ph. 0175-2205100, 2215100
SUBJECT: ‘Desktop Publishing Tools’ (B.Sc. IT - 2)Page 21 of 29
2) Lasso Tools : - The lasso tools allow you to select precise areas of an image by drawing or tracing the selection outline. There are three lasso tools available:
I. Lasso Tool : - This is a freehand selection tool. Click and hold your left mouse button on the image and draw your selection.
II. Polygonal Lasso Tool : - Similar to the lasso tool, except that instead of holding your mouse button down to draw, left-click on various points to create a selection with a series of straight edges. The Polygonal Lasso tool is used to draw straight-line selections. You can make the polygonal lasso tool work just like the regular lasso tool by holding down the Alt key to draw freehand selection.
III. Magnetic Lasso Tool : - The Magnetic Lasso tool works similarly to the other lasso tools, but it has special powers that can detect areas of contrast and it will snap to the edges of the object you're trying to select Left-click at the starting point of your selection and simply move the mouse along the edge. "Fastening points" are automatically made at various points along the edges. Left-click at any time to add a fastening point manually.
3) Magic Wand Tool : - The magic wand makes selections based on color similarity. The shortcut for the magic wand key is W. Double click on the magic wand tool to bring the options palette to the front. The tolerance setting controls the range of color that will be selected and has a range from 0 to 255. To select a small range of colors enter a low number, for a wider range of color, select a high number. When contiguous is checked, the selection only includes adjacent pixels of the same color range. If you want to select islands of color all at once, you would deselect the contiguous option.
Q7. Explain the Following Tools: Airbrush Tool, Eraser Tool, Clone Stamp Tool, Pen Tool, Notes Tool and Audio Annotations, Hand Tool, Move Tool, Paintbrush Tool, History Brush Tool. (SEP 2010)Ans. Airbrush Tool: The airbrush tool applies gradual tones (including sprays of color) to an image, simulating traditional airbrush techniques. The edges of the stroke are more diffused than those created with the paintbrush tool.Eraser Tool: The eraser tool changes pixels in the image as you drag through them If you're working in the background or in a layer with transparency locked, the pixels change to the background color; otherwise, the pixels are erased to transparency. You can also use the eraser to return the affected area to a state selected in the History palette.Clone Stamp Tool: The clone stamp tool takes a sample of an image, which you can then apply over another image or part of the same image. Each stroke of the tool paints on more of the sample.Pen Tool: You can create or edit straight lines, curves, or freeform lines and shapes using the pen tools. The pen tools can be used in conjunction with the shape tools to create complex shapes.Notes Tool and Audio Annotations: You can add notes and audio annotations anywhere on a Photoshop image canvas. When you create a note, a resizable window appears for entering text. When you record an audio annotation, you must have a microphone plugged into the audio-in port of your computer.
Prepared By: - Vaishnoo Maa Computers, SCO 145, Chotti Baradari, Patiala.Ph. 0175-2205100, 2215100

SUBJECT: ‘Desktop Publishing Tools’ (B.Sc. IT - 2)Page 22 of 29
You can import both kinds of annotations from Photoshop documents saved in PDF or from Acrobat documents saved in PDF or Form Data Format (FDF).Hand Tool: If the entire image is not visible in the document window, you can navigate to bring another area of the image into view using hand tool, Select the hand tool and drag to pan over the image. In Photoshop, you can also use the Navigator palette to quickly change the view of an image.Move Tool: The move tool lets you drag a selection or layer to a new location in the image. With the Info palette open, you can track the exact distance of the move. You can also use the move tool to align selections and layers and distribute layers within an image.Paintbrush Tool: Paintbrush tool to let you paint the current foreground color on an image. The paintbrush tool creates soft strokes of color. History Brush Tool (MARCH 2011): The history brush tool lets you paint a copy of one state or snapshot of an image into the current image window. This tool makes a copy, or sample, of the image and then paints with it.
Q8. What is Layer? Explain layer Creating, Hiding, Showing, Merging layer in Photoshop? (MARCH 2011) ORHow we can work with Multiple Layers?
Ans. Layers allow you to work on one element of an image without disturbing the others. Think of layers as sheets of acetate stacked one on top of the other.
Layers allow you to work on one element of an image without disturbing the others. Layers are the various layers that you can create of the image or picture for the editing purposes and putting them one over another for the final result. When you open an image such as a digital photo in Photoshop, normally the image opens with only a background layer. The background is a special layer that cannot have transparency and always remains on the bottom of the stack.
You will use layers in many different situations. Whenever we are combining two or more images. The elements you paste over the background image are added on separate layers. You can control the opacity of objects you paste onto a layer or paint that you apply to it. You can also control the blending modes that affect how one layer appears on top of another, just as you could when painting over an image or background.1) Create a new layer : - Make a new page, Click the small page icon at the bottom of the Layer Palette and now use any selection to make a new shape in this layer.2) Hiding/Showing layer : - Another great feature of layers I that when you want to concentrate on one part of your image, you can hide all the other layers. To the left of the layer thumbnails, there is small icons that resemble eyes. These indicate that a layer is
Prepared By: - Vaishnoo Maa Computers, SCO 145, Chotti Baradari, Patiala.Ph. 0175-2205100, 2215100

SUBJECT: ‘Desktop Publishing Tools’ (B.Sc. IT - 2)Page 23 of 29
visible. If you click the eye, however, the eye disappears, and the layer becomes hidden. Click again and the eye icons appear with the layer.3) Margining a Layer: - When you have finalized the content of layers, you can merge them to create partial versions of your composite image. The intersection of all transparent areas in the merged layers remains transparent. Merging layers helps manage the size of image files.To merge two layers
1) Position the layers you want to merge next to each other in the Layers palette, and make sure that the visibility for both items is enabled.
2) Select the top item in the pair.3) Choose Merge Down from the Layers menu.
Q9. What do you mean by Blending Modes? Explain Briefly. (MARCH 2011)Ans. The blending mode specified in the options bar controls how a painting or editing tool affects pixels in the image. The following blending modes are available.Normal : - Edits or paints each pixel to make it the result colors. This is the default mode.Dissolve : - Edits or paints each pixel to make it the result colors. However, the result color is a random replacement of the pixels with the base color or the blend color, depending on the opacity at any pixel location. Behind : - Edits or paints only on the transparent part of a layer. This mode works only in layers with Lock Transparency deselected and is analogous to painting on the back of transparent areas in a sheet of acetate.Clear : - Edits or paints each pixel and makes it transparent. This mode is available for the line tool, the paint bucket tool, the brush tool, the pencil tool, the Fill command, and the Stroke command. You must be in a layer with Lock Transparency deselected to use this mode. Darken : - Looks at the color information in each channel and selects the base or blend color--whichever is darker--as the result color. Pixels lighter than the blend color is replaced, and pixels darker than the blend color do not change. Multiply : - Looks at the color information in each channel and multiplies the base color by the blend color. The result color is always a darker color. Multiplying any color with black produces black. Multiplying any color with white leaves the color unchanged. When you're painting with a color other than black or white, successive strokes with a painting tool produce progressively darker colors. The effect is similar to drawing on the image with multiple magic markers. Color Burn : - Looks at the color information in each channel and darkens the base color to reflect the blend color by increasing the contrast. Blending with white produces no change.Linear Burn : - Looks at the color information in each channel and darkens the base color to reflect the blend color by decreasing the brightness. Blending with white produces no change.Lighten : - Looks at the color information in each channel and selects the base or blend color--whichever is lighter--as the result color. Pixels darker than the blend color is replaced, and pixels lighter than the blend color do not change. Screen : - Looks at each channel's color information and multiplies the inverse of the blend and base colors. The result color is always a lighter color. Screening with black leaves the color unchanged. Screening with white produces white. The effect is similar to projecting multiple photographic slides on top of each other. Color Dodge : - Looks at the color information in each channel and brightens the base color to reflect the blend color by decreasing the contrast. Blending with black produces no change.
Prepared By: - Vaishnoo Maa Computers, SCO 145, Chotti Baradari, Patiala.Ph. 0175-2205100, 2215100
SUBJECT: ‘Desktop Publishing Tools’ (B.Sc. IT - 2)Page 24 of 29
Linear Dodge : - Looks at the color information in each channel and brightens the base color to reflect the blend color by increasing the brightness. Blending with black produces no change.Overlay : - Multiplies or screens the colors, depending on the base color. Patterns or colors overlay the existing pixels while preserving the highlights and shadows of the base color. The base color is not replaced but is mixed with the blend color to reflect the lightness or darkness of the original color. Soft Light : - Darkens or lightens the colors, depending on the blend color. The effect is similar to shining a diffused spotlight on the image.
If the blend color (light source) is lighter than 50% gray, the image is lightened as if it were dodged. If the blend color is darker than 50% gray, the image is darkened as if it were burned in. Painting with pure black or white produces a distinctly darker or lighter area but does not result in pure black or white. Hard Light : - Multiplies or screens the colors, depending on the blend color. The effect is similar to shining a harsh spotlight on the image.
If the blend color (light source) is lighter than 50% gray, the image is lightened, as if it were screened. This is useful for adding highlights to an image. If the blend color is darker than 50% gray, the image is darkened, as if it were multiplied. This is useful for adding shadows to an image. Painting with pure black or white results in pure black or white.Vivid Light : - Burns or dodges the colors by increasing or decreasing the contrast, depending on the blend color. If the blend color (light source) is lighter than 50% gray, the image is lightened by decreasing the contrast. If the blend color is darker than 50% gray, increasing the contrast darkens the image. Linear Light : - Burns or dodges the colors by decreasing or increasing the brightness, depending on the blend color. If the blend color (light source) is lighter than 50% gray, the image is lightened by increasing the brightness. If the blend color is darker than 50% gray, decreasing the brightness darkens the image. Pin Light : - Replaces the colors, depending on the blend color. If the blend color (light source) is lighter than 50% gray, pixels darker than the blend color are replaced, and pixels lighter than the blend color do not change. If the blend color is darker than 50% gray, pixels lighter than the blend color are replaced, and pixels darker than the blend color do not change. This is useful for adding special effects to an image.Difference : - Looks at the color information in each channel and subtracts either the blend color from the base color or the base color from the blend color, depending on which has the greater brightness value. Blending with white inverts the base color values; blending with black produces no change.Exclusion : - Creates an effect similar to but lower in contrast than the Difference mode. Blending with white inverts the base color values. Blending with black produces no change.Hue(MARCH 2011) : - Creates a result color with the luminance and saturation of the base color and the hue of the blend color. Saturation(MARCH 2011) : - Creates a result color with the luminance and hue of the base color and the saturation of the blend color. Painting with this mode in an area with no (0) saturation (gray) causes no change. Color : - Creates a result color with the luminance of the base color and the hue and saturation of the blend color. This preserves the gray levels in the image and is useful for coloring monochrome images and for tinting color images.
Prepared By: - Vaishnoo Maa Computers, SCO 145, Chotti Baradari, Patiala.Ph. 0175-2205100, 2215100
SUBJECT: ‘Desktop Publishing Tools’ (B.Sc. IT - 2)Page 25 of 29
Luminosity : - Creates a result color with the hue and saturation of the base color and the luminance of the blend color. This mode creates an inverse effect from that of the Color mode.
Q10. Discuss various menus and sub-menus of Photoshop.Ans. The menu bar is located below the Title Bar and contains the Pull Down Menus. The Pull Down menus contains the Corel draw commands. Click on a menu title in the menu bar to pull down the menu.
The File Menu This is the menu from which you open, save, import, export and print files. User will notice a few new item: Print Preview is a short to Draw’s new preview screen within the Print dialogs, and Document Info is a display of more information than you would ever need on the current drawing.
The Edit Menu This menu is in charge of changes, duplications, coping, deleting, cloning, undoing, redoing, and repeating all of the above. The edit menu acts as the headquarters for all Clipboard activity coming from and going to other programs.
The View Menu The View menu takes charge of almost all on-screen activities. These controls let you specify which parts of the Corel draw interface you want to make visible or keep hidden, as well as how much detail of your drawing’s components you want displayed. Notice the new viewing choices of Simple Wire frame, Draft, and enhanced and a few new on-screen controls to toggle on and off.
The Layout Menu The layout menu is used to set a page size and number of pages, guides, grid, guideline and page setups all reside here, as do the roll-ups for Layers and Styles.
The Arrange Menu If it needs to be ordered, layered, aligned, collected, skewed, stretched, moved, taken apart, or put back together again, it is done by this menu.
The Effect Menu The Effect menu contains the commands: Blending, extruding, enveloping, masking, and clipping.
The Bitmaps Menu This menu introduces many of the powerful features found in PHOTO-PAINT, for use with imported bitmaps.
The Text Menu The Text menu is used for text formatting and editing. The Fit Text to Path command is the most widely used special effect.
The Tools Menu The Tools menu is the nifty Customize dialog, which allows you to decide what goes where, how, when and why.
The Window Menu This menu support MDI (Multiple Document Interface). You can new open up more than one drawing at a time, and this menu helps you manage them by giving you a better view and letting you switch among windows.
The Help Menu This menu is the conventional gateway to Corel draw Help system
Q11. What is the Use of File Browser in Photoshop? Explain. Ans. File Browser lets you view, sort, and process image files. You can use the File Browser to perform tasks such as creating new folders; renaming, moving, and deleting files; and rotating images. You can also view individual file information and data imported from your digital camera.Displaying the File Browser : - Choose File > Browse or Window > File Browser. By default, the File Browser is displayed in the palette well. Using the File Browser palette menu : - Click the triangle button in the upper right corner of the palette to access commands for working with layers. If the palette is docked in the palette well, click the triangle on the palette tab.
Prepared By: - Vaishnoo Maa Computers, SCO 145, Chotti Baradari, Patiala.Ph. 0175-2205100, 2215100

SUBJECT: ‘Desktop Publishing Tools’ (B.Sc. IT - 2)Page 26 of 29
Navigating in the File Browser : - Double-click a folder to view its contents. To show or hide folders on the right side of the palette, choose the Show Folders from the palette menu. A check mark indicates that folders are showing.Changing the display of files : - Choose a thumbnail display option from the palette menu, or click the View By pop-
Up menu at the bottom of the File Browser and choose a display option.Sorting files : - Click the Sort By pop-up menu at the bottom of the File Browser, and choose a sorting option. Selecting and deselecting files : - On the right side of the palette, click a thumbnail to select the file, or Shift-click to select multiple files. To select all files in the current folder, choose Select All from the palette menu. To deselect all files, choose Deselect All from the palette menu.Opening files : - Select the file or files you want to open, and do one of the following: select a file and press Enter; double-click a selected file; drag the selected file or files out of the File Browser; or choose Open from the palette menu.
When the File Browser is docked in the palette well, double-clicking a file or selecting a file and pressing Enter opens the image and closes the File Browser. To keep the File Browser open, hold down Alt when you double-click the file, press Enter.Renaming files and folders
On the right side of the palette, click a filename or folder name, or select a file or folder and choose Rename from the palette menu. Then type a new name, and press Enter. Deleting files
Select the file or files you want to delete, and do one of the following: click the Trash button, drag the files to the Trash button, press the Delete key, or choose Delete from the palette menu.Creating new folders : - Choose New Folder from the palette menu, type a name, and press Enter. Moving and copying files : - To move a file, drag it to a different folder; to copy a file, Alt-drag it to a different folder.Rotating images : - Select one or more files, and do one of the following: choose a rotation option from the palette menu; click the Rotate button to rotate the images clockwise by 90 degrees; or Alt-click the Rotate button to rotate the images counter-clockwise by 90 degrees.Refreshing the view : - When you rename a file, the order of files in the File Browser is not automatically updated. To refresh the view, choose Refresh Desktop View from the palette menu. Closing and reopening the File Browser also refreshes the view.
Q12. Write down short notes on the followings.1. Rectangles and Squares2. Ellipses and circles3. Polygons and Stars
Ans. Rectangles and Squares : - Rectangles and squares are one of the basic shapes available with almost all-drawing software’s. To draw a rectangle in Corel draw:-1) Choose Rectangle tool. Move the cursor to the first point of the rectangle and click. 2) Now drag in the drawing window until rectangle is of the size you want. 3) Press and hold down Ctrl key if you want square.Ellipses and circles : - Ellipses also known as ovals can be drawn using the Ellipse tool from the Toolbox, To draw a rectangle in Corel draw: -
Prepared By: - Vaishnoo Maa Computers, SCO 145, Chotti Baradari, Patiala.Ph. 0175-2205100, 2215100

SUBJECT: ‘Desktop Publishing Tools’ (B.Sc. IT - 2)Page 27 of 29
1) Choose selecting tool2) Drag in the drawing window until the ellipse is the shape you want. 3) To draw an ellipse from the center to outward, hold down the Shift key while you drag. 4) Press and hold down Ctrl do make a circle.Polygons and Stars : - Polygons is any closed figure with 3 or more sides, you can draw polygons of any number of sides using the polygon tool. This tool also allows you to draw stars or polygon as stars.
Q13. How text formatting is done in Corel draw and how text positioned along the path? (MARCH 2011,2010)Ans. The Text Property Bar becomes active when you click the text tool it is more useful for paragraph text than for artistic text. It provide us Font List drop down, Font Size List, Font effects (Bold, Italic and Underline), Drop Cap, Increase/Decrease Indent, Show/Hide Bullets etc. Moreover Text Properly Bar enables you to apply all types of formatting to the selected-text objects. Both the property bar and the Format Text dialog provide full control of font, style and size. These controls behave differently in three different selection setting these are: With the entire string of text selected (Format changes affect all of the text) With text selected within a string or frame (Only the selected text is changed) With the editing cursor place in text (Text that you type from that point forward uses the new formatting)You can position artistic text along the path of an open object or a closed object. To do this Draw a curve using the Pick tool. Click Text menu and choose Fit Text to path. Type along the path. You can fit text to any object.After you fit text to a path, you can adjust the text’s position relative to that path. For example, you can place the text on the opposite side of the path, or you can adjust the distance between the text and the path. If the text is fitted to a closed path, the text is centered along the path. If the text is fitted to an open path, the text flows from the point of insertion. You cannot fit text to the path of another text object. You can also fit text to path by clicking the Text tool, pointing over an object, clicking where you want the text to begin, and typing the text.
Q14. Write down the Keyboard Shortcuts for Painting & Editing.Ans. Painting & Editing
Result Action
Selects background color Pick Color + click
Sets opacity, tolerance, strength, or exposure for painting mode
Any painting or editing tool + number keys
Sets flow for painting mode Any painting or editing tool + Shift + number keys
Cycles through blending modes Shift + + or Shift + -
Displays Fill dialog box Shift + DeleteMoves type in image Ctrl + drag type when Type layer is
selectedAligns left, center, or right* + + Ctrl + L, C, or RAligns top, center, or bottom* + + Ctrl + L, C, or R
Prepared By: - Vaishnoo Maa Computers, SCO 145, Chotti Baradari, Patiala.Ph. 0175-2205100, 2215100

SUBJECT: ‘Desktop Publishing Tools’ (B.Sc. IT - 2)Page 28 of 29
Selects 1 character left/right or 1 line down/up, or 1 word left/right
+ , Or + Ctrl +
Selects characters from insertion point to mouse click point
+ Click
Moves 1 character left/right, 1 line down/up, or 1 word left/right
, , Or Ctrl +
Designates new origin over existing type + Click or click + drag
Selects word, line, paragraph, or story Double-click, triple-click, quadruple-click, or quintuple-click
Shows/Hides selection on selected type Ctrl + H
Toggles Underlining on/off* + Ctrl + U
Toggles Strikethrough on/off* + Ctrl + /
Toggles All Uppercase on/off* + Ctrl + K
Toggles Small Caps on/off* + Ctrl + H
Toggles Superscript on/off* + Ctrl + +
Toggles Subscript on/off* + Alt + Ctrl + +
Chooses 100% horizontal scale* + Ctrl + X
Chooses 100% vertical scale* + Alt + Ctrl + X
Chooses Auto leading* + Alt + Ctrl + A
Chooses 0 for tracking* + Ctrl + Q
Justifies paragraph, left aligns last line* + Ctrl + J
Justifies paragraph, forces last line* + Ctrl + F
Toggles paragraph hyphenation on/off* + Alt + Ctrl + H
Toggles single/every-line composer on/off* + Alt + Ctrl + T
Decreases/increases type size of selected text 2 pts/px
+ Ctrl + < >†
Decreases/increases leading 2 pts/px Alt + ††
Decreases/increases baseline shift 2 pts/px + Alt + ††
Decreases/increases kerning/tracking 20/1000 ems
Alt + ††
Q15.How you can set the outline style and outline arrows? How we can Choose and Edit arrow symbol?What is the use of freehand tool?
Ans. Outline Style: Corel draw offers any outline styles, from dots to dashes and combinations. Combined with width and calligraphy effects, the range of effects is unlimited. Steps: -1. Select any object with the pick tool;
Prepared By: - Vaishnoo Maa Computers, SCO 145, Chotti Baradari, Patiala.Ph. 0175-2205100, 2215100

SUBJECT: ‘Desktop Publishing Tools’ (B.Sc. IT - 2)Page 29 of 29
2. Click on the Outline Tool in the Toolbox to open the fly-out. 3. Choose the Outline Pen Dialog to open the Outline pen window. 4. Select the style from the style fly-out. 5. Click the Edit Style button, 6. In the Edit Style window, locate the line of squares and click and drag on the dumbbell shaped icon to increase the work area. This is where you design you style. 7. Click on the squares to toggle black and white. You can see the results in the window below the edit bar.8. Finally click Add to create a new style.Set Default Style: - For Set Default Style, Make sure there are no objects selected in your document. Steps: -1. Click on the Outline Tool and a pop-up will appear asking you to choose which items will receive the new default settings.2. Choose Graphics only for outline style, since this effect is not good for text. Click Ok and the Outline Pen window will open.3. Choose the desired and click OK. Any new graphic objects will have this style outline when they are drawn.
Outline arrows:Corel draw provides us a facility to make a line with arrows. The preset style will match most needs, but there is also an easy to use edit feature for highly specialized arrowheads. When we select an object, having arrowheads selection handles only show where the line starts and ends.
Choose Arrow Symbol In the Arrow sections of the Pen Outline, click on the triangle in the left hand illustration. A fly-out appears with your arrow choices. Choose one, and it will be displayed in the sample box. If you also desire an end symbol for your arrow, choose from the right hand fly-out. If you decide you would like them reversed, choose Options, Swap from the same section. The Arrow symbols will switch positions with each other.Edit Arrow Symbol Select the arrowhead you wish to modify, Click on Options, Edit to open the Edit Arrowhead window. You can resize the arrow that is presented by clicking and dragging on the handles. Move the arrowhead by clicking and nodes. Note the Center in X and Center in Y Buttons. These buttons will help you return your arrowhead to a centered position once your editing is complete.
Prepared By: - Vaishnoo Maa Computers, SCO 145, Chotti Baradari, Patiala.Ph. 0175-2205100, 2215100