12 easy diy projects
TRANSCRIPT
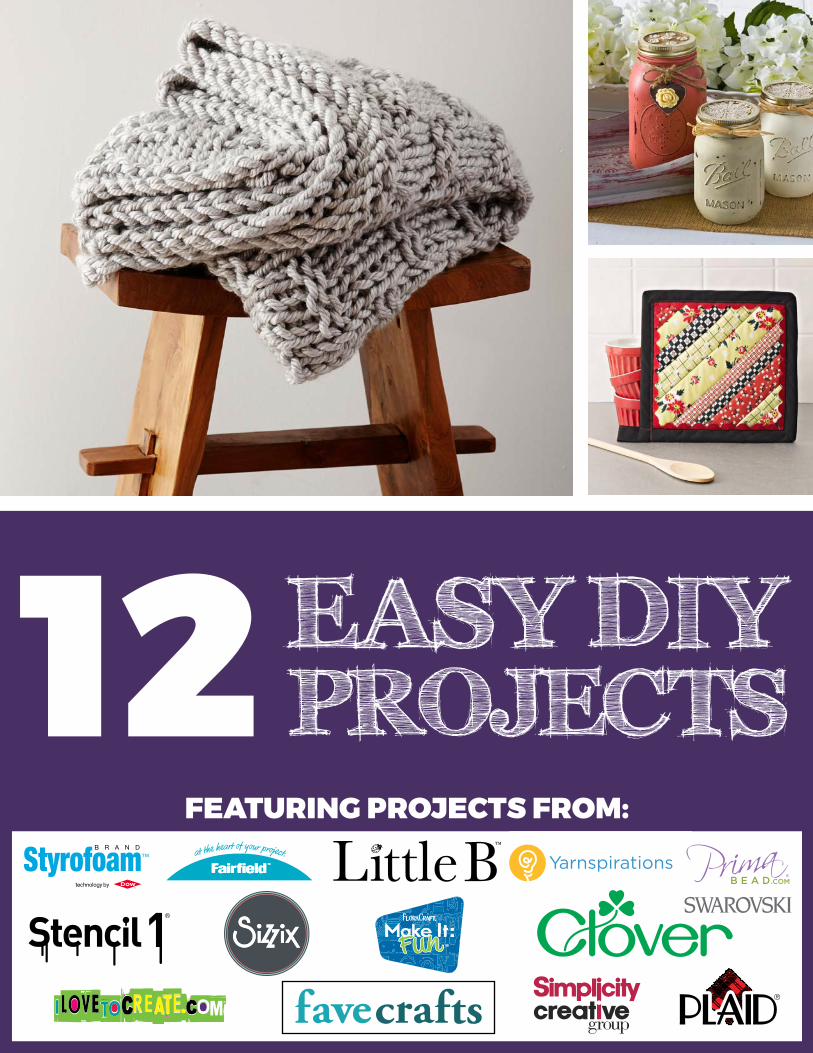
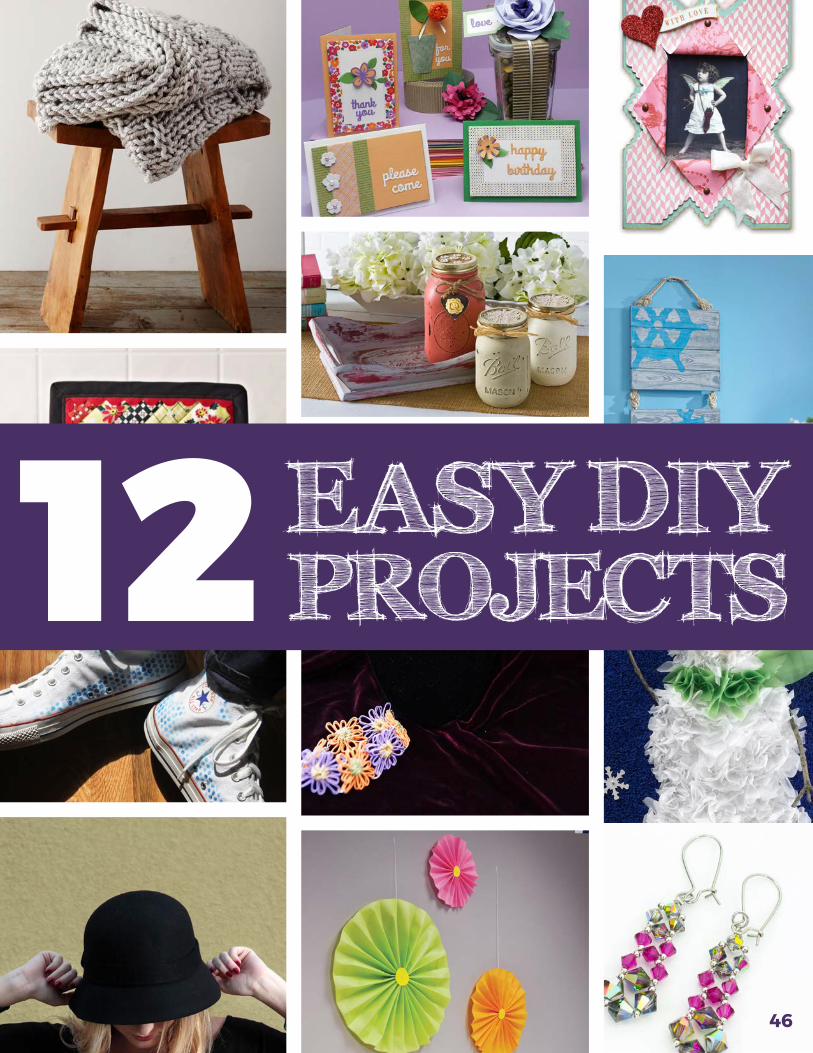
12 EASY DIYPROJECTS
FEATURING PROJECTS FROM:
12 EASY DIYPROJECTS
TA B L E O F C O N T E N T SExtra Chunky Gratitude Blanket.................................................By the designers of Yarnspirations
4
Charming Country Mason Jars.....................................................By Julie Lewis for Plaid
10
Sassy Hot Pink Earrings..................................................................By the designers of Prima Bead
7
Aunt Betty’s Strip Pieced Potholder..........................................By Barbara Parsons Cartier for Simplicity
Slices Of Silver Geometric T-Shirt...............................................By Pattie Wilkinson for ilovetocreate.com
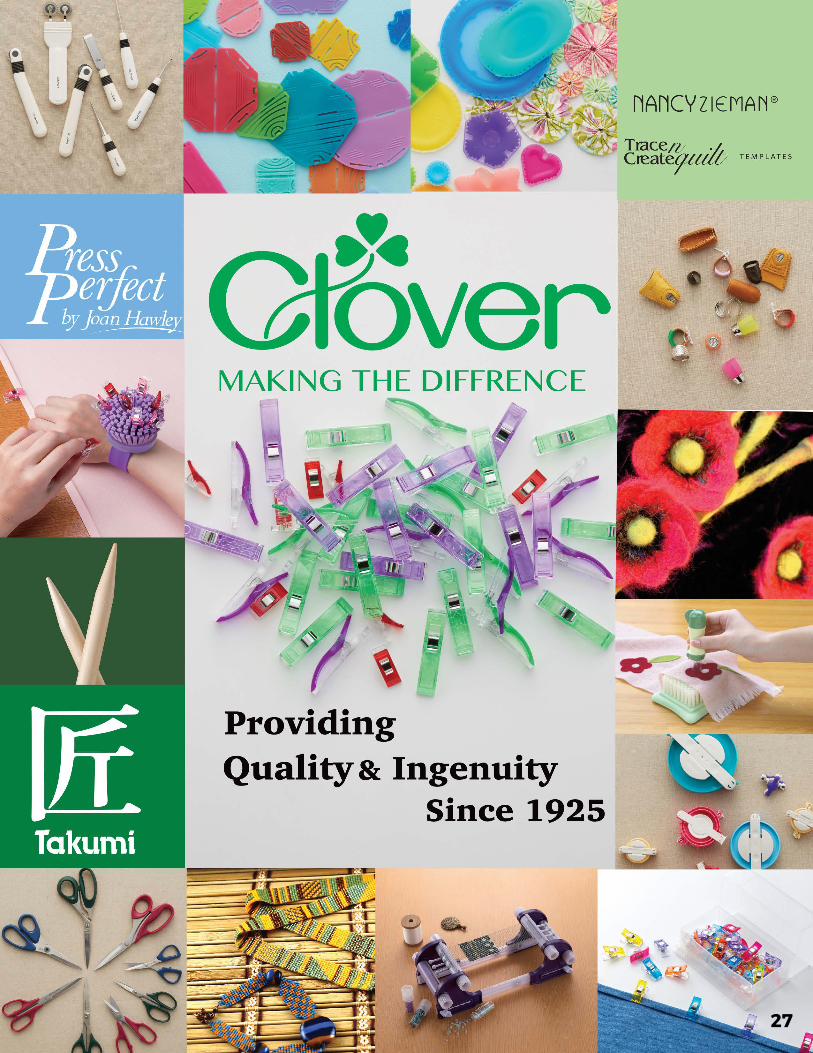
Dainty Mini Flower Loom Jewelry Set.......................................By the designers of Clover
Perfect Posies Greeting Cards......................................................By Dale Nicholson for Little B LLC
Eye Popping Fabric Rosettes........................................................By the designers of Fairfield
Restyled Polka Dot Sneakers........................................................By Ed Roth for Stencil 1
By Brenda Walton for SizzixMade With Love Victorian Frame Card......................................
Nifty Nautical Pallet Wall Art.......................................................By Dondi Richardson for FloraCraft
Recycled Plastic Bag Snowman Portrait..................................From The Dow Chemical Company, maker of STYROFOAM™ Brand Foam
13
16
19
25
28
31
34
38
41
Dear Reader,
Are you making a commitment to crafting this year? Maybe you’re looking for new ways to get inspired and new crafts to learn? Well, with our new eBook, 12 Easy DIY Projects, you’ll learn how to do everything from creating handmade cards to learning how to knit an afghan on a loom. With 12 brand new projects from Clover, Fairfield, FloraCraft, I Love to Create, Little B, Plaid, Prima Bead,Simplicity, Spinrite, Sizzix, Stencil1, and STYROFOAM™, you’ll get a wide variety of crafting projects to help you broaden your skill set and learn a new crafting skill. There’s something for everyone in this collection, and we’re so excited to share it with you! Happy Crafting!
The Editors of FaveCrafts.com
12 EASY DIYPROJECTS
L E T T E R F R O M T H E E D I T O R
simplicity.com
sizzix.com
yarnspirations.com
stencil1.com
styrofoamcrafts.com
primabead.comclover-usa.com
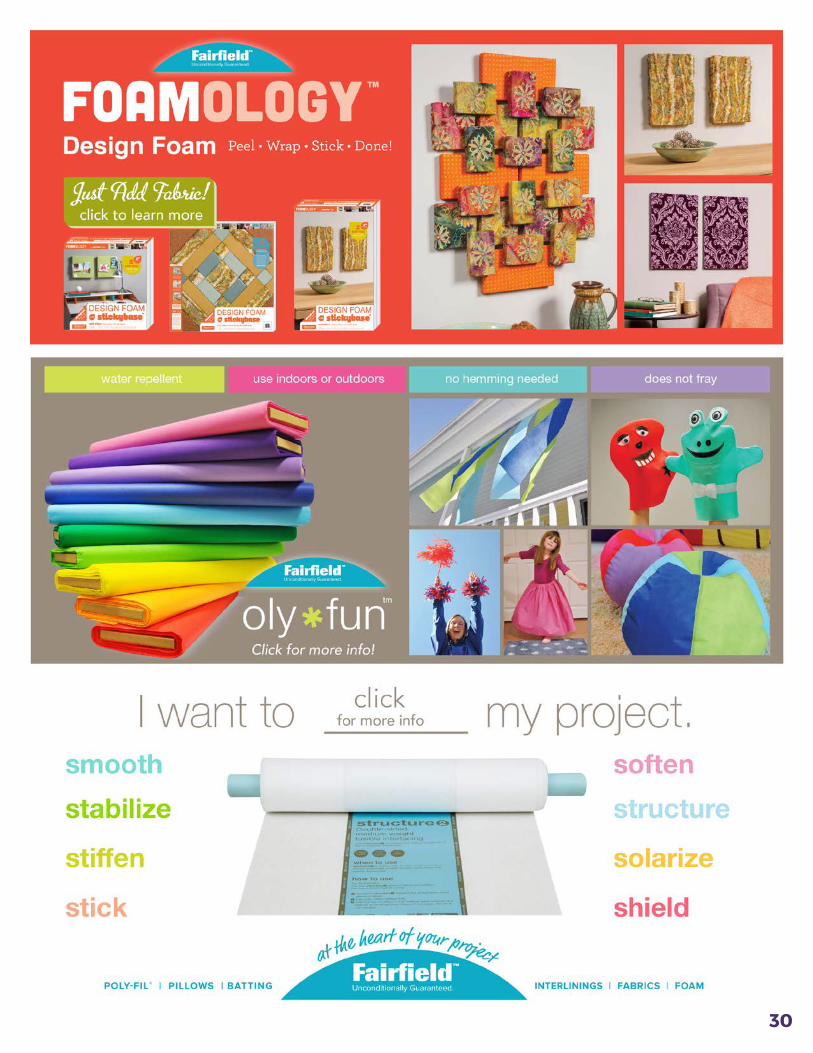
fairfieldworld.com
floracraft.com
ilovetocreate.com
littlebllc.com
plaidonline.com

EXTRA CHUNKYGRATITUDE BLANKET
4.com
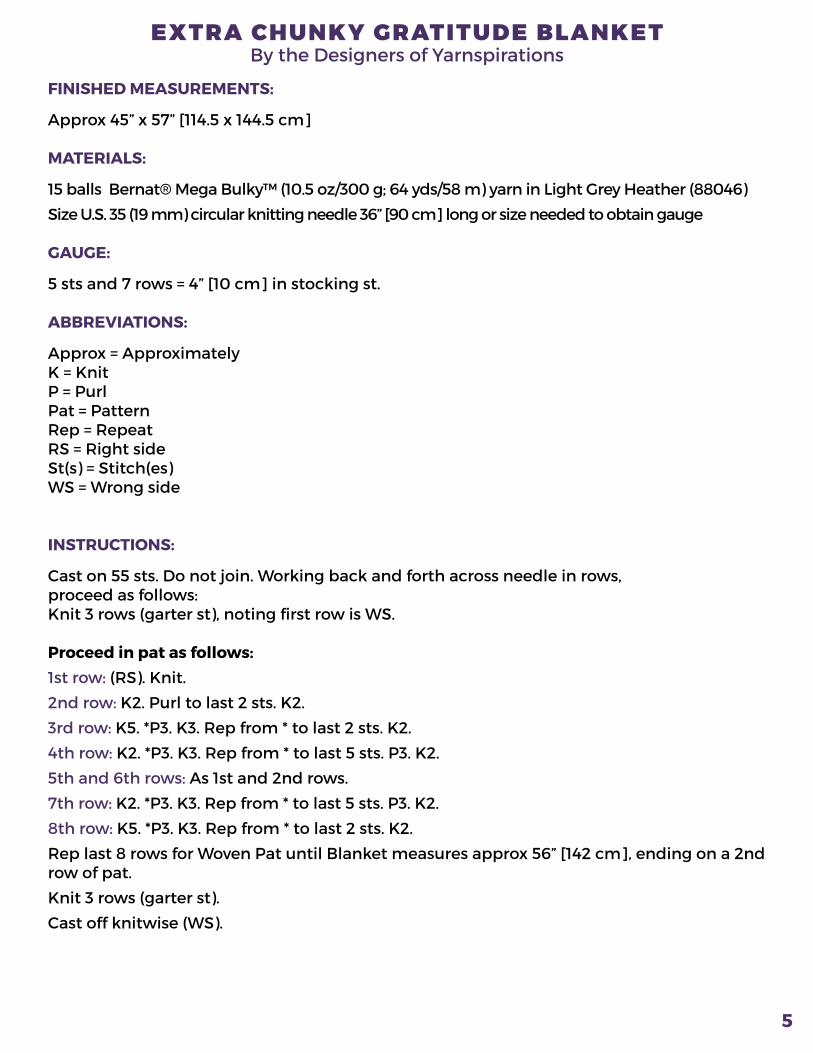
FINISHED MEASUREMENTS:
Approx 45” x 57” [114.5 x 144.5 cm]
MATERIALS:
15 balls Bernat® Mega Bulky™ (10.5 oz/300 g; 64 yds/58 m) yarn in Light Grey Heather (88046)
Size U.S. 35 (19 mm) circular knitting needle 36” [90 cm] long or size needed to obtain gauge
GAUGE:
5 sts and 7 rows = 4” [10 cm] in stocking st.
ABBREVIATIONS:
Approx = ApproximatelyK = KnitP = PurlPat = PatternRep = RepeatRS = Right sideSt(s) = Stitch(es)WS = Wrong side
INSTRUCTIONS:
Cast on 55 sts. Do not join. Working back and forth across needle in rows,proceed as follows:Knit 3 rows (garter st), noting first row is WS.
Proceed in pat as follows:1st row: (RS). Knit.
2nd row: K2. Purl to last 2 sts. K2.
3rd row: K5. *P3. K3. Rep from * to last 2 sts. K2.
4th row: K2. *P3. K3. Rep from * to last 5 sts. P3. K2.
5th and 6th rows: As 1st and 2nd rows.
7th row: K2. *P3. K3. Rep from * to last 5 sts. P3. K2.
8th row: K5. *P3. K3. Rep from * to last 2 sts. K2.
Rep last 8 rows for Woven Pat until Blanket measures approx 56” [142 cm], ending on a 2nd row of pat.
Knit 3 rows (garter st).
Cast off knitwise (WS).
EXTRA CHUNKY GRATITUDE BLANKET
5
By the Designers of Yarnspirations

6

FUCHSIAWOVEN EARRINGS
7
WITH SWAROVSKI CRYSTAL
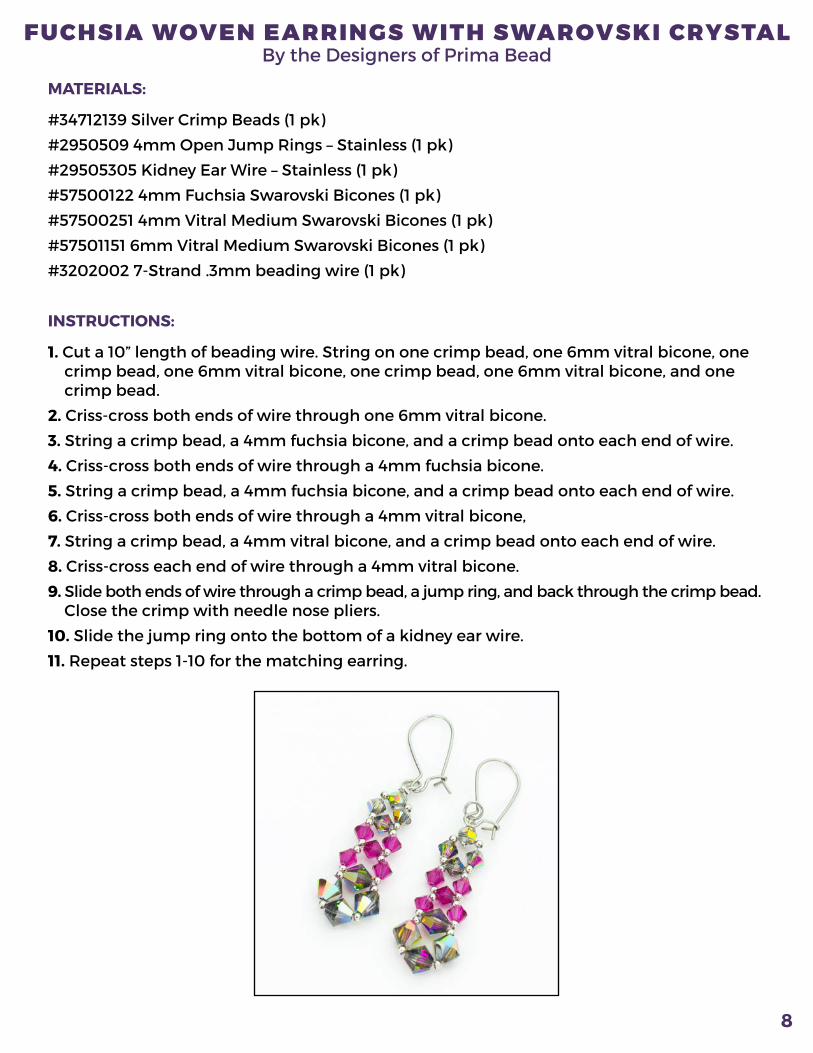
FUCHSIA WOVEN EARRINGS WITH SWAROVSKI CRYSTAL
MATERIALS:
#34712139 Silver Crimp Beads (1 pk)
#2950509 4mm Open Jump Rings – Stainless (1 pk)
#29505305 Kidney Ear Wire – Stainless (1 pk)
#57500122 4mm Fuchsia Swarovski Bicones (1 pk)
#57500251 4mm Vitral Medium Swarovski Bicones (1 pk)
#57501151 6mm Vitral Medium Swarovski Bicones (1 pk)
#3202002 7-Strand .3mm beading wire (1 pk)
INSTRUCTIONS:
1. Cut a 10” length of beading wire. String on one crimp bead, one 6mm vitral bicone, one crimp bead, one 6mm vitral bicone, one crimp bead, one 6mm vitral bicone, and one crimp bead.
2. Criss-cross both ends of wire through one 6mm vitral bicone.
3. String a crimp bead, a 4mm fuchsia bicone, and a crimp bead onto each end of wire.
4. Criss-cross both ends of wire through a 4mm fuchsia bicone.
5. String a crimp bead, a 4mm fuchsia bicone, and a crimp bead onto each end of wire.
6. Criss-cross both ends of wire through a 4mm vitral bicone,
7. String a crimp bead, a 4mm vitral bicone, and a crimp bead onto each end of wire.
8. Criss-cross each end of wire through a 4mm vitral bicone.
9. Slide both ends of wire through a crimp bead, a jump ring, and back through the crimp bead. Close the crimp with needle nose pliers.
10. Slide the jump ring onto the bottom of a kidney ear wire.
11. Repeat steps 1-10 for the matching earring.
8
By the Designers of Prima Bead

9

CHARMING COUNTRYMASON JARS
10
MATERIALS:
FolkArt® Home Decor Chalk Paint
34150 White Adirondack
34154 Salmon Coral
34151 Sheepskin
34912 FolkArt® Home Decor Sanding Foam Block
34909 FolkArt® Home Décor Small Chalk and Wax Brush Set
Assorted sized ball jars
Rubbing alcohol
Paper towels
Water basin
Foam plates
INSTRUCTIONS:
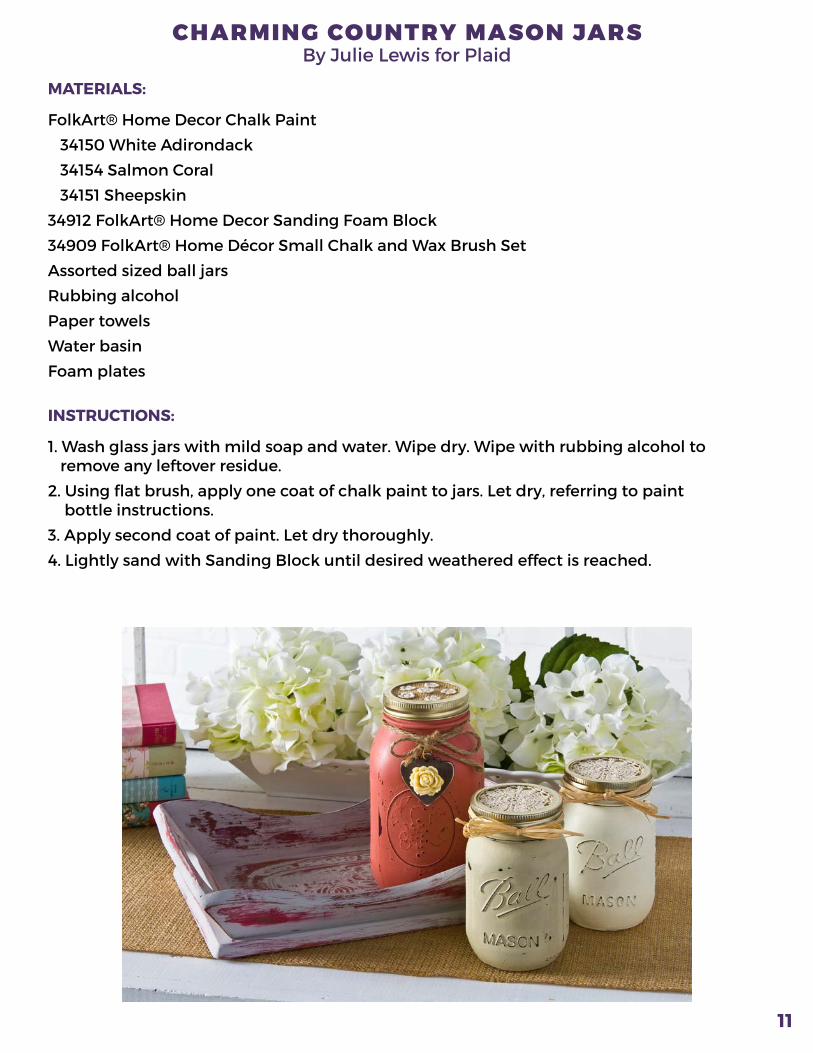
1. Wash glass jars with mild soap and water. Wipe dry. Wipe with rubbing alcohol to remove any leftover residue.
2. Using flat brush, apply one coat of chalk paint to jars. Let dry, referring to paint bottle instructions.
3. Apply second coat of paint. Let dry thoroughly.
4. Lightly sand with Sanding Block until desired weathered effect is reached.
CHARMING COUNTRY MASON JARS
11
By Julie Lewis for Plaid
12
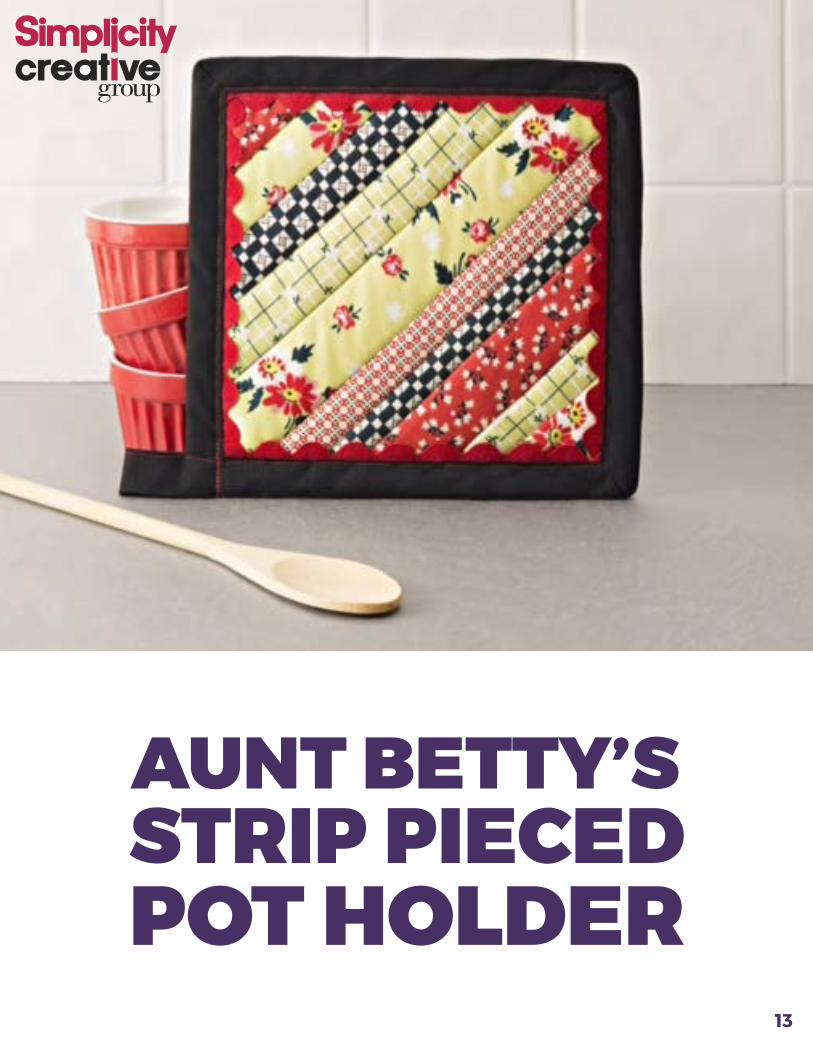
STRIP PIECED POT HOLDER
AUNT BETTY’S
13
FABRIC REQUIREMENTS:
10” strips of fabric in varying widths (1” to 2”) – approximately twelve strips
Backing fabric – one 9” x 9” square
Insulated Fleece – two 9” x 9” squares
Wrights Jumbo Rick-Rack – one package
Wrights Double Fold Bias Tape 7/8” wide – one package
MATERIALS:
General sewing suppliesRotary cutter and mat9 1/2” Square Acrylic Ruler
INSTRUCTIONS:Finished Size: 8 ½” Square
1. Layer the 9” backing square right side down with the two 9” insulated fleece squares on top. Pin-baste the three squares together.
2. Place one strip of fabric right side up on top of the fleece, diagonally across the middle.
3. Place a second strip of fabric on top of the first strip right sides together aligning one long edge. Stitch the long common edge of the strips with a ¼” seam. Flip the second strip over and finger press along the seam.
4. Continue aligning, stitching, and flipping strips until the entire square is covered with strips.
5. Trim the strip-pieced square to 8 ½” x 8 ½”.
6. Cut four 8 ½” long pieces of jumbo rick-rack. Place the rick-rack ¼” from the edge along each of the four sides of the strip-pieced square and baste. Note: Make sure the rick-rack is placed so that it will peek out from under the bias tape.
7. Place the bias tape over the edge of the square, encasing the raw edge. At the corners, fold the bias tape so that it creates a mitered corner. Stitch the bias tape on all four sides of the square. Hand stitch the mitered corner seams.
Optional: Create a hanging loop with the bias tape. Begin applying the bias tape at one corner. After stitching the bias tape on the last side, leave a 5” length at the corner to create the hanging loop. Stitch the long edges of the bias tape together and fold it in half, stitching it down on the back side of the potholder.
AUNT BETTY’S STRIP PIECED POT HOLDER
14
By Barbara Parsons Cartier for Simplicity
15

SLICES OF SILVERGEOMETRIC T-SHIRT
16
By Pattie Wilkinson for ilovetocreate.com
MATERIALS:
Tulip® Color Shot Instant Fabric Color™ Silver
T-shirt
Paper towels
1” wide masking tape
INSTRUCTIONS:
1. Wash and dry T-shirt without fabric softener.
2. Cover work surface with paper towels in a well-ventilated area.
3. Place paper towels flat inside T-shirt.
4. Tape a rectangle shape on the shirt.
5. Tape a diagonal line from the bottom left corner to the top right corner.
6. Tape additional lines diagonally inside the taped lines.
7. Press tape firmly on all sides with fingers.
8. Tape paper towels around all four sides of the taped design to prevent overspray.
9. Shake can well for at least 1 minute. Hold can 6-8” from fabric and spray with smooth, even strokes. Shake often during use.
10. Apply one light coat at a time, waiting 5 minutes between coats. Add additional coats for desired coverage and intensity.
11. Let dry 30 minutes. Fabric can be washed inside out with mild detergent on gentle cycle after 24 hours. Tumble dry low.12. Turn can upside down after use and spray 5 seconds to prevent clogging for next project. Replace cap.
13. Peel tape away from shirt after paint has dried completely.
SLICES OF SILVER GEOMETRIC T-SHIRT
17
By Pattie Wilkinson for ilovetocreate.com
18
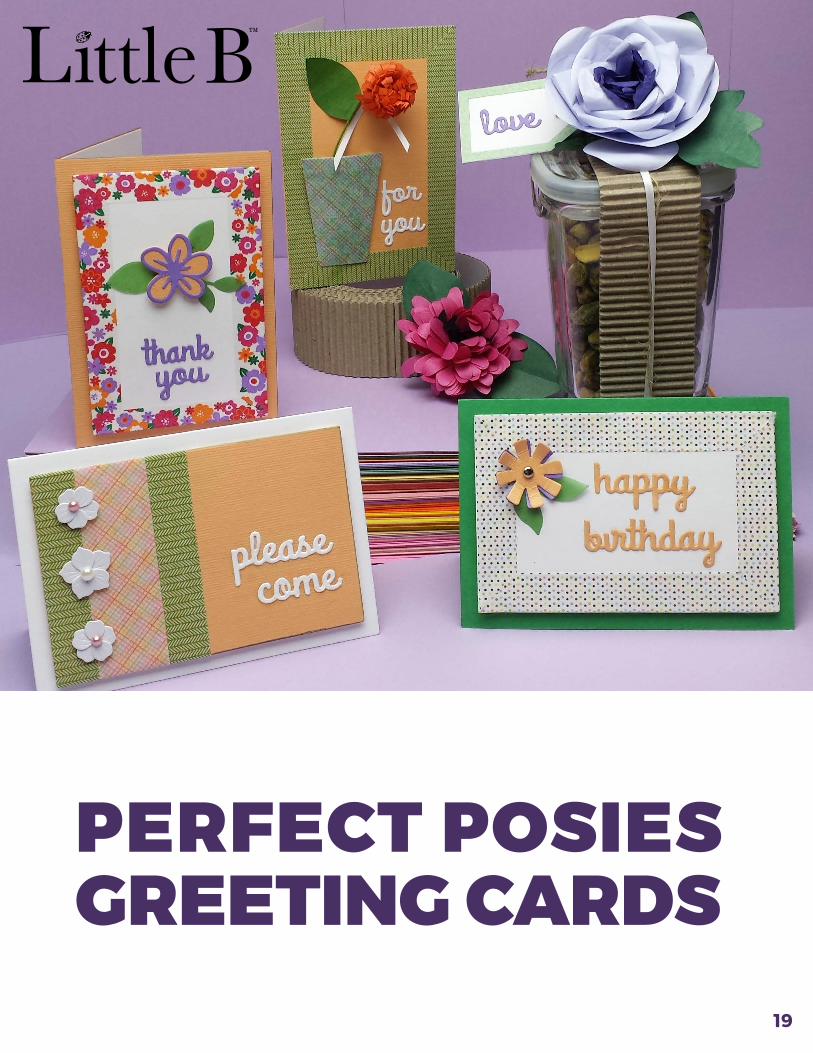
PERFECT POSIESGREETING CARDS
19
MATERIALS:
Paper Flower Kits:
White Daisy Petal Strips (100503)
Bright Pink Daisy Petal Kit (100490)
Pansy Petal Strips (100499)
Designer Cutting Dies:
Cards (100385)
Bouquet (100394)
Handwritten (100396)
Birthday (100391)
Tags (100386)
Perfect Positioner (100407)
Decorative Paper Tape:
Colorful Mini Flowers 25mm (100062)
Pastel Weave 25mm (100560)
Green Herringbone 15mm (100559)
Gold Foil Pastel Polka Dots 15mm (100571)
Decorative Mini Embellishments - Pearl Flowers (100327)
Corrugate Tape (100422)
Cardstock - Peach, Green, Orchid, White
Adhesive (for small die cuts)
Dimensional Foam Adhesive
Small Brad (paper fastener)
Thin (1/8”) White Ribbon
Die Cut Machine
Small Hole Punch
Metal Ruler
Craft Knife
INSTRUCTIONS:
Read through all instructions first before beginning your final project. If new to making mitered corners practice the process first to become familiar with the steps.
PERFECT POSIES GREETINGS CARDS
20
By Dale Nicholson for Little B LLC
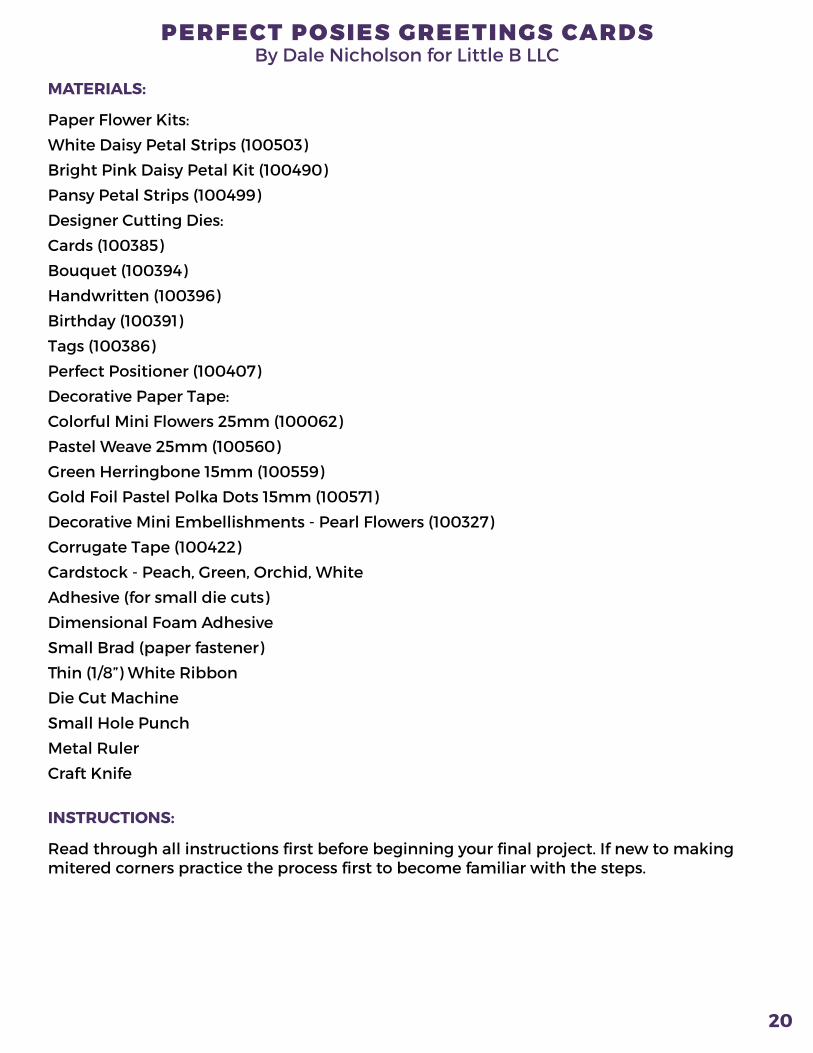
CREATING WITH PAPER FLOWERS
It’s great fun to make paper flowers. We encourage you to have fun working with the manyPetal Strips to come up with the look that you like for your personality. All of the pieces forcompleting 6 paper flowers are included in the kit; it just depends on what size flower you are making. The how-to’s could not be easier!
BASIC CARD INSTRUCTIONS
Each of the cards is made with the largest card shape from the Cards Die Set. Three cards use the large rectangle as an accent piece on top. Three cards have mitered corners using Decorative Paper or Foil Tape. Die cut sentiments and flower accents are cut out from the die sets, layered and glued in place.
Mitered Corners
1. Make sure you have clean hands and a clean work surface that can tolerate a craft knife (self-healing mat is good).
2. Lay decorative tape down along the edge of both long sides, leaving about ½” tails off the end. Press tape down lightly to adhere it in place to the card (you will be cutting in the corners so don’t press down too hard in this area).
3. Now place tape across both short ends and again press each strip in place lightly.
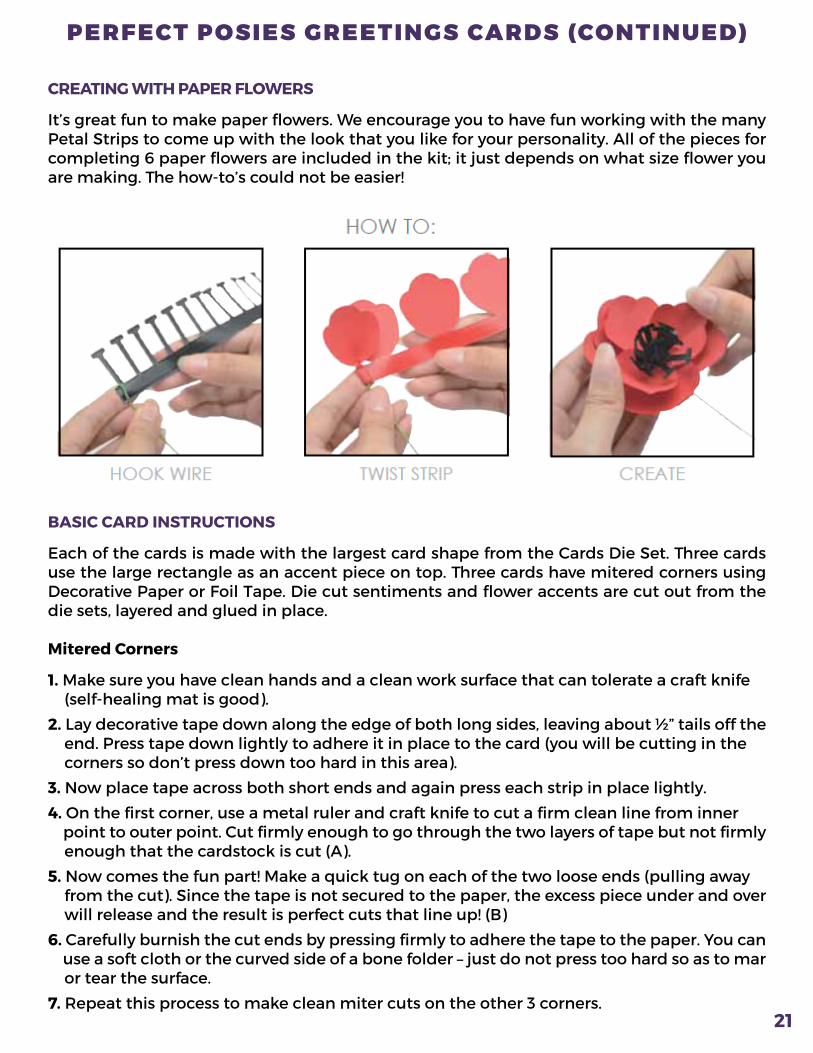
4. On the first corner, use a metal ruler and craft knife to cut a firm clean line from inner point to outer point. Cut firmly enough to go through the two layers of tape but not firmly enough that the cardstock is cut (A).
5. Now comes the fun part! Make a quick tug on each of the two loose ends (pulling away from the cut). Since the tape is not secured to the paper, the excess piece under and over will release and the result is perfect cuts that line up! (B)
6. Carefully burnish the cut ends by pressing firmly to adhere the tape to the paper. You can use a soft cloth or the curved side of a bone folder – just do not press too hard so as to mar or tear the surface.
7. Repeat this process to make clean miter cuts on the other 3 corners.
PERFECT POSIES GREETINGS CARDS (CONTINUED)
21
PROJECT INSTRUCTIONS
Please Come Invitation
1. Die cut largest card shape from Cards Die Set in white cardstock. Fold.
2. Die cut the largest rectangle from Cards Die set in peach cardstock.
3. Die cut “please” and “come” shapes from Handwritten Die Set in white cardstock.
4. Edge the large rectangle with 3 strips of decorative paper tape as shown. First place Green Herringbone in place followed by Basket Weave and then finished with Green Herringbone again. Bring all ends around to fasten on back of rectangle.
5. Position Pearl Flowers mini embellishments in place on top of tape lines as shown.
6. Glue handwritten “please come” die cut to front of card.
7. Adhere decorated white rectangle to front of card using dimensional foam adhesive.
8. If desired, glue a white liner sheet inside of card for writing a personal note.
Thank You Card
1. Die cut largest card shape from Cards Die Set in peach cardstock. Fold.
2. Die cut the largest rectangle from Cards Die set in white cardstock.
3. Die cut “thank” and “you” shapes from Handwritten Die Set in orchid cardstock.
4. Die cut small layered flowers and leaves from Bouquet Die Set in cardstock colors as shown (peach, orchid, and green).
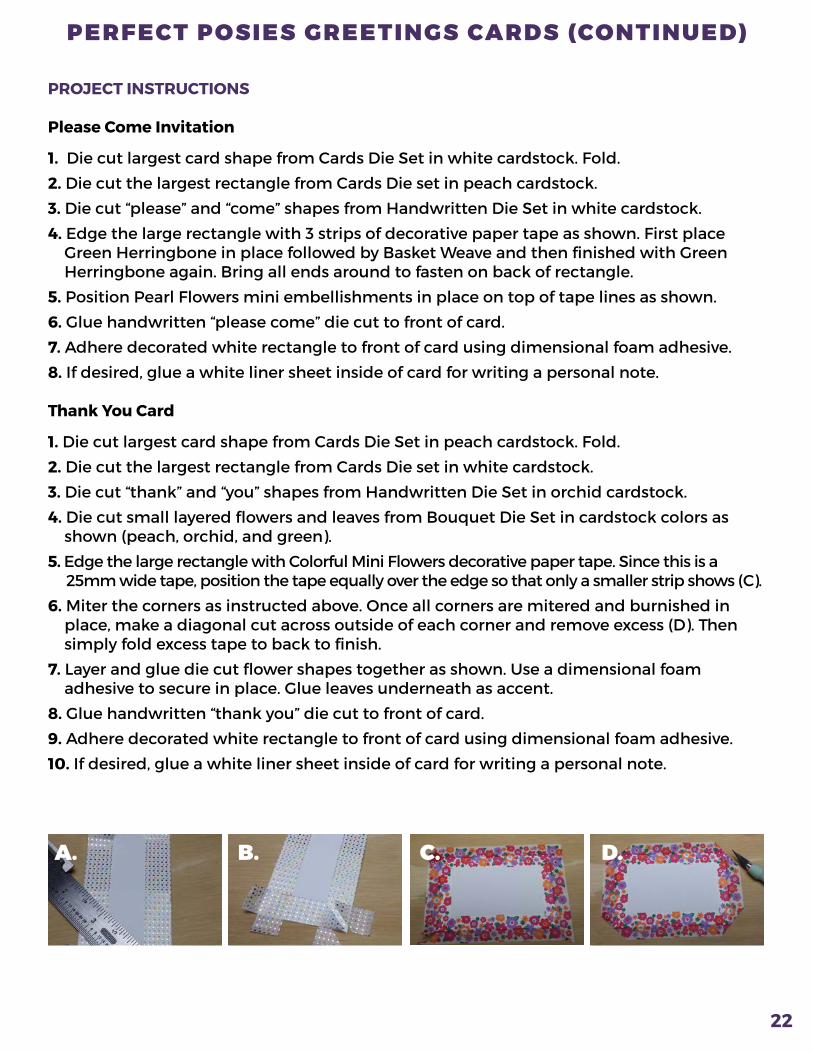
5. Edge the large rectangle with Colorful Mini Flowers decorative paper tape. Since this is a 25mm wide tape, position the tape equally over the edge so that only a smaller strip shows (C).
6. Miter the corners as instructed above. Once all corners are mitered and burnished in place, make a diagonal cut across outside of each corner and remove excess (D). Then simply fold excess tape to back to finish.
7. Layer and glue die cut flower shapes together as shown. Use a dimensional foam adhesive to secure in place. Glue leaves underneath as accent.
8. Glue handwritten “thank you” die cut to front of card.
9. Adhere decorated white rectangle to front of card using dimensional foam adhesive.
10. If desired, glue a white liner sheet inside of card for writing a personal note.
PERFECT POSIES GREETINGS CARDS (CONTINUED)
A. B. C. D.
22
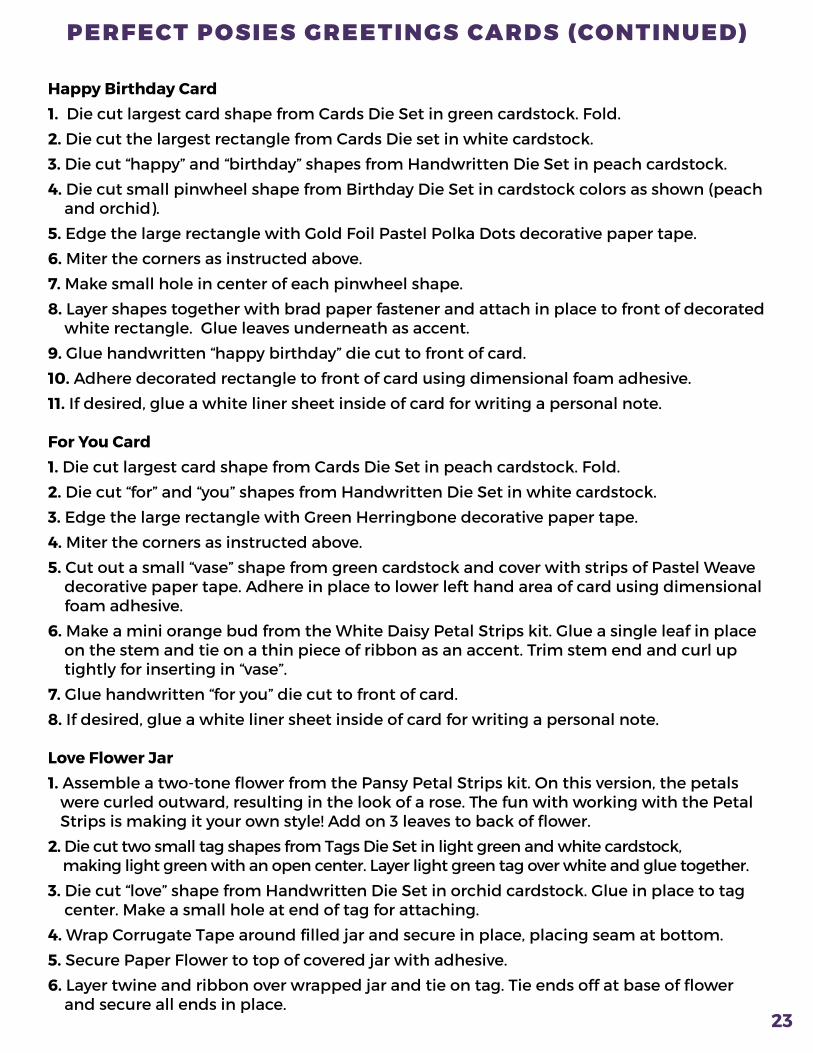
Happy Birthday Card1. Die cut largest card shape from Cards Die Set in green cardstock. Fold.
2. Die cut the largest rectangle from Cards Die set in white cardstock.
3. Die cut “happy” and “birthday” shapes from Handwritten Die Set in peach cardstock.
4. Die cut small pinwheel shape from Birthday Die Set in cardstock colors as shown (peach and orchid).
5. Edge the large rectangle with Gold Foil Pastel Polka Dots decorative paper tape.
6. Miter the corners as instructed above.
7. Make small hole in center of each pinwheel shape.
8. Layer shapes together with brad paper fastener and attach in place to front of decorated white rectangle. Glue leaves underneath as accent.
9. Glue handwritten “happy birthday” die cut to front of card.
10. Adhere decorated rectangle to front of card using dimensional foam adhesive.
11. If desired, glue a white liner sheet inside of card for writing a personal note.
For You Card1. Die cut largest card shape from Cards Die Set in peach cardstock. Fold.
2. Die cut “for” and “you” shapes from Handwritten Die Set in white cardstock.
3. Edge the large rectangle with Green Herringbone decorative paper tape.
4. Miter the corners as instructed above.
5. Cut out a small “vase” shape from green cardstock and cover with strips of Pastel Weave decorative paper tape. Adhere in place to lower left hand area of card using dimensional foam adhesive.
6. Make a mini orange bud from the White Daisy Petal Strips kit. Glue a single leaf in place on the stem and tie on a thin piece of ribbon as an accent. Trim stem end and curl up tightly for inserting in “vase”.
7. Glue handwritten “for you” die cut to front of card.
8. If desired, glue a white liner sheet inside of card for writing a personal note.
Love Flower Jar1. Assemble a two-tone flower from the Pansy Petal Strips kit. On this version, the petals were curled outward, resulting in the look of a rose. The fun with working with the Petal Strips is making it your own style! Add on 3 leaves to back of flower.
2. Die cut two small tag shapes from Tags Die Set in light green and white cardstock, making light green with an open center. Layer light green tag over white and glue together.
3. Die cut “love” shape from Handwritten Die Set in orchid cardstock. Glue in place to tag center. Make a small hole at end of tag for attaching.
4. Wrap Corrugate Tape around filled jar and secure in place, placing seam at bottom.
5. Secure Paper Flower to top of covered jar with adhesive.
6. Layer twine and ribbon over wrapped jar and tie on tag. Tie ends off at base of flower and secure all ends in place.
PERFECT POSIES GREETINGS CARDS (CONTINUED)
23
At Little B, we design products of quality and innovation. Many products coordinate well together for creative ease.
Use them with confidence and style to express your personality!
Little B LLC www.LittleBLLC.com 300-3D Route 17 South Lodi, NJ 732-283-9050
CORRUGATE TAPE PAPER TAPE DESIGNER CUTTING DIES MINI EMBELLISHMENTS TRIM EDGE PUNCHES
24
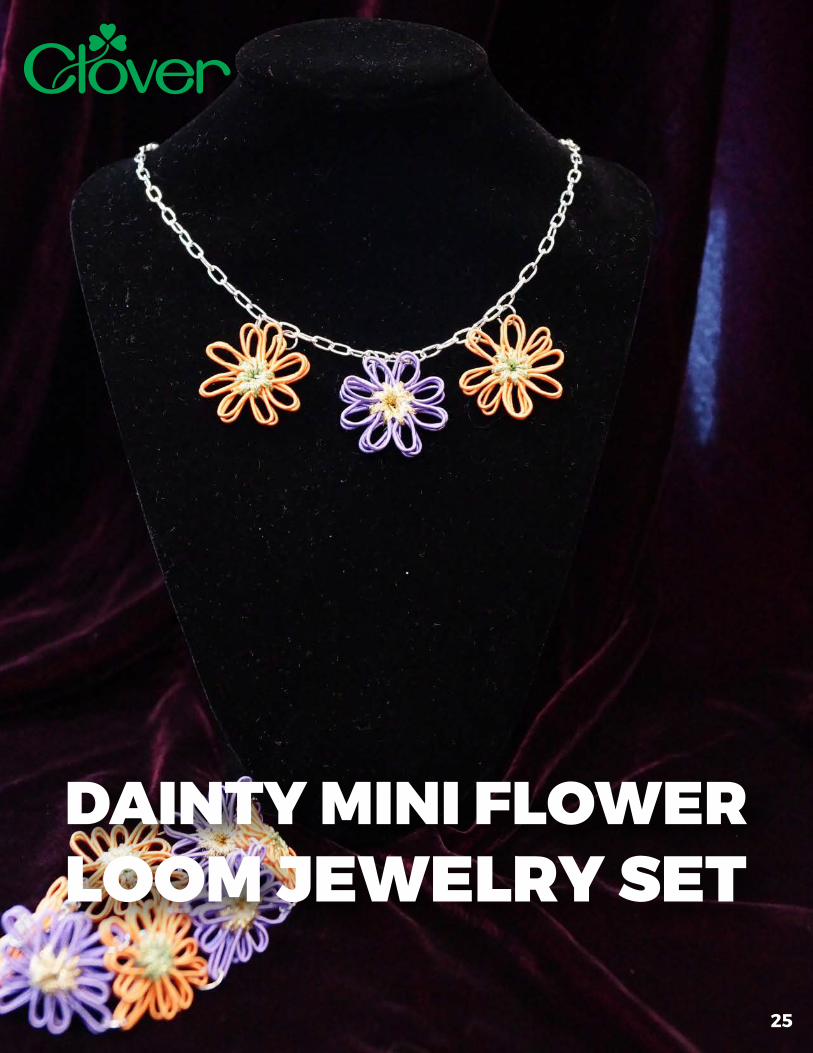
DAINTY MINI FLOWERLOOM JEWELRY SET
25
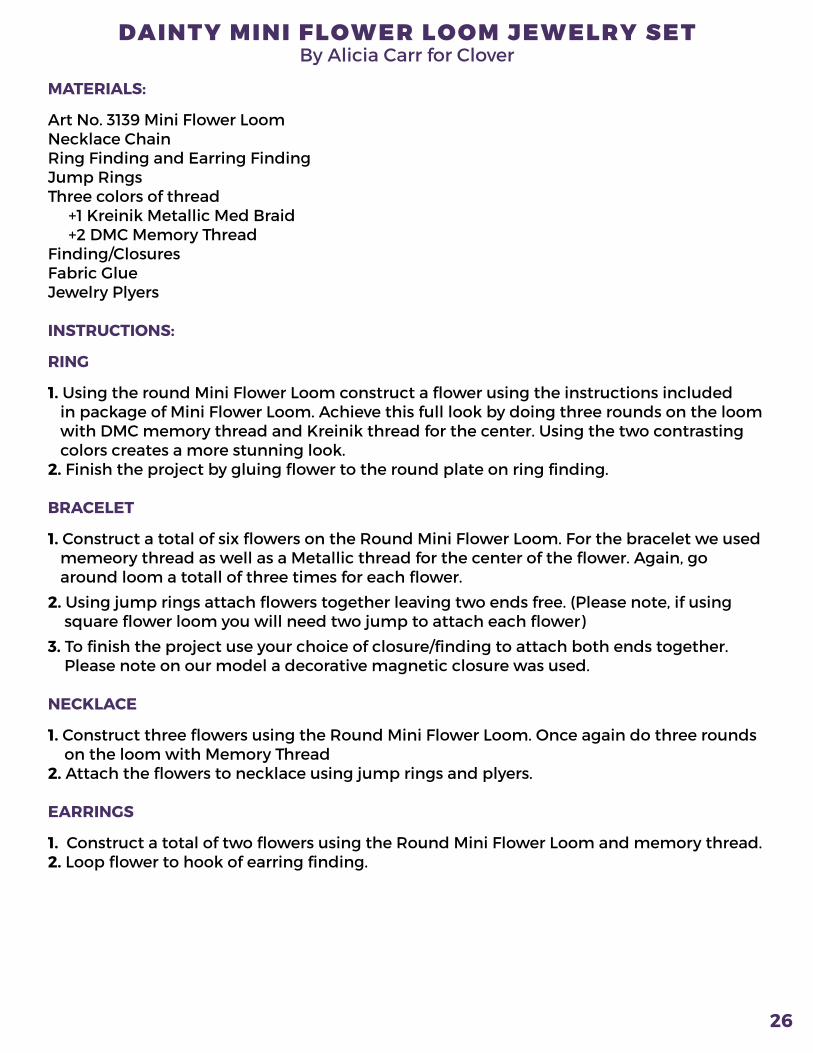
MATERIALS:
Art No. 3139 Mini Flower LoomNecklace ChainRing Finding and Earring FindingJump RingsThree colors of thread +1 Kreinik Metallic Med Braid +2 DMC Memory ThreadFinding/ClosuresFabric GlueJewelry Plyers
INSTRUCTIONS:
RING
1. Using the round Mini Flower Loom construct a flower using the instructions included in package of Mini Flower Loom. Achieve this full look by doing three rounds on the loom with DMC memory thread and Kreinik thread for the center. Using the two contrasting colors creates a more stunning look. 2. Finish the project by gluing flower to the round plate on ring finding.
BRACELET
1. Construct a total of six flowers on the Round Mini Flower Loom. For the bracelet we used memeory thread as well as a Metallic thread for the center of the flower. Again, go around loom a totall of three times for each flower.
2. Using jump rings attach flowers together leaving two ends free. (Please note, if using square flower loom you will need two jump to attach each flower)
3. To finish the project use your choice of closure/finding to attach both ends together. Please note on our model a decorative magnetic closure was used.
NECKLACE
1. Construct three flowers using the Round Mini Flower Loom. Once again do three rounds on the loom with Memory Thread2. Attach the flowers to necklace using jump rings and plyers.
EARRINGS
1. Construct a total of two flowers using the Round Mini Flower Loom and memory thread.2. Loop flower to hook of earring finding.
DAINTY MINI FLOWER LOOM JEWELRY SET
26
By Alicia Carr for Clover
27
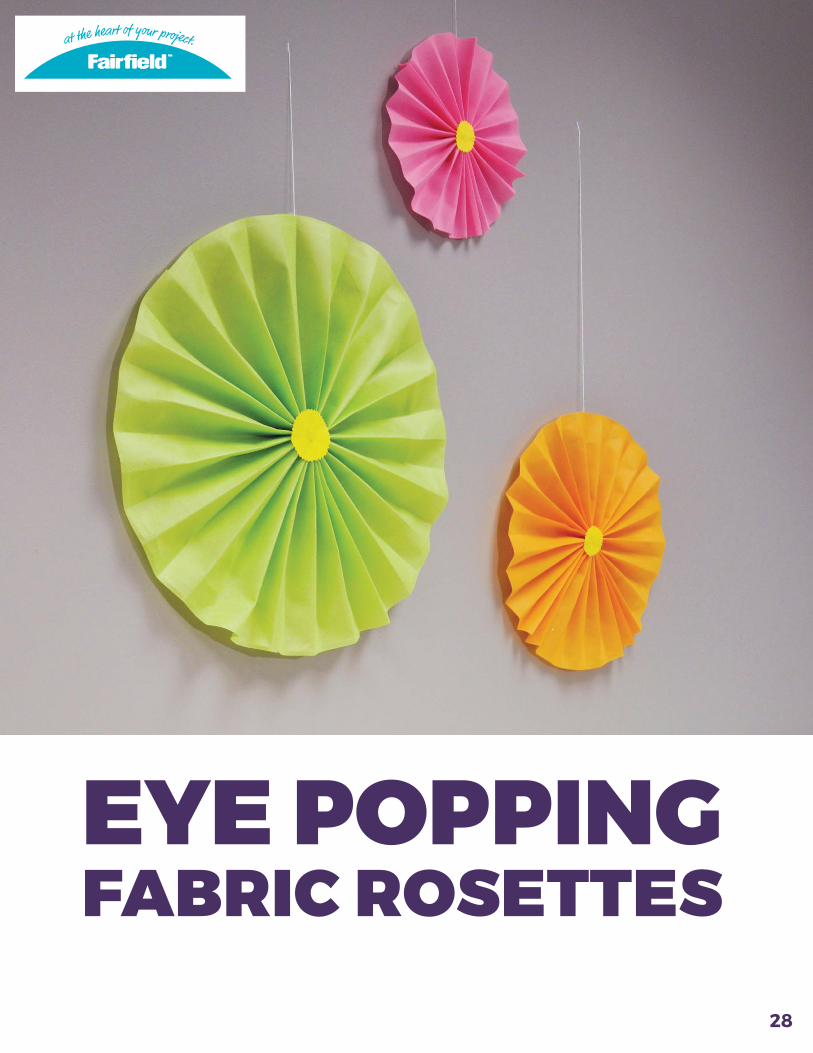
EYE POPPINGFABRIC ROSETTES
28
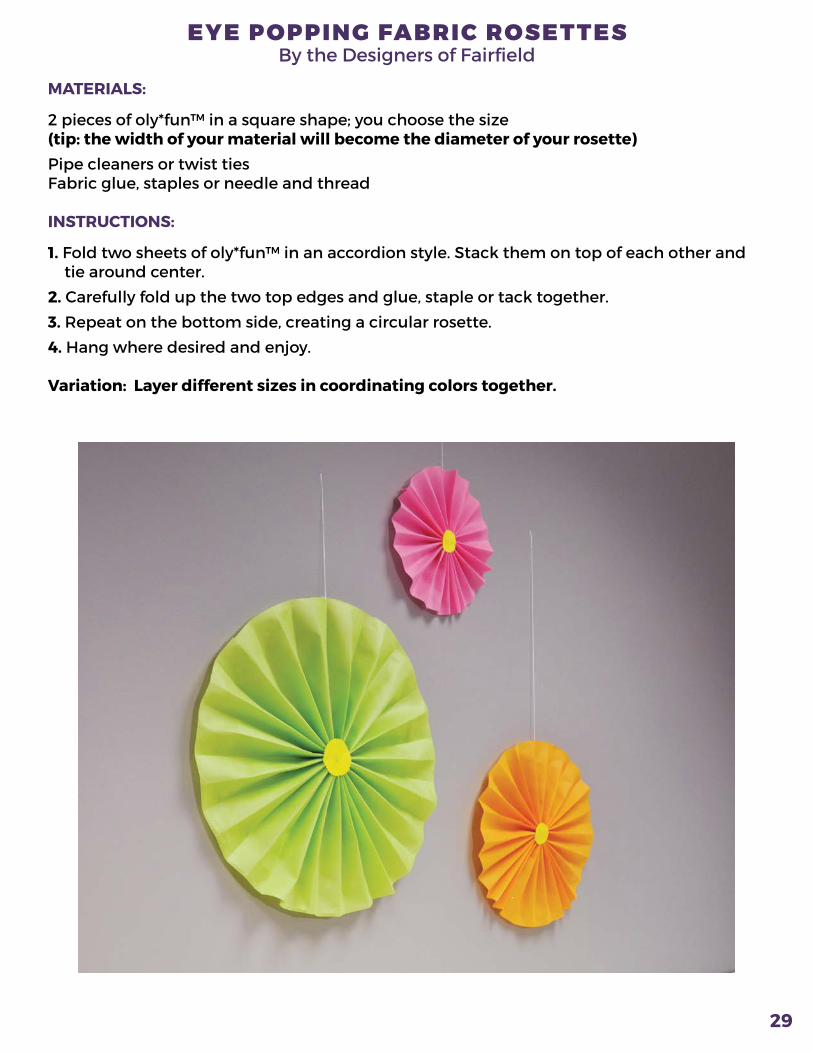
MATERIALS:
2 pieces of oly*fun™ in a square shape; you choose the size(tip: the width of your material will become the diameter of your rosette)Pipe cleaners or twist tiesFabric glue, staples or needle and thread
INSTRUCTIONS:
1. Fold two sheets of oly*fun™ in an accordion style. Stack them on top of each other and tie around center.
2. Carefully fold up the two top edges and glue, staple or tack together.
3. Repeat on the bottom side, creating a circular rosette.
4. Hang where desired and enjoy.
Variation: Layer different sizes in coordinating colors together.
EYE POPPING FABRIC ROSETTES
29
By the Designers of Fairfield
30
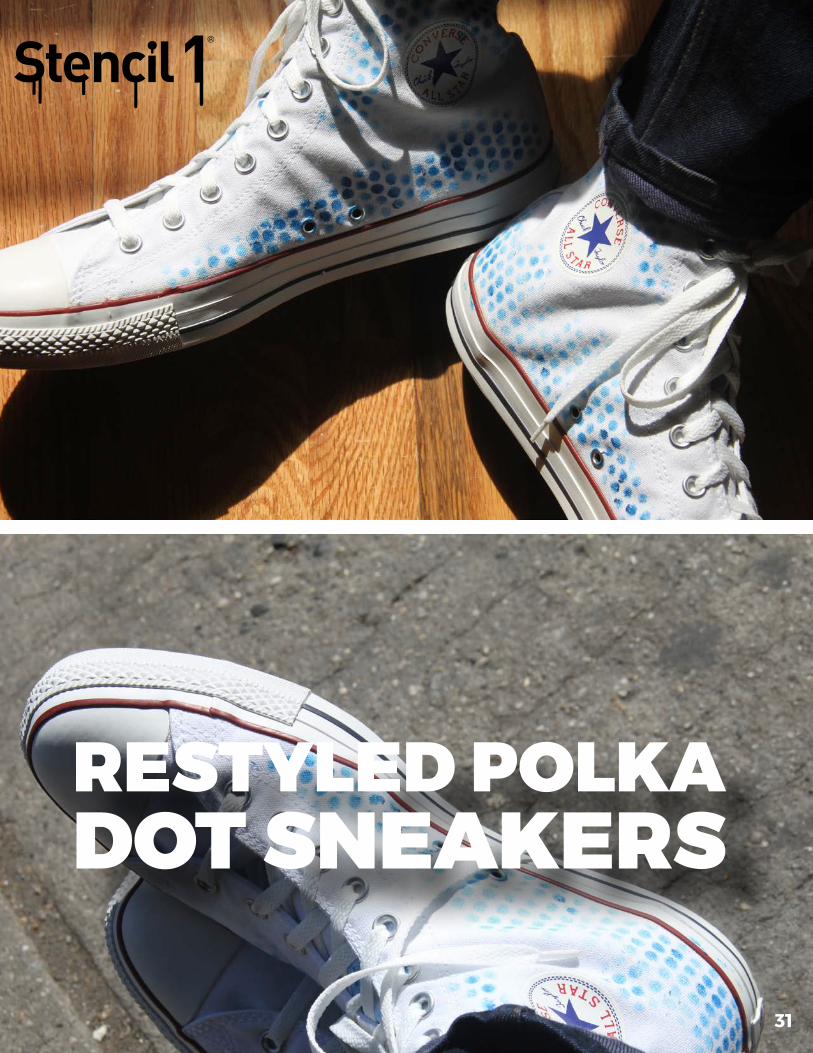
RESTYLED POLKADOT SNEAKERS
31
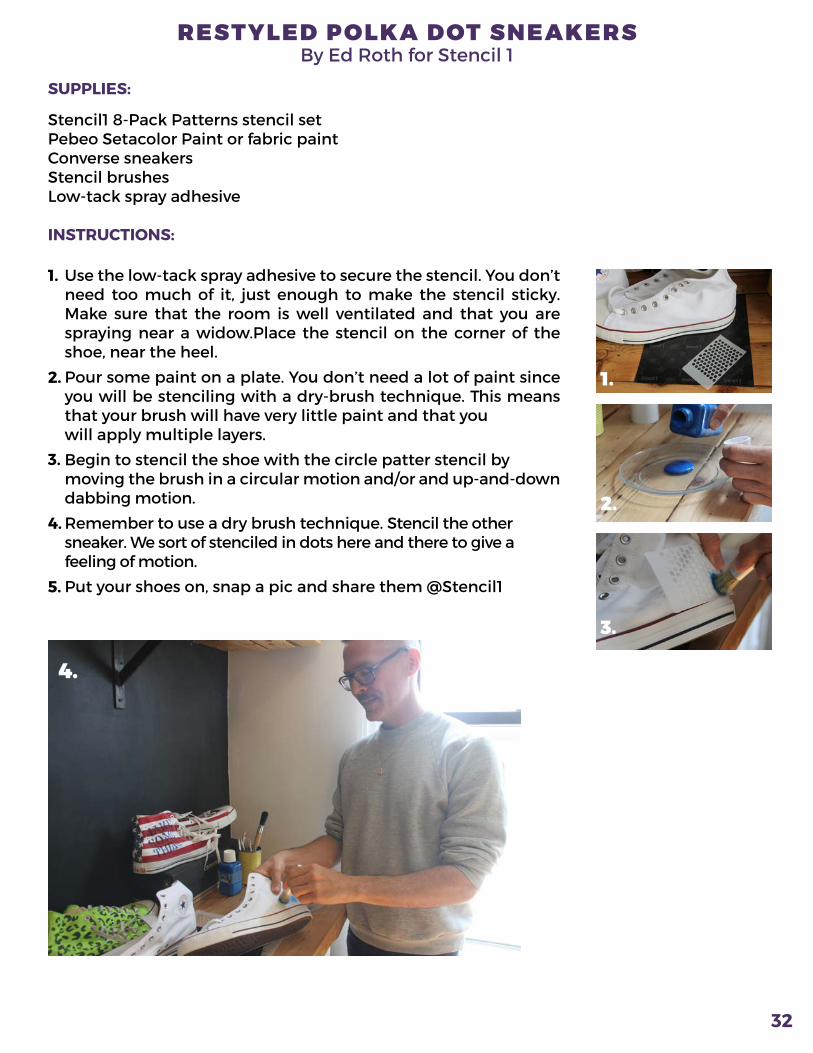
SUPPLIES:
Stencil1 8-Pack Patterns stencil setPebeo Setacolor Paint or fabric paintConverse sneakersStencil brushesLow-tack spray adhesive
INSTRUCTIONS:
RESTYLED POLKA DOT SNEAKERS
32
By Ed Roth for Stencil 1
Use the low-tack spray adhesive to secure the stencil. You don’t need too much of it, just enough to make the stencil sticky. Make sure that the room is well ventilated and that you are spraying near a widow.Place the stencil on the corner of the shoe, near the heel.
Pour some paint on a plate. You don’t need a lot of paint since you will be stenciling with a dry-brush technique. This means that your brush will have very little paint and that youwill apply multiple layers.
Begin to stencil the shoe with the circle patter stencil bymoving the brush in a circular motion and/or and up-and-down dabbing motion.
Remember to use a dry brush technique. Stencil the othersneaker. We sort of stenciled in dots here and there to give afeeling of motion.
Put your shoes on, snap a pic and share them @Stencil1
1.
2.
3.
4.
5.
1.
2.
3.
4.
33
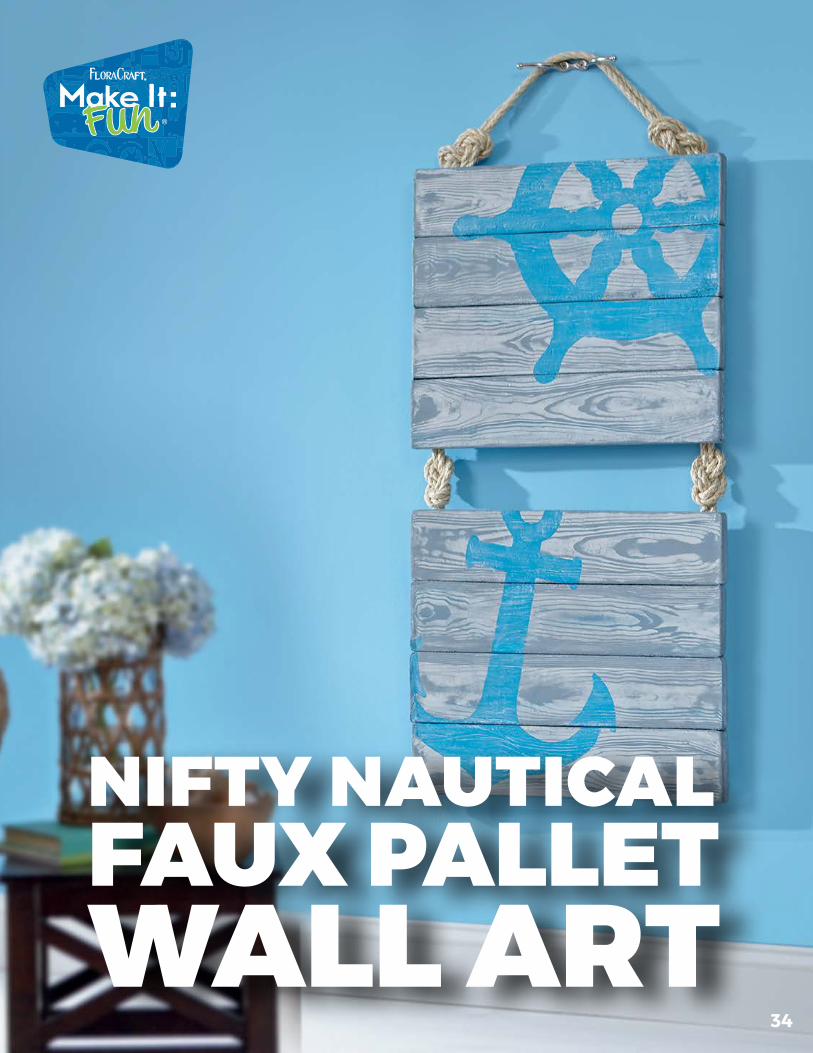
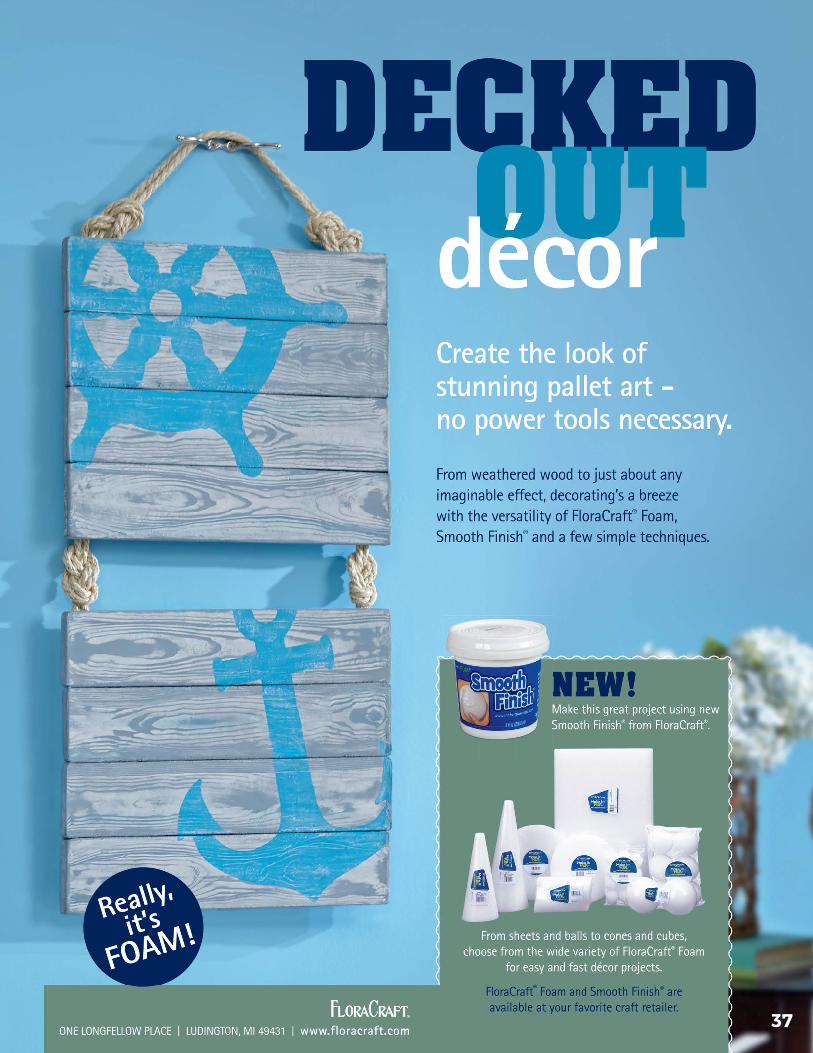
NIFTY NAUTICALFAUX PALLET WALL ART
34

MATERIALS:
(3) 1x12x18” sheets FloraCraft® Foam
FloraCraft® Smooth Finish®
Acrylic Paint: white, black and bright blue
Rope: ½” diameter
T-Pins
Make It: Fun® Foam Cutter
Low-Temp Glue Gun
Wood Graining Tool
Flat Paint Brush: 1”
Ruler
Black Marker
Craft Spatula
Fine Grit Sanding Block
INSTRUCTIONS:
1. Lay the ruler across the 12” end of the foam sheet. Make a mark every 4” with the black marker to create the boards. Do this at both ends of 4” with the black marker to create the boards. Do this at both ends of all three foam sheets. Lay the ruler even with the marks at the top and bottom of the foam sheet. Hold the ruler tightly to the foam and use it as a guide as you cut the boards from the sheets. You will only need eight 4x18” foam boards, save the remaining foam for a future project. Lightly rub the cut edges to gether side by side to remove the loose foam particles and lightly sand the edges smooth.
2. Wear protective gloves while working with Smooth Finish. Apply one coat Smooth Finish to the top and sides of all the foam boards. Apply the Smooth Finish in all directions being sure to completely fill the cells of the foam. Let dry.
3. Sand the boards lightly with the sanding block until smooth. Apply a second coat of Smooth Finish to the tops and sides of all the boards. Let Dry. Sand boards for a completely smooth surface.
4. Base Coat: Mix a very small amount of black paint to some white paint to create a very light grey. Cover all the boards with light grey paint and let dry.
5. Graining Coat: Mix the black and white paint to get a medium/dark grey. Add just enough of the bright blue paint in with the medium/ dark grey to give it a slight blue hue. Add a little water to thin the paint slightly, this will make it easier to work with and give you a little longer dry time. Be sure to mix enough of this color so that you will have enough for all the boards. Working with one board at a time, apply a generous coat of the medium grey paint.
NIFTY NAUTICAL FAUX PALLET WALL ART
35
By Dondi Richardson for FloraCraft
1.
4.
2.
3.
5.
6.
7.
8.
9.
10.
11.
12.
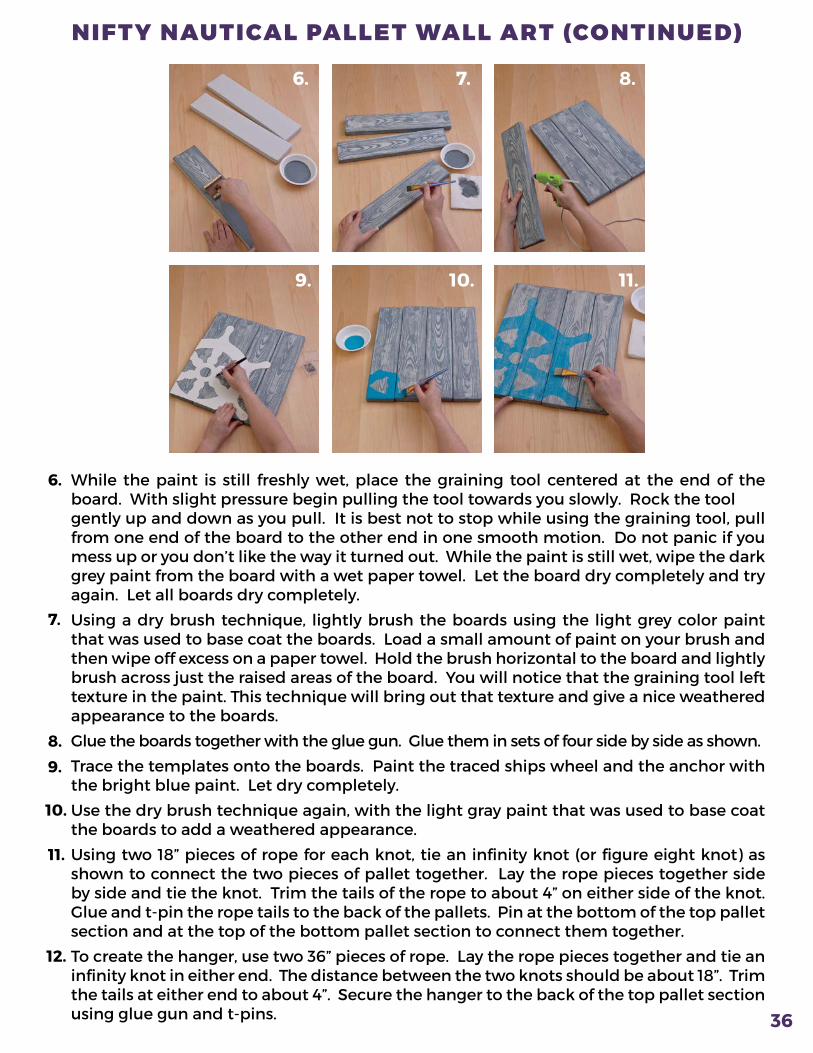
While the paint is still freshly wet, place the graining tool centered at the end of the board. With slight pressure begin pulling the tool towards you slowly. Rock the toolgently up and down as you pull. It is best not to stop while using the graining tool, pull from one end of the board to the other end in one smooth motion. Do not panic if you mess up or you don’t like the way it turned out. While the paint is still wet, wipe the dark grey paint from the board with a wet paper towel. Let the board dry completely and try again. Let all boards dry completely.
Using a dry brush technique, lightly brush the boards using the light grey color paint that was used to base coat the boards. Load a small amount of paint on your brush and then wipe off excess on a paper towel. Hold the brush horizontal to the board and lightly brush across just the raised areas of the board. You will notice that the graining tool left texture in the paint. This technique will bring out that texture and give a nice weathered appearance to the boards.
Glue the boards together with the glue gun. Glue them in sets of four side by side as shown.
Trace the templates onto the boards. Paint the traced ships wheel and the anchor with the bright blue paint. Let dry completely.
Use the dry brush technique again, with the light gray paint that was used to base coat the boards to add a weathered appearance.
Using two 18” pieces of rope for each knot, tie an infinity knot (or figure eight knot) as shown to connect the two pieces of pallet together. Lay the rope pieces together side by side and tie the knot. Trim the tails of the rope to about 4” on either side of the knot. Glue and t-pin the rope tails to the back of the pallets. Pin at the bottom of the top pallet section and at the top of the bottom pallet section to connect them together.
To create the hanger, use two 36” pieces of rope. Lay the rope pieces together and tie an infinity knot in either end. The distance between the two knots should be about 18”. Trim the tails at either end to about 4”. Secure the hanger to the back of the top pallet section using glue gun and t-pins.
NIFTY NAUTICAL PALLET WALL ART (CONTINUED)
36
6.
9.
7.
10.
8.
11.
37
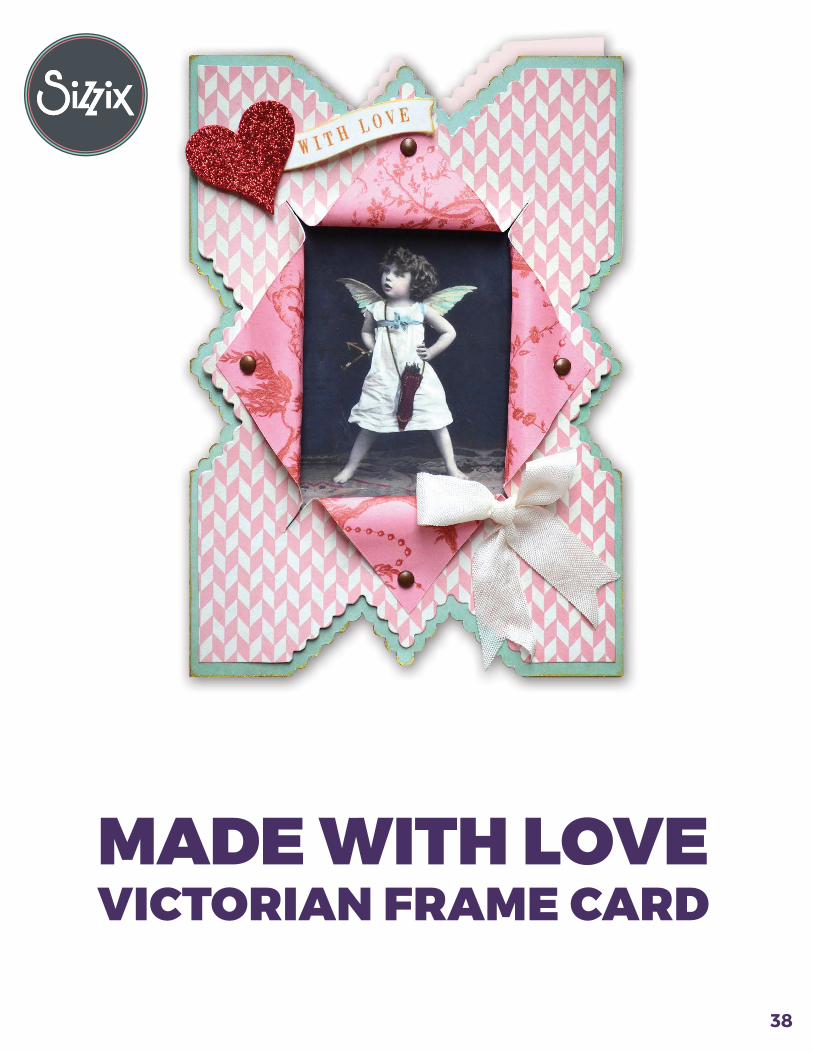
MADE WITH LOVEVICTORIAN FRAME CARD
38
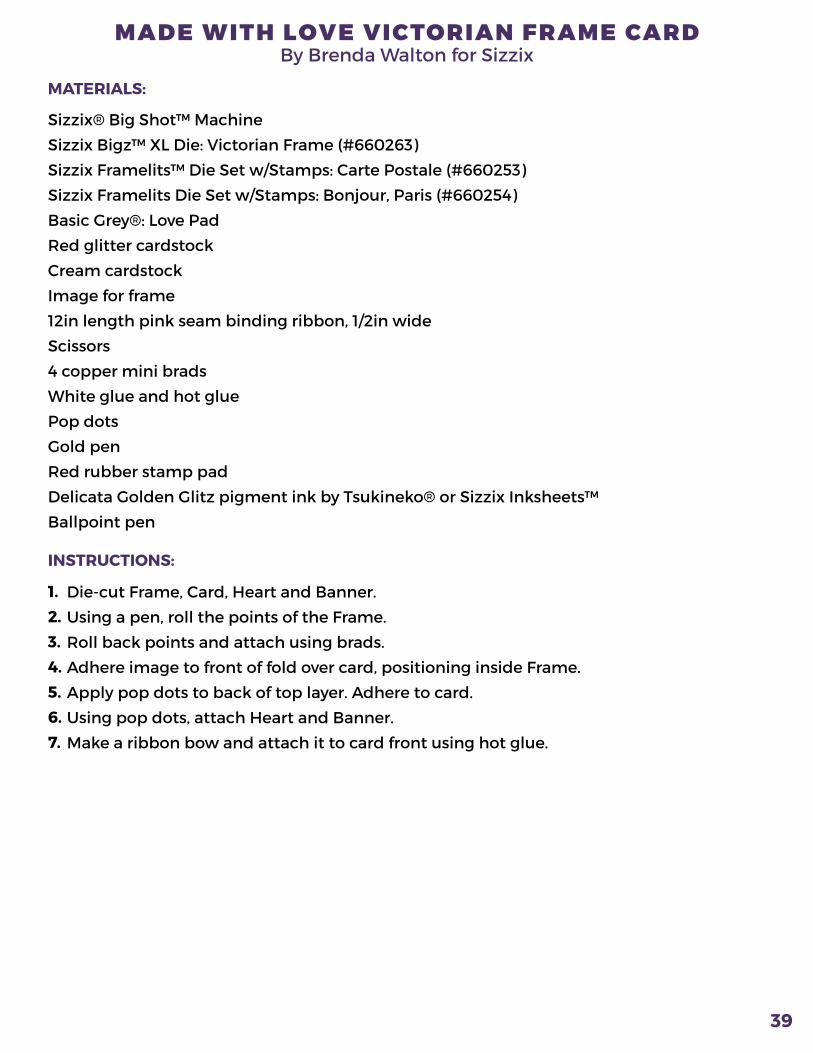
MATERIALS:
Sizzix® Big Shot™ Machine
Sizzix Bigz™ XL Die: Victorian Frame (#660263)
Sizzix Framelits™ Die Set w/Stamps: Carte Postale (#660253)
Sizzix Framelits Die Set w/Stamps: Bonjour, Paris (#660254)
Basic Grey®: Love Pad
Red glitter cardstock
Cream cardstock
Image for frame
12in length pink seam binding ribbon, 1/2in wide
Scissors
4 copper mini brads
White glue and hot glue
Pop dots
Gold pen
Red rubber stamp pad
Delicata Golden Glitz pigment ink by Tsukineko® or Sizzix Inksheets™
Ballpoint pen
INSTRUCTIONS:
1.2.3.4.5.6.7.
Die-cut Frame, Card, Heart and Banner.
Using a pen, roll the points of the Frame.
Roll back points and attach using brads.
Adhere image to front of fold over card, positioning inside Frame.
Apply pop dots to back of top layer. Adhere to card.
Using pop dots, attach Heart and Banner.
Make a ribbon bow and attach it to card front using hot glue.
MADE WITH LOVE VICTORIAN FRAME CARD
39
By Brenda Walton for Sizzix

40
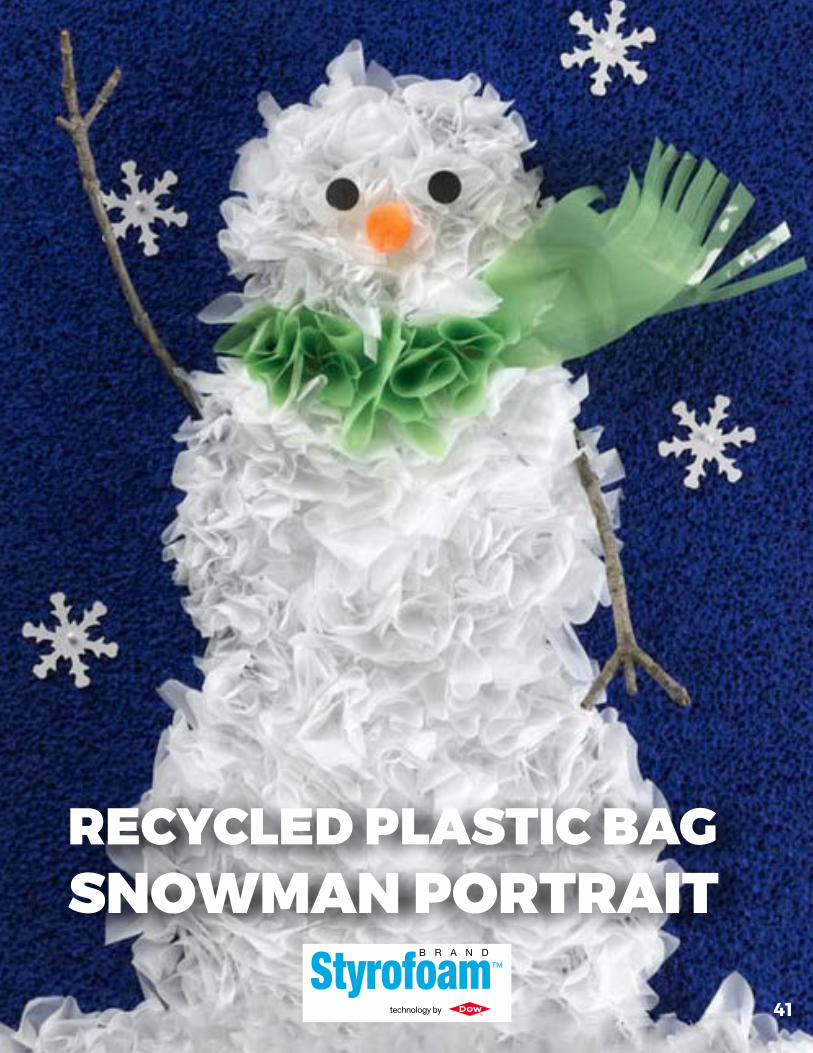
RECYCLED PLASTIC BAGSNOWMAN PORTRAIT
41
MATERIALS:
STYROFOAM™ Brand Foam: 1” x 8” x 12” sheet*
Plastic shopping bags: Approximately 3 white and ½ in a color. (The actual number you’ll use may vary depending on the size and placement of the store logo.)
Acrylic craft paint in blue
Pompom, one ½” orange
Black construction paper, just a scrap
Straight pins, extra long with large heads
Two twigs (arms)
Optional: Snowflake sequins
Thick, white craft glue
Tools needed: Scissors; 1” stiff paint brush; marker; wood skewers; optional: ¼” hole punch
*Note: Cut a larger sheet to size using a serrated knife. Wax the knife blade with an old candle or bar of soap for easier cutting.
INSTRUCTIONS:
1. Paint blue the front and sides of the sheet of STYROFOAM Brand Foam. Let the paint dry.
2. Cut white plastic bags into 2” squares. Avoid the printed areas on the bags, and don’t worry if the squares aren’t perfect. You’ll trim away the ragged points at the end. Hint: Smoothing and folding the bag into a 2” strip will allow you to cut more than one square at a time.
3. Once the paint is thoroughly dry, use a marker to outline a chubby snowman with a scarf on the foam sheet.
4. Tuck the plastic squares into the foam:
• Cut off the pointed end of the wood skewer and discard. You’ll use the blunt end to attach the plastic squares to the foam background.
• Squeeze a small dot of tacky glue onto the outline of the snowman. Center the plastic square over the dot of glue, and center the blunt end of the skewer over the plastic square. Push the skewer straight down into the STYROFOAM Brand Foam about ½”. Twist the skewer a tiny bit and pull it out, leaving the plastic behind.
• Repeat, inserting plastic squares every 1/2” or so. Once you get the hang of it, you can squeeze on several dots of glue at a time to speed up the process. A
• Finish the outline, and then fill in the snowman.
5. Insert plastic squares along the bottom of the picture, creating snow-covered ground.
6. Cut 2” squares from the colored plastic bag, and insert them in the same way to make the scarf.
RECYCLED PLASTIC BAG SNOWMAN PORTRAIT
42
From The Dow Chemical Company, maker of STYROFOAM™ Brand Foam

RECYCLED PLASTIC BAG SNOWMAN PORTRAIT (CONTINUED)
7. When the glue is dry, stroke your hand across the top of the plastic to fluff it out and even out its appearance. Fill in any empty spots with additional plastic squares. Use scissors to trim off any points that stick out too much.
8. Punch out two, ¼” circles from the black construction paper; or, cut them out by hand. Glue each circle onto the head of a straight pin, and then insert the pins into the snowman’s face for eyes.
9. Glue on the orange pom pom nose.
10. Carefully insert two small sticks for the arms at the sides of the snowman.
11. Optional: Glue on snowflake sequins.
43
44
12 EASY DIYPROJECTS
©Copyright 2015 by Prime Publishing LLC
All rights reserved. No part of this book may be reproduced or transmitted in any form or by any means electronic or mechanical, including photocopying, recording, or by anyinformation storage or retrieval system, without written permission from the publisher,except in the case of brief quotations embodied in critical articles and reviews.
Trademarks are property of their respective holders. When used, trademarks are for thebenefit of the trademark owner only.
Published by Prime Publishing LLC, 3400 Dundee Road, Northbrook, IL 60062.
ALLFREECROCHET ALLFREEKNITTINGALLFREESEWING FAVEQUILTS
45
46
12 EASY DIYPROJECTS