1/2 inch manual iris eng f d fixed-focal lenses · sole. può causare cecità. attenzione: non...
TRANSCRIPT

Safety
Warning: Do not use the lens to look at the sun.It may cause loss of sight.
Attention: Do not direct the lens into the sun. Itmay cause a fire.
Mountingn Screw the lens into the camera head until it completely
stops.n Unscrew the three mounting screws one full turn. Turn
the lens until the cable connectors are aligned.n Tighten the mounting three screws, ensuring that the
lens is pushed towards the camera.
Sécurité
Attention: N’utilisez pas l’objectif pour regarderle soleil. Ceci pourrait occasionner une cécité.
Attention: Ne dirigez pas l’objectif vers le soleil.Ceci pourrait occasionner un incendie.
Montagen Visser l'objectif sur le corps de la caméra jusqu'à ce
qu’il bute.n Dévissez d'un tour complet les trois vis de fixation.
Faites tourner l'objectif jusqu'à ce que les connecteursdu câble soient alignés.
n Resserrez les trois vis de fixation, en veillant à ce quel'objectif soit bien poussé vers la caméra.
Sicherheit
Warnung: Mit diesem Objektiv nicht in dieSonne blicken. Erblindung kann die Folge sein.
Achtung: Das Objektiv nicht in die Sonne richt-en. Brandgefahr.
Montagen Das Objektiv in den Kamerakopf schrauben, bis es
ganz fest sitzt.n Die drei Befestigungsschrauben um eine volle Drehung
lockern. Das Objektiv drehen, bis die Kabelanschlüssekorrekt ausgerichtet sind.
n Die drei Befestigungsschrauben festziehen, dabei sicher-stellen, daß das Objektiv zur Kamera geschoben wird.
1/2 inch Manual Iris Fixed-Focal Lenses
TC9703 = LTC 3211/20
PhilipsCommunication &Security Systems
Eng
F
D
E
NL
I
Tw
3922 988 85682 98-40© 1998 Philips Electronics N.V.Data subject to change without notice
Eng F D
Seguridad
Advertencia: No use la objetivo para mirar al sol.Puede causar la pérdida de la vista.
Atención: No deje que el sol se refleje en la obje-tivo. Puede causar un incendio.
Montajen Atornille la objetivo al máximo en el cabezal de la
cámara.n Destornille los tres tornillos de montaje una vuelta
completa. Gire el objetivo hasta que los cables conec-tores estén alineados.
n Apriete los tres tornillos de montaje, asegurándose deque el objetivo sea empujado hacia la cámara.
Veiligheid
Waarschuwing: De lens niet gebruiken om naarde zon te kijken. Dit kan leiden tot verlies van hetgezichtsvermogen.
Let op: De lens niet op de zon richten. Dit kanbrand veroorzaken.
Montagen Schroef de lens op de camera tot hij volledig stopt.n Draai de drie bevestigingsschroeven een volle omwen-
teling los. Draai de lens tot de kabelaansluitingen opeen lijn staan.
n Draai de drie bevestigingsschroeven vast; let er hierbijop dat de lens in de richting van de camera wordtgedrukt.
Sisurezza
Pericolo: Non usare l’objettivo per guardare ilsole. Può causare cecità.
Attenzione: Non puntare l’objettivo sul sole.Pericolo d’incendio.
Montaggion Avvitare l’objettivo nella testa della telecamera fino al
bioccaggio completo.n Svitare di un giro completo le tre viti di fissaggio.
Ruotare l’obiettivo fino a quando i connettori dei cavisono allineati.
n Serrare le tre viti di fissaggio, controllando che l’obietti-vo venga spinto verso la macchina fotografica.
I TwNLE

ConnectionViewed from solder side
1 Damping Coil - Blue2 Damping Coil + Red3 Driving Coil + White4 Driving Coil - Green
SafetyWarning: Do not use the lens to look at the sun.It may cause loss of sight.Attention: Do not direct the lens into the sun. Itmay cause a fire.
DC-iris Fixed-Focal lensThe iris auto-close function is added to protect imagersfrom extreme high lights when power is switched off.
Mountingn Screw the lens into the camera head until it completely
stops.n Loosen the focus ring screw and pulling the lens
forward, turn it to the optimum position, (release thelens and it returns). Turn the lens to confirm it islocked (every 20°).
n Tighten the focus ring screw and connect the lens cableto the camera.
ConnexionVue depuis le cõté des soudures
1 Bobine d’amortissement - Blue2 Bobine d’amortissement + Rouge3 Bobine d’entraînement + Blanc4 Bobine d’entraînement - Vert
SécuritéAttention: N’utilisez pas l’objectif pour regarderle soleil. Ceci pourrait occasionner une cécité.Attention: Ne dirigez pas l’objectif vers le soleil.Ceci pourrait occasionner un incendie.
Objectif à focale variable et diaphragme iris CCL’ objectif à focale variable et diaphragme iris CC disposed’un réglage de la profondeur et du grossissement.
Montagen Visser l'objectif sur le corps de la caméra jusqu'à ce
qu’il bute.n Desserrez la vis de la bague de mise au point et, en
tirant l'objectif vers l'avant, faites-le tourner pour lemettre dans la position optimale (relâchez l'objectif et ilrevient dans sa position). Faites tourner l'objectif pourvérifier qu'il est verrouillé (tous les 20°).
n Serrez la vis de la bague de mise au point et raccordezle câble de l'objectif à la caméra.
AnschlußVon der Lötseite aus betrachtet
1 Dämpferspule - Blau2 Dämpferspule + Rote3 Antriesspule + Weiss4 Antriesspule - Grün
SicherheitWarnung: Mit diesem Objektiv nicht in dieSonne blicken. Erblindung kann die Folge sein.Achtung: Das Objektiv nicht in die Sonnerichten. Brandgefahr.
DC-iris VariofokalobjektivDieses Variofokalobjektiv DC-iris verfügt über verstellbareBrennweite und Zoom.
Montagen Das Objektiv in den Kamerakopf schrauben, bis es
ganz fest sitzt.n Den Objektivring lockern, das Objektiv nach vorn
ziehen und in die optimale Position bringen (wird dasObjektiv losgelassen, kehrt es in die ursprünglichePosition zurück). Das Objektiv drehen, um dessenFestsitz zu überprüfen (bei jeweils 20°).
n Den Objektivring festziehen und das Objektivkabel andie Kamera anschließen.
1/2 inch DC Iris Fixed-Focal Lenses
LDH 6703/03 = LTC 3214/20
PhilipsCommunication &Security Systems
Eng
F
D
E
NL
I
Tw
3922 988 85982 98-40© 1998 Philips Electronics N.V.Data subject to change without notice
Eng F D
ConexiónVista desde el lado del soldador
1 Bobina de arnortiguamiento - Azul2 Bobina de arnortiguamiento + Rojo3 Bobina excitadora + Blanco4 Bobina excitadora - Verde
SeguridadAdvertencia: No use la objetivo para mirar al sol.Puede causar la pérdida de la vista.Atención: No deje que el sol se refleje en laobjetivo. Puede causar un incendio.
Objetivo DC-iris vari-focalEsta objetivo DC-iris vari-focal tiene foco y zoomajustables.Montajen Atornille la objetivo al máximo en el cabezal de la
cámara.n Afloje el tornillo circular de foco, tire del objetivo y
gírelo a la posición óptima (suelte el objetivo y ésteretorna). Gire el objetivo para confirmar que se bloquea(cada 20º).
n Apriete el tornillo circular de foco y conecte el cable delobjetivo a la cámara.
AansluitingGezien vanaf de soldeerzijde
1 Dempingsspoel - Blauw2 Dempingsspoel + Rode3 Stuurspoel + Wit4 Stuurspoel - Groen
VeiligheidWaarschuwing: De lens niet gebruiken om naarde zon te kijken. Dit kan leiden tot verlies vanhet gezichtsvermogen.Let op: De lens niet op de zon richten. Dit kanbrand veroorzaken.
DC-iris vari-focuslensDe DC-iris vari-focuslens heeft een instelbare focus enzoom.Montagen Schroef de lens op de camera tot hij volledig stopt.n Draai de schroef van de focusring los. Trek vervolgens
de lens naar voren en draai deze naar de optimalepositie (wanneer de lens wordt losgelaten, gaat dezeterug naar de uitgangspositie). Draai de lens terbevestiging dat deze wordt vergrendeld (iedere 20°).
n Draai de schroef van de focusring vast en sluit delenskabel aan op de camera.
CollegamentoVista dal lato saldatura
1 Bobina di smorzamento - Blu2 Bobina di smorzamento + Rosso3 Bobina di comando + Bianco4 Bobina di comando - Verde
SisurezzaPericolo: Non usare l’objettivo per guardare ilsole. Può causare cecità.Attenzione: Non puntare l’objettivo sul sole.Pericolo d’incendio.
Objettivo a focale variabile con diaframma DCL’objettivo a focale variabile con diaframma DC è dotatodi regolazione messa a fuoco e zoom.Montaggion Avvitare l’objettivo nella testa della telecamera fino al
bioccaggio completo.n Allentare la ghiera di messa a fuoco e, tirando in avanti
l’obiettivo, ruotarla nella posizione ottimale (rilasciarel’obiettivo che tornerà nella posizione originale).Ruotare l’obiettivo per confermare che è bloccato (ogni20°).
n Serrare la ghiera di messa a fuoco e collegare il cavodell’obiettivo alla macchina fotografica.
I TwNLE
Safety
Warning: Do not use the lens to look at the sun.It may cause loss of sight.
Attention: Do not direct the lens into the sun. Itmay cause a fire.
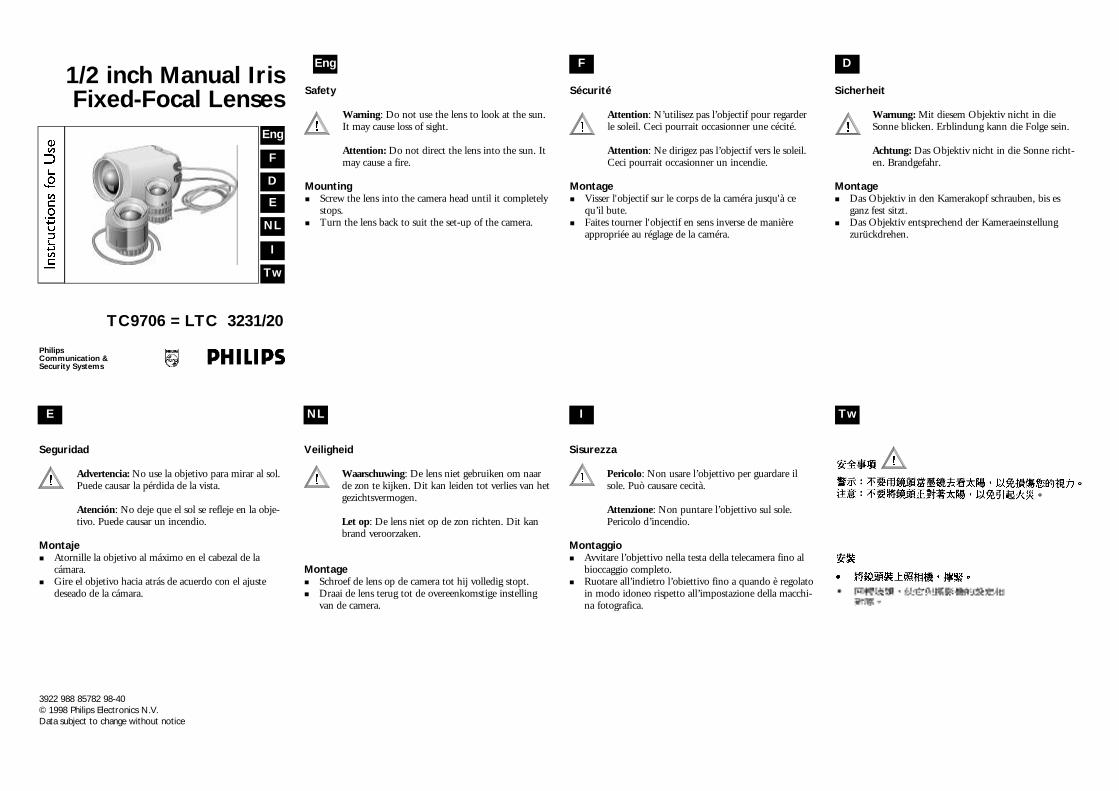
Mountingn Screw the lens into the camera head until it completely
stops.n Turn the lens back to suit the set-up of the camera.
Sécurité
Attention: N’utilisez pas l’objectif pour regarderle soleil. Ceci pourrait occasionner une cécité.
Attention: Ne dirigez pas l’objectif vers le soleil.Ceci pourrait occasionner un incendie.
Montagen Visser l'objectif sur le corps de la caméra jusqu'à ce
qu’il bute.n Faites tourner l'objectif en sens inverse de manière
appropriée au réglage de la caméra.
Sicherheit
Warnung: Mit diesem Objektiv nicht in dieSonne blicken. Erblindung kann die Folge sein.
Achtung: Das Objektiv nicht in die Sonne richt-en. Brandgefahr.
Montagen Das Objektiv in den Kamerakopf schrauben, bis es
ganz fest sitzt.n Das Objektiv entsprechend der Kameraeinstellung
zurückdrehen.
1/2 inch Manual Iris Fixed-Focal Lenses
TC9706 = LTC 3231/20
PhilipsCommunication &Security Systems
Eng
F
D
E
NL
I
Tw
3922 988 85782 98-40© 1998 Philips Electronics N.V.Data subject to change without notice
Eng F D
Seguridad
Advertencia: No use la objetivo para mirar al sol.Puede causar la pérdida de la vista.
Atención: No deje que el sol se refleje en la obje-tivo. Puede causar un incendio.
Montajen Atornille la objetivo al máximo en el cabezal de la
cámara.n Gire el objetivo hacia atrás de acuerdo con el ajuste
deseado de la cámara.
Veiligheid
Waarschuwing: De lens niet gebruiken om naarde zon te kijken. Dit kan leiden tot verlies van hetgezichtsvermogen.
Let op: De lens niet op de zon richten. Dit kanbrand veroorzaken.
Montagen Schroef de lens op de camera tot hij volledig stopt.n Draai de lens terug tot de overeenkomstige instelling
van de camera.
Sisurezza
Pericolo: Non usare l’objettivo per guardare ilsole. Può causare cecità.
Attenzione: Non puntare l’objettivo sul sole.Pericolo d’incendio.
Montaggion Avvitare l’objettivo nella testa della telecamera fino al
bioccaggio completo.n Ruotare all’indietro l’obiettivo fino a quando è regolato
in modo idoneo rispetto all’impostazione della macchi-na fotografica.
I TwNLE

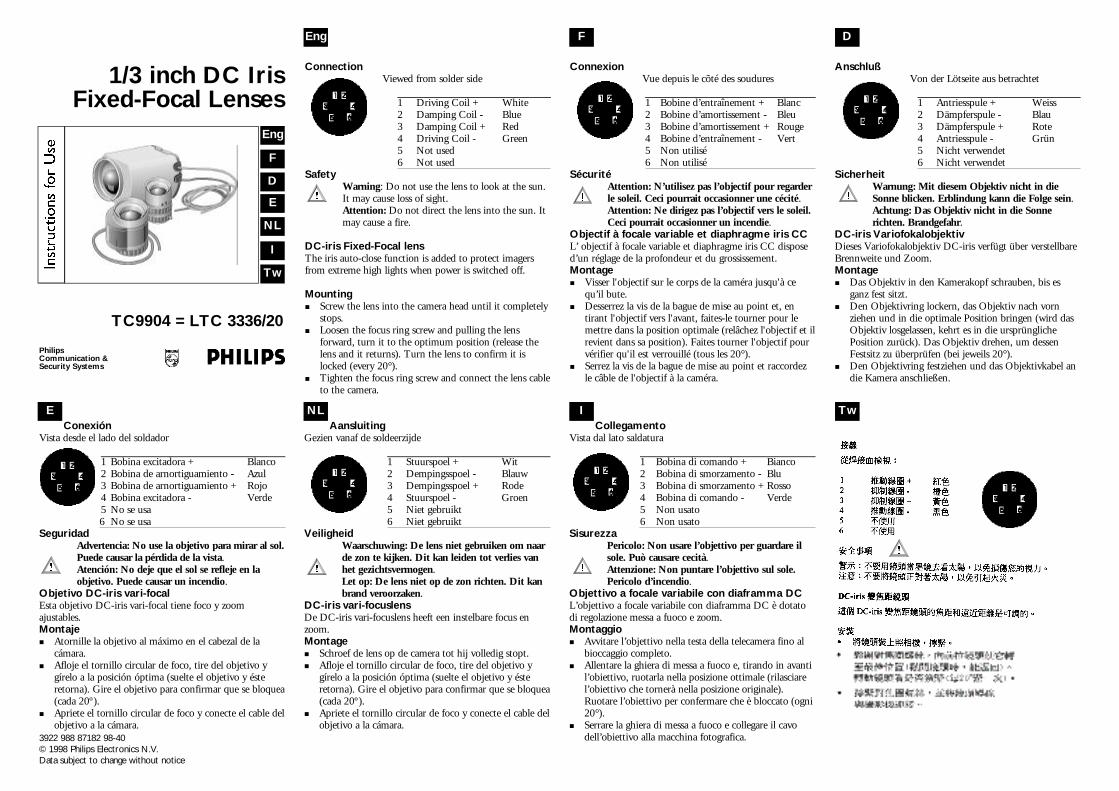
ConnectionViewed from solder side
1 Damping Coil - Blue2 Damping Coil + Red3 Driving Coil + White4 Driving Coil - Green
SafetyWarning: Do not use the lens to look at the sun.It may cause loss of sight.Attention: Do not direct the lens into the sun. Itmay cause a fire.
DC-iris Fixed-Focal lensThe iris auto-close function is added to protect imagersfrom extreme high lights when power is switched off.
Mountingn Screw the lens into the camera head until it completely
stops.n Turn the lens back to suit the set-up of the camera.n Connect the lens cable to the camera.
ConnexionVue depuis le cõté des soudures
1 Bobine d’amortissement - Blue2 Bobine d’amortissement + Rouge3 Bobine d’entraînement + Blanc4 Bobine d’entraînement - Vert
SécuritéAttention: N’utilisez pas l’objectif pour regarderle soleil. Ceci pourrait occasionner une cécité.Attention: Ne dirigez pas l’objectif vers le soleil.Ceci pourrait occasionner un incendie.
Objectif à focale variable et diaphragme iris CCL’ objectif à focale variable et diaphragme iris CC disposed’un réglage de la profondeur et du grossissement.
Montagen Visser l'objectif sur le corps de la caméra jusqu'à ce
qu’il bute.n Faites tourner l'objectif en sens inverse de manière
appropriée au réglage de la caméra.n Raccordez le câble de l'objectif à la caméra.
AnschlußVon der Lötseite aus betrachtet
1 Dämpferspule - Blau2 Dämpferspule + Rote3 Antriesspule + Weiss4 Antriesspule - Grün
SicherheitWarnung: Mit diesem Objektiv nicht in dieSonne blicken. Erblindung kann die Folge sein.Achtung: Das Objektiv nicht in die Sonnerichten. Brandgefahr.
DC-iris VariofokalobjektivDieses Variofokalobjektiv DC-iris verfügt über verstellbareBrennweite und Zoom.
Montagen Das Objektiv in den Kamerakopf schrauben, bis es
ganz fest sitzt.n Das Objektiv entsprechend der Kameraeinstellung
zurückdrehen.n Das Objektivkabel an die Kamera anschließen.
1/2 inch DC Iris Fixed-Focal Lenses
LDH 6704/03 = LTC 3234/20
PhilipsCommunication &Security Systems
Eng
F
D
E
NL
I
Tw
3922 988 86082 98-40© 1998 Philips Electronics N.V.Data subject to change without notice
Eng F D
ConexiónVista desde el lado del soldador
1 Bobina de arnortiguamiento - Azul2 Bobina de arnortiguamiento + Rojo3 Bobina excitadora + Blanco4 Bobina excitadora - Verde
SeguridadAdvertencia: No use la objetivo para mirar al sol.Puede causar la pérdida de la vista.Atención: No deje que el sol se refleje en laobjetivo. Puede causar un incendio.
Objetivo DC-iris vari-focalEsta objetivo DC-iris vari-focal tiene foco y zoomajustables.Montajen Atornille la objetivo al máximo en el cabezal de la
cámara.n Gire el objetivo hacia atrás de acuerdo con el ajuste
deseado de la cámara.n Conecte el cable del objetivo a la cámara.
AansluitingGezien vanaf de soldeerzijde
1 Dempingsspoel - Blauw2 Dempingsspoel + Rode3 Stuurspoel + Wit4 Stuurspoel - Groen
VeiligheidWaarschuwing: De lens niet gebruiken om naarde zon te kijken. Dit kan leiden tot verlies vanhet gezichtsvermogen.Let op: De lens niet op de zon richten. Dit kanbrand veroorzaken.
DC-iris vari-focuslensDe DC-iris vari-focuslens heeft een instelbare focus enzoom.Montagen Schroef de lens op de camera tot hij volledig stopt.n Draai de lens terug tot de overeenkomstige instelling
van de camera.n Sluit de lenskabel aan op de camera.
CollegamentoVista dal lato saldatura
1 Bobina di smorzamento - Blu2 Bobina di smorzamento + Rosso3 Bobina di comando + Bianco4 Bobina di comando - Verde
SisurezzaPericolo: Non usare l’objettivo per guardare ilsole. Può causare cecità.Attenzione: Non puntare l’objettivo sul sole.Pericolo d’incendio.
Objettivo a focale variabile con diaframma DCL’objettivo a focale variabile con diaframma DC è dotatodi regolazione messa a fuoco e zoom.Montaggion Avvitare l’objettivo nella testa della telecamera fino al
bioccaggio completo.n Ruotare all’indietro l’obiettivo fino a quando è regolato
in modo idoneo rispetto all’impostazione dellamacchina fotografica.
n Collegare il cavo dell’obiettivo alla macchinafotografica.
I TwNLE

Safety
Warning: Do not use the lens to look at the sun.It may cause loss of sight.
Attention: Do not direct the lens into the sun. Itmay cause a fire.
Mountingn Screw the lens into the camera head until it completely
stops.n Turn the lens back to suit the set-up of the camera.
Sécurité
Attention: N’utilisez pas l’objectif pour regarderle soleil. Ceci pourrait occasionner une cécité.
Attention: Ne dirigez pas l’objectif vers le soleil.Ceci pourrait occasionner un incendie.
Montagen Visser l'objectif sur le corps de la caméra jusqu'à ce
qu’il bute.n Faites tourner l'objectif en sens inverse de manière
appropriée au réglage de la caméra.
Sicherheit
Warnung: Mit diesem Objektiv nicht in dieSonne blicken. Erblindung kann die Folge sein.
Achtung: Das Objektiv nicht in die Sonne richt-en. Brandgefahr.
Montagen Das Objektiv in den Kamerakopf schrauben, bis es
ganz fest sitzt.n Das Objektiv entsprechend der Kameraeinstellung
zurückdrehen.
1/2 inch Manual Iris Fixed-Focal Lenses
TC9712 = LTC 3241/20
PhilipsCommunication &Security Systems
Eng
F
D
E
NL
I
Tw
3922 988 85882 98-40© 1998 Philips Electronics N.V.Data subject to change without notice
Eng F D
Seguridad
Advertencia: No use la objetivo para mirar al sol.Puede causar la pérdida de la vista.
Atención: No deje que el sol se refleje en la obje-tivo. Puede causar un incendio.
Montajen Atornille la objetivo al máximo en el cabezal de la
cámara.n Gire el objetivo hacia atrás de acuerdo con el ajuste
deseado de la cámara.
Veiligheid
Waarschuwing: De lens niet gebruiken om naarde zon te kijken. Dit kan leiden tot verlies van hetgezichtsvermogen.
Let op: De lens niet op de zon richten. Dit kanbrand veroorzaken.
Montagen Schroef de lens op de camera tot hij volledig stopt.n Draai de lens terug tot de overeenkomstige instelling
van de camera.
Sisurezza
Pericolo: Non usare l’objettivo per guardare ilsole. Può causare cecità.
Attenzione: Non puntare l’objettivo sul sole.Pericolo d’incendio.
Montaggion Avvitare l’objettivo nella testa della telecamera fino al
bioccaggio completo.n Ruotare all’indietro l’obiettivo fino a quando è regolato
in modo idoneo rispetto all’impostazione della macchi-na fotografica.
I TwNLE

ConnectionViewed from solder side
1 Damping Coil - Blue2 Damping Coil + Red3 Driving Coil + White4 Driving Coil - Green
SafetyWarning: Do not use the lens to look at the sun.It may cause loss of sight.Attention: Do not direct the lens into the sun. Itmay cause a fire.
DC-iris Fixed-Focal lensThe iris auto-close function is added to protect imagersfrom extreme high lights when power is switched off.
Mountingn Screw the lens into the camera head until it completely
stops.n Turn the lens back to suit the set-up of the camera.n Connect the lens cable to the camera.
ConnexionVue depuis le cõté des soudures
1 Bobine d’amortissement - Blue2 Bobine d’amortissement + Rouge3 Bobine d’entraînement + Blanc4 Bobine d’entraînement - Vert
SécuritéAttention: N’utilisez pas l’objectif pour regarderle soleil. Ceci pourrait occasionner une cécité.Attention: Ne dirigez pas l’objectif vers le soleil.Ceci pourrait occasionner un incendie.
Objectif à focale variable et diaphragme iris CCL’ objectif à focale variable et diaphragme iris CC disposed’un réglage de la profondeur et du grossissement.
Montagen Visser l'objectif sur le corps de la caméra jusqu'à ce
qu’il bute.n Faites tourner l'objectif en sens inverse de manière
appropriée au réglage de la caméra.n Raccordez le câble de l'objectif à la caméra.
AnschlußVon der Lötseite aus betrachtet
1 Dämpferspule - Blau2 Dämpferspule + Rote3 Antriesspule + Weiss4 Antriesspule - Grün
SicherheitWarnung: Mit diesem Objektiv nicht in dieSonne blicken. Erblindung kann die Folge sein.Achtung: Das Objektiv nicht in die Sonnerichten. Brandgefahr.
DC-iris VariofokalobjektivDieses Variofokalobjektiv DC-iris verfügt über verstellbareBrennweite und Zoom.
Montagen Das Objektiv in den Kamerakopf schrauben, bis es
ganz fest sitzt.n Das Objektiv entsprechend der Kameraeinstellung
zurückdrehen.n Das Objektivkabel an die Kamera anschließen.
1/2 inch DC Iris Fixed-Focal Lenses
LDH 6705/03 = LTC 3244/20
PhilipsCommunication &Security Systems
Eng
F
D
E
NL
I
Tw
3922 988 86182 98-40© 1998 Philips Electronics N.V.Data subject to change without notice
Eng F D
ConexiónVista desde el lado del soldador
1 Bobina de arnortiguamiento - Azul2 Bobina de arnortiguamiento + Rojo3 Bobina excitadora + Blanco4 Bobina excitadora - Verde
SeguridadAdvertencia: No use la objetivo para mirar al sol.Puede causar la pérdida de la vista.Atención: No deje que el sol se refleje en laobjetivo. Puede causar un incendio.
Objetivo DC-iris vari-focalEsta objetivo DC-iris vari-focal tiene foco y zoomajustables.Montajen Atornille la objetivo al máximo en el cabezal de la
cámara.n Gire el objetivo hacia atrás de acuerdo con el ajuste
deseado de la cámara.n Conecte el cable del objetivo a la cámara.
AansluitingGezien vanaf de soldeerzijde
1 Dempingsspoel - Blauw2 Dempingsspoel + Rode3 Stuurspoel + Wit4 Stuurspoel - Groen
VeiligheidWaarschuwing: De lens niet gebruiken om naarde zon te kijken. Dit kan leiden tot verlies vanhet gezichtsvermogen.Let op: De lens niet op de zon richten. Dit kanbrand veroorzaken.
DC-iris vari-focuslensDe DC-iris vari-focuslens heeft een instelbare focus enzoom.Montagen Schroef de lens op de camera tot hij volledig stopt.n Draai de lens terug tot de overeenkomstige instelling
van de camera.n Sluit de lenskabel aan op de camera.
CollegamentoVista dal lato saldatura
1 Bobina di smorzamento - Blu2 Bobina di smorzamento + Rosso3 Bobina di comando + Bianco4 Bobina di comando - Verde
SisurezzaPericolo: Non usare l’objettivo per guardare ilsole. Può causare cecità.Attenzione: Non puntare l’objettivo sul sole.Pericolo d’incendio.
Objettivo a focale variabile con diaframma DCL’objettivo a focale variabile con diaframma DC è dotatodi regolazione messa a fuoco e zoom.Montaggion Avvitare l’objettivo nella testa della telecamera fino al
bioccaggio completo.n Ruotare all’indietro l’obiettivo fino a quando è regolato
in modo idoneo rispetto all’impostazione dellamacchina fotografica.
n Collegare il cavo dell’obiettivo alla macchinafotografica.
I TwNLE

Safety
Warning: Do not use the lens to look at the sun.It may cause loss of sight.
Attention: Do not direct the lens into the sun. Itmay cause a fire.
Mountingn Screw the lens into the camera head until it completely
stops.n Loosen the focus ring screw and pulling the lens for-
ward, turn it to the optimum position (release the lensand it returns). Turn the lens to confirm it is locked(every 20°).
n Tighten the focus ring screw.
Sécurité
Attention: N’utilisez pas l’objectif pour regarderle soleil. Ceci pourrait occasionner une cécité.
Attention: Ne dirigez pas l’objectif vers le soleil.Ceci pourrait occasionner un incendie.
Montagen Visser l'objectif sur le corps de la caméra jusqu'à ce
qu’il bute.n Desserrez la vis de la bague de mise au point et, en
tirant l'objectif vers l'avant, faites-le tourner pour lemettre dans la position optimale (relâchez l'objectif et ilrevient dans sa position). Faites tourner l'objectif pourvérifier qu'il est verrouillé (tous les 20°).
n Resserrez la vis de la bague de mise au point.
Sicherheit
Warnung: Mit diesem Objektiv nicht in dieSonne blicken. Erblindung kann die Folge sein.
Achtung: Das Objektiv nicht in die Sonne richt-en. Brandgefahr.
Montagen Das Objektiv in den Kamerakopf schrauben, bis es
ganz fest sitzt.n Den Objektivring lockern, das Objektiv nach vorn
ziehen und in die optimale Position bringen (wird dasObjektiv losgelassen, kehrt es in die ursprünglichePosition zurück). Das Objektiv drehen, um dessenFestsitz zu überprüfen (bei jeweils 20°).
n · Den Objektivring festziehen.
1/3 inch Manual Iris Fixed-Focal Lenses
TC9702 = LTC 3311/20
PhilipsCommunication &Security Systems
Eng
F
D
E
NL
I
Tw
3922 988 86482 98-40© 1998 Philips Electronics N.V.Data subject to change without notice
Eng F D
Seguridad
Advertencia: No use la objetivo para mirar al sol.Puede causar la pérdida de la vista.
Atención: No deje que el sol se refleje en la obje-tivo. Puede causar un incendio.
Montajen Atornille la objetivo al máximo en el cabezal de la
cámara.n Afloje el tornillo circular de foco, tire del objetivo y
gírelo a la posición óptima (suelte el objetivo y ésteretorna). Gire el objetivo para confirmar que se bloquea(cada 20º).
n Apriete el tornillo circular de foco.
Veiligheid
Waarschuwing: De lens niet gebruiken om naarde zon te kijken. Dit kan leiden tot verlies van hetgezichtsvermogen.
Let op: De lens niet op de zon richten. Dit kanbrand veroorzaken.
Montagen Schroef de lens op de camera tot hij volledig stopt.n Draai de schroef van de focusring los. Trek vervolgens
de lens naar voren en draai deze naar de optimale posi-tie (wanneer de lens wordt losgelaten, gaat deze terugnaar de uitgangspositie). Draai de lens ter bevestigingdat deze wordt vergrendeld (iedere 20°).
n Draai de schroef van de focusring vast.
Sisurezza
Pericolo: Non usare l’objettivo per guardare ilsole. Può causare cecità.
Attenzione: Non puntare l’objettivo sul sole.Pericolo d’incendio.
Montaggion Avvitare l’objettivo nella testa della telecamera fino al
bioccaggio completo.n Allentare la ghiera di messa a fuoco e, tirando in avanti
l’obiettivo, ruotarla nella posizione ottimale (rilasciarel’obiettivo che tornerà nella posizione originale).Ruotare l’obiettivo per confermare che è bloccato (ogni20°).
n Serrare la ghiera di messa a fuoco.
I TwNLE

ConnectionViewed from solder side
1 Damping Coil - Blue2 Damping Coil + Red3 Driving Coil + White4 Driving Coil - Green
SafetyWarning: Do not use the lens to look at the sun.It may cause loss of sight.Attention: Do not direct the lens into the sun. Itmay cause a fire.
DC-iris Fixed-Focal lensThe iris auto-close function is added to protect imagersfrom extreme high lights when power is switched off.
Mountingn Screw the lens into the camera head until it completely
stops.n Loosen the focus ring screw and pulling the lens
forward, turn it to the optimum position (release thelens and it returns). Turn the lens to confirm it islocked (every 20°).
n Tighten the focus ring screw and connect the lens cableto the camera.
ConnexionVue depuis le cõté des soudures
1 Bobine d’amortissement - Blue2 Bobine d’amortissement + Rouge3 Bobine d’entraînement + Blanc4 Bobine d’entraînement - Vert
SécuritéAttention: N’utilisez pas l’objectif pour regarderle soleil. Ceci pourrait occasionner une cécité.Attention: Ne dirigez pas l’objectif vers le soleil.Ceci pourrait occasionner un incendie.
Objectif à focale variable et diaphragme iris CCL’ objectif à focale variable et diaphragme iris CC disposed’un réglage de la profondeur et du grossissement.
Montagen Visser l'objectif sur le corps de la caméra jusqu'à ce
qu’il bute.n Desserrez la vis de la bague de mise au point et, en
tirant l'objectif vers l'avant, faites-le tourner pour lemettre dans la position optimale (relâchez l'objectif et ilrevient dans sa position). Faites tourner l'objectif pourvérifier qu'il est verrouillé (tous les 20°).
n Serrez la vis de la bague de mise au point et raccordezle câble de l'objectif à la caméra.
AnschlußVon der Lötseite aus betrachtet
1 Dämpferspule - Blau2 Dämpferspule + Rote3 Antriesspule + Weiss4 Antriesspule - Grün
SicherheitWarnung: Mit diesem Objektiv nicht in dieSonne blicken. Erblindung kann die Folge sein.Achtung: Das Objektiv nicht in die Sonnerichten. Brandgefahr.
DC-iris VariofokalobjektivDieses Variofokalobjektiv DC-iris verfügt über verstellbareBrennweite und Zoom.
Montagen Das Objektiv in den Kamerakopf schrauben, bis es
ganz fest sitzt.n Den Objektivring lockern, das Objektiv nach vorn
ziehen und in die optimale Position bringen (wird dasObjektiv losgelassen, kehrt es in die ursprünglichePosition zurück). Das Objektiv drehen, um dessenFestsitz zu überprüfen (bei jeweils 20°).
n Den Objektivring festziehen und das Objektivkabel andie Kamera anschließen.
1/3 inch DC Iris Fixed-Focal Lenses
LDH 6740/03 = LTC 3314/20
PhilipsCommunication &Security Systems
Eng
F
D
E
NL
I
Tw
3922 988 86782 98-40© 1998 Philips Electronics N.V.Data subject to change without notice
Eng F D
ConexiónVista desde el lado del soldador
1 Bobina de arnortiguamiento - Azul2 Bobina de arnortiguamiento + Rojo3 Bobina excitadora + Blanco4 Bobina excitadora - Verde
SeguridadAdvertencia: No use la objetivo para mirar al sol.Puede causar la pérdida de la vista.Atención: No deje que el sol se refleje en laobjetivo. Puede causar un incendio.
Objetivo DC-iris vari-focalEsta objetivo DC-iris vari-focal tiene foco y zoomajustables.Montajen Atornille la objetivo al máximo en el cabezal de la
cámara.n Afloje el tornillo circular de foco, tire del objetivo y
gírelo a la posición óptima (suelte el objetivo y ésteretorna). Gire el objetivo para confirmar que se bloquea(cada 20º).
n Apriete el tornillo circular de foco y conecte el cable delobjetivo a la cámara.
AansluitingGezien vanaf de soldeerzijde
1 Dempingsspoel - Blauw2 Dempingsspoel + Rode3 Stuurspoel + Wit4 Stuurspoel - Groen
VeiligheidWaarschuwing: De lens niet gebruiken om naarde zon te kijken. Dit kan leiden tot verlies vanhet gezichtsvermogen.Let op: De lens niet op de zon richten. Dit kanbrand veroorzaken.
DC-iris vari-focuslensDe DC-iris vari-focuslens heeft een instelbare focus enzoom.Montagen Schroef de lens op de camera tot hij volledig stopt.n Afloje el tornillo circular de foco, tire del objetivo y
gírelo a la posición óptima (suelte el objetivo y ésteretorna). Gire el objetivo para confirmar que se bloquea(cada 20º).
n Apriete el tornillo circular de foco y conecte el cable delobjetivo a la cámara.
CollegamentoVista dal lato saldatura
1 Bobina di smorzamento - Blu2 Bobina di smorzamento + Rosso3 Bobina di comando + Bianco4 Bobina di comando - Verde
SisurezzaPericolo: Non usare l’objettivo per guardare ilsole. Può causare cecità.Attenzione: Non puntare l’objettivo sul sole.Pericolo d’incendio.
Objettivo a focale variabile con diaframma DCL’objettivo a focale variabile con diaframma DC è dotatodi regolazione messa a fuoco e zoom.Montaggion Avvitare l’objettivo nella testa della telecamera fino al
bioccaggio completo.n Allentare la ghiera di messa a fuoco e, tirando in avanti
l’obiettivo, ruotarla nella posizione ottimale (rilasciarel’obiettivo che tornerà nella posizione originale).Ruotare l’obiettivo per confermare che è bloccato (ogni20°).
n Serrare la ghiera di messa a fuoco e collegare il cavodell’obiettivo alla macchina fotografica.
I TwNLE

ConnectionViewed from solder side
1 Driving Coil + White2 Damping Coil - Blue3 Damping Coil + Red4 Driving Coil - Green5 Not used6 Not used
SafetyWarning: Do not use the lens to look at the sun.It may cause loss of sight.Attention: Do not direct the lens into the sun. Itmay cause a fire.
DC-iris Fixed-Focal lensThe iris auto-close function is added to protect imagersfrom extreme high lights when power is switched off.
Mountingn Screw the lens into the camera head until it completely
stops.n Loosen the focus ring screw and pulling the lens
forward, turn it to the optimum position (release thelens and it returns). Turn the lens to confirm it islocked (every 20°).
n Tighten the focus ring screw and connect the lens cableto the camera.
ConnexionVue depuis le cõté des soudures
1 Bobine d’entraînement + Blanc2 Bobine d’amortissement - Bleu3 Bobine d’amortissement + Rouge4 Bobine d’entraînement - Vert5 Non utilisé6 Non utilisé
SécuritéAttention: N’utilisez pas l’objectif pour regarderle soleil. Ceci pourrait occasionner une cécité.Attention: Ne dirigez pas l’objectif vers le soleil.Ceci pourrait occasionner un incendie.
Objectif à focale variable et diaphragme iris CCL’ objectif à focale variable et diaphragme iris CC disposed’un réglage de la profondeur et du grossissement.
Montagen Visser l'objectif sur le corps de la caméra jusqu'à ce
qu’il bute.n Desserrez la vis de la bague de mise au point et, en
tirant l'objectif vers l'avant, faites-le tourner pour lemettre dans la position optimale (relâchez l'objectif et ilrevient dans sa position). Faites tourner l'objectif pourvérifier qu'il est verrouillé (tous les 20°).
n Serrez la vis de la bague de mise au point et raccordezle câble de l'objectif à la caméra.
AnschlußVon der Lötseite aus betrachtet
1 Antriesspule + Weiss2 Dämpferspule - Blau3 Dämpferspule + Rote4 Antriesspule - Grün5 Nicht verwendet6 Nicht verwendet
SicherheitWarnung: Mit diesem Objektiv nicht in dieSonne blicken. Erblindung kann die Folge sein.Achtung: Das Objektiv nicht in die Sonnerichten. Brandgefahr.
DC-iris VariofokalobjektivDieses Variofokalobjektiv DC-iris verfügt über verstellbareBrennweite und Zoom.Montagen Das Objektiv in den Kamerakopf schrauben, bis es
ganz fest sitzt.n Den Objektivring lockern, das Objektiv nach vorn
ziehen und in die optimale Position bringen (wird dasObjektiv losgelassen, kehrt es in die ursprünglichePosition zurück). Das Objektiv drehen, um dessenFestsitz zu überprüfen (bei jeweils 20°).
n Den Objektivring festziehen und das Objektivkabel andie Kamera anschließen.
1/3 inch DC Iris Fixed-Focal Lenses
TC9902 = LTC 3316/20
PhilipsCommunication &Security Systems
Eng
F
D
E
NL
I
Tw
3922 988 87082 98-40© 1998 Philips Electronics N.V.
Eng F D
ConexiónVista desde el lado del soldador
1 Bobina excitadora + Blanco2 Bobina de arnortiguamiento - Azul3 Bobina de arnortiguamiento + Rojo4 Bobina excitadora - Verde5 No se usa6 No se usa
SeguridadAdvertencia: No use la objetivo para mirar al sol.Puede causar la pérdida de la vista.Atención: No deje que el sol se refleje en laobjetivo. Puede causar un incendio.
Objetivo DC-iris vari-focalEsta objetivo DC-iris vari-focal tiene foco y zoomajustables.Montajen Atornille la objetivo al máximo en el cabezal de la
cámara.n Afloje el tornillo circular de foco, tire del objetivo y
gírelo a la posición óptima (suelte el objetivo y ésteretorna). Gire el objetivo para confirmar que se bloquea(cada 20º).
n Apriete el tornillo circular de foco y conecte el cable delobjetivo a la cámara.
AansluitingGezien vanaf de soldeerzijde
1 Stuurspoel + Wit2 Dempingsspoel - Blauw3 Dempingsspoel + Rode4 Stuurspoel - Groen5 Niet gebruikt6 Niet gebruikt
VeiligheidWaarschuwing: De lens niet gebruiken om naarde zon te kijken. Dit kan leiden tot verlies vanhet gezichtsvermogen.Let op: De lens niet op de zon richten. Dit kanbrand veroorzaken.
DC-iris vari-focuslensDe DC-iris vari-focuslens heeft een instelbare focus enzoom.Montagen Schroef de lens op de camera tot hij volledig stopt.n Draai de schroef van de focusring los. Trek vervolgens
de lens naar voren en draai deze naar de optimalepositie (wanneer de lens wordt losgelaten, gaat dezeterug naar de uitgangspositie). Draai de lens terbevestiging dat deze wordt vergrendeld (iedere 20°).
n Draai de schroef van de focusring vast en sluit delenskabel aan op de camera.
CollegamentoVista dal lato saldatura
1 Bobina di comando + Bianco2 Bobina di smorzamento - Blu3 Bobina di smorzamento + Rosso4 Bobina di comando - Verde5 Non usato6 Non usato
SisurezzaPericolo: Non usare l’objettivo per guardare ilsole. Può causare cecità.Attenzione: Non puntare l’objettivo sul sole.Pericolo d’incendio.
Objettivo a focale variabile con diaframma DCL’objettivo a focale variabile con diaframma DC è dotatodi regolazione messa a fuoco e zoom.Montaggion Avvitare l’objettivo nella testa della telecamera fino al
bioccaggio completo.n Allentare la ghiera di messa a fuoco e, tirando in avanti
l’obiettivo, ruotarla nella posizione ottimale (rilasciarel’obiettivo che tornerà nella posizione originale).Ruotare l’obiettivo per confermare che è bloccato (ogni20°).
n Serrare la ghiera di messa a fuoco e collegare il cavodell’obiettivo alla macchina fotografica.
I TwNLE

Safety
Warning: Do not use the lens to look at the sun.It may cause loss of sight.
Attention: Do not direct the lens into the sun. Itmay cause a fire.
Mountingn Screw the lens into the camera head until it completely
stops.
Sécurité
Attention: N’utilisez pas l’objectif pour regarderle soleil. Ceci pourrait occasionner une cécité.
Attention: Ne dirigez pas l’objectif vers le soleil.Ceci pourrait occasionner un incendie.
Montagen Vissez l'objectif dans la tête de la caméra jusqu'à ce
qu'il bute complètement.
Sicherheit
Warnung: Mit diesem Objektiv nicht in dieSonne blicken. Erblindung kann die Folge sein.
Achtung: Das Objektiv nicht in die Sonne richt-en. Brandgefahr.
Montagen Das Objektiv in den Kamerakopf schrauben, bis es
ganz fest sitzt.
1/3 inch Fixed Iris Fixed-Focal Lenses
TC9783 = LTC 3320/20
PhilipsCommunication &Security Systems
Eng
F
D
E
NL
I
Tw
3922 988 86282 98-40© 1998 Philips Electronics N.V.Data subject to change without notice
Eng F D
Seguridad
Advertencia: No use la objetivo para mirar al sol.Puede causar la pérdida de la vista.
Atención: No deje que el sol se refleje en la obje-tivo. Puede causar un incendio.
Montajen Atornille el objetivo en el cabezal de la cámara hasta
que se detenga completamente.
Veiligheid
Waarschuwing: De lens niet gebruiken om naarde zon te kijken. Dit kan leiden tot verlies van hetgezichtsvermogen.
Let op: De lens niet op de zon richten. Dit kanbrand veroorzaken.
Montagen Schroef de lens zo ver mogelijk in de camera.
Sisurezza
Pericolo: Non usare l’objettivo per guardare ilsole. Può causare cecità.
Attenzione: Non puntare l’objettivo sul sole.Pericolo d’incendio.
Montaggion Avvitare l’obiettivo nella macchina fotografica fino a
quando smette di ruotare.
I TwNLE

Safety
Warning: Do not use the lens to look at the sun.It may cause loss of sight.
Attention: Do not direct the lens into the sun. Itmay cause a fire.
Mountingn Screw the lens into the camera head until it completely
stops.n Loosen the focus ring screw and pulling the lens for-
ward, turn it to the optimum position (release the lensand it returns). Turn the lens to confirm it is locked(every 20°).
n Tighten the focus ring screw.
Sécurité
Attention: N’utilisez pas l’objectif pour regarderle soleil. Ceci pourrait occasionner une cécité.
Attention: Ne dirigez pas l’objectif vers le soleil.Ceci pourrait occasionner un incendie.
Montagen Visser l'objectif sur le corps de la caméra jusqu'à ce
qu’il bute.n Desserrez la vis de la bague de mise au point et, en
tirant l'objectif vers l'avant, faites-le tourner pour lemettre dans la position optimale (relâchez l'objectif et ilrevient dans sa position). Faites tourner l'objectif pourvérifier qu'il est verrouillé (tous les 20°).
n Resserrez la vis de la bague de mise au point.
Sicherheit
Warnung: Mit diesem Objektiv nicht in dieSonne blicken. Erblindung kann die Folge sein.
Achtung: Das Objektiv nicht in die Sonne richt-en. Brandgefahr.
Montagen Das Objektiv in den Kamerakopf schrauben, bis es
ganz fest sitzt.n Den Objektivring lockern, das Objektiv nach vorn
ziehen und in die optimale Position bringen (wird dasObjektiv losgelassen, kehrt es in die ursprünglichePosition zurück). Das Objektiv drehen, um dessenFestsitz zu überprüfen (bei jeweils 20°).
n · Den Objektivring festziehen.
1/3 inch Manual Iris Fixed-Focal Lenses
TC9704 = LTC 3331/20
PhilipsCommunication &Security Systems
Eng
F
D
E
NL
I
Tw
3922 988 86582 98-40© 1998 Philips Electronics N.V.Data subject to change without notice
Eng F D
Seguridad
Advertencia: No use la objetivo para mirar al sol.Puede causar la pérdida de la vista.
Atención: No deje que el sol se refleje en la obje-tivo. Puede causar un incendio.
Montajen Atornille la objetivo al máximo en el cabezal de la
cámara.n Afloje el tornillo circular de foco, tire del objetivo y
gírelo a la posición óptima (suelte el objetivo y ésteretorna). Gire el objetivo para confirmar que se bloquea(cada 20º).
n Apriete el tornillo circular de foco.
Veiligheid
Waarschuwing: De lens niet gebruiken om naarde zon te kijken. Dit kan leiden tot verlies van hetgezichtsvermogen.
Let op: De lens niet op de zon richten. Dit kanbrand veroorzaken.
Montagen Schroef de lens op de camera tot hij volledig stopt.n Draai de schroef van de focusring los. Trek vervolgens
de lens naar voren en draai deze naar de optimale posi-tie (wanneer de lens wordt losgelaten, gaat deze terugnaar de uitgangspositie). Draai de lens ter bevestigingdat deze wordt vergrendeld (iedere 20°).
n Draai de schroef van de focusring vast.
Sisurezza
Pericolo: Non usare l’objettivo per guardare ilsole. Può causare cecità.
Attenzione: Non puntare l’objettivo sul sole.Pericolo d’incendio.
Montaggion Avvitare l’objettivo nella testa della telecamera fino al
bioccaggio completo.n Allentare la ghiera di messa a fuoco e, tirando in avanti
l’obiettivo, ruotarla nella posizione ottimale (rilasciarel’obiettivo che tornerà nella posizione originale).Ruotare l’obiettivo per confermare che è bloccato (ogni20°).
n Serrare la ghiera di messa a fuoco.
I TwNLE

ConnectionViewed from solder side
1 Damping Coil - Blue2 Damping Coil + Red3 Driving Coil + White4 Driving Coil - Green
SafetyWarning: Do not use the lens to look at the sun.It may cause loss of sight.Attention: Do not direct the lens into the sun. Itmay cause a fire.
DC-iris Fixed-Focal lensThe iris auto-close function is added to protect imagersfrom extreme high lights when power is switched off.
Mountingn Screw the lens into the camera head until it completely
stops.n Loosen the focus ring screw and pulling the lens
forward, turn it to the optimum position (release thelens and it returns). Turn the lens to confirm it islocked (every 20°).
n Tighten the focus ring screw and connect the lens cableto the camera.
ConnexionVue depuis le cõté des soudures
1 Bobine d’amortissement - Blue2 Bobine d’amortissement + Rouge3 Bobine d’entraînement + Blanc4 Bobine d’entraînement - Vert
SécuritéAttention: N’utilisez pas l’objectif pour regarderle soleil. Ceci pourrait occasionner une cécité.Attention: Ne dirigez pas l’objectif vers le soleil.Ceci pourrait occasionner un incendie.
Objectif à focale variable et diaphragme iris CCL’ objectif à focale variable et diaphragme iris CC disposed’un réglage de la profondeur et du grossissement.
Montagen Visser l'objectif sur le corps de la caméra jusqu'à ce
qu’il bute.n Desserrez la vis de la bague de mise au point et, en
tirant l'objectif vers l'avant, faites-le tourner pour lemettre dans la position optimale (relâchez l'objectif et ilrevient dans sa position). Faites tourner l'objectif pourvérifier qu'il est verrouillé (tous les 20°).
n Serrez la vis de la bague de mise au point et raccordezle câble de l'objectif à la caméra.
AnschlußVon der Lötseite aus betrachtet
1 Dämpferspule - Blau2 Dämpferspule + Rote3 Antriesspule + Weiss4 Antriesspule - Grün
SicherheitWarnung: Mit diesem Objektiv nicht in dieSonne blicken. Erblindung kann die Folge sein.Achtung: Das Objektiv nicht in die Sonnerichten. Brandgefahr.
DC-iris VariofokalobjektivDieses Variofokalobjektiv DC-iris verfügt über verstellbareBrennweite und Zoom.
Montagen Das Objektiv in den Kamerakopf schrauben, bis es
ganz fest sitzt.n Den Objektivring lockern, das Objektiv nach vorn
ziehen und in die optimale Position bringen (wird dasObjektiv losgelassen, kehrt es in die ursprünglichePosition zurück). Das Objektiv drehen, um dessenFestsitz zu überprüfen (bei jeweils 20°).
n Den Objektivring festziehen und das Objektivkabel andie Kamera anschließen.
1/3 inch DC Iris Fixed-Focal Lenses
LDH 6741/03 = LTC 3334/20
PhilipsCommunication &Security Systems
Eng
F
D
E
NL
I
Tw
3922 988 86882 98-40© 1998 Philips Electronics N.V.Data subject to change without notice
Eng F D
ConexiónVista desde el lado del soldador
1 Bobina de arnortiguamiento - Azul2 Bobina de arnortiguamiento + Rojo3 Bobina excitadora + Blanco4 Bobina excitadora - Verde
SeguridadAdvertencia: No use la objetivo para mirar al sol.Puede causar la pérdida de la vista.Atención: No deje que el sol se refleje en laobjetivo. Puede causar un incendio.
Objetivo DC-iris vari-focalEsta objetivo DC-iris vari-focal tiene foco y zoomajustables.Montajen Atornille la objetivo al máximo en el cabezal de la
cámara.n Afloje el tornillo circular de foco, tire del objetivo y
gírelo a la posición óptima (suelte el objetivo y ésteretorna). Gire el objetivo para confirmar que se bloquea(cada 20º).
n Apriete el tornillo circular de foco y conecte el cable delobjetivo a la cámara.
AansluitingGezien vanaf de soldeerzijde
1 Dempingsspoel - Blauw2 Dempingsspoel + Rode3 Stuurspoel + Wit4 Stuurspoel - Groen
VeiligheidWaarschuwing: De lens niet gebruiken om naarde zon te kijken. Dit kan leiden tot verlies vanhet gezichtsvermogen.Let op: De lens niet op de zon richten. Dit kanbrand veroorzaken.
DC-iris vari-focuslensDe DC-iris vari-focuslens heeft een instelbare focus enzoom.Montagen Schroef de lens op de camera tot hij volledig stopt.n Draai de schroef van de focusring los. Trek vervolgens
de lens naar voren en draai deze naar de optimalepositie (wanneer de lens wordt losgelaten, gaat dezeterug naar de uitgangspositie). Draai de lens terbevestiging dat deze wordt vergrendeld (iedere 20°).
n Draai de schroef van de focusring vast en sluit delenskabel aan op de camera.
CollegamentoVista dal lato saldatura
1 Bobina di smorzamento - Blu2 Bobina di smorzamento + Rosso3 Bobina di comando + Bianco4 Bobina di comando - Verde
SisurezzaPericolo: Non usare l’objettivo per guardare ilsole. Può causare cecità.Attenzione: Non puntare l’objettivo sul sole.Pericolo d’incendio.
Objettivo a focale variabile con diaframma DCL’objettivo a focale variabile con diaframma DC è dotatodi regolazione messa a fuoco e zoom.Montaggion Avvitare l’objettivo nella testa della telecamera fino al
bioccaggio completo.n Allentare la ghiera di messa a fuoco e, tirando in avanti
l’obiettivo, ruotarla nella posizione ottimale (rilasciarel’obiettivo che tornerà nella posizione originale).Ruotare l’obiettivo per confermare che è bloccato (ogni20°).
n Serrare la ghiera di messa a fuoco e collegare il cavodell’obiettivo alla macchina fotografica.
I TwNLE
ConnectionViewed from solder side
1 Driving Coil + White2 Damping Coil - Blue3 Damping Coil + Red4 Driving Coil - Green5 Not used6 Not used
SafetyWarning: Do not use the lens to look at the sun.It may cause loss of sight.Attention: Do not direct the lens into the sun. Itmay cause a fire.
DC-iris Fixed-Focal lensThe iris auto-close function is added to protect imagersfrom extreme high lights when power is switched off.
Mountingn Screw the lens into the camera head until it completely
stops.n Loosen the focus ring screw and pulling the lens
forward, turn it to the optimum position (release thelens and it returns). Turn the lens to confirm it islocked (every 20°).
n Tighten the focus ring screw and connect the lens cableto the camera.
ConnexionVue depuis le cõté des soudures
1 Bobine d’entraînement + Blanc2 Bobine d’amortissement - Bleu3 Bobine d’amortissement + Rouge4 Bobine d’entraînement - Vert5 Non utilisé6 Non utilisé
SécuritéAttention: N’utilisez pas l’objectif pour regarderle soleil. Ceci pourrait occasionner une cécité.Attention: Ne dirigez pas l’objectif vers le soleil.Ceci pourrait occasionner un incendie.
Objectif à focale variable et diaphragme iris CCL’ objectif à focale variable et diaphragme iris CC disposed’un réglage de la profondeur et du grossissement.Montagen Visser l'objectif sur le corps de la caméra jusqu'à ce
qu’il bute.n Desserrez la vis de la bague de mise au point et, en
tirant l'objectif vers l'avant, faites-le tourner pour lemettre dans la position optimale (relâchez l'objectif et ilrevient dans sa position). Faites tourner l'objectif pourvérifier qu'il est verrouillé (tous les 20°).
n Serrez la vis de la bague de mise au point et raccordezle câble de l'objectif à la caméra.
AnschlußVon der Lötseite aus betrachtet
1 Antriesspule + Weiss2 Dämpferspule - Blau3 Dämpferspule + Rote4 Antriesspule - Grün5 Nicht verwendet6 Nicht verwendet
SicherheitWarnung: Mit diesem Objektiv nicht in dieSonne blicken. Erblindung kann die Folge sein.Achtung: Das Objektiv nicht in die Sonnerichten. Brandgefahr.
DC-iris VariofokalobjektivDieses Variofokalobjektiv DC-iris verfügt über verstellbareBrennweite und Zoom.Montagen Das Objektiv in den Kamerakopf schrauben, bis es
ganz fest sitzt.n Den Objektivring lockern, das Objektiv nach vorn
ziehen und in die optimale Position bringen (wird dasObjektiv losgelassen, kehrt es in die ursprünglichePosition zurück). Das Objektiv drehen, um dessenFestsitz zu überprüfen (bei jeweils 20°).
n Den Objektivring festziehen und das Objektivkabel andie Kamera anschließen.
1/3 inch DC Iris Fixed-Focal Lenses
TC9904 = LTC 3336/20
PhilipsCommunication &Security Systems
Eng
F
D
E
NL
I
Tw
Eng F D
ConexiónVista desde el lado del soldador
1 Bobina excitadora + Blanco2 Bobina de arnortiguamiento - Azul3 Bobina de arnortiguamiento + Rojo4 Bobina excitadora - Verde5 No se usa6 No se usa
SeguridadAdvertencia: No use la objetivo para mirar al sol.Puede causar la pérdida de la vista.Atención: No deje que el sol se refleje en laobjetivo. Puede causar un incendio.
Objetivo DC-iris vari-focalEsta objetivo DC-iris vari-focal tiene foco y zoomajustables.Montajen Atornille la objetivo al máximo en el cabezal de la
cámara.n Afloje el tornillo circular de foco, tire del objetivo y
gírelo a la posición óptima (suelte el objetivo y ésteretorna). Gire el objetivo para confirmar que se bloquea(cada 20º).
n Apriete el tornillo circular de foco y conecte el cable delobjetivo a la cámara.
AansluitingGezien vanaf de soldeerzijde
1 Stuurspoel + Wit2 Dempingsspoel - Blauw3 Dempingsspoel + Rode4 Stuurspoel - Groen5 Niet gebruikt6 Niet gebruikt
VeiligheidWaarschuwing: De lens niet gebruiken om naarde zon te kijken. Dit kan leiden tot verlies vanhet gezichtsvermogen.Let op: De lens niet op de zon richten. Dit kanbrand veroorzaken.
DC-iris vari-focuslensDe DC-iris vari-focuslens heeft een instelbare focus enzoom.Montagen Schroef de lens op de camera tot hij volledig stopt.n Afloje el tornillo circular de foco, tire del objetivo y
gírelo a la posición óptima (suelte el objetivo y ésteretorna). Gire el objetivo para confirmar que se bloquea(cada 20º).
n Apriete el tornillo circular de foco y conecte el cable delobjetivo a la cámara.
CollegamentoVista dal lato saldatura
1 Bobina di comando + Bianco2 Bobina di smorzamento - Blu3 Bobina di smorzamento + Rosso4 Bobina di comando - Verde5 Non usato6 Non usato
SisurezzaPericolo: Non usare l’objettivo per guardare ilsole. Può causare cecità.Attenzione: Non puntare l’objettivo sul sole.Pericolo d’incendio.
Objettivo a focale variabile con diaframma DCL’objettivo a focale variabile con diaframma DC è dotatodi regolazione messa a fuoco e zoom.Montaggion Avvitare l’objettivo nella testa della telecamera fino al
bioccaggio completo.n Allentare la ghiera di messa a fuoco e, tirando in avanti
l’obiettivo, ruotarla nella posizione ottimale (rilasciarel’obiettivo che tornerà nella posizione originale).Ruotare l’obiettivo per confermare che è bloccato (ogni20°).
n Serrare la ghiera di messa a fuoco e collegare il cavodell’obiettivo alla macchina fotografica.
I TwNLE
3922 988 87182 98-40© 1998 Philips Electronics N.V.Data subject to change without notice
Safety
Warning: Do not use the lens to look at the sun.It may cause loss of sight.
Attention: Do not direct the lens into the sun. Itmay cause a fire.
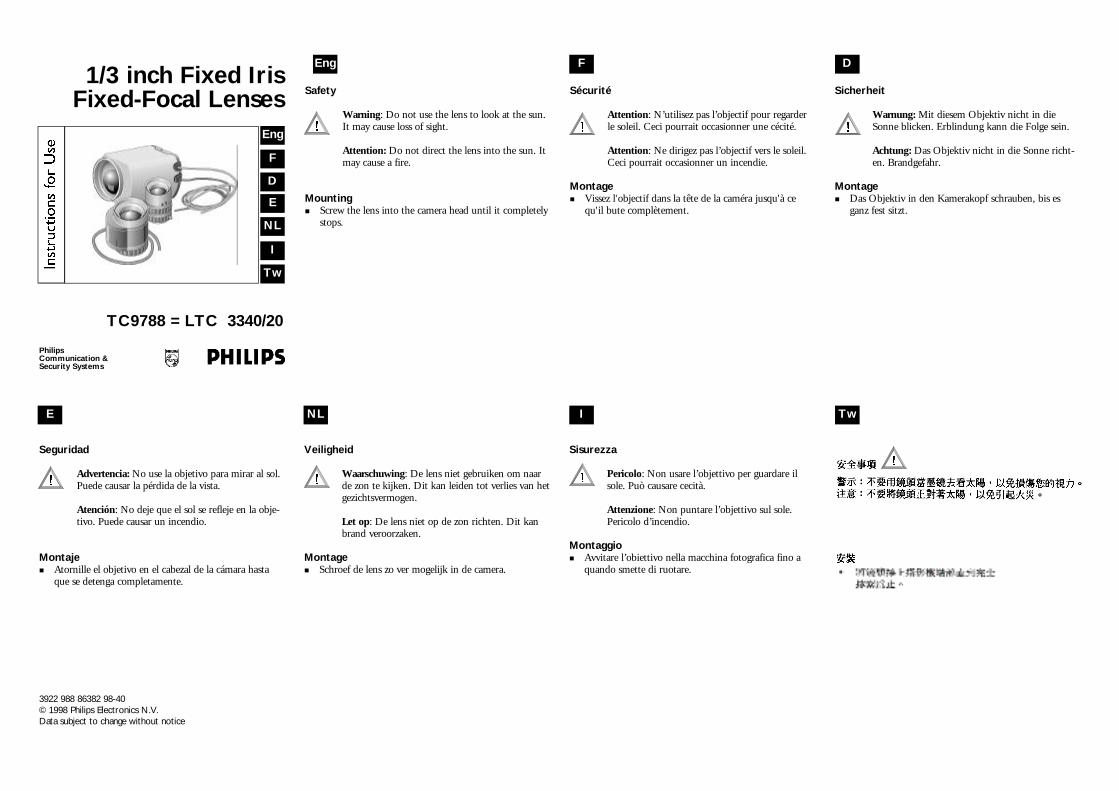
Mountingn Screw the lens into the camera head until it completely
stops.
Sécurité
Attention: N’utilisez pas l’objectif pour regarderle soleil. Ceci pourrait occasionner une cécité.
Attention: Ne dirigez pas l’objectif vers le soleil.Ceci pourrait occasionner un incendie.
Montagen Vissez l'objectif dans la tête de la caméra jusqu'à ce
qu'il bute complètement.
Sicherheit
Warnung: Mit diesem Objektiv nicht in dieSonne blicken. Erblindung kann die Folge sein.
Achtung: Das Objektiv nicht in die Sonne richt-en. Brandgefahr.
Montagen Das Objektiv in den Kamerakopf schrauben, bis es
ganz fest sitzt.
1/3 inch Fixed Iris Fixed-Focal Lenses
TC9788 = LTC 3340/20
PhilipsCommunication &Security Systems
Eng
F
D
E
NL
I
Tw
3922 988 86382 98-40© 1998 Philips Electronics N.V.Data subject to change without notice
Eng F D
Seguridad
Advertencia: No use la objetivo para mirar al sol.Puede causar la pérdida de la vista.
Atención: No deje que el sol se refleje en la obje-tivo. Puede causar un incendio.
Montajen Atornille el objetivo en el cabezal de la cámara hasta
que se detenga completamente.
Veiligheid
Waarschuwing: De lens niet gebruiken om naarde zon te kijken. Dit kan leiden tot verlies van hetgezichtsvermogen.
Let op: De lens niet op de zon richten. Dit kanbrand veroorzaken.
Montagen Schroef de lens zo ver mogelijk in de camera.
Sisurezza
Pericolo: Non usare l’objettivo per guardare ilsole. Può causare cecità.
Attenzione: Non puntare l’objettivo sul sole.Pericolo d’incendio.
Montaggion Avvitare l’obiettivo nella macchina fotografica fino a
quando smette di ruotare.
I TwNLE
Safety
Warning: Do not use the lens to look at the sun.It may cause loss of sight.
Attention: Do not direct the lens into the sun. Itmay cause a fire.
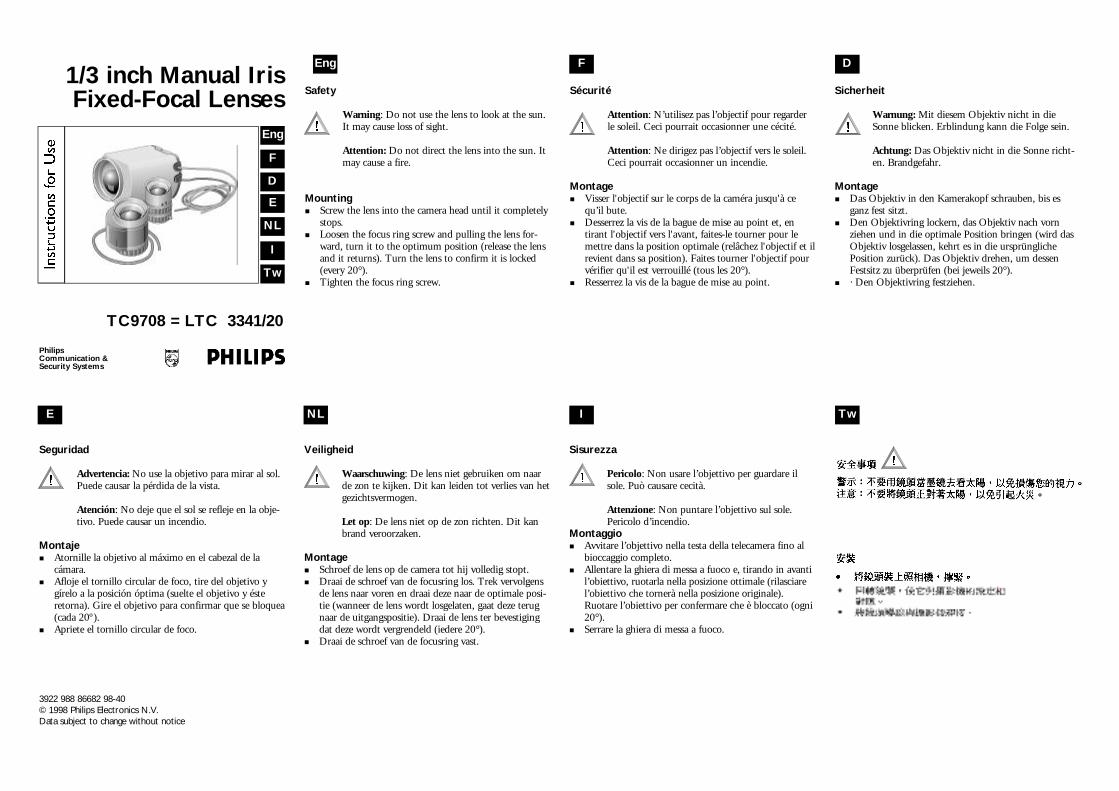
Mountingn Screw the lens into the camera head until it completely
stops.n Loosen the focus ring screw and pulling the lens for-
ward, turn it to the optimum position (release the lensand it returns). Turn the lens to confirm it is locked(every 20°).
n Tighten the focus ring screw.
Sécurité
Attention: N’utilisez pas l’objectif pour regarderle soleil. Ceci pourrait occasionner une cécité.
Attention: Ne dirigez pas l’objectif vers le soleil.Ceci pourrait occasionner un incendie.
Montagen Visser l'objectif sur le corps de la caméra jusqu'à ce
qu’il bute.n Desserrez la vis de la bague de mise au point et, en
tirant l'objectif vers l'avant, faites-le tourner pour lemettre dans la position optimale (relâchez l'objectif et ilrevient dans sa position). Faites tourner l'objectif pourvérifier qu'il est verrouillé (tous les 20°).
n Resserrez la vis de la bague de mise au point.
Sicherheit
Warnung: Mit diesem Objektiv nicht in dieSonne blicken. Erblindung kann die Folge sein.
Achtung: Das Objektiv nicht in die Sonne richt-en. Brandgefahr.
Montagen Das Objektiv in den Kamerakopf schrauben, bis es
ganz fest sitzt.n Den Objektivring lockern, das Objektiv nach vorn
ziehen und in die optimale Position bringen (wird dasObjektiv losgelassen, kehrt es in die ursprünglichePosition zurück). Das Objektiv drehen, um dessenFestsitz zu überprüfen (bei jeweils 20°).
n · Den Objektivring festziehen.
1/3 inch Manual Iris Fixed-Focal Lenses
TC9708 = LTC 3341/20
PhilipsCommunication &Security Systems
Eng
F
D
E
NL
I
Tw
3922 988 86682 98-40© 1998 Philips Electronics N.V.Data subject to change without notice
Eng F D
Seguridad
Advertencia: No use la objetivo para mirar al sol.Puede causar la pérdida de la vista.
Atención: No deje que el sol se refleje en la obje-tivo. Puede causar un incendio.
Montajen Atornille la objetivo al máximo en el cabezal de la
cámara.n Afloje el tornillo circular de foco, tire del objetivo y
gírelo a la posición óptima (suelte el objetivo y ésteretorna). Gire el objetivo para confirmar que se bloquea(cada 20º).
n Apriete el tornillo circular de foco.
Veiligheid
Waarschuwing: De lens niet gebruiken om naarde zon te kijken. Dit kan leiden tot verlies van hetgezichtsvermogen.
Let op: De lens niet op de zon richten. Dit kanbrand veroorzaken.
Montagen Schroef de lens op de camera tot hij volledig stopt.n Draai de schroef van de focusring los. Trek vervolgens
de lens naar voren en draai deze naar de optimale posi-tie (wanneer de lens wordt losgelaten, gaat deze terugnaar de uitgangspositie). Draai de lens ter bevestigingdat deze wordt vergrendeld (iedere 20°).
n Draai de schroef van de focusring vast.
Sisurezza
Pericolo: Non usare l’objettivo per guardare ilsole. Può causare cecità.
Attenzione: Non puntare l’objettivo sul sole.Pericolo d’incendio.
Montaggion Avvitare l’objettivo nella testa della telecamera fino al
bioccaggio completo.n Allentare la ghiera di messa a fuoco e, tirando in avanti
l’obiettivo, ruotarla nella posizione ottimale (rilasciarel’obiettivo che tornerà nella posizione originale).Ruotare l’obiettivo per confermare che è bloccato (ogni20°).
n Serrare la ghiera di messa a fuoco.
I TwNLE
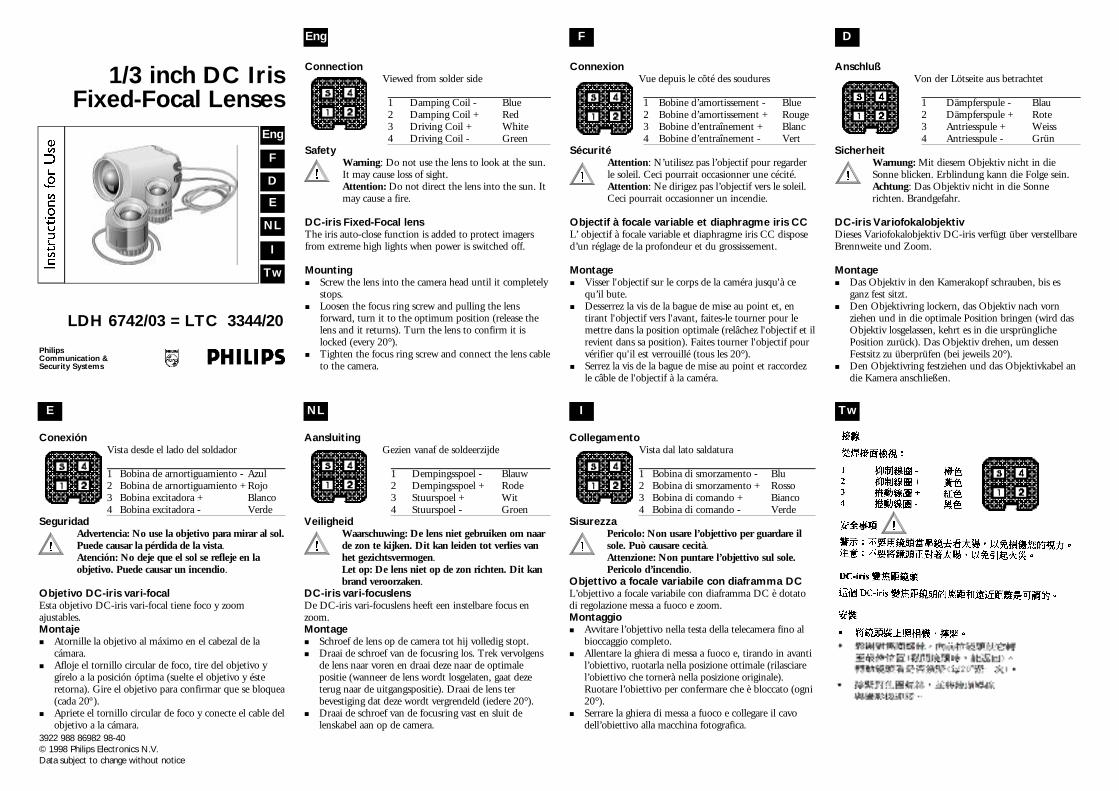
ConnectionViewed from solder side
1 Damping Coil - Blue2 Damping Coil + Red3 Driving Coil + White4 Driving Coil - Green
SafetyWarning: Do not use the lens to look at the sun.It may cause loss of sight.Attention: Do not direct the lens into the sun. Itmay cause a fire.
DC-iris Fixed-Focal lensThe iris auto-close function is added to protect imagersfrom extreme high lights when power is switched off.
Mountingn Screw the lens into the camera head until it completely
stops.n Loosen the focus ring screw and pulling the lens
forward, turn it to the optimum position (release thelens and it returns). Turn the lens to confirm it islocked (every 20°).
n Tighten the focus ring screw and connect the lens cableto the camera.
ConnexionVue depuis le cõté des soudures
1 Bobine d’amortissement - Blue2 Bobine d’amortissement + Rouge3 Bobine d’entraînement + Blanc4 Bobine d’entraînement - Vert
SécuritéAttention: N’utilisez pas l’objectif pour regarderle soleil. Ceci pourrait occasionner une cécité.Attention: Ne dirigez pas l’objectif vers le soleil.Ceci pourrait occasionner un incendie.
Objectif à focale variable et diaphragme iris CCL’ objectif à focale variable et diaphragme iris CC disposed’un réglage de la profondeur et du grossissement.
Montagen Visser l'objectif sur le corps de la caméra jusqu'à ce
qu’il bute.n Desserrez la vis de la bague de mise au point et, en
tirant l'objectif vers l'avant, faites-le tourner pour lemettre dans la position optimale (relâchez l'objectif et ilrevient dans sa position). Faites tourner l'objectif pourvérifier qu'il est verrouillé (tous les 20°).
n Serrez la vis de la bague de mise au point et raccordezle câble de l'objectif à la caméra.
AnschlußVon der Lötseite aus betrachtet
1 Dämpferspule - Blau2 Dämpferspule + Rote3 Antriesspule + Weiss4 Antriesspule - Grün
SicherheitWarnung: Mit diesem Objektiv nicht in dieSonne blicken. Erblindung kann die Folge sein.Achtung: Das Objektiv nicht in die Sonnerichten. Brandgefahr.
DC-iris VariofokalobjektivDieses Variofokalobjektiv DC-iris verfügt über verstellbareBrennweite und Zoom.
Montagen Das Objektiv in den Kamerakopf schrauben, bis es
ganz fest sitzt.n Den Objektivring lockern, das Objektiv nach vorn
ziehen und in die optimale Position bringen (wird dasObjektiv losgelassen, kehrt es in die ursprünglichePosition zurück). Das Objektiv drehen, um dessenFestsitz zu überprüfen (bei jeweils 20°).
n Den Objektivring festziehen und das Objektivkabel andie Kamera anschließen.
1/3 inch DC Iris Fixed-Focal Lenses
LDH 6742/03 = LTC 3344/20
PhilipsCommunication &Security Systems
Eng
F
D
E
NL
I
Tw
3922 988 86982 98-40© 1998 Philips Electronics N.V.Data subject to change without notice
Eng F D
ConexiónVista desde el lado del soldador
1 Bobina de arnortiguamiento - Azul2 Bobina de arnortiguamiento + Rojo3 Bobina excitadora + Blanco4 Bobina excitadora - Verde
SeguridadAdvertencia: No use la objetivo para mirar al sol.Puede causar la pérdida de la vista.Atención: No deje que el sol se refleje en laobjetivo. Puede causar un incendio.
Objetivo DC-iris vari-focalEsta objetivo DC-iris vari-focal tiene foco y zoomajustables.Montajen Atornille la objetivo al máximo en el cabezal de la
cámara.n Afloje el tornillo circular de foco, tire del objetivo y
gírelo a la posición óptima (suelte el objetivo y ésteretorna). Gire el objetivo para confirmar que se bloquea(cada 20º).
n Apriete el tornillo circular de foco y conecte el cable delobjetivo a la cámara.
AansluitingGezien vanaf de soldeerzijde
1 Dempingsspoel - Blauw2 Dempingsspoel + Rode3 Stuurspoel + Wit4 Stuurspoel - Groen
VeiligheidWaarschuwing: De lens niet gebruiken om naarde zon te kijken. Dit kan leiden tot verlies vanhet gezichtsvermogen.Let op: De lens niet op de zon richten. Dit kanbrand veroorzaken.
DC-iris vari-focuslensDe DC-iris vari-focuslens heeft een instelbare focus enzoom.Montagen Schroef de lens op de camera tot hij volledig stopt.n Draai de schroef van de focusring los. Trek vervolgens
de lens naar voren en draai deze naar de optimalepositie (wanneer de lens wordt losgelaten, gaat dezeterug naar de uitgangspositie). Draai de lens terbevestiging dat deze wordt vergrendeld (iedere 20°).
n Draai de schroef van de focusring vast en sluit delenskabel aan op de camera.
CollegamentoVista dal lato saldatura
1 Bobina di smorzamento - Blu2 Bobina di smorzamento + Rosso3 Bobina di comando + Bianco4 Bobina di comando - Verde
SisurezzaPericolo: Non usare l’objettivo per guardare ilsole. Può causare cecità.Attenzione: Non puntare l’objettivo sul sole.Pericolo d’incendio.
Objettivo a focale variabile con diaframma DCL’objettivo a focale variabile con diaframma DC è dotatodi regolazione messa a fuoco e zoom.Montaggion Avvitare l’objettivo nella testa della telecamera fino al
bioccaggio completo.n Allentare la ghiera di messa a fuoco e, tirando in avanti
l’obiettivo, ruotarla nella posizione ottimale (rilasciarel’obiettivo che tornerà nella posizione originale).Ruotare l’obiettivo per confermare che è bloccato (ogni20°).
n Serrare la ghiera di messa a fuoco e collegare il cavodell’obiettivo alla macchina fotografica.
I TwNLE

ConnectionViewed from solder side
1 Driving Coil + White2 Damping Coil - Blue3 Damping Coil + Red4 Driving Coil - Green5 Not used6 Not used
SafetyWarning: Do not use the lens to look at the sun.It may cause loss of sight.Attention: Do not direct the lens into the sun. Itmay cause a fire.
DC-iris Fixed-Focal lensThe iris auto-close function is added to protect imagersfrom extreme high lights when power is switched off.
Mountingn Screw the lens into the camera head until it completely
stops.n Loosen the focus ring screw and pulling the lens
forward, turn it to the optimum position (release thelens and it returns). Turn the lens to confirm it islocked (every 20°).
n Tighten the focus ring screw and connect the lens cableto the camera.
ConnexionVue depuis le cõté des soudures
1 Bobine d’entraînement + Blanc2 Bobine d’amortissement - Bleu3 Bobine d’amortissement + Rouge4 Bobine d’entraînement - Vert5 Non utilisé6 Non utilisé
SécuritéAttention: N’utilisez pas l’objectif pour regarderle soleil. Ceci pourrait occasionner une cécité.Attention: Ne dirigez pas l’objectif vers le soleil.Ceci pourrait occasionner un incendie.
Objectif à focale variable et diaphragme iris CCL’ objectif à focale variable et diaphragme iris CC disposed’un réglage de la profondeur et du grossissement.Montagen Visser l'objectif sur le corps de la caméra jusqu'à ce
qu’il bute.n Desserrez la vis de la bague de mise au point et, en
tirant l'objectif vers l'avant, faites-le tourner pour lemettre dans la position optimale (relâchez l'objectif et ilrevient dans sa position). Faites tourner l'objectif pourvérifier qu'il est verrouillé (tous les 20°).
n Serrez la vis de la bague de mise au point et raccordezle câble de l'objectif à la caméra.
AnschlußVon der Lötseite aus betrachtet
1 Antriesspule + Weiss2 Dämpferspule - Blau3 Dämpferspule + Rote4 Antriesspule - Grün5 Nicht verwendet6 Nicht verwendet
SicherheitWarnung: Mit diesem Objektiv nicht in dieSonne blicken. Erblindung kann die Folge sein.Achtung: Das Objektiv nicht in die Sonnerichten. Brandgefahr.
DC-iris VariofokalobjektivDieses Variofokalobjektiv DC-iris verfügt über verstellbareBrennweite und Zoom.Montagen Das Objektiv in den Kamerakopf schrauben, bis es
ganz fest sitzt.n Den Objektivring lockern, das Objektiv nach vorn
ziehen und in die optimale Position bringen (wird dasObjektiv losgelassen, kehrt es in die ursprünglichePosition zurück). Das Objektiv drehen, um dessenFestsitz zu überprüfen (bei jeweils 20°).
n Den Objektivring festziehen und das Objektivkabel andie Kamera anschließen.
1/3 inch DC Iris Fixed-Focal Lenses
TC9908 = LTC 3346/20
PhilipsCommunication &Security Systems
Eng
F
D
E
NL
I
Tw
Eng F D
ConexiónVista desde el lado del soldador
1 Bobina excitadora + Blanco2 Bobina de arnortiguamiento - Azul3 Bobina de arnortiguamiento + Rojo4 Bobina excitadora - Verde5 No se usa6 No se usa
SeguridadAdvertencia: No use la objetivo para mirar al sol.Puede causar la pérdida de la vista.Atención: No deje que el sol se refleje en laobjetivo. Puede causar un incendio.
Objetivo DC-iris vari-focalEsta objetivo DC-iris vari-focal tiene foco y zoomajustables.Montajen Atornille la objetivo al máximo en el cabezal de la
cámara.n Afloje el tornillo circular de foco, tire del objetivo y
gírelo a la posición óptima (suelte el objetivo y ésteretorna). Gire el objetivo para confirmar que se bloquea(cada 20º).
n Apriete el tornillo circular de foco y conecte el cable delobjetivo a la cámara.
AansluitingGezien vanaf de soldeerzijde
1 Stuurspoel + Wit2 Dempingsspoel - Blauw3 Dempingsspoel + Rode4 Stuurspoel - Groen5 Niet gebruikt6 Niet gebruikt
VeiligheidWaarschuwing: De lens niet gebruiken om naarde zon te kijken. Dit kan leiden tot verlies vanhet gezichtsvermogen.Let op: De lens niet op de zon richten. Dit kanbrand veroorzaken.
DC-iris vari-focuslensDe DC-iris vari-focuslens heeft een instelbare focus enzoom.Montagen Schroef de lens op de camera tot hij volledig stopt.n Afloje el tornillo circular de foco, tire del objetivo y
gírelo a la posición óptima (suelte el objetivo y ésteretorna). Gire el objetivo para confirmar que se bloquea(cada 20º).
n Apriete el tornillo circular de foco y conecte el cable delobjetivo a la cámara.
CollegamentoVista dal lato saldatura
1 Bobina di comando + Bianco2 Bobina di smorzamento - Blu3 Bobina di smorzamento + Rosso4 Bobina di comando - Verde5 Non usato6 Non usato
SisurezzaPericolo: Non usare l’objettivo per guardare ilsole. Può causare cecità.Attenzione: Non puntare l’objettivo sul sole.Pericolo d’incendio.
Objettivo a focale variabile con diaframma DCL’objettivo a focale variabile con diaframma DC è dotatodi regolazione messa a fuoco e zoom.Montaggion Avvitare l’objettivo nella testa della telecamera fino al
bioccaggio completo.n Allentare la ghiera di messa a fuoco e, tirando in avanti
l’obiettivo, ruotarla nella posizione ottimale (rilasciarel’obiettivo che tornerà nella posizione originale).Ruotare l’obiettivo per confermare che è bloccato (ogni20°).
n Serrare la ghiera di messa a fuoco e collegare il cavodell’obiettivo alla macchina fotografica.
I TwNLE
3922 988 87282 98-40© 1998 Philips Electronics N.V.Data subject to change without notice

Safety
Warning: Do not use the lens to look at the sun.It may cause loss of sight.
Attention: Do not direct the lens into the sun. Itmay cause a fire.
Manual Vari-Focal lensThis manual vari-focal lens has adjustable focus and zoom.
Mountingn Screw the lens into the camera head until it completely
stops.n Turn the lens back to suit the set-up of the camera.
Sécurité
Attention: N’utilisez pas l’objectif pour regarderle soleil. Ceci pourrait occasionner une cécité.
Attention: Ne dirigez pas l’objectif vers le soleil.Ceci pourrait occasionner un incendie.
Objectif vari-focale à manuelleCet objectif à focale variable manuelle dispose d’un réglagede la profondeur et du grossissement.
Montagen Visser l'objectif sur le corps de la caméra jusqu'à ce
qu’il bute.n Tournez l’objectif en sens inverse jusqu’à atteindre la
position correspondant au réglage de la caméra.
Sicherheit
Warnung: Mit diesem Objektiv nicht in dieSonne blicken. Erblindung kann die Folge sein.
Achtung: Das Objektiv nicht in die Sonne richt-en. Brandgefahr.
Manuelle VariofokalobjektivDieses manuelle Variofokalobjektiv verfügt über verstell-bare Brennweite und Zoom.
Montagen Das Objektiv in den Kamerakopf schrauben, bis es
ganz fest sitzt.n Das Objektiv entsprechend der Kamereinstellung
zurückdrehen.
1/3 inch Manual Iris Vari-Focal Lenses
LTC 3361/20
PhilipsCommunication &Security Systems
Eng
F
D
E
NL
I
Tw
3922 988 87381 97-49© 1997 Philips Electronics N.V.Data subject to change without notice
Eng F D
Seguridad
Advertencia: No use la objetivo para mirar al sol.Puede causar la pérdida de la vista.
Atención: No deje que el sol se refleje en la obje-tivo. Puede causar un incendio.
Objetivo de manual vari-focalEsta objetivo manual vari-focal tiene foco y zoom ajusta-bles.
Montajen Atornille la objetivo al máximo en el cabezal de la
cámara.n Destornille el objetivo según al ajuste de la cámara.
Veiligheid
Waarschuwing: De lens niet gebruiken om naarde zon te kijken. Dit kan leiden tot verlies van hetgezichtsvermogen.
Let op: De lens niet op de zon richten. Dit kanbrand veroorzaken.
Handbediende vari-focuslensDeze met de hand bediende vari-focuslens heeft een instel-bare focus en zoom.
Montagen Schroef de lens op de camera tot hij volledig stopt.n Draai de lens zodanig terug dat hij aansluit op de
instelling van de camera.
Sisurezza
Pericolo: Non usare l’objettivo per guardare ilsole. Può causare cecità.
Attenzione: Non puntare l’objettivo sul sole.Pericolo d’incendio.
Objettivo manualeQuesto objettivo manuale a focle variabile è dotato di rego-lazione messa a fuoco e zoom.
Montaggion Avvitare l’objettivo nella testa della telecamera fino al
bioccaggio completo.n Ruotare l’objettivo indietro per adattarlo alla dispo-
sizione della telecamera.
I TwNLE

Safety
Warning: Do not use the lens to look at the sun.It may cause loss of sight.
Attention: Do not direct the lens into the sun. Itmay cause a fire.
Manual Vari-Focal lensThis manual vari-focal lens has adjustable focus and zoom.
Mountingn Screw the lens into the camera head until it completely
stops.n Turn the lens back to suit the set-up of the camera.
Sécurité
Attention: N’utilisez pas l’objectif pour regarderle soleil. Ceci pourrait occasionner une cécité.
Attention: Ne dirigez pas l’objectif vers le soleil.Ceci pourrait occasionner un incendie.
Objectif vari-focale à manuelleCet objectif à focale variable manuelle dispose d’un réglagede la profondeur et du grossissement.
Montagen Visser l'objectif sur le corps de la caméra jusqu'à ce
qu’il bute.n Tournez l’objectif en sens inverse jusqu’à atteindre la
position correspondant au réglage de la caméra.
Sicherheit
Warnung: Mit diesem Objektiv nicht in dieSonne blicken. Erblindung kann die Folge sein.
Achtung: Das Objektiv nicht in die Sonne richt-en. Brandgefahr.
Manuelle VariofokalobjektivDieses manuelle Variofokalobjektiv verfügt über verstell-bare Brennweite und Zoom.
Montagen Das Objektiv in den Kamerakopf schrauben, bis es
ganz fest sitzt.n Das Objektiv entsprechend der Kamereinstellung
zurückdrehen.
1/3 inch Manual Iris Vari-Focal Lenses
LTC 3361/30
PhilipsCommunication &Security Systems
Eng
F
D
E
NL
I
Tw
3922 988 85381 97-47© 1997 Philips Electronics N.V.Data subject to change without notice
Eng F D
Seguridad
Advertencia: No use la objetivo para mirar al sol.Puede causar la pérdida de la vista.
Atención: No deje que el sol se refleje en la obje-tivo. Puede causar un incendio.
Objetivo de manual vari-focalEsta objetivo manual vari-focal tiene foco y zoom ajusta-bles.
Montajen Atornille la objetivo al máximo en el cabezal de la
cámara.n Destornille el objetivo según al ajuste de la cámara.
Veiligheid
Waarschuwing: De lens niet gebruiken om naarde zon te kijken. Dit kan leiden tot verlies van hetgezichtsvermogen.
Let op: De lens niet op de zon richten. Dit kanbrand veroorzaken.
Handbediende vari-focuslensDeze met de hand bediende vari-focuslens heeft een instel-bare focus en zoom.
Montagen Schroef de lens op de camera tot hij volledig stopt.n Draai de lens zodanig terug dat hij aansluit op de
instelling van de camera.
Sisurezza
Pericolo: Non usare l’objettivo per guardare ilsole. Può causare cecità.
Attenzione: Non puntare l’objettivo sul sole.Pericolo d’incendio.
Objettivo manualeQuesto objettivo manuale a focle variabile è dotato di rego-lazione messa a fuoco e zoom.
Montaggion Avvitare l’objettivo nella testa della telecamera fino al
bioccaggio completo.n Ruotare l’objettivo indietro per adattarlo alla dispo-
sizione della telecamera.
I TwNLE
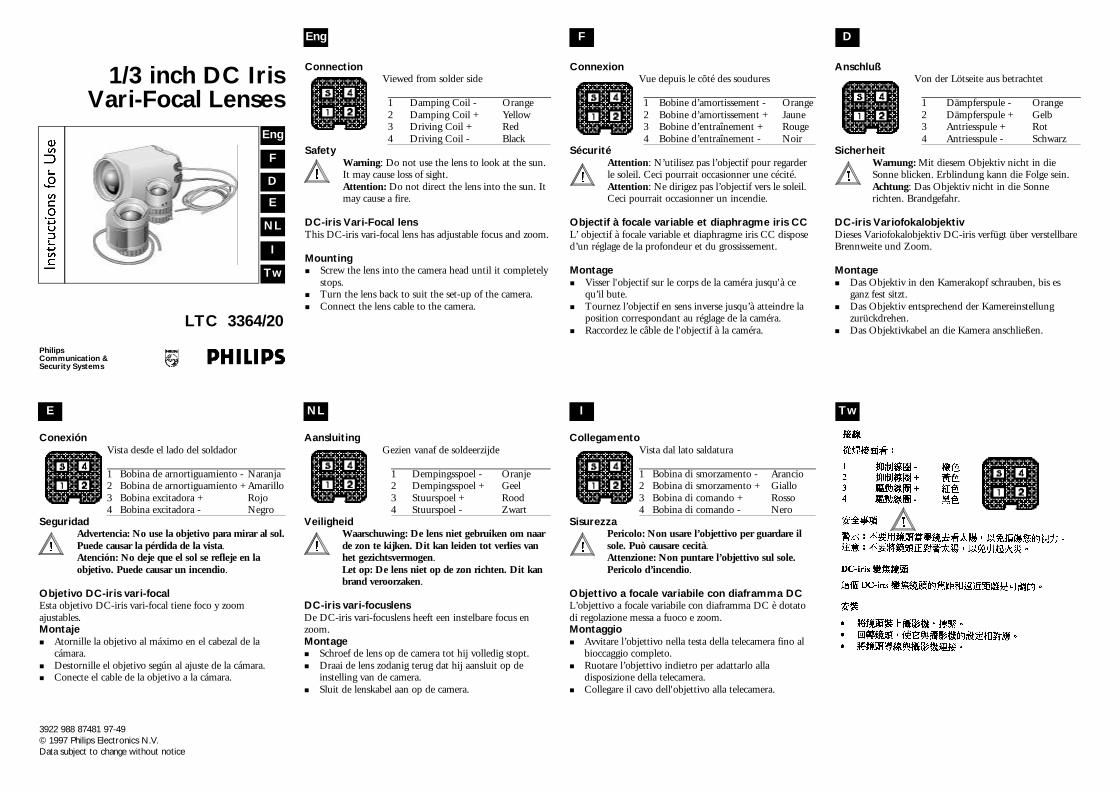
ConnectionViewed from solder side
1 Damping Coil - Orange2 Damping Coil + Yellow3 Driving Coil + Red4 Driving Coil - Black
SafetyWarning: Do not use the lens to look at the sun.It may cause loss of sight.Attention: Do not direct the lens into the sun. Itmay cause a fire.
DC-iris Vari-Focal lensThis DC-iris vari-focal lens has adjustable focus and zoom.
Mountingn Screw the lens into the camera head until it completely
stops.n Turn the lens back to suit the set-up of the camera.n Connect the lens cable to the camera.
ConnexionVue depuis le cõté des soudures
1 Bobine d’amortissement - Orange2 Bobine d’amortissement + Jaune3 Bobine d’entraînement + Rouge4 Bobine d’entraînement - Noir
SécuritéAttention: N’utilisez pas l’objectif pour regarderle soleil. Ceci pourrait occasionner une cécité.Attention: Ne dirigez pas l’objectif vers le soleil.Ceci pourrait occasionner un incendie.
Objectif à focale variable et diaphragme iris CCL’ objectif à focale variable et diaphragme iris CC disposed’un réglage de la profondeur et du grossissement.
Montagen Visser l'objectif sur le corps de la caméra jusqu'à ce
qu’il bute.n Tournez l’objectif en sens inverse jusqu’à atteindre la
position correspondant au réglage de la caméra.n Raccordez le câble de l'objectif à la caméra.
AnschlußVon der Lötseite aus betrachtet
1 Dämpferspule - Orange2 Dämpferspule + Gelb3 Antriesspule + Rot4 Antriesspule - Schwarz
SicherheitWarnung: Mit diesem Objektiv nicht in dieSonne blicken. Erblindung kann die Folge sein.Achtung: Das Objektiv nicht in die Sonnerichten. Brandgefahr.
DC-iris VariofokalobjektivDieses Variofokalobjektiv DC-iris verfügt über verstellbareBrennweite und Zoom.
Montagen Das Objektiv in den Kamerakopf schrauben, bis es
ganz fest sitzt.n Das Objektiv entsprechend der Kamereinstellung
zurückdrehen.n Das Objektivkabel an die Kamera anschließen.
1/3 inch DC Iris Vari-Focal Lenses
LTC 3364/20
PhilipsCommunication &Security Systems
Eng
F
D
E
NL
I
Tw
3922 988 87481 97-49© 1997 Philips Electronics N.V.Data subject to change without notice
Eng F D
ConexiónVista desde el lado del soldador
1 Bobina de arnortiguamiento - Naranja2 Bobina de arnortiguamiento + Amarillo3 Bobina excitadora + Rojo4 Bobina excitadora - Negro
SeguridadAdvertencia: No use la objetivo para mirar al sol.Puede causar la pérdida de la vista.Atención: No deje que el sol se refleje en laobjetivo. Puede causar un incendio.
Objetivo DC-iris vari-focalEsta objetivo DC-iris vari-focal tiene foco y zoomajustables.Montajen Atornille la objetivo al máximo en el cabezal de la
cámara.n Destornille el objetivo según al ajuste de la cámara.n Conecte el cable de la objetivo a la cámara.
AansluitingGezien vanaf de soldeerzijde
1 Dempingsspoel - Oranje2 Dempingsspoel + Geel3 Stuurspoel + Rood4 Stuurspoel - Zwart
VeiligheidWaarschuwing: De lens niet gebruiken om naarde zon te kijken. Dit kan leiden tot verlies vanhet gezichtsvermogen.Let op: De lens niet op de zon richten. Dit kanbrand veroorzaken.
DC-iris vari-focuslensDe DC-iris vari-focuslens heeft een instelbare focus enzoom.Montagen Schroef de lens op de camera tot hij volledig stopt.n Draai de lens zodanig terug dat hij aansluit op de
instelling van de camera.n Sluit de lenskabel aan op de camera.
CollegamentoVista dal lato saldatura
1 Bobina di smorzamento - Arancio2 Bobina di smorzamento + Giallo3 Bobina di comando + Rosso4 Bobina di comando - Nero
SisurezzaPericolo: Non usare l’objettivo per guardare ilsole. Può causare cecità.Attenzione: Non puntare l’objettivo sul sole.Pericolo d’incendio.
Objettivo a focale variabile con diaframma DCL’objettivo a focale variabile con diaframma DC è dotatodi regolazione messa a fuoco e zoom.Montaggion Avvitare l’objettivo nella testa della telecamera fino al
bioccaggio completo.n Ruotare l’objettivo indietro per adattarlo alla
disposizione della telecamera.n Collegare il cavo dell'objettivo alla telecamera.
I TwNLE

ConnectionViewed from solder side
1 Damping Coil - Orange2 Damping Coil + Yellow3 Driving Coil + Red4 Driving Coil - Black
SafetyWarning: Do not use the lens to look at the sun.It may cause loss of sight.Attention: Do not direct the lens into the sun. Itmay cause a fire.
DC-iris Vari-Focal lensThis DC-iris vari-focal lens has adjustable focus and zoom.
Mountingn Screw the lens into the camera head until it completely
stops.n Turn the lens back to suit the set-up of the camera.n Connect the lens cable to the camera.
ConnexionVue depuis le cõté des soudures
1 Bobine d’amortissement - Orange2 Bobine d’amortissement + Jaune3 Bobine d’entraînement + Rouge4 Bobine d’entraînement - Noir
SécuritéAttention: N’utilisez pas l’objectif pour regarderle soleil. Ceci pourrait occasionner une cécité.Attention: Ne dirigez pas l’objectif vers le soleil.Ceci pourrait occasionner un incendie.
Objectif à focale variable et diaphragme iris CCL’ objectif à focale variable et diaphragme iris CC disposed’un réglage de la profondeur et du grossissement.
Montagen Visser l'objectif sur le corps de la caméra jusqu'à ce
qu’il bute.n Tournez l’objectif en sens inverse jusqu’à atteindre la
position correspondant au réglage de la caméra.n Raccordez le câble de l'objectif à la caméra.
AnschlußVon der Lötseite aus betrachtet
1 Dämpferspule - Orange2 Dämpferspule + Gelb3 Antriesspule + Rot4 Antriesspule - Schwarz
SicherheitWarnung: Mit diesem Objektiv nicht in dieSonne blicken. Erblindung kann die Folge sein.Achtung: Das Objektiv nicht in die Sonnerichten. Brandgefahr.
DC-iris VariofokalobjektivDieses Variofokalobjektiv DC-iris verfügt über verstellbareBrennweite und Zoom.
Montagen Das Objektiv in den Kamerakopf schrauben, bis es
ganz fest sitzt.n Das Objektiv entsprechend der Kamereinstellung
zurückdrehen.n Das Objektivkabel an die Kamera anschließen.
1/3 inch DC Iris Vari-Focal Lenses
LTC 3364/30
PhilipsCommunication &Security Systems
Eng
F
D
E
NL
I
Tw
3922 988 85481 97-47© 1997 Philips Electronics N.V.Data subject to change without notice
Eng F D
ConexiónVista desde el lado del soldador
1 Bobina de arnortiguamiento - Naranja2 Bobina de arnortiguamiento + Amarillo3 Bobina excitadora + Rojo4 Bobina excitadora - Negro
SeguridadAdvertencia: No use la objetivo para mirar al sol.Puede causar la pérdida de la vista.Atención: No deje que el sol se refleje en laobjetivo. Puede causar un incendio.
Objetivo DC-iris vari-focalEsta objetivo DC-iris vari-focal tiene foco y zoomajustables.Montajen Atornille la objetivo al máximo en el cabezal de la
cámara.n Destornille el objetivo según al ajuste de la cámara.n Conecte el cable de la objetivo a la cámara.
AansluitingGezien vanaf de soldeerzijde
1 Dempingsspoel - Oranje2 Dempingsspoel + Geel3 Stuurspoel + Rood4 Stuurspoel - Zwart
VeiligheidWaarschuwing: De lens niet gebruiken om naarde zon te kijken. Dit kan leiden tot verlies vanhet gezichtsvermogen.Let op: De lens niet op de zon richten. Dit kanbrand veroorzaken.
DC-iris vari-focuslensDe DC-iris vari-focuslens heeft een instelbare focus enzoom.Montagen Schroef de lens op de camera tot hij volledig stopt.n Draai de lens zodanig terug dat hij aansluit op de
instelling van de camera.n Sluit de lenskabel aan op de camera.
CollegamentoVista dal lato saldatura
1 Bobina di smorzamento - Arancio2 Bobina di smorzamento + Giallo3 Bobina di comando + Rosso4 Bobina di comando - Nero
SisurezzaPericolo: Non usare l’objettivo per guardare ilsole. Può causare cecità.Attenzione: Non puntare l’objettivo sul sole.Pericolo d’incendio.
Objettivo a focale variabile con diaframma DCL’objettivo a focale variabile con diaframma DC è dotatodi regolazione messa a fuoco e zoom.Montaggion Avvitare l’objettivo nella testa della telecamera fino al
bioccaggio completo.n Ruotare l’objettivo indietro per adattarlo alla
disposizione della telecamera.n Collegare il cavo dell'objettivo alla telecamera.
I TwNLE

ConnectionViewed from solder side
1 Driving Coil + Red2 Damping Coil - Orange3 Damping Coil + Yellow4 Driving Coil - Black5 Not used6 Not used
SafetyWarning: Do not use the lens to look at the sun.It may cause loss of sight.Attention: Do not direct the lens into the sun. Itmay cause a fire.
DC-iris Vari-Focal lensThis DC-iris vari-focal lens has adjustable focus and zoom.
Mountingn Screw the lens into the camera head until it completely
stops.n Turn the lens back to suit the set-up of the camera.n Connect the lens cable to the camera.
ConnexionVue depuis le cõté des soudures
1 Bobine d’entraînement + Rouge2 Bobine d’amortissement - Orange3 Bobine d’amortissement + Jaune4 Bobine d’entraînement - Noir5 Non utilisé6 Non utilisé
SécuritéAttention: N’utilisez pas l’objectif pour regarderle soleil. Ceci pourrait occasionner une cécité.Attention: Ne dirigez pas l’objectif vers le soleil.Ceci pourrait occasionner un incendie.
Objectif à focale variable et diaphragme iris CCL’ objectif à focale variable et diaphragme iris CC disposed’un réglage de la profondeur et du grossissement.
Montagen Visser l'objectif sur le corps de la caméra jusqu'à ce
qu’il bute.n Tournez l’objectif en sens inverse jusqu’à atteindre la
position correspondant au réglage de la caméra.n Raccordez le câble de l'objectif à la caméra.
AnschlußVon der Lötseite aus betrachtet
1 Antriesspule + Rot2 Dämpferspule - Orange3 Dämpferspule + Gelb4 Antriesspule - Schwarz5 Nicht verwendet6 Nicht verwendet
SicherheitWarnung: Mit diesem Objektiv nicht in dieSonne blicken. Erblindung kann die Folge sein.Achtung: Das Objektiv nicht in die Sonnerichten. Brandgefahr.
DC-iris VariofokalobjektivDieses Variofokalobjektiv DC-iris verfügt über verstellbareBrennweite und Zoom.
Montagen Das Objektiv in den Kamerakopf schrauben, bis es
ganz fest sitzt.n Das Objektiv entsprechend der Kamereinstellung
zurückdrehen.n Das Objektivkabel an die Kamera anschließen.
1/3 inch DC Iris Vari-Focal Lenses
LTC 3366/20
PhilipsCommunication &Security Systems
Eng
F
D
E
NL
I
Tw
3922 988 87581 97-49© 1997 Philips Electronics N.V.Data subject to change without notice
Eng F D
ConexiónVista desde el lado del soldador
1 Bobina excitadora + Rojo2 Bobina de arnortiguamiento - Naranja3 Bobina de arnortiguamiento + Amarillo4 Bobina excitadora - Negro5 No se usa6 No se usa
SeguridadAdvertencia: No use la objetivo para mirar al sol.Puede causar la pérdida de la vista.Atención: No deje que el sol se refleje en laobjetivo. Puede causar un incendio.
Objetivo DC-iris vari-focalEsta objetivo DC-iris vari-focal tiene foco y zoomajustables.Montajen Atornille la objetivo al máximo en el cabezal de la
cámara.n Destornille el objetivo según al ajuste de la cámara.n Conecte el cable de la objetivo a la cámara.
AansluitingGezien vanaf de soldeerzijde
1 Stuurspoel + Rood2 Dempingsspoel - Oranje3 Dempingsspoel + Geel4 Stuurspoel - Zwart5 Niet gebruikt6 Niet gebruikt
VeiligheidWaarschuwing: De lens niet gebruiken om naarde zon te kijken. Dit kan leiden tot verlies vanhet gezichtsvermogen.Let op: De lens niet op de zon richten. Dit kanbrand veroorzaken.
DC-iris vari-focuslensDe DC-iris vari-focuslens heeft een instelbare focus enzoom.Montagen Schroef de lens op de camera tot hij volledig stopt.n Draai de lens zodanig terug dat hij aansluit op de
instelling van de camera.n Sluit de lenskabel aan op de camera.
CollegamentoVista dal lato saldatura
1 Bobina di comando + Rosso2 Bobina di smorzamento - Arancio3 Bobina di smorzamento + Giallo4 Bobina di comando - Nero5 Non usato6 Non usato
SisurezzaPericolo: Non usare l’objettivo per guardare ilsole. Può causare cecità.Attenzione: Non puntare l’objettivo sul sole.Pericolo d’incendio.
Objettivo a focale variabile con diaframma DCL’objettivo a focale variabile con diaframma DC è dotatodi regolazione messa a fuoco e zoom.Montaggion Avvitare l’objettivo nella testa della telecamera fino al
bioccaggio completo.n Ruotare l’objettivo indietro per adattarlo alla
disposizione della telecamera.n Collegare il cavo dell'objettivo alla telecamera.
I TwNLE

ConnectionViewed from solder side
1 Driving Coil + Red2 Damping Coil - Orange3 Damping Coil + Yellow4 Driving Coil - Black5 Not used6 Not used
SafetyWarning: Do not use the lens to look at the sun.It may cause loss of sight.Attention: Do not direct the lens into the sun. Itmay cause a fire.
DC-iris Vari-Focal lensThis DC-iris vari-focal lens has adjustable focus and zoom.
Mountingn Screw the lens into the camera head until it completely
stops.n Turn the lens back to suit the set-up of the camera.n Connect the lens cable to the camera.
ConnexionVue depuis le cõté des soudures
1 Bobine d’entraînement + Rouge2 Bobine d’amortissement - Orange3 Bobine d’amortissement + Jaune4 Bobine d’entraînement - Noir5 Non utilisé6 Non utilisé
SécuritéAttention: N’utilisez pas l’objectif pour regarderle soleil. Ceci pourrait occasionner une cécité.Attention: Ne dirigez pas l’objectif vers le soleil.Ceci pourrait occasionner un incendie.
Objectif à focale variable et diaphragme iris CCL’ objectif à focale variable et diaphragme iris CC disposed’un réglage de la profondeur et du grossissement.
Montagen Visser l'objectif sur le corps de la caméra jusqu'à ce
qu’il bute.n Tournez l’objectif en sens inverse jusqu’à atteindre la
position correspondant au réglage de la caméra.n Raccordez le câble de l'objectif à la caméra.
AnschlußVon der Lötseite aus betrachtet
1 Antriesspule + Rot2 Dämpferspule - Orange3 Dämpferspule + Gelb4 Antriesspule - Schwarz5 Nicht verwendet6 Nicht verwendet
SicherheitWarnung: Mit diesem Objektiv nicht in dieSonne blicken. Erblindung kann die Folge sein.Achtung: Das Objektiv nicht in die Sonnerichten. Brandgefahr.
DC-iris VariofokalobjektivDieses Variofokalobjektiv DC-iris verfügt über verstellbareBrennweite und Zoom.
Montagen Das Objektiv in den Kamerakopf schrauben, bis es
ganz fest sitzt.n Das Objektiv entsprechend der Kamereinstellung
zurückdrehen.n Das Objektivkabel an die Kamera anschließen.
1/3 inch DC Iris Vari-Focal Lenses
LTC 3366/30
PhilipsCommunication &Security Systems
Eng
F
D
E
NL
I
Tw
3922 988 85581 97-47© 1997 Philips Electronics N.V.Data subject to change without notice
Eng F D
ConexiónVista desde el lado del soldador
1 Bobina excitadora + Rojo2 Bobina de arnortiguamiento - Naranja3 Bobina de arnortiguamiento + Amarillo4 Bobina excitadora - Negro5 No se usa6 No se usa
SeguridadAdvertencia: No use la objetivo para mirar al sol.Puede causar la pérdida de la vista.Atención: No deje que el sol se refleje en laobjetivo. Puede causar un incendio.
Objetivo DC-iris vari-focalEsta objetivo DC-iris vari-focal tiene foco y zoomajustables.Montajen Atornille la objetivo al máximo en el cabezal de la
cámara.n Destornille el objetivo según al ajuste de la cámara.n Conecte el cable de la objetivo a la cámara.
AansluitingGezien vanaf de soldeerzijde
1 Stuurspoel + Rood2 Dempingsspoel - Oranje3 Dempingsspoel + Geel4 Stuurspoel - Zwart5 Niet gebruikt6 Niet gebruikt
VeiligheidWaarschuwing: De lens niet gebruiken om naarde zon te kijken. Dit kan leiden tot verlies vanhet gezichtsvermogen.Let op: De lens niet op de zon richten. Dit kanbrand veroorzaken.
DC-iris vari-focuslensDe DC-iris vari-focuslens heeft een instelbare focus enzoom.Montagen Schroef de lens op de camera tot hij volledig stopt.n Draai de lens zodanig terug dat hij aansluit op de
instelling van de camera.n Sluit de lenskabel aan op de camera.
CollegamentoVista dal lato saldatura
1 Bobina di comando + Rosso2 Bobina di smorzamento - Arancio3 Bobina di smorzamento + Giallo4 Bobina di comando - Nero5 Non usato6 Non usato
SisurezzaPericolo: Non usare l’objettivo per guardare ilsole. Può causare cecità.Attenzione: Non puntare l’objettivo sul sole.Pericolo d’incendio.
Objettivo a focale variabile con diaframma DCL’objettivo a focale variabile con diaframma DC è dotatodi regolazione messa a fuoco e zoom.Montaggion Avvitare l’objettivo nella testa della telecamera fino al
bioccaggio completo.n Ruotare l’objettivo indietro per adattarlo alla
disposizione della telecamera.n Collegare il cavo dell'objettivo alla telecamera.
I TwNLE