12 steps required for successful rice production
DESCRIPTION
12 Steps Required for Successful Rice ProductionTRANSCRIPT
12 Steps for Successful Rice Production
12 Steps for Successful Rice
Production

12 Steps for Successful Rice Production
Contents
Step 1: Use a Crop Calendar
Step 2: Choose the best variety
Step 3: Use the best quality seed
Step 4: Prepare and level the fields well
Step 5: Plant on time
Step 6: Weed early
Step 7: Fertilizer to maximize returns
Step 8: Use water efficiency
Step 9:. Harvest on time
Step 10: Store safely
Step 11: Mill efficiently
Step 12: Understand the market
12 Steps for Successful Rice Production
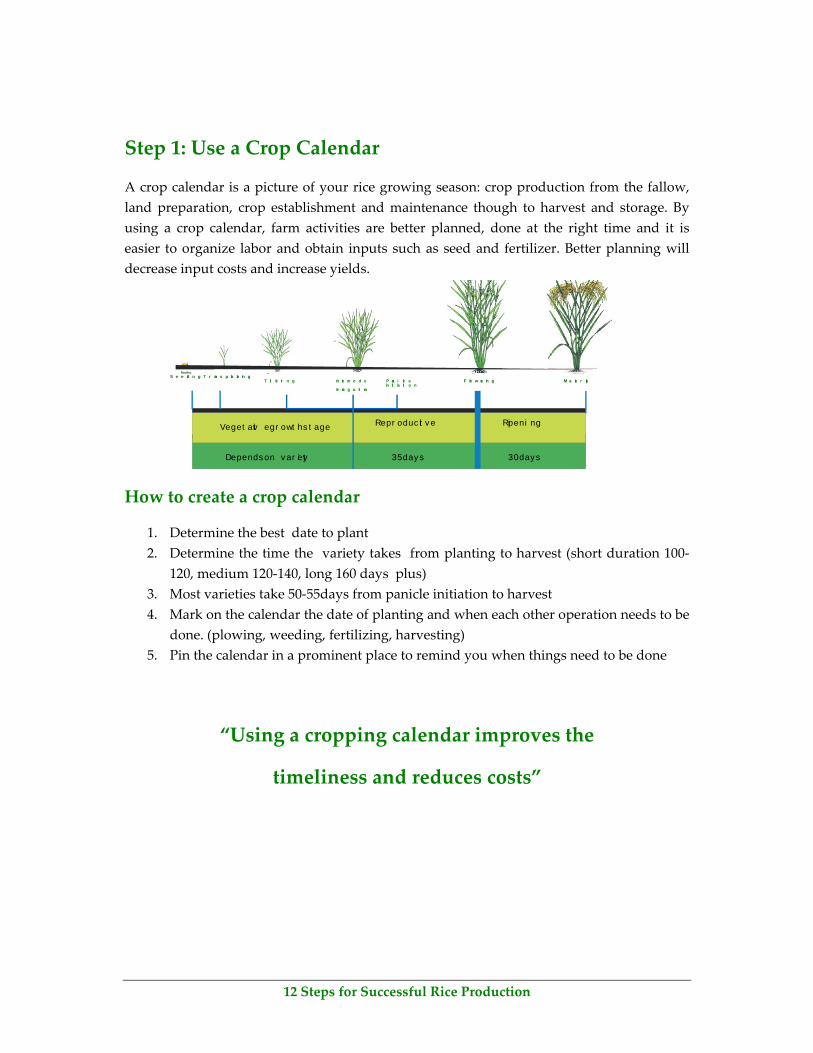
T il le ri n g P an i cl e in it ia ti o n
In te rn o d e
el on g a ti on
S e e di n g T r an s p la nt in g
Veget ativ e gr owt h s t age Repr oduc ti v e Ripeni ng
30 days Depends on v ar iety
F lo w er in g M a tu r ity
35 day s
Step 1: Use a Crop Calendar
A crop calendar is a picture of your rice growing season: crop production from the fallow,
land preparation, crop establishment and maintenance though to harvest and storage. By
using a crop calendar, farm activities are better planned, done at the right time and it is
easier to organize labor and obtain inputs such as seed and fertilizer. Better planning will
decrease input costs and increase yields.
How to create a crop calendar
1. Determine the best date to plant
2. Determine the time the variety takes from planting to harvest (short duration 100‐
120, medium 120‐140, long 160 days plus)
3. Most varieties take 50‐55days from panicle initiation to harvest
4. Mark on the calendar the date of planting and when each other operation needs to be
done. (plowing, weeding, fertilizing, harvesting)
5. Pin the calendar in a prominent place to remind you when things need to be done
“Using a cropping calendar improves the
timeliness and reduces costs”
12 Steps for Successful Rice Production
STEP 2: Choose the best variety
The most suitable variety is the one that best meets the farmer and the consumer’s
needs. It may not always give the highest yield and will be influenced by availability
water, either from rain or irrigation, soil type, and field elevation and whether the rice
will be sold or consumed at home
Select a variety that suits your growing conditions.
Varieties should be selected that have good yield potential, resistance to disease, good
eating qualities, high milling yield and are suitable for the market. When selecting a
variety check on the:
Crop duration
Long duration varieties (160 days plus) suitable for irrigated areas or flood
prone areas
Medium duration varieties (120‐140days) suitable for both rain fed and irrigated
areas
Short term varieties (less than 120days) suitable for drought prone areas or for
double cropping.
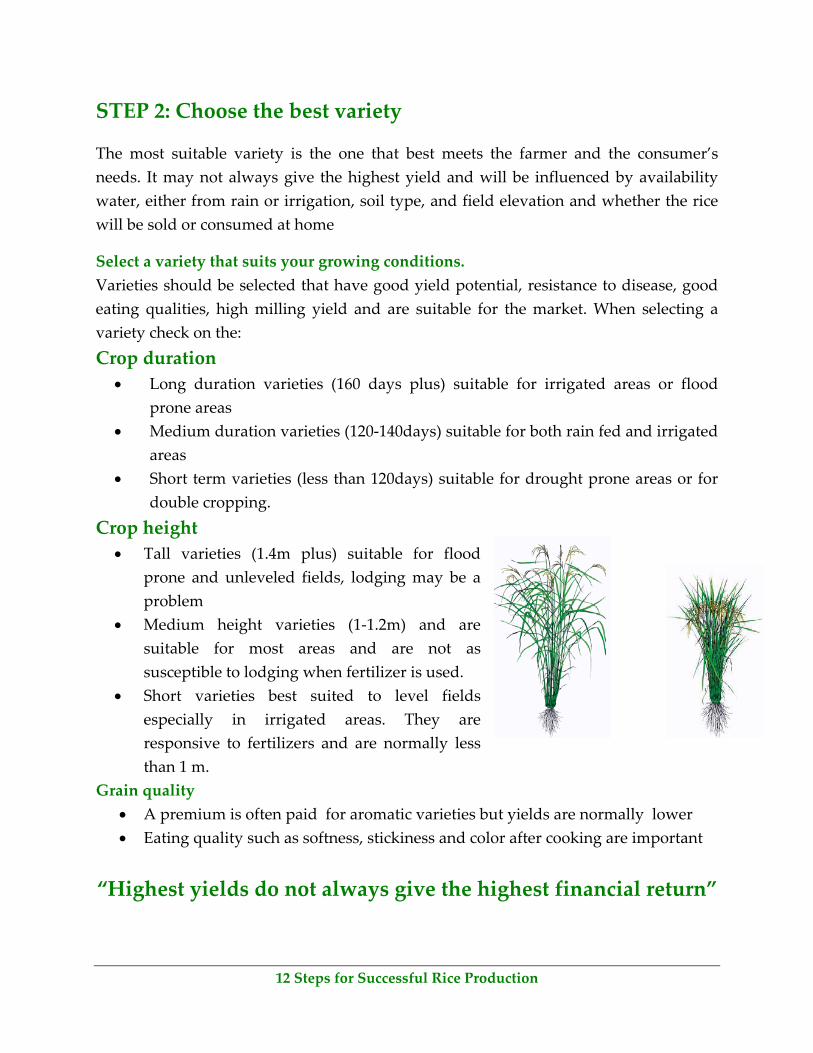
Crop height
Tall varieties (1.4m plus) suitable for flood
prone and unleveled fields, lodging may be a
problem
Medium height varieties (1‐1.2m) and are
suitable for most areas and are not as
susceptible to lodging when fertilizer is used.
Short varieties best suited to level fields
especially in irrigated areas. They are
responsive to fertilizers and are normally less
than 1 m.
Grain quality
A premium is often paid for aromatic varieties but yields are normally lower
Eating quality such as softness, stickiness and color after cooking are important
“Highest yields do not always give the highest financial return”
12 Steps for Successful Rice Production
STEP 3: Use the best quality seed
Good quality seed reduces the required seeding rate, produces strong healthy seedlings
which results in a more uniform crop and higher yields.
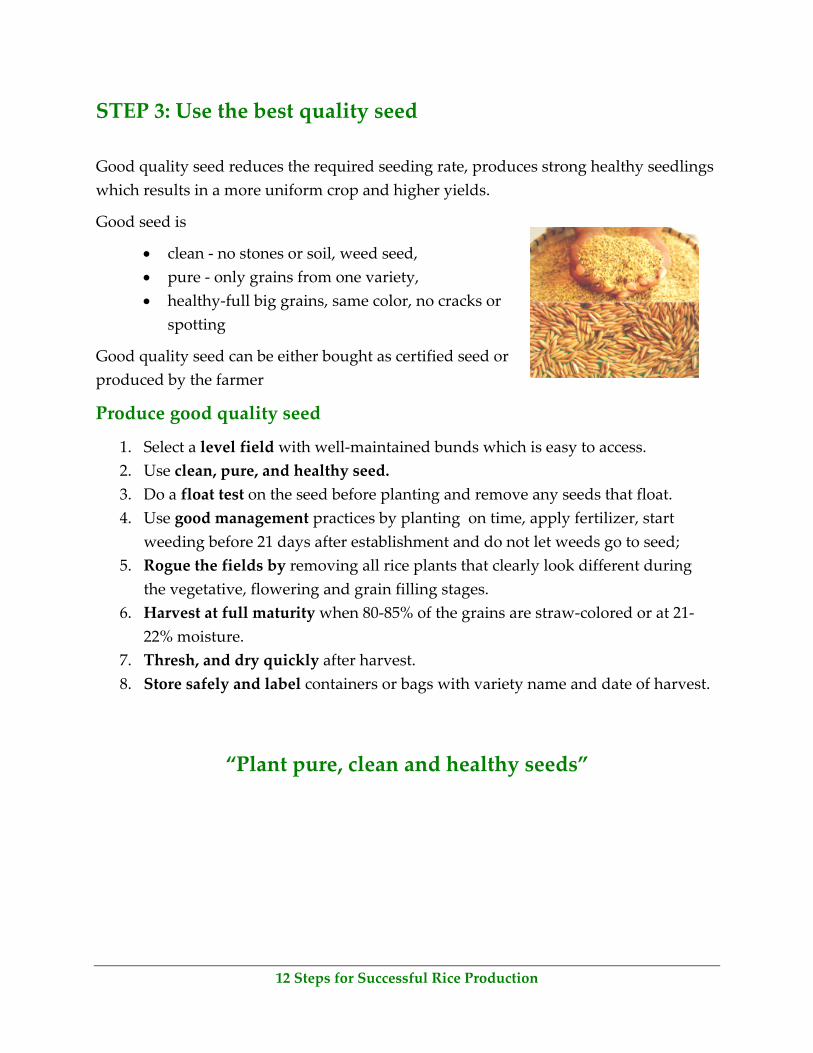
Good seed is
clean ‐ no stones or soil, weed seed,
pure ‐ only grains from one variety,
healthy‐full big grains, same color, no cracks or
spotting
Good quality seed can be either bought as certified seed or
produced by the farmer
Produce good quality seed
1. Select a level field with well‐maintained bunds which is easy to access.
2. Use clean, pure, and healthy seed.
3. Do a float test on the seed before planting and remove any seeds that float.
4. Use good management practices by planting on time, apply fertilizer, start
weeding before 21 days after establishment and do not let weeds go to seed;
5. Rogue the fields by removing all rice plants that clearly look different during
the vegetative, flowering and grain filling stages.
6. Harvest at full maturity when 80‐85% of the grains are straw‐colored or at 21‐
22% moisture.
7. Thresh, and dry quickly after harvest.
8. Store safely and label containers or bags with variety name and date of harvest.
“Plant pure, clean and healthy seeds”

12 Steps for Successful Rice Production
STEP 4: Prepare and level the fields well
A well prepared and leveled field gives a uniform, healthy crop that can compete with weeds,
uses less water and gives higher yields at a lower cost.
A well prepared field has:
Many small soil clods to give good seed ‐soil
contact‐ clod size and seed size are similar.
No weeds
Harder layer at 10cm to stop water penetrating
Level and smooth surface after working.
Well‐constructed bunds
To prepare the field When possible plow immediately after the previous harvest‐ especially if the soil is still moist.
First or primary plowing. Use a disc or moldboard plow to kill weeds and incorporate trash,
preferably 6‐8 weeks before planting ‐ maximum depth needed 10 cm.
Second plowing. Plow across the field with the disc or tine harrow at least twice to make
small clod sizes. Second plowing should be 2‐3 weeks before planting and the last harrowing 1
week before planting ‐maximum depth 5‐7.5 cm.
Repair bunds. Destroy rat burrows and repair any holes and cracks and re‐compact the
bunds. Bunds should be at least 0.5m high and 1m wide.
Leveling the field will give better water coverage, better crop establishment and better weed
control.
Soil Puddling should be done at least 1‐2 days before seeding to allow the water to clear
when direct seeding.
“Level fields give the best yields”

12 Steps for Successful Rice Production
Step 5: Plant on time
Planting the crop on time will help produce a fast growing,
uniform crop that will have higher yields and will be better
able compete with weeds and pests. The best time to plant
depends on the locality, variety, water availability and the
best harvest time. Rice can be either transplanted from a
nursery or direct seeded in the field. Transplanted crops will
normally take less time in the production field but 10‐15
days longer for the total crop duration. In both cases a well
prepared seedbed is needed.
For transplanted crops: 1. Select a nursery site1/10 of the intended
planting area
2. Prepare the nursery by plowing at least
twice and harrow at least once.
3. Level the soil surface and put in drainage lines across the field
4. Pre‐ germination and sowing. Soak the seed for 24hrs and then drain for
24hours in the shade before
broadcasting evenly over the water
covered soil surface.
5. Apply seed: 30‐40kg seed/transplanted ha.
6. Apply both chemical or animal
fertilizer before the last plowing.
7. Transplanting age: short‐medium
duration varieties need 20‐30 days and
long duration varieties need 20‐40 days
in nursery after seeding.
8. Transplant in lines into puddled and water covered fields.
9. Maintain water coverage in field
For direct seeding:
1. Prepare the field by plowing at least
twice and harrowing once‐compare seed
size and clod size
2. Level the soil surface
3. Apply and incorporate basal fertilizer before the last plowing or at 10 days
after establishment
Wet direct seeding 1. Pre‐ germination seed. Soak the seed for
24hrs and then drain for 24hours in the
shade before broadcasting evenly over
the water covered soil surface.
2. Broadcast pre‐germinated seed at
100kg/ha
3. Allow surface water to drain or
percolate naturally into soil
4. Keep soil surface moist by adding water
5. Add permanent water at 10‐15 days after establishment or at 2‐3leaf stage
6. Apply basal fertilizer after permanent
water is added
Dry direct seeding 1. Hand broadcast dry seed at 100kg/ha
and machine
2. Machine drill seed at 80kg/ha and 20mm depth
3. Apply basal fertilizer with through the seed drill
4. Cover broadcast seed and fertilizer with a light harrowing
5. Flash flood until 15 days after emergence or 2 leaf stage and then add
permanent water.

12 Steps for Successful Rice Production
Step 6: Weed early
Weeds compete directly with the rice plants and reduce
rice yield. Each 1 kg dry matter of weeds is equivalent to
1kg grain loss. Weeds cause most yield loss within the first
20‐ 50 days after crop establishment. Weeding after panicle
initiation may also be important to prevent weeds
shedding seeds in future crops.
Effective weed management
Plowing and harrowing in fallow should be undertaken at least 10‐14 days
apart or after rain.
Good land leveling reduces weed growth because most weeds have trouble
germinating under water
Select varieties which have early vigor
Use clean rice seed which is free of weed seeds.
Apply permanent water early ‐ weeds cannot germinate under water.
First weeding begun within 2‐3 weeks after establishment and the second in
another 2‐3 weeks. Weed before fertilizer application.
Using herbicides. Identify the weed correctly and use the appropriate
herbicide as recommended on the label.
Spray when the weeds are small
Pre‐emergent herbicides apply after planting prior to establishment
Post emergent herbicides apply after emergence being careful of crop damage
Herbicides are poisonous; if they are not used properly they can cause health
and environment problems. Label them clearly and keep them out of children’s
reach.
Always use protective clothing when spraying.
Do not wear raincoats as this increases sweating.
“One year’s seeding equals seven years weeding”
12 Steps for Successful Rice Production
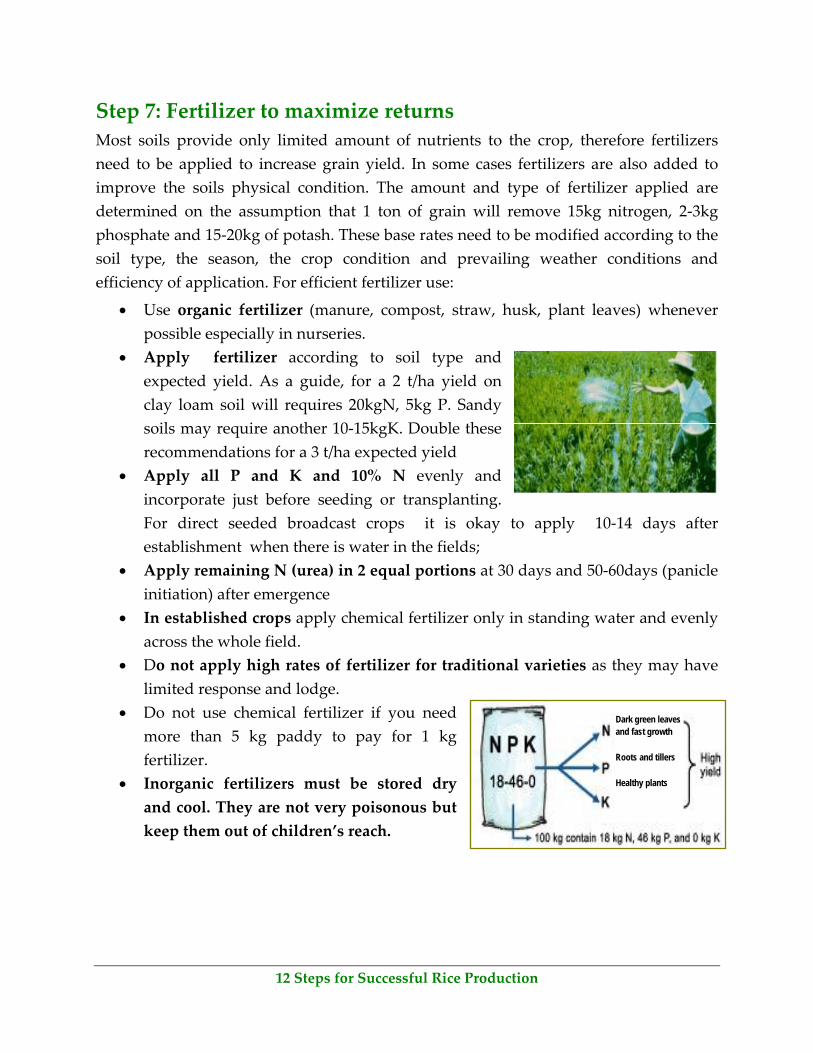
Step 7: Fertilizer to maximize returns
Most soils provide only limited amount of nutrients to the crop, therefore fertilizers
need to be applied to increase grain yield. In some cases fertilizers are also added to
improve the soils physical condition. The amount and type of fertilizer applied are
determined on the assumption that 1 ton of grain will remove 15kg nitrogen, 2‐3kg
phosphate and 15‐20kg of potash. These base rates need to be modified according to the
soil type, the season, the crop condition and prevailing weather conditions and
efficiency of application. For efficient fertilizer use:
Use organic fertilizer (manure, compost, straw, husk, plant leaves) whenever
possible especially in nurseries.
Apply fertilizer according to soil type and
expected yield. As a guide, for a 2 t/ha yield on
clay loam soil will requires 20kgN, 5kg P. Sandy
soils may require another 10‐15kgK. Double these
recommendations for a 3 t/ha expected yield
Apply all P and K and 10% N evenly and
incorporate just before seeding or transplanting.
For direct seeded broadcast crops it is okay to apply 10‐14 days after
establishment when there is water in the fields;
Apply remaining N (urea) in 2 equal portions at 30 days and 50‐60days (panicle
initiation) after emergence
In established crops apply chemical fertilizer only in standing water and evenly
across the whole field.
Do not apply high rates of fertilizer for traditional varieties as they may have
limited response and lodge.
Do not use chemical fertilizer if you need
more than 5 kg paddy to pay for 1 kg
fertilizer.
Inorganic fertilizers must be stored dry
and cool. They are not very poisonous but
keep them out of children’s reach.
Dark green leaves and fast growth
Roots and tillers
Healthy plants
12 Steps for Successful Rice Production
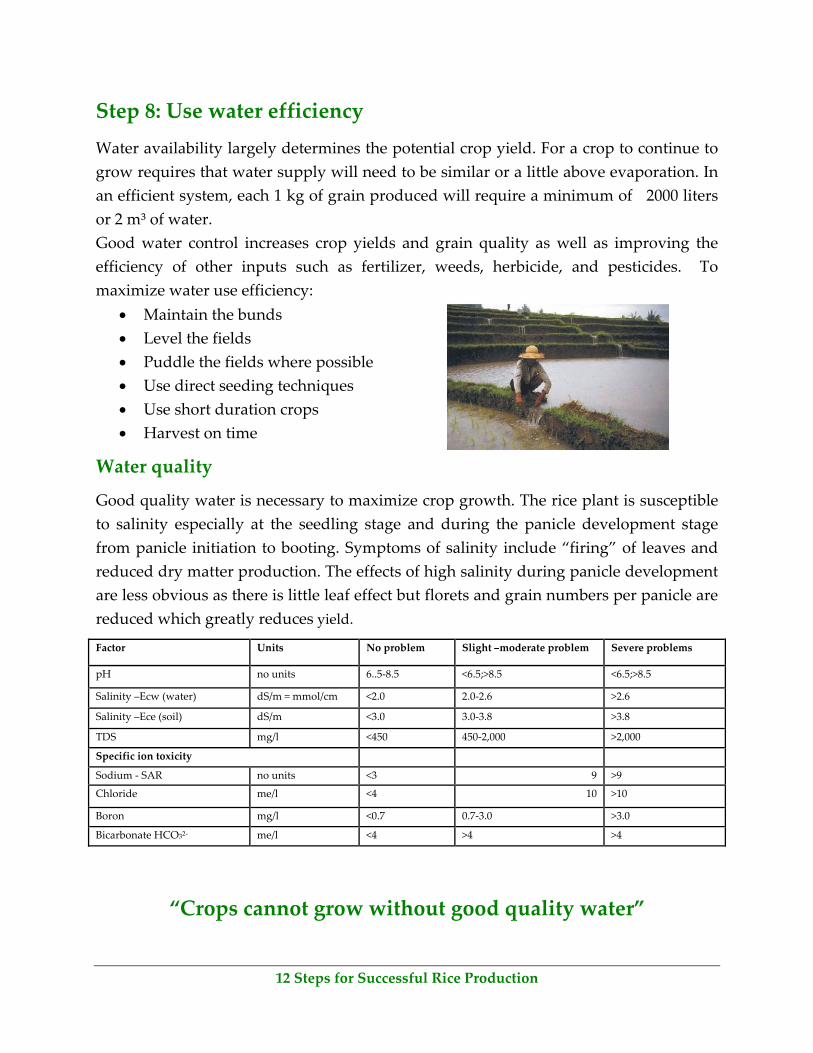
Step 8: Use water efficiency
Water availability largely determines the potential crop yield. For a crop to continue to
grow requires that water supply will need to be similar or a little above evaporation. In
an efficient system, each 1 kg of grain produced will require a minimum of 2000 liters
or 2 m³ of water.
Good water control increases crop yields and grain quality as well as improving the
efficiency of other inputs such as fertilizer, weeds, herbicide, and pesticides. To
maximize water use efficiency:
Maintain the bunds
Level the fields
Puddle the fields where possible
Use direct seeding techniques
Use short duration crops
Harvest on time
Water quality
Good quality water is necessary to maximize crop growth. The rice plant is susceptible
to salinity especially at the seedling stage and during the panicle development stage
from panicle initiation to booting. Symptoms of salinity include “firing” of leaves and
reduced dry matter production. The effects of high salinity during panicle development
are less obvious as there is little leaf effect but florets and grain numbers per panicle are
reduced which greatly reduces yield.
Factor Units No problem Slight –moderate problem Severe problems
pH no units 6..5‐8.5 <6.5;>8.5 <6.5;>8.5
Salinity –Ecw (water) dS/m = mmol/cm <2.0 2.0‐2.6 >2.6
Salinity –Ece (soil) dS/m <3.0 3.0‐3.8 >3.8
TDS mg/l <450 450‐2,000 >2,000
Specific ion toxicity
Sodium ‐ SAR no units <3 9 >9
Chloride me/l <4 10 >10
Boron mg/l <0.7 0.7‐3.0 >3.0
Bicarbonate HCO32‐ me/l <4 >4 >4
“Crops cannot grow without good quality water”
12 Steps for Successful Rice Production
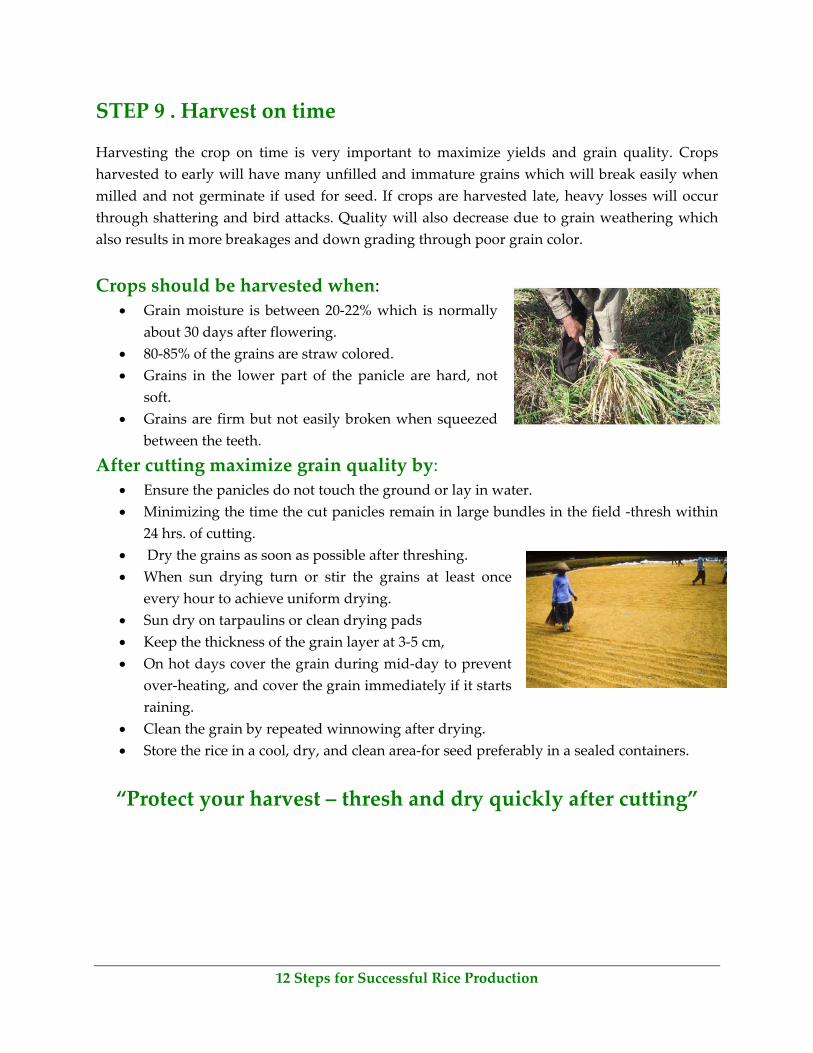
STEP 9 . Harvest on time
Harvesting the crop on time is very important to maximize yields and grain quality. Crops
harvested to early will have many unfilled and immature grains which will break easily when
milled and not germinate if used for seed. If crops are harvested late, heavy losses will occur
through shattering and bird attacks. Quality will also decrease due to grain weathering which
also results in more breakages and down grading through poor grain color.
Crops should be harvested when: Grain moisture is between 20‐22% which is normally
about 30 days after flowering.
80‐85% of the grains are straw colored.
Grains in the lower part of the panicle are hard, not
soft.
Grains are firm but not easily broken when squeezed
between the teeth.
After cutting maximize grain quality by: Ensure the panicles do not touch the ground or lay in water.
Minimizing the time the cut panicles remain in large bundles in the field ‐thresh within
24 hrs. of cutting.
Dry the grains as soon as possible after threshing.
When sun drying turn or stir the grains at least once
every hour to achieve uniform drying.
Sun dry on tarpaulins or clean drying pads
Keep the thickness of the grain layer at 3‐5 cm,
On hot days cover the grain during mid‐day to prevent
over‐heating, and cover the grain immediately if it starts
raining.
Clean the grain by repeated winnowing after drying.
Store the rice in a cool, dry, and clean area‐for seed preferably in a sealed containers.
“Protect your harvest – thresh and dry quickly after cutting”

12 Steps for Successful Rice Production
STEP 10: Store Safely
Rice is best stored as paddy because the husk provides some protection against insects and
helps prevent grain quality deterioration. A safe storage system will prevent the grain getting
wet after drying and also give protection from insects, rodents and birds.
Rice can be stored for longer periods if:
Moisture is maintained at less than 14% for grain and 12% for seed.
Grain is protected from insects, rodents and birds
Grain is protected from re‐wetting by rain or from the surrounding air.
A rule of thumb for seed is that the life of the seed will be halved for every 1% increase in
moisture content or a 5oC increase in storage temperature above recommended levels.
Rice Storage systems
Bag storage system Bags should not be stacked higher than 4m.
Bags should be stacked under a roof, in a shed or
under water proof tarpaulins
A one meter gap should be left between and around
stacks
Bags should be stacked on pallets or above ground
Bags should be stacked so that fumigation can be undertaken if necessary.
Bulk storage
Grain can be stored in bulk in containers made from wood,
metal or concrete, located under or inside the house. While
these storages vary in size they all need to be protected from
insects, rodents, birds attack as well as moisture uptake
Hermetic Sealed storage
Sealed or hermetic storage systems are a very effective means of
controlling grain moisture content and insect activity for seed or
grain stored in tropical regions. Sealed storage containers come
in all shapes and sizes. They may range from a 50kg super bag, a
small 25 l plastic containers, 200‐litre oil drum to the more costly
sealed large plastic commercial storage units from 1‐300 tons.

12 Steps for Successful Rice Production
STEP 11: Mill Efficiently
Milling rice paddy removes the husk and bran layer to produce white rice. Rice is best milled at
13‐14% moisture and the best results are attained when the process is completed in a number of
stage and grain temperatures do not exceed 45C during the process. An efficient mill will
remove the husk (20%), the bran or meal (8‐10%) and leave 70% as white rice. Rice grown in
irrigated systems should attain 60% white rice as head rice (unbroken white kernels) and rain
fed systems 40‐50% as head rice. There are a number of different types of rice mills and
processing being used. These include:
1. Hand pounding using a mortar with a pestle results in very high number of broken
rice and leaves brown rice (meal layer still attached). Cleaning of the husk is done by
winnowing
2. A one step milling process where the husk and the bran are removed in one pass
and white rice is produced directly from the paddy. The single pass rice mill is an
adaptation of the ʺEnglebergʺ coffee huller. This process results in many broken kernels,
low white rice recovery of 50‐55% and head rice yields less than 30%. The fine brokens
are often mixed in with the bran and the ground rice husk.
3. A two‐step process where the husk and the bran are
removed separately. These mills are often called compact rice
mills and in many countries have superseded the Engleberg
mill. The two‐stage mill has separate hulling and the polishing
processes. Rubber rollers remove the husk and the brown rice is
then polished with a steel friction whitener. These mills have a
capacity of 0.5 to 1 ton per hour paddy input and are often used
for custom milling in the rural areas. The milling performance
of the compact rice mill is superior to the single pass huller
with milling recoveries normally above 60%.
4. A multi‐stage process where rice passes through a number of different operations
and machines from paddy to white rice. The milling process in larger commercial mills
combines a number of operations that produces higher quality and higher yields of
white rice from paddy rice. The process involves:
Pre‐cleaning the paddy prior to milling
Removing the husk or outer layer from the paddy
Polishing or whiting the brown rice to remove the bran layer
Separating the broken grains from the whole kernels
Bagging the milled rice
Managing the by products
“Poor grain quality into the mill means poor quality rice out”
12 Steps for Successful Rice Production
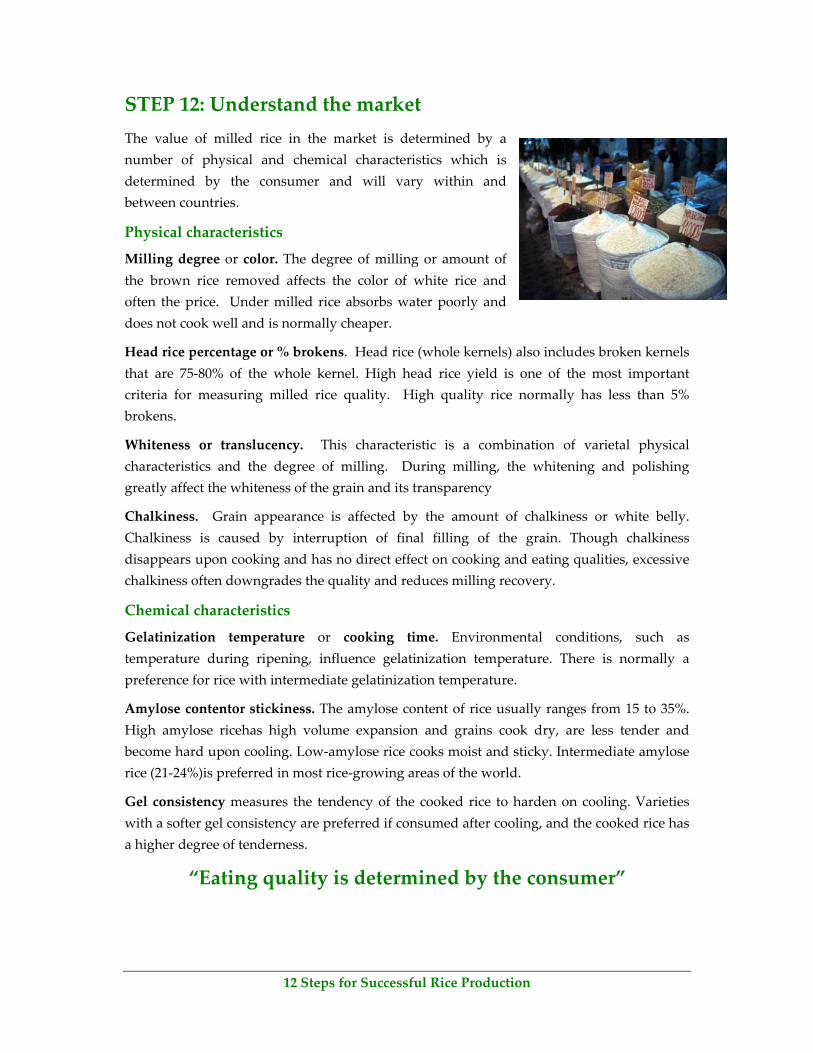
STEP 12: Understand the market
The value of milled rice in the market is determined by a
number of physical and chemical characteristics which is
determined by the consumer and will vary within and
between countries.
Physical characteristics
Milling degree or color. The degree of milling or amount of
the brown rice removed affects the color of white rice and
often the price. Under milled rice absorbs water poorly and
does not cook well and is normally cheaper.
Head rice percentage or % brokens. Head rice (whole kernels) also includes broken kernels
that are 75‐80% of the whole kernel. High head rice yield is one of the most important
criteria for measuring milled rice quality. High quality rice normally has less than 5%
brokens.
Whiteness or translucency. This characteristic is a combination of varietal physical
characteristics and the degree of milling. During milling, the whitening and polishing
greatly affect the whiteness of the grain and its transparency
Chalkiness. Grain appearance is affected by the amount of chalkiness or white belly.
Chalkiness is caused by interruption of final filling of the grain. Though chalkiness
disappears upon cooking and has no direct effect on cooking and eating qualities, excessive
chalkiness often downgrades the quality and reduces milling recovery.
Chemical characteristics
Gelatinization temperature or cooking time. Environmental conditions, such as
temperature during ripening, influence gelatinization temperature. There is normally a
preference for rice with intermediate gelatinization temperature.
Amylose contentor stickiness. The amylose content of rice usually ranges from 15 to 35%.
High amylose ricehas high volume expansion and grains cook dry, are less tender and
become hard upon cooling. Low‐amylose rice cooks moist and sticky. Intermediate amylose
rice (21‐24%)is preferred in most rice‐growing areas of the world.
Gel consistency measures the tendency of the cooked rice to harden on cooling. Varieties
with a softer gel consistency are preferred if consumed after cooling, and the cooked rice has
a higher degree of tenderness.
“Eating quality is determined by the consumer”