1.cdn.edl.io€¦ · web viewin this lesson, students will investigate properties of waves by...
TRANSCRIPT

WavesPhysical Science/Grade 6
In this unit, students will complete readings, experiments, activities, and discussions in order to answer the question, “What are the characteristic properties of waves and how can they be used?”. By the end of this unit, students will be able to describe and predict the characteristic properties and behaviors of waves when waves interact with matter and will explore how waves are used in communication and are manifested in real life. Throughout the unit, the students will demonstrate proficiency in asking questions, developing and using models, analyzing and interpreting data, using mathematical thinking, constructing explanations, arguing from evidence, and obtaining, evaluating, and communicating information. The students will use these practices to demonstrate an understanding of these core ideas and principles.
Authors:
Gregory Ferland, Mathematics major, Williams CollegeMichael Smith, Elementary Education and English major, Massachusetts College of Liberal Arts
This unit was developed with Race to the Top and National Science Foundation (Grant # 1432591). It should be considered a DRAFT document that will be revised annually as the unit is piloted through the 2017-18 school year. Page 1 of 53

Table of Contents
Unit Plan
Lesson 1: What do waves look like? (Teacher Led prior to Science Fellows arrival) Parts of a wave (amplitude, frequency review, wavelength intro. Maybe a mini-lesson on each?)Lesson 2: Physical Representations and Manifestations of WavesLesson 3: The Relationship Between Sound Waves and Light WavesLesson 4: Tracing the Path of a Wave Through Solids, Liquids, and GasesLesson 5: Properties of Waves: Reflection, absorption, and TransmissionLesson 6: What is Soundproofing?Lesson 7: Underwater Light and SoundLesson 8: Waves and Communication: Locating resources and how to find pertinent information in a scientific textUnit Resources:
This unit was developed with Race to the Top and National Science Foundation (Grant # 1432591). It should be considered a DRAFT document that will be revised annually as the unit is piloted through the 2017-18 school year. Page 2 of 53

Stage 1 Desired ResultsMS-PS4.1. Use diagrams of a simple wave to explain that a wave has a repeating pattern with a specific amplitude, frequency and wavelength.[Assessment Boundary: Assessment does not include electromagnetic waves and is limited to standard repeating waves.]MS-PS4.2. Use diagrams and other models to show that both light rays and mechanical waves are reflected, absorbed, or transmitted through various materials. [Clarification Statement: Materials may include solids, liquids, and gasses. Mechanical waves (including sound) need a material (medium) through which they are transmitted. Examples of models could include drawings, simulations, and written descriptions.] [Assessment Boundary: Assessment is limited to qualitative applications.]MS-PS4.3. Present qualitative scientific and technical information to support the claim that digitized signals (sent as wave pulses representing 0s and 1s) can be used to encode and transmit information. [Assessment Boundary: Assessment does not include binary counting nor the specific mechanism of any given device.]
RI6-8.2 Analyze how a particular sentence,
MeaningUNDERSTANDINGS UStudents will understand that...
● A simple wave has a repeating pattern with a specific wavelength, frequency, and amplitude
● A sound wave needs a medium through which it is transmitted.
● When light shines on an object, it is reflected, absorbed, or transmitted through the object
● Digitized signals (sent as wave pulses) are a more reliable way to encode and transmit information.
ESSENTIAL QUESTIONS Q1. What are the characteristic
properties of waves?
Student Learning ObjectivesStudents will be able to
1. Define amplitude, wavelength, frequency, mechanical waves and light waves.
2. Correctly label amplitude, frequency and wavelength on a diagram
3. Use information found in the text to accurately diagram the parts of a wave and give examples of their purpose.
4. Take information found during research and transfer it to a graphical representation (diagram, picture, etc)
5. Sketch waves to accurately represent real world situations, such as sound of varying pitch, volume, or the effect of dropping different sized stones into a body of water making sure that the repeating pattern is apparent.
6. Correctly label amplitude, frequency and wavelength on a diagram.
This unit was developed with Race to the Top and National Science Foundation (Grant # 1432591). It should be considered a DRAFT document that will be revised annually as the unit is piloted through the 2017-18 school year. Page 3 of 53

paragraph, chapter, or section fits into the overall structure of a text and contributes to the development of the ideas
6-8.RST.7 Integrate quantitative or technical information expressed in words in a text with a version of that information expressed visually (e.g. in a flowchart, diagram, model, graph or table)
7. Relate changes in pitch, volume, brightness, and color to the corresponding changes in the diagram of the wave.
8. Correctly draw waves corresponding to the relative wavelengths of different pitches and colors.
9. Compare and contrast properties of light and sound waves.
10. Explain that sound waves need a medium through which to travel, but light waves do not
11. Diagram the movement of waves through the three states of matter12. Differentiate between transverse and longitudinal waves
13. Give examples of how waves are reflected, absorbed, and transmitted14. Discuss and explain the path of waves as they encounter various materials15. Identify soundproofing materials and explain why they work.16. Diagram how soundproofing materials interact with waves.17. Explain and discuss how and why soundproofing materials are more efficient at
dampening noise than other materials.18. Diagram the path of light and sound through water19. Explain how sound travels faster in water than in air20. Differentiate between analog and digital signals21. Provide evidence to show that digital signals are more reliable than analog signals
to transmit informationStage 2 - Evidence
Evaluative Criteria Assessment EvidencePre-unit Assessment (if any) Unit Assessment -CEPA
OTHER EVIDENCE: OEStudents will be assessed on the following:
● Participation in class discussions● Participation in class activities● Participation in experiments● Completion of worksheets and other resources● Completion and comprehension of required readings● Responses to prompts in Science Journals
Stage 3 – Learning Plan
This unit was developed with Race to the Top and National Science Foundation (Grant # 1432591). It should be considered a DRAFT document that will be revised annually as the unit is piloted through the 2017-18 school year. Page 4 of 53
Maybe prior grade level knowledge assumed?● Waves are repeating patterns.● Frequency and amplitude
Lesson 1: What do waves look like? In this lesson, the students will review what they know about what a wave looks like and demonstrate the repeating pattern. They will learn about the proper vocabulary for the parts of a wave and use it appropriately. (Teacher Led prior to Science Fellows arrival) Parts of a wave (amplitude, frequency review, wavelength) will be re-introduced in this lesson.Lesson 2: Physical Representation of Waves (Ripples in a pond, etc). In this lesson, the students will learn about the connection between the waves they can see and the waves they cannot. They will use what they have learned about parts of a wave to relate the parts to the changes we can see and hear (amplitude=volume/brightness, wavelength=pitch/color)Lesson 3: Relationship between sound/light and waves In this lesson, students will take what they learned in the last lesson about parts of a wave and what they relate to and review the role waves have in sound and light. They will diagram a sound wave and a light wave and complete a compare and contrast activity between sound and light waves.Lesson 4: Tracing the path of a wave when it comes into contact with different materials ( 3 states of matter) In this lesson students will learn through discovery how the path of a wave travels through various states of matter. They will be able to diagram how it travels through a solid, a liquid, and a gas.Lesson 5: Reflect, absorb and transmit activity-In this lesson, students will define reflect, absorb and transmit in terms of waves. They will predict different materials that will reflect waves, absorb waves and transmit waves before demonstrating transmission, absorption, and reflection with both sound and light waves and creating explanations for why the waves behave the way they do when they interact with the respective objects.Lesson 6: What is Soundproofing?-This lesson will be a continuation of the previous lesson in which students learned how and why sound waves are absorbed, reflected, or transmitted. This lesson will include an activity where students can learn through discovery what materials are used for soundproofing and why they work. They will be able to offer an explanation of why we use the materials that we do to soundproof, citing the effects that those materials have on sound waves.Lesson 7: Underwater light and sound. In this lesson students will learn through discovery what happens to light and sound when the waves come into contact with water. They will be able to diagram the path of the waves when they are finished with the lesson.Lesson 8: Waves in Communication. In this lesson students will learn how waves are used in communication. They will be introduced to digitized waves and their effectiveness. Through exploration they will discover how they are used to encode and transmit information.The students will also work on how to find useful/pertinent information in a scientific text by learning how to dissect a scientific text in order to find the information they are looking for.
Adapted from Massachusetts Department of Elementary and Secondary Education’s Model Curriculum Unit Template. Originally based on Understanding by Design 2.0 © 2011 Grant Wiggins and Jay McTighe. Used with Permission July 2012
This unit was developed with Race to the Top and National Science Foundation (Grant # 1432591). It should be considered a DRAFT document that will be revised annually as the unit is piloted through the 2017-18 school year. Page 5 of 53

Lesson #1: What Are Waves?Taught by Classroom Teacher
BACKGROUND
Overview of the Lesson: In this lesson, students will review the parts of a wave that they learned about in grade 4. The students will diagram a wave and label the amplitude and frequency. The teacher will introduce the concept of wavelength and what it represents. The students will complete a Frayer 4 square for each vocabulary word to be displayed on a bulletin board on waves.
Focus Standard(s) ● MS-PS4.1. Use diagrams of a simple wave to explain that a wave has a repeating pattern with a specific amplitude, frequency and wavelength. ● 6-8.RS.T.7. Integrate quantitative or technical information expressed in words in a text with a version of that information expressed visually (e.g.,
in a flowchart, diagram, model, graph, or table).
Learning Objectives By the end of this lesson, students will be able to:
1. Define amplitude, wavelength, frequency, mechanical waves and light waves.2. Correctly label amplitude, frequency and wavelength on a diagram3. Use information found in the text to accurately diagram the parts of a wave and give examples of their purpose.
This unit was developed with Race to the Top and National Science Foundation (Grant # 1432591). It should be considered a DRAFT document that will be revised annually as the unit is piloted through the 2017-18 school year. Page 6 of 53
4. Take information found during research and transfer it to a graphical representation (diagram, picture, etc)
Assessment
Draw a diagram of a wave and label it with the vocabulary words.
WIDA Language Objectives (?)
Key Vocabulary
Tier 1: Mechanical Waves, Light Waves
Tier 2: Frequency, Amplitude, Wavelength
RESOURCES AND MATERIALS Quantity Item Source
20 Frayer vocabulary templates Classroom Teacher1 Chart paper Classroom Teacher1 Computer with internet and speakers Classroom Teacher1 https://www.youtube.com/watch?v=6f0hsbFHYvs Internet20 Classroom laptops Classroom teacher
**items in bold should be returned for use next year**
This unit was developed with Race to the Top and National Science Foundation (Grant # 1432591). It should be considered a DRAFT document that will be revised annually as the unit is piloted through the 2017-18 school year. Page 7 of 53
LESSON DETAILS
Lesson Opening/ ActivatorAsk students to work in pairs to brainstorm everything they know about waves. Give approximately 5 minutes for pairs to come up with a list. On chart paper, compile a class list encouraging and facilitating discussion as points are made. Use this list as the K column for classroom K-W-L chart that will be used throughout this unit. Ask the class to talk to their partners about what questions they have about waves and/or what they want to learn more about and put this in the W column. Show https://www.youtube.com/watch?v=6f0hsbFHYvs. During the Lesson
1. The teacher will explain to the class that there are a couple of review vocabulary words and one new term that they need to know before the science fellows come in to work with them on experiments. Write the words Mechanical Waves, Light Waves, Frequency, Wavelength and Amplitude on the board. Ask students to take 30 seconds to think about these words and where they have heard them and what they think they mean. Ask students to tell their partner one thing they know about one of the words. Say to the students:“I’m going to put you into groups of 3 students. With your group, you will research the three words on the board. You are looking for facts about these words that are related to waves. Make sure the facts you find are in reference to waves. Make list of the facts you find for each word. Once you have all the information you need, you will complete a Frayer sheet for each word. Each student will make their own sheet, but you may work together. Once your Frayer sheets are completed, we will display them on our “Waves” bulletin board. Let me show you what I want in each square”
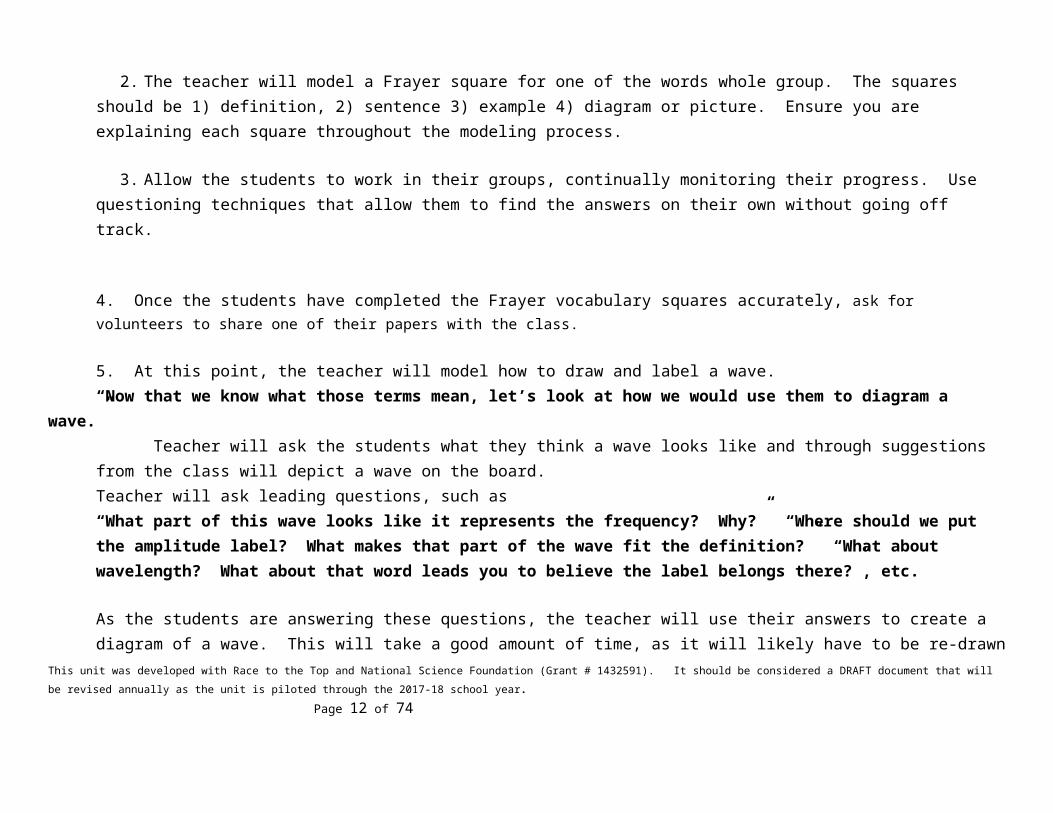
2. The teacher will model a Frayer square for one of the words whole group. The squares should be 1) definition, 2) sentence 3) example 4) diagram or picture. Ensure you are explaining each square throughout the modeling process.
3. Allow the students to work in their groups, continually monitoring their progress. Use questioning techniques that allow them to find the answers on their own without going off track.
This unit was developed with Race to the Top and National Science Foundation (Grant # 1432591). It should be considered a DRAFT document that will be revised annually as the unit is piloted through the 2017-18 school year. Page 8 of 53
4. Once the students have completed the Frayer vocabulary squares accurately, ask for volunteers to share one of their papers with the class.
5. At this point, the teacher will model how to draw and label a wave.“Now that we know what those terms mean, let’s look at how we would use them to diagram a wave.” Teacher will ask the students what they think a wave looks like and through suggestions from the class will depict a wave on the board.Teacher will ask leading questions, such as“What part of this wave looks like it represents the frequency? Why?” “Where should we put the amplitude label? What makes that part of the wave fit the definition?” “What about wavelength? What about that word leads you to believe the label belongs there?”, etc.
As the students are answering these questions, the teacher will use their answers to create a diagram of a wave. This will take a good amount of time, as it will likely have to be re-drawn as the students conceptualize what the relationship is between the definitions and the drawing. The teacher may find it helpful to ask the students to work in pairs to sketch what a certain part of the wave looks like then ask the pairs to share. That way all students are engaged at all times.Once the class has a helped the teacher create a sketch of a wave and all of its parts, the teacher will erase/remove the class drawing from the board.
Lesson ClosingThe students will then be asked to take out their science journals and write 2 new things they learned from the day’s lesson.
Assessment
The students will be assessed by asking them to draw a diagram of a wave and label it with the vocabulary words. Teacher will say. “ Using the information from the text you researched with your partner, draw and label parts of a wave and give 2 examples of their purpose.”
This unit was developed with Race to the Top and National Science Foundation (Grant # 1432591). It should be considered a DRAFT document that will be revised annually as the unit is piloted through the 2017-18 school year. Page 9 of 53

Lesson #2: Physical Representations and Manifestations of Waves
This lesson is meant to be taught by the Science Fellow in collaboration with the Classroom Teacher
BACKGROUND
Overview of the Lesson In this lesson, the students will learn about the connection between the waves they can see and the waves they cannot. After reviewing the different parts of a wave, they will use what they know to relate the parts to the changes we can see and hear (amplitude=volume/brightness, wavelength=pitch/color) through both class discussion and activities. Refer to the provided website for assistance in accurately representing the amplitude and frequency of waves- waves-http://phet.colorado.edu/sims/html/wave-on-a-string/latest/wave-on-a-string_en.html
Focus Standard(s) MS-PS4.1. Use diagrams of a simple wave to explain that a wave has a repeating pattern with a specific amplitude, frequency and wavelength.
Learning Objectives By the end of this lesson, students will be able to:
1. Sketch waves to accurately represent real world situations, such as sound of varying pitch, volume, or the effect of dropping different sized stones into a body of water making sure that the repeating pattern is apparent.
2. Correctly label amplitude, frequency and wavelength on a diagram.3. Relate changes in pitch, volume, brightness, and color to the corresponding changes in the diagram of the wave.
This unit was developed with Race to the Top and National Science Foundation (Grant # 1432591). It should be considered a DRAFT document that will be revised annually as the unit is piloted through the 2017-18 school year. Page 10 of 53

AssessmentStudents will be assessed on participation in classroom discussions and activities, as well as on their responses to the following prompts in their Science Journals:
1. What are some examples of naturally occurring waves? How do you know that these are waves and have regular patterns of motion?2. How would the wavelength of sound created by an 18-wheeler be different than that of a hybrid car?3. How would the wavelength of a bright yellow color differ from that of a dark blue color?4. Using what you’ve learned, define the following terms and explain how they affect the physical representation of a given wave:
amplitude, wavelength, and frequency.
WIDA Language Objectives (?)
Key Vocabulary
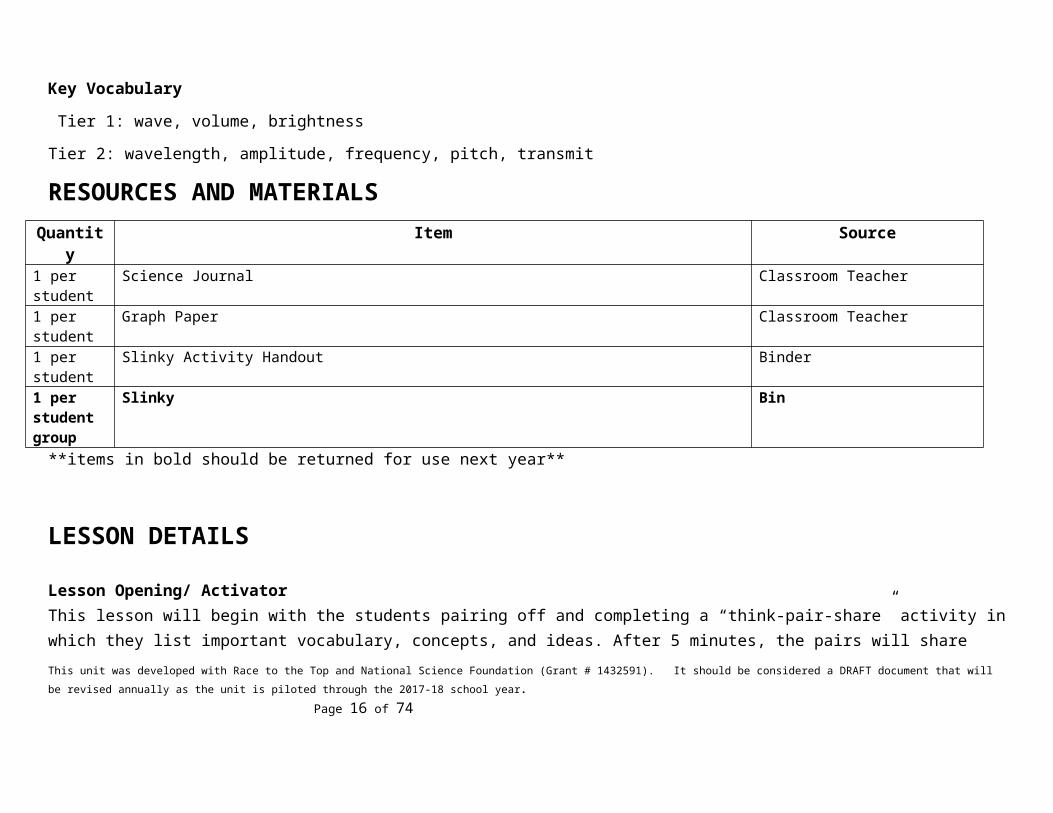
Tier 1: wave, volume, brightness
Tier 2: wavelength, amplitude, frequency, pitch, transmit
RESOURCES AND MATERIALS Quantity Item Source
1 per student
Science Journal Classroom Teacher
1 per student
Graph Paper Classroom Teacher
1 per student
Slinky Activity Handout Binder
1 per student group
Slinky Bin
**items in bold should be returned for use next year**This unit was developed with Race to the Top and National Science Foundation (Grant # 1432591). It should be considered a DRAFT document that will be revised annually as the unit is piloted through the 2017-18 school year.
Page 11 of 53
LESSON DETAILS
Lesson Opening/ ActivatorThis lesson will begin with the students pairing off and completing a “think-pair-share” activity in which they list important vocabulary, concepts, and ideas. After 5 minutes, the pairs will share their lists and the Science Fellow will list what the pairs came up with on the whiteboard, augmenting the list as necessary to include all of the ideas introduced both in 4th grade and in the previous lesson. The Science Fellow will guide the discussion and ask relevant questions as appropriate in order to guide the class discussion in the correct direction (making sure to include frequency, wavelength, amplitude, pitch, brightness, volume, and color in order to activate prior learning and re-introduce students to key concepts and vocabulary that will be focused on throughout the course of the unit).
During the Lesson1. Students will then be broken into groups of no more than 4 and the Science Fellow will list the following objects on the whiteboard:
airplane, truck, car, remote control car, and bicycle(refer to the previously supplied website for how to accurately portray waves-the objects are listed in descending order of amplitude and ascending order of frequency). The Science Fellow, working with the students, will create a diagram of the sound waves created by the airplane. This diagram should include labels indicating the amplitude, frequency, wavelength of the diagram. The Science Fellow will then ask the students how loud an airplane is (with the correct answer being very loud corresponding with a large amplitude) and how that volume is indicated in the diagram. This discussion will be repeated for the pitch of an airplane (low corresponding with a low frequency) in order to allow students to relate the relationship between amplitude, frequency, wavelength, and the presentation of that sound.
2. The groups will then hypothesize which of the remaining objects has the largest amplitude (loudest volume) and highest frequency (highest pitch) and why they think this is the correct answer before predicting which of the objects has the lowest volume and lowest pitch and how that is reflected in the diagrams. After sharing their predictions, the groups will then sketch diagrams representing the waves of each of the previously listed objects, labelling them appropriately with frequency, amplitude, and wavelength. [SP2-Developing and Using Models]
3. The groups will then have the opportunity to present their diagrams to the class using the image projector, defending their models using information previously learned in the unit. [SP7-Engaging in Argument from Evidence]
This unit was developed with Race to the Top and National Science Foundation (Grant # 1432591). It should be considered a DRAFT document that will be revised annually as the unit is piloted through the 2017-18 school year. Page 12 of 53

4. The class will then re-form as a whole and the Science Fellow will draw 2 diagrams of light waves on the whiteboard with the same frequency and wavelength but with one having low amplitude and one having a high amplitude. After explaining that the 2 diagrams are representations of light waves, the students will be given the opportunity to predict what the difference between the 2 light waves is before sharing their predictions with the class.
5. The Science Fellow will then explain that the amplitude of light waves affects the brightness of the color, turning off the classroom lights to demonstrate the diagram with the lower amplitude and turning the lights back on to describe the diagram with the higher amplitude. This will allow students to draw a tangible relationship between the amplitude of a light wave and its effect on the brightness (or intensity) of that light wave.
6. The students will then be broken up into their respective groups once again before the Science Fellow explains that the groups will be working together to create physical representations of waves using Slinkys. The Science Fellow and Classroom Teacher will then pass out the experiment handout and review each step (as well as reviewing the proper way to handle and use the slinkys) with the groups before the students are allowed to complete the experiment. [SP3-Planning and Carrying Out Investigations]
Lesson ClosingThe groups will then be given the opportunity to share their predictions, observations, and conclusions with the class (including how making waves with high frequencies and/or amplitudes made their arms tired-relating the size of the amplitude and level of the frequency to the amount of energy expended). During this time the Science Fellow will facilitate the discussion in order to once again emphasize the important vocabulary and concepts being introduced and reviewed in this lesson.
The students will then be given the opportunity to respond to the assessment prompts in their Science Journal before volunteering to share, discuss, and defend their answers with their classmates.
AssessmentStudents will be assessed on participation in classroom discussions and activities, as well as on their responses to the following prompts in their Science Journals (students should be encouraged to use diagrams when responding to the questions):
1. What are some examples of naturally occurring waves? How do you know that these are waves and have regular patterns of motion?2. How would the wavelength of sound created by an 18-wheeler be different than that of a hybrid car?
This unit was developed with Race to the Top and National Science Foundation (Grant # 1432591). It should be considered a DRAFT document that will be revised annually as the unit is piloted through the 2017-18 school year. Page 13 of 53

3. How would the wavelength of a bright yellow color differ from that of a dark blue color?4. Using what you’ve learned, define the following terms and explain how they affect the physical representation of a given wave:
amplitude, wavelength, and frequency.
This unit was developed with Race to the Top and National Science Foundation (Grant # 1432591). It should be considered a DRAFT document that will be revised annually as the unit is piloted through the 2017-18 school year. Page 14 of 53

Lesson #3: The Relationship Between Sound Waves and Light Waves
This lesson is meant to be taught by the Science Fellow in collaboration with the Classroom Teacher
BACKGROUND
Overview of the LessonIn this lesson, students will investigate properties of waves by measuring the wavelength of various pitched sounds and the angle of dispersion of different colored light. They will use knowledge gained in these activities to compare and contrast light and sound waves.
Focus Standard(s)
MS-PS4.1. Use diagrams of a simple wave to explain that a wave has a repeating pattern with a specific amplitude, frequency and wavelength.
MS-PS4.2. Use diagrams and other models to show that both light rays and mechanical waves are reflected, absorbed, or transmitted through various materials.
Learning Objectives By the end of this lesson, students will be able to:
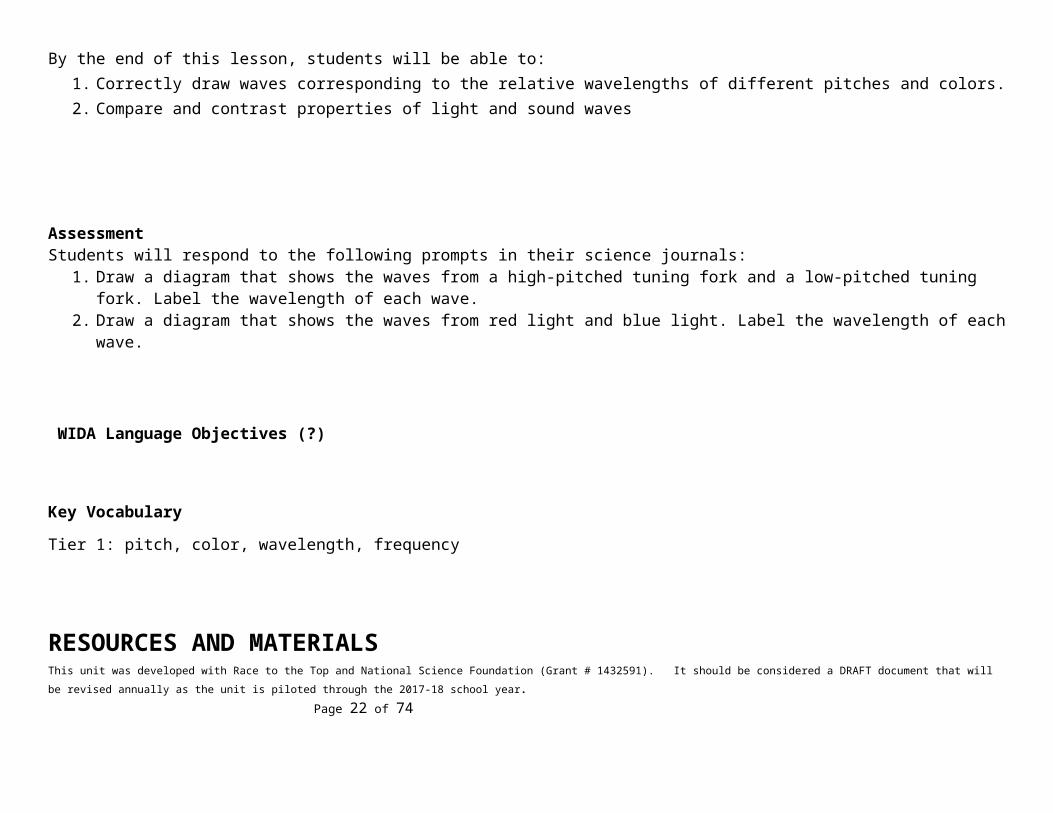
1. Correctly draw waves corresponding to the relative wavelengths of different pitches and colors.2. Compare and contrast properties of light and sound waves
This unit was developed with Race to the Top and National Science Foundation (Grant # 1432591). It should be considered a DRAFT document that will be revised annually as the unit is piloted through the 2017-18 school year. Page 15 of 53
AssessmentStudents will respond to the following prompts in their science journals:
1. Draw a diagram that shows the waves from a high-pitched tuning fork and a low-pitched tuning fork. Label the wavelength of each wave.
2. Draw a diagram that shows the waves from red light and blue light. Label the wavelength of each wave.
WIDA Language Objectives (?)
Key Vocabulary
Tier 1: pitch, color, wavelength, frequency
RESOURCES AND MATERIALS
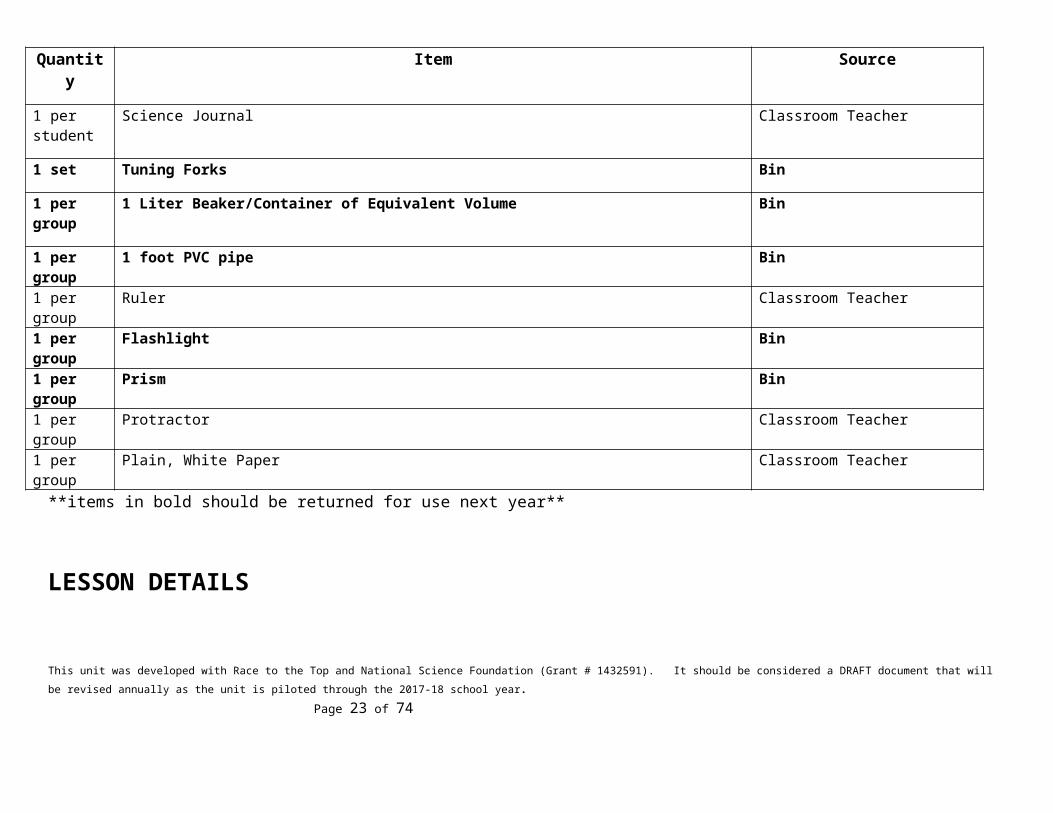
Quantity Item Source
1 per student
Science Journal Classroom Teacher
1 set Tuning Forks Bin
1 per group
1 Liter Beaker/Container of Equivalent Volume Bin
1 per group
1 foot PVC pipe Bin
1 per group Ruler Classroom Teacher1 per group
Flashlight Bin
This unit was developed with Race to the Top and National Science Foundation (Grant # 1432591). It should be considered a DRAFT document that will be revised annually as the unit is piloted through the 2017-18 school year. Page 16 of 53

1 per group
Prism Bin
1 per group Protractor Classroom Teacher1 per group Plain, White Paper Classroom Teacher
**items in bold should be returned for use next year**
LESSON DETAILS
Lesson Opening/ Activator
Give the students 5 minutes to make a Venn diagram comparing light waves and sound waves. At the end of the time limit, have students share items from their Venn diagrams to make a class list. If there are important characteristics of light and sound missing from the students’ responses, add them to the list. Do not worry if the students do not know all of these yet, because they will all be addressed in the coming unit.
The most important similarities between light waves and sound waves are:•They both have an amplitude, wavelength, and frequency•They both can be reflected, absorbed, or transmitted by various materials•They both carry energy
The most important differences between light waves and sound waves are:•Sound waves need a medium to travel through, light waves do not•Sound waves are mechanical waves (vibrations), light waves are electromagnetic waves•The frequency of a sound wave is its pitch, the frequency of a light wave is its color•The amplitude of a sound wave is its volume, the amplitude of a light wave is its brightness/intensity
This unit was developed with Race to the Top and National Science Foundation (Grant # 1432591). It should be considered a DRAFT document that will be revised annually as the unit is piloted through the 2017-18 school year. Page 17 of 53

During the LessonMeasuring the Wavelength of Sound
1. The first activity involves the use of tuning forks, so the science fellow should display the proper ways to use a tuning fork. To use a tuning fork:
•Hold it in one hand by the base (so the two prongs are free to vibrate).•Vibrate the tuning fork by hitting one prong against your hand or knee. Do not hit it against the table, as this can damage to the instrument.•Gently touch the prongs where they come together at the base to dampen harmonic (unwanted) vibrations.•Hold the fork close to your ear or place the base on a hard surface to hear the sound more clearly.
2. Divide the class into small groups (3-4 students). Explain that in this activity they will be measuring the wavelength of different pitches of sound. Write the following materials list on the board:
•Container filled halfway with water•PVC tube•Ruler•Tuning fork
3. Have the students gather the materials that they need. Though there is a complete set of tuning forks, each group should take only one to start, to make sure each group gets one. As the experiment continues, groups can swap out tuning forks to that each group can try many different frequencies.
4. The Science Fellow will read the following instructions for the experiment, writing them on the board if necessary:a. Make a prediction about how the wavelength of a sound relates to its frequency.b. Place the PVC tube in the container of water so that it is partially submerged.c. Strike the tuning fork and place it just above the top of the tube.d. Slowly move the tube and the fork together up and down until you hear the volume of the sound increase.e. Measure the height from the surface of the water to the top of the tube. [SP5 - Using Mathematics and Computational
Thinking]f. Repeat for 4 different pitches (frequencies) of tuning forks.
This unit was developed with Race to the Top and National Science Foundation (Grant # 1432591). It should be considered a DRAFT document that will be revised annually as the unit is piloted through the 2017-18 school year. Page 18 of 53

g. Record measurements in science journal.
5. Clean up the experiment, then come back together as a class and discuss the results of the experiment. Particularly, what does this demonstration show about the relationship between wavelength and frequency? Also, talk about how sound is being produced in this experiment. In particular, what is vibrating? The tuning fork vibrates, which in turn vibrates the air inside the PVC tube. When the tube is the correct length, the sound resonates and gets louder. So this experiment also shows how sound can be carried through solid matter (metal tuning fork) and gaseous matter (air in tube). [SP4 - Analyzing and Interpreting Data]
Deviation of Light Through a Prism1. Divide the class into small groups (3-4 students). Each group can be the same or different from the previous activity. Explain that in
this activity, students will be measuring the angles of different colored light as it passes through a prism.
2. The Science Fellow will write a new materials list up on the board:•Flashlight•Sheet of blank, white paper•Ruler•Pencil•Protractor
3. Have the students gather the materials that they need. Then, the Science Fellow will say the steps of the experiment, writing the procedure on the board if necessary.
a. Make a prediction about how the angle of light through a prism relates to its color (hint: What do you know about the relationship between color, frequency, and energy?).
b. Place the flashlight flat on the piece of paper so that it shines parallel to the paper. Using the ruler, draw a straight line with your pencil in the path of the light beam. Label this line “white light”.
c. Place the prism down on the sheet of paper. Observe what happens to the light as it enters and exits the prism. (Note: this is s an example of refraction. Refraction is first introduced in the grade 4 unit on Waves and is mentioned later in the unit)
d. Using the ruler, draw a straight line with your pencil on the paper in the path of each color beam of light. Label each line with the name of the color it represents.
This unit was developed with Race to the Top and National Science Foundation (Grant # 1432591). It should be considered a DRAFT document that will be revised annually as the unit is piloted through the 2017-18 school year. Page 19 of 53

e. Using the protractor, measure the angle between the line representing the white light and each of the lines representing the colored light. Record these measurements in your science journals.
4. Clean up the experiment, then come back together as a class and discuss the results of the experiment. What relationship did you find between the color of the light and the angle at which it comes out of the prism? Also, discuss the path of light in this experiment. Through what materials does the light travel in this experiment? Finally, relate the light activity to the sound activity. The main understanding the students should take away from this lesson is that both sound waves and light waves have a wavelength and frequency, and they both have properties that depend on the wavelength and frequency. Both experiments also show how light and sound can be transmitted through various materials (solid and gaseous matter).
Lesson Closing
As a class, make a new Venn diagram comparing sound waves and light waves. As students think of characteristics of these waves, ask them to support their claims with evidence from the activities in today’s lesson.
Assessment
Students will respond to the following prompts in their science journals:1. Draw a diagram that shows the waves from a high-pitched tuning fork and a low-pitched tuning fork. Label the wavelength of each
wave.2. Draw a diagram that shows the waves from red light and blue light. Label the wavelength of each wave.
This unit was developed with Race to the Top and National Science Foundation (Grant # 1432591). It should be considered a DRAFT document that will be revised annually as the unit is piloted through the 2017-18 school year. Page 20 of 53

Lesson #4: Tracing the Path of a Wave Through Solids, Liquids, and Gases
This lesson is meant to be taught by the Science Fellow in collaboration with the Classroom Teacher
BACKGROUND
Overview of the Lesson In this lesson, students will perform experiments to learn how waves travel through different media: solids, liquids, and gases. A review of the matter unit may be helpful to refresh the students’ memories on the properties of the three states of matter. Students will also learn to categorize moving waves as either transverse waves or longitudinal waves. This lesson requires demonstrations that must be set up ahead of time. Please read the lesson carefully to be sure you have all the necessary materials.
Focus Standard(s) MS-PS4.1. Use diagrams of a simple wave to explain that a wave has a repeating pattern with a specific amplitude, frequency and wavelength.
MS-PS4.2. Use diagrams and other models to show that both light rays and mechanical waves are reflected, absorbed, or transmitted through various materials.
This unit was developed with Race to the Top and National Science Foundation (Grant # 1432591). It should be considered a DRAFT document that will be revised annually as the unit is piloted through the 2017-18 school year. Page 21 of 53
Learning Objectives By the end of this lesson, students will be able to:
1. Explain that sound waves need a medium through which to travel, but light waves do not 2. Diagram the movement of waves through the three states of matter3. Differentiate between transverse and longitudinal waves
Assessment
Students will respond to the following questions in their science journals:
1. What is the difference between transverse and longitudinal waves? Give an example of each.2. Compare and contrast how light and sound waves move through a medium. Use evidence from today’s experiments in your answer.
WIDA Language Objectives (?)
Key Vocabulary
Tier 1: matter, solid, liquid, gas
Tier 2:
Tier 3: transverse wave, longitudinal wave, medium, vacuum
This unit was developed with Race to the Top and National Science Foundation (Grant # 1432591). It should be considered a DRAFT document that will be revised annually as the unit is piloted through the 2017-18 school year. Page 22 of 53
RESOURCES AND MATERIALS Quantity Item Source
1 per student
Science Journal Classroom Teacher
1 Transverse and Longitudinal Wave Diagrams Binder1 per student
Worksheet for General Wave Stations Binder
1 per student
Worksheet for Light Wave Stations Binder
1 per group
Slinky Bin
1 Bin (for water) Bin1 Ball Bin1 Rope Bin1 Speaker1 package Rice Bin1 Black Cloth Bin1 Scissors Bin1-3 Flashlight Bin1 Can Bin
**items in bold should be returned for use next year**
LESSON DETAILS
Lesson Opening/ ActivatorThe Science Fellow will lead a class discussion about matter as an introduction to the lesson. The goal of this discussion is to help the students remember the defining characteristics of matter and its three phases. In fifth grade, the students learned that matter is made up of particles and that matter has three states or phases: solid, liquid, and gas. These three phases can be distinguished by their shape and volume (fixed vs. variable) and the speed and proximity of their particles. These facts are most important in understanding how waves move through matter. As the discussion progresses, write “working definitions” of matter, solid, liquid, and gas on the board so the students may reference them throughout the remainder of the lesson.
This unit was developed with Race to the Top and National Science Foundation (Grant # 1432591). It should be considered a DRAFT document that will be revised annually as the unit is piloted through the 2017-18 school year. Page 23 of 53
Also introduce the term medium, a word that the students will hear often for the remainder of the unit. A medium is the matter through which waves travel. A solid, liquid, or gas can be an example of a medium. What media have the students been introduced to so far in the unit? (Air, water, tuning fork, slinky, etc.)
During the Lesson
Transverse and Longitudinal Waves1. Waves travel through a medium in two different ways, depending on the relationship between the motion of the wave and the motion
of the particles in the medium. Transverse waves move the particles of the medium perpendicular to the direction of the wave. Longitudinal waves move the particles of the medium parallel to the direction of the wave. Diagrams of these two types of waves can be found in the binder at the end of this lesson to either project on the Elmo or draw on the board.
2. To demonstrate transverse and longitudinal waves, divide the class up into small groups (3-4 students) and pass out a slinky to each group.
3. Spread the Slinky out on the table and have two people hold the ends of the slinky. One person will be moving the slinky to make waves, the other will simply anchor the slinky in place on the table. To make a transverse wave, move the end of the slinky back and forth on the table (note: this may cause a bit of noise as the slinky rubs on the table). To make a longitudinal wave, push one end of the slinky towards the other.
4. Give the students 5-10 minutes to experiment with making waves in the slinky. They should try to vary both the amplitude and the frequency of the waves in the slinky.
5. In their science journals, have the students make a diagram of transverse and longitudinal waves. For each type of wave, draw a diagram that shows how the amplitude and frequency of the waves can change. In writing, describe the types of arm movements that could lead to changes of amplitude or frequency in the slinky (i.e. pushing harder, moving arm faster, etc.). [SP2 - Developing and Using Models]
This unit was developed with Race to the Top and National Science Foundation (Grant # 1432591). It should be considered a DRAFT document that will be revised annually as the unit is piloted through the 2017-18 school year. Page 24 of 53

Waves and the Three States of MatterSet up a series of stations around the classroom and have the students progress through the stations in groups. The Science Fellow should study and prepare the stations ahead of time. Students may answer the questions verbally at each station or write their answers on the worksheet provided at the end of this lesson. The stations are as follows:
Station 1 - Waves in Liquids (bin of water and ball)- Place a ball on one side of the bin.- Demonstrate wave formation by disturbing the water on the other side of the bin.- Have students record their observations: What do the waves look like when they pass through water? Does the ball move
or stay where it is? Is this a transverse or a longitudinal wave? (answer: transverse)- Explain to students that when waves travel through water, they don’t carry the water or the ball with them, only the
energy.Station 2 - Waves in Solids (rope)
- Have two students each hold an end of the rope.- One student holds his/her end steady while the other moves his/her end up and down.- Have the students experiment with the height and speed of their arms as they move the rope. What effects does this
have on the amplitude and/or frequency of the waves?- Go around in a circle and have students take turns sending waves across the cloth. Let each student have a turn.- Have students record their observations: What did waves look like when they passed through cloth? How were these
waves different from the waves made in water? How were they the same? Station 3- Waves in Gases (speaker and rice)
- Place the speaker face up on a table and put rice on top of the speaker. Play loud music through the speaker.- Watch the vibrations caused by sound waves make the rice bounce up and down.- The rice moves without being touched by anything visible. Ask students to record their observations and make a
hypothesis about why this might be happening: What do you think is making the rice move? (answer: vibrating air) Does the rice look like anything else you’ve seen today? What does the sound box tell you about sound waves? (answer: sound waves are longitudinal waves!) Have students brainstorm in groups and record their hypotheses and observations in their science journals.
Light and the Three States of MatterThis unit was developed with Race to the Top and National Science Foundation (Grant # 1432591). It should be considered a DRAFT document that will be revised annually as the unit is piloted through the 2017-18 school year.
Page 25 of 53

The following demonstrations can be done by the Classroom Teacher or Science Fellow, or may be done as another series of rotating stations. It is recommended that the lights are turned out and the window shades are closed because these experiments are best viewed in a dark classroom. Students can answer the questions verbally or write their answers on the worksheet provided at the end of this lesson.
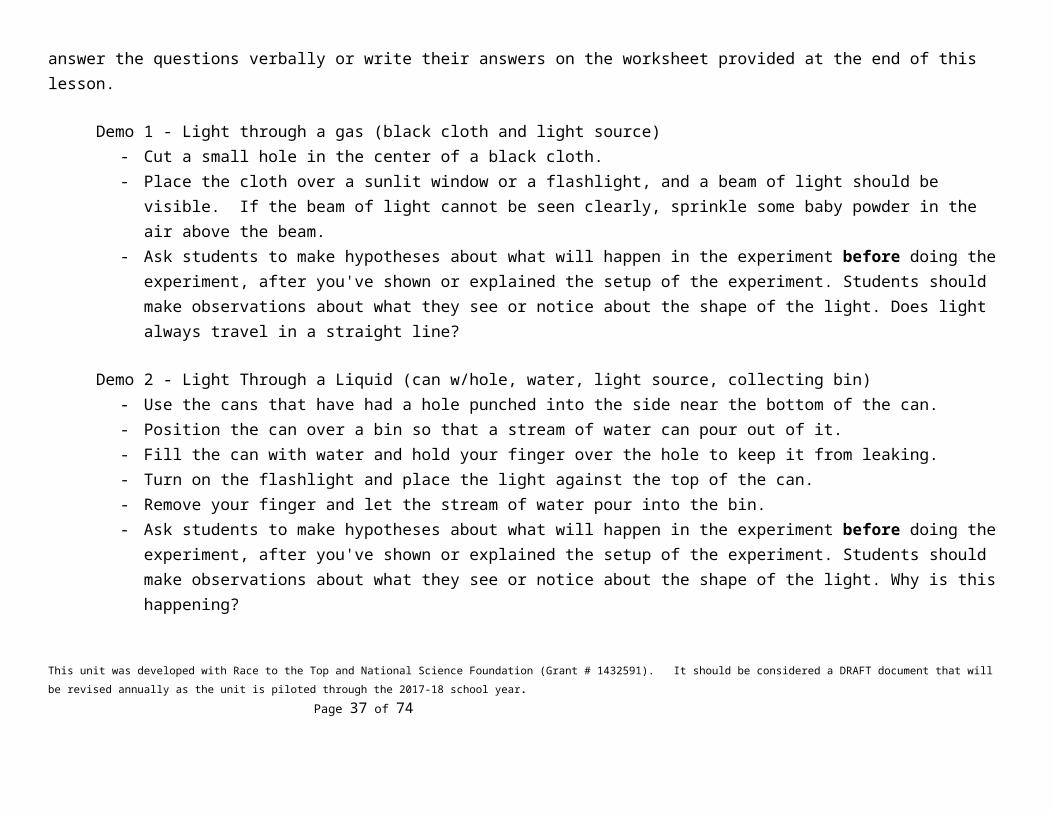
Demo 1 - Light through a gas (black cloth and light source)- Cut a small hole in the center of a black cloth. - Place the cloth over a sunlit window or a flashlight, and a beam of light should be visible. If the beam of light cannot be seen
clearly, sprinkle some baby powder in the air above the beam. - Ask students to make hypotheses about what will happen in the experiment before doing the experiment, after you've shown
or explained the setup of the experiment. Students should make observations about what they see or notice about the shape of the light. Does light always travel in a straight line?
Demo 2 - Light Through a Liquid (can w/hole, water, light source, collecting bin)- Use the cans that have had a hole punched into the side near the bottom of the can. - Position the can over a bin so that a stream of water can pour out of it. - Fill the can with water and hold your finger over the hole to keep it from leaking. - Turn on the flashlight and place the light against the top of the can. - Remove your finger and let the stream of water pour into the bin. - Ask students to make hypotheses about what will happen in the experiment before doing the experiment, after you've shown
or explained the setup of the experiment. Students should make observations about what they see or notice about the shape of the light. Why is this happening?
Teacher Explanation: Notice that light is only reflected through a small portion of the arc of water. Light won't follow a curve more than about 40-50 degrees in water. The light is spread and reflected back and forth inside the stream but cannot escape from it, allowing the beam of light to appear to bend.
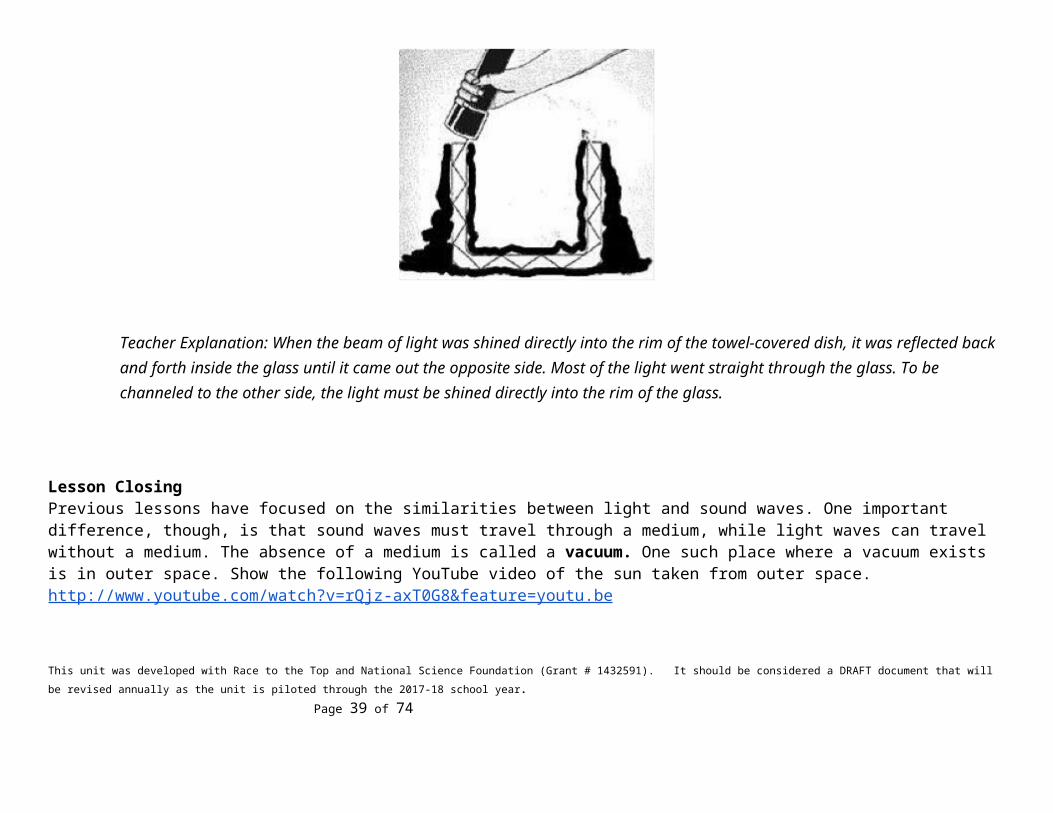
Demo 3 - Light through a solid (glass dish, 2 black towels, light source)
- Place the glass dish on one of the towels. - Cover the outside of the dish up to the rim with the towel, but do not cover the rim itself. - Place the other towel inside the dish, also up to the rim, but not covering the rim itself.
This unit was developed with Race to the Top and National Science Foundation (Grant # 1432591). It should be considered a DRAFT document that will be revised annually as the unit is piloted through the 2017-18 school year. Page 26 of 53

- Now shine the beam of flashlight down into the rim of the dish (see image below for a visual representation of the set-up). - Ask students to make hypotheses about what will happen in the experiment before doing the experiment, after you've shown
or explained the setup of the experiment. Students should make observations about what they see or notice about the light in this experiment. How is this similar to what happened in the previous experiment?
Teacher Explanation: When the beam of light was shined directly into the rim of the towel-covered dish, it was reflected back and forth inside the glass until it came out the opposite side. Most of the light went straight through the glass. To be channeled to the other side, the light must be shined directly into the rim of the glass.
Lesson ClosingPrevious lessons have focused on the similarities between light and sound waves. One important difference, though, is that sound waves must travel through a medium, while light waves can travel without a medium. The absence of a medium is called a vacuum. One such place where a vacuum exists is in outer space. Show the following YouTube video of the sun taken from outer space. http://www.youtube.com/watch?v=rQjz-axT0G8&feature=youtu.be
Why is it important that light can travel in a vacuum? (Without this property of light, energy from the sun could not reach the earth and we would not be able to live.) [SP6 - Constructing Explanations]This unit was developed with Race to the Top and National Science Foundation (Grant # 1432591). It should be considered a DRAFT document that will be revised annually as the unit is piloted through the 2017-18 school year.
Page 27 of 53

Assessment
Students will respond to the following questions in their science journals:
1. What is the difference between transverse and longitudinal waves? Give an example of each.2. Compare and contrast how light and sound waves move through a medium. Use evidence from today’s experiments in your answer.
This unit was developed with Race to the Top and National Science Foundation (Grant # 1432591). It should be considered a DRAFT document that will be revised annually as the unit is piloted through the 2017-18 school year. Page 28 of 53
Lesson #5: Properties of Waves: Reflection, Absorption, and Transmission
This lesson is meant to be taught by the Science Fellow in collaboration with the Classroom Teacher
BACKGROUND
Overview of the Lesson In this lesson, students will define reflect, absorb and transmit in terms of waves. They will predict different materials that will reflect waves, absorb waves and transmit waves before demonstrating transmission, absorption, and reflection with both sound and light waves and creating explanations for why the waves behave the way they do when they interact with the respective objects. The Science Fellow and Classroom Teacher should review the reflection, absorption, and transmission of sound and light waves prior to teaching this lesson.
Focus Standard(s) MS-PS4.2 Use diagrams and other models to show that both light rays and mechanical waves are reflected, absorbed, or transmitted through various materials.
Learning Objectives By the end of this lesson, students will be able to:
1. Give examples of how waves are reflected, absorbed, and transmitted2. Discuss and explain the path of waves as they encounter various materials
This unit was developed with Race to the Top and National Science Foundation (Grant # 1432591). It should be considered a DRAFT document that will be revised annually as the unit is piloted through the 2017-18 school year. Page 29 of 53
AssessmentStudents will be assessed based on participation in class discussions and activities and on their responses to the following prompts in their Science Journals:1. How do you know if a light waves is reflected, transmitted, or absorbed? What are some ways that each of these interactions are present in the real world?2. What are some ways that you can tell a sound wave is reflected, absorbed or transmitted? What are some examples of these interactions and how are they useful in everyday life?
WIDA Language Objectives (?)
Key Vocabulary
Tier 1: light waves, mechanical waves
Tier 2: reflection, absorption, transmission
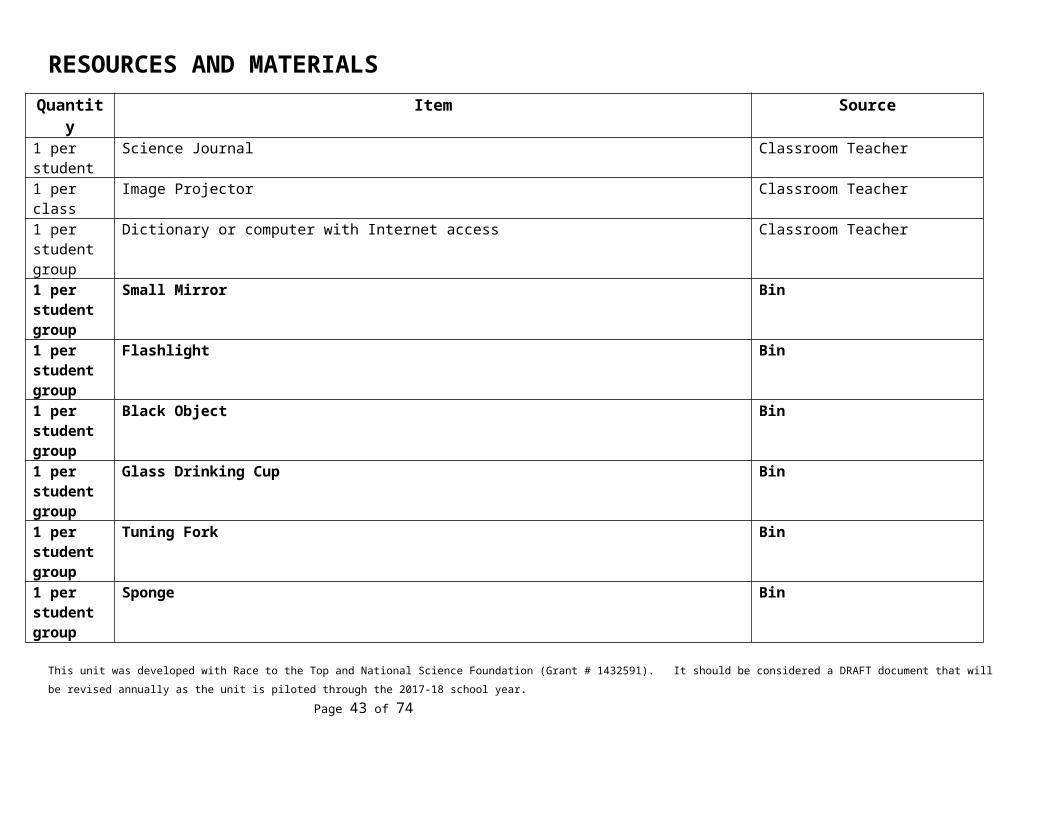
RESOURCES AND MATERIALS Quantity Item Source
1 per student
Science Journal Classroom Teacher
1 per class Image Projector Classroom Teacher1 per student group
Dictionary or computer with Internet access Classroom Teacher
1 per student group
Small Mirror Bin
1 per student
Flashlight Bin
This unit was developed with Race to the Top and National Science Foundation (Grant # 1432591). It should be considered a DRAFT document that will be revised annually as the unit is piloted through the 2017-18 school year. Page 30 of 53
group1 per student group
Black Object Bin
1 per student group
Glass Drinking Cup Bin
1 per student group
Tuning Fork Bin
1 per student group
Sponge Bin
1 per student group
Piece of Wood Bin
1 per student group
Plastic Container (for water) Bin
**items in bold should be returned for use next year**
LESSON DETAILS
Lesson Opening/ ActivatorThis lesson will begin with students working in groups of no more than 4 to create “working” definitions of the following vocabulary: transmission, reflection, and absorption. The students will use knowledge previously learned in 4th grade as well as in earlier lessons in this unit to create these definitions and will record them in their Science Journals. After each group has finished, they will be given the opportunity to share their definitions with the class, and the Science Fellow should use this opportunity to correct or augment any of the definitions. The Science Fellow will list the various definitions on the whiteboard, and after the presentation has concluded, the groups will use dictionaries or computers with Internet access to look up the definitions of the vocabulary words. The groups will then discuss among themselves why their definitions were either correct or incorrect and how they predict this vocabulary relates to waves (based on what they already know). They will share their discussions and concepts with the class before continuing on with the lesson.
This unit was developed with Race to the Top and National Science Foundation (Grant # 1432591). It should be considered a DRAFT document that will be revised annually as the unit is piloted through the 2017-18 school year. Page 31 of 53

During the Lesson1. Working once more in groups of no more than 4, the students will create lists of objects that they predict will reflect, absorb, or
transmit light waves. Each group should predict what attributes these objects have that allow them to reflect, absorb, or transmit light, and they will be expected to provide justification for their choices and will be given the opportunity to share their lists with the class. [SP7-Engaging in Argument from Evidence]
2. The groups will then be given a flashlight, a mirror, a black object (this can be anything), and a glass drinking cup. They will predict which object reflects, absorbs, or transmits light and will record these predictions in their Science Journals and share their predictions with the rest of the class. They will then use the flashlight to observe whether each object absorbs, reflects, or transmits light (based on the definitions previously created) and will record those observations in their Science Journals. The groups will then share their observations with the class and will state whether their predictions were supported or refuted before working collaboratively to add the items to their corresponding lists (mirror-reflection, black object-absorption, and drinking glass-transmission).
3. The groups will then work to complete a prediction/diagram for how the light waves behave when they are reflected, absorbed, or transmitted based on their observations and previous knowledge. This can include models and will be shared with the class as a whole when completed. The Science Fellow will guide this discussion and presentation in order to insure that the information being presented is accurate. [SP2-Developing and Using Models]
4. The groups will then work to complete Step 1, using sound waves instead of light waves. If students are struggling to differentiate between the 2, a Venn diagram comparing and contrasting the two types of waves can be created as a class to activate prior knowledge and provide support as necessary.
5. The groups will then be given a tuning fork, a sponge, a piece of wood, and a plastic container of water. The proper use of a tuning fork will be demonstrated before the groups predict which objects will reflect, absorb, or transmit sound waves and record those predictions in their Science Journals. The Science Fellow will tell the students that the waves created by the tuning fork are sound waves and will work with the students to describe how these waves will indicate whether an object absorbs, transmits, or reflects sound waves (absorption-muffles/slows tuning fork, reflection-tuning fork continue to vibrate/make sound, and transmission-waves from tuning fork transmit through the object/material). each group will have the opportunity to share their predictions with the class.
This unit was developed with Race to the Top and National Science Foundation (Grant # 1432591). It should be considered a DRAFT document that will be revised annually as the unit is piloted through the 2017-18 school year. Page 32 of 53

6. The groups will then use the tuning forks and provided materials to observe whether each object reflects, absorbs, or transmits sound waves and will record these observations in their Science Journals. The groups will then be given the opportunity to share their observations with the class and whether their initial hypothesis were supported or refuted by what they saw. The class will then work collaboratively to place each object in its respective list (container of water-transmission, piece of wood-reflection, sponge-absorption).
7. The groups will then create a prediction and model for how sound waves are reflected, absorbed, or transmitted and will record this in their Science Journal for future reference. These will be shared with the class as a whole, with the Science Fellow guiding the discussion as necessary to insure the accuracy of the information being presented. [SP2-Developing and Using Models]
Lesson ClosingThe class will then work as a whole to create 3 Venn diagrams on posters comparing and contrasting how sound and light waves are absorbed, transmitted, and reflected. These will be hung in the class for the rest of the unit in order to cement learning.
The students will then be given the opportunity to respond to the assessment prompts in their Science Journals before sharing their responses with the class.
AssessmentStudents will be assessed based on participation in class discussions and activities and on their responses to the following prompts in their Science Journals:1. How do you know if a light waves is reflected, transmitted, or absorbed? What are some ways that each of these interactions are present in the real world?2. What are some ways that you can tell a sound wave is reflected, absorbed or transmitted? What are some examples of these interactions and how are they useful in everyday life?
This unit was developed with Race to the Top and National Science Foundation (Grant # 1432591). It should be considered a DRAFT document that will be revised annually as the unit is piloted through the 2017-18 school year. Page 33 of 53
Lesson #6: What is Soundproofing? This lesson is meant to be taught by the Science Fellow in collaboration with the Classroom Teacher
BACKGROUND
Overview of the Lesson This lesson will be a continuation of the previous lesson in which students learned how and why sound waves are absorbed, reflected, or transmitted. This lesson will include an activity where students can learn through discovery what materials are used for soundproofing and why they work. They will be able to offer an explanation of why we use the materials that we do to soundproof, citing the effects those materials have on sound waves.
Focus Standard(s) MS-PS4.2. Use diagrams and other models to show that both light rays and mechanical waves are reflected, absorbed, or transmitted through various materials.
Learning Objectives By the end of this lesson, students will be able to:
1. Identify soundproofing materials and explain why they work.2. Diagram how soundproofing materials interact with waves.3. Explain and discuss how and why soundproofing materials are more efficient at dampening noise than other materials.
AssessmentStudents will be assessed based on participation in class discussions and activities and on their responses to the following prompts in their Science Journals:1. Based on what you just learned, what materials are the most effective at soundproofing a room? Why are they so effective? Be sure to include how these materials interact with the properties of sound waves.
This unit was developed with Race to the Top and National Science Foundation (Grant # 1432591). It should be considered a DRAFT document that will be revised annually as the unit is piloted through the 2017-18 school year. Page 34 of 53

2. Diagram how soundproofing materials interact with sound waves. Make sure that you label all of the attributes of waves that we have been learning about and be prepared to share your diagram with the class! 3. What are some real-world situations that use soundproofing? Why is soundproofing so important in these instances?
WIDA Language Objectives (?)
Key Vocabulary
Tier 1: mechanical waves
Tier 2: absorption, soundproofing
RESOURCES AND MATERIALS Quantity Item Source
1 per student Science Journal Classroom Teacher1 per student group
Cardboard box (shoebox/etc…) Bin
1 per student group
Sound Source (tape player/music tuner/ etc…) Bin
1 per student group
Roll of Tape Bin
1 unit/package per student group
Bubble wrap/sleeping pad foam Bin
10 feet per student group
Aluminum Foil Bin
10 feet per student group
Paper Towel Classroom Teacher
1 package (containing at least 5
Large Sponges Bin
This unit was developed with Race to the Top and National Science Foundation (Grant # 1432591). It should be considered a DRAFT document that will be revised annually as the unit is piloted through the 2017-18 school year. Page 35 of 53
sponges) per student group10 pieces per student group
Construction Paper Bin
**items in bold should be returned for use next year**
LESSON DETAILS
Lesson Opening/ ActivatorThis lesson will begin with students working in small groups of no more than 3 in order to predict what some soundproofing materials could be and how they interact with sound waves (do they reflect, absorb, or transmit them?). After the groups have had time to construct their answers, they will share them with the class. During this time the Science Fellow will guide the discussion so that it is accurate. This discussion will incorporate the fact that soundproofing materials absorb sound waves and the best soundproofing materials are porous (like a sponge). The Science Fellow can refer to the previous lesson if students are struggling to make this connection. This activity will serve as the activator for previous learning, allowing the students to more effectively engage with the information that they will be presented.
During the Lesson1. The students will then be broken into groups of no more than 6 and told that they will be designing a soundproof box for a speaker.
The Science Fellow will then list the following materials on the whiteboard: foam/bubble wrap, aluminum foil, paper towels, large sponges, construction paper. Before beginning the activity, the groups will predict which objects will work the best at soundproofing and which objects won’t work, creating a list (numbered 1-5) listing the materials from most effective to least effective in their Science Journals. While creating these predictions, each group should be aware that they will be asked to share their predictions with the class and to provide reasoning as to why they predicted what they did. the groups will then share their predictions with the class. [SP7-Engaging in Argument from Evidence]
2. The Science Fellow will then demonstrate how to line the provided cardboard boxes with one of the materials, covering the inside of the box with the provided material (using tape if necessary). The Science Fellow will explain to the students that everybody in the group should get a turn at constructing/modifying the box and that they can choose to use the materials in any order that they want.
This unit was developed with Race to the Top and National Science Foundation (Grant # 1432591). It should be considered a DRAFT document that will be revised annually as the unit is piloted through the 2017-18 school year. Page 36 of 53
3. The groups will then play their sound sources outside of the box to create a baseline sound from which they will base their observations. The groups will then line the box with a given material based on the previous demonstration by the Science Fellow, place the speaker/tape recorder/ sound source inside of it and then turning that sound source on before shutting the box. They will then observe how much sound is blocked out by the soundproofing material and record those observations in their Science Journals. [SP2-Developing and Using Models]
4. Each student group will repeat Step 3 for the remaining soundproofing materials, disassembling the previous soundproofing material after completing the experiment with it. they will use their observations to create a list of the most effective soundproofing materials (numbered 1-5).
5. After the students have completed the experiment, they will compare their prediction list with their observation list, noticing any differences and constructing explanations among themselves for why their predictions were either correct or incorrect. [SP6-Constructing Explanations]
Lesson ClosingThe groups will then be given the opportunity to share their predictions, observations, and conclusions with the class, drawing upon evidence from the lessons in this unit and prior knowledge in order to validate their claims.
The Science Fellow will guide the discussion that occurs during and in between these presentations, focusing it so that it incorporates the fundamental ideas of this lesson and unit as a whole. This discussions should include absorption and why some of the soundproofing materials were much more effective than others (porousness, thickness, absorption rate, etc…). This discussion should also include how sound waves react with absorbent materials, drawing on knowledge from the previous lesson. This knowledge can be reviewed with the class if necessary to insure comprehension and retention.
The students will then be given time to respond to the assessment prompts in their Science Journals and will share their responses with the class.
AssessmentStudents will be assessed based on participation in class discussions and activities and on their responses to the following prompts in their Science Journals:1. Based on what you just learned, what materials are the most effective at soundproofing a room? Why are they so effective? Be sure to include how these materials interact with the properties of sound waves.This unit was developed with Race to the Top and National Science Foundation (Grant # 1432591). It should be considered a DRAFT document that will be revised annually as the unit is piloted through the 2017-18 school year.
Page 37 of 53

2. Diagram how soundproofing materials interact with sound waves. Make sure that you label all of the attributes of waves that we have been learning about and be prepared to share your diagram with the class!
This unit was developed with Race to the Top and National Science Foundation (Grant # 1432591). It should be considered a DRAFT document that will be revised annually as the unit is piloted through the 2017-18 school year. Page 38 of 53
Lesson #7: Underwater Light and Sound BACKGROUND
Overview of the LessonIn this lesson, students experiment with how light and sound travels through water. Students will then use the knowledge gained from these experiments to diagram the path of light and sound through water and discuss how both light and sound have different speeds in different media.
Focus Standard(s) MS-PS4.2. Use diagrams and other models to show that both light rays and mechanical waves are reflected, absorbed, or transmitted through various materials.
Learning Objectives By the end of this lesson, students will be able to:
1. Diagram the path of light and sound through water2. Explain how sound travels faster in water than in air
AssessmentStudents will complete a “3-2-1” exit slip at the completion of the lesson. A blank exit slip is included in the binder at the end of this lesson.
WIDA Language Objectives (?)
This unit was developed with Race to the Top and National Science Foundation (Grant # 1432591). It should be considered a DRAFT document that will be revised annually as the unit is piloted through the 2017-18 school year. Page 39 of 53
RESOURCES AND MATERIALS Quantity Item Source
1 per group
Clear Plastic Cups Bin
1 per group
Flashlight Bin
1 bottle Milk Bin1 per group
Tuning Fork Bin
1 per student
Science Journal Classroom Teacher
1 bottle Rubbing Alcohol Bin1 bag Cotton Balls Bin1 per group
Bin Bin
1 per group
Stethoscope Bin
1 per student
Exit Slip Binder
1 Foss Physics of Sound Investigation 3 Binder**items in bold should be returned for use next year**
LESSON DETAILSThis unit was developed with Race to the Top and National Science Foundation (Grant # 1432591). It should be considered a DRAFT document that will be revised annually as the unit is piloted through the 2017-18 school year.
Page 40 of 53
Light Underwater
1. Divide the class into small groups (3-4 students) and explain that the lesson will start by exploring what happens when light and sound come into contact with water.
2. The Science Fellow will write the following materials list up on the board and then invite the students to gather the materials for their group:
•Plastic Cup•Water•Milk•Flashlight
3. The Science Fellow will then describe the procedure for the experiment. First, the students will make a prediction in their science journals about what will happen to the light waves when they come into contact with water. It may be helpful to consider how light waves travel, and what ability water has to reflect, absorb, or transmit waves.
4. Fill the plastic cup with water. At this point light from the classroom is already traveling through the water, but students should use the flashlight to observe what happens when a more direct beam of light is directed at the water.
5. Place a few drops of milk into the cup and stir until it is mixed. Then, shine the flashlight beam into the water again. The milk particles in the water should light up, revealing the path of the light through water. If the beams of light cannot be seen, add a few more drops of milk. But be careful, adding too much milk can block the light from being seen at all.
6. Record your observations in your science journal, then create a diagram to show the path of the light waves from the flashlight traveling in the milky water. (Review question: What is it called when light bends as it enters another medium? answer: refraction).
7. Clean up the materials to prepare for the next activity.
Sound UnderwaterThis unit was developed with Race to the Top and National Science Foundation (Grant # 1432591). It should be considered a DRAFT document that will be revised annually as the unit is piloted through the 2017-18 school year.
Page 41 of 53
Note: This activity is adapted from Foss Physics of Sound Investigation 3. The lesson plan from the Foss Physics of Sound manual is included in the binder for reference.
1. The Science Fellow will pose the following series of questions to the class: What is in this classroom that allows us to communicate with one another through sound? (answer: Air.) Suppose the classroom was filled with water instead. Would we still be able to communicate through sound? (answer: Yes! Water is actually a much better medium for sound than air.) [SP1 - Asking Questions]
2. For the following experiment the students will be using stethoscopes to listen to sound underwater. It is important that the stethoscopes are cleaned in between each use for the students’ health and safety. The Science Fellow will demonstrate how to properly clean the stethoscopes using rubbing alcohol and cotton balls.
3. The Science Fellow should also explain how the stethoscope works. The round piece at the bottom is called the diaphragm, and consists of a round vibrating membrane. It vibrates the air inside the black tubes and that air eventually reaches our ears through the earpieces.
4. Divide the class up into small groups (3-4 students) and instruct each group to grab a stethoscope, tuning fork, and a bin for water.
5. Fill the bin about two-thirds full with water.
6. Each student will take a turn listening to the water with the stethoscope while the other students in the group take turns making sounds in the water. This can be done by splashing the water or tapping the sides of the bin. The student with the stethoscope should also try listening to the splashing and tapping with the diaphragm close to the water, but not submerged. This gives a comparison between sound traveling through water and sound traveling through air.
7. Next, experiment with the tuning fork and how that sound travels in air and water. Strike the tuning fork to start it vibrating. How well can you hear the tone in the air?
8. Then, place the tuning fork in the water. Observe what happens to the water when it comes into contact with the tuning fork. What happens to the sound? Can the person listening with the stethoscope hear the tuning fork through the water?
This unit was developed with Race to the Top and National Science Foundation (Grant # 1432591). It should be considered a DRAFT document that will be revised annually as the unit is piloted through the 2017-18 school year. Page 42 of 53
9. After each student has taken a turn with the stethoscope, discuss as a group how well sound can be heard underwater. Does sound travel underwater better or worse than in air? [SP7 - Engaging in Argument from Evidence]
10. Finally, diagram the path of sound waves through water. Recall that sound waves are longitudinal waves created by the compression and decompression of particles in a medium.
Lesson ClosingHave a larger class discussion about the difference between sound traveling in water and sound traveling in air. What evidence can the students provide from the experiment they did during the lesson? What evidence can they provide using what they know about the molecules in air and water? Since liquids are denser than gases, liquids are much better at transmitting sound than gases. In fact, sound travels about 5 times faster through water than through air (1500 meters per second vs. 343 meters per second)! How well do you think solids are at transmitting sound? (answer: Solids are the densest states of matter so they are the best at transmitting sound.)
What happens to light in water? Light refracts, or bends, when it enters water. This happens because light slows down when it enters a medium (recall light can travel, and travels fastest, in a vacuum). So, if you live underwater sound is a much better tool for communication than light. Animals like whales use echolocation to “see” underwater because sound travels better in the ocean than light!
AssessmentStudents will complete a “3-2-1” exit slip at the completion of the lesson. A blank exit slip is included in the binder at the end of this lesson.
This unit was developed with Race to the Top and National Science Foundation (Grant # 1432591). It should be considered a DRAFT document that will be revised annually as the unit is piloted through the 2017-18 school year. Page 43 of 53
Lesson #8: Waves in Communication: Analog and DigitalThis lesson is meant to be taught by the Classroom Teacher
BACKGROUND
Overview of the Lesson More information on this lesson will be added for the 2016-2017 school year. This lesson will include information on binary code- teachers should supplement if possible.
Focus Standard(s)
MS-PS4.3 Present qualitative scientific and technical information to support the claim that digitized signals (sent as wave pulses representing 0s and 1s) can be used to encode and transmit information.
Learning Objectives By the end of this lesson, students will be able to:
1. Differentiate between analog and digital signals2. Provide evidence to show that digital signals are more reliable than analog signals to transmit information
AssessmentTeacher designed
WIDA Language Objectives (?)
Key Vocabulary
Tier 1: Signal, Noise
Tier 2: Analog, Digital
This unit was developed with Race to the Top and National Science Foundation (Grant # 1432591). It should be considered a DRAFT document that will be revised annually as the unit is piloted through the 2017-18 school year. Page 44 of 53
RESOURCES AND MATERIALS Quantity Item Source
1 per student
“Difference Between Analog and Digital Signals Binder
1 https://www.youtube.com/watch?v=XCu6L4kQF3k Internet
**items in bold should be returned for use next year**
LESSON DETAILS
Lesson Opening/ ActivatorThe lesson will begin with the students playing a game of snowball with the vocabulary terms covered up to this point in the unit.
● Each student is given one piece of blank paper. The teacher splits the class into two teams. Team 1 will be the “word” team and team 2 will be the “definition” team.
● The teacher will give each student on Team 1 a vocabulary word and each student on Team 2 a definition. All the vocabulary words and their corresponding definitions should be assigned.
● The student will write the word or definition they were assigned on one sheet of paper.● Once all students are finished writing the words and definitions, the teacher will instruct the students to get into two lines, facing
each other (moving the desks or doing this activity in the gym may be helpful)● Once the students are lined up, they will crumple up the paper into a “snowball” and at the teacher’s command will throw their
snowballs at the other team. They will pick up snowballs that are near them and throw them until the teacher instructs them to stop.● Each student should pick up a snowball and open it up. Their task is to find the student who has the corresponding word or definition
to their snowball. The first pair who finds their match and sits down is the winner.
During the Lesson1. Show the YouTube video “Physics - Waves - Analogue and Digital Signals”. The Teacher should preview the video ahead of time. Feel
free to pause the video or play it multiple times to allow for students to ask questions and to fully understand the material. https://www.youtube.com/watch?v=XCu6L4kQF3k
This unit was developed with Race to the Top and National Science Foundation (Grant # 1432591). It should be considered a DRAFT document that will be revised annually as the unit is piloted through the 2017-18 school year. Page 45 of 53
2. Then, the students will read the article “Difference Between Analog and Digital Signals” (found in the unit binder) with a partner. The pairs will prepare three facts they found in the article to share with the whole group. The teacher says “ Today we will be reading an article that compares analog signals and digital signals. While you are reading, think about the context of the article. If I was reading this and I had to find an important fact I would read carefully looking for clues of what might be important.” Teacher models reading the first paragraph, “ There are two types of signals that carry information -analog and digital signals. The difference between analog and digital signals is that analog is a continuous electrical signal, whereas digital is a non-continuous electrical signal. (This would be a good time to review what continuous means in this context)
3. The teacher will tell the students that they need to be on the lookout for 3 important facts. “Remember, facts are statements that can be proven true.” Give a few statements that are a mix of facts and opinions and have the students tell you if it’s a fact or not.
Some examples:*My eyes are brown*Chocolate is the best ice cream*I am wearing black pants*The Red Sox are the best baseball team*School lunches are delicious*Abraham Lincoln was a president
Once you have determined that the students are able to pick out a fact, let them work with their partner to come up with 3 facts from the reading. They should list them along with the paragraph that they located them in.
Lesson Closing
Students will share their 3 facts with the class.
AssessmentStudents will be assessed on participation in classroom discussions, as well as the three facts that they found in the text, and on their
responses to the following prompts in their Science Journals:1. What is the difference between analog signals and digital signals?2. List the three facts you and your partner found in the article.
This unit was developed with Race to the Top and National Science Foundation (Grant # 1432591). It should be considered a DRAFT document that will be revised annually as the unit is piloted through the 2017-18 school year. Page 46 of 53
List of Unit Resources **items in bold should be returned for use next year**
Lesson 1:
Quantity Item Source20 Frayer vocabulary templates Classroom Teacher1 Chart paper Classroom Teacher1 Computer with internet and speakers Classroom Teacher1 https://www.youtube.com/watch?v=6f0hsbFHYvs Internet20 Classroom laptops Classroom teacher
**items in bold should be returned for use next year**
Lesson 2:
Quantity Item Source1 per student
Science Journal Classroom Teacher
1 per student
Graph Paper Classroom Teacher
1 per student
Slinky Activity Handout Binder
1 per student group
Slinky Bin
**items in bold should be returned for use next year**
This unit was developed with Race to the Top and National Science Foundation (Grant # 1432591). It should be considered a DRAFT document that will be revised annually as the unit is piloted through the 2017-18 school year. Page 47 of 53
Lesson 3:
Quantity Item Source
1 per student
Science Journal Classroom Teacher
1 set Tuning Forks Bin
1 per group
1 Liter Beaker/Container of Equivalent Volume Bin
1 per group
1 foot PVC pipe Bin
1 per group Ruler Classroom Teacher1 per group
Flashlight Bin
1 per group
Prism Bin
1 per group Protractor Classroom Teacher1 per group Plain, White Paper Classroom Teacher
**items in bold should be returned for use next year**
Lesson 4:
Quantity Item Source1 per student
Science Journal Classroom Teacher
1 Transverse and Longitudinal Wave Diagrams Binder1 per student
Worksheet for General Wave Stations Binder
1 per student
Worksheet for Light Wave Stations Binder
1 per Slinky Bin
This unit was developed with Race to the Top and National Science Foundation (Grant # 1432591). It should be considered a DRAFT document that will be revised annually as the unit is piloted through the 2017-18 school year. Page 48 of 53

group1 Bin (for water) Bin1 Ball Bin1 Rope Bin1 Speaker1 package Rice Bin1 Black Cloth Bin1 Scissors Bin1-3 Flashlight Bin1 Can Bin1 Glass Dish Bin2 Black Towels Bin
**items in bold should be returned for use next year**
Lesson 5:
Quantity Item Source1 per student
Science Journal Classroom Teacher
1 per class Image Projector Classroom Teacher1 per student group
Dictionary or computer with Internet access Classroom Teacher
1 per student group
Small Mirror Bin
1 per student group
Flashlight Bin
1 per student group
Black Object Bin
1 per student group
Glass Drinking Cup Bin
This unit was developed with Race to the Top and National Science Foundation (Grant # 1432591). It should be considered a DRAFT document that will be revised annually as the unit is piloted through the 2017-18 school year. Page 49 of 53

1 per student group
Tuning Fork Bin
1 per student group
Sponge Bin
1 per student group
Piece of Wood Bin
1 per student group
Plastic Container (for water) Bin
**items in bold should be returned for use next year**
Lesson 6:
Quantity Item Source1 per student Science Journal Classroom Teacher1 per student group
Cardboard box (shoebox/etc…) Bin
1 per student group
Sound Source (phone/computer/ etc…) Science Fellow
1 per student group
Roll of Tape Bin
1 unit/package per student group
Bubble wrap/sleeping pad foam Bin
10 feet per student group
Aluminum Foil Bin
10 feet per student group
Paper Towel Classroom Teacher
1 package (containing at least 5
Large Sponges Bin
This unit was developed with Race to the Top and National Science Foundation (Grant # 1432591). It should be considered a DRAFT document that will be revised annually as the unit is piloted through the 2017-18 school year. Page 50 of 53

sponges) per student group10 pieces per student group
Construction Paper Bin
**items in bold should be returned for use next year**
Lesson 7:
Quantity Item Source1 per group
Clear Plastic Cups Bin
1 per group
Flashlight Bin
1 bottle Milk Bin1 per group
Tuning Fork Bin
1 per student
Science Journal Classroom Teacher
1 bottle Rubbing Alcohol Bin1 bag Cotton Balls Bin1 per group
Bin Bin
1 per group
Stethoscope Bin
1 per student
Exit Slip Binder
**items in bold should be returned for use next year**
Lesson 8:
Quantity Item Source1 per student
“Difference Between Analog and Digital Signals Binder
This unit was developed with Race to the Top and National Science Foundation (Grant # 1432591). It should be considered a DRAFT document that will be revised annually as the unit is piloted through the 2017-18 school year. Page 51 of 53

1 https://www.youtube.com/watch?v=XCu6L4kQF3k Internet
**items in bold should be returned for use next year**
This unit was developed with Race to the Top and National Science Foundation (Grant # 1432591). It should be considered a DRAFT document that will be revised annually as the unit is piloted through the 2017-18 school year. Page 52 of 53
http://www.readworks.org/passages/why-sky-blue
http://betterlesson.com/lesson/633530/sound-waves-vs-light-waves-un-notes-2-days
CEPA
This unit was developed with Race to the Top and National Science Foundation (Grant # 1432591). It should be considered a DRAFT document that will be revised annually as the unit is piloted through the 2017-18 school year. Page 53 of 53