2012 charger srt8 uconnect manual
TRANSCRIPT

11CTP-226-AA First Edition
Chrysler Group LLC
Printed in U.S.A.
TABLE OF CONTENTSSECTION PAGE
1 INTRODUCTION . . . . . . . . . . . . . . . . . . . . . . . . . . . . . . . . . . . . . . . . . . . . . . . . . . . . . . . . . . . . 3
2 Uconnect Touch™ 4.3 SYSTEM . . . . . . . . . . . . . . . . . . . . . . . . . . . . . . . . . . . . . . . . . . . . . . . . . . 11
3 Uconnect Touch™ 8.4 SYSTEM . . . . . . . . . . . . . . . . . . . . . . . . . . . . . . . . . . . . . . . . . . . . . . . . . . 35
4 SAFETY GUIDELINES . . . . . . . . . . . . . . . . . . . . . . . . . . . . . . . . . . . . . . . . . . . . . . . . . . . . . . . 113
1
2
3
4

INTRODUCTION
CONTENTS
� Introduction . . . . . . . . . . . . . . . . . . . . . . . . . . . 4
▫ Uconnect Touch™ System (4.3) . . . . . . . . . . . . 4
▫ Uconnect Touch™ System (8.4 & 8.4 NAV) . . . . 7
1
INTRODUCTION
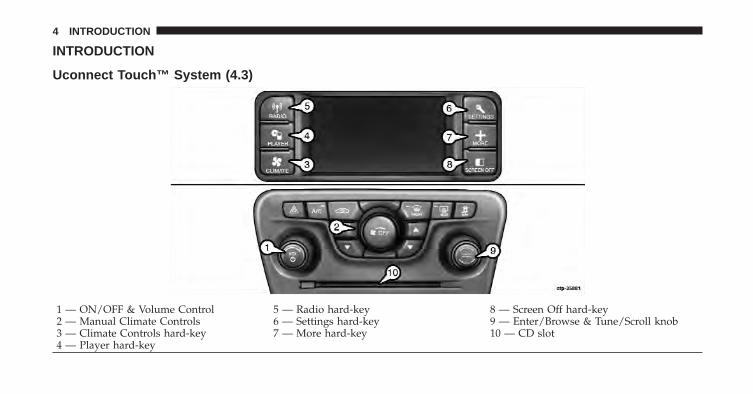
Uconnect Touch™ System (4.3)
1 — ON/OFF & Volume Control 5 — Radio hard-key 8 — Screen Off hard-key2 — Manual Climate Controls 6 — Settings hard-key 9 — Enter/Browse & Tune/Scroll knob3 — Climate Controls hard-key 7 — More hard-key 10 — CD slot4 — Player hard-key
4 INTRODUCTION
(1) ON/OFF & VOLUMEPress the ON/OFF button to turn the system ON or OFF.Rotate the rotary knob to adjust the Volume.
NOTE: If the ignition is switched OFF with the radio instandby mode, the radio memorizes the standby modewhen the ignition is turned ON again. Press the ON/OFFVOLUME Control to turn the radio ON. It is possible toeject the CD and to display the time if the system is off.
(2)(3) CLIMATE CONTROLSManual Climate Controls and Climate Control Hard-key.Refer to Climate Controls in your vehicles Owner’sManual on the DVD for further details.
(4) PLAYERPress the PLAYER hard-key to access media sources suchas: Disc, USB Device and AUX as long as the requestedmedia is present.
(5) RADIOPress the RADIO hard-key to enter the Radio Mode. Thedifferent tuner modes; AM, FM and SAT can be selectedby touching the corresponding soft-keys in the RadioMode.
(6) SETTINGSPress the SETTINGS hard-key to access the Settings list.Clock, Display, Audio, Bluetooth and Sirius Settings aredescribed in this manual. See your vehicles Owner’sManual on the DVD for more details.
(7) MOREPress the MORE hard-key to access additional options.Options available such as: Uconnect™ Phone and Com-pass can be accessed by touching the correspondingsoft-key in the More Menu.
1
INTRODUCTION 5
(8) SCREEN OFFPress the SCREEN OFF hard-key to turn the touch-screenOFF. To turn the screen back ON, just touch the screen.
(9) ENTER/BROWSE & TUNE/SCROLLPress the ENTER/BROWSE button to accept a high-lighted selection on the screen. Rotate the TUNE/SCROLL rotary knob to scroll through a list or tune aradio station.
(10) CD SLOTWhen inserting a disc, make sure the label is facing up.Press the Eject button to eject the disc.
6 INTRODUCTION
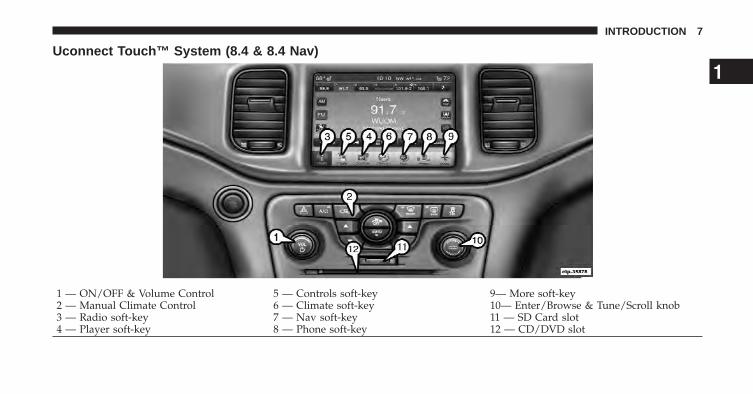
Uconnect Touch™ System (8.4 & 8.4 Nav)
1 — ON/OFF & Volume Control 5 — Controls soft-key 9— More soft-key2 — Manual Climate Control 6 — Climate soft-key 10— Enter/Browse & Tune/Scroll knob3 — Radio soft-key 7 — Nav soft-key 11 — SD Card slot4 — Player soft-key 8 — Phone soft-key 12 — CD/DVD slot
1
INTRODUCTION 7
(1) ON/OFF VOLUMEPress the ON/OFF button to turn the unit ON or OFF.Rotate the rotary knob to adjust the Volume.
NOTE: If the ignition is switched OFF with the radio instandby mode, the radio memorizes the standby modewhen the ignition is turned ON again. Press the ON/OFFVOLUME Control to turn the radio ON. It is possible toeject the CD and to display the time if the system is off.The navigation software is always working when theignition is switched ON, even if the radio is in standbymode. It is possible to eject the CD and to display thetime if the unit is switched off.
(2) CLIMATE CONTROLS (Manual Controls)Refer to Climate Controls in your vehicles Owner’sManual on the DVD for further details.
(3) RADIOPress the Radio soft-key to enter the Radio Mode. Thedifferent tuner modes; AM, FM and SAT can be selectedby touching the corresponding soft-keys in the RadioMode.
(4) PLAYERPress the Player soft-key to access media sources such as:Disc, USB Device and AUX as long as the requestedmedia is present.
(5) CONTROLSPress the Controls soft-key to access the Settings list.Controls such as; Heated Seats, Heated Steering Wheel,Ventilated Seats, etc. can be selected or turned ON/OFFby touching the corresponding soft-key.
8 INTRODUCTION
(6) CLIMATE (On-Screen Controls)Refer to Climate Controls in your vehicles Owner’sManual on the DVD for further details.
(7) NAVPress the Nav soft-key to access the Navigation feature.Refer to the Navigation section in this manual for furtherdetails.
(8) PHONEPress the Phone soft-key to access the Uconnect™ Phonefeature. Refer to the Uconnect™ Phone section in theOwner’s Manual on the DVD for further details.
(9) MOREPress the More soft-key to access additional options.Options available such as: Settings and SIRIUS TravelLink can be accessed by touching the correspondingsoft-key in the More Menu.
(10) ENTER/BROWSE & TUNE/SCROLLPress the ENTER/BROWSE button to accept a high-lighted selection on the screen. Rotate the TUNE/SCROLL rotary knob to scroll through a list or tune aradio station.
(11) SD CARD SLOTInsert an SD Card containing audio media in order toplay them through the vehicles sound system.
(12) CD/DVD SLOTWhen inserting a disc, make sure the label is facing up.Press the Eject button to eject the disc.
1
INTRODUCTION 9

Uconnect Touch™ 4.3 SYSTEM
CONTENTS
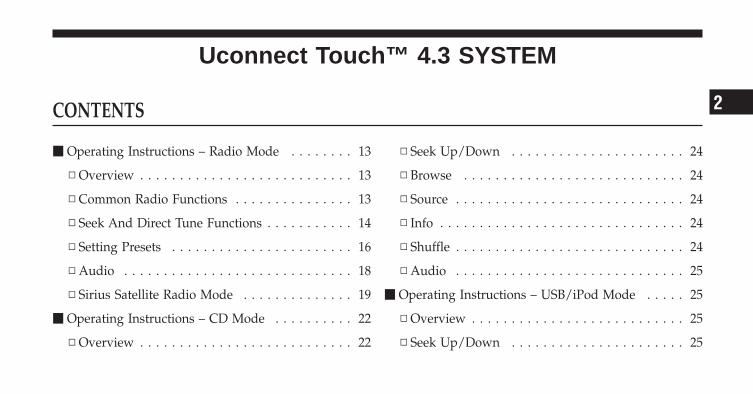
� Operating Instructions – Radio Mode . . . . . . . . 13
▫ Overview . . . . . . . . . . . . . . . . . . . . . . . . . . . 13
▫ Common Radio Functions . . . . . . . . . . . . . . . 13
▫ Seek And Direct Tune Functions . . . . . . . . . . . 14
▫ Setting Presets . . . . . . . . . . . . . . . . . . . . . . . 16
▫ Audio . . . . . . . . . . . . . . . . . . . . . . . . . . . . . 18
▫ Sirius Satellite Radio Mode . . . . . . . . . . . . . . 19
� Operating Instructions – CD Mode . . . . . . . . . . 22
▫ Overview . . . . . . . . . . . . . . . . . . . . . . . . . . . 22
▫ Seek Up/Down . . . . . . . . . . . . . . . . . . . . . . 24
▫ Browse . . . . . . . . . . . . . . . . . . . . . . . . . . . . 24
▫ Source . . . . . . . . . . . . . . . . . . . . . . . . . . . . . 24
▫ Info . . . . . . . . . . . . . . . . . . . . . . . . . . . . . . . 24
▫ Shuffle . . . . . . . . . . . . . . . . . . . . . . . . . . . . . 24
▫ Audio . . . . . . . . . . . . . . . . . . . . . . . . . . . . . 25
� Operating Instructions – USB/iPod Mode . . . . . 25
▫ Overview . . . . . . . . . . . . . . . . . . . . . . . . . . . 25
▫ Seek Up/Down . . . . . . . . . . . . . . . . . . . . . . 25
2
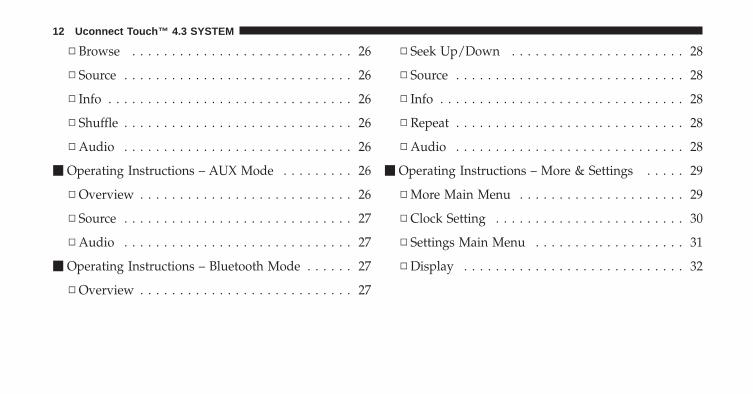
▫ Browse . . . . . . . . . . . . . . . . . . . . . . . . . . . . 26
▫ Source . . . . . . . . . . . . . . . . . . . . . . . . . . . . . 26
▫ Info . . . . . . . . . . . . . . . . . . . . . . . . . . . . . . . 26
▫ Shuffle . . . . . . . . . . . . . . . . . . . . . . . . . . . . . 26
▫ Audio . . . . . . . . . . . . . . . . . . . . . . . . . . . . . 26
� Operating Instructions – AUX Mode . . . . . . . . . 26
▫ Overview . . . . . . . . . . . . . . . . . . . . . . . . . . . 26
▫ Source . . . . . . . . . . . . . . . . . . . . . . . . . . . . . 27
▫ Audio . . . . . . . . . . . . . . . . . . . . . . . . . . . . . 27
� Operating Instructions – Bluetooth Mode . . . . . . 27
▫ Overview . . . . . . . . . . . . . . . . . . . . . . . . . . . 27
▫ Seek Up/Down . . . . . . . . . . . . . . . . . . . . . . 28
▫ Source . . . . . . . . . . . . . . . . . . . . . . . . . . . . . 28
▫ Info . . . . . . . . . . . . . . . . . . . . . . . . . . . . . . . 28
▫ Repeat . . . . . . . . . . . . . . . . . . . . . . . . . . . . . 28
▫ Audio . . . . . . . . . . . . . . . . . . . . . . . . . . . . . 28
� Operating Instructions – More & Settings . . . . . 29
▫ More Main Menu . . . . . . . . . . . . . . . . . . . . . 29
▫ Clock Setting . . . . . . . . . . . . . . . . . . . . . . . . 30
▫ Settings Main Menu . . . . . . . . . . . . . . . . . . . 31
▫ Display . . . . . . . . . . . . . . . . . . . . . . . . . . . . 32
12 Uconnect Touch™ 4.3 SYSTEM
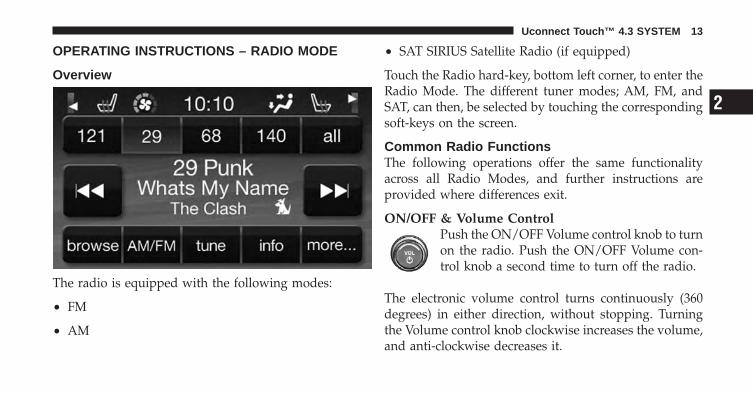
OPERATING INSTRUCTIONS – RADIO MODE
Overview
The radio is equipped with the following modes:
• FM
• AM
• SAT SIRIUS Satellite Radio (if equipped)
Touch the Radio hard-key, bottom left corner, to enter theRadio Mode. The different tuner modes; AM, FM, andSAT, can then, be selected by touching the correspondingsoft-keys on the screen.
Common Radio FunctionsThe following operations offer the same functionalityacross all Radio Modes, and further instructions areprovided where differences exit.
ON/OFF & Volume ControlPush the ON/OFF Volume control knob to turnon the radio. Push the ON/OFF Volume con-trol knob a second time to turn off the radio.
The electronic volume control turns continuously (360degrees) in either direction, without stopping. Turningthe Volume control knob clockwise increases the volume,and anti-clockwise decreases it.
2
Uconnect Touch™ 4.3 SYSTEM 13
When the audio system is turned on, the sound will beset at the same volume level as last played.
Enter/Browse & Tune/Scroll ControlTurn the rotary TUNE/SCROLL control knobclockwise to increase or counterclockwise todecrease the radio station frequency. Push theENTER/BROWSE button to choose a selection.
InfoTouch the info soft-key to display channel number/frequency, song title, genre and artist. This feature is onlyavailable in FM and SAT modes.
ExitThe Exit soft-key, provides a means to close the DirectTune Screen.
GoTouch the green GO soft-key to allow you to commit anentry, at which time, the radio will tune to the enteredChannel, and close the Direct Tune Screen. The GOsoft-key is only for SIRIUS Satellite radio mode.
Seek and Direct Tune FunctionsThe Seek Up and Down functions are activated bypressing the double arrow soft-keys to the right and leftof the radio station display, or by pressing the leftSteering Wheel Audio Control (if equipped) up or down.
Seek UpTouching the Seek Up soft-key for less than 2 seconds,tunes the radio to the next listenable station or channel.
During a Seek Up function, if the radio reaches thestarting station after passing through the entire band twotimes, the radio will stop at the station where it began.
14 Uconnect Touch™ 4.3 SYSTEM
Fast Seek UpTouching and holding the Seek Up soft-key for more than2 seconds, advances the radio through the availablestations or channels at a faster rate, the radio stops at thenext available station or channel when the soft-key isreleased.
Seek DownTouching the Seek Down soft-key for less than 2 seconds,tunes the radio to the next listenable station or channel.
During a Seek Down function, if the radio reaches thestarting station after passing through the entire band twotimes, the radio will stop at the station where it began.
Fast Seek DownTouching and holding the Seek Down soft-key for morethan 2 seconds, advances the radio through the availablestations or channel at a faster rate, the radio stops at thenext available station or channel when the soft-key isreleased.
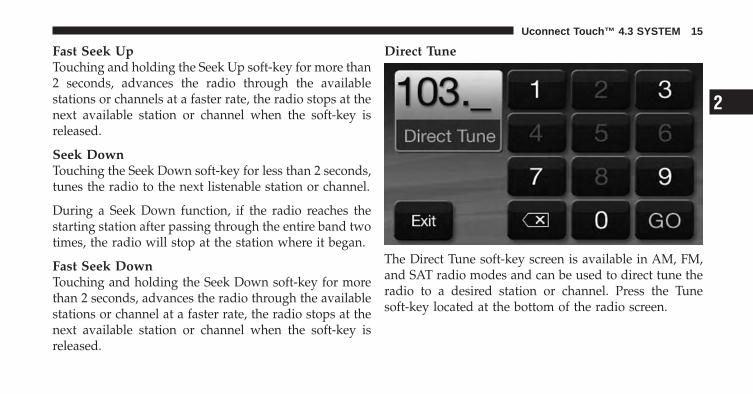
Direct Tune
The Direct Tune soft-key screen is available in AM, FM,and SAT radio modes and can be used to direct tune theradio to a desired station or channel. Press the Tunesoft-key located at the bottom of the radio screen.
2
Uconnect Touch™ 4.3 SYSTEM 15
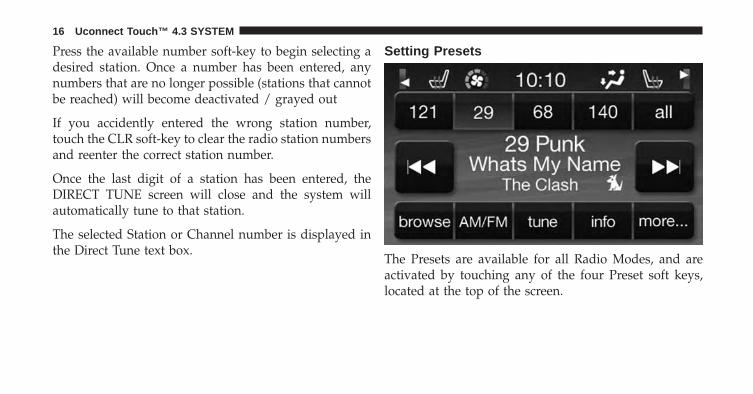
Press the available number soft-key to begin selecting adesired station. Once a number has been entered, anynumbers that are no longer possible (stations that cannotbe reached) will become deactivated / grayed out
If you accidently entered the wrong station number,touch the CLR soft-key to clear the radio station numbersand reenter the correct station number.
Once the last digit of a station has been entered, theDIRECT TUNE screen will close and the system willautomatically tune to that station.
The selected Station or Channel number is displayed inthe Direct Tune text box.
Setting Presets
The Presets are available for all Radio Modes, and areactivated by touching any of the four Preset soft keys,located at the top of the screen.
16 Uconnect Touch™ 4.3 SYSTEM
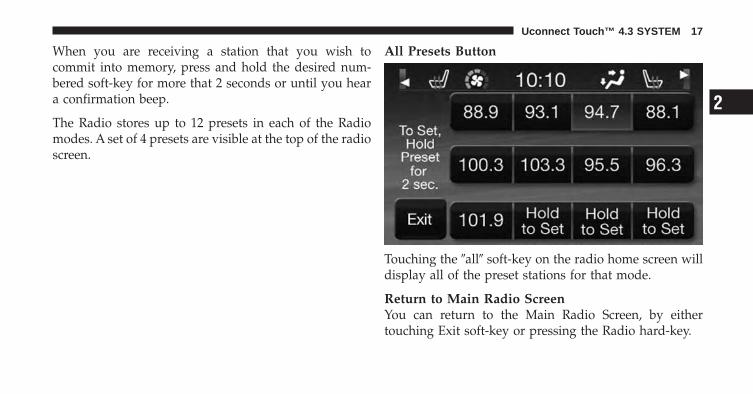
When you are receiving a station that you wish tocommit into memory, press and hold the desired num-bered soft-key for more that 2 seconds or until you heara confirmation beep.
The Radio stores up to 12 presets in each of the Radiomodes. A set of 4 presets are visible at the top of the radioscreen.
All Presets Button
Touching the �all� soft-key on the radio home screen willdisplay all of the preset stations for that mode.
Return to Main Radio ScreenYou can return to the Main Radio Screen, by eithertouching Exit soft-key or pressing the Radio hard-key.
2
Uconnect Touch™ 4.3 SYSTEM 17
Audio
1. Press the SETTINGS hard-key on the right side of theunit.
2. Then scroll down and press the Audio soft-key to getto the Audio menu.
3. The Audio Menu shows the following options for youto customize your audio settings.
• Equalizer
Touch the Equalizer soft-key to adjust the Bass, Midand Treble. Use the + or - soft-key to adjust theequalizer to your desired settings. Press the backarrow soft-key when done.
• Balance/Fade
Touch the Balance/Fade soft-key to adjust thesound from the speakers. Use the arrow soft-key toadjust the sound level from the front and rear orright and left side speakers. Touch the Center �C�soft-key to reset the balance and fade to the factorysetting. Press the back arrow soft-key when done.
• Speed Adjusted Volume
Touch the Speed Adjusted Volume soft-key to selectbetween OFF, 1, 2 or 3. This will decrease the radiovolume relative to a decrease in vehicle speed. Pressthe back arrow soft-key when done.
4. Touch the Exit soft-key to exit from the Audio Menu.
18 Uconnect Touch™ 4.3 SYSTEM
SIRIUS Satellite Radio ModeSatellite radio uses direct satellite-to-receiver broadcast-ing technology to provide clear digital sound, coast tocoast. The subscription service provider is SIRIUS Satel-lite Radio. This service offers over 130 channels of music,sports, news, entertainment, and programming for chil-dren, directly from its satellites and broadcasting studios.A one-year SIRIUS Satellite Radio subscription is in-cluded.
SIRIUS XM and all related marks and logos are trade-marks of SIRIUS XM Radio Inc. and its subsidiaries.SIRIUS Radio requires a subscription, sold separatelyafter trial subscription included with vehicle purchase.Prices and programming are provided by SIRIUS and aresubject to change. Subscriptions governed by Terms &Conditions available at sirius.com/serviceterms. SIRIUSRadio U.S. service only available to those at least 18 yearsof age in the 48 contiguous United States, D.C., and PR.Service available in Canada; see www.siriuscanada.ca.
This functionality is only available for radios equippedwith a Satellite receiver. In order to receive satellite radio,the vehicle needs to be outside with a clear view to thesky.
If the screen shows Acquiring Signal, you might have tochange the vehicle’s position in order to receive a signal.In most cases, the satellite radio does not receive a signalin underground parking garages or tunnels.
No SubscriptionRadios equipped with a Satellite receiver, require asubscription to the Sirius Service. When the Radio doesnot have the necessary subscription, the Radio is able toreceive the Traffic/Weather channel only.
2
Uconnect Touch™ 4.3 SYSTEM 19
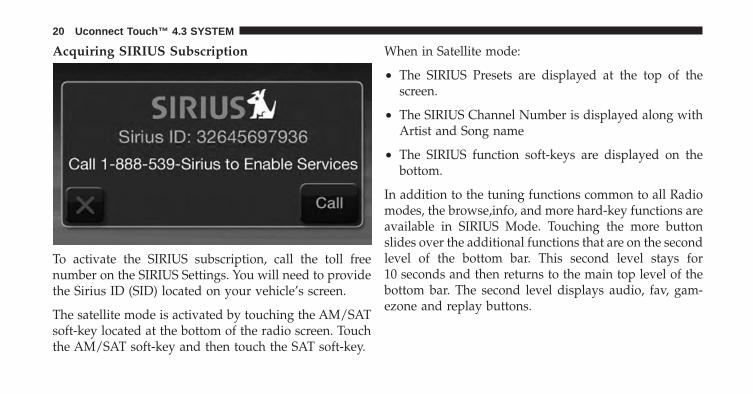
Acquiring SIRIUS Subscription
To activate the SIRIUS subscription, call the toll freenumber on the SIRIUS Settings. You will need to providethe Sirius ID (SID) located on your vehicle’s screen.
The satellite mode is activated by touching the AM/SATsoft-key located at the bottom of the radio screen. Touchthe AM/SAT soft-key and then touch the SAT soft-key.
When in Satellite mode:
• The SIRIUS Presets are displayed at the top of thescreen.
• The SIRIUS Channel Number is displayed along withArtist and Song name
• The SIRIUS function soft-keys are displayed on thebottom.
In addition to the tuning functions common to all Radiomodes, the browse,info, and more hard-key functions areavailable in SIRIUS Mode. Touching the more buttonslides over the additional functions that are on the secondlevel of the bottom bar. This second level stays for10 seconds and then returns to the main top level of thebottom bar. The second level displays audio, fav, gam-ezone and replay buttons.
20 Uconnect Touch™ 4.3 SYSTEM
BrowseTouch the browse soft-key at the bottom left of the screento enter the Browse screen
The Browse screen in SAT mode provides you the abilityto browse by All, Favorites or Genres. You can also accessGamezone, and Traffic and Weather settings in theBrowse screen.
FavoritesTouch the more... soft-key and then the fav soft-key toaccess the favorites feature.
The favorites feature enables you to set a favorite artist,or song. The Radio then uses this information to alert youwhen either the favorite song, or works by the favoriteartist are being played at any time by any of the SIRIUSChannels.
GamezoneTouch the more... soft-key and then the gamezone soft-key to access the gamezone feature. This feature providesyou with the ability to Select teams, edit the selection,and set Alerts.
ReplayThe replay function provides a means to store and replayup to 22 minutes of music audio and 48 minutes of talkradio.
Touch the replay soft-key. The play/pause, rewind/forward and live soft-keys will display at the top of thescreen, along with the replay time.
Replay can be exited by touching the replay soft-key, anytime during the Replay mode.
2
Uconnect Touch™ 4.3 SYSTEM 21
Play/Pause
Touch the Pause or Play soft-key to pause playing of thecontent at any time that the content is playing live orrewound content. Play can be resumed again by touchingof the Pause/Play soft-key.
Rewind
Touch the RW soft-key to rewind the content in steps of5 seconds. Touching the RW soft-key for more than2 seconds rewinds the content. The Radio begins playingthe content at the point at which the touch is released.
Forward
Each touch of the FW soft-key forwards the content insteps of 5 seconds. Forwarding of the content can only bedone when the content is previously rewound, andtherefore, can not be done for live content. A continuous
touch of the FW soft-key also forwards the content. TheRadio begins playing the content at the point at which thetouch is release.
Live
Touch the Live soft-key to resume playing of Livecontent.
OPERATING INSTRUCTIONS – CD MODE
OverviewCD Mode is entered by either inserting a CD or bytouching the Player hard-key located left of the display.Once in Player Mode, touch the source soft-key and selectDisc.
A “No Disc” message will be displayed on the screen inthe Disc mode when a Disc is not present in the Radio.
22 Uconnect Touch™ 4.3 SYSTEM
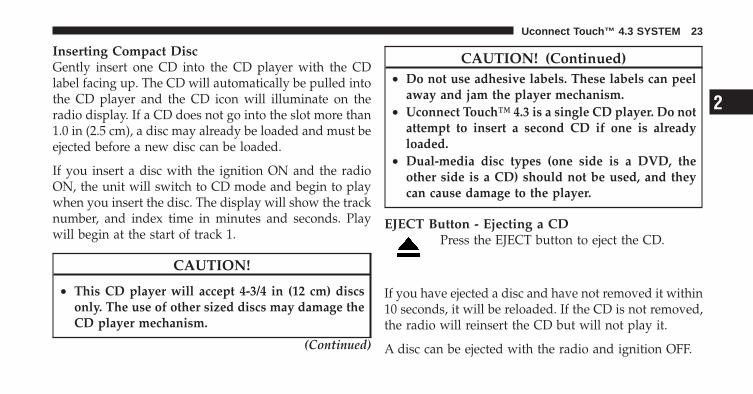
Inserting Compact DiscGently insert one CD into the CD player with the CDlabel facing up. The CD will automatically be pulled intothe CD player and the CD icon will illuminate on theradio display. If a CD does not go into the slot more than1.0 in (2.5 cm), a disc may already be loaded and must beejected before a new disc can be loaded.
If you insert a disc with the ignition ON and the radioON, the unit will switch to CD mode and begin to playwhen you insert the disc. The display will show the tracknumber, and index time in minutes and seconds. Playwill begin at the start of track 1.
CAUTION!
• This CD player will accept 4-3/4 in (12 cm) discsonly. The use of other sized discs may damage theCD player mechanism.
(Continued)
CAUTION! (Continued)• Do not use adhesive labels. These labels can peel
away and jam the player mechanism.• Uconnect Touch™ 4.3 is a single CD player. Do not
attempt to insert a second CD if one is alreadyloaded.
• Dual-media disc types (one side is a DVD, theother side is a CD) should not be used, and theycan cause damage to the player.
EJECT Button - Ejecting a CDPress the EJECT button to eject the CD.
If you have ejected a disc and have not removed it within10 seconds, it will be reloaded. If the CD is not removed,the radio will reinsert the CD but will not play it.
A disc can be ejected with the radio and ignition OFF.
2
Uconnect Touch™ 4.3 SYSTEM 23
Seek Up/DownPress the right Arrow soft-key for less than 2 second forthe next selection on the CD. Press the left Arrow soft-keyfor less than 2 seconds to return to the beginning of thecurrent selection, or return to the beginning of theprevious selection if the CD is within the first second ofthe current selection.
Fast Seek UpPress and hold the right arrow soft-key for more that twoseconds and the CD player will begin to fast forwardthrough the current track until the soft-key is released.
Fast Seek DownPress and hold the left arrow soft-key for more that twoseconds and the CD player will begin to rewind throughthe current track until the soft-key is released.
BrowseTouch the browse soft-key to scroll through and select adesired track on the CD. Touch the exit soft-key if youwish to cancel the browse function.
SourceTouch the Source soft-key to select the desired audiosource, CD, AUX or USB. This screen will time out aftera few seconds and return to the main radio screen if noselection is made.
InfoTouch the Info soft-key to display the current trackinformation. Touch the �X� soft-key to cancel this feature.
ShuffleTouch the more... soft-key then the shuffle soft-key toplay the selections on the compact disc in random orderto provide an interesting change of pace. Touch thesoft-key a second time to turn this feature off.
24 Uconnect Touch™ 4.3 SYSTEM
AudioRefer to Operating Instructions – Radio Mode for adjust-ing the audio settings.
OPERATING INSTRUCTIONS – USB/iPod MODE
OverviewUSB/iPod Mode is entered by either inserting a USBJump Drive or iPod cable into the USB port or bytouching the Player hard-key located left of the display.Once in Player Mode, touch the source soft-key and selectUSB/iPod.
Inserting USB/iPod DeviceGently insert the USB/iPod device into the USB Port. Ifyou insert a USB/iPod device with the ignition ON andthe radio ON, the unit will switch to USB/iPod mode andbegin to play when you insert the device. The displaywill show the track number, and index time in minutesand seconds. Play will begin at the start of track 1.
Seek Up/DownPress the right Arrow soft-key for less than 2 second forthe next selection on the USB/iPod device. Press the leftArrow soft-key for less than 2 seconds to return to thebeginning of the current selection, or return to thebeginning of the previous selection if the USB/iPoddevice is within the first second of the current selection.
Fast Seek UpPress and hold the right arrow soft-key for more that twoseconds and the USB/iPod device will begin to fastforward through the current track until the soft-key isreleased.
Fast Seek DownPress and hold the left arrow soft-key for more that twoseconds and the USB/iPod device will begin to rewindthrough the current track until the soft-key is released.
2
Uconnect Touch™ 4.3 SYSTEM 25
BrowseTouch the Browse soft-key to select Artist, Albums,Genres, Songs, Playlists or Folders from the USB/iPoddevice. Once the desired selection is made you can chosefrom the available media by touching the soft-key. Touchthe exit soft-key if you wish to cancel the browsefunction.
SourceTouch the Source soft-key to select the desired audiosource, CD, AUX or USB/iPod. This screen will time outafter a few seconds and return to the main radio screen ifno selection is made.
InfoTouch the Info soft-key to display the current trackinformation. Touch the �X� soft-key to cancel this feature.
ShuffleTouch the more... soft-key then the shuffle soft-key toplay the selections on the USB/iPod device in random
order to provide an interesting change of pace. Touch thesoft-key a second time to turn this feature off.
AudioRefer to Operating Instructions – Radio Mode for adjust-ing the audio settings.
OPERATING INSTRUCTIONS – AUX MODE
OverviewAUX Mode is entered by inserting a AUX device using acable with a 3.5 mm audio jack into the AUX port or bytouching the Player hard-key located left of the display.Once in Player Mode, touch the source soft-key and selectAUX.
Inserting Auxiliary DeviceGently insert the Auxiliary device cable into the AUXPort. If you insert a Auxiliary device with the ignition ONand the radio ON, the unit will switch to AUX mode andbegin to play when you insert the device cable.
26 Uconnect Touch™ 4.3 SYSTEM
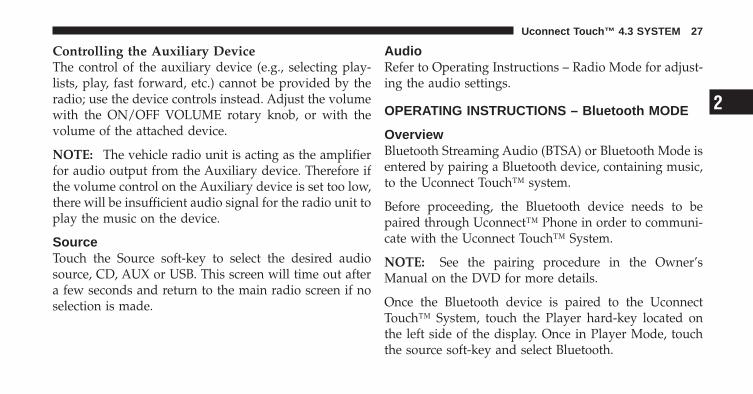
Controlling the Auxiliary DeviceThe control of the auxiliary device (e.g., selecting play-lists, play, fast forward, etc.) cannot be provided by theradio; use the device controls instead. Adjust the volumewith the ON/OFF VOLUME rotary knob, or with thevolume of the attached device.
NOTE: The vehicle radio unit is acting as the amplifierfor audio output from the Auxiliary device. Therefore ifthe volume control on the Auxiliary device is set too low,there will be insufficient audio signal for the radio unit toplay the music on the device.
SourceTouch the Source soft-key to select the desired audiosource, CD, AUX or USB. This screen will time out aftera few seconds and return to the main radio screen if noselection is made.
AudioRefer to Operating Instructions – Radio Mode for adjust-ing the audio settings.
OPERATING INSTRUCTIONS – Bluetooth MODE
OverviewBluetooth Streaming Audio (BTSA) or Bluetooth Mode isentered by pairing a Bluetooth device, containing music,to the Uconnect Touch™ system.
Before proceeding, the Bluetooth device needs to bepaired through Uconnect™ Phone in order to communi-cate with the Uconnect Touch™ System.
NOTE: See the pairing procedure in the Owner’sManual on the DVD for more details.
Once the Bluetooth device is paired to the UconnectTouch™ System, touch the Player hard-key located onthe left side of the display. Once in Player Mode, touchthe source soft-key and select Bluetooth.
2
Uconnect Touch™ 4.3 SYSTEM 27
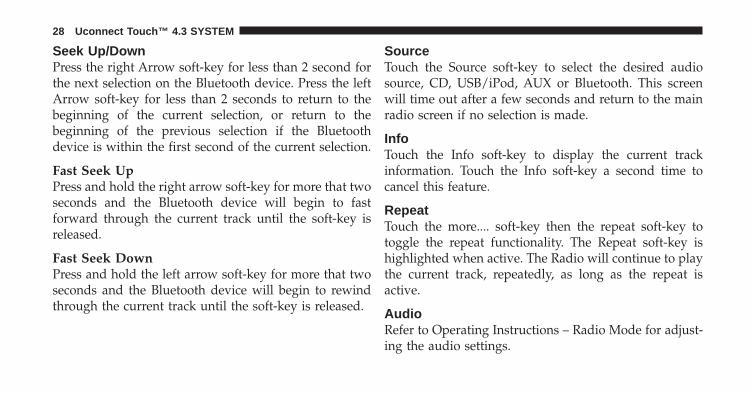
Seek Up/DownPress the right Arrow soft-key for less than 2 second forthe next selection on the Bluetooth device. Press the leftArrow soft-key for less than 2 seconds to return to thebeginning of the current selection, or return to thebeginning of the previous selection if the Bluetoothdevice is within the first second of the current selection.
Fast Seek UpPress and hold the right arrow soft-key for more that twoseconds and the Bluetooth device will begin to fastforward through the current track until the soft-key isreleased.
Fast Seek DownPress and hold the left arrow soft-key for more that twoseconds and the Bluetooth device will begin to rewindthrough the current track until the soft-key is released.
SourceTouch the Source soft-key to select the desired audiosource, CD, USB/iPod, AUX or Bluetooth. This screenwill time out after a few seconds and return to the mainradio screen if no selection is made.
InfoTouch the Info soft-key to display the current trackinformation. Touch the Info soft-key a second time tocancel this feature.
RepeatTouch the more.... soft-key then the repeat soft-key totoggle the repeat functionality. The Repeat soft-key ishighlighted when active. The Radio will continue to playthe current track, repeatedly, as long as the repeat isactive.
AudioRefer to Operating Instructions – Radio Mode for adjust-ing the audio settings.
28 Uconnect Touch™ 4.3 SYSTEM
OPERATING INSTRUCTIONS – MORE &SETTINGS
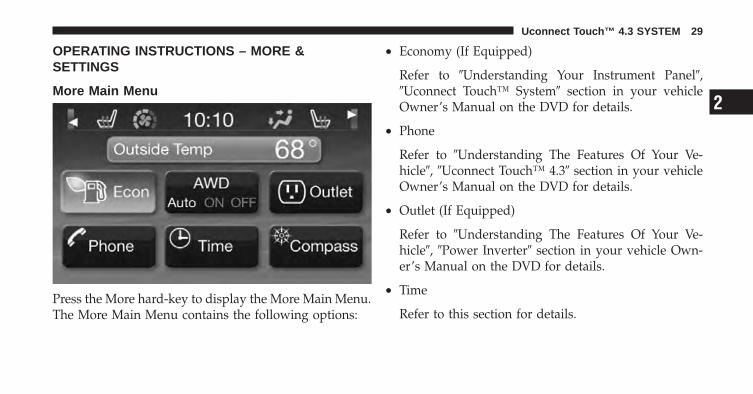
More Main Menu
Press the More hard-key to display the More Main Menu.The More Main Menu contains the following options:
• Economy (If Equipped)
Refer to �Understanding Your Instrument Panel�,�Uconnect Touch™ System� section in your vehicleOwner’s Manual on the DVD for details.
• Phone
Refer to �Understanding The Features Of Your Ve-hicle�, �Uconnect Touch™ 4.3� section in your vehicleOwner’s Manual on the DVD for details.
• Outlet (If Equipped)
Refer to �Understanding The Features Of Your Ve-hicle�, �Power Inverter� section in your vehicle Own-er’s Manual on the DVD for details.
• Time
Refer to this section for details.
2
Uconnect Touch™ 4.3 SYSTEM 29
• Compass
Refer to �Understanding Your Instrument Panel�,�Uconnect Touch™ System� section in your vehicleOwner’s Manual on the DVD for details.
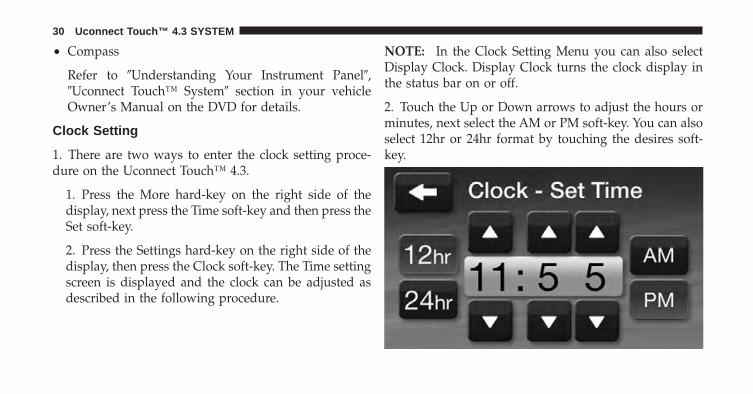
Clock Setting
1. There are two ways to enter the clock setting proce-dure on the Uconnect Touch™ 4.3.
1. Press the More hard-key on the right side of thedisplay, next press the Time soft-key and then press theSet soft-key.
2. Press the Settings hard-key on the right side of thedisplay, then press the Clock soft-key. The Time settingscreen is displayed and the clock can be adjusted asdescribed in the following procedure.
NOTE: In the Clock Setting Menu you can also selectDisplay Clock. Display Clock turns the clock display inthe status bar on or off.
2. Touch the Up or Down arrows to adjust the hours orminutes, next select the AM or PM soft-key. You can alsoselect 12hr or 24hr format by touching the desires soft-key.
30 Uconnect Touch™ 4.3 SYSTEM

3. Once the time is set press the �Done� soft-key to exitthe time screen.
Settings Main MenuPress the Settings hard-key to display the Settings MainMenu. The Settings Main Menu contains the followingoptions:
• Display
Refer to this section for details.
• Clock
Refer to this section for details.
• Safety/Assistance
Refer to �Understanding Your Instrument Panel�,�Uconnect Touch™ System� section in your vehicleOwner’s Manual on the DVD for details.
• Lights
Refer to �Understanding Your Instrument Panel�,�Uconnect Touch™ System� section in your vehicleOwner’s Manual on the DVD for details.
• Doors & Locks
Refer to �Understanding Your Instrument Panel�,�Uconnect Touch™ System� section in your vehicleOwner’s Manual on the DVD for details.
• Heated Seats
Refer to �Understanding The Features Of Your Ve-hicle�, �Seats� section in your vehicle Owner’s Manualon the DVD for details.
• Engine Off Options
Refer to �Understanding Your Instrument Panel�,�Uconnect Touch™ System� section in your vehicleOwner’s Manual on the DVD for details.
2
Uconnect Touch™ 4.3 SYSTEM 31
• Compass Settings
Refer to �Understanding Your Instrument Panel�,�Uconnect Touch™ System� section in your vehicleOwner’s Manual on the DVD for details.
• Audio
Refer to the Operating Instructions – Radio section inthis manual for details.
• Phone/Bluetooth
Refer to �Understanding The Features Of Your Ve-hicle�, �Uconnect Touch™ 4.3� section in your vehicleOwner’s Manual on the DVD for details.
• Sirius Setup
Refer to the Operating Instructions – Radio section inthis manual for details.
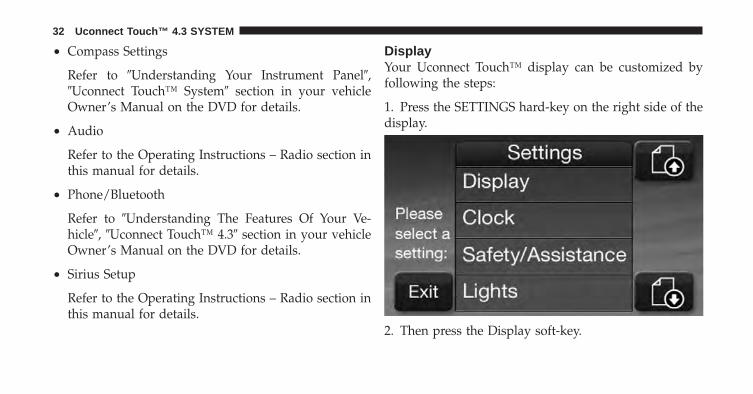
DisplayYour Uconnect Touch™ display can be customized byfollowing the steps:
1. Press the SETTINGS hard-key on the right side of thedisplay.
2. Then press the Display soft-key.
32 Uconnect Touch™ 4.3 SYSTEM
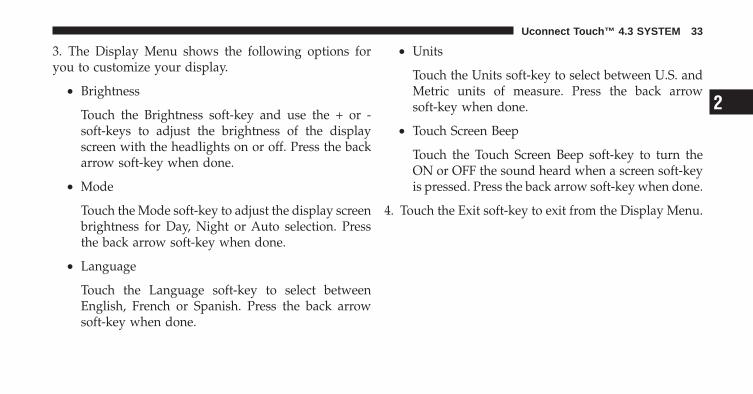
3. The Display Menu shows the following options foryou to customize your display.
• Brightness
Touch the Brightness soft-key and use the + or -soft-keys to adjust the brightness of the displayscreen with the headlights on or off. Press the backarrow soft-key when done.
• Mode
Touch the Mode soft-key to adjust the display screenbrightness for Day, Night or Auto selection. Pressthe back arrow soft-key when done.
• Language
Touch the Language soft-key to select betweenEnglish, French or Spanish. Press the back arrowsoft-key when done.
• Units
Touch the Units soft-key to select between U.S. andMetric units of measure. Press the back arrowsoft-key when done.
• Touch Screen Beep
Touch the Touch Screen Beep soft-key to turn theON or OFF the sound heard when a screen soft-keyis pressed. Press the back arrow soft-key when done.
4. Touch the Exit soft-key to exit from the Display Menu.
2
Uconnect Touch™ 4.3 SYSTEM 33

Uconnect Touch™ 8.4 SYSTEM
CONTENTS
� Operating Instructions – Radio . . . . . . . . . . . . . 38
▫ Overview. . . . . . . . . . . . . . . . . . . . . . . . . . . . 38
▫ Common Radio Functions . . . . . . . . . . . . . . . 38
▫ Seek And Direct Tune Functions . . . . . . . . . . . 39
▫ Setting Presets . . . . . . . . . . . . . . . . . . . . . . . 41
▫ Sirius Satellite Radio Mode . . . . . . . . . . . . . . 44
▫ Browse In SAT . . . . . . . . . . . . . . . . . . . . . . . 47
▫ Audio . . . . . . . . . . . . . . . . . . . . . . . . . . . . . 51
� Operating Instructions – Disc Mode . . . . . . . . . 52
▫ Overview . . . . . . . . . . . . . . . . . . . . . . . . . . . 52
▫ Seek Up/Down . . . . . . . . . . . . . . . . . . . . . . 54
▫ Browse . . . . . . . . . . . . . . . . . . . . . . . . . . . . 54
▫ Source . . . . . . . . . . . . . . . . . . . . . . . . . . . . . 55
▫ Repeat . . . . . . . . . . . . . . . . . . . . . . . . . . . . . 55
▫ Shuffle . . . . . . . . . . . . . . . . . . . . . . . . . . . . . 55
▫ Info . . . . . . . . . . . . . . . . . . . . . . . . . . . . . . . 55
▫ Tracks . . . . . . . . . . . . . . . . . . . . . . . . . . . . . 55
▫ Audio . . . . . . . . . . . . . . . . . . . . . . . . . . . . . 56
3
� Operating Instructions – USB/iPod Mode . . . . . 56
▫ Overview . . . . . . . . . . . . . . . . . . . . . . . . . . . 56
▫ Seek Up/Down . . . . . . . . . . . . . . . . . . . . . . 57
▫ Browse . . . . . . . . . . . . . . . . . . . . . . . . . . . . 57
▫ Source . . . . . . . . . . . . . . . . . . . . . . . . . . . . . 61
▫ Repeat . . . . . . . . . . . . . . . . . . . . . . . . . . . . . 61
▫ Shuffle . . . . . . . . . . . . . . . . . . . . . . . . . . . . . 61
▫ Info . . . . . . . . . . . . . . . . . . . . . . . . . . . . . . . 62
▫ Tracks . . . . . . . . . . . . . . . . . . . . . . . . . . . . . 62
▫ Audio . . . . . . . . . . . . . . . . . . . . . . . . . . . . . 62
� Operating Instructions – AUX Mode . . . . . . . . . 63
▫ Overview . . . . . . . . . . . . . . . . . . . . . . . . . . . 63
▫ Source . . . . . . . . . . . . . . . . . . . . . . . . . . . . . 64
▫ Audio . . . . . . . . . . . . . . . . . . . . . . . . . . . . . 64
� Operating Instructions – SD Card Mode . . . . . . 64
▫ Overview . . . . . . . . . . . . . . . . . . . . . . . . . . . 64
▫ Seek Up/Down . . . . . . . . . . . . . . . . . . . . . . 65
▫ Browse . . . . . . . . . . . . . . . . . . . . . . . . . . . . 65
▫ Source . . . . . . . . . . . . . . . . . . . . . . . . . . . . . 68
▫ Repeat . . . . . . . . . . . . . . . . . . . . . . . . . . . . . 68
▫ Shuffle . . . . . . . . . . . . . . . . . . . . . . . . . . . . . 68
▫ Info . . . . . . . . . . . . . . . . . . . . . . . . . . . . . . . 69
▫ Tracks . . . . . . . . . . . . . . . . . . . . . . . . . . . . . 69
▫ Audio . . . . . . . . . . . . . . . . . . . . . . . . . . . . . 69
� Operating Instructions – Bluetooth Mode . . . . . . 70
▫ Overview . . . . . . . . . . . . . . . . . . . . . . . . . . . 70
36 Uconnect Touch™ 8.4 SYSTEM
▫ Seek Up/Down . . . . . . . . . . . . . . . . . . . . . . 70
▫ Source . . . . . . . . . . . . . . . . . . . . . . . . . . . . . 70
▫ Repeat . . . . . . . . . . . . . . . . . . . . . . . . . . . . . 71
▫ Info . . . . . . . . . . . . . . . . . . . . . . . . . . . . . . . 71
▫ Tracks . . . . . . . . . . . . . . . . . . . . . . . . . . . . . 71
▫ Audio . . . . . . . . . . . . . . . . . . . . . . . . . . . . . 71
� Operating Instructions – Navigation (8.4NOnly) . . . . . . . . . . . . . . . . . . . . . . . . . . . . . . . . 72
▫ Getting Started . . . . . . . . . . . . . . . . . . . . . . . 72
▫ Find It And Go! . . . . . . . . . . . . . . . . . . . . . . 73
▫ Where To? . . . . . . . . . . . . . . . . . . . . . . . . . . 78
▫ Favorites . . . . . . . . . . . . . . . . . . . . . . . . . . . 82
▫ The Main Pages . . . . . . . . . . . . . . . . . . . . . . 85
▫ Creating And Editing Routes . . . . . . . . . . . . . 89
▫ Customizing The Settings . . . . . . . . . . . . . . . 91
▫ Sirius Travel Link . . . . . . . . . . . . . . . . . . . . . 94
▫ Appendix . . . . . . . . . . . . . . . . . . . . . . . . . . . 96
▫ Safety Precautions And ImportantInformation . . . . . . . . . . . . . . . . . . . . . . . . . 96
� Operation Instructions – More . . . . . . . . . . . . 108
▫ More Main Menu . . . . . . . . . . . . . . . . . . . . 108
▫ Settings Main Menu . . . . . . . . . . . . . . . . . . 109
▫ Display . . . . . . . . . . . . . . . . . . . . . . . . . . . 110
▫ Clock Setting . . . . . . . . . . . . . . . . . . . . . . . 112
3
Uconnect Touch™ 8.4 SYSTEM 37
OPERATING INSTRUCTIONS – RADIO
Overview
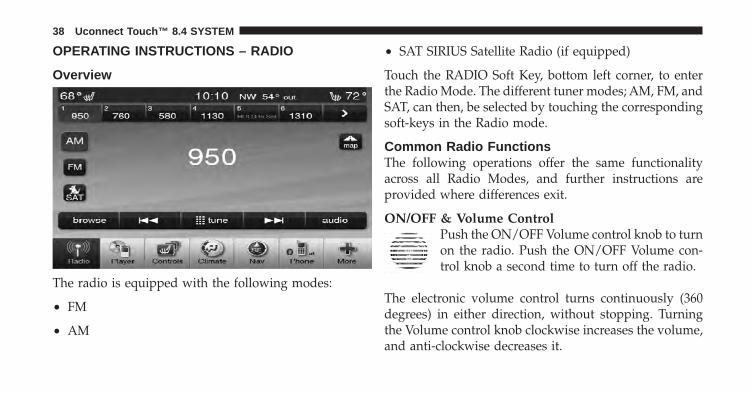
The radio is equipped with the following modes:
• FM
• AM
• SAT SIRIUS Satellite Radio (if equipped)
Touch the RADIO Soft Key, bottom left corner, to enterthe Radio Mode. The different tuner modes; AM, FM, andSAT, can then, be selected by touching the correspondingsoft-keys in the Radio mode.
Common Radio FunctionsThe following operations offer the same functionalityacross all Radio Modes, and further instructions areprovided where differences exit.
ON/OFF & Volume ControlPush the ON/OFF Volume control knob to turnon the radio. Push the ON/OFF Volume con-trol knob a second time to turn off the radio.
The electronic volume control turns continuously (360degrees) in either direction, without stopping. Turningthe Volume control knob clockwise increases the volume,and anti-clockwise decreases it.
38 Uconnect Touch™ 8.4 SYSTEM
When the audio system is turned on, the sound will beset at the same volume level as last played.
Tune/Scroll ControlTurn the rotary TUNE/SCROLL control knobclockwise to increase or counterclockwise todecrease the radio station frequency. Push theENTER/BROWSE button to choose a selection.
UndoYou can backspace an entry by touching the bottom leftUndo soft key.
GOWhen touched, the green GO soft key allows the you tocommit an entry, at which time the radio will tune to theentered station or channel and close the Direct TuneScreen.
Screen CloseThe Red X Soft key at the top right, provides a means toclose the Direct Tune Screen. The Direct Tune Screen alsoauto closes if no activity occurs within 10 seconds.
Seek and Direct Tune FunctionsThe Seek Up and Down functions are activated bypressing the double arrow soft-keys to the right and leftof the radio station display, or by pressing the leftSteering Wheel Audio Control (if equipped) up or down.
Seek UpTouching the Seek Up soft-key for less than 2 seconds,tunes the radio to the next listenable station or channel.
During a Seek Up function, if the radio reaches thestarting station after passing through the entire band twotimes, the radio will stop at the station where it began.
3
Uconnect Touch™ 8.4 SYSTEM 39
Fast Seek UpTouching and holding the Seek Up soft-key for more than2 seconds, advances the radio through the availablestations or channels at a faster rate, the radio stops at thenext available station or channel when the soft-key isreleased.
Seek DownTouching the Seek Down soft-key for less than 2 seconds,tunes the radio to the next listenable station or channel.
During a Seek Down function, if the radio reaches thestarting station after passing through the entire band twotimes, the radio will stop at the station where it began.
Fast Seek DownTouching and holding the Seek Down soft-key for morethan 2 seconds, advances the radio through the availablestations or channel at a faster rate, the radio stops at thenext available station or channel when the soft-key isreleased.
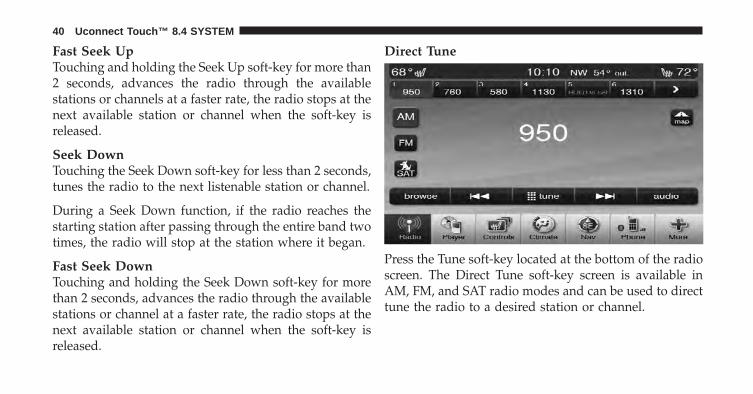
Direct Tune
Press the Tune soft-key located at the bottom of the radioscreen. The Direct Tune soft-key screen is available inAM, FM, and SAT radio modes and can be used to directtune the radio to a desired station or channel.
40 Uconnect Touch™ 8.4 SYSTEM
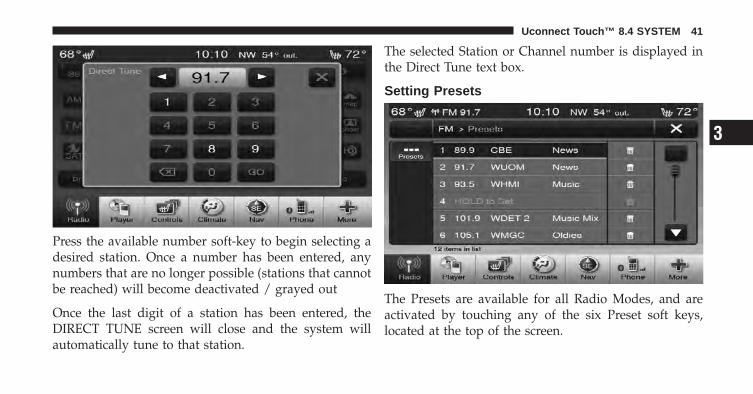
Press the available number soft-key to begin selecting adesired station. Once a number has been entered, anynumbers that are no longer possible (stations that cannotbe reached) will become deactivated / grayed out
Once the last digit of a station has been entered, theDIRECT TUNE screen will close and the system willautomatically tune to that station.
The selected Station or Channel number is displayed inthe Direct Tune text box.
Setting Presets
The Presets are available for all Radio Modes, and areactivated by touching any of the six Preset soft keys,located at the top of the screen.
3
Uconnect Touch™ 8.4 SYSTEM 41
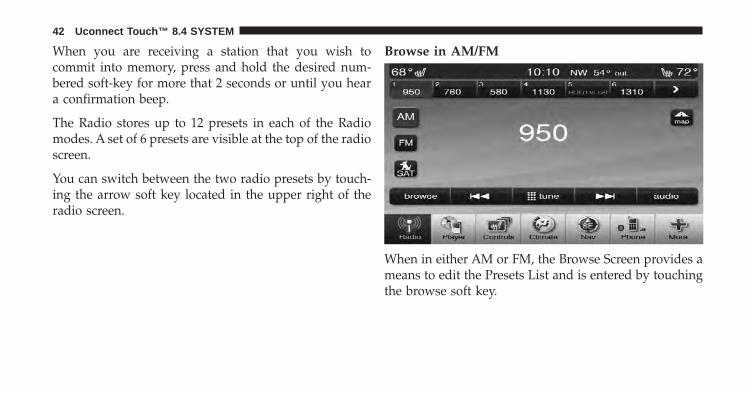
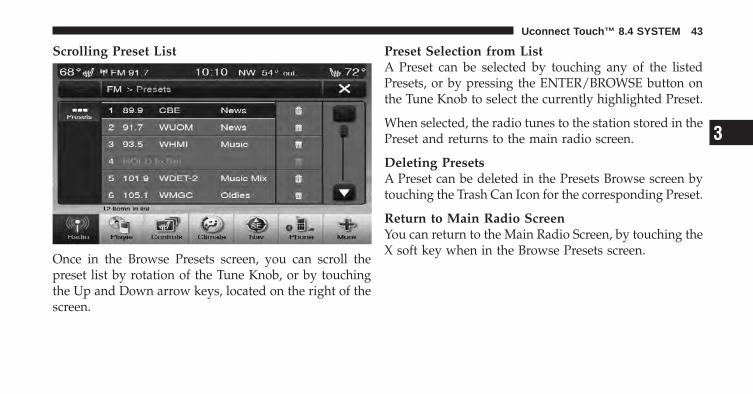
When you are receiving a station that you wish tocommit into memory, press and hold the desired num-bered soft-key for more that 2 seconds or until you heara confirmation beep.
The Radio stores up to 12 presets in each of the Radiomodes. A set of 6 presets are visible at the top of the radioscreen.
You can switch between the two radio presets by touch-ing the arrow soft key located in the upper right of theradio screen.
Browse in AM/FM
When in either AM or FM, the Browse Screen provides ameans to edit the Presets List and is entered by touchingthe browse soft key.
42 Uconnect Touch™ 8.4 SYSTEM
Scrolling Preset List
Once in the Browse Presets screen, you can scroll thepreset list by rotation of the Tune Knob, or by touchingthe Up and Down arrow keys, located on the right of thescreen.
Preset Selection from ListA Preset can be selected by touching any of the listedPresets, or by pressing the ENTER/BROWSE button onthe Tune Knob to select the currently highlighted Preset.
When selected, the radio tunes to the station stored in thePreset and returns to the main radio screen.
Deleting PresetsA Preset can be deleted in the Presets Browse screen bytouching the Trash Can Icon for the corresponding Preset.
Return to Main Radio ScreenYou can return to the Main Radio Screen, by touching theX soft key when in the Browse Presets screen.
3
Uconnect Touch™ 8.4 SYSTEM 43
SIRIUS Satellite Radio Mode
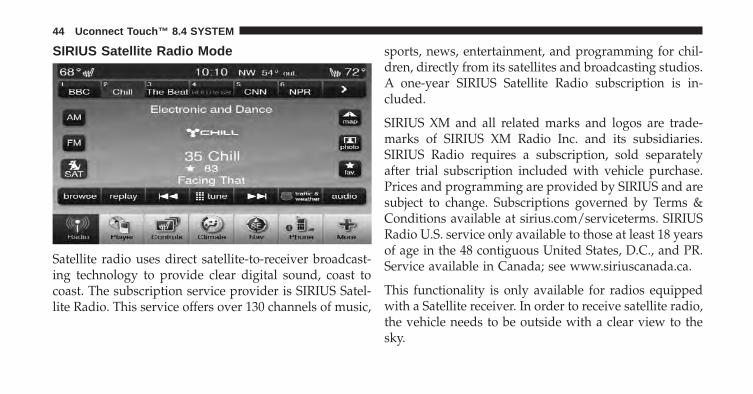
Satellite radio uses direct satellite-to-receiver broadcast-ing technology to provide clear digital sound, coast tocoast. The subscription service provider is SIRIUS Satel-lite Radio. This service offers over 130 channels of music,
sports, news, entertainment, and programming for chil-dren, directly from its satellites and broadcasting studios.A one-year SIRIUS Satellite Radio subscription is in-cluded.
SIRIUS XM and all related marks and logos are trade-marks of SIRIUS XM Radio Inc. and its subsidiaries.SIRIUS Radio requires a subscription, sold separatelyafter trial subscription included with vehicle purchase.Prices and programming are provided by SIRIUS and aresubject to change. Subscriptions governed by Terms &Conditions available at sirius.com/serviceterms. SIRIUSRadio U.S. service only available to those at least 18 yearsof age in the 48 contiguous United States, D.C., and PR.Service available in Canada; see www.siriuscanada.ca.
This functionality is only available for radios equippedwith a Satellite receiver. In order to receive satellite radio,the vehicle needs to be outside with a clear view to thesky.
44 Uconnect Touch™ 8.4 SYSTEM
If the screen shows Acquiring Signal, you might have tochange the vehicle’s position in order to receive a signal.In most cases, the satellite radio does not receive a signalin underground parking garages or tunnels.
No SubscriptionRadios equipped with a Satellite receiver, require asubscription to the Sirius Service. When the Radio doesnot have the necessary subscription, the Radio is able toreceive the Traffic/Weather channel only.
Acquiring SIRIUS SubscriptionTo activate the Sirius subscription, call the toll freenumber on the Weather channel. You will need to pro-vide the Sirius ID (SID) located at the bottom of theChannel 0 screen.
The Satellite Mode is activated by a touch of the SATsoft-key.
When in Satellite mode:
• The SAT button is highlighted blue.
• The SIRIUS Presets are displayed at the top of thescreen.
• The Genre is displayed below the Presets Bar.
• The SIRIUS Channel Number is displayed in thecenter.
• The Program Information is displayed at the bottom ofthe Channel Number.
• The SIRIUS function soft-keys are displayed below theProgram Information.
Tuning is done by operating the Tune Knob or by DirectTune, similar to other Radio Bands, see Presets, browse,Tune Knob, and Direct Tune.
In addition to the tuning Operation functions common toall Radio modes, the replay, Traffic/Weather Jump, andfav soft-key functions are available in SIRIUS Mode.
3
Uconnect Touch™ 8.4 SYSTEM 45
ReplayThe replay function provides a means to store and replayup to 22 minutes of music audio and 48 minutes of talkradio.
Touch the replay soft-key. The play/pause, rewind/forward and live soft-keys will display at the top of thescreen, along with the replay time.
Replay can be exited by touching the replay soft-key, anytime during the Replay mode.
Play/Pause
Touch the Pause or Play soft-key to pause playing of thecontent at any time that the content is playing live orrewound content. Play can be resumed again by touchingof the Pause/Play soft-key.
Rewind
Touch the RW soft-key to rewind the content in steps of5 seconds. Touching the RW soft-key for more than
2 seconds rewinds the content. The Radio begins playingthe content at the point at which the touch is released.
Forward
Each touch of the FW soft-key forwards the content insteps of 5 seconds. Forwarding of the content can only bedone when the content is previously rewound, andtherefore, can not be done for live content. A continuoustouch of the FW soft-key also forwards the content. TheRadio begins playing the content at the point at which thetouch is release.
Live
Touch the Live soft-key to resume playing of Livecontent.
FavoritesTouch the fav. soft-key to activate the favorites menu,which will time out in 5 seconds in absence of userinteraction.
46 Uconnect Touch™ 8.4 SYSTEM
You can exit the Favorites Menu by a touch of the X in thetop right corner.
The favorites feature enables you to set a favorite artist,or song that is currently playing. The Radio then uses thisinformation to alert you when either the favorite song, orfavorite artist are being played at any time by any of theSIRIUS Channels.
The maximum number of favorites that can be stored inthe Radio is 50.
Fav. Artist
While the song is playing to set a Favorite Artist, touchthe fav. soft-key and then the Fav. Artist soft-key.
Fav. Song
While the song is playing to set a Favorite Song, touch thefav. soft-key and then the Fav Song soft-key.
JumpTouch the Jump soft-key (Curved Arrow) to tune to aSIRIUS Traffic and Weather channel. To set a Traffic &Weather alert for any one of the cities in the Jump Browselist, see Browse in SAT.
When the Jump soft-key (Curved Arrow) is touched, theJump Traffic & Weather channel is tuned.
If the Traffic/Weather alert City is not set, you arepresented with a pop up to allow you to select thefavorite city using the Browse Screen.
Browse in SATTouch the browse soft-key to edit Presets, Favorites,Game Zone, and Jump settings, along with providing theSIRIUS Channel List.
This Screen contains many sub menus. You can exit a submenu to get back to a parent menu by a touch of the BackArrow.
3
Uconnect Touch™ 8.4 SYSTEM 47
AllTouch the All soft-key at the left of the Browse Screen.
Channel List
Touch the Channel List to display all the SIRIUS ChannelNumbers along with the corresponding Genre. You canscroll the Channel list by touching the up and downarrows, located on the right side of the screen. Scrollingcan also be done by operating the Tune/Scroll Knob.
Genre
Touch the Genre button to display a list of Genres. Youcan select any desired Genre by touching the Genre list, atwhich point, the Radio tunes to a channel with thecontent in the selected Genre.
PresetsTouch the Presets soft-key located at the left of theBrowse screen.
You can scroll the Presets list touching the up and downarrows, located at the right side of the screen. Scrollingcan also be done by operating the Tune/Scroll Knob aswell.
Preset Selection
A Preset can be selected by touching any of the listedPresets, or by pressing the ENTER/BROWSE button onthe Tune Knob to select the currently highlighted Preset.When selected, the Radio tunes to the station stored inthe Preset, and returns to the main Radio screen.
Deleting a Preset
A Preset can be deleted in the Presets Browse screen bytouching the Trash Can Icon for the corresponding Preset.
FavoritesTouch the Favorites soft-key, located at the left of theBrowse screen.
48 Uconnect Touch™ 8.4 SYSTEM
The Favorites menu provides a means to Edit the Favor-ites list and to configure the Alert Settings, along withproviding a list of Channels currently airing any of theitems in the Favorites list.
You can scroll the Favorites list touching the up anddown arrows, located at the right side of the screen.Scrolling can also be done by operating the Tune/ScrollKnob as well.
On Air
Touch the On-Air tab at the top of the screen. The On-Airlist provides a list of Channels currently airing any of theitems in the Favorites list, and touching any of the itemsin the list tunes the radio to that channel.
Remove Favorites
Touch the Remove Favorites tab at the top of the screen.Touch the Delete All soft-key to delete all of the Favoritesor touch the Trash Can icon next to the Favorite to bedeleted.
Alert Settings
Touch the Alert Setting tab at the top of the screen. TheAlert Settings menu allows you to choose from a Visualalert or Audible and Visual alert when one of yourfavorites is airing on any of the SIRIUS channels.
Game ZoneTouch the Game Zone soft-key, located at the left of theBrowse screen. This feature provides you with the abilityto select teams, edit the selection, and set alerts.
3
Uconnect Touch™ 8.4 SYSTEM 49
On Air
Touch the On-Air tab at the top of the screen. The On-Airlist provides a list of Channels currently airing any of theitems in the Selections list, and touching any of the itemsin the list tunes the radio to that channel.
Select Teams
Touch the Select Teams soft-key to activate the LeagueScroll list. Touch the chosen league and a scroll list of allteams within the league will appear, then you can selecta team by touching the corresponding box. A check markappears for all teams that are chosen.
Remove Selection
Touch the Remove Selection tab at the top of the screen.Touch the Delete All soft-key to delete all of the Selectionsor touch the Trash Can icon next to the Selection to bedeleted.
Alert Settings
Touch the Alert Setting tab at the top of the screen. TheAlert Settings menu allows you to choose from “Alert meto on-air games upon start” or “Alert upon score update”or both when one or more of your selections is airing onany of the SIRIUS channels.
JumpTouch the Jump (Curved Arrow) soft-key, located at theleft of the Browse Screen to select a City for Traffic andWeather Reports
Touch the Up and Down arrows to the right side of thelist to view all the available cities. This operation can alsobe done with operation of the Scroll/Tune Knob.
Touch the check box next to the desired City. A checkmark appears besides the selected City.
50 Uconnect Touch™ 8.4 SYSTEM
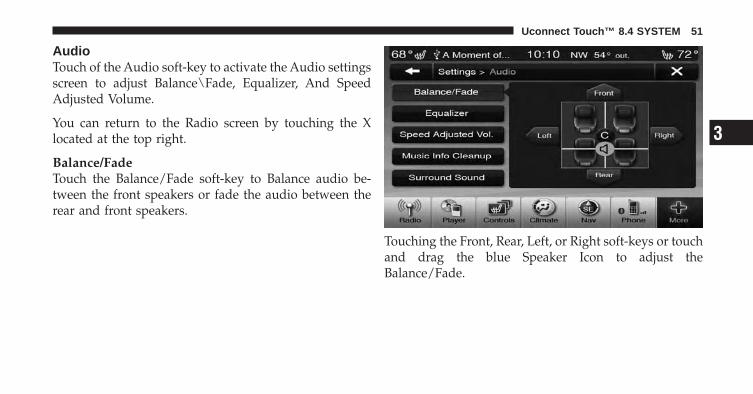
AudioTouch of the Audio soft-key to activate the Audio settingsscreen to adjust Balance\Fade, Equalizer, And SpeedAdjusted Volume.
You can return to the Radio screen by touching the Xlocated at the top right.
Balance/FadeTouch the Balance/Fade soft-key to Balance audio be-tween the front speakers or fade the audio between therear and front speakers.
Touching the Front, Rear, Left, or Right soft-keys or touchand drag the blue Speaker Icon to adjust theBalance/Fade.
3
Uconnect Touch™ 8.4 SYSTEM 51
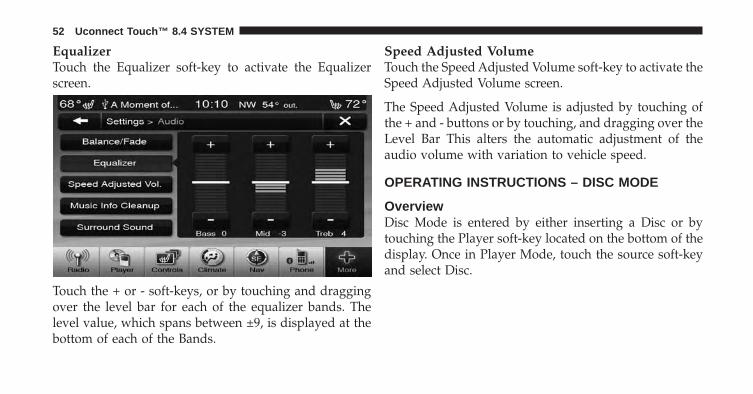
EqualizerTouch the Equalizer soft-key to activate the Equalizerscreen.
Touch the + or - soft-keys, or by touching and draggingover the level bar for each of the equalizer bands. Thelevel value, which spans between ±9, is displayed at thebottom of each of the Bands.
Speed Adjusted VolumeTouch the Speed Adjusted Volume soft-key to activate theSpeed Adjusted Volume screen.
The Speed Adjusted Volume is adjusted by touching ofthe + and - buttons or by touching, and dragging over theLevel Bar This alters the automatic adjustment of theaudio volume with variation to vehicle speed.
OPERATING INSTRUCTIONS – DISC MODE
OverviewDisc Mode is entered by either inserting a Disc or bytouching the Player soft-key located on the bottom of thedisplay. Once in Player Mode, touch the source soft-keyand select Disc.
52 Uconnect Touch™ 8.4 SYSTEM
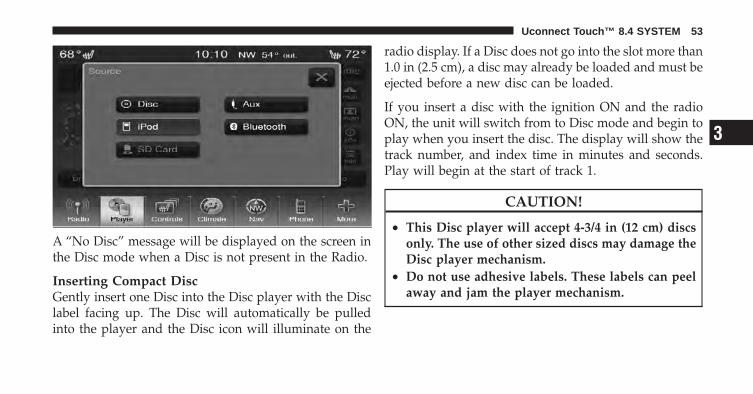
A “No Disc” message will be displayed on the screen inthe Disc mode when a Disc is not present in the Radio.
Inserting Compact DiscGently insert one Disc into the Disc player with the Disclabel facing up. The Disc will automatically be pulledinto the player and the Disc icon will illuminate on the
radio display. If a Disc does not go into the slot more than1.0 in (2.5 cm), a disc may already be loaded and must beejected before a new disc can be loaded.
If you insert a disc with the ignition ON and the radioON, the unit will switch from to Disc mode and begin toplay when you insert the disc. The display will show thetrack number, and index time in minutes and seconds.Play will begin at the start of track 1.
CAUTION!
• This Disc player will accept 4-3/4 in (12 cm) discsonly. The use of other sized discs may damage theDisc player mechanism.
• Do not use adhesive labels. These labels can peelaway and jam the player mechanism.
3
Uconnect Touch™ 8.4 SYSTEM 53
CAUTION! (Continued)• Uconnect Touch™ 8.4 is a single Disc player. Do
not attempt to insert a second Disc if one is alreadyloaded.
EJECT Button - Ejecting a DiscPress the EJECT button to eject the Disc.
If you have ejected a disc and have not removed it within10 seconds, it will be reloaded. If the Disc is not removed,the radio will reinsert the Disc but will not play it.
A disc can be ejected with the radio and ignition OFF.
Seek Up/DownPress the right Arrow soft-key for less than 2 second forthe next selection on the Disc. Press the left Arrowsoft-key for less than 2 seconds to return to the beginning
of the current selection, or return to the beginning of theprevious selection if the Disc is within the first second ofthe current selection.
Fast Seek UpPress and hold the right arrow soft-key for more that twoseconds and the Disc player will begin to fast forwardthrough the current track until the soft-key is released.
Fast Seek DownPress and hold the left arrow soft-key for more that twoseconds and the Disc player will begin to rewind throughthe current track until the soft-key is released.
BrowseTouch the browse soft-key to display the browse window.The left side of the browse window displays a list of waysyou can browse through the contents of the Disc. Ifsupported by the device, you can browse by Folders,Artists, Playlists, Albums, Songs, etc. Touch the desiredsoft-key on the left side of the screen. The center of the
54 Uconnect Touch™ 8.4 SYSTEM
browse window shows items and it’s sub-functions,which can be scrolled by touching the Up and Downsoft-keys to the right. The Scroll/Tune knob can also beused to scroll.
SourceTouch the Source soft-key to select the desired audiosource, Disc, USB/iPod, SD Card, AUX or Bluetooth. Thisscreen will time out after a few seconds and return to themain radio screen if no selection is made.
RepeatTouch the repeat soft-key to toggle the repeat function-ality. The Repeat soft-key is highlighted when active. TheRadio will continue to play the current track, repeatedly,as long as the repeat is active.
ShuffleTouch the shuffle soft-key to play the selections on thecompact disc in random order to provide an interestingchange of pace. Touch the soft-key a second time to turnthis feature off.
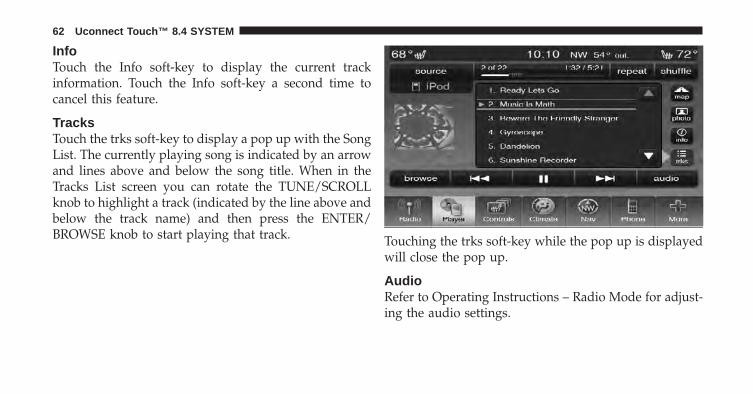
InfoTouch the Info soft-key to display the current trackinformation. Touch the Info soft-key a second time tocancel this feature.
TracksTouch the trks soft-key to display a pop up with the SongList. The currently playing song is indicated by an arrowand lines above and below the song title.
3
Uconnect Touch™ 8.4 SYSTEM 55
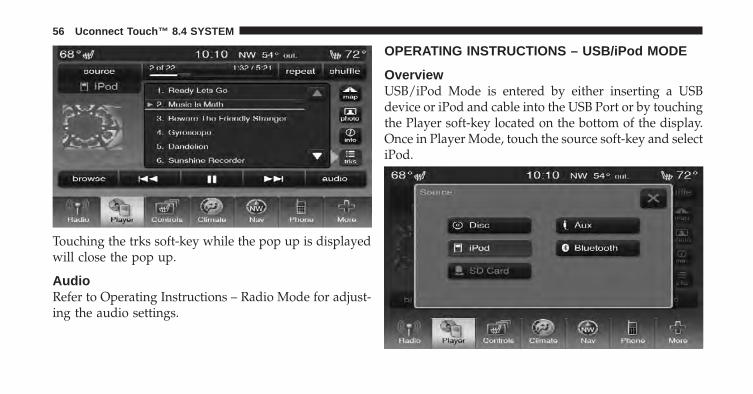
Touching the trks soft-key while the pop up is displayedwill close the pop up.
AudioRefer to Operating Instructions – Radio Mode for adjust-ing the audio settings.
OPERATING INSTRUCTIONS – USB/iPod MODE
OverviewUSB/iPod Mode is entered by either inserting a USBdevice or iPod and cable into the USB Port or by touchingthe Player soft-key located on the bottom of the display.Once in Player Mode, touch the source soft-key and selectiPod.
56 Uconnect Touch™ 8.4 SYSTEM
Inserting USB/iPod DeviceGently insert the USB/iPod device into the USB Port. Ifyou insert a USB/iPod device with the ignition ON andthe radio ON, the unit will switch to USB/iPod mode andbegin to play when you insert the device. The displaywill show the track number, and index time in minutesand seconds. Play will begin at the start of track 1.
Seek Up/DownPress the right Arrow soft-key for less than 2 second forthe next selection on the USB device/iPod. Press the leftArrow soft-key for less than 2 seconds to return to thebeginning of the current selection, or return to thebeginning of the previous selection if the USB device/iPod is within the first second of the current selection.
Fast Seek UpPress and hold the right arrow soft-key for more that twoseconds and the USB device/iPod will begin to fastforward through the current track until the soft-key isreleased.
Fast Seek DownPress and hold the left arrow soft-key for more that twoseconds and the USB device/iPod will begin to rewindthrough the current track until the soft-key is released.
BrowseTouch the browse soft-key to display the browse window.The left side of the browse window displays a list of waysyou can browse through the contents of the USB device/iPod. If supported by the device, you can browse byFolders, Artists, Playlists, Albums, Songs, etc. Touch thedesired soft-key on the left side of the screen. The center
3
Uconnect Touch™ 8.4 SYSTEM 57

of the browse window shows items and it’s sub-functions, which can be scrolled by touching the Up andDown soft-keys to the right. The Scroll/Tune knob canalso be used to scroll.
ABC JumpTouch the ABC Jump soft-key tab at the top of the screento search an alpha numeric keypad used to search byletter/number for a certain Folder, Artist, Song, Album,or Genre. Touch one letter to select all contents that startwith that letter. Touch the 123 soft-key to display allcontents that start with numbers. Touch the 123 soft-keyagain to return to letters. Touch the X soft-key to exit theABC Jump feature.
NOTE: Many features of this system are speed depen-dent. For your own safety these features may be grayedout and not accessible while the vehicle is in motion. Pullover at a safe location to complete your task.
58 Uconnect Touch™ 8.4 SYSTEM
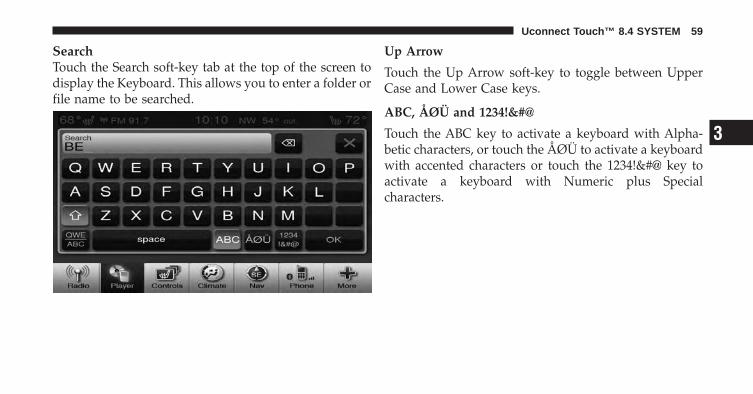
SearchTouch the Search soft-key tab at the top of the screen todisplay the Keyboard. This allows you to enter a folder orfile name to be searched.
Up Arrow
Touch the Up Arrow soft-key to toggle between UpperCase and Lower Case keys.
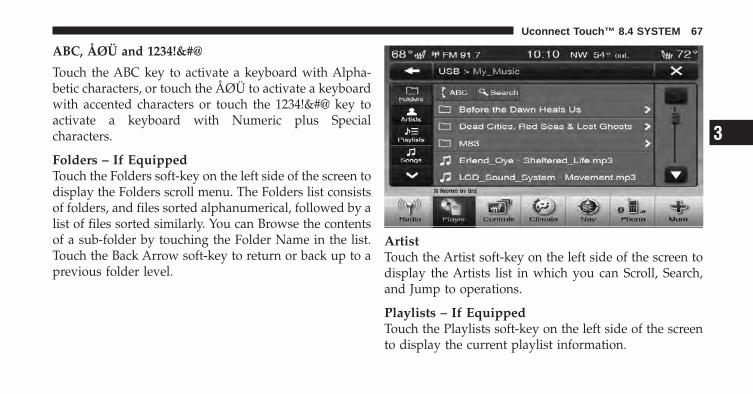
ABC, ÅØÜ and 1234!&#@
Touch the ABC key to activate a keyboard with Alpha-betic characters, or touch the ÅØÜ to activate a keyboardwith accented characters or touch the 1234!&#@ key toactivate a keyboard with Numeric plus Specialcharacters.
3
Uconnect Touch™ 8.4 SYSTEM 59
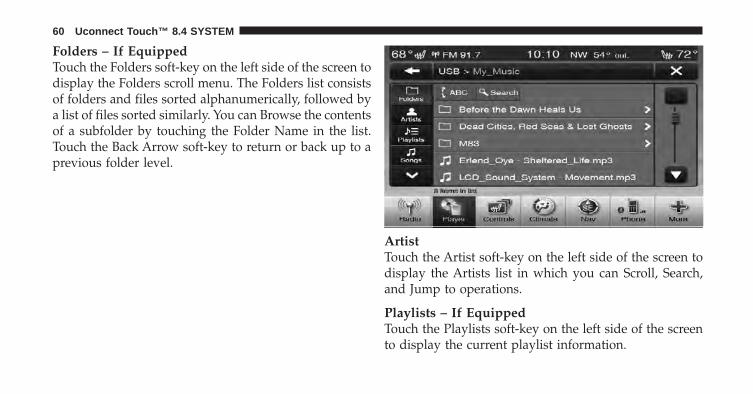
Folders – If EquippedTouch the Folders soft-key on the left side of the screen todisplay the Folders scroll menu. The Folders list consistsof folders and files sorted alphanumerically, followed bya list of files sorted similarly. You can Browse the contentsof a subfolder by touching the Folder Name in the list.Touch the Back Arrow soft-key to return or back up to aprevious folder level.
ArtistTouch the Artist soft-key on the left side of the screen todisplay the Artists list in which you can Scroll, Search,and Jump to operations.
Playlists – If EquippedTouch the Playlists soft-key on the left side of the screento display the current playlist information.
60 Uconnect Touch™ 8.4 SYSTEM
SongsTouch the Songs soft-key on the left side of the screen todisplay the Songs list in which the user can Scroll, Search,and Jump to operations.
The currently playing song is displayed with a blackbackground, and lines both above and below the title.
AlbumsTouch the Albums soft-key on the left side of the screen todisplay the Albums list in which you can Scroll, Search,and Jump to operations.
GenresTouch the Genres soft-key to display the Albums list inwhich you can Scroll, Search, and Jump to operations.
SourceTouch the Source soft-key to select the desired audiosource, Disc, USB/iPod, SD Card, AUX or Bluetooth. Thisscreen will time out after a few seconds and return to themain radio screen if no selection is made.
RepeatTouch the repeat soft-key to toggle the repeat function-ality. The Repeat soft-key is highlighted when active. TheRadio will continue to play the current track, repeatedly,as long as the repeat is active.
ShuffleTouch the shuffle soft-key to play the selections on theUSB/iPod device in random order to provide an inter-esting change of pace. Touch the soft-key a second time toturn this feature off.
3
Uconnect Touch™ 8.4 SYSTEM 61
InfoTouch the Info soft-key to display the current trackinformation. Touch the Info soft-key a second time tocancel this feature.
TracksTouch the trks soft-key to display a pop up with the SongList. The currently playing song is indicated by an arrowand lines above and below the song title. When in theTracks List screen you can rotate the TUNE/SCROLLknob to highlight a track (indicated by the line above andbelow the track name) and then press the ENTER/BROWSE knob to start playing that track. Touching the trks soft-key while the pop up is displayed
will close the pop up.
AudioRefer to Operating Instructions – Radio Mode for adjust-ing the audio settings.
62 Uconnect Touch™ 8.4 SYSTEM

OPERATING INSTRUCTIONS – AUX MODE
OverviewAUX Mode is entered by inserting an AUX device usinga cable with a 3.5 mm audio jack into the AUX port or bytouching the Player soft-key located at the bottom of thedisplay. Once in Player Mode, touch the source soft-keyand select AUX.
Inserting Auxiliary DeviceGently insert the Auxiliary device cable into the AUX Port.If you insert an Auxiliary device with the ignition ON andthe radio ON, the unit will switch to AUX mode and beginto play when you insert the device cable. The display willshow the track number, and index time in minutes andseconds. Play will begin at the start of track 1.
Controlling the Auxiliary DeviceThe control of the auxiliary device (e.g., selecting play-lists, play, fast forward, etc.) cannot be provided by theradio; use the device controls instead. Adjust the volumewith the ON/OFF VOLUME rotary knob, or with thevolume of the attached device.
NOTE: The vehicle radio unit is acting as the amplifierfor audio output from the Auxiliary device. Therefore ifthe volume control on the Auxiliary device is set too low,there will be insufficient audio signal for the radio unit toplay the music on the device.
3
Uconnect Touch™ 8.4 SYSTEM 63
SourceTouch the Source soft-key to select the desired audiosource, Disc, USB/iPod, SD Card, AUX or Bluetooth. Thisscreen will time out after a few seconds and return to themain radio screen if no selection is made.
AudioRefer to Operating Instructions – Radio Mode for adjust-ing the audio settings.
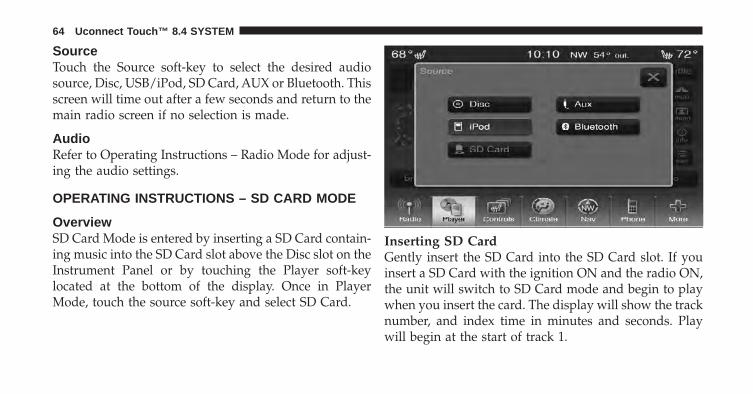
OPERATING INSTRUCTIONS – SD CARD MODE
OverviewSD Card Mode is entered by inserting a SD Card contain-ing music into the SD Card slot above the Disc slot on theInstrument Panel or by touching the Player soft-keylocated at the bottom of the display. Once in PlayerMode, touch the source soft-key and select SD Card.
Inserting SD CardGently insert the SD Card into the SD Card slot. If youinsert a SD Card with the ignition ON and the radio ON,the unit will switch to SD Card mode and begin to playwhen you insert the card. The display will show the tracknumber, and index time in minutes and seconds. Playwill begin at the start of track 1.
64 Uconnect Touch™ 8.4 SYSTEM
Seek Up/DownPress the right Arrow soft-key for less than 2 second forthe next selection on the SD Card. Press the left Arrowsoft-key for less than 2 seconds to return to the beginningof the current selection, or return to the beginning of theprevious selection if the SD Card is within the firstsecond of the current selection.
Fast Seek UpPress and hold the right arrow soft-key for more that twoseconds and the SD Card will begin to fast forwardthrough the current track until the soft-key is released.
Fast Seek DownPress and hold the left arrow soft-key for more that twoseconds and the SD Card will begin to rewind throughthe current track until the soft-key is released.
BrowseTouch the browse soft-key to display the browse window.The left side of the browse window displays a list of waysyou can browse through the contents of the SD Card. Ifequipped, you can browse by Folders, Artists, Playlists,Albums, Songs, etc. Touch the desired soft-key on the leftside of the screen. The center of the browse windowshows items and it’s sub-functions, which can be scrolledby touching the Up and Down soft-keys to the right. TheScroll/Tune knob can also be used to scroll.
ABC JumpTouch the ABC Jump soft-key tab at the top of the screento display a alpha numeric keypad used to search byletter/number for a certain Folder, Artist, Song, Album,or Genre. Touch one letter to select all contents that startwith that letter. Touch the 123 soft-key to search allcontents that start with numbers. Touch the 123 soft-keyto return to letters. Touch the X soft-key to exit the ABCJump feature.
3
Uconnect Touch™ 8.4 SYSTEM 65
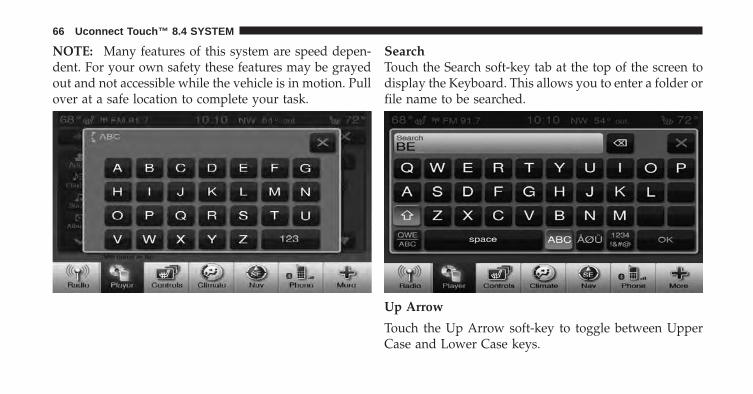
NOTE: Many features of this system are speed depen-dent. For your own safety these features may be grayedout and not accessible while the vehicle is in motion. Pullover at a safe location to complete your task.
SearchTouch the Search soft-key tab at the top of the screen todisplay the Keyboard. This allows you to enter a folder orfile name to be searched.
Up Arrow
Touch the Up Arrow soft-key to toggle between UpperCase and Lower Case keys.
66 Uconnect Touch™ 8.4 SYSTEM
ABC, ÅØÜ and 1234!&#@
Touch the ABC key to activate a keyboard with Alpha-betic characters, or touch the ÅØÜ to activate a keyboardwith accented characters or touch the 1234!&#@ key toactivate a keyboard with Numeric plus Specialcharacters.
Folders – If EquippedTouch the Folders soft-key on the left side of the screen todisplay the Folders scroll menu. The Folders list consistsof folders, and files sorted alphanumerical, followed by alist of files sorted similarly. You can Browse the contentsof a sub-folder by touching the Folder Name in the list.Touch the Back Arrow soft-key to return or back up to aprevious folder level.
ArtistTouch the Artist soft-key on the left side of the screen todisplay the Artists list in which you can Scroll, Search,and Jump to operations.
Playlists – If EquippedTouch the Playlists soft-key on the left side of the screento display the current playlist information.
3
Uconnect Touch™ 8.4 SYSTEM 67
SongsTouch the Songs soft-key on the left side of the screen todisplay the Songs list in which the user can Scroll, Search,and Jump to operations.
The currently playing song is displayed with a blackbackground, and blue lines both above and below thetitle.
AlbumsTouch the Albums soft-key on the left side of the screen todisplay the Albums list in which you can Scroll, Search,and Jump to operations.
GenresTouch the Genres soft-key to display the Albums list inwhich you can Scroll, Search, and Jump to operations.
SourceTouch the Source soft-key to select the desired audiosource, Disc, USB/iPod, SD Card, AUX or Bluetooth. Thisscreen will time out after a few seconds and return to themain radio screen if no selection is made.
RepeatTouch the repeat soft-key to toggle the repeat function-ality. The Repeat soft-key is highlighted when active. TheRadio will continue to play the current track, repeatedly,as long as the repeat is active.
ShuffleTouch the Shuffle soft-key to play the selections on theAuxiliary device in random order to provide an interest-ing change of pace. Touch the soft-key a second time toturn this feature off.
68 Uconnect Touch™ 8.4 SYSTEM

InfoTouch the Info soft-key to display the current trackinformation. Touch the Info soft-key a second time tocancel this feature.
TracksTouch the trks soft-key to display a pop up with the SongList. The currently playing song is indicated by an arrowand lines above and below the song title. When in theTracks List screen you can rotate the TUNE/SCROLLknob to highlight a track (indicated by the line above andbelow the track name) and then press the ENTER/BROWSE knob to start playing that track. Touching the trks soft-key while the pop up is displayed
will close the pop up.
AudioRefer to Operating Instructions – Radio Mode for adjust-ing the audio settings.
3
Uconnect Touch™ 8.4 SYSTEM 69
OPERATING INSTRUCTIONS – Bluetooth MODE
OverviewBluetooth Streaming Audio (BTSA) or Bluetooth Mode isentered by pairing a Bluetooth device, containing music,to the Uconnect Touch™ system.
Before proceeding, the Bluetooth device needs to bepaired through Uconnect™ Phone in order to communi-cate with the Uconnect Touch™ System.
NOTE: See the pairing procedure in the Owner’sManual on the DVD for more details.
Once the Bluetooth device is paired to the UconnectTouch™ System, touch the Player soft-key located on thebottom of the display. Once in Player Mode, touch thesource soft-key and select Bluetooth.
Seek Up/DownPress the right Arrow soft-key for less than 2 second forthe next selection on the Bluetooth device. Press the left
Arrow soft-key for less than 2 seconds to return to thebeginning of the current selection, or return to thebeginning of the previous selection if the Bluetoothdevice is within the first second of the current selection.
Fast Seek UpPress and hold the right arrow soft-key for more that twoseconds and the Bluetooth device will begin to fastforward through the current track until the soft-key isreleased.
Fast Seek DownPress and hold the left arrow soft-key for more that twoseconds and the Bluetooth device will begin to rewindthrough the current track until the soft-key is released.
SourceTouch the Source soft-key to select the desired audiosource, Disc, USB/iPod, SD Card, AUX or Bluetooth. Thisscreen will time out after a few seconds and return to themain radio screen if no selection is made.
70 Uconnect Touch™ 8.4 SYSTEM
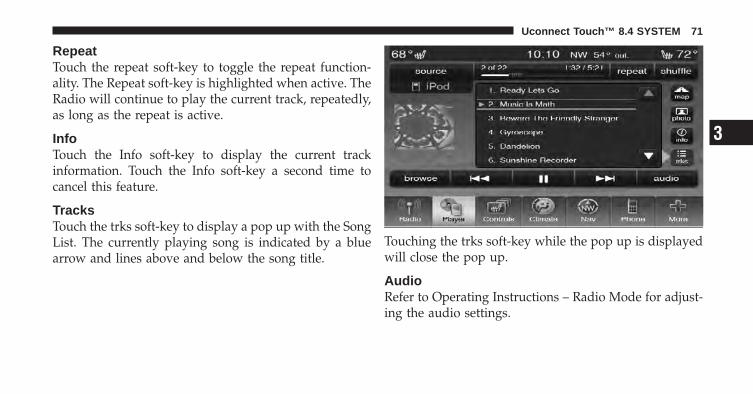
RepeatTouch the repeat soft-key to toggle the repeat function-ality. The Repeat soft-key is highlighted when active. TheRadio will continue to play the current track, repeatedly,as long as the repeat is active.
InfoTouch the Info soft-key to display the current trackinformation. Touch the Info soft-key a second time tocancel this feature.
TracksTouch the trks soft-key to display a pop up with the SongList. The currently playing song is indicated by a bluearrow and lines above and below the song title.
Touching the trks soft-key while the pop up is displayedwill close the pop up.
AudioRefer to Operating Instructions – Radio Mode for adjust-ing the audio settings.
3
Uconnect Touch™ 8.4 SYSTEM 71
OPERATING INSTRUCTIONS – NAVIGATION (8.4NONLY)
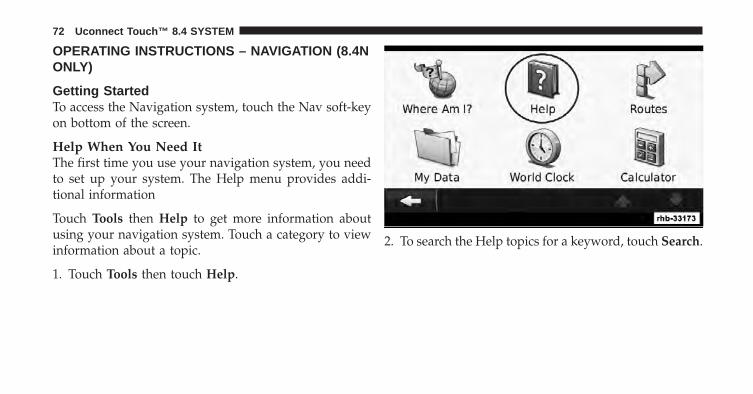
Getting StartedTo access the Navigation system, touch the Nav soft-keyon bottom of the screen.
Help When You Need ItThe first time you use your navigation system, you needto set up your system. The Help menu provides addi-tional information
Touch Tools then Help to get more information aboutusing your navigation system. Touch a category to viewinformation about a topic.
1. Touch Tools then touch Help.
2. To search the Help topics for a keyword, touch Search.
72 Uconnect Touch™ 8.4 SYSTEM
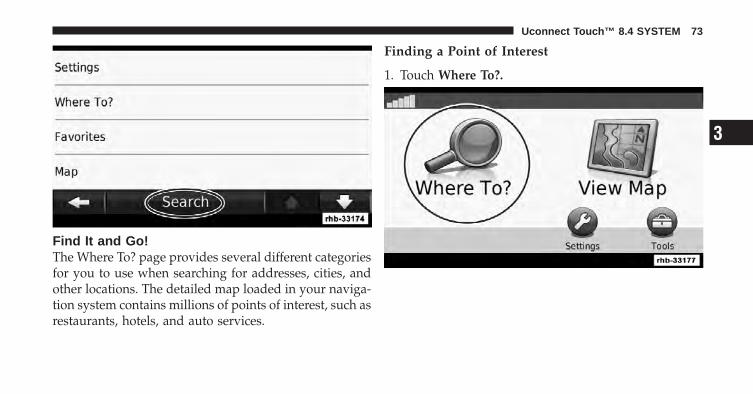
Find It and Go!The Where To? page provides several different categoriesfor you to use when searching for addresses, cities, andother locations. The detailed map loaded in your naviga-tion system contains millions of points of interest, such asrestaurants, hotels, and auto services.
Finding a Point of Interest
1. Touch Where To?.
3
Uconnect Touch™ 8.4 SYSTEM 73
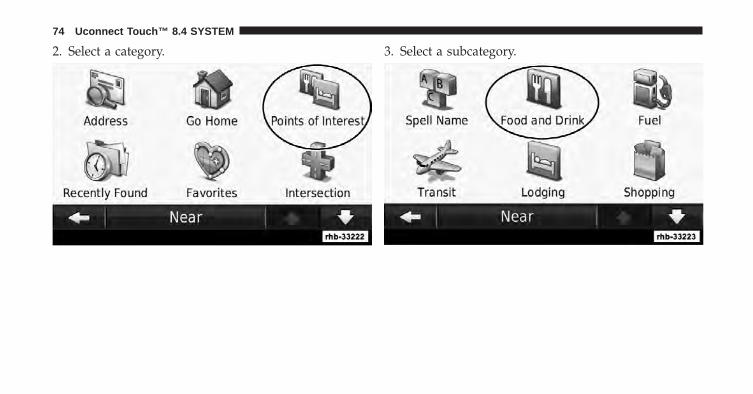
2. Select a category. 3. Select a subcategory.
74 Uconnect Touch™ 8.4 SYSTEM
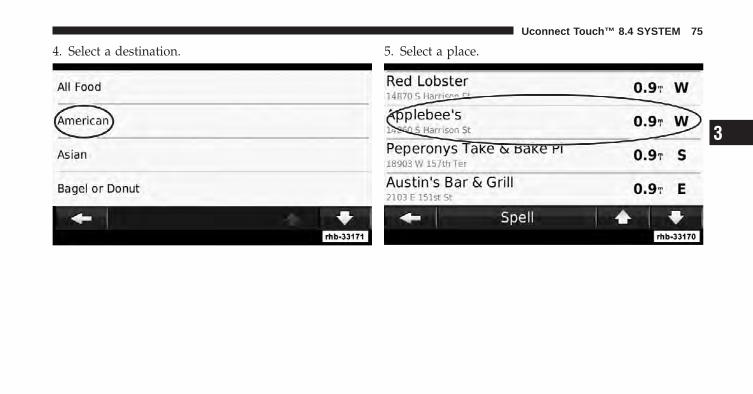
4. Select a destination. 5. Select a place.
3
Uconnect Touch™ 8.4 SYSTEM 75
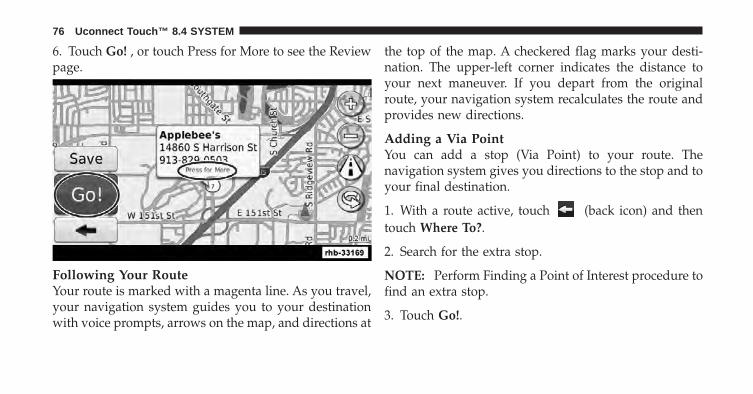
6. Touch Go! , or touch Press for More to see the Reviewpage.
Following Your RouteYour route is marked with a magenta line. As you travel,your navigation system guides you to your destinationwith voice prompts, arrows on the map, and directions at
the top of the map. A checkered flag marks your desti-nation. The upper-left corner indicates the distance toyour next maneuver. If you depart from the originalroute, your navigation system recalculates the route andprovides new directions.
Adding a Via PointYou can add a stop (Via Point) to your route. Thenavigation system gives you directions to the stop and toyour final destination.
1. With a route active, touch (back icon) and thentouch Where To?.
2. Search for the extra stop.
NOTE: Perform Finding a Point of Interest procedure tofind an extra stop.
3. Touch Go!.
76 Uconnect Touch™ 8.4 SYSTEM
4. Touch Add As a Via Point to add this stop before yourdestination.
Taking a DetourIf a road on your route is closed, you can take a detour.
1. With a route active, touch .
2. Touch Detour.
The navigation system attempts to get you back on youroriginal route as quickly as possible. If the route you arecurrently taking is the only reasonable option, the navi-gation system might not calculate a detour.
Stopping the Route
1. With a route active, touch .
2. Touch Stop.
Custom POIs (Points of Interest)You can manually load custom points of interest (POI)databases, available from various companies on the In-ternet. Some custom POI databases contain alert infor-mation for points such as safety cameras and schoolzones. The navigation system can notify you when youapproach one of these points.
CAUTION!
Garmin and Chrysler LLC are not responsible for theconsequences of using a custom POI database, or forthe accuracy of the safety camera or other custom POIdatabase.
3
Uconnect Touch™ 8.4 SYSTEM 77
After downloading your POI database, use the GarminPOI Loader to install the POIs onto a DVD. Use the DVDto load the POIs. The POI Loader is available atwww.garmin.com/products/poiloader. Refer to the POILoader Help file for more information; click Help to openthe Help file.
NOTE: Each time you load custom POIs to the naviga-tion system, any other custom POIs already saved in thesystem will be overwritten.
Finding Custom POIsTo view a list of the custom POIs loaded in yournavigation system:
1. Touch Where To?.
2. Then touch Extras.
3. Lastly, touch Custom POIs.
Deleting Custom POIsTo delete all custom POIs from your navigation system:
1. Touch Tools.
2. Touch My Data.
3. Touch Custom POIs.
4. Touch Delete All.
5. Lastly, touch Yes to confirm.
Where To?The Where To? page provides several different categoriesyou can use to search for locations.
78 Uconnect Touch™ 8.4 SYSTEM
Searching Near Another LocationYour navigation system automatically searches for placesnear your current location.
1. Touch Where To? , then touch Near.
2. Select an option:
• Where I Am Now — search near your currentlocation.
• A Different City — search near the city you enter.
• A Recent Destination — search near a recent des-tination.
• A Favorite Destination — search near a favoritedestination.
• My Current Route — search along your route.
• My Destination — search near your currentdestination.
3. Touch OK.
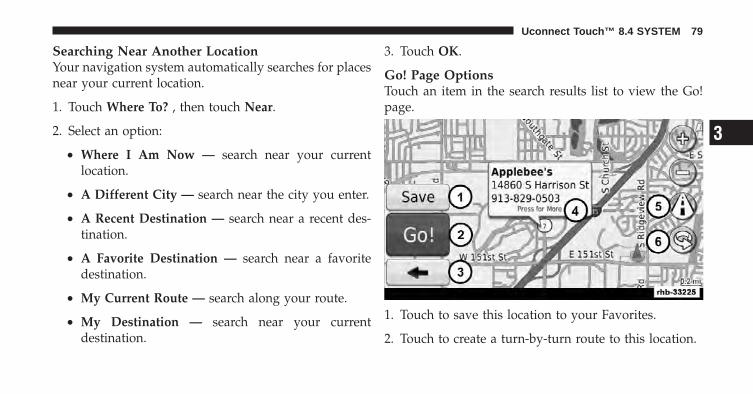
Go! Page OptionsTouch an item in the search results list to view the Go!page.
1. Touch to save this location to your Favorites.
2. Touch to create a turn-by-turn route to this location.
3
Uconnect Touch™ 8.4 SYSTEM 79
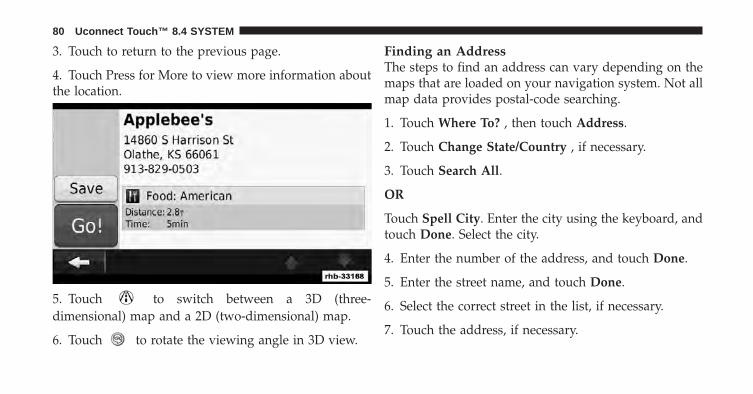
3. Touch to return to the previous page.
4. Touch Press for More to view more information aboutthe location.
5. Touch to switch between a 3D (three-dimensional) map and a 2D (two-dimensional) map.
6. Touch to rotate the viewing angle in 3D view.
Finding an AddressThe steps to find an address can vary depending on themaps that are loaded on your navigation system. Not allmap data provides postal-code searching.
1. Touch Where To? , then touch Address.
2. Touch Change State/Country , if necessary.
3. Touch Search All.
OR
Touch Spell City. Enter the city using the keyboard, andtouch Done. Select the city.
4. Enter the number of the address, and touch Done.
5. Enter the street name, and touch Done.
6. Select the correct street in the list, if necessary.
7. Touch the address, if necessary.
80 Uconnect Touch™ 8.4 SYSTEM
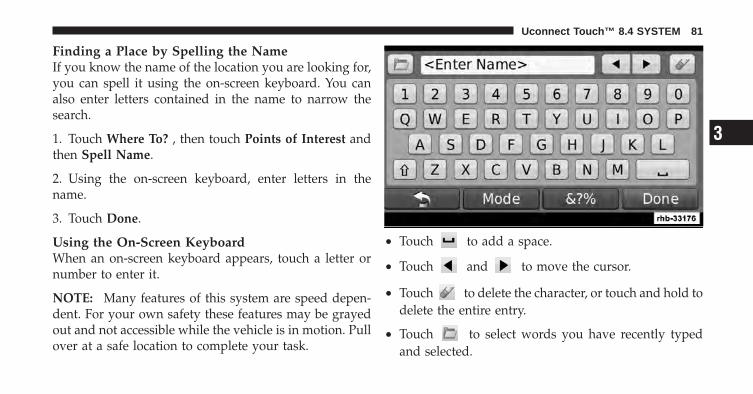
Finding a Place by Spelling the NameIf you know the name of the location you are looking for,you can spell it using the on-screen keyboard. You canalso enter letters contained in the name to narrow thesearch.
1. Touch Where To? , then touch Points of Interest andthen Spell Name.
2. Using the on-screen keyboard, enter letters in thename.
3. Touch Done.
Using the On-Screen KeyboardWhen an on-screen keyboard appears, touch a letter ornumber to enter it.
NOTE: Many features of this system are speed depen-dent. For your own safety these features may be grayedout and not accessible while the vehicle is in motion. Pullover at a safe location to complete your task.
• Touch to add a space.
• Touch and to move the cursor.
• Touch to delete the character, or touch and hold todelete the entire entry.
• Touch to select words you have recently typedand selected.
3
Uconnect Touch™ 8.4 SYSTEM 81
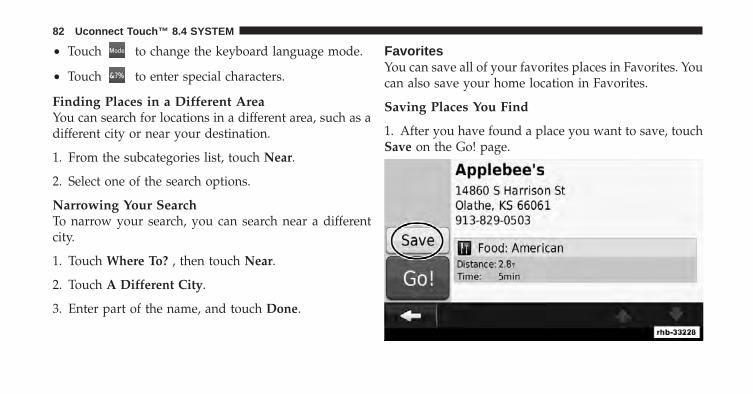
• Touch to change the keyboard language mode.
• Touch to enter special characters.
Finding Places in a Different AreaYou can search for locations in a different area, such as adifferent city or near your destination.
1. From the subcategories list, touch Near.
2. Select one of the search options.
Narrowing Your SearchTo narrow your search, you can search near a differentcity.
1. Touch Where To? , then touch Near.
2. Touch A Different City.
3. Enter part of the name, and touch Done.
FavoritesYou can save all of your favorites places in Favorites. Youcan also save your home location in Favorites.
Saving Places You Find
1. After you have found a place you want to save, touchSave on the Go! page.
82 Uconnect Touch™ 8.4 SYSTEM
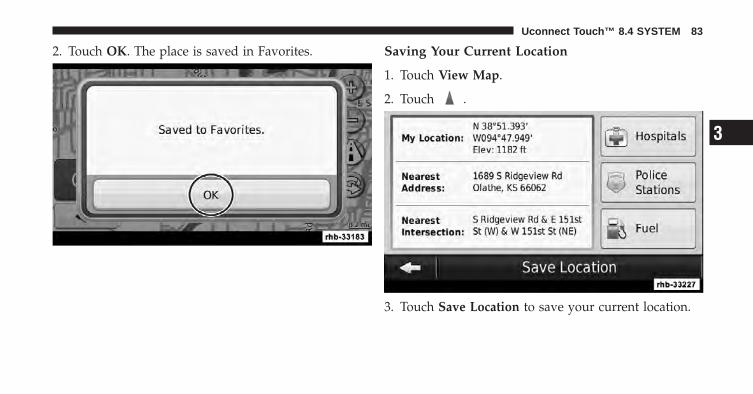
2. Touch OK. The place is saved in Favorites. Saving Your Current Location
1. Touch View Map.
2. Touch .
3. Touch Save Location to save your current location.
3
Uconnect Touch™ 8.4 SYSTEM 83
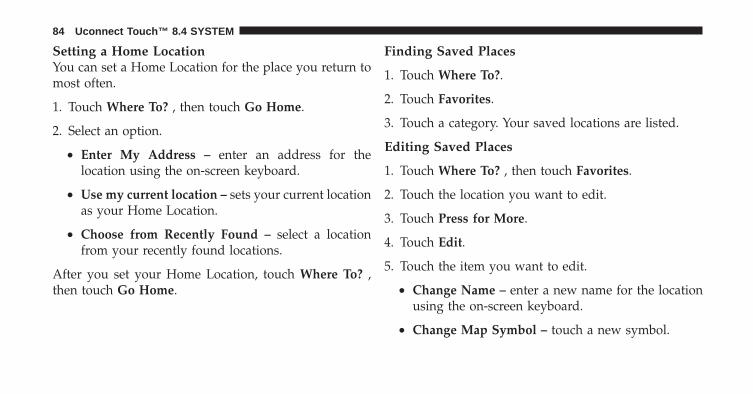
Setting a Home LocationYou can set a Home Location for the place you return tomost often.
1. Touch Where To? , then touch Go Home.
2. Select an option.
• Enter My Address – enter an address for thelocation using the on-screen keyboard.
• Use my current location – sets your current locationas your Home Location.
• Choose from Recently Found – select a locationfrom your recently found locations.
After you set your Home Location, touch Where To? ,then touch Go Home.
Finding Saved Places
1. Touch Where To?.
2. Touch Favorites.
3. Touch a category. Your saved locations are listed.
Editing Saved Places
1. Touch Where To? , then touch Favorites.
2. Touch the location you want to edit.
3. Touch Press for More.
4. Touch Edit.
5. Touch the item you want to edit.
• Change Name – enter a new name for the locationusing the on-screen keyboard.
• Change Map Symbol – touch a new symbol.
84 Uconnect Touch™ 8.4 SYSTEM
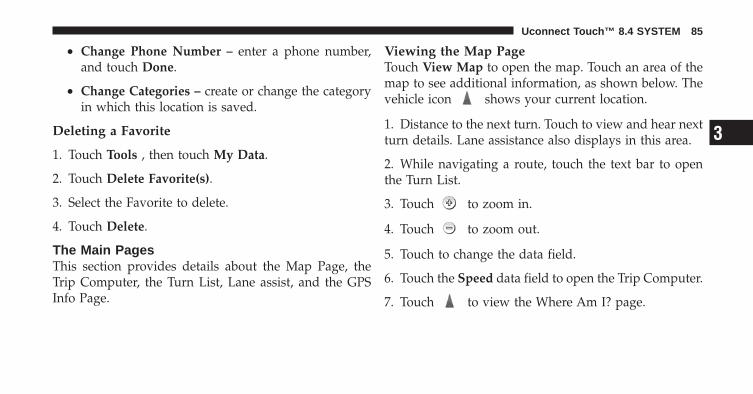
• Change Phone Number – enter a phone number,and touch Done.
• Change Categories – create or change the categoryin which this location is saved.
Deleting a Favorite
1. Touch Tools , then touch My Data.
2. Touch Delete Favorite(s).
3. Select the Favorite to delete.
4. Touch Delete.
The Main PagesThis section provides details about the Map Page, theTrip Computer, the Turn List, Lane assist, and the GPSInfo Page.
Viewing the Map PageTouch View Map to open the map. Touch an area of themap to see additional information, as shown below. Thevehicle icon shows your current location.
1. Distance to the next turn. Touch to view and hear nextturn details. Lane assistance also displays in this area.
2. While navigating a route, touch the text bar to openthe Turn List.
3. Touch to zoom in.
4. Touch to zoom out.
5. Touch to change the data field.
6. Touch the Speed data field to open the Trip Computer.
7. Touch to view the Where Am I? page.
3
Uconnect Touch™ 8.4 SYSTEM 85
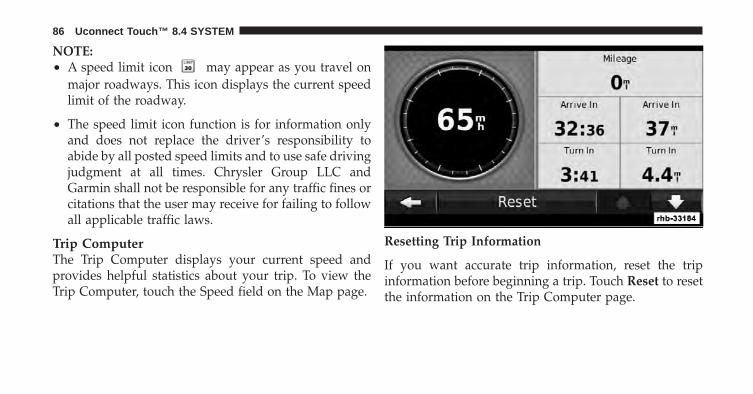
NOTE:• A speed limit icon may appear as you travel on
major roadways. This icon displays the current speedlimit of the roadway.
• The speed limit icon function is for information onlyand does not replace the driver’s responsibility toabide by all posted speed limits and to use safe drivingjudgment at all times. Chrysler Group LLC andGarmin shall not be responsible for any traffic fines orcitations that the user may receive for failing to followall applicable traffic laws.
Trip ComputerThe Trip Computer displays your current speed andprovides helpful statistics about your trip. To view theTrip Computer, touch the Speed field on the Map page.
Resetting Trip Information
If you want accurate trip information, reset the tripinformation before beginning a trip. Touch Reset to resetthe information on the Trip Computer page.
86 Uconnect Touch™ 8.4 SYSTEM
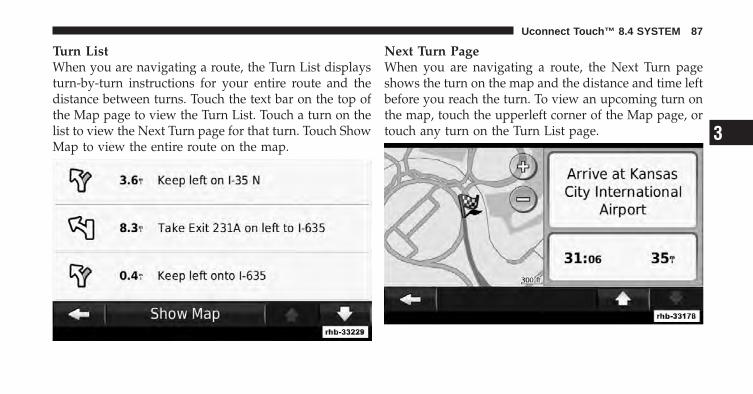
Turn ListWhen you are navigating a route, the Turn List displaysturn-by-turn instructions for your entire route and thedistance between turns. Touch the text bar on the top ofthe Map page to view the Turn List. Touch a turn on thelist to view the Next Turn page for that turn. Touch ShowMap to view the entire route on the map.
Next Turn PageWhen you are navigating a route, the Next Turn pageshows the turn on the map and the distance and time leftbefore you reach the turn. To view an upcoming turn onthe map, touch the upperleft corner of the Map page, ortouch any turn on the Turn List page. 3
Uconnect Touch™ 8.4 SYSTEM 87
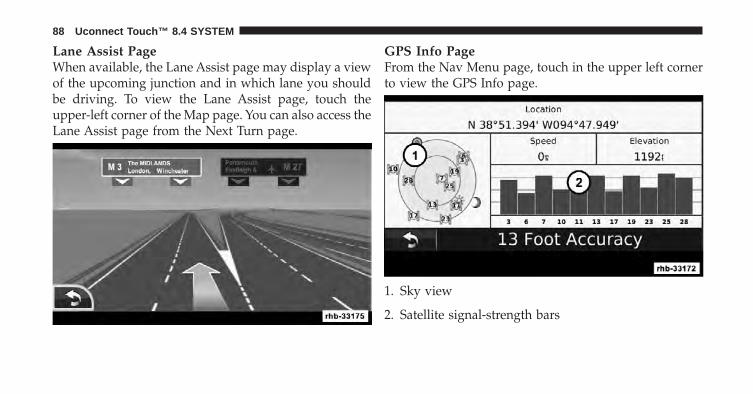
Lane Assist PageWhen available, the Lane Assist page may display a viewof the upcoming junction and in which lane you shouldbe driving. To view the Lane Assist page, touch theupper-left corner of the Map page. You can also access theLane Assist page from the Next Turn page.
GPS Info PageFrom the Nav Menu page, touch in the upper left cornerto view the GPS Info page.
1. Sky view
2. Satellite signal-strength bars
88 Uconnect Touch™ 8.4 SYSTEM
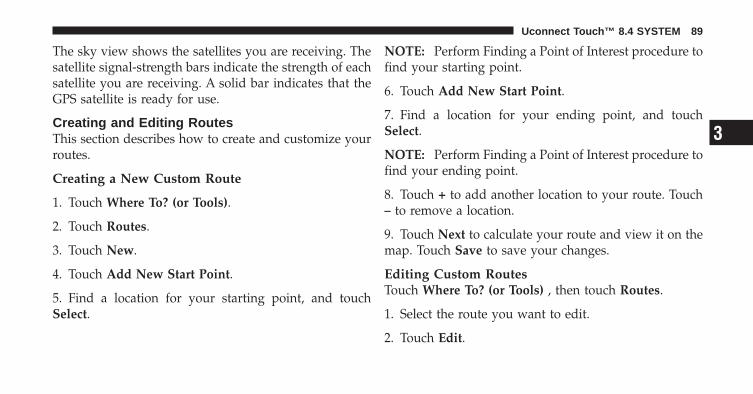
The sky view shows the satellites you are receiving. Thesatellite signal-strength bars indicate the strength of eachsatellite you are receiving. A solid bar indicates that theGPS satellite is ready for use.
Creating and Editing RoutesThis section describes how to create and customize yourroutes.
Creating a New Custom Route
1. Touch Where To? (or Tools).
2. Touch Routes.
3. Touch New.
4. Touch Add New Start Point.
5. Find a location for your starting point, and touchSelect.
NOTE: Perform Finding a Point of Interest procedure tofind your starting point.
6. Touch Add New Start Point.
7. Find a location for your ending point, and touchSelect.
NOTE: Perform Finding a Point of Interest procedure tofind your ending point.
8. Touch + to add another location to your route. Touch– to remove a location.
9. Touch Next to calculate your route and view it on themap. Touch Save to save your changes.
Editing Custom RoutesTouch Where To? (or Tools) , then touch Routes.
1. Select the route you want to edit.
2. Touch Edit.
3
Uconnect Touch™ 8.4 SYSTEM 89
3. Touch the item to edit.
• Change Name – enter a new name, and touch Done.
• Add or Remove Points – add or remove points fromthe route.
• Manually Reorder Points – change the order ofpoints along your route.
• Optimally Reorder Points – automatically order thepoints.
• Recalculate – recalculates the route.
• Delete – remove this route.
Your changes are saved automatically when you exit anyof the route edit pages.
Saving and Modifying the Active Route
1. Touch Where To? (or Tools) , then touch Routes.
2. Touch Active Route.
3. Touch Add or Remove Points.
4. Add, remove or reorder the points.
5. Touch Next.
6. Touch Save.
Navigating a Saved Route
1. Touch Where To? (or Tools) , then touch Routes.
2. Touch the route you want to navigate, and touch Go!.
90 Uconnect Touch™ 8.4 SYSTEM
Deleting All Saved Routes
1. Touch Tools.
2. Touch My Data.
3. Touch Deleted Selected Route(s).
4. Touch Select All.
5. Lastly, touch Delete.
Stopping Your RouteWith a route active, touch , then touch Stop.
Adding a Detour to a RouteIf a road on your route is closed or congested with traffic,you can take a detour.
1. With a route active on the Main Map, touch .
2. Touch Detour.
The navigation system attempts to get you back on youroriginal route as quickly as possible. If the route you arecurrently taking is the only reasonable option, the navi-gation system might not calculate a detour.
Customizing the SettingsThis section describes how to customize the settings ofyour GPS navigation system
Customizing the Navigation System
1. Touch Settings.
2. Touch the setting you want to change.
3. Touch the button above the setting name to change it.
3
Uconnect Touch™ 8.4 SYSTEM 91
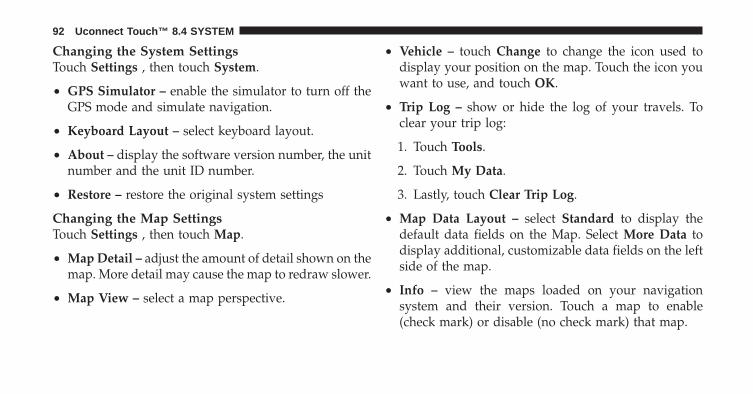
Changing the System SettingsTouch Settings , then touch System.
• GPS Simulator – enable the simulator to turn off theGPS mode and simulate navigation.
• Keyboard Layout – select keyboard layout.
• About – display the software version number, the unitnumber and the unit ID number.
• Restore – restore the original system settings
Changing the Map SettingsTouch Settings , then touch Map.
• Map Detail – adjust the amount of detail shown on themap. More detail may cause the map to redraw slower.
• Map View – select a map perspective.
• Vehicle – touch Change to change the icon used todisplay your position on the map. Touch the icon youwant to use, and touch OK.
• Trip Log – show or hide the log of your travels. Toclear your trip log:
1. Touch Tools.
2. Touch My Data.
3. Lastly, touch Clear Trip Log.
• Map Data Layout – select Standard to display thedefault data fields on the Map. Select More Data todisplay additional, customizable data fields on the leftside of the map.
• Info – view the maps loaded on your navigationsystem and their version. Touch a map to enable(check mark) or disable (no check mark) that map.
92 Uconnect Touch™ 8.4 SYSTEM
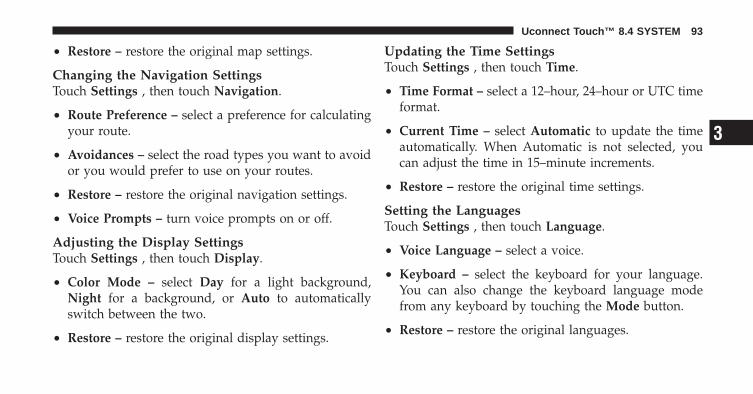
• Restore – restore the original map settings.
Changing the Navigation SettingsTouch Settings , then touch Navigation.
• Route Preference – select a preference for calculatingyour route.
• Avoidances – select the road types you want to avoidor you would prefer to use on your routes.
• Restore – restore the original navigation settings.
• Voice Prompts – turn voice prompts on or off.
Adjusting the Display SettingsTouch Settings , then touch Display.
• Color Mode – select Day for a light background,Night for a background, or Auto to automaticallyswitch between the two.
• Restore – restore the original display settings.
Updating the Time SettingsTouch Settings , then touch Time.
• Time Format – select a 12–hour, 24–hour or UTC timeformat.
• Current Time – select Automatic to update the timeautomatically. When Automatic is not selected, youcan adjust the time in 15–minute increments.
• Restore – restore the original time settings.
Setting the LanguagesTouch Settings , then touch Language.
• Voice Language – select a voice.
• Keyboard – select the keyboard for your language.You can also change the keyboard language modefrom any keyboard by touching the Mode button.
• Restore – restore the original languages.
3
Uconnect Touch™ 8.4 SYSTEM 93
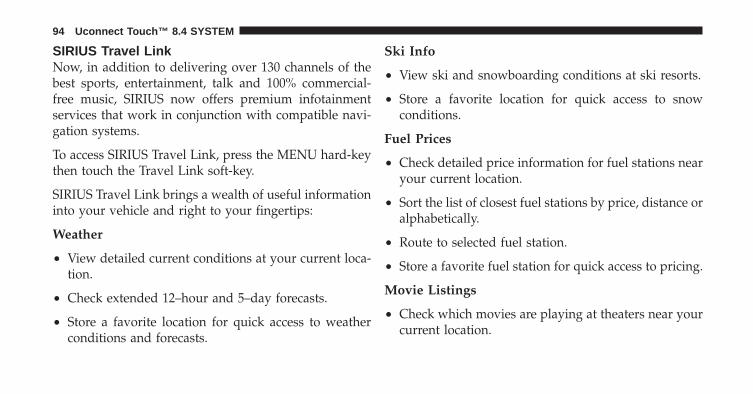
SIRIUS Travel LinkNow, in addition to delivering over 130 channels of thebest sports, entertainment, talk and 100% commercial-free music, SIRIUS now offers premium infotainmentservices that work in conjunction with compatible navi-gation systems.
To access SIRIUS Travel Link, press the MENU hard-keythen touch the Travel Link soft-key.
SIRIUS Travel Link brings a wealth of useful informationinto your vehicle and right to your fingertips:
Weather
• View detailed current conditions at your current loca-tion.
• Check extended 12–hour and 5–day forecasts.
• Store a favorite location for quick access to weatherconditions and forecasts.
Ski Info
• View ski and snowboarding conditions at ski resorts.
• Store a favorite location for quick access to snowconditions.
Fuel Prices
• Check detailed price information for fuel stations nearyour current location.
• Sort the list of closest fuel stations by price, distance oralphabetically.
• Route to selected fuel station.
• Store a favorite fuel station for quick access to pricing.
Movie Listings
• Check which movies are playing at theaters near yourcurrent location.
94 Uconnect Touch™ 8.4 SYSTEM
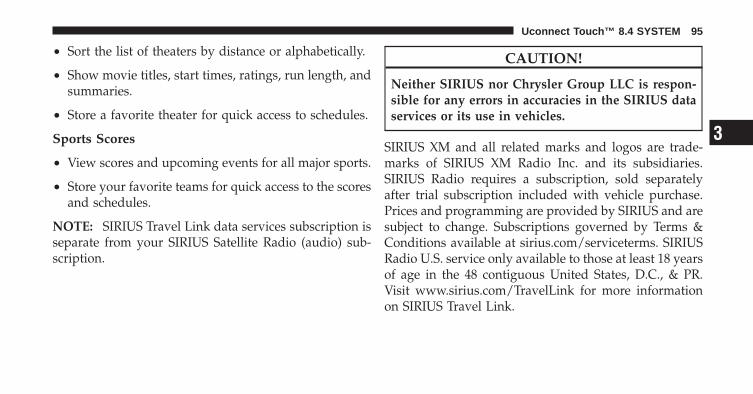
• Sort the list of theaters by distance or alphabetically.
• Show movie titles, start times, ratings, run length, andsummaries.
• Store a favorite theater for quick access to schedules.
Sports Scores
• View scores and upcoming events for all major sports.
• Store your favorite teams for quick access to the scoresand schedules.
NOTE: SIRIUS Travel Link data services subscription isseparate from your SIRIUS Satellite Radio (audio) sub-scription.
CAUTION!
Neither SIRIUS nor Chrysler Group LLC is respon-sible for any errors in accuracies in the SIRIUS dataservices or its use in vehicles.
SIRIUS XM and all related marks and logos are trade-marks of SIRIUS XM Radio Inc. and its subsidiaries.SIRIUS Radio requires a subscription, sold separatelyafter trial subscription included with vehicle purchase.Prices and programming are provided by SIRIUS and aresubject to change. Subscriptions governed by Terms &Conditions available at sirius.com/serviceterms. SIRIUSRadio U.S. service only available to those at least 18 yearsof age in the 48 contiguous United States, D.C., & PR.Visit www.sirius.com/TravelLink for more informationon SIRIUS Travel Link.
3
Uconnect Touch™ 8.4 SYSTEM 95
AppendixThis appendix provides additional information aboutyour navigation system, such as how to update thesoftware and map data.
Updating the SoftwareTo update the navigation system software, you musthave a writable DVD, DVD drive and an Internet con-nection.
To update the navigation software:
1. Go to www.garmin.com/chrysler. Select Software Up-dates, then select Download.
2. Read and accept the terms of the Software LicenseAgreement.
3. Follow the instructions on the Web site to complete theinstallation of the update software.
Updating the Map DataThe navigation system will provide periodic notificationat startup when the preloaded maps are considered outof date. You can purchase a DVD of updated map datafrom Garmin, or ask your dealer or service center fordetails.
1. Go to www.garmin.com/chrysler. Select Order MapUpdates, and then follow the Web site checkout proce-dure.
2. After you receive your new map data DVD, follow theinstructions provided with the DVD to install the newmap data in your unit.
Safety Precautions and Important InformationRead this information carefully before starting to operatethe navigation system and follow the instructions in thismanual. Neither Chrysler Group LLC nor Garmin shallbe liable for problems or accidents resulting from failureto observe the instructions in this manual.
96 Uconnect Touch™ 8.4 SYSTEM
WARNINGSTo prevent injury or fire, take the following precau-tions:
• To prevent a short circuit, never put or leave anymetallic objects (such as coins or metal tools) inside theunit.
• Do not watch or fix your eyes on the unit’s displaywhen you are driving for any extended period.
Failure to avoid the following potentially hazardoussituations could result in an accident or collision result-ing in death or serious injury.When navigating, carefully compare information dis-played on the navigation system to all available naviga-tion sources, including information from street signs,visual sightings, and maps. For safety, always resolve anydiscrepancies or questions before continuing navigation.Always operate the vehicle in a safe manner.
Do not become distracted by the navigation system whiledriving, and always be fully aware of all driving condi-tions. Minimize the amount of time spent viewing thescreen of the navigation system while driving.Do not enter destinations, change settings, or access anyfunctions requiring prolonged use of the navigationsystem controls while driving. Stop your vehicle in a safeand legal manner before attempting such operations.Keep the system volume at a low enough level to be ableto hear outside noises while driving. If you can no longerhear outside noises, you may be unable to react ad-equately to the traffic situation.This may cause accidents.The navigation system will not display the correct cur-rent position of the vehicle the first time it is used afterpurchase, or if the vehicle battery is disconnected. GPSsatellite signals will soon be received, however, and thecorrect position will be displayed.
3
Uconnect Touch™ 8.4 SYSTEM 97
Be careful of the ambient temperature. Using the naviga-tion system at extreme temperatures can lead to malfunc-tion or damage. Also note that the unit can be damagedby strong vibration, by metal objects, or by water gettinginside the unit.
CAUTIONSFailure to avoid the following potentially hazardoussituations may result in injury or property damage.The navigation system is designed to provide you withroute suggestions. It does not reflect road closures or roadconditions, weather conditions, or other factors that mayaffect safety or timing while driving.Use the navigation system only as a navigational aid. Donot attempt to use the navigation system for any purposerequiring precise measurement of direction, distance,location, or topography.The Global Positioning System (GPS) is operated by theUnited States government, which is solely responsible forits accuracy and maintenance. The government system is
subject to changes that could affect the accuracy andperformance of all GPS equipment, including the navi-gation system.Although the navigation system is a precision navigationdevice, any navigation device can be misused or misin-terpreted and, therefore, become unsafe.
IMPORTANT INFORMATIONVehicle Battery PreservationThis navigation system can be used when the ignitionkey is turned to ON or ACC. To preserve the battery,however, it should be used with the engine runningwhenever possible. Using the navigation system for along time with the engine switched off can cause thebattery to run down.
Map Data InformationOne of our goals is to provide customers with the mostcomplete and accurate cartography that is available to us
98 Uconnect Touch™ 8.4 SYSTEM
at a reasonable cost. We use a combination of govern-mental and private data sources, which we identify inproduct literature and copyright messages displayed tothe consumer. Virtually all data sources contain someinaccurate or incomplete data. In some countries, com-plete and accurate map information is either not availableor is prohibitively expensive.
Software License AgreementBY USING THIS NAVIGATION SYSTEM, YOU AGREETO BE BOUND BY THE TERMS AND CONDITIONS OFTHE FOLLOWING SOFTWARE LICENSE AGREE-MENT. PLEASE READ THIS AGREEMENT CARE-FULLY.Garmin grants you a limited license to use the softwareembedded in this device (the “Software”) in binaryexecutable form in the normal operation of the product.Title, ownership rights, and intellectual property rights inand to the Software remain in Garmin.
You acknowledge that the Software is the property ofGarmin and is protected under the United States ofAmerica copyright laws and international copyright trea-ties. You further acknowledge that the structure, organi-zation, and code of the Software are valuable tradesecrets of Garmin and that the Software in source codeform remains a valuable trade secret of Garmin. Youagree not to decompile, disassemble, modify, reverseassemble, reverse engineer, or reduce to human readableform the Software or any part thereof or create anyderivative works based on the Software. You agree not toexport or re-export the Software to any country inviolation of the export control laws of the United States ofAmerica.
NAVTEQ� End-user License AgreementThe software embedded in your Garmin product (the“Software”) is owned by Garmin Ltd. or its subsidiaries(“Garmin”). The third-party map data embedded in oraccompanying your Garmin product (the “Data”) is
3
Uconnect Touch™ 8.4 SYSTEM 99
owned by NAVTEQ North America LLC and is licensedto Garmin. Both the Software and Data are protectedunder copyright laws and international copyright trea-ties. The Software and Data are licensed, not sold. TheSoftware and Data are provided under the followinglicense and are subject to the following terms and condi-tions which are agreed to by End User (“you” or “your”),on the one hand, and Garmin and its licensors (includingtheir licensors and suppliers) and affiliated companies onthe other hand.IMPORTANT: CAREFULLY READ THIS LICENSE BE-FORE USING THIS PRODUCT. INSTALLING, COPY-ING, OR OTHERWISE USING THIS PRODUCT INDI-CATES YOUR ACKNOWLEDGMENT THAT YOUHAVE READ THIS LICENSE AND AGREE TO ITSTERMS. IF YOU DO NOT AGREE, RETURN THE COM-PLETE PRODUCT WITHIN 10 DAYS OF THE DATEYOU ACQUIRED IT (IF PURCHASED NEW) FOR AFULL REFUND TO ONE OF THE FOLLOWING: (1) THE
DEALER FROM WHICH YOU PURCHASED THISPRODUCT; (2) Garmin INTERNATIONAL, INC. CUS-TOMER SERVICE, 1200 EAST 151st STREET, OLATHE,KS 66062, USA; (3) Garmin (EUROPE) LTD., LIBERTYHOUSE, HOUNSDOWN BUSINESS PARK, SOUTH-AMPTON, SO40 9LR, UNITED KINGDOM; OR (4)Garmin CORPORATION CUSTOMER SERVICE, No. 68,JANGSHU 2nd ROAD, SIJHIH, TAIPEI COUNTY,TAIWAN.
License Terms and ConditionsGarmin (“we” or “us”) provides you with storage mediacontaining the computer Software (the “Software”) andthe embedded or accompanying digital map Data, in-cluding any “online” or electronic documentation andprinted materials (together called the “Product” for pur-poses of this License Agreement), and grants you alimited, non-exclusive license to use the Product inaccordance with the terms of this Agreement. You agreeto use this Data together with the Garmin product for
100 Uconnect Touch™ 8.4 SYSTEM
solely personal, or if applicable, for use in your business’internal operations, and not for service bureau, time-sharing, resale or other similar purposes. Accordingly,but subject to the restrictions set forth in the followingparagraphs, you may copy this Data only as necessary foryour use to (i) view it, and (ii) save it, provided that youdo not remove any copyright notices that appear and donot modify the Software or Data in any way. You agreenot to otherwise reproduce, copy, modify, decompile,disassemble, reverse engineer or create derivative worksof any portion of the Product, and may not transfer ordistribute it in any form, for any purpose, except to theextent permitted by mandatory laws.Restrictions. Except where you have been specificallylicensed to do so by Garmin, and without limiting thepreceding paragraph, you may not use this Data withany products, systems, or applications installed or other-wise connected to or in communication with vehicles,and which are capable of dispatch, fleet management or
similar applications where the Data is used by a centralcontrol center in dispatching a fleet of vehicles. In addi-tion, you are prohibited from renting or leasing the Dataor the Garmin products containing the Data to any otherperson or third party. Only those rental car companiesthat are specifically authorized by Garmin in writing torent Garmin products containing the Data to their rentalcustomers are permitted to rent out such products.No Warranty. This Product (including the Data) is pro-vided to you “as is,” and you agree to use it at your ownrisk. Garmin and its licensors (and their licensors andsuppliers) make no guarantees, representations or war-ranties of any kind, express or implied, arising by law orotherwise, including but not limited to, content, quality,accuracy, completeness, effectiveness, reliability, mer-chantability, fitness for a particular purpose, usefulness,use or results to be obtained from the Product, or that theData or server will be uninterrupted or error-free.
3
Uconnect Touch™ 8.4 SYSTEM 101
Disclaimer of Warranty. Garmin AND ITS LICENSORS(INCLUDING THEIR LICENSORS AND SUPPLIERS)DISCLAIM ANY WARRANTIES, EXPRESS OR IM-PLIED, OF QUALITY, PERFORMANCE, MERCHANT-ABILITY, FITNESS FOR A PARTICULAR PURPOSE ORNONINFRINGEMENT. NO ORAL OR WRITTEN AD-VICE OR INFORMATION PROVIDED BY Garmin ORITS SUPPLIERS AND LICENSORS SHALL CREATE AWARRANTY, AND YOU ARE NOT ENTITLED TO RELYON ANY SUCH ADVICE OR INFORMATION. THISDISCLAIMER OF WARRANTIES IS AN ESSENTIALCONDITION OF THIS AGREEMENT. Some States, Ter-ritories and Countries do not allow certain warrantyexclusions, so to that extent the above exclusion may notapply to you.Disclaimer of Liability. Garmin AND ITS LICENSORS(INCLUDING THEIR LICENSORS AND SUPPLIERS)SHALL NOT BE LIABLE TO YOU: IN RESPECT OF ANYCLAIM, DEMAND OR ACTION, IRRESPECTIVE OF
THE NATURE OF THE CAUSE OF THE CLAIM, DE-MAND OR ACTION ALLEGING ANY LOSS, INJURYOR DAMAGES, DIRECT OR INDIRECT, WHICH MAYRESULT FROM THE USE OR POSSESSION OF THEINFORMATION; OR FOR ANY LOSS OF PROFIT, REV-ENUE, CONTRACTS OR SAVINGS, OR ANY OTHERDIRECT, INDIRECT, INCIDENTAL, SPECIAL OR CON-SEQUENTIAL DAMAGES ARISING OUT OF YOURUSE OF OR INABILITY TO USE THIS INFORMATION,ANY DEFECT IN THE DATA OR INFORMATION, ORTHE BREACH OF THESE TERMS OR CONDITIONS,WHETHER IN AN ACTION IN CONTRACT OR TORTOR BASED ON A WARRANTY, EVEN IF Garmin OR ITSLICENSORS HAVE BEEN ADVISED OF THE POSSIBIL-ITY OF SUCH DAMAGES. Garmin’S AND ITS LICEN-SORS’ TOTAL AGGREGATE LIABILITY WITH RE-SPECT TO ITS OBLIGATIONS UNDER THISAGREEMENT OR OTHERWISE WITH RESPECT TOTHE Garmin PRODUCT OR THE DATA SHALL NOT
102 Uconnect Touch™ 8.4 SYSTEM
EXCEED $1.00. Some States, Territories and Countries donot allow certain liability exclusions or damages limita-tions, so to that extent the above may not apply to you.Disclaimer of Endorsement. Reference to any products,services, processes, hypertext links to third parties orother Data by trade name, trademark, manufacturer,supplier or otherwise does not necessarily constitute orimply its endorsement, sponsorship or recommendationby Garmin or its licensors. Product and service informa-tion are the sole responsibility of each individual vendor.The NAVTEQ name and logo, the NAVTEQ andNAVTEQ ON BOARD trademarks and logos, and othertrademarks and trade names owned by NAVTEQ NorthAmerica LLC may not be used in any commercial man-ner without the prior written consent of NAVTEQ.Export Control. You agree not to export from anywhereany part of the Data provided to you or any direct
product thereof except in compliance with, and with alllicenses and approvals required under, applicable exportlaws, rules and regulations.Indemnity. You agree to indemnify, defend and holdGarmin and its licensors (including their respective licen-sors, suppliers, assignees, subsidiaries, affiliated compa-nies, and the respective officers, directors, employees,shareholders, agents and representatives of each of them)free and harmless from and against any liability, loss,injury (including injuries resulting in death), demand,action, cost, expense, or claim of any kind or character,including but not limited to attorney’s fees, arising out ofor in connection with any use or possession by you of theProduct (including the Data).Entire Agreement. These terms and conditions constitutethe entire agreement between Garmin (and its licensors,including their licensors and suppliers) and you pertain-ing to the subject matter hereof, and supersedes in their
3
Uconnect Touch™ 8.4 SYSTEM 103
entirety any and all written or oral agreements previ-ously existing between us with respect to such subjectmatter.Governing Law. (a) For European Union NAVTEQ DataThe above terms and conditions shall be governed by thelaws of the Netherlands, without giving effect to (i) itsconflict of laws provisions, or (ii) the United NationsConvention for Contracts for the International Sale ofGoods, which is explicitly excluded. You agree to submitto the jurisdiction of the Netherlands for any and alldisputes, claims and actions arising from or in connectionwith the Data provided to you hereunder. (b) For NorthAmerican NAVTEQ Data and other non-European UnionNAVTEQ Data The above terms and conditions shall begoverned by the laws of Illinois, without giving effect to(i) its conflict of laws provisions, or (ii) the UnitedNations Convention for Contracts for the InternationalSale of Goods, which is explicitly excluded. You agree tosubmit to the jurisdiction of Illinois for any and all
disputes, claims and actions arising from or in connectionwith the Data provided to you hereunder.Government End Users. If End User is an agency, depart-ment, or other entity of the United States Government, orfunded in whole or in part by the U.S. Government, thenuse, duplication, reproduction, release, modification, dis-closure or transfer of the Product and accompanyingdocumentation is subject to restrictions as set forth inDFARS 252.227-7014(a)(1) (JUN 1995) (DOD commercialcomputer software definition), DFARS 27.7202-1 (DODpolicy on commercial computer software), FAR 52.227-19(JUN 1987) (commercial computer software clause forcivilian agencies), DFARS 252.227-7015 (NOV 1995)(DOD technical data – commercial items clause); FAR52.227-14 Alternates I, II, and III (JUN 1987) (civilianagency technical data and noncommercial computer soft-ware clause); and/or FAR 12.211 and FAR 12.212 (com-mercial item acquisitions), as applicable. In case of con-flict between any of the FAR and DFARS provisions listed
104 Uconnect Touch™ 8.4 SYSTEM
herein and this License, the construction that providesgreater limitations on the Government’s rights shallcontrol. The contractor/manufacturer is Garmin Interna-tional, Inc., 1200 East 151st Street, Olathe, KS 66062, USAand NAVTEQ North America LLC, 222 MerchandiseMart Plaza, Suite 900, Chicago, Illinois 60654.
DMTI Spatial, Inc. End User License AgreementThe software embedded in your Garmin product isowned by Garmin Ltd. or its subsidiaries (“Garmin”).The third-party postal code data (the “Licensed Prod-uct”) embedded in or accompanying your Garmin prod-uct is owned by DMTI Spatial, Inc. and is licensed toGarmin. Both the software and Licensed Product areprotected under copyright laws and international copy-right treaties. THIS is a legal Agreement between you, theend user, and DMTI Spatial, Inc. BY LOADING THEPRODUCT(S) WITH THIS AGREEMENT YOU AREAGREEING TO BE BOUND BY THE TERMS OF THISAGREEMENT. IF YOU DO NOT AGREE TO THE
TERMS OF THIS AGREEMENT, PROMPTLY (within7 days of purchase) RETURN THE PRODUCTS ANDANY ACCOMPANYING ITEMS (including written ma-terials) TO Garmin INTERNATIONAL, INC. CUS-TOMER SERVICE, 1200 EAST 151ST STREET, OLATHE,KANSAS 66062, FOR A REFUND.DMTI Spatial hereby grants to you a non-exclusive,non-transferable license to use the data contained on themedia in this package (the “Licensed Product”) solely forpersonal non-commercial use or internal use in yourbusiness, on a single computer, Pocket PC, or Palmdevice in conjunction with Garmin software, and withcompatible Garmin products that you personally own.Your use of the data is subject to the following terms andconditions:
You acknowledge that the Licensed Product(s) belongto DMTI Spatial and its third party supplier, and thatthe Licensed Product(s) are copyrighted. Unauthorized
3
Uconnect Touch™ 8.4 SYSTEM 105
copying of the Licensed Product(s), is expressly forbid-den and you may be held legally responsible forcopyright infringement which is caused or encouragedby your failure to abide by the terms of this agreement.You may make one archival copy of the LicensedProduct(s), solely for your own use, subject to thefollowing restrictions: (1) The archival copy must betreated in the same way as the original copy; (2) Nocopy may be used while any other copy is in use. If youmake an archival copy of the Licensed Product(s), youmust include on it the copyright notice that is on theoriginal media.You may not reproduce, sell, rent, lease, loan, distrib-ute or sublicense the Licensed Product(s) or otherwisetransfer the Licensed Product(s) to any third party, usethe Licensed Product for commercial purposes exceptfor internal use in your business, decompile, disas-semble, reverseengineer the Licensed Product(s), oruse the Licensed Product to create any derived product
for any of these prohibited purposes. You may notplace the Licensed Product(s) on the Internet without aprior written agreement with DMTI Spatial.In no event shall DMTI Spatial or its third partysupplier(s) be liable to you or your organization forany indirect damages including any lost profits, lostsavings, interruption of business, loss of businessopportunities or other incidental or consequentialdamages, arising out of your possession, use of, orinability to use the Licensed Product(s), even if DMTISpatial, its third party supplier(s), or any authorizeddealer, has been advised of the possibility of thedamages, or for any claim by any other party. In noevent shall DMTI Spatial have any liability for damagein excess of the license fee paid for the LicensedProduct(s).You shall indemnify and hold DMTI Spatial, its thirdparty supplier(s) and their officers, employees andagents, harmless from and against any claim, demand
106 Uconnect Touch™ 8.4 SYSTEM
or action, irrespective of the nature of the claim,demand or action, alleging loss, costs, damages, ex-penses, or injury (including injury from death) result-ing from your authorized or unauthorized, use, pos-session, modification, or alteration of the LicensedProduct(s).
THE LICENSED PRODUCT(S) AND THE ASSOCIATEDWRITTEN MATERIALS IN CONNECTION THERE-WITH ARE PROVIDED “AS IS” WITHOUT WAR-RANTY OF ANY KIND, EITHER EXPRESSED OR IM-PLIED, ARISING BY LAW OR OTHERWISE,INCLUDING BUT NOT LIMITED TO WARRANTIES OFEFFECTIVENESS, COMPLETENESS, ACCURACY,MERCHANTABILITY OR FITNESS FOR A PARTICU-LAR PURPOSE. THE ENTIRE RISK AS TO THE QUAL-ITY AND PERFORMANCE OF THE LICENSED PROD-UCT(S) IS WITH YOU, THE END USER. NO ORAL ORWRITTEN ADVICE GIVEN BY DMTI SPATIAL OR ITSDEALERS, DISTRIBUTORS, AGENTS OR EMPLOYEES
CREATES A WARRANTY OR IN NAY WAY INCREASESDMTI SPATIAL’S LIABILITY AND YOU MAY NOTRELY ON ANY SUCH INFORMATION OR ADVICE.No statement or recommendation made or assistancegiven by DMTI Spatial or by its representatives oremployees shall constitute a waiver by DMTI Spatial orany of the provisions herein. Nor does or will DMTISpatial warrant any services it may provide in connectionwith the use of the Licensed product(s), to include anyassistance, training, or other consultation with you.This license is effective until terminated. This license willterminate automatically without notice from DMTI Spa-tial if you fail to comply with any provision of thisLicense Agreement. Upon termination, you shall destroyor return the Licensed Product(s) including any writtenmaterials and all copies of the Licensed Product(s) andany written materials in connection therewith have beendestroyed or returned to DMTI Spatial.
3
Uconnect Touch™ 8.4 SYSTEM 107
This Agreement shall be governed by the laws of theProvince of Ontario.©2007 DMTI Spatial Inc. (except for data licensed fromthird parties).DMTI Spatial is an authorized user and distributor ofselected Statistics Canada Computer files under Licens-ing Agreement 6230.© Copyright, HER MAJESTY THE QUEEN IN RIGHTOF CANADA, as represented by the Minister of Industry,Statistics Canada 1996.Digital Topographic Data produced under license fromHer Majesty the Queen in Right of Canada, with permis-sion of Natural Resources Canada.
OPERATION INSTRUCTIONS – MORE
More Main MenuThe More Main Menu consists of the following options:
• Settings
Refer to the Settings information in this section formore details.
• SIRIUS Travel Link
Refer to the Navigation section in this manual formore details.
108 Uconnect Touch™ 8.4 SYSTEM
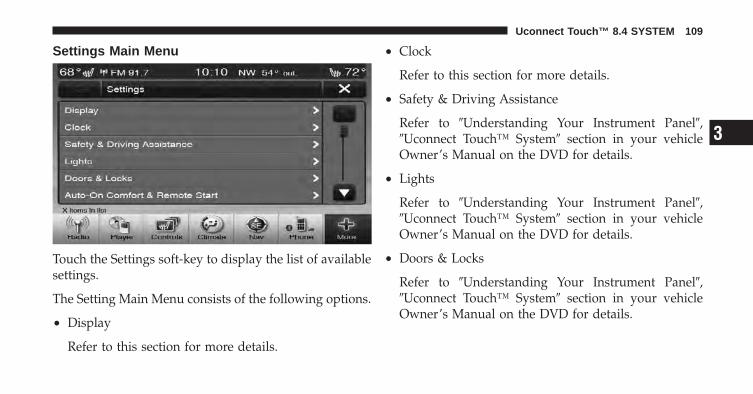
Settings Main Menu
Touch the Settings soft-key to display the list of availablesettings.
The Setting Main Menu consists of the following options.
• Display
Refer to this section for more details.
• Clock
Refer to this section for more details.
• Safety & Driving Assistance
Refer to �Understanding Your Instrument Panel�,�Uconnect Touch™ System� section in your vehicleOwner’s Manual on the DVD for details.
• Lights
Refer to �Understanding Your Instrument Panel�,�Uconnect Touch™ System� section in your vehicleOwner’s Manual on the DVD for details.
• Doors & Locks
Refer to �Understanding Your Instrument Panel�,�Uconnect Touch™ System� section in your vehicleOwner’s Manual on the DVD for details.
3
Uconnect Touch™ 8.4 SYSTEM 109
• Auto–On Comfort & Remote Start
Refer to �Understanding Your Instrument Panel�,�Uconnect Touch™ System� section in your vehicleOwner’s Manual on the DVD for details.
• Engine Off
Refer to �Understanding Your Instrument Panel�,�Uconnect Touch™ System� section in your vehicleOwner’s Manual on the DVD for details.
• Compass
Refer to �Understanding Your Instrument Panel�,�Uconnect Touch™ System� section in your vehicleOwner’s Manual on the DVD for details.
• Audio
Refer to this section for more details.
• Phone/Bluetooth
Refer to �Understanding The Features Of Your Ve-hicle�, �Uconnect Touch™ 8.4� section in your vehicleOwner’s Manual on the DVD for details.
• Sirius Setup
Refer to the Radio section in this manual for moredetails.
DisplayYour Uconnect Touch™ display can be customized byfollowing the steps:
1. Press the More soft-key on the bottom of the screen.
2. Then press the Settings soft-key.
110 Uconnect Touch™ 8.4 SYSTEM
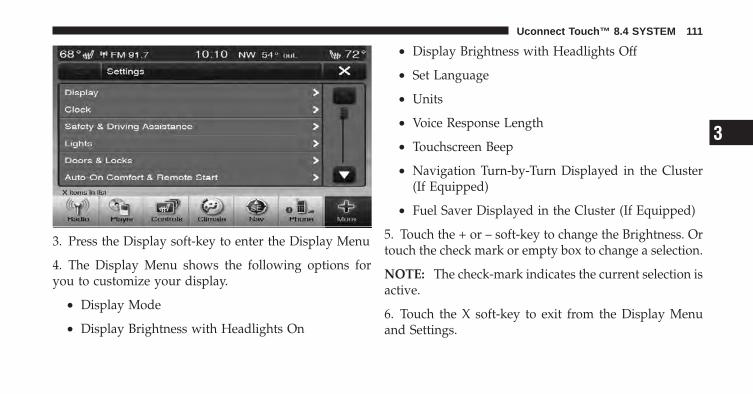
3. Press the Display soft-key to enter the Display Menu
4. The Display Menu shows the following options foryou to customize your display.
• Display Mode
• Display Brightness with Headlights On
• Display Brightness with Headlights Off
• Set Language
• Units
• Voice Response Length
• Touchscreen Beep
• Navigation Turn-by-Turn Displayed in the Cluster(If Equipped)
• Fuel Saver Displayed in the Cluster (If Equipped)
5. Touch the + or – soft-key to change the Brightness. Ortouch the check mark or empty box to change a selection.
NOTE: The check-mark indicates the current selection isactive.
6. Touch the X soft-key to exit from the Display Menuand Settings.
3
Uconnect Touch™ 8.4 SYSTEM 111
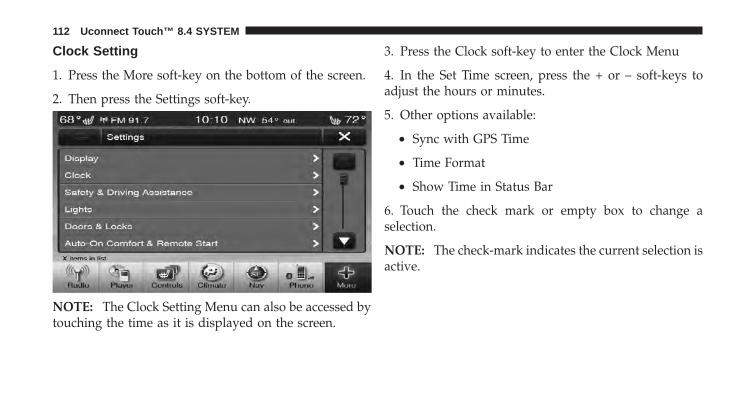
Clock Setting
1. Press the More soft-key on the bottom of the screen.
2. Then press the Settings soft-key.
NOTE: The Clock Setting Menu can also be accessed bytouching the time as it is displayed on the screen.
3. Press the Clock soft-key to enter the Clock Menu
4. In the Set Time screen, press the + or – soft-keys toadjust the hours or minutes.
5. Other options available:
• Sync with GPS Time
• Time Format
• Show Time in Status Bar
6. Touch the check mark or empty box to change aselection.
NOTE: The check-mark indicates the current selection isactive.
112 Uconnect Touch™ 8.4 SYSTEM
SAFETY GUIDELINES
CONTENTS
� Safety Guidelines . . . . . . . . . . . . . . . . . . . . . 114
▫ Warnings . . . . . . . . . . . . . . . . . . . . . . . . . . 114
▫ Safety References . . . . . . . . . . . . . . . . . . . . 115
▫ Intended Use . . . . . . . . . . . . . . . . . . . . . . . 115
▫ System Care . . . . . . . . . . . . . . . . . . . . . . . . 1154
SAFETY GUIDELINESEnsure that all persons read this manual carefully beforeusing the radio system. It contains instructions on how touse the system in a safe and effective manner.
WARNING!
Please read and follow these safety precautions.Failure to do so may result in injury or propertydamage.
• Glance at the screen only when necessary and safe todo so. If prolonged viewing of the screen is necessary,pull over at a safe location.
• Stop use immediately if a problem occurs. Failure todo so may cause injury or damage to the product.Return it to your authorized dealer to repair.
• Make certain that the volume level of the system is setto a level that still allows you to hear outside trafficand emergency vehicles.
• The law in some states prohibits the Front Seat DVDViewer. As a result, it may be disabled prior to deliveryto you. If you move to another state, you shouldconsult your dealer for the proper enable/disablesetting for your new state. Currently all states prohibitfront seat video viewers except for: Arkansas, Dela-ware, Georgia, Hawaii, Idaho, Iowa, Kentucky, Missis-sippi, Missouri, Montana, North Dakota and Ohio.
WarningsThis manual contains WARNINGS against operatingprocedures that could result in an accident or bodilyinjury. If you do not read the entire manual, you maymiss important information. Observe all WARNINGS!
The information given in this manual is subject tochange.
114 SAFETY GUIDELINES
Safety ReferencesBefore operating this system for the first time, please readthis manual carefully. Note the safety precautions de-scribed in this manual. If you have any questions, pleasecontact the vehicle manufacturer or your authorizeddealer.
Intended UseGenerally recognized rules of radio technology weremaintained during the development and manufacture ofthis system. When using this product, be aware ofstate/province-specific norms and guidelines.
System Care
Safe Usage of the Uconnect™ Touch SystemRead all instructions in this manual carefully beforeusing your system to ensure proper usage!
Your system is a sophisticated electronic device. Do notlet young children use your system.
Permanent hearing loss may occur if you play your musicor the system at loud volumes. Exercise caution whensetting the volume on your system.
Driving is a complex activity that requires your fullattention. If you’re engaged in driving or any activity thatrequires your full attention, we recommend that you notuse your system.
NOTE: Many features of this system are speed depen-dent. For your own safety, it is not possible to use thetouch screen keyboard while the vehicle is in motion.
Keep drinks, rain, and other sources of moisture awayfrom your system. Besides damage to your system,moisture can cause electric shocks as with any electronicdevice.
4
SAFETY GUIDELINES 115
ConnectionsNever force any connector into the ports of your system.Make sure your connectors are the correct shape and sizebefore you connect.
Any attached cable should be routed so that it will notapply any pressure to the connection.
Touch ScreenDo not touch the screen with any hard or sharp objects(pen, USB stick, jewelry, etc.) which could scratch thetouch screen surface!
NOTE: It is possible to use a plastic stylus for pressscreen enabled devices such as a PDA and Pocket PCs.
Do not spray any liquid or caustic chemicals directly onthe screen! Use a clean and dry micro fiber lens cleaningcloth in order to clean the touch screen.
If necessary, use a lint-free cloth dampened with acleaning solution, such as isopropyl alcohol, or an iso-propyl alcohol and water solution ratio of 50:50. Be sureto follow the solvent manufacturer’s precautions anddirections.
CD/DVD DriveDo not insert any damaged, warped, scratched or dirtyCDs or DVDs into the CD/DVD player.
Discs that have been modified with an adhesive labelshould not be used in the CD/DVD player.
Do not insert more than one CD/DVD at a time into thedrive slot.
116 SAFETY GUIDELINES
GPS Navigation Antenna – If EquippedThe antenna for the navigation GPS system is mounted invarious locations (depending on the vehicle model)within the dashboard. Do not place items on the dash-board around the GPS antenna location. Objects placedwithin the line of sight of the antenna will decreaseperformance. Do not place items directly on or above theantenna.
Satellite Radio Antenna – If EquippedThe antenna for the satellite radio and SIRIUS BackseatTV™ is mounted on the roof of the vehicle. Do not placeitems on the roof around the roof top antenna location.Objects placed within the line of sight of the antenna willcause decreased performance. Larger luggage itemsshould be placed as far from the antenna as possible. Donot place items directly on or above the antenna.
Other Electronic DevicesYou may bring other electronic devices into your vehicle(e.g., PDA, iPod, laptop computer, etc.). Some of thesedevices may cause electromagnetic interference with theGPS. If a degradation in the navigation system is ob-served, turn the devices off, or keep them as far awayfrom the GPS antenna as possible.
4
SAFETY GUIDELINES 117

11CTP-226-AA First Edition
Chrysler Group LLC
Printed in U.S.A.