21 user manual - m.media-amazon.com
TRANSCRIPT

X-Sense Innovations Co., Ltd.
Email: [email protected]
Conforms to EN 14604:2005+AC:2008
User Manual1008
21
Wireless Interlinked Smoke Alarm XS01-WR
01
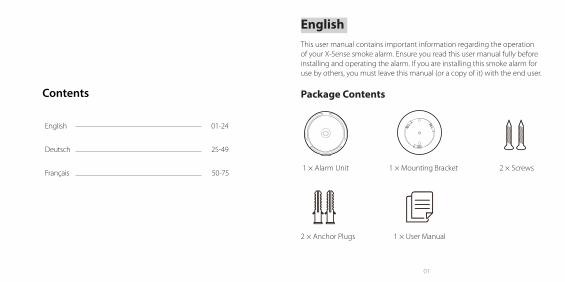
EnglishThis user manual contains important information regarding the operation of your X-Sense smoke alarm. Ensure you read this user manual fully before installing and operating the alarm. If you are installing this smoke alarm for use by others, you must leave this manual (or a copy of it) with the end user.
Package ContentsContents
English 01-24
Deutsch 25-49
Français 50-75 1 × Alarm Unit 1 × Mounting Bracket 2 × Screws
2 × Anchor Plugs 1 × User Manual

02 03
Safety Information IMPORTANT
1. DANGERS, WARNINGS, AND CAUTIONS ALERT YOU TO IMPORTANT OPERATING INSTRUCTIONS OR TO POTENTIALLY HAZARDOUS SITUATIONS. PAY SPECIAL ATTENTION TO THESE SITUATIONS.
2. THIS ALARM IS NOT INTENDED TO ALERT HEARING IMPAIRED INDIVIDUALS. THE USE OF ALCOHOL OR DRUGS MAY ALSO IMPAIR ONE’S ABILITY TO HEAR THE SMOKE ALARM.
3. FIRES IN CHIMNEYS, WALLS, ROOFS, DIFFERENT LEVELS OR BEHIND CLOSED DOORS MIGHT NOT BE DETECTED.
4. THIS DEVICE DOES NOT DETECT FLAMES, HEAT, CARBON MONOXIDE OR OTHER HAZARDOUS GASES.
WARNING
1. NEVER IGNORE ANY ALARM. FAILURE TO RESPOND CAN RESULT IN SERIOUS INJURY OR DEATH.
2. THE SILENCE FEATURE IS ONLY FOR YOUR CONVENIENCE AND WILL NOT CORRECT A PROBLEM. ALWAYS CHECK YOUR HOME FOR A POTENTIAL PROBLEM AFTER ANY ALARM. FAILURE TO DO SO CAN RESULT IN INJURY OR DEATH.
3. TEST THIS SMOKE ALARM ONCE A WEEK. IF THE ALARM EVER FAILS TO TEST CORRECTLY, REPLACE IT IMMEDIATELY! IF THE ALARM CANNOT WORK
PROPERLY, IT WILL NOT ALERT YOU TO A PROBLEM.
How to Set up and Interconnect Wireless Alarms
All X-Sense Link+ wireless interlinked alarms contain a built-in RF module that enables you to wirelessly connect 2 or more interlinked alarms and create an interlinked network. When one unit is triggered, all interconnected alarms will sound. The X-Sense Link+ series contain wireless interlinked smoke alarms, wireless interlinked carbon monoxide alarms, and wireless interlinked combination smoke and carbon monoxide alarms. This model is designed to be wirelessly interlinked with other X-Sense Link+ alarms, but is not designed to communicate with wireless interlinked alarms from other manufacturers.
The X-Sense Link+ wireless interlinked alarms in one multi-pack have already been interconnected, and the alarms in each multi-pack have their own independent interlinked network. If you have more than one multi-pack, you will need to connect them all to the same network. Choose one multi-pack as your base network and connect the other multi-packs to it.
NOTE! The following instructions regarding wireless interconnection are applicable to the X-Sense Link+ wireless interlinked alarms only.
H ow to Interconnect
1. Make sure you only work with 2 units at a time, and make sure that they are both turned on to ensure successful connection.
04 05
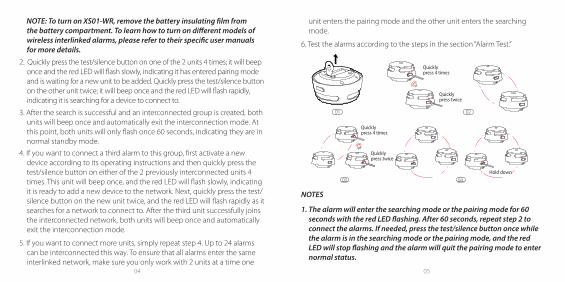
NOTE: To turn on XS01-WR, remove the battery insulating � lm from the battery compartment. To learn how to turn on di� erent models of wireless interlinked alarms, please refer to their speci� c user manuals for more details.
2. Quickly press the test/silence button on one of the 2 units 4 times; it will beep once and the red LED will fl ash slowly, indicating it has entered pairing mode and is waiting for a new unit to be added. Quickly press the test/silence button on the other unit twice; it will beep once and the red LED will fl ash rapidly, indicating it is searching for a device to connect to.
3. After the search is successful and an interconnected group is created, both units will beep once and automatically exit the interconnection mode. At this point, both units will only fl ash once 60 seconds, indicating they are in normal standby mode.
4. If you want to connect a third alarm to this group, fi rst activate a new device according to its operating instructions and then quickly press the test/silence button on either of the 2 previously interconnected units 4 times. This unit will beep once, and the red LED will fl ash slowly, indicating it is ready to add a new device to the network. Next, quickly press the test/silence button on the new unit twice, and the red LED will fl ash rapidly as it searches for a network to connect to. After the third unit successfully joins the interconnected network, both units will beep once and automatically exit the interconnection mode.
5. If you want to connect more units, simply repeat step 4. Up to 24 alarms can be interconnected this way. To ensure that all alarms enter the same interlinked network, make sure you only work with 2 units at a time one
unit enters the pairing mode and the other unit enters the searching mode.
6. Test the alarms according to the steps in the section “Alarm Test.”
NOTES
1. The alarm will enter the searching mode or the pairing mode for 60 seconds with the red LED � ashing. After 60 seconds, repeat step 2 to connect the alarms. If needed, press the test/silence button once while the alarm is in the searching mode or the pairing mode, and the red LED will stop � ashing and the alarm will quit the pairing mode to enter normal status.
RF
Quickly press twice
Quickly press twice
Quickly press 4 times
Quickly press 4 times
01 02
RF
Hold down
03 04
06 07
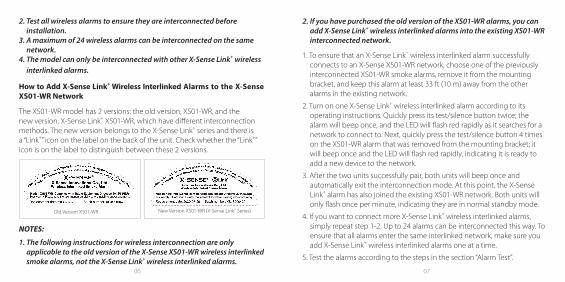
2. If you have purchased the old version of the XS01-WR alarms, you can add X-Sense Link+ wireless interlinked alarms into the existing XS01-WR interconnected network.
1. To ensure that an X-Sense Link+ wireless interlinked alarm successfully connects to an X-Sense XS01-WR network, choose one of the previously interconnected XS01-WR smoke alarms, remove it from the mounting bracket, and keep this alarm at least 33 ft (10 m) away from the other alarms in the existing network.
2. Turn on one X-Sense Link+ wireless interlinked alarm according to its operating instructions. Quickly press its test/silence button twice; the alarm will beep once, and the LED will fl ash red rapidly as it searches for a network to connect to. Next, quickly press the test/silence button 4 times on the XS01-WR alarm that was removed from the mounting bracket; it will beep once and the LED will fl ash red rapidly, indicating it is ready to add a new device to the network.
3. After the two units successfully pair, both units will beep once and automatically exit the interconnection mode. At this point, the X-Sense Link+ alarm has also joined the existing XS01-WR network. Both units will only fl ash once per minute, indicating they are in normal standby mode.
4. If you want to connect more X-Sense Link+ wireless interlinked alarms, simply repeat step 1-2. Up to 24 alarms can be interconnected this way. To ensure that all alarms enter the same interlinked network, make sure you add X-Sense Link+ wireless interlinked alarms one at a time.
5. Test the alarms according to the steps in the section “Alarm Test”.
2. Test all wireless alarms to ensure they are interconnected before installation.
3. A maximum of 24 wireless alarms can be interconnected on the same network.
4. The model can only be interconnected with other X-Sense Link+ wireless interlinked alarms.
How to Add X-Sense Link+ Wireless Interlinked Alarms to the X-Sense XS01-WR Network
The XS01-WR model has 2 versions: the old version, XS01-WR, and the new version, X-Sense Link+ XS01-WR, which have diff erent interconnection methods. The new version belongs to the X-Sense Link+ series and there is a “Link+” icon on the label on the back of the unit. Check whether the “Link+” icon is on the label to distinguish between these 2 versions.
NOTES:
1. The following instructions for wireless interconnection are only applicable to the old version of the X-Sense XS01-WR wireless interlinked smoke alarms, not the X-Sense Link+ wireless interlinked alarms.
New Version XS01-WR (X-Sense Link+ Series)Old Version XS01-WR

08 09
How to Disconnect
Quickly press the test/silence button 4 times; the smoke alarm will beep once. Then, hold down the button until it beeps once more to disconnect. After disconnecting, it can be reconnected to the same network, or added to a new network.
NOTE: The X-Sense Link+ wireless interlinked alarms in one multi-pack have already been interconnected. To create a new network, you will � rst need to disconnect each alarm individually in this multi-pack to avoid having them all join the same network.
Alarm TestBe sure to test your smoke alarms when you turn them on for the fi rst time, or when the group confi guration has changed. In addition to the weekly tests you should perform, it is recommended to test the alarm after returning from a long trip or vacation.
If your X-Sense Link+ XS01-WR is interconnected to other wireless smoke alarms, we recommend that every individual smoke alarm is tested during the weekly test.
Test a single alarm Test all interconnected smoke alarms
Action Press the test/silence button.
Hold down the test/silence button.

10 11
Indication • The alarm will sound 3 short quick beeps.
• The red LED will fl ash once every second during the audible signal.
• After testing, the alarm will automatically enter standby mode.
• The initiating smoke alarm will beep continuously with the red LED fl ashing.
• Other interconnected smoke alarms in the network will receive the signal after 5 seconds, and they will beep continuously with the red LED fl ashing. Release the test/silence button and all the smoke alarms will stop testing.
• The testing of the units should be completed within 3 minutes.
• After testing, the units will automatically enter standby mode.
NOTE: The test function accurately tests the alarm’s smoke sensing circuit without the need to test with smoke. If your smoke alarm fails to give an audible test signal, please refer immediately to the troubleshooting guide at the end of this manual. Never use an open � ame to test this device.
Installation Positioning
NOTE: If a smoke alarm is installed in a kitchen, ensure it has an accessible silence button, and install it as far away from the stove and sink as possible to avoid false alarms.
Smoke Alarms Smoke & Carbon Monoxide Alarms
Fire ExtinguishersCarbon Monoxide Alarms

12 13
1. Prioritize the installation of an alarm in the bedroom and walkways, and make sure you can hear the alarm from all sleeping areas. In a home with several bedrooms, install an alarm in every bedroom. If you install only one smoke alarm in your home, install the alarm near to all bedrooms where possible, and not in a basement or furnace room.
2. Install an alarm above the stairway and on every fl oor of the house.
3. Smoke, heat and anything burning will spread horizontally after rising to the ceiling, so install the alarm in the middle of the ceiling where possible. Ensure that the alarm is installed at the minimum distance away from corner.
4. If an alarm cannot be installed in the middle of a ceiling, install it at a distance of 20 inches (50 cm) away from the corners of the room.
5. If an alarm is installed onto a wall, a distance of 4-12 inches (10-30 cm) should be kept below the ceiling.
6. If the length of a room or hall is beyond 30 feet (900 cm), several alarms should be installed in the same room.
7. When the wall or ceiling is angled, the alarm needs to be installed within 3 feet (90 cm) of the highest wall or ceiling point (measured horizontally) in the room.
8. In multi-level houses or apartments, install at least one wireless smoke alarm on each level and keep them installed in a st raight vertical line (see diagram) with as few obstacles between each of the interconnected alarms as possible to ensure optimal signal transmission.

14 15
Loc ations to Avoid
1. Nea r large metal surfaces and/or bundles of wire.
2. Near fl uorescent lights, amateur radios, electrical equipment, or other devices that may transmit an RF signal, a s electronic “noise” may cause nuisance alarms.
WARNING
1. THIS ALARM SHOULD BE INSTALLED BY A COMPETENT PERSON.
2. ALARMS SHOULD NOT BE USED AS A SUBSTITUTE FOR PROPER INSTALLATION, USE AND MAINTENANCE OF FUELBURNING APPLIANCES INCLUDING APPROPRIATE VENTILATION AND EXHAUST SYSTEMS.
In stallation Method
NOTE: Bef ore installation, it is recommended to test the interconnected smoke alarms in di� erent rooms where you intend to install these alarms to ensure that they are within the transmission range.
1. Use the mounting bracket to mark the screw holes on the ceiling or the wall.
2. Drill holes at the 2 marks using an appropriately-sized drill bit. Insert the anchor plugs and screw the mounting bracket using the screws provided.
3. Attach the alarm to the mounting bracket and turn clockwise to lock the alarm.
4. Test the smoke alarm according to the steps in the section “Alarm Test”.

16 17
Battery Replacement1. To replace the battery, detach the smoke alarm from the mounting bracket
by twisting counterclockwise.
2. Pull the battery removal tab to remove the battery, and then install a new battery, matching the correct polarity markings.
3. Test the alarm, and then mount the alarm onto the mounting bracket by twisting clockwise to lock the alarm.
01 02
03 04

18 19
LED Indicator and Audible Alarm
Status LED indicator Audible alarm Note
Normal Red LED fl ashes once every 60 seconds.
None
Alarm Red LED fl ashes once every second.
Short quick beeps
All alarms in the interconnected network
TestSingle Smoke Alarm Red LED
fl ashes once every second.
3 short quick beeps
Press the test/silence button once.
All interconnected smoke alarms in the network
Red LED fl ashes once every second.
Continuous beeping until you release t he test/silence button
Hold down the test/silence button.
Silence Mode Red LED fl ashes once every 5 seconds.
None
Low Battery Red LED fl ashes once every 60 seconds.
1 beep every 60 seconds
Each alarm gives an independent warning.
Malfunction Red LED fl ashes twice every 40 seconds.
2 beeps every 40 seconds
Each alarm gives an independent warning.
Silence Mode
If you press the silence button during an a larm state, the unit will be in the silence mode for 9 minutes. During the silence mode, the red LED will fl ash once every 5 seconds. The alarm will enter the normal mode after 9 minutes.

20 21
NOTES
1. You can silence all interconnected units by pressing the test/silence button on one of the units. If one unit is still alarming, it is the initiating unit (the unit that detected danger); to silence all interlinked units, you must also press the test/silence button on the initiating unit.
2. While interconnected, the initiating unit cannot be triggered again during the 9-minute silence duration. However, all other interconnected units can be triggered again if they detect danger during the silence mode.
Technical Speci� cations
Power Supply Replaceable 3 V CR123A lithium battery
Operating Life 10 years
Battery Life 5 years
Sensor Type Photoelectric
Safety Standard EN 14604:2005+AC:2008
Standby Current < 15 uA (avg.)
Alarm Current < 150 mA (avg.)
Coverage Area 215-430 ft2 (20-40 m2)
Best Operating Ambient Temperature
40–100°F (4.4–37.8°C)
Operating Relative Humidity ≤ 85% (non-condensing)
Alarm Loudness ≥ 85 dB at 10 ft (3 m) @ 3.2 ± 0.3 kHz pulsing alarm
Silence Duration About 9 minutes
Operating Frequency 868 MHz
Maximum Number of Interconnected Units
24 wireless units (only compatible with X-Sense wireless alarms)
Transmission Range Over 820 ft (250 m) in open air
NOTES
1. Battery life is calculated on the current ratings in the standby mode with weekly testings. If its operation mode changes to an alarming condition, the battery life will be decreased accordingly.
2. The smoke alarm functions between 40 and 100°F (4.4 and 37.8°C). Prolonged exposure to temperatures outside of this range can reduce battery life and aff ect accuracy. We do not recommend operating the device outside of this range.

22 23
MaintenanceTo keep your smoke alarm in good working order, follow these simple steps:
1. Verify the unit’s alarm sound and indicator are working properly by testing the unit once a week.
2. As a minimum your smoke alarm should be cleaned once every 3 months: Remove the unit from the ceiling and clean the alarm cover and vents with your vacuum cleaner fi tted with the soft brush attachment to remove dust
and dirt.
3. Never use detergents or other solvents to clean the unit.
4. Avoid spraying air fresheners, hair spray or other aerosols near the alarm.
5. Do not paint the unit. Paint will seal the vents and interfere with the sensor’s ability to detect fi re.
6. Never attempt to disassemble the unit or clean inside. Doing so will void your warranty.
7. When removed, place the smoke alarm back in its proper location as soon as possible, to assure continuous
protection from fi re.
8. When household cleaning supplies or similar contaminants are used, the area should be ventilated.
Troubleshooting
PROBLEM SOLUTION
Your smoke alarm does not sound during testing.
• Make sure you push the test/silence button
fi rmly.
• Check the installation positioning. The wireless signal might be blocked or out of range.
False alarms triggered intermittently or when residents are cooking, taking showers, etc.
• Check the location of your smoke alarm (see
“Installation Positioning”).
• Clean the smoke alarm (see “Maintenance”).
Red LED fl ashes and the alarm sounds one beep every 60 seconds.
The battery is low. Replace the battery immediately.
Red LED fl ashes and the alarm sounds two beeps every 40 seconds.
The alarm is malfunctioning. Please clean your smoke alarm and see if it is working normally. If not, replace the device immediately.
24 25
Environmental Protection
Waste electrical products should not be disposed of with household waste. Please recycle where facilities exist. Check with Local Authority or retailer for recycling advice.
Manufacturer and Service Information
X-Sense Innovations Co., Ltd.Address: B4-503-D, Tower B, Kexing Science Park, No. 15 Keyuan Road, Technology Park Community, Yuehai Avenue, Nanshan District, Shenzhen, 518057, CHINA Email: [email protected]
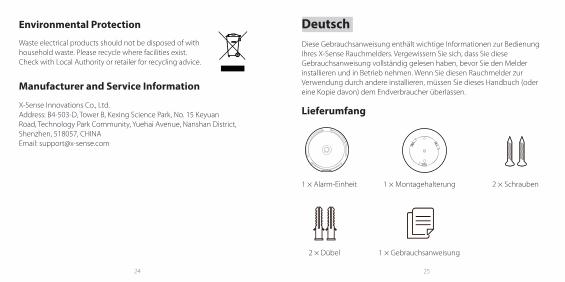
DeutschDiese Gebrauchsanweisung enthält wichtige Informationen zur Bedienung Ihres X-Sense Rauchmelders. Vergewissern Sie sich, dass Sie diese Gebrauchsanweisung vollständig gelesen haben, bevor Sie den Melder installieren und in Betrieb nehmen. Wenn Sie diesen Rauchmelder zur Verwendung durch andere installieren, müssen Sie dieses Handbuch (oder eine Kopie davon) dem Endverbraucher überlassen.
Lieferumfang
1 × Alarm-Einheit 1 × Montagehalterung 2 × Schrauben
2 × Dübel 1 × Gebrauchsanweisung
26 27
Sicherheitshinweise
WICHTIG
1. GEFAHREN, WARNHINWEISE UND VORSICHTSHINWEISE WEISEN SIE AUF WICHTIGE GEBRAUCHSANWEISUNGEN ODER AUF POTENZIELL GEFÄHRLICHE SITUATIONEN HIN. ACHTEN SIE BESONDERS AUF DIESE SACHVERHALTE.
2. DIESER MELDER IST NICHT DAZU BESTIMMT, HÖRGESCHÄDIGTE PERSONEN ZU WARNEN. DER KONSUM VON ALKOHOL ODER DROGEN KANN DIE HÖRBARKEIT DES RAUCHMELDERS EBENFALLS BEEINTRÄCHTIGEN.
3. BRÄNDE IN SCHORNSTEINEN, WÄNDEN, DÄCHERN, VERSCHIEDENEN EBENEN ODER HINTER GESCHLOSSENEN TÜREN WERDEN MÖGLICHERWEISE NICHT ERKANNT.
4. DIESES GERÄT ERKENNT KEINE FLAMMEN, HITZE, KOHLENMONOXID ODER ANDERE GEFÄHRLICHE GASE.
WARNUNG
1. IGNORIEREN SIE NIEMALS EINEN ALARM. NICHTBEACHTUNG KANN ZU SCHWEREN VERLETZUNGEN ODER ZUM TOD FÜHREN.
2. DIE STUMMSCHALTFUNKTION DIENT NUR IHRER BEQUEMLICHKEIT UND WIRD EIN PROBLEM NICHT BEHEBEN. ÜBERPRÜFEN SIE IHR ZUHAUSE NACH JEDEM ALARM IMMER AUF EIN MÖGLICHES PROBLEM. NICHTBEACHTUNG KANN ZU VERLETZUNGEN ODER ZUM TOD FÜHREN.
3. TESTEN SIE DIESEN RAUCHMELDER EINMAL PRO WOCHE. SOLLTE JEMALS EIN TESTFEHLER DES MELDERS VORLIEGEN, ERSETZEN SIE IHN SOFORT! WENN DER MELDER NICHT EINWANDFREI FUNKTIONIERT, WARNT ER MÖGLICHERWEISE NICHT VOR GEFAHREN.
Drahtlose Melder einrichten und vernetzen
Alle X-Sense Link+ drahtlos vernetzte Melder enthalten ein eingebautes HF-Modul, mit dem Sie 2 oder mehr Rauchmelder drahtlos verbinden und ein vernetztes Netzwerk erstellen können. Wenn eine Einheit ausgelöst wird, ertönen alle miteinander verbundenen Melder. Die X-Sense Link+
Serie enthält drahtlose miteinander verbundene Rauchmelder, drahtlose miteinander verbundene Kohlenmonoxidmelder und drahtlose miteinander verbundene Kombinierter Rauch- und Kohlenmonoxidmelder. Dieses Modell ist so konzipiert, dass es drahtlos mit anderen X-Sense Link+
Melder verbunden ist und nicht für die Kommunikation mit miteinander verbundenen drahtlosen Melder anderer Hersteller ausgelegt ist.
Die drahtlosen miteinander verbundenen Melder X-Sense Link+ in einem Multipack wurden bereits miteinander verbunden, und die Melder in jedem Multipack verfügen über ein eigenes unabhängiges miteinander verbundenes Netzwerk. Wenn Sie mehr als ein Multipack haben, müssen Sie sie alle mit demselben Netzwerk verbinden. Wählen Sie ein Multi-Pack als Basisnetzwerk und verbinden Sie die anderen Multi-Packs damit.

28 29
HINWEIS! Die folgenden Anweisungen für die drahtlose Verbindung gelten nur für die X-Sense Link+ miteinander verbundenen Melder.
Wie man untereinander verbindet
1. Stellen Sie sicher, dass Sie nur mit 2 Einheiten gleichzeitig arbeiten, und stellen Sie sicher, dass beide eingeschaltet sind, um eine erfolgreiche Verbindung sicherzustellen.
HINWEIS: Um XS01-WR einzuschalten, entfernen Sie die Batterie-Isolierfolie aus dem Batteriefach. Weitere Informationen zum Einschalten verschiedener Modelle von drahtlos miteinander verbundenen Melder fi nden Sie in der Bedienungsanleitung.
2. Drücken Sie schnell die Test-/Stummschalt-Taste auf eine der 2 Einheiten 4 Mal; es wird einmal piepen und die rote LED blinkt langsam, es zeigt an, dass es ist in den Paarungsmodus gewechselt ist und wartet auf eine neu hinzugefügte Einheit. Drücken Sie schnell die Test-/Stummschalt-Taste auf der anderen Einheit zweimal; es wird einmal piepen und und die rote LED blinkt schnell, es zeigt an, dass es ein Gerät zum Verbinden sucht.
3. Nachdem die Suche erfolgreich war, wird eine miteinander verbundene Gruppe erstellt, beide Einheiten piepen einmal und verlassen automatisch den Verbindungsmodus Zu diesem Zeitpunkt blinken beide Geräte nur einmal 60 Sekunden und zeigen an, dass sie sich im normalen Standby-Modus befi nden.
4. Wenn Sie einen dritten Melder an diese Gruppe anschließen möchten, aktivieren Sie zuerst ein neues Gerät gemäß der Bedienungsanleitung und drücken Sie dann schnell die Test-/Stummschalt-Taste an einer der beiden zuvor miteinander verbundenen Einheiten 4 Mal. Diese Einheit piept einmal und die rote LED blinkt langsam und zeigt an, dass er bereit ist, ein neues Gerät zum Netzwerk hinzuzufügen. Als nächstes drücken Sie schnell die Test-/Stummschalt-Taste auf der neuen Einheit zweimal und die rote LED blinkt schnell, da es nach einem Netzwerk sucht, um sich zu verbinden. Nachdem die dritte Einheit erfolgreich dem miteinander verbundenen Netzwerk beigetreten ist, piepen beide Einheiten einmal und verlassen automatisch den Verbindungsmodus.
5. Wenn Sie weitere Einheiten anschließen möchten, wiederholen Sie einfach Schritt 4. Bis zu 24 Melder können so miteinander verbunden werden. Um sicherzustellen, dass alle Melder in dasselbe vernetzte Netzwerk gelangen, stellen Sie sicher, dass Sie jeweils nur mit 2 Geräten arbeiten—eine Einheit wechselt in den Paarungsmodus und die andere in den Suchmodus.
6. Testen Sie den Melder gemäß den Schritten im folgenden Abschnitt "Meldertest".

30 31
HINWEISE
1. Der Melder wechselt für 60 Sekunden in den Suchmodus oder in den Paarungsmodus, während dessen die rote LED blinkt. Wiederholen Sie nach 60 Sekunden Schritt 2, um die Melder anzuschließen. Drücken Sie bei Bedarf einmal die Test-/Stummschalt-Taste, während sich der Melder im Suchmodus oder im Paarungsmodus befindet, und die rote LED hört auf zu blinken und der Melder beendet den Paarungsmodus, um in den Normalzustand zu gelangen.
2. Testen Sie alle Funk-Melder, um sicherzustellen, dass sie vor der Installation miteinander verbunden sind.
3. Im selben Netzwerk können maximal 24 Funk-Melder miteinander verbunden werden.
4. Das Modell kann nur mit anderen X-Sense Link+ drahtlosen miteinander verbundenen Melder verbunden werden.
So fügen Sie die X-Sense Link+ drahtlose miteinander verbundenen Melder in das X-Sense XS01-WR Netzwerk hinzu
Das Modell XS01-WR hat 2 Versionen: die alte Version XS01-WR und die neue Version X-Sense Link+ XS01-WR, die unterschiedliche Verbindungsmethoden haben. Die neue Version gehört zur X-Sense Link+ Serie und auf dem Etikett auf der Rückseite des Geräts befi ndet sich ein Symbol "Link+" (siehe folgenden Screenshot). Sie können überprüfen, ob sich auf dem Etikett ein Symbol "Link+" befi ndet, um diese beiden Versionen zu unterscheiden.
Drücken Sie schnell 2 Mal
Drücken Sie schnell 2 Mal
Drücken Sie schnell 4 Mal
Drücken Sie schnell 4 Mal
01 02
Unten halten
03 04
HF
HF
Alte Version XS01-WR Neue Version XS01-WR (X-Sense Link+ Serie)

32 33
HINWEISE
1. Die folgenden Anweisungen für die drahtlose Vernetzung sind nur für die alte Version der X-Sense XS01-WR drahtlose miteinander verbundene Rauchmelder, die nicht zu X-Sense Link+ drahtlose miteinander verbundenen Melder gehören.
2. Wenn Sie die alte Version XS01-WR Melder erworben haben, können Sie X-Sense Link+ drahtlose miteinander verbundene Melder in das zuvor miteinander verbundene Netzwerk XS01-WR hinzufügen.
1. Um sicherzustellen, dass ein X-Sense Link+ drahtloser miteinander verbundene Melder erfolgreich eine Verbindung zu einem X-Sense XS01-WR Netzwerk herstellt, wählen Sie einen der zuvor miteinander verbundenen XS01-WR Rauchmelder aus, entfernen Sie ihn aus der Halterung und halten Sie diesen Alarm mindestens 10 m von den anderen Meldern im vorhandenen Netzwerk entfernt.
2. Schalten Sie einen X-Sense Link+ drahtlos miteinander verbundenen Melder gemäß der Bedienungsanleitung ein. Drücken Sie schnell die Test-/Stummschalt-Taste zweimal, der Melder piept einmal, und die LED blinkt schnell rot, das es ein Netzwerk zum Verbinden sucht. Als nächstes drücken Sie schnell die Test-/Stummschalt-Taste auf einem der zuvor miteinander verbundenen XS01-WR Melder 4 Mal; es piept einmal und die LED blinkt schnell rot, es ist bereit, ein neues Gerät in das Netzwerk hinzuzufügen.
3. Nachdem die beiden Einheiten erfolgreich gepaart wurden, piepen beide Einheiten einmal und verlassen automatisch den Verbindungsmodus.
Zu diesem Zeitpunkt ist der X-Sense Link+ Melder auch dem bestehenden
XS01-WR Netzwerk beigetreten. Beide Geräte blinken nur einmal pro Minute und zeigen an, dass sie sich im normalen Standby-Modus befi nden.
4. Wenn Sie weitere X-Sense Link+ drahtlose miteinander verbundene Melder anschließen möchten, wiederholen Sie einfach Schritt 1-2. Bis zu 24 Melder können so miteinander verbunden werden. Um sicherzustellen, dass alle Melder in dasselbe vernetzte Netzwerk gelangen, stellen Sie sicher, dass Sie X-Sense Link+ drahtlose miteinander verbundene Melder einzeln hinzufügen.
5. Testen Sie den Melder gemäß den Schritten im folgenden Abschnitt "Meldertest".

34 35
Wie trennt man die Verbindung
Drücken Sie schnell 4 Mal die Test-/Stummschalt-Taste und der Rauchmelder piept einmal, dann halten Sie die Taste gedrückt, bis es einmal piept, um es zu trennen. Nach dem Trennen können Sie es erneut verbinden, damit es in das vernetzte Netzwerk eintritt.
HINWEIS: Die drahtlosen miteinander verbundenen X-Sense Link+ Melder in einem Multipack wurden bereits miteinander verbunden. Um ein neues Netzwerk zu erstellen, müssen Sie zuerst jeden Melder einzeln in diesem Multipack trennen, um zu vermeiden, dass sie alle demselben Netzwerk beitreten.
MeldertestTesten Sie Ihre Rauchmelder unbedingt, wenn Sie sie zum ersten Mal einschalten oder wenn sich die Gruppenkonfi guration geändert hat. Zusätzlich zu den wöchentlichen Tests, die Sie durchführen sollten, wird empfohlen, den Melder nach der Rückkehr von einer langen Reise oder einem Urlaub zu testen.
Wenn Ihr X-Sense Link+ XS01-WR mit anderen Funk-Rauchmeldern verbunden ist, empfehlen wir Ihnen, jeden einzelnen Rauchmelder während des wöchentlichen Tests zu testen.
Testen Sie einen einzigen Melder
Testen Sie alle miteinander verbundenen Rauchmelder
Aktion Drücken Sie die Test-/Stummschalt-Taste.
Halten Sie die Test-/Stummschalt-Taste gedrückt.
Indikation • Der Melder gibt 3 kurze schnelle Pieptöne von sich.
• Die rote LED blinkt während des hörbaren Signals einmal jede Sekunde.
• Nach dem Testen wechselt der Melder automatisch in den Standby-Modus.
• Der initiierende Rauchmelder piept kontinuierlich mit rot blinkender LED.
• Andere miteinander verbundene Rauchmelder im Netzwerk empfangen das Signal nach 5 Sekunden und piepen kontinuierlich mit der rot blinkender LED. Lasse die Test-/Stummschalt-Taste los und alle Rauchmelder hören auf zu testen.
• Der Alarmtest ist innerhalb von 3
Minuten abgeschlossen.
• Nach dem Testen wechselt der Melder automatisch in den Standby-Modus.
HINWEIS: Die Testfunktion testet genau den Rauchmelderkreis des Melders ohne die Notwendigkeit von Testrauch. Wenn Ihr Rauchmelder kein akustisches Testsignal gibt, lesen Sie bitte am Ende dieser Bedienungsanleitung sofort die Anleitung zur Fehlerbehebung.Verwenden Sie niemals eine off ene Flamme, um dieses Gerät zu testen.

36 37
Installationsort
HINWEIS: Wenn ein Rauchmelder in einer Küche installiert ist, stellen Sie sicher, dass er über eine leicht zugängliche Stummschalt-Taste verfügt, und installieren Sie den Melder so weit wie möglich vom Herd und der Spüle entfernt, um Fehlalarme zu vermeiden.
1. Priorisieren Sie die Installation eines Rauchmelders im Schlafzimmer und in den Gängen und stellen Sie sicher, dass Sie den Melder von allen Schlafbereichen hören können. In einem Haus mit mehreren Schlafzimmern, installieren Sie einen Melder in jedem Schlafzimmer.
Wenn Sie nur einen Rauchmelder in Ihrem Haus installieren, installieren Sie den Melder möglichst in der Nähe aller Schlafzimmer und nicht in einem Keller oder Ofenraum.
2. Installieren Sie einen Melder über der Treppe und auf jeder Etage des Hauses.
3. Rauch, Hitze und alles, was brennt, breitet sich nach dem Aufsteigen an die Decke horizontal aus, so dass der Melder nach Möglichkeit in der Mitte der Decke installiert werden kann. Vergewissern Sie sich, dass sich der Melder in Reichweite aller Ecken des Raumes befi ndet.
4. Wenn ein Melder nicht in der Mitte einer Decke installiert werden kann, installieren Sie ihn in einem Abstand von 50 cm zu Raumecken.
5. Wird ein Melder an einer Wand installiert, sollte der Abstand zur Decke 10-30 cm betragen.
6. Wenn die Länge eines Raums oder einer Halle mehr als 900 cm beträgt, ollten mehrere Melder im selben Raum installiert werden.
7. Wenn die Wand oder Decke geneigt ist, muss der Melder innerhalb 90 cm vom höchsten Wand- oder Deckenpunkt (horizontal gemessen) im Raum entfernt installiert werden.

38 39
8. Installieren Sie in mehrstöckigen Häusern oder Wohnungen mindestens einen Funk-Rauchmelder auf jeder Etage und halten Sie ihn in einer geraden vertikalen Linie (siehe Diagramm) damit wenige Hindernissen wie möglich zwischen den miteinander verbundenen Melder stehen, um eine optimale Signalübertragung zu gewährleisten.
Orte vermeiden1. In der Nähe von großen Metalloberfl ächen und/oder Drahtkabeln.
2. In der Nähe von Leuchtstoff röhren, Amateur-Radios, elektrische Geräte oder andere Geräte, die ein HF-Signal übertragen können, das als elektronische ”Rauschen“, Fehlalarme verursachen.

40 41
1. WARNUNG
1. DER RAUCHMELDER SOLLTE VON EINER KOMPETENTEN PERSON INSTALLIERT WERDEN.
2. DIE INSTALLATION DES MELDERS SOLLTE NICHT ALS ERSATZ FÜR DIE ORDNUNGSGEMÄSSE INSTALLATION, VERWENDUNG UND WARTUNG VON FEUERBETRIEBENEN GERÄTSCHAFTEN, EINSCHLIESSLICH GEEIGNETER
BE- UND ENTLÜFTUNGSSYSTEMEN VERWENDET WERDEN.
InstallationsmethodeHINWEIS: Vor der Installation wird empfohlen, die miteinander verbundenen Rauchmelder in verschiedenen Räumen zu testen, in denen Sie diese Melder installieren möchten, um sicherzustellen, dass Sie sich im Übertragungsbereich be� nden.
1. Verwenden Sie die Halterung, um die Schraublöcher an der Decke oder an der Wand zu markieren.
2. Bohren Sie Löcher an den 2 Markierungen mit einem entsprechend großen Bohrer. Drücken Sie die Dübel ein und schrauben Sie die Halterung mit den mitgelieferten Schrauben fest.
3. Befestigen Sie den Melder an der Halterung und drehen Sie im Uhrzeigersinn, um den Melder zu fi xieren.
4. Testen Sie den Rauchmelder gemäß den Schritten im folgenden Abschnitt.
01 02
03 04
42 43
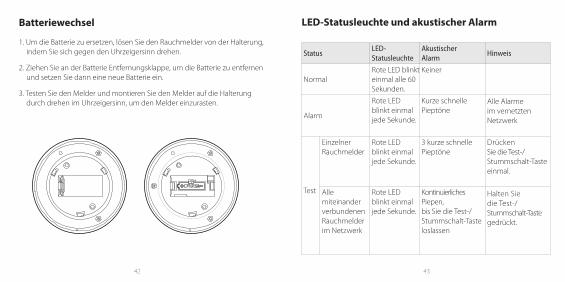
Batteriewechsel
1. Um die Batterie zu ersetzen, lösen Sie den Rauchmelder von der Halterung, indem Sie sich gegen den Uhrzeigersinn drehen.
2. Ziehen Sie an der Batterie Entfernungsklappe, um die Batterie zu entfernen und setzen Sie dann eine neue Batterie ein.
3. Testen Sie den Melder und montieren Sie den Melder auf die Halterung durch drehen im Uhrzeigersinn, um den Melder einzurasten.
LED-Statusleuchte und akustischer Alarm
StatusLED-Statusleuchte
AkustischerAlarm
Hinweis
NormalRote LED blinkt einmal alle 60 Sekunden.
Keiner
Alarm
Rote LED blinkt einmal jede Sekunde.
Kurze schnelle Pieptöne
Alle Alarme im vernetzten Netzwerk
Test
Einzelner Rauchmelder
Rote LED blinkt einmal jede Sekunde.
3 kurze schnelle Pieptöne
D rücken Sie die Test-/Stummschalt-Taste einmal.
Alle miteinander verbundenen Rauchmelder im Netzwerk
Rote LED blinkt einmal jede Sekunde.
Kontinuierliches Piepen, bis Sie die Test-/Stummschalt-Taste loslassen
Halten Sie die Test-/Stummschalt-Taste gedrückt.
44 45
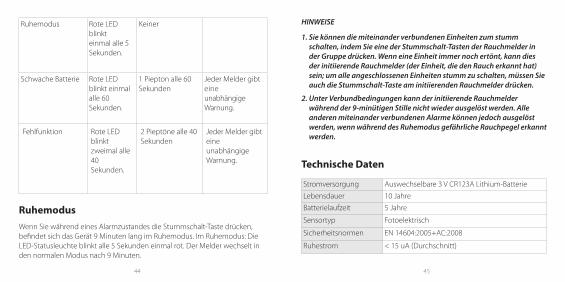
Ruhemodus Rote LED blinkt einmal alle 5 Sekunden.
Keiner
Schwache Batterie Rote LED blinkt einmal alle 60 Sekunden.
1 Piepton alle 60 Sekunden
Jeder Melder gibt eine unabhängige Warnung.
Fehlfunktion Rote LED blinkt zweimal alle 40 Sekunden.
2 Pieptöne alle 40 Sekunden
Jeder Melder gibt eine unabhängige Warnung.
RuhemodusWenn Sie während eines Alarmzustandes die Stummschalt-Taste drücken, befi ndet sich das Gerät 9 Minuten lang im Ruhemodus. Im Ruhemodus: Die LED-Statusleuchte blinkt alle 5 Sekunden einmal rot. Der Melder wechselt in den normalen Modus nach 9 Minuten.
HINWEISE
1. Sie können die miteinander verbundenen Einheiten zum stumm schalten, indem Sie eine der Stummschalt-Tasten der Rauchmelder in der Gruppe drücken. Wenn eine Einheit immer noch ertönt, kann dies der initiierende Rauchmelder (der Einheit, die den Rauch erkannt hat) sein; um alle angeschlossenen Einheiten stumm zu schalten, müssen Sie auch die Stummschalt-Taste am initiierenden Rauchmelder drücken.
2. Unter Verbundbedingungen kann der initiierende Rauchmelder während der 9-minütigen Stille nicht wieder ausgelöst werden. Alle anderen miteinander verbundenen Alarme können jedoch ausgelöst werden, wenn während des Ruhemodus gefährliche Rauchpegel erkannt werden.
Technische Daten
Stromversorgung Auswechselbare 3 V CR123A Lithium-Batterie
Lebensdauer 10 Jahre
Batterielaufzeit 5 Jahre
Sensortyp Fotoelektrisch
Sicherheitsnormen EN 14604:2005+AC:2008
Ruhestrom < 15 uA (Durchschnitt)

46 47
Alarmstrom < 150 mA (Durchschnitt)Abdeckungsbereich 20-40 m²
Beste Betriebstemperatur
4,4°C bis 37,8°C
Messbereich Luftfeuchtigkeit
≤ 85% (nicht kondensierend)
Alarmton ≥ 85 dB bei 3 m mit 3,2 ± 0,3 kHz Alarmpuls
Stummschaltdauer Ca. 9 MinutenBetriebsfrequenz 868 MHz
Maximale Anzahl der miteinander verbundenen Einheiten
24 drahtlose Einheiten (nur kompatibel mit X-Sense Funk-Meldern)
Übertragungsbereich Über 250 m im Freien
HINWEISE
1. Die Batterielaufzeit wird anhand der aktuellen Bewertungen im Standby-Modus mit wöchentlichen Tests berechnet. Wenn sich der Betriebsmodus in Alarmzustand ändert, wird die Batterielaufzeit entsprechend verringert.
2. Der Rauchmelder funktioniert zwischen 4,4 und 37,8°C. Längere Einwirkung von Temperaturen außerhalb dieses Bereichs kann die Batterielaufzeit verkürzen und die Genauigkeit beeinträchtigen. Wir empfehlen nicht, das Gerät außerhalb dieses Bereichs zu betreiben.
Reinigung und Wartung
Um die Funktionstüchtigkeit Ihres Rauchmelders zu gewährleisten, führen Sie die folgenden einfachen Schritte aus:
1. Vergewissern Sie sich, dass der Alarmton des Geräts und die Anzeigen ordnungsgemäß funktionieren, indem Sie das Gerät einmal pro Woche testen.
2. Ihr Rauchmelder sollte mindestens alle 3 Monate gereinigt werden: Entfernen Sie das Gerät von der Decke und reinigen Sie die Melderabdeckung und die Lüftungsöff nungen mit Ihrem Staubsauger mit weichem Bürstenaufsatz, um Staub und Schmutz zu entfernen.
3. Verwenden Sie niemals Reinigungs- oder Lösungsmittel, um den Melder zu reinigen.
4. Vermeiden Sie es, Lufterfrischer, Haarspray oder andere Aerosole in der Nähe des Melders zu versprühen.
5. Bestreichen Sie das Gerät nicht. Farbe versiegelt die Lüftungsöff nungen und beeinträchtigt den ordnungsgemäßen Betrieb des Sensors.
6. Versuchen Sie niemals, das Gerät zu zerlegen oder zu reinigen. Dies führt
zum Erlöschen der Garantie.
7. Nach dem Entfernen den Rauchmelder so schnell wie möglich wieder an seinen Bestimmungsort zurückbringen, um einen kontinuierlichen Brandschutz zu gewährleisten.

48 49
8. Wenn Haushaltsreinigungsmittel oder ähnliche Verunreinigungen verwendet werden, sollte der Bereich belüftet werden.
Fehlerbehebung
PROBLEM LÖSUNG
Ihr Rauchmelder ertönt während des Tests nicht.
• Stellen Sie sicher, dass Sie die Testtaste fest drücken.
• Überprüfen Sie die Positionierung der Installation. Das Funksignal kann blockiert oder außer Reichweite sein.
Fehlalarme werden zeitweise ausgelöst oder wenn Bewohner Kochen, Duschen, usw.
• Überprüfen Sie den Standort Ihres Rauchmelders (siehe “Installationsort”).
• Reinigen Sie den Rauchmelder (siehe "Reinigung und Wartung“).
Rote LED blinkt und der Alarm ertönt alle 60 Sekunden 1 Mal.
Die Batterie ist schwach. Ersetzen Sie sofort die Batterie.
Rote LED blinkt und der Alarm ertönt alle 40 Sekunden 2 Mal.
Der Melder ist defekt. Bitte reinigen Sie Ihren Rauchmelder und prüfen Sie, ob er normal funktioniert. Wenn nicht, ersetzen Sie das Gerät sofort.
Umweltschutz
Elektroaltgeräte dürfen nicht über den Hausmüll entsorgt werden. Bitte entsorgen Sie das Gerät bei einer Müllsammelstelle für Elektroaltgeräte. Wenden Sie sich an die örtliche Behörde oder den Einzelhändler, um Ratschläge zum Recycling zu erhalten.
Hersteller- und Serviceinformationen
X-Sense Innovations Co., Ltd.Adresse: B4-503-D, Turm B, Kexing Science Park, Keyuan Road Nr. 15, Technologiepark Gemeinschaft, Yuehai Avenue, Distrikt Nanshan, Shenzhen, 518057, CHINAE-Mail: [email protected]
50 51
Français
Ce manuel contient des informations importantes sur le fonctionnement de votre détecteur de fumée X-Sense. Veuillez bien le lire complètement avant d’installer et d’utiliser le détecteur. Si vous installez ce détecteur de fumée pour d’autres personnes, il est impératif que vous laissiez le présent manuel (ou une copie de ce manuel) à l’utilisateur fi nal.
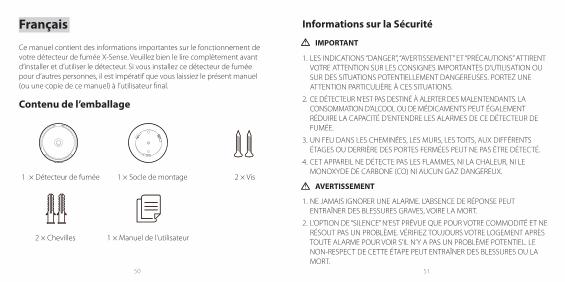
Contenu de l’emballage
1 × Détecteur de fumée 1 × Socle de montage 2 × Vis
2 × Chevilles 1 × Manuel de l’utilisateur
Informations sur la Sécurité
IMPORTANT
1. LES INDICATIONS “DANGER”, “AVERTISSEMENT” ET “PRÉCAUTIONS” ATTIRENT VOTRE ATTENTION SUR LES CONSIGNES IMPORTANTES D’UTILISATION OU SUR DES SITUATIONS POTENTIELLEMENT DANGEREUSES. PORTEZ UNE ATTENTION PARTICULIÈRE À CES SITUATIONS.
2. CE DÉTECTEUR N’EST PAS DESTINÉ À ALERTER DES MALENTENDANTS. LA CONSOMMATION D’ALCOOL OU DE MÉDICAMENTS PEUT ÉGALEMENT RÉDUIRE LA CAPACITÉ D’ENTENDRE LES ALARMES DE CE DÉTECTEUR DE FUMÉE.
3. UN FEU DANS LES CHEMINÉES, LES MURS, LES TOITS, AUX DIFFÉRENTS ÉTAGES OU DERRIÈRE DES PORTES FERMÉES PEUT NE PAS ÊTRE DÉTECTÉ.
4. CET APPAREIL NE DÉTECTE PAS LES FLAMMES, NI LA CHALEUR, NI LE MONOXYDE DE CARBONE (CO) NI AUCUN GAZ DANGEREUX.
AVERTISSEMENT
1. NE JAMAIS IGNORER UNE ALARME. L’ABSENCE DE RÉPONSE PEUT ENTRAÎNER DES BLESSURES GRAVES, VOIRE LA MORT.
2. L’OPTION DE “SILENCE” N’EST PRÉVUE QUE POUR VOTRE COMMODITÉ ET NE RÉSOUT PAS UN PROBLÈME. VÉRIFIEZ TOUJOURS VOTRE LOGEMENT APRÈS TOUTE ALARME POUR VOIR S’IL N’Y A PAS UN PROBLÈME POTENTIEL. LE NON-RESPECT DE CETTE ÉTAPE PEUT ENTRAÎNER DES BLESSURES OU LA MORT.
52 53
3. TESTEZ CE DÉTECTEUR DE FUMÉE UNE FOIS PAR SEMAINE. SI JAMAIS LE DÉTECTEUR NE FONCTIONNAIT PAS CORRECTEMENT, REMPLACEZ-LE IMMÉDIATEMENT! EN EFFET, S’IL NE FONCTIONNE PAS CORRECTEMENT, IL NE VOUS ALERTERA PAS EN CAS DE PROBLÈME.
Con� gurer et interconnecter les détecteurs sans � l
Tous les détecteurs interconnectés sans fi l X-Sense Link+ contiennent un module radiofréquence (RF) intégré qui vous permet de connecter sans fi l 2 détecteurs interconnectés ou plus et de créer ainsi un réseau interconnecté. Lorsqu'un des appareils se déclenche, tous les détecteurs interconnectés retentissent. La série X-Sense Link+ contient des détecteurs de fumée interconnectés sans fi l, des détecteurs de monoxyde de carbone interconnectés sans fi l et des détecteurs combinés de fumée et de monoxyde de carbone interconnectés sans fi l. Ce modèle est conçu pour être interconnecté sans fi l avec d'autres détecteurs X-Sense Link+ et il n'est pas conçu pour communiquer avec des détecteurs sans fi l interconnectés d'autres fabricants.
Les détecteurs interconnectés sans � l X-Sense Link+ dans un multi-pack ont déjà été interconnectés entre eux et les détecteurs de chaque multi-pack ont leur propre réseau interconnecté indépendant. Si vous disposez de plusieurs multi-packs, vous devrez tous les connecter au même réseau. Choisissez un multi-pack comme réseau de base et connectez-y les autres multi-packs.
REMARQUE! Les instructions suivantes pour l'interconnexion sans � l s'appliquent uniquement aux détecteurs sans � l interconnectés X-Sense Link+.
Comment les interconnect er.
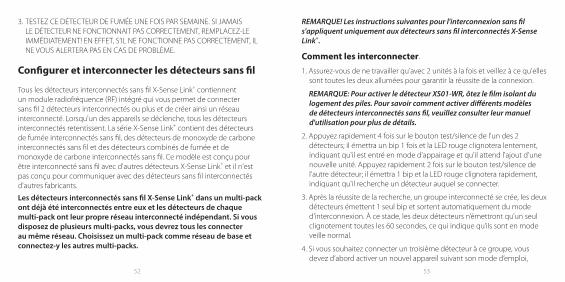
1. Assurez-vous de ne travailler qu'avec 2 unités à la fois et veillez à ce qu'elles sont toutes les deux allumées pour garantir la réussite de la connexion.
REMARQUE: Pour activer le détecteur XS01-WR, ôtez le � lm isolant du logement des piles. Pour savoir comment activer di� érents modèles de détecteurs interconnectés sans � l, veuillez consulter leur manuel d'utilisation pour plus de détails.
2. Appuyez rapidement 4 fois sur le bouton test/silence de l'un des 2 détecteurs; il émettra un bip 1 fois et la LED rouge clignotera lentement, indiquant qu'il est entré en mode d'appairage et qu'il attend l'ajout d'une nouvelle unité. Appuyez rapidement 2 fois sur le bouton test/silence de l'autre détecteur; il émettra 1 bip et la LED rouge clignotera rapidement, indiquant qu'il recherche un détecteur auquel se connecter.
3. Après la réussite de la recherche, un groupe interconnecté se crée, les deux détecteurs émettent 1 seul bip et sortent automatiquement du mode d’interconnexion. À ce stade, les deux détecteurs n’émettront qu’un seul clignotement toutes les 60 secondes, ce qui indique qu’ils sont en mode veille normal.
4. Si vous souhaitez connecter un troisième détecteur à ce groupe, vous devez d’abord activer un nouvel appareil suivant son mode d’emploi,

54 55
puis appuyer rapidement 4 fois sur le bouton test/silence de l’un des deux détecteurs précédemment interconnectés. Ce détecteur va émettre 1 bip, et la LED rouge va clignoter lentement, indiquant qu’il est prêt à ajouter un nouvel appareil au réseau. Ensuite, appuyez rapidement 2 fois sur le bouton test/silence du nouvel appareil et sa LED rouge va clignoter rapidement tandis qu’il cherche un réseau auquel se connecter. Après que le troisième détecteur a rejoint avec succès le réseau interconnecté, les deux détecteurs vont émettre 1 bip unique et sortiront automatiquement du mode d’interconnexion.
5. Si vous souhaitez connecter un plus grand nombre d’appareils, répétez simplement l'étape 4. Jusqu'à 24 détecteurs peuvent être interconnectés de cette façon. Pour vous assurer que tous les détecteurs sont entrés dans le même réseau interconnecté, ne travaillez qu’avec seulement 2 appareils à la fois – l’un entrant en mode d’appairement et l’autre entrant en mode de recherche.
6. Testez les détecteurs selon les étapes de la section «Test de détecteurs».REMARQUES
1. Le détecteur entrera en mode de recherche ou en mode d’appairement durant 60 secondes, pendant lesquelles le voyant LED rouge clignotera. Après 60 secondes, répétez l’étape 2 pour connecter les détecteurs. Si nécessaire, appuyez 1 fois sur le bouton test/silence pendant que le détecteur est en mode de recherche ou en mode d’appairement, et la LED rouge va cesser de clignoter et le détecteur va sortir du mode d’appairement pour passer au statut normal.
RF
Appuyez brièvement 4 fois
Appuyez brièvement 4 fois
Appuyez brièvement 2 fois
Appuyez brièvement 2 fois
01 02
RF
Maintenez enfoncé
03 04

56 57
2. Testez touts les détecteurs sans � l pour vous assurer qu'ils sont interconnectés avant l'installation.
3. Un maximum de 24 détecteurs sans � l peuvent être interconnectés sur le même réseau.
4. Ce modèle ne peut être interconnecté qu'avec d'autres détecteurs sans � l interconnectés X-Sense Link+.
Comment ajouter les détecteurs interconnectés sans � l X-Sense Link+
au réseau X-Sense XS01-WR
Le modèle XS01-WR a 2 versions: l'ancienne version XS01-WR et la nouvelle version X-Sense Link+ XS01-WR, qui ont diff érentes méthodes d'interconnexion. La nouvelle version appartient à la série X-Sense Link+ et il y a une icône «Link+» sur l'étiquette à l'arrière de l'appareil (voir la capture d'écran suivante). Vous pouvez vérifi er s'il y a une icône «Link+» sur l'étiquette pour distinguer ces deux versions.
REMARQUES
1. Les instructions suivantes pour l'interconnexion sans � l s'appliquent uniquement aux détecteurs de fumée interconnectés sans � l X-Sense XS01-WR de l'ancienne version, qui ne font pas partie des détecteurs sans � l interconnectés X-Sense Link+.
2. Si vous avez acheté des détecteurs de l'ancienne version XS01-WR, vous pouvez ajouter des détecteurs interconnectés sans � l X-Sense Link+ au réseau précédemment interconnecté XS01-WR.
1. Pour vous assurer qu’un détecteur sans fi l interconnecté X-Sense Link+ se connecte avec succès à un réseau XS01-WR de X-Sense, choisissez l’un des détecteurs de fumée XS01-WR précédemment interconnectés, détachez-le de son socle de montage et maintenez ce détecteur à une distance d’au moins 10 m (ou 33 pieds) des autres détecteurs du réseau existant.
2. Activez un détecteur interconnecté sans fi l X-Sense Link+ suivant son mode d'emploi. Appuyez rapidement 2 fois sur son bouton test/silence, le détecteur émettra 1 bip et la LED clignotera rapidement en rouge pendant qu'il recherche un réseau auquel se connecter. Ensuite, appuyez rapidement 4 fois sur le bouton test/silence de l'un des détecteurs XS01-WR précédemment interconnectés; il émettra 1 bip et la LED clignotera rapidement en rouge, indiquant qu'il est prêt à ajouter un nouveau périphérique au réseau.
3. Après réussite de l’appairement des 2 détecteurs, les deux vont émettre 1 bip unique et sortiront automatiquement du mode d’interconnexion. À ce
Nouvelle version XS01-WR (X-Sense Link+ Series)Ancienne version XS01-W

58 59
stade, le détecteur X-Sense Link+ a aussi rejoint le réseau existant XS01-WR. Les deux appareils ne clignoteront ensuite qu’une seule fois par minute, indiquant qu’ils sont en mode veille normal.
4. Si vous voulez connecter davantage de détecteurs sans fi l interconnectés X-Sense Link+ , répétez simplement l’étape 1-2. Vous pouvez interconnecter ainsi jusqu’à 24 détecteurs. Pour que tous les détecteurs entrent dans le même réseau interconnecté, assurez-vous d’ajouter un par un à la fois les détecteurs interconnectés sans fi l X-Sense Link+ .
5. Testez les détecteurs suivant les étapes de la section “Test des détecteurs”.
Commet déconnecter
Appuyez 4 fois sur le bouton test/silence et le détecteur de fumée émettra un bip une fois, puis maintenez le bouton enfoncé jusqu’à ce que le détecteur émette un bip une fois pour le déconnecter. Après la déconnexion, vous pouvez le reconnecter pour le faire entrer dans le réseau interconnecté.
REMARQUE: Les détecteurs interconnectés sans � l X-Sense Link+ dans un multi-pack ont déjà été interconnectés. Pour créer un nouveau réseau, vous devrez d'abord déconnecter chaque détecteur individuellement dans ce multi-pack pour éviter qu'ils ne rejoignent tous le même réseau.
Test de l’alarmeVeillez à tester vos détecteurs de fumée lorsque vous les activez pour la première fois ou lorsque la confi guration du groupe a changé. En plus des tests hebdomadaires que vous devez eff ectuer, il est recommandé de tester le détecteur après votre retour d'un long voyage ou de vacances.
Si votre détecteur X-Sense Link+ XS01-WR est interconnecté à d'autres détecteurs de fumée sans fi l, nous vous recommandons de tester chaque détecteur de fumée individuellement pendant le test hebdomadaire.
Appuyez brièvement 4 fois
Au moins 10 m
XS01-WR
XS01-WR
Appuyez brièvement 2 fois
XS01-WR
60 61
Tester un détecteur de fumée individuel
Tester tous les détecteurs interconnectés
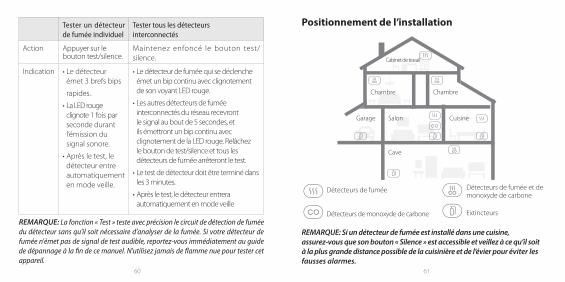
Action Appuyer sur le bouton test/silence.
Maintenez enfoncé le bouton test/silence.
Indication • Le détecteur émet 3 brefs bips
rapides.
• La LED rouge clignote 1 fois par seconde durant l’émission du signal sonore .
• Après le test, le détecteur entre automatiquement en mode veille.
• Le détecteur de fumée qui se déclenche émet un bip continu avec clignotement de son voyant LED rouge.
• Les autres détecteurs de fumée interconnectés du réseau recevront le signal au bout de 5 secondes, et ils émettront un bip continu avec clignotement de la LED rouge. Relâchez le bouton de test/silence et tous les détecteurs de fumée arrêteront le test.
• Le test de détecteur doit être terminé dans les 3 minutes.
• Après le test, le détecteur entrera automatiquement en mode veille
REMARQUE: La fonction « Test » teste avec précision le circuit de détection de fumée du détecteur sans qu’il soit nécessaire d’analyser de la fumée. Si votre détecteur de fumée n'émet pas de signal de test audible, reportez-vous immédiatement au guide de dépannage à la fi n de ce manuel. N'utilisez jamais de fl amme nue pour tester cet appareil.
Positionnement de l’installation
REMARQUE: Si un détecteur de fumée est installé dans une cuisine, assurez-vous que son bouton « Silence » est accessible et veillez à ce qu’il soit à la plus grande distance possible de la cuisinière et de l’évier pour éviter les fausses alarmes.

62 63
1. Installez prioritairement un détecteur de fumée dans les chambres à coucher et les corridors, et assurez-vous que le signal d’alarme est audible de toutes les pièces où l’on dort. Dans un logement qui comporte plusieurs chambres à coucher, placez un détecteur dans chaque chambre à coucher. Si vous n’installez qu’un seul détecteur de fumée dans votre logement, installez-le autant que possible à proximité de toutes les chambres, et pas au sous-sol ou dans une chauff erie.
2. Installez un détecteur au-dessus de la cage d’escalier et à chaque étage de la maison.
3. La fumée, la chaleur et tout ce qui brûle se propagera horizontalement après avoir atteint le plafond. Installez par conséquent le détecteur autant que possible au centre du plafond. Assurez-vous que le détecteur soit à une distance fonctionnelle des coins de la pièce.
4. Si un détecteur ne peut pas être installé au centre d’un plafond, placez-le à une distance de 50 cm des coins de la pièce.
5. S’il est installé sur un mur, placez-le à une distance de 10 à 30 cm sous le plafond.
6. Si la longueur d'une pièce ou d'un hall dépasse 9 mètres (30 pieds), plusieurs détecteurs doivent être installés dans la même pièce.
7. Lorsque le mur ou le plafond présentent un angle oblique, le détecteur doit être installé à une distance de 90 cm du point le plus élevé du mur ou du plafond (mesuré horizontalement) de la pièce.
8. Dans les habitations ou dans les appartements à plusieurs étages, installez au moins un détecteur de fumée sans fi l à chaque niveau et fi xez-le dans un axe vertical droit (voir plan) avec un minimum d’obstacles entre chaque détecteur interconnecté afi n d’assurer une transmission du signal la meilleure possible.

64 65
Emplacements à éviter :
1. Proximité de grandes surfaces métalliques et/ou de faisceaux de câbles.
2. Tout près de tubes fl uorescents, de postes de radio-amateurs, d’équipements électriques ou d’autres appareils pouvant transmettre un signal radio-fréquence (RF), parce que le bruit électronique peut provoquer des fausses alertes .
AVERTISSEMENT
1. CE DÉTECTEUR DOIT ÊTRE INSTALLÉ PAR UNE PERSONNE COMPÉTENTE.
2. L’INSTALLATION DU DÉTECTEUR NE DOIT PAS REMPLACER L’INSTALLATION, L’UTILISATION ET L’ENTRETIEN APPROPRIÉS DES APPAREILS DE COMBUSTION, EN CE COMPRIS LES SYSTÈMES DE VENTILATION ET D’ÉVACUATION.
Méthode d’installation
REMARQUE: Avant l'installation, il est recommandé de tester les détecteurs de fumée interconnectés dans différentes pièces où vous prévoyez d'installer ces détecteurs pour vous assurer qu'ils se trouvent bien à portée de transmission.
1. Utilisez la base de montage pour marquer les endroits des vis dans le plafond ou sur le mur.
2. Forez un trou aux deux endroits marqués avec une mèche de diamètre approprié. Insérez une cheville dans le trou et fi xez la base de montage avec les vis fournies.
3. Attachez le détecteur à la base de montage et verrouillez-le en le tournant d’un quart de tour dans le sens horlogique.
4. Testez le détecteur en suivant la méthode décrite plus bas.

66 67
01 02
03 04
Remplacement de la pile
1. Pour remplacer la pile, détachez le détecteur de son socle en le tournant dans le sens anti-horlogique.
2. Tirez sur le languette pour faire sortir la pile et mettez une nouvelle à la place, en observant bien la polarité.
3. Testez le détecteur et remontez-le sur son socle en le tournant dans le sens horlogique pour le verrouiller.

68 69
Voyant LED et alarme sonore
Statut Voyant LED Alarme sonore Remarque
Normal La LED rouge clignote 1 fois toutes les 60 secondes.
Aucune
DétecteurLa LED rouge clignote 1 fois par seconde.
Brefs bips rapides
Tous les détecteurs du réseau interconnecté
Test
Détecteur de fumée individuel
La LED rouge clignote 1 fois par seconde.
3 brefs bips rapides
Appuyez 1 fois sur le bouton test/silence.
Tous les détecteurs de fumée Interconnectés au réseau
La LED rouge clignote une fois par seconde.
Émission continue de bips jusqu’au relâchement du bouton test/silence.
Tenir enfoncé le bouton test/silence.
Mode Silence La LED rouge clignote 1 fois toutes les 5 secondes.
Aucune
Pile faible La LED rouge clignote 1 fois toutes les 60 secondes.
1 bip toutes les 60 secondes
Chaque détecteur émet un avertissement indépendant .
Dysfonctionnement La LED rouge clignote 2 fois toutes les 40 secondes.
2 bips toutes les 40 secondes
Chaque détecteur émet un avertissement indépendant .
Mode Silence
Si vous appuyez sur le bouton Silence pendant une situation d’alarme, le détecteur se mettra en mode Silence durant 9 minutes. Pendant la durée du mode S ilence, la LED rouge clignotera 1 fois toutes les 5 secondes. Le détecteur repassera en mode normal après 9 minutes.

70 71
REMARQUES
1. Vous pouvez réduire au silence les détecteurs interconnectés en appuyant sur le bouton de silence de l’un des détecteurs de fumée faisant partie du groupe. Si un des détecteurs retentit encore, il peut alors s'agir du détecteur de fumée déclencheur (celui qui a détecté la fumée); pour réduire au silence tous les détecteurs connectés, vous devez également appuyer sur le bouton de silence du détecteur de fumée à l’origine de l’alarme.
2. Dans des conditions d’interconnexion, le détecteur de fumée à l’origine de l’alarme ne peut pas être déclenché à nouveau pendant la durée de silence de 9 minutes. Cependant, tous les autres détecteurs interconnectés peuvent être déclenchés lors de la détection de niveaux de fumée dangereux pendant le mode silence.
Spéci� cations techniques
Alimentation Pile au lithium remplaçable de 3 V CR123A
Durée de vie 10 ans
Durée de la pile 5 ans
Type de capteur Photoélectrique
Normes de sécurité EN 14604:2005+AC:2008
Courant de veille < 15 uA (moyenne)
Courant en mode alarme < 150 mA (moyenne)
Portée de la détection entre 20 et 40 m²
Température ambiante pour un fonctionnement optimal
De 4,4 °C à 37,8 °C
Hygrométrie ≤ 85% (sans condensation)
Alarme sonore Alarme pulsante ≥ 85 dB à 3 mètres @ 3,2 ± 0,3 kHz
Durée du mode Silence Environ 9 minutes
Fréquence opérationnelle 868 MHz
Nombre maximal de détecteurs interconnectés
24 détecteurs sans fi l (uniquement compatibles avec les détecteurs sans fi l de X-Sense)
Portée de transmission Plus de 250 m en espace ouvert à l’air libre
REMARQUES
1. L'autonomie de la batterie est calculée sur les valeurs nominales actuelles en mode veille avec des tests hebdomadaires. Si son mode de fonctionnement passe au statut d’alarme, la durée de vie de la pile sera réduite en conséquence.
72 73
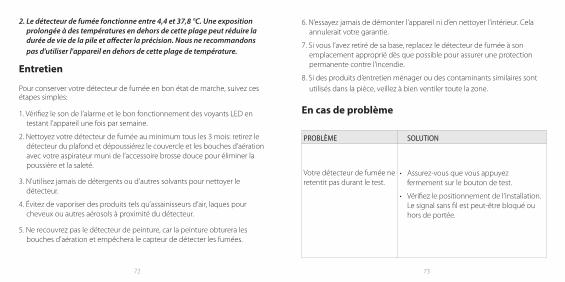
2. Le détecteur de fumée fonctionne entre 4,4 et 37,8 °C. Une exposition prolongée à des températures en dehors de cette plage peut réduire la durée de vie de la pile et a� ecter la précision. Nous ne recommandons pas d'utiliser l'appareil en dehors de cette plage de température.
Entretien
Pour conserver votre détecteur de fumée en bon état de marche, suivez ces étapes simples:
1. Vérifi ez le son de l’alarme et le bon fonctionnement des voyants LED en testant l’appareil une fois par semaine.
2. Nettoyez votre détecteur de fumée au minimum tous les 3 mois: retirez le détecteur du plafond et dépoussiérez le couvercle et les bouches d’aération avec votre aspirateur muni de l’accessoire brosse douce pour éliminer la poussière et la saleté.
3. N’utilisez jamais de détergents ou d’autres solvants pour nettoyer le détecteur.
4. Évitez de vaporiser des produits tels qu’assainisseurs d’air, laques pour cheveux ou autres aérosols à proximité du détecteur.
5. Ne recouvrez pas le détecteur de peinture, car la peinture obturera les bouches d’aération et empêchera le capteur de détecter les fumées.
6. N’essayez jamais de démonter l’appareil ni d’en nettoyer l’intérieur. Cela annulerait votre garantie.
7. Si vous l’avez retiré de sa base, replacez le détecteur de fumée à son emplacement approprié dès que possible pour assurer une protection permanente contre l’incendie.
8. Si des produits d’entretien ménager ou des contaminants similaires sont utilisés dans la pièce, veillez à bien ventiler toute la zone.
En cas de problème
PROBLÈME SOLUTION
Votre détecteur de fumée ne retentit pas durant le test.
• Assurez-vous que vous appuyez fermement sur le bouton de test.
• Vérifi ez le positionnement de l'installation. Le signal sans fi l est peut-être bloqué ou hors de portée.

74 75
Des fausses alertes se déclenchent de façon intermittente ou lorsque les résidents cuisinent, prennent une douche etc.
• Vérifi ez l’endroit où est installé le détecteur de fumée (voir « Positionnement de l’installation »).
• Nettoyez le détecteur (voir « Entretien »).
La LED rouge clignote et le détecteur émet 1 bip toutes les 60 secondes.
La pile est faible. Remplacez la batterie immédiatement.
La LED rouge clignote et le détecteur émet 2 bips toutes les 40 secondes.
Le détecteur dysfonctionne. Veuillez nettoyer votre détecteur de fumée et vérifi er s'il fonctionne normalement. Sinon, remplacez immédiatement l'appareil.
Protection de l’environnementLes déchets de produits électriques ne doivent pas être jetés avec les ordures ménagères. Veuillez les recycler lorsqu’il y a des services de recyclage disponibles. Vérifi ez auprès des autorités locales ou des détaillants pour obtenir des conseils de recyclage.
Informations sur le fabricant et le service après-vente
X-Sense Innovations Co., Ltd.Adresse: B4-503-D, Tour B, Parc Scientifi que de Kexing, 15 route de Keyuan, Communauté du Parc Technologique, avenue de Yuehai, District de Nanshan, Shenzhen, 518057, CHINEEmail: [email protected]