21212 –greenworks 4a 13”
TRANSCRIPT

21212 – GreenWorks 4A 13” String Trimmer
Tool Setup

21212 – Product Packaging
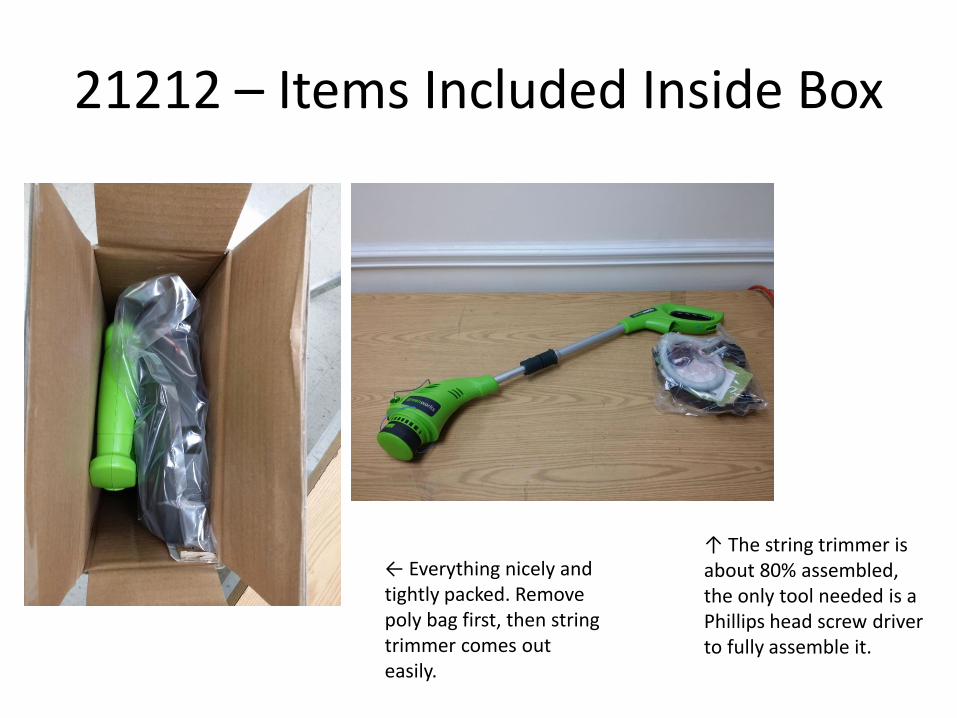
21212 – Items Included Inside Box
← Everything nicely and tightly packed. Remove poly bag first, then string trimmer comes out easily.
↑ The string trimmer is about 80% assembled, the only tool needed is a Phillips head screw driver to fully assemble it.

21212 – Hardware/Accessories
Included:
• Owner’s Manual
• Information Cards
• Extra String Reel
• Auxiliary Handle
• String Guard
21212 – Assembly (Part 1)
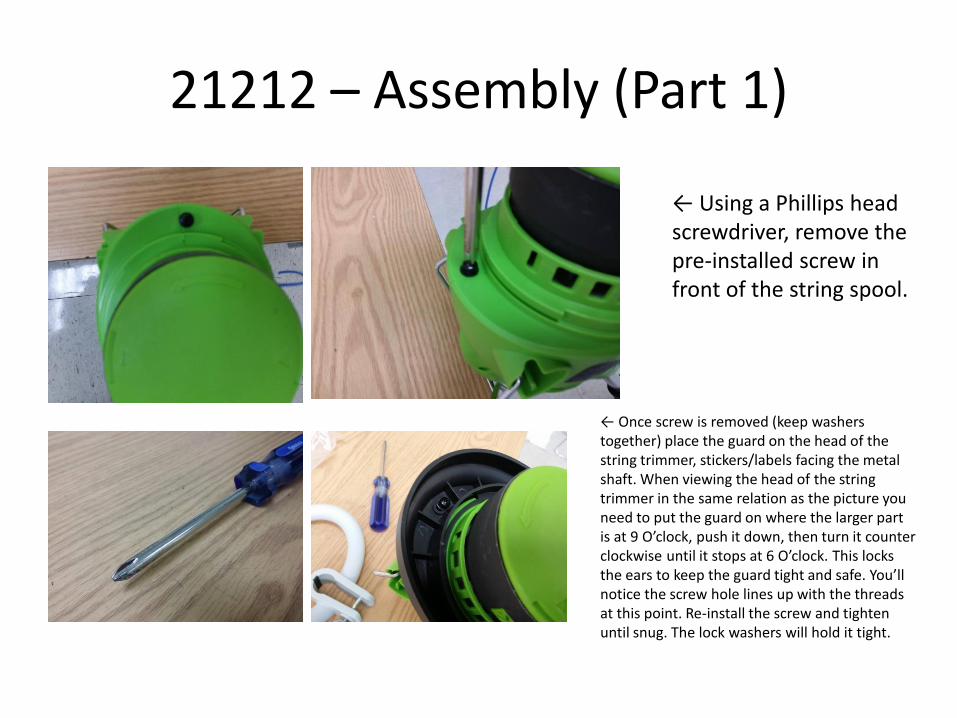
← Using a Phillips head screwdriver, remove the pre-installed screw in front of the string spool.
← Once screw is removed (keep washers together) place the guard on the head of the string trimmer, stickers/labels facing the metal shaft. When viewing the head of the string trimmer in the same relation as the picture you need to put the guard on where the larger part is at 9 O’clock, push it down, then turn it counter clockwise until it stops at 6 O’clock. This locks the ears to keep the guard tight and safe. You’ll notice the screw hole lines up with the threads at this point. Re-install the screw and tighten until snug. The lock washers will hold it tight.
21212 – Assembly (Part 2)
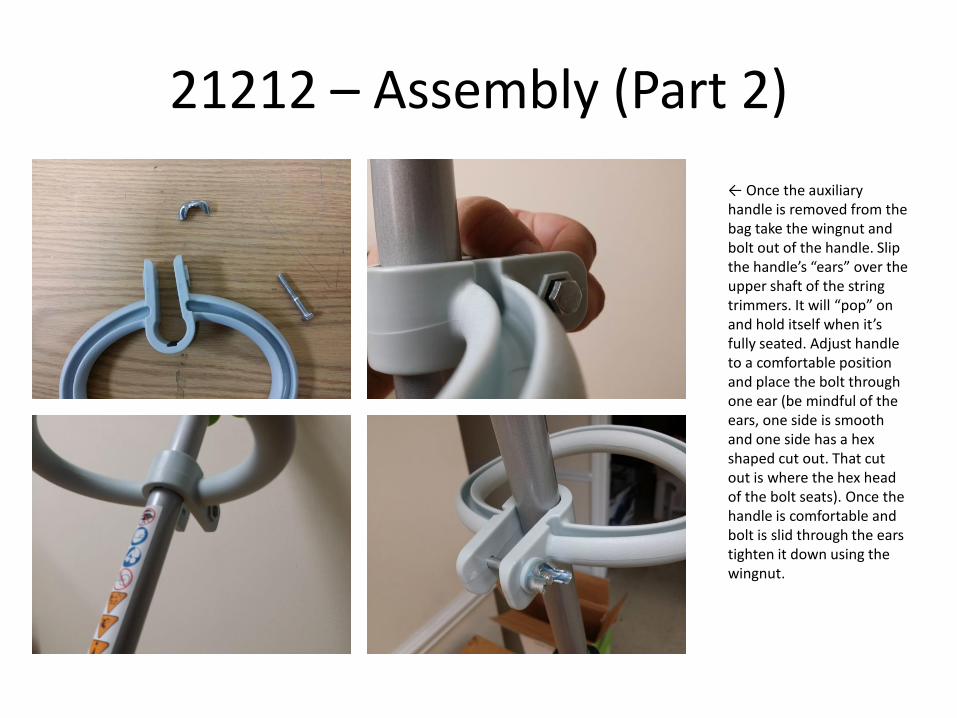
← Once the auxiliary handle is removed from the bag take the wingnut and bolt out of the handle. Slip the handle’s “ears” over the upper shaft of the string trimmers. It will “pop” on and hold itself when it’s fully seated. Adjust handle to a comfortable position and place the bolt through one ear (be mindful of the ears, one side is smooth and one side has a hex shaped cut out. That cut out is where the hex head of the bolt seats). Once the handle is comfortable and bolt is slid through the ears tighten it down using the wingnut.
21212 – Fully Assembled
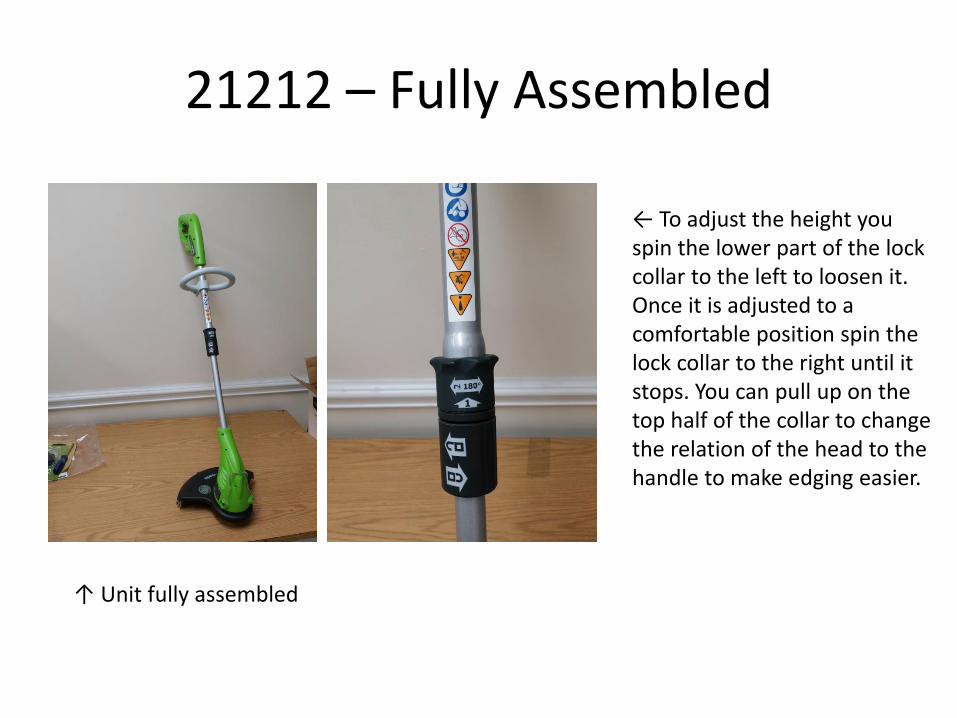
↑ Unit fully assembled
← To adjust the height you spin the lower part of the lock collar to the left to loosen it. Once it is adjusted to a comfortable position spin the lock collar to the right until it stops. You can pull up on the top half of the collar to change the relation of the head to the handle to make edging easier.

21212 – Connecting Power Cord
← Using a high quality power/extension cord (we used a 12AWG) measure about 8-10 inches from the female connector (the black plug connecting to the unit) and then fold it in half. Wiggle the folded part through the cut out in the handle, twist it 90° either way and loop it over the hook. Pull the excess cord back through the handle hole to secure the cord under the hook. You now have a safe anchor and can attach the power cord.
21212 - Summary
• Make sure to consult the owner’s manual before assembly and/or use.
• Use a high quality extension cord in the correct gauge (consult the owner’s manual for this information).
• Work safe and enjoy your GreenWorks String Trimmer!