2.3 game charts and tables - turning point...
TRANSCRIPT

1.0 INTRODUCTION
2.0 GAME COMPONENTSGame Map, Playing Pieces, Markers
3.0 IMPORTANT CONCEPTS Stacking, Zones of Control, Facing, Supply,National Will Level
4.0 THE SEQUENCE OF PLAYFirst Determination Phase, English Player Turn,French Player Turn, Final Determination Phase
5.0 FIRST DETERMINATION PHASESupply Check Step, Replacements Step, RansomStep, Jeanne Events Table
6.0 THE PLAYER PHASESMovement Phase, Combat Phase
7.0 COMBAT RESULTS & RESOLUTIONDie Roll Modifiers, Combat Results, Strength PointLosses, Leader Losses, Retreats, Advance AfterCombat
8.0 FINAL DETERMINATION PHASESupply Check Step, Siege Step, French NationalWill, Automatic Victory, Victory by Other Means
9.0 COMBAT RESULTSFavorable Column Shifts, Other Die Roll Modifiers,Force Multipliers, Routs, English Supply Train
10.0 SETTING UP THE GAMEInitial French Forces, Initial English Forces, InitialBurgundian Forces, Town Control, French NationalWill Check, Game Length
11.1 VARIANTSVariant Game Set-Up, Burgundians Take GreaterRole, De Rais Not Ascendent
12.0 DESIGNER’S NOTES
13.0 DEVELOPER’S NOTES
Terrain Effects Chart
SECOND PRINTING

how this book is organizedThis rulebook is structured to introduce concepts following the game’s sequence of play. They are written in a format known as the Case System. This approach divides the rules into Modules, each dealing with an important aspect of play. Modules are numbered sequentially and possess a title. Each Module is divided into Sections, dealing with major sub-topics within the Module. These are also numbered sequentially. Finally, the majority of each Section consists of Cases: the specific, detailed rules that govern play. Their sequential numbering follows a logical progression based upon the Module and Section of which the Cases are a part. Look to these numbers to determine where a Case is located in the rules. 3.1.4 The fourth Case of the first Section of the third Module of the rules.
learning to play the gameBegin by familiarizing yourself with all of the components listed for this game. Then skim through the charts and rules, reading all the titles of the Modules and Sections. Set up a game scenario or portion of a scenario (after reading the applicable Module) and play a trial game against yourself. Try referring to the rules only when you have a question and remember the numbering system we employ makes it easy to look up rules. While a trial game may take you an hour or two, it is the quickest and most pleasant way to learn (short of having an experienced friend teach you). We don’t recommend attempting to learn the rules word-for-word. We’ve written these rules to be as comprehensive as possible—but they are not designed to be memorized. Taking in the rules as you play along is the best approach to mastering this game. We’re always open to suggestions on how to improve the comprehension of our rules. Write to us (see addresses in 2.0) if you have an idea on how we can communicate better with you.
1.0 introductionBy April of 1429, the English were on the verge of capping 14 years of successful campaigning in France. Though small in numbers, usually no more than 5000, English commanders had driven deep inland, and by late 1428 had captured Paris. The Dauphin Charles, the uncrowned King of France, faced an experienced English army bolstered by an alliance with the Burgundians. His army, reeling from the defeat at Agincourt and riddled with doubt after being beaten back time and time again, was on the verge of dissolution. The Earl of Salisbury, from his headquarters in Paris, assembled a force of some 5000 men and struck southward toward Orleans, one of the last major towns controlled by Charles. Along the way he picked up a number of Burgundians and began to besiege the ancient city, defended by Count Dunois, known popularly as the Bastard of Orleans. Despite superior numbers, the French were unable to shake the English stranglehold on Orleans, marked by the peculiar Battle of the Herrings, where an overwhelming French/Scottish relief force attacked an English supply column and were routed. Convinced that the English were unbeatable, Orleans considered surrender.
Then, seemingly out of nowhere, appeared a young girl from Burgundian-held lands near the town of Domremy. Inspired by heavenly voices giving her clear instructions, she walked to Chinon, the Dauphin’s capital, identified him in a crowd, and convinced him by word and deed that she was called by God, the King of Heaven, to drive the English from France. While the senior French commanders did not take her seriously, the Dauphin sent her along with a relief column to the town of Orleans, and along the way, she built up the morale of the French army, sending out priests chanting psalms ahead of the column. She also wrote to the King of England to “…Render to the Maid, sent by God, the King of Heaven, all the good towns you have taken and violated in France.”
At Orleans her prophecy, and the fate of France, would be revealed. Joan of Arc’s Victory is a simulation of this campaign led by Jeanne d’Arc, la Pucelle (the Maid).
1.0.1 Game Scale Each hexagon on the map is approximately sixteen miles across. Each strength point on a Combat Unit represents about 500 troops. Game turns portray one calendar month of time.
2.0 GAME COMPONENTSYour copy of Joan of Arc’s Victory should contain the following components:
• One 11” x 17” mounted mapsheet depicting the terrain the battle was fought over• One set of 200 die-cut ½” playing pieces• One 8½” x 11” cardstock chart printed with various tracks and Holding Boxes, plus the Jeanne Events Table• This 12 page rulebook• Two six-sided dice used to resolve combat and other factors for which performance will vary
If any of these parts are missing or damaged, write to:Turning Point SimulationsPO Box 165Southeastern PA 19399-0165 USAAttn: Joan of Arc’s Victory
Or e-mail us at: [email protected] We hope you enjoy this game. Should you have any difficulty interpreting the rules, please write to us at the above postal address, or e-mail: [email protected]
Phrase your questions so that a simple sentence, word, or number can answer them. If you send a letter by mail, you must enclose a stamped, self-addressed envelope to receive a reply. We recommend e-mail as the best way to resolve a query. Although we welcome comments and suggestions about the game’s interpretation of events, we cannot promise to respond to questions on theory or design intent.
2.1 The Game Map The map represents the area of France where the campaign took place. The map is overlaid with a grid of hexagons— hexes—that are used to regulate movement of pieces. The hexes facilitate positioning and movement of the playing pieces.
2.1.1 Map Features Various types of terrain and certain features are denoted on the game map, and are defined and their effects explained on the Terrain Effects Chart. These terrain types include features such as: Clear, Woods, Swamps, Rough, Rivers, Streams, and various sized urban areas. Towns represent major urban areas subject to siege and affect combat in a hex. Cathedral towns are significant because they are places where those seeking to be King of France may be crowned in the Final Determination Phase. Villages have no effect on combat, may not be sieged, and exist for historical reference only.
2.2 The Playing Pieces The cardboard playing pieces (or counters) in the game should be carefully separated before trying to play. The pieces are of different types depending on the information that appears on each. In general the pieces represent either Combat Units, Leaders, or informational markers. The countermix is a hard limit based on design and development decisions; players should not make new Combat Units when they run out of a certain type or denomination.
2.2.1 Combat Units Combat Units (and the few noncombat units) represent historical forces that fought in the campaign. There are seven different types of Combat Units: Infantry, Militia, Archers, Engineers, Siege Weapons, and Light and Heavy Cavalry. Combat Units are denoted
2 Joan of Arc’s VICTORY

in generic “Strength Points” (SPs) of value. Counters of the same unit type can be combined or “broken down” in the same way one makes change for monetary matters. Strength points of each specific unit type are completely interchangeable.
Example A French player needs four SPs of infantry. He can have two counters, each with two infantry SPs, one counter with one SP and another with three SPs, or a single counter with four SPs. All are equal.
The top face of each Combat Unit shows the Combat Unit with a greater SP value while the reverse side of each Combat Unit shows a lesser SP value. Each face of a Combat Unit presents information that determines its capabilities in the game. Combat Unit counters are illustrated below. The various information appearing on the counters is explained in the notes following.
National Identity The nominal “country” the Combat Unit was a part of or belonged to. The two major opposing sides are the English and French, with Scots, Bretons and Burgundians allied to one side or the other.
Unit Type Symbol The symbols printed in the center of the counter indicate what kind of Combat Unit the counter represents (at left).
Strength Points (SPs) Printed in the lower left part of the counter, this number is a quantification of the unit’s fighting power, both offensively and defensively, in battle. Strength Points can be modifed by the type of terrain the units is operating in, its supply status, and the current National Will level.
Movement Point (MP) Allowance Printed in the lower right part of the counter, this is the maximum number of Movement Points (MPs) a unit may expend in a single Movement Phase as it moves from hex to hex. A clear terrain hex generally costs 1 MP to enter, for example. In general, a Combat Unit with 5 or fewer MPs is considered a “foot” unit type, meaning it travels primarily via its own legs or is slowly horse-drawn. A Combat Unit with 6 MPs is considered a “cavalry” unit type, meaning it moves largely via horseback.
2.2.2 Leaders Leader units represent the actual significant top commanders on each side that fought in the campaign.
Name The historical name of the Leader (note that Joan of Arc is spelled with the French “Jeanne” or “Jeanne d’Arc” throughout the game).
Attack Bonus A numerical quantification of the Leader’s ability to pull off a successful attack when operating offensively, expressed as a positive Die Roll Modifier (DRM). Add this Leader’s DRM bonus to the actual die roll result on the Combat Results Table when he is attacking.
Defense Bonus A numerical quantification of the Leader’s ability to stoutly defend a postion when attacked, expressed as a negative Die Roll Modifier (DRM). Subtract this Leader’s DRM bonus from the actual die roll result on the Combat Results Table when he is defending.
Movement Allowance Leaders have 6 MPs and are considered to be “cavalry” unit types (moving largely via horseback).
2.2.3 Markers Markers are special pieces used to record various game functions, such as the state of supply, replacements, the presence of field works, etc. Markers generally contain only a symbol or notation for their use.
2.3 Game Charts and Tables Various charts and tables simplify and illustrate the game and furnish results for certain game actions. These include the Turn Record Track, Terrain Effects Chart, and the Defensive Fire, Siege and Combat Results Tables.
Joan of Arc’s VICTORY 3

3.0 IMPORTANT CONCEPTSBefore getting on with the main body of the rules, there are several important concepts with which players should familiarize themselves. These are presented here and include key rules on Stacking, Zones of Control, Facing and other matters.
3.1 Stacking A maximum of 20 SPs of Cavalry, Infantry, Archers and Militia may be in a hex at the end of the owning player’s Movement Phase. Units may overstack during the Replacement Segment of the First Determination Phase as long as stacking problems are resolved by the end of the owning player’s movement phase.
3.1.1 Units That Stack for Free An unlimited number of Leaders, plus Artillery, Siege Weapons, and Engineer SPs may also stack in the hex, nor does the Supply Train count toward stacking. Status Markers do not count towards stacking limits either.
3.1.2 Joint Movement By Stacks Combat Units and Leader(s) that move together as a stack are limited to the Movement Allowance of the slowest Combat Unit in the stack. Otherwise, all units may move together or separately as long as they are eligible to move. Breaking down units, or “making change” to send different stacks in different directions, does not cost any additional MPs. Note: Players are provided with holding boxes on a card separate from the map. They may place units in boxes corresponding to each commander, to prevent unwieldy stacks on the map. This is simply a matter of convenience, and has no effect on play.
3.1.3 Stacking Violations Excess SPs present in a hex in violation of the stacking limit at end of a player’s Movement Phase are eliminated. SPs removed from play to meet stacking limitations are chosen by the owning player.
3.1.4 The Fog of War Unlike many other games, there are no particluar “fog of war” rules. Players may freely peek under markers or in enemy Leader Holding Boxes to see the identities of enemy units or where the opposing Leader is.
3.1.5 Leader Holding Boxes For the sake of convenience and to avoid having clumsy stacks that tend to fall down on the map, players may choose to keep the units accompanying a Leader off the map, in the Leader Holding Box bearing his or her name. Use of the boxes is strictly voluntary, and at no time is their use is ever mandated.
3.1.6 Use of Boxes Players may freely move units into and out of these boxes, in accordance with all the other rules of stacking and movement. When a Leader moves, all the units in his or her box move too; they are considered one stack for all purposes, including combat.
3.1.7 Examining Enemy Boxes Players may also freely examine the units in each other’s Leader Holding Boxes; there is no intent of limited intelligence.
Developer’s Note Playtesters reported that big stacks tended to fall over, especially in siege situations. The Leader Holding Boxes are simply an attempt to prevent this.
3.2 Zones of Control (zoc) Unlike in many other games, Combat Units do not project a “Zone of Control” into any of the hexes surrounding the hex that they occupy.
3.3 Facing Unlike in many other pre-20th century games, Combat Units and Leaders do not need to “face” (be oriented) in any particular direction, due to the game’s scale. Units can move and have combat from any orientation.
3.4 Supply Supply is an important consideration in Joan of Arc’s Victory, and is checked for all Combat Units twice a turn, once during the
player’s First Determination Phase and again in the Final Determaination Phase.
3.4.1 General Rule To be considered in supply, a Combat Unit must be able to trace a path of no more than three hexes, unoccupied by enemy Combat Units, to a friendly-controlled town. Ignore any terrain types in the path when counting. The path does not include the hex the Combat Unit checking status is in, but does include the friendly town hex. A firendly-controlled town may provide supply for any number of SPs.
3.4.2 Friendly Towns The towns inside each player’s initial territory at start are considered friendly towns and do not have to be garrisoned to maintain control. If the French player takes a town east of the English-Controlled Area Boundary Line printed on the map, he must garrison it with at least 1 SP in order to retain control; else it reverts back to English control. Similarly, if the English player takes a town west of the Boundary Line (except for La Rochelle), he must garrison it with at least 1 SP to retain control, else it reverts back to French control. Even a besieged Combat Unit is sufficient to maintain control of a town in enemy territory.
3.4.3 English Supply Train English and allied forces (that is, actively allied Burgundians) may also trace supply to their Supply Train unit and treat it as a friendly town for supply purposes if it meets all other conditions, including garrison.
3.4.4 Out of Supply Effects Place an “Out of Supply” marker on any Combat Units not in supply at the beginning of a turn. Combat Units that are Out of Supply lose 2 MPs for the turn and have their SPs halved when attacking that turn. Combat Units that are still Out of Supply during the Final Determination Phase and not in a town are removed, as per Section 8.1. 3.5 National Will The ability of one side or the other to conduct combat operations. High National Will means that a country can
engage in a robust campaign, while low National Will indicates a state closer to defeat. In Joan of Arc’s Victory, only French National Will is measured; English National Will remains constant.
4.0 SEQUENCE OF PLAYJoan of Arc’s Victory is played using Game-Turns, of which there are up to fourteen total. The game keeps going until one player wins, as determined in Section 8.4 or 8.5. Each game-turn includes two Player Turns, one for each player. The order of these Player Turns within the Game Turn is fixed; the English always go first.
4.1 First Determination Phase Note that this phase is ignored on the first game turn. Proceed directly to the French Player Turn. Otherwise during this phase:
• The Supply status for all Combat Units is checked for by both sides.• Replacements points are checked for, and replacements are created and placed, first by the English, then the Burgundians, and finally by the French.• Any Leader ransoms may now take place.• Roll on the Jeanne Events Table.
4.2 English Player Turn4.2.1 English Movement Phase The English player may move all, some, or none of his units in accordance with the movement rules.
4.2.2 English Combat Phase The English player declares all attacks and resolves them in any order he desires, including storming towns and villages. Besieged towns not stormed have their status checked during the Final Determination phase.
4 Joan of Arc’s VICTORY

4.3 French Player Turn4.3.1 French Movement Phase The French player now moves all, some, or none of his units in accordance with the movement rules.
4.3.2. French Combat Phase The French player declares all attacks and resolves them in any order he desires, including storming towns and villages. Besieged towns not stormed have their status checked during the Final Determination phase.
4.4. Final Determination Phase The status of besieged towns and unsupplied units is checked at this time, and the French National Will Track is adjusted if necessary. At the very end of this phase, each turn, the players check the automatic victory conditions (Section 8.4) to see if either side wins. If neither has achieved automatic victory, then advance the turn marker and continue playing until either one side wins, or the end of the June 1430 game turn.
5.0 First determination phaseA number of activites take place during the First Determination Phase each turn (though this Phase is skipped on the first turn).
5.1 Supply Status Check Both players simulataneously check the supply status of all their Combat Units in accordance with the rules in Section 3.4. Combat Units found to be out of supply are so indicated with an Out of Supply marker placed on them.
5.2 Replacement Point Check Each side receives Replacement Points (RPs) during the First Determination Phase, first the English, then the Burgundians, and finally the French.
5.2.1 General Rule During this step, each side automatically receives one Militia SP in each town and cathedral town that it controls, up to the limits of the Militia SPs supplied in the countermix. No RP expenditure is required to receive these Militia SPs, but if there are already two or more Militia SPs present in the town during this step, then no new Militia SPs may appear there.
Designer’s Note Militia SPs are an expendable commodity, and are intended to be continually recycled. Nobody is meant to have masses of militia.
5.2.2 English RP Bonus During this step the English player automatically receives three RPs that he can use to build any type of unit, as long as he controls Harfleur or Calais. He also rolls a die each turn to see if he gets additional RPs from England. If he rolls a 5 or 6, or if King Henry is in France, a 4, 5, or 6, he gets five more RPs.
5.2.3 Burgundian RP Bonus During this step, Burgundy similarly receives three RPs on a die roll of 5 or 6, with no modifiers allowed. The English player does not roll if Burgundy is currently neutral, or if Auxerre is occupied by the French.
5.2.4 French RP Bonus During this step the French receive five RPs on a die roll of 5 or 6. French RPs can be used to build Scottish and Breton as well as French units.
5.2.5 Creating Replacements Both sides may exchange RPs for new units as follows:• Engineers, Artillery, and Siege Weapons 3 RPs per SP built.• Heavy Cavalry 2 RPs per SP built.• Light Cavalry, Infantry, and Archers 1 RP per SP built. Created French and Scottish replacement SPs appear at Chinon, Orleans, or Paris.
Breton replacement SPs appear at Vannes or Rennes. English replacement SPs appear at Harfleur or Calais or both. Burgundian replacement SPs appear at Auxerre.
5.2.6 Limits on Replacements Both sides can spend all of the RPs that they receive on the turn in which they receive them. A player may also accumulate up to ten RPs for expenditure in later turns. The maximum number of any
nation’s SPs that may be on the map at any one time is limited by those supplied in the countermix. If replacements cannot be brought on due to occupation of all replacement cities by a non-ally, half the RPs earned this step may be accumulated to the next turn, and the rest are lost.
5.2.7 King Henry Henry, the boy king of England, arrives at Calais on turn 13 during this segment. If Calais is French-controlled on that turn, he stays in England and does not enter as a reinforcement on any turn.
5.3 Leader Ransom During this step of each turn, both sides roll a die to determine if any enemy Leaders captured by them are successfully ransomed. On a roll of 5 or 6, the enemy Leader is ransomed and returns to the owning player at a friendly town of his choice during the Replacement Step of the following First Determination Phase (repeat this roll for each captured Leader).
5.4 Jeanne Event Table Check During this step, the French player rolls two dice and consults the Jeanne Events Table for the imapct on play. Remember, on the first turn only, do not roll on the Jeanne Events Table. Historical Note Quotes on the table are either attributed to Jeanne or from the Duke of Bedford’s report and have been rendered into modern English.
5.4.1 Mandated Attacks Events 9 through 11 state that Jeanne must attempt to take a specific town. To satisfy the requirement, the Jeanne Leader and any French and allied forces stacked with her must march toward the objective named in the event, and start immediately. They may lay siege to English occupied towns if that is necessary to supply the army en route to the designated objective. Once there, they must attack the defenders in combat, or through siege, at least once. If Jeanne fails to take the town on the first battle or siege, she and her troops are freed from further attacks on the town unless the event occurs again.
5.4.2 Effect of Defeats Alternately, if Jeanne and her army are on her way to a town that she must attack, they are freed from this requirement if defeated in battle before making the attack, or laying siege. This includes battles fought en route. But if Jeanne wins, then she must continue to the town.
5.4.3 Multiple Mandates If a second event calling for Jeanne to attempt an attack occurs before she can reach the first town, then the first mandated attack is immediately cancelled, and she and her troops proceed to the new one.
5.4.4 Canceling Mandates Once the French player no longer rolls on the Jeanne Events Table, all mandated attempts to take a town are cancelled, even if the attack has not taken place yet.
5.4.5 Failure to Comply Barring any of the above conditions, should the French player not attempt to obey the mandate, then the English player wins immediately.
Developer’s Note The above rules spell out that the French player follow the letter and the spirit of the Jeanne Events Table’s more inconvenient mandates. In real play, few except the most noxious rules lawyers will trip over the last rule by trying to weasel out of what the table says. Yet some players might ask why the penalties are so strict, and the answer is that this is the fifteenth century after all, and disobeying the voices of God and His saints was just not a nice thing to do.
Joan of Arc’s VICTORY 5

6.0 player TurnSEach game turn has two identical Player Turns in it. The English Player goes first in the sequence, followed by the French Player. The player whose turn it is is referred to as the phasing player. A Player Turn consists of a Movement Phase, where the movement of his Combat Units and Leaders takes place, followed by a Combat Phase, where the phasing player may attack enemy units he is adjacent to.
6.1 The Movement Phase Each unit has a Movement Point allowance, representing the number of Movement Points (MPs) a unit may expend in during its turn. The costs to enter the various types of hexes and cross certain types of hex sides are listed on the Terrain Effects Chart. Movement is always voluntary, never required. Exception: Mandated attacks by Jeanne (Case 5.4.1).
6.1.1 Procedure Each Combat Unit and Leader may be moved as many hexes as desired within the limits of its Movement Point allowance, and within the restrictions of the Terrain Effects Chart. Units move from one hex to another, contiguous hex. Units cannot move into a hex occupied by an enemy Combat Unit, but do not have to stop when they move adjacent to an enemy unit.
6.1.2 Slow-Moving Units Units with an MP allowance of five or less may not move unless they start the turn with a Leader. Cavalry units may move independent of Leaders if the owning player so desires. A Leader may “drop off” SPs along his movement path.
6.1.3 Leader Bonus for Cavalry Heavy and Light Cavalry units, accompanied solely by a Leader(s) whose MP allowance is six, receive one additional MP that turn. Having any other units under that Leader negates this bonus.
6.1.4 Moving Units in Stacks Units may move together or separately as long as they are eligible to move. Breaking down units, or “making change” to send different stacks in different directions, does not cost any additional MPs.
6.1.5 Prohibited Hexes Units may not enter prohibited terrain or hexes containing enemy units unless besieging an enemy-held town (see Section 8.2).
6.1.6 Order of Movement There is no precedence to which units a player may elect to move. He may choose any order he prefers and may change his mind about moving units as he wishes. The non-moving player has the right to question the moving player’s actions at any time to see if units had enough MPs to get where they ended up.
6.1.7 Movement Into Towns Units may enter a non-friendly town only if it is unoccupied. They may not continue moving unless they have left behind at least one SP as a garrison. Garrisoned towns become “friendly” to the garrisoning player immediately and may be treated as supply sources.
6.1.8 Building Fieldworks Engineer units that have not moved and are not in a town hex may expend three MPs to construct and place a Fieldworks marker in the hex they occupy. Engineers are then free to move out of the hex with
their remaining MPs. A Fieldworks marker provides a favorable -1 die roll modifier to defenders occupying them when attacked. Out of Supply Engineers may not build Fieldworks, nor may any other type of unit, supplied or not. A player may remove any Fieldworks marker at any time (no MP cost) to free up a marker to place another hex.
6.2 The Combat Phase All combat occurs during the Combat Phase, after the Movement Phase is complete. Choosing to attack is voluntary; a player is never required to attack (but must defend if attacked) unless Jeanne is under a mandate (Case 5.4.1).
6.2.1 Procedure In order to initiate combat, the player must be in a hex adjacent to enemy Combat Units, and the Combat Units he wishes to attack with must be stacked with a Leader with a non-zero Attack Bonus.
6.2.2 Defending Town Hexes If a player is defending in the same hex as a town or cathedral town, he has a choice of how to conduct the battle. He can:
• Defend outside the town, in which case the terrain effects are those of the hex outside the town, and it is conducted as a standard combat.• Defend inside the town: the defender’s SP total is tripled, and both sides receive all bonuses for any Artillery, Siege Weapons, or Engineers present. In addition, if the attacker meets the conditions for conducting a siege (Section 8.2), he may elect not to attack at all, and instead enter the town hex and initiate a siege.
6.2.3 Multiple Hex Combats Friendly forces in different hexes may not combine strengths to attack a single defending enemy force. However, each may attack it separately, provided that the defenders are not eliminated, or forced to retreat away, during the phase. If a player wants to attack an enemy force and the combat result requires it to retreat, the friendly force that has not attacked yet may not advance in order to do so (it has lost its chance). Therefore an enemy force can be attacked multiple times during a single combat phase.
6.2.4 Siege Units in Combat Siege units participate in combat only when attacking or defending a town. They never attack or defend in any other circumstance, including when a besieging force is attacked, either from inside or outside the town.
6.2.5 Artillery in Combat Artillery is separate from siege units, and can participate in any kind of combat.
6.2.6 Defensive Fire If the defending force contains Archers or Artillery (Siege Weapons are not Artillery), then the defending force may first fire at the attacking stack, hoping to reduce its strength before the battle is joined. Cross-reference the defending number of SPs of Archers and Artillery with a die roll on the Archer/Artillery Defensive Fire Table and remove the indicated number of lost SPs from the attacker. At least half of the SP losses (round up) to the attacker must come from Cavalry, if present.
6.2.7 Odds Determination After any attacker losses from Defensive Fire have been removed, the next step is to convert the opposing sides’ SP totals to a simple ratio from which the combat odds may be determined. The effective SP total of either side may be affected by supply status, the defender’s SPs may be modified by terrain, and the French player’s SPs may be modified by French National Will (Case 7.1.4). Once the two sides’ final SP totals are calculated, divide the attacker’s SPs by the defender’s SPs and reduce the result to a simple odds ratio. Round down any excess factors in the defender’s favor. Odds worse than 1:3 are treated as 1:3. Odds greater than 4:1 generate an automatic “-/E” result.
Examples After all modifiers are calculated, 12 SPs attacking 5 SPs makes for 2:1 odds, 7 SPs attacking 2 SPs are 3:1 odds, etc.
7.0 COMBAT RESULTs & resolutionOnce the basic combat odds have been determined, the attacking player consults the Combat Results Table (CRT), looking for the column that matches the calculated odds. Before he rolls the die, he determines any further modifications to the odds column and die roll.
7.1 Die Roll Modifiers The die roll used to determine the results of the attack may be modified for a number of conditions. The total modifiers, whether positive or negative, are agreed upon and the die is rolled. The modified result is then cross-referenced and the results are applied as noted on the CRT.
6 Joan of Arc’s VICTORY

7.1.1 Leaders The die roll may be modified by the difference between the Attack Bonus modifier (add) printed on any one attacking Leader and any one defending Leader’s Defense Bonus (subtract) modifier if any.
7.1.2 Heavy Cavalry Charge If at least 1 SP of Heavy Cavalry is present and attacking into a Clear terrain hex whose defending force contains only Infantry, Militia, or Light Cavalry SPs, add 1 to the die roll for the attack. Heavy Cavalry still receives this bonus whether it is the only attacking friendly unit type, or if it is accompanied by other types.
7.1.3 Field Works There is a -1 die roll modifier in efect if the defender occupies Fieldworks (Case 6.1.8).
7.1.4 French National Will Level There is a +1 die roll modifier in effect if the French player attacks and French National Will is currently at Level 2. Similarly, there is a -1 die roll modifier in effect if the French player attacks and French National Will is currently at Level 0. There is no effect when the French are defending.
7.1.5 Jeanne Event in Effect Finally, there may be a die roll modifier in effect for the current turn from events on the Jeanne Events Table.
7.2 Combat Results The outcome of a battle may require units to be eliminated, captured, or retreated away from the battle hex. Results on the CRT are expressed in terms of Attacker/Defender. Codes are as follows:
E Eliminated. All Combat Units on that side are removed. # Number of SP losses suffered by that side.R Requires that side’s force to retreat one hex. - No effect.
7.3 Strength Point Losses The CRT result may indicate that a side has suffered a number of SP losses. Remove or flip units to make up the required number of SPs lost. The owning player makes the determination of what type of SPs are lost from his side, unless mandatory unit type SP losses are in effect. In order to satisfy losses, a player may make make “change” from unused counters so long as the Unit Type remains the same. If no change is available, then the additional points are lost.
7.3.1 Restrictions If there are any Light or Heavy Cavalry unit SPs present, at least half the SP losses from the battle must be from those types. The exception to that is if a force containing Artillery or Siege Weapons is forced to retreat. The Artillery and Siege Weapon SPs are totally eliminated first, and if further SPs are called for to satisfy the results, then half the remaining must come from Cavalry types, and the owning player may choose what SPs he wishes to use to satisfy the results.
7.4 Leader Losses Maneuver and combat may result in the death or capture of one or more Leaders on either side.
7.4.1 During Movement If a force moves into or through a hex containing nothing but an enemy leader, or multiple leaders, they are all captured. The phasing force does not expend MPs, nor does it have to stop moving in order to accomplish this.
7.4.2 One Side Eliminated in Combat Any combat result that eliminates all friendly Combat Units from a hex also containing a Leader(s) forces the owning player to roll separately for the fate of each one. On a die roll of 6, the Leader is killed and removed from play. On any other result, the Leader is captured and given to the opposing player.
7.4.3 When Forces Remain in Combat If neither force is completely destroyed, then each player rolls two dice separately for each Leader involved in the combat. A roll of 2 results in that Leader being killed, and a roll of 12 means that he or she is captured.
Developer’s Note During playtesting, some players thought that having a lot of leaders at one’s disposal meant that one could put together a lot of armies.
However, considering that losing one’s only commander in a battle also means effectively immobilizing most of the survivors, that is a very bad idea. Putting multiple leaders in the same force becomes insurance against casualties in the command structure.
7.4.4 Capture of Jeanne If Jeanne is captured, the English player rolls the die to determine her fate. A roll of 1 through 4 means that she remains in captivity but alive, a 5 ransoms her, and a roll of 6 means she is executed. This roll is made
during the Ransom Step in the First Determination Phase each turn after her capture.
7.4.5 Loss of Kings (or Notables) If Charles is captured or killed, the game ends in an automatic English victory. If King Henry is captured or killed, the French win immediately. There’s no penalty for losing the Duke of Burgundy in battle. The Burgundians stay in the war, but are limited by no longer having an effective leader to command them in battle.
7.5 Retreats A combat result of “R” indicates that that player must retreat the affected stack one hex. He must retreat toward a friendly supply source if possible and then into a hex empty of any units if one is available.
7.5.1 Retreat Into Friendly Occupied Hexes If no empty hex is available, then the stack may retreat into one occupied by friendly units. Stacking limits must be obeyed, and if a retreat would result in a hex being overstacked, the player must retreat the entire stack one extra hex.
7.5.2 Retreat Into Enemy Occupied Hexes A stack may retreat through an enemy-occupied hex if no other route toward a friendly supply source is available. In this case, the stack retreats one extra hex, as in 7.5.1 above, and loses one additional SP (owning player’s choice) for each enemy SP in the hex.
Developer’s Note Small forces surrounding a great big one, in a game of Joan of Arc’s Victory’s scale, would be able to do little to stop the big one from retreating. The probable result would be something closer to Kevin Bacon being run over by the panicked mob at the end of Animal House than Sedan in 1870.
7.5.3 Automatic Retreats Should a combat result in the raising of a siege, whether by destroying the besieging force, compelling it to retreat, or reducing its strength so that it is smaller than the force inside the town, the formerly besieging force must retreat, even if it did not suffer an “R” result.
Developer’s Note This might happen when a relief force raises a siege, and the combined strength of the relief force and the troops inside the town are over the stacking limits. In fact, some games will see this occur in the first turn.
7.5.4 Retreat Into Towns Defending units in a friendly town hex (but defending outside the town), in lieu of retreating an actual hex (if called for by the CRT result), may instead retreat directly into the town. The town may then be subject to siege (Section 8.2) if the conditions are met as outlined in the Final Determination Phase.
7.6 Advance After Combat If one side is eliminated or forced to retreat in combat, the other force may advance into the vacated hex, at the owning player’s discretion. This decision must be made immediately, and before conducting the next combat.
7.6.1 Advance to Besiege If a force retreats into a town in the same hex that it defends, either before or after combat, then the attackers may advance into the town’s hex in order to initiate a siege (Section 8.2).
7.6.2 Restrictions on Advancing As with retreat, stacking limits must be obeyed by advancing units. However, an advancing force may leave SPs and Leaders off along the way if the advance would otherwise form an overstacked hex.
Joan of Arc’s VICTORY 7

8.0 Final determination phaseOnce both sides have finished moving and fighting, play moves to the Final Determination Phase. During this phase:
• The supply status for all Combat Units is again checked for by both sides.• Sieges are initiated or resolved.• French National Will is assessed.• Both sides check to see if they have achieved their victory conditions to win the game yet.
8.1 Supply Check The supply status of all Combat Units is checked again. Combat Units now out of supply are so noted, and Combat units that were judged out of supply during the First Determination Phase are eliminated unless they are in a friendly town, even if besieged.
Important Note This means that forces under siege cannot be eliminated simply for being out of supply; the town has to fall either to an attack or resolution of the siege to change control. Historically, cities such as Orleans could hold out for months, or much longer if the defenders drove out the civilians. In other late medieval and Renaissance conflicts, Rhodes, Malta, and Vienna were also able to hold out for long periods.
8.2 Sieges At this point, all sieges are initiated or resolved. The following conditions must be met in order to initiate a siege:
• the enemy to be besieged is in a town or cathedral town hex, and• the besieging force must have a greater number of SPs, and• the besieging force must contain at least one SP of Engineers and one SP of either Artillery or Siege Weapons, or • if there are no Engineer SPs in the force, friendly units (of at least 1 SP each) must occupy alternating hexes surrounding the besieged force, in addition to the force of SPs besieging the town. Regardless, the besieging force still must contain at least one SP of Artillery or Siege Weapon units.
8.2.1 Siege Initiation To initiate a siege, the besieging force moves into the same hex as the town; this is the only time that opposing units can be in the same hex.
8.2.2 Siege Resolution During this step, the active player consults the Siege Resolution Table, rolls a die, and modifies for any of the conditions listed there. Players do get to try to resolve the siege the same turn it is initiated.
8.2.3 Successful Result If the besieged force is eliminated, roll for any Leaders remaining in the hex as in Case 7.4.2.
8.2.4 Unsuccessful Result If the siege is unsuccessful, the besieging units remain in the hex, and can attack the town, or continue the siege, if the conditions for the siege are still met the following friendly player turn.
8.2.5 Sorties Units inside the besieged town can sortie out in order to break the siege. This is conducted as a normal attack during the besieged units’ Combat Phase. If the attackers win by reducing the enemy’s SP level below the level needed to maintain the siege, or if the defender suffers an “R” result, then the besieging units retreat into an adjacent hex. If the attackers suffer an “R” result, then they retreat back into the town, incurring any other losses normally.
8.2.6 Relieving Sieges Forces from outside the town can also attack the besieging units, and this is conducted as normal combat. If the besieging units are forced to retreat, or are reduced below the SP level necessary to maintain the siege, then the siege is lifted; in addition, the attackers may advance into the same hex as the town.
8.2.7 Separate Attacks If units from inside and outside the besieged town attack the besiegers, this is conducted as two separate attacks, one for the inside troops and the other for the “relief troops.” The attacking player can choose in which order he wishes to resolve these attacks.
Developer’s Note This is because of the impossibility of coordinating two armies, with enemy forces and siege works between them, before the age of radio. In the ancient world, the best-known example is that of Alesia.
8.3 French National Will Check Once all sieges have been resolved, check to see if the French National Will level has changed and adjust it as necessary. If the level falls below zero, the game is over and the English have won.
8.3.1 Changing the Level French National Will is affected by several factors. It can never be higher than 2. The effects of French National Will levels and what triggers changes are summarized on the French National Will Table.
8.3.2 Capture of Jeanne Effects If Jeanne is captured, French National Will drops to 0 and can never get higher than 1 for the rest of the game.
8.4 Automatic Victory Determination If the current turn is not the last turn of the game, check to see if Automatic Victory has occurred. If either king is captured or killed, then the game ends immediately in the other side’s favor. If the both monarchs are in captivity, then it ends in a draw.
8.5 Victory by Any Other Means If automatic victory has not occurred, then the game lasts until turn 14 (May 1430) at which time victory is determined.
The French win if they control Orleans, Chinon, and Rheims, Charles has spent at least one full turn in Rheims, and French National Will is at least 1.
The English win if they have avoided the French victory conditions and Henry is supplied and unbesieged in Rouen on turn 14. Any other result is a draw.
Historical Outcome The English retained Paris but Henry was not crowned as king of France until December of 1431. In the time frame of the game, it was a draw, but the result set up an English victory the next year.
9.0 Optional RulesOptaionl rules are just that, optional. If both players agree, use any of the rules below to add zest to the game.
9.1 Favorable Odds Column Shifts Shift the final calculated odds one column either way if one side or the other has no Archer or Artillery SPs present, and the other side does. So, if the French attack without Archer or Artillery SPs, and the calculated odds are 2:1, and the English player has at least 1 Archer SP present, the attack would shift to the 1:1 column, showing that even a small number of Archers could have a decisive effect in those days.
9.2 Die Roll Modifiers Additional die roll modifers you can use in combat are presented below.
9.2.1 Militia in Combat If a force consisting entirely of Militia SPs chooses to attack or beseige, subtract 1 from the die roll. If a stack consisting entirely of Militia SPs is attacked or besieged, add 1.
9.2.2 Engineers/Siege Weapons Present at Sieges If the attacker has at least 1 Engineer SP present at a siege, add 1 to the die roll, and if the defender has at least 1 Engineer SP, subtract 1. Add 1 if the attacker has at least 1 Artillery or Siege
Weapon SP present, and subtract 1 if the defender has at least 1 Artillery or Siege Weapon SP present. This is a single modifier, not cumulative for having both types present, or more than 1 SP.
8 Joan of Arc’s VICTORY
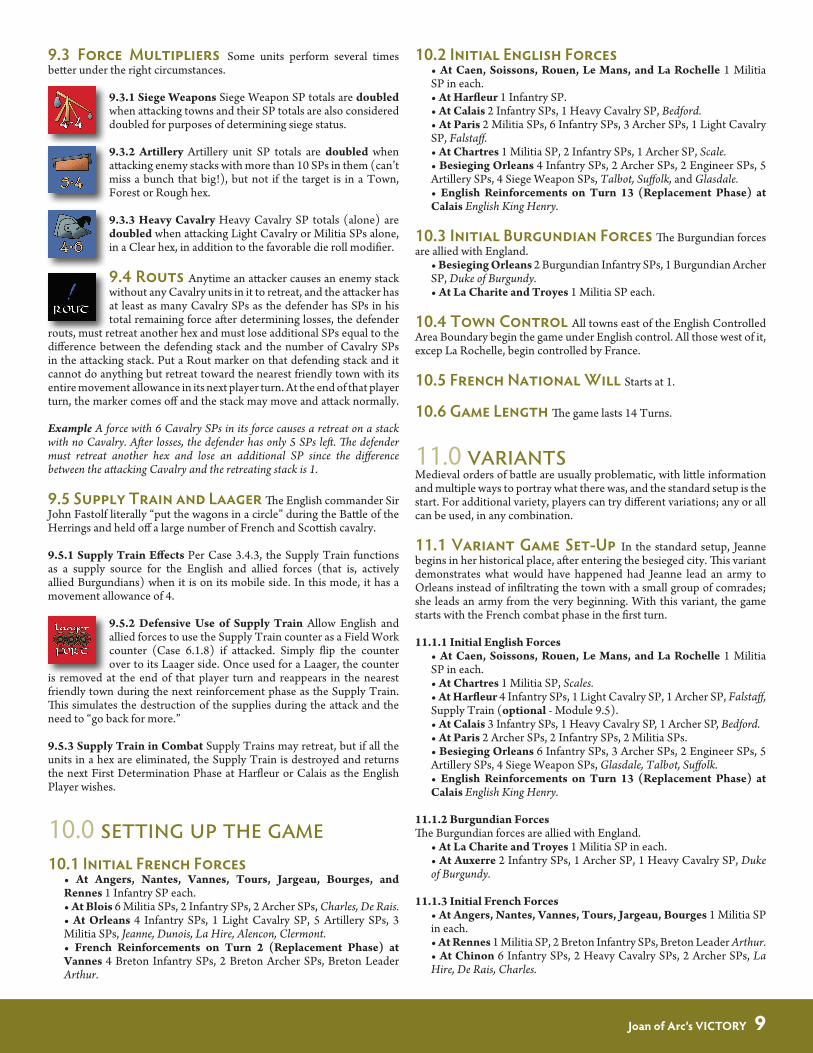
9.3 Force Multipliers Some units perform several timesbetter under the right circumstances.
9.3.1 Siege Weapons Siege Weapon SP totals are doubled when attacking towns and their SP totals are also considered doubled for purposes of determining siege status.
9.3.2 Artillery Artillery unit SP totals are doubled when attacking enemy stacks with more than 10 SPs in them (can’t miss a bunch that big!), but not if the target is in a Town, Forest or Rough hex.
9.3.3 Heavy Cavalry Heavy Cavalry SP totals (alone) are doubled when attacking Light Cavalry or Militia SPs alone, in a Clear hex, in addition to the favorable die roll modifier.
9.4 Routs Anytime an attacker causes an enemy stackwithout any Cavalry units in it to retreat, and the attacker has at least as many Cavalry SPs as the defender has SPs in his total remaining force after determining losses, the defender
routs, must retreat another hex and must lose additional SPs equal to the difference between the defending stack and the number of Cavalry SPs in the attacking stack. Put a Rout marker on that defending stack and it cannot do anything but retreat toward the nearest friendly town with its entire movement allowance in its next player turn. At the end of that player turn, the marker comes off and the stack may move and attack normally.
Example A force with 6 Cavalry SPs in its force causes a retreat on a stack with no Cavalry. After losses, the defender has only 5 SPs left. The defender must retreat another hex and lose an additional SP since the difference between the attacking Cavalry and the retreating stack is 1.
9.5 Supply Train and Laager The English commander Sir John Fastolf literally “put the wagons in a circle” during the Battle of the Herrings and held off a large number of French and Scottish cavalry.
9.5.1 Supply Train Effects Per Case 3.4.3, the Supply Train functions as a supply source for the English and allied forces (that is, actively allied Burgundians) when it is on its mobile side. In this mode, it has a movement allowance of 4.
9.5.2 Defensive Use of Supply Train Allow English and allied forces to use the Supply Train counter as a Field Work counter (Case 6.1.8) if attacked. Simply flip the counter over to its Laager side. Once used for a Laager, the counter
is removed at the end of that player turn and reappears in the nearest friendly town during the next reinforcement phase as the Supply Train. This simulates the destruction of the supplies during the attack and the need to “go back for more.”
9.5.3 Supply Train in Combat Supply Trains may retreat, but if all the units in a hex are eliminated, the Supply Train is destroyed and returns the next First Determination Phase at Harfleur or Calais as the English Player wishes.
10.0 setting up the game10.1 Initial French Forces
• At Angers, Nantes, Vannes, Tours, Jargeau, Bourges, and Rennes 1 Infantry SP each.• At Blois 6 Militia SPs, 2 Infantry SPs, 2 Archer SPs, Charles, De Rais.• At Orleans 4 Infantry SPs, 1 Light Cavalry SP, 5 Artillery SPs, 3Militia SPs, Jeanne, Dunois, La Hire, Alencon, Clermont.• French Reinforcements on Turn 2 (Replacement Phase) at Vannes 4 Breton Infantry SPs, 2 Breton Archer SPs, Breton Leader Arthur.
10.2 Initial English Forces• At Caen, Soissons, Rouen, Le Mans, and La Rochelle 1 MilitiaSP in each.• At Harfleur 1 Infantry SP.• At Calais 2 Infantry SPs, 1 Heavy Cavalry SP, Bedford.• At Paris 2 Militia SPs, 6 Infantry SPs, 3 Archer SPs, 1 Light Cavalry SP, Falstaff.• At Chartres 1 Militia SP, 2 Infantry SPs, 1 Archer SP, Scale.• Besieging Orleans 4 Infantry SPs, 2 Archer SPs, 2 Engineer SPs, 5Artillery SPs, 4 Siege Weapon SPs, Talbot, Suffolk, and Glasdale.• English Reinforcements on Turn 13 (Replacement Phase) atCalais English King Henry.
10.3 Initial Burgundian Forces The Burgundian forces are allied with England.
• Besieging Orleans 2 Burgundian Infantry SPs, 1 Burgundian Archer SP, Duke of Burgundy.• At La Charite and Troyes 1 Militia SP each.
10.4 Town Control All towns east of the English ControlledArea Boundary begin the game under English control. All those west of it, excep La Rochelle, begin controlled by France.
10.5 French National Will Starts at 1.
10.6 Game Length The game lasts 14 Turns.
11.0 VARIANTSMedieval orders of battle are usually problematic, with little information and multiple ways to portray what there was, and the standard setup is the start. For additional variety, players can try different variations; any or all can be used, in any combination.
11.1 Variant Game Set-Up In the standard setup, Jeannebegins in her historical place, after entering the besieged city. This variant demonstrates what would have happened had Jeanne lead an army to Orleans instead of infiltrating the town with a small group of comrades; she leads an army from the very beginning. With this variant, the game starts with the French combat phase in the first turn.
11.1.1 Initial English Forces• At Caen, Soissons, Rouen, Le Mans, and La Rochelle 1 MilitiaSP in each.• At Chartres 1 Militia SP, Scales.• At Harfleur 4 Infantry SPs, 1 Light Cavalry SP, 1 Archer SP, Falstaff, Supply Train (optional - Module 9.5).• At Calais 3 Infantry SPs, 1 Heavy Cavalry SP, 1 Archer SP, Bedford.• At Paris 2 Archer SPs, 2 Infantry SPs, 2 Militia SPs.• Besieging Orleans 6 Infantry SPs, 3 Archer SPs, 2 Engineer SPs, 5Artillery SPs, 4 Siege Weapon SPs, Glasdale, Talbot, Suffolk.• English Reinforcements on Turn 13 (Replacement Phase) atCalais English King Henry.
11.1.2 Burgundian ForcesThe Burgundian forces are allied with England.
• At La Charite and Troyes 1 Militia SP in each.• At Auxerre 2 Infantry SPs, 1 Archer SP, 1 Heavy Cavalry SP, Duke of Burgundy.
11.1.3 Initial French Forces• At Angers, Nantes, Vannes, Tours, Jargeau, Bourges 1 Militia SP in each.• At Rennes 1 Militia SP, 2 Breton Infantry SPs, Breton Leader Arthur.• At Chinon 6 Infantry SPs, 2 Heavy Cavalry SPs, 2 Archer SPs, La Hire, De Rais, Charles.
Joan of Arc’s VICTORY 9

• At Blois 5 Infantry SPs, 2 Heavy Cavalry SPs, 1 Scottish Heavy Cavalry, 1 Scottish Archer, 2 Archer SPs, 2 SiegeWeapon SPs, Jeanne, Clermont, Alençon, Scottish Leader Ogilvy.• At Orleans 4 Infantry SPs, 1 Light Cavalry SP, 5 Artillery SPs, 3Militia SPs, 4 Archer SPs, Dunois.
11.1.4 Town Control All towns east of the English Controlled Area Boundary begin the game under English control. All those west of it, except La Rochelle, begin controlled by France.
11.1.5 French National Will Starts at 1.
11.1.6 Game Length 14 Turns
11.2 Burgundy Takes a Greater Role at Orleans Historically, Burgundy assisted its English allies inthe siege of Orleans, but was sent away before the start of the game’s time frame, out of an English concern that the Burgundians would take possession of the city if it fell. Use this Burgundian setup:
• At La Charite and Troyes 1 Militia SP each.• At Auxerre 2 Infantry SPs.• At Auxerre 2 Infantry SPs, 1 Archer SP, 1 Heavy Cavalry SP.
11.3 de Rais Not Quite Ascendent Gille de Rais wasone of the more interesting characters of the Hundred Years War, to put it mildly. He had two distinct careers, the first of which was as a military commander and associate of Jeanne d’Arc, rising to the office of Marshall of France. But as his comrade became a saint of the Catholic Church and France’s greatest heroine, de Rais took another path, one to the direct opposite. When his fighting days were done, he retired to his castles to pursue his passions for ostentations religious devotion, conspicuous consumption, and the theater. He was also convicted of being a Satanic mass murderer of young boys, whom it was said he would rape and torture, combining the belief system of Richard Ramirez with the sick proclivities of John Wayne Gayce. For his crimes de Rais was hanged and burned in Nantes on October 20, 1440.
His guilt remains a matter of some controversy, due to the medieval judicial system’s habit of making confession by torture more important than extending rights and due process to the accused.
There is one thing though of which de Rais was certainly guilty: overplaying his own importance to history. One favorite play that he produced made himself the central hero of the relief of Orleans, when it was really Jeanne’s victory. In this variant, remove the de Rais counter from the game. He might be fighting, and not yet disgracing himself, but he is not yet important enough to warrant a Leader counter with his name on it.
(Unknown Artist) Siege of Orléans, 1429 Musee de l’Armee, Paris, France
10 Joan of Arc’s VICTORY