3 pointlighting.ppt
TRANSCRIPT
3 POINT LIGHTINGPhotographic Imaging 1
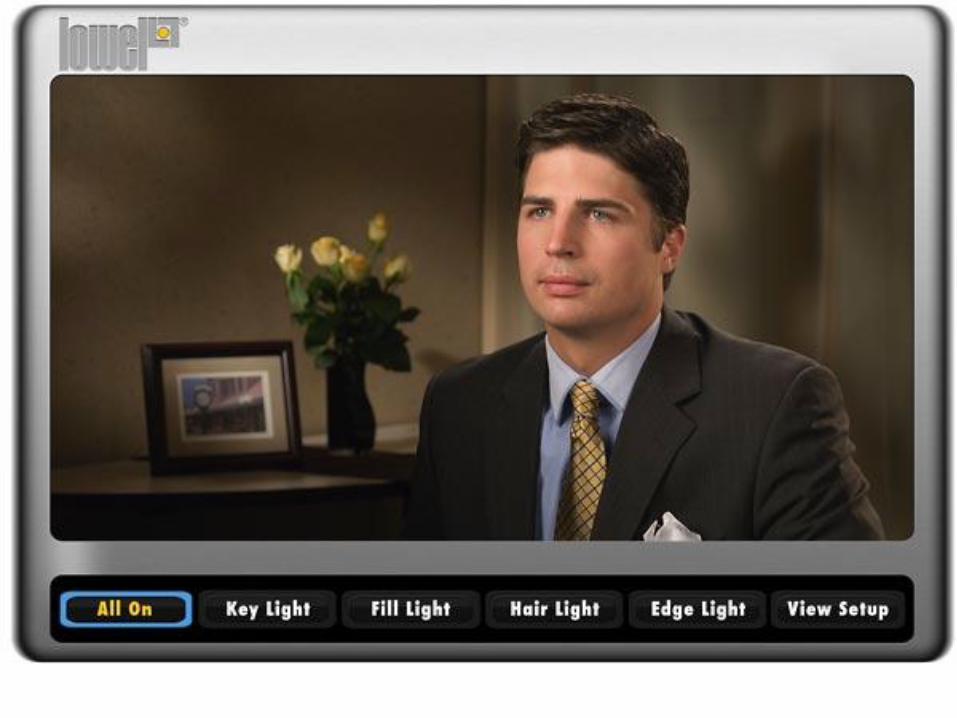
Interview Lighting●The concepts covered here will reappear in many other lighting setups. ●They will also help you to create your own distinctive lighting style. ●These 4 lights: Key, Fill, Hair, & Edge, form the basics of a well lit portrait.
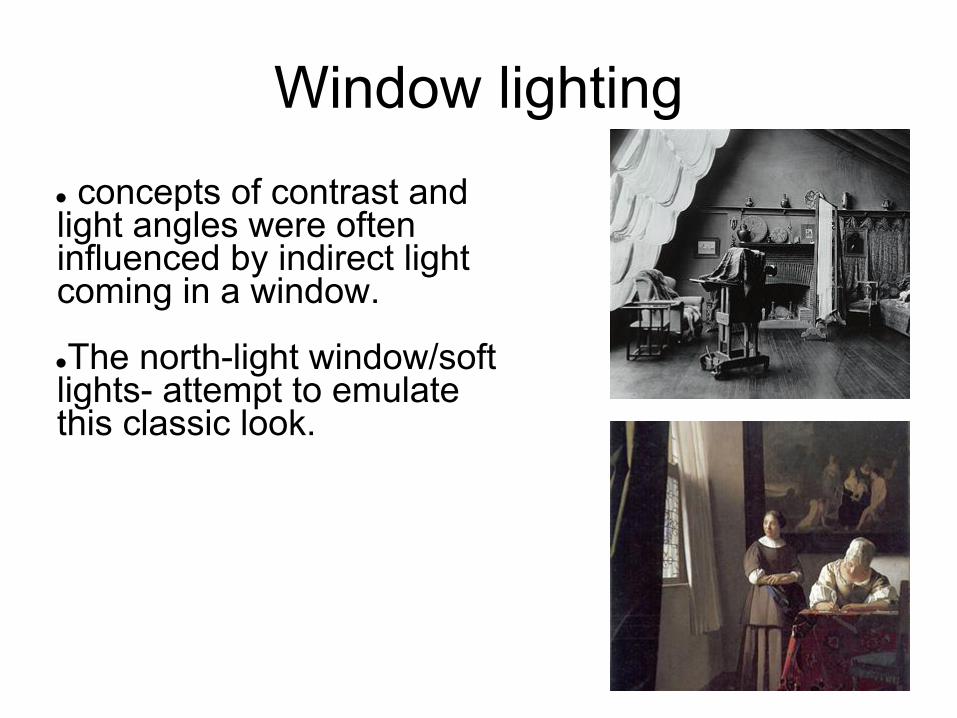
Window lighting● concepts of contrast and light angles were often influenced by indirect light coming in a window. ●The north-light window/soft lights- attempt to emulate this classic look.
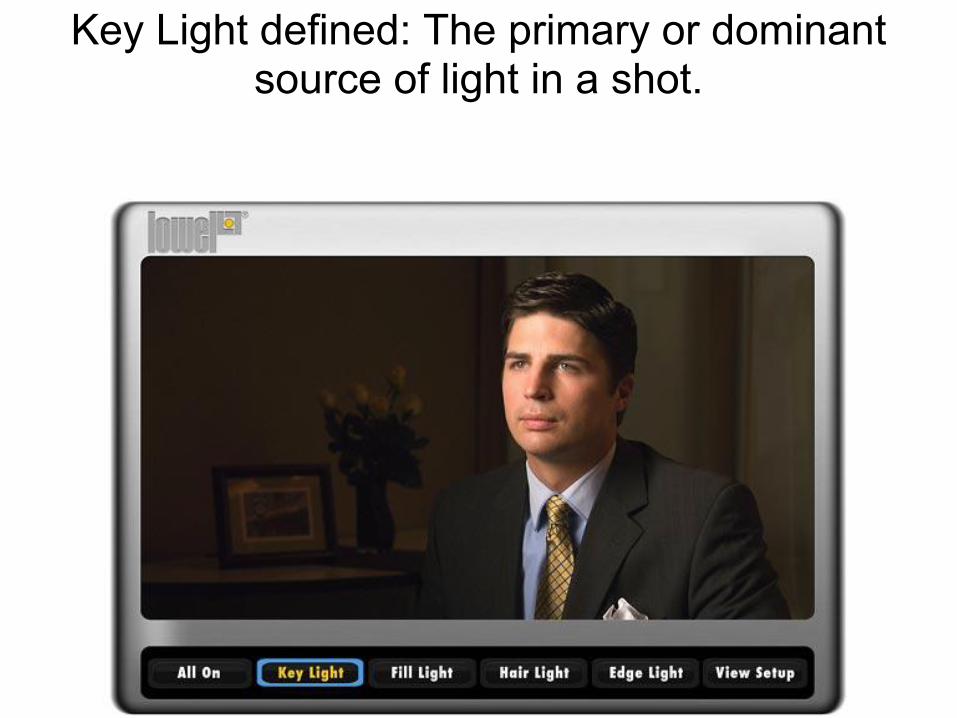
Key Light defined: The primary or dominant source of light in a shot.
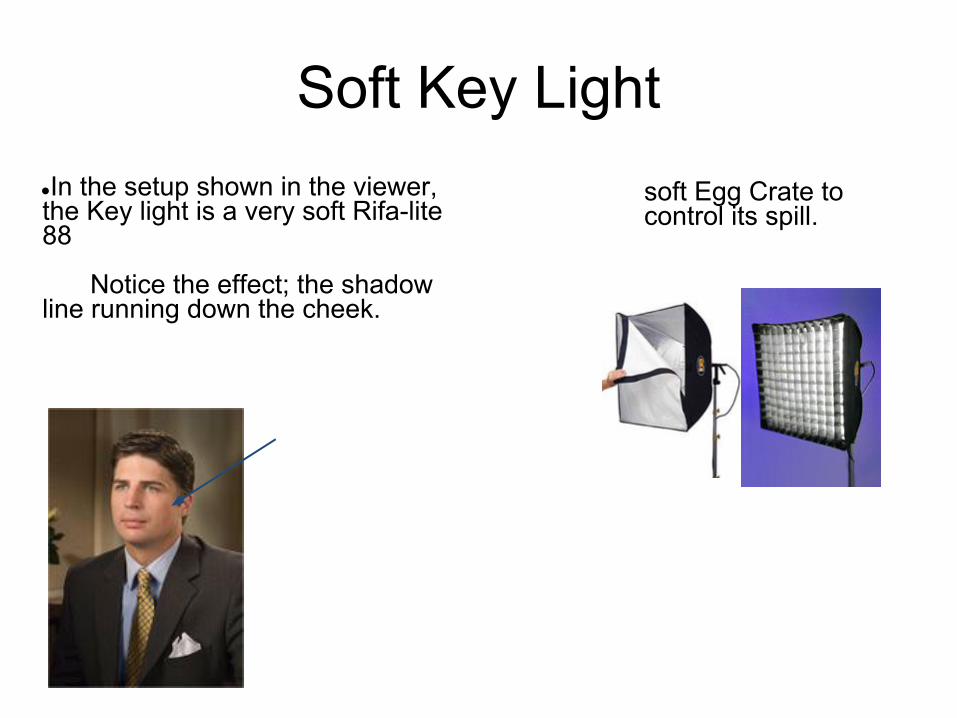
Soft Key Light●In the setup shown in the viewer, the Key light is a very soft Rifa-lite 88
Notice the effect; the shadow
line running down the cheek.
soft Egg Crate to control its spill.
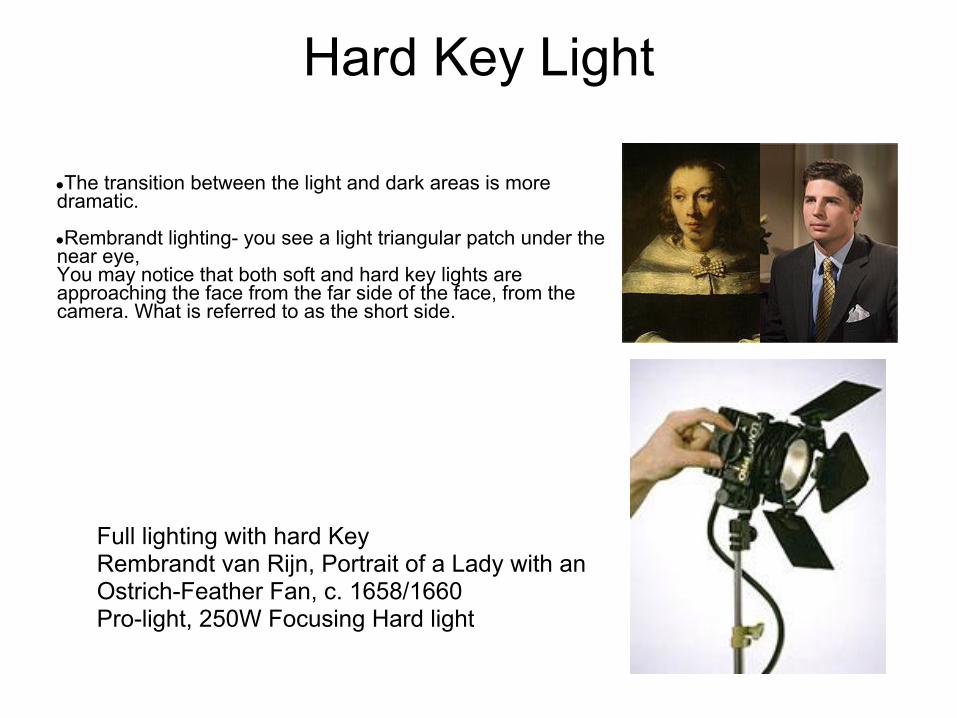
Hard Key Light
●The transition between the light and dark areas is more dramatic. ●Rembrandt lighting- you see a light triangular patch under the near eye,You may notice that both soft and hard key lights are approaching the face from the far side of the face, from the camera. What is referred to as the short side.
Full lighting with hard KeyRembrandt van Rijn, Portrait of a Lady with an Ostrich-Feather Fan, c. 1658/1660Pro-light, 250W Focusing Hard light
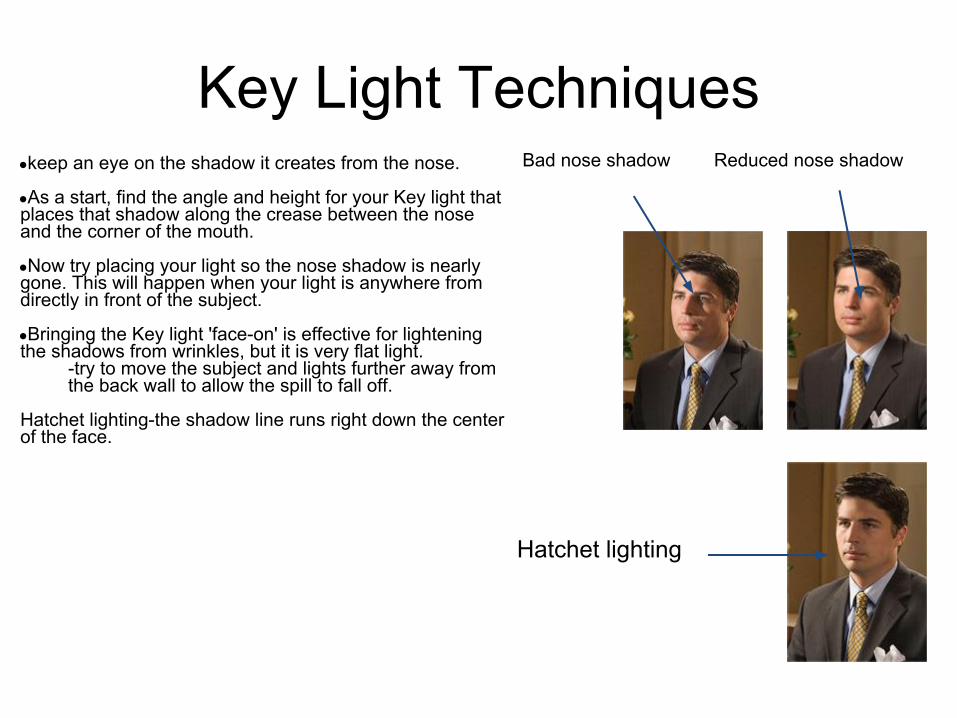
Key Light Techniques●keep an eye on the shadow it creates from the nose. ●As a start, find the angle and height for your Key light that places that shadow along the crease between the nose and the corner of the mouth. ●Now try placing your light so the nose shadow is nearly gone. This will happen when your light is anywhere from directly in front of the subject. ●Bringing the Key light 'face-on' is effective for lightening the shadows from wrinkles, but it is very flat light.
-try to move the subject and lights further away from the back wall to allow the spill to fall off.
Hatchet lighting-the shadow line runs right down the center of the face.
Hatchet lighting
Bad nose shadow Reduced nose shadow
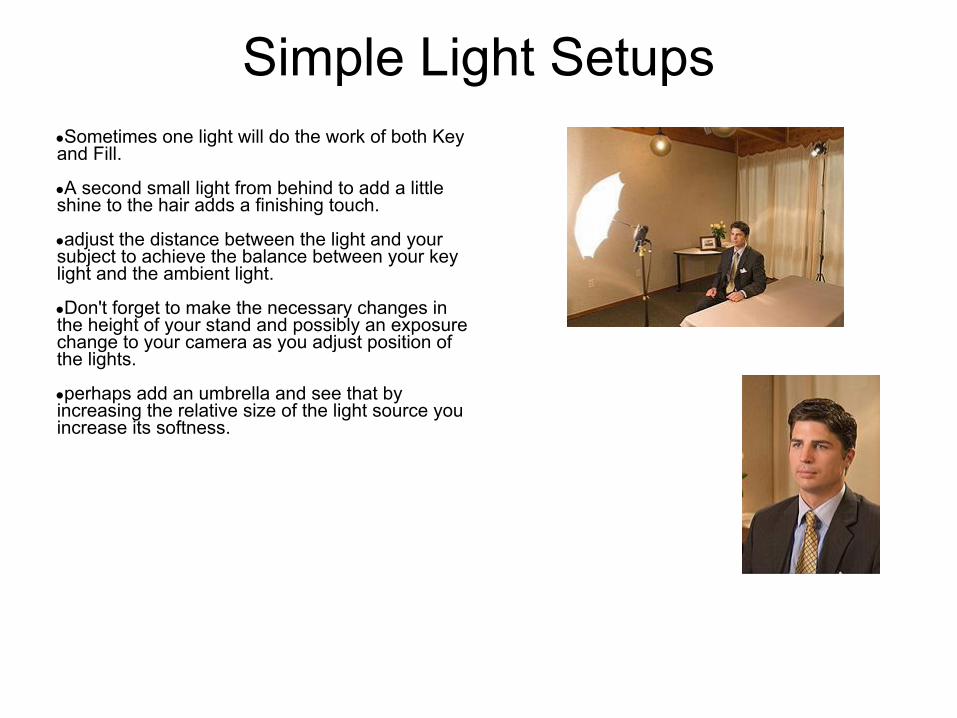
Simple Light Setups●Sometimes one light will do the work of both Key and Fill. ●A second small light from behind to add a little shine to the hair adds a finishing touch. ●adjust the distance between the light and your subject to achieve the balance between your key light and the ambient light. ●Don't forget to make the necessary changes in the height of your stand and possibly an exposure change to your camera as you adjust position of the lights. ●perhaps add an umbrella and see that by increasing the relative size of the light source you increase its softness.

●Fill light: used to lighten shadows and control contrast ratios. Combined with the Key light, Fill light helps define the mood by lighting the shaded areas in a range of intensities. ●contrast ratio: the ratio of amount of Key to Fill light
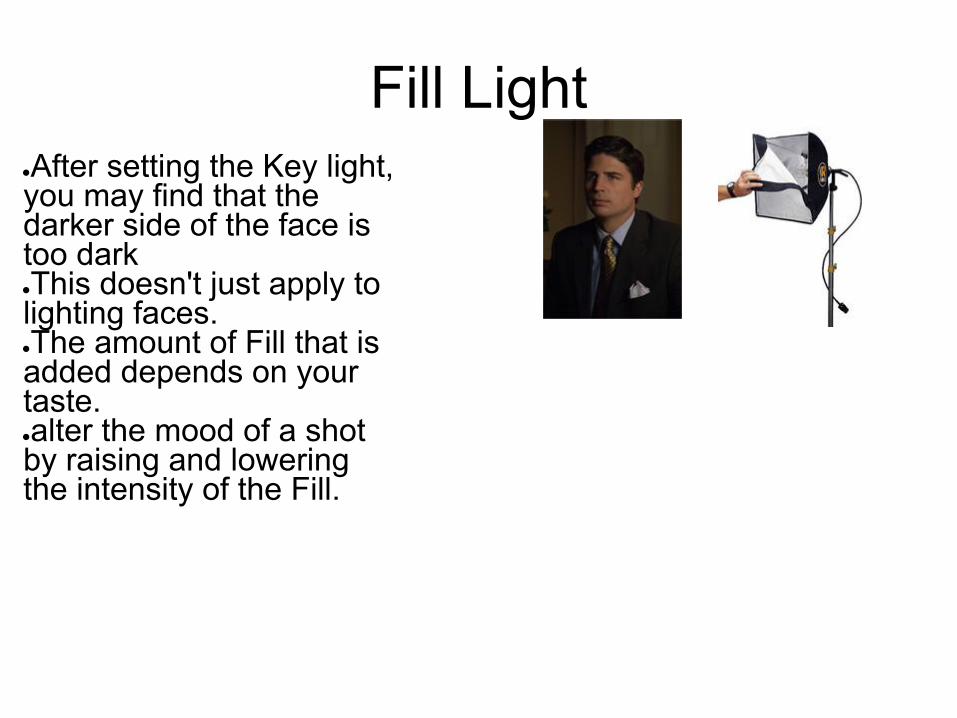
Fill Light ●After setting the Key light, you may find that the darker side of the face is too dark ●This doesn't just apply to lighting faces. ●The amount of Fill that is added depends on your taste. ●alter the mood of a shot by raising and lowering the intensity of the Fill.
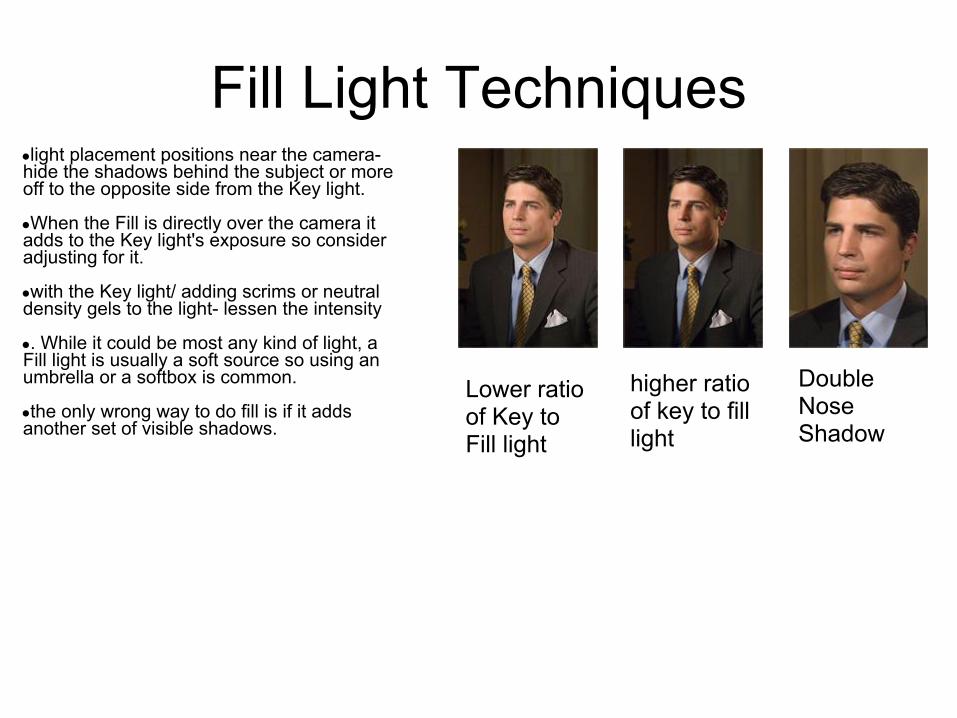
Fill Light Techniques●light placement positions near the camera- hide the shadows behind the subject or more off to the opposite side from the Key light. ●When the Fill is directly over the camera it adds to the Key light's exposure so consider adjusting for it. ●with the Key light/ adding scrims or neutral density gels to the light- lessen the intensity ●. While it could be most any kind of light, a Fill light is usually a soft source so using an umbrella or a softbox is common. ●the only wrong way to do fill is if it adds another set of visible shadows.
Lower ratio of Key to Fill light
higher ratio of key to fill light
Double Nose Shadow
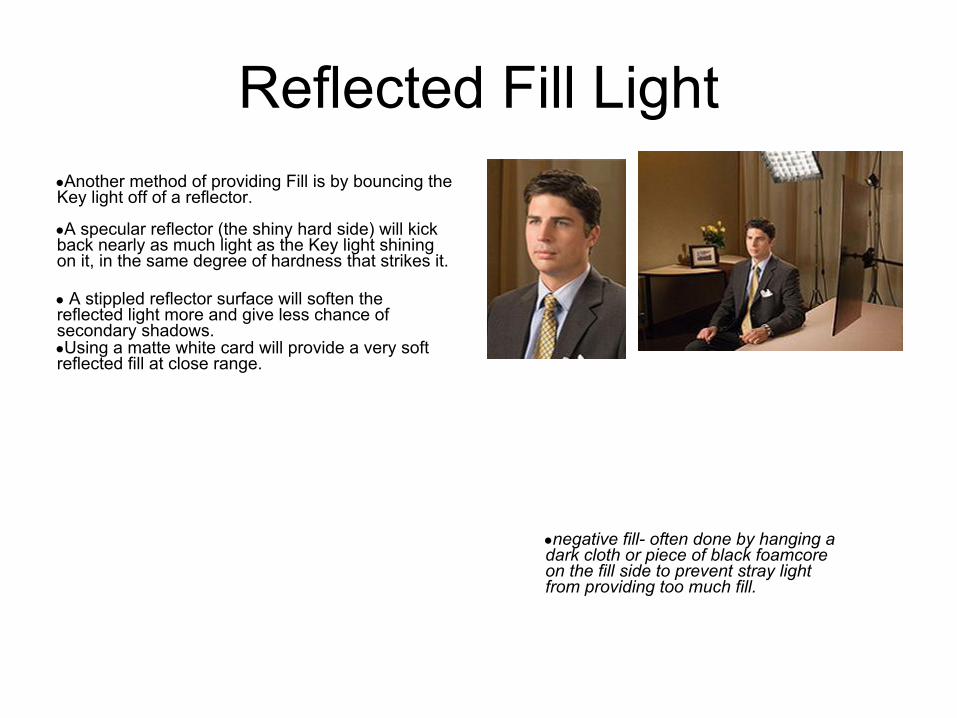
Reflected Fill Light●Another method of providing Fill is by bouncing the Key light off of a reflector. ●A specular reflector (the shiny hard side) will kick back nearly as much light as the Key light shining on it, in the same degree of hardness that strikes it. ● A stippled reflector surface will soften the reflected light more and give less chance of secondary shadows.●Using a matte white card will provide a very soft reflected fill at close range.
●negative fill- often done by hanging a dark cloth or piece of black foamcore on the fill side to prevent stray light from providing too much fill.
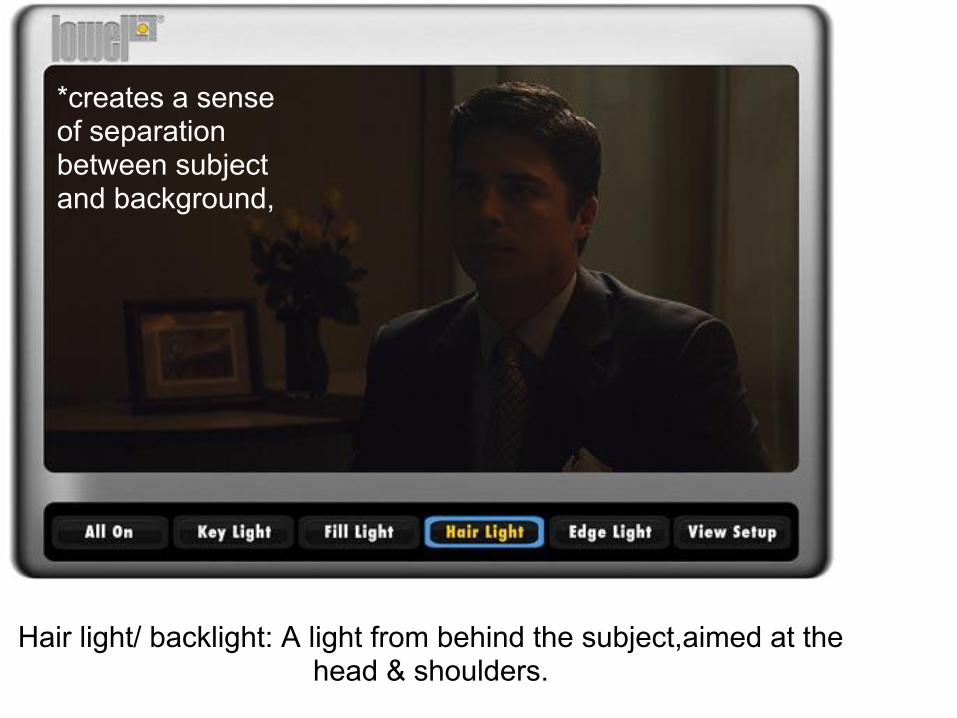
Hair light/ backlight: A light from behind the subject,aimed at the head & shoulders.
*creates a sense of separation between subject and background,
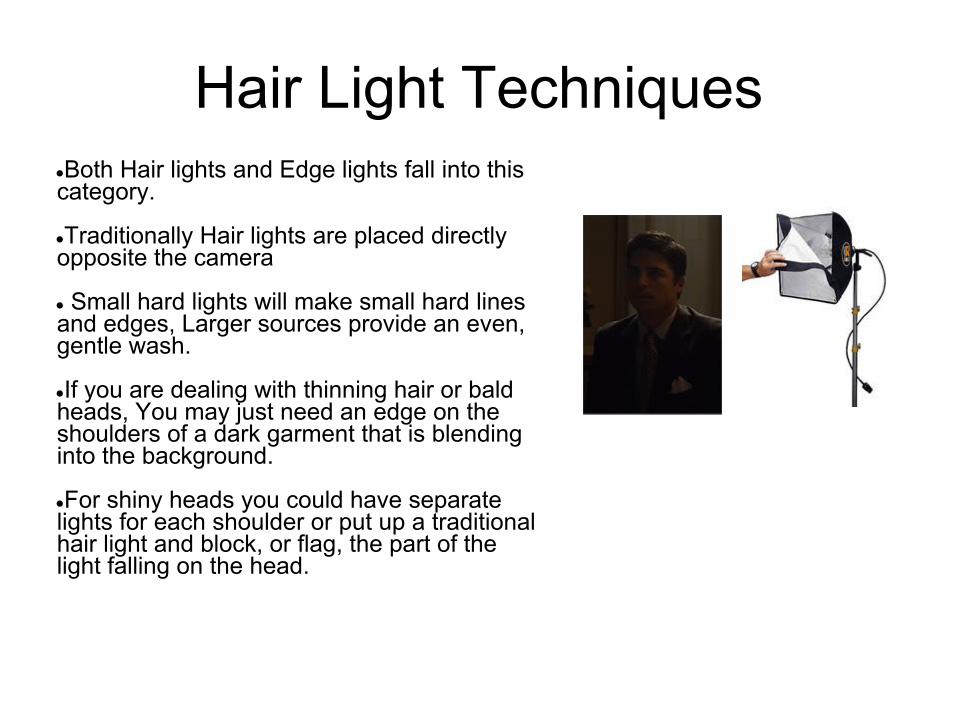
Hair Light Techniques ●Both Hair lights and Edge lights fall into this category. ●Traditionally Hair lights are placed directly opposite the camera ● Small hard lights will make small hard lines and edges, Larger sources provide an even, gentle wash. ●If you are dealing with thinning hair or bald heads, You may just need an edge on the shoulders of a dark garment that is blending into the background. ●For shiny heads you could have separate lights for each shoulder or put up a traditional hair light and block, or flag, the part of the light falling on the head.
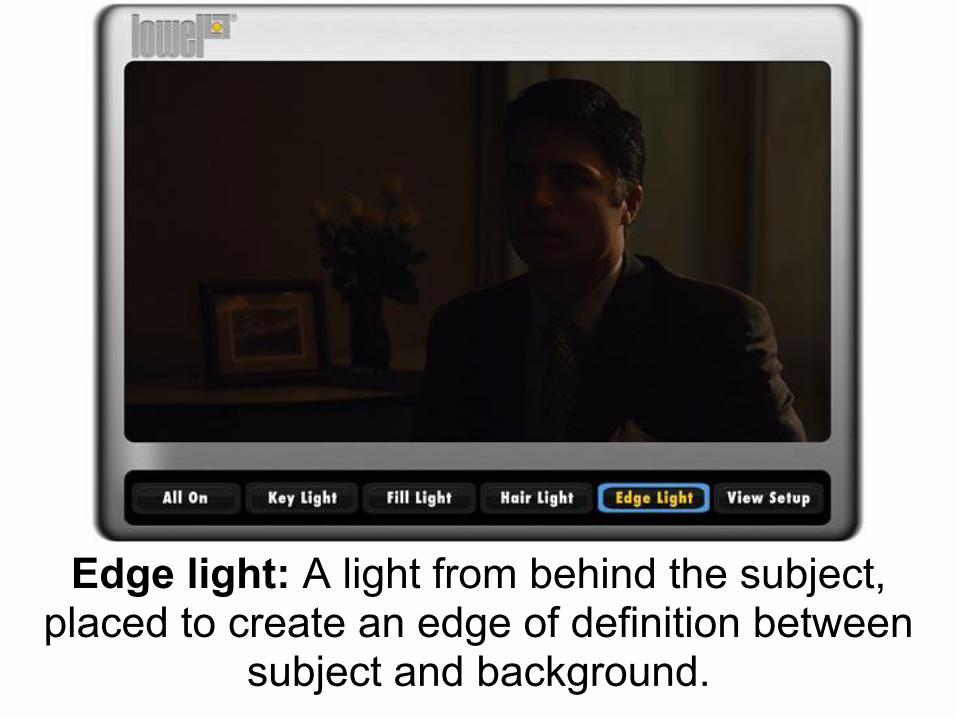
Edge light: A light from behind the subject, placed to create an edge of definition between
subject and background.
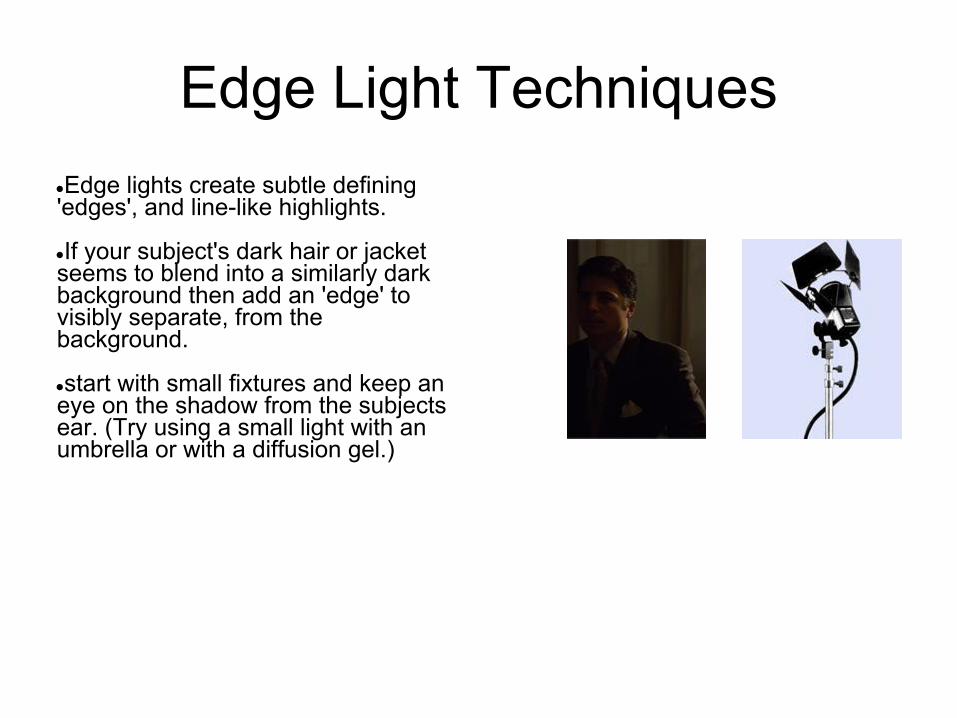
Edge Light Techniques●Edge lights create subtle defining 'edges', and line-like highlights. ●If your subject's dark hair or jacket seems to blend into a similarly dark background then add an 'edge' to visibly separate, from the background. ●start with small fixtures and keep an eye on the shadow from the subjects ear. (Try using a small light with an umbrella or with a diffusion gel.)
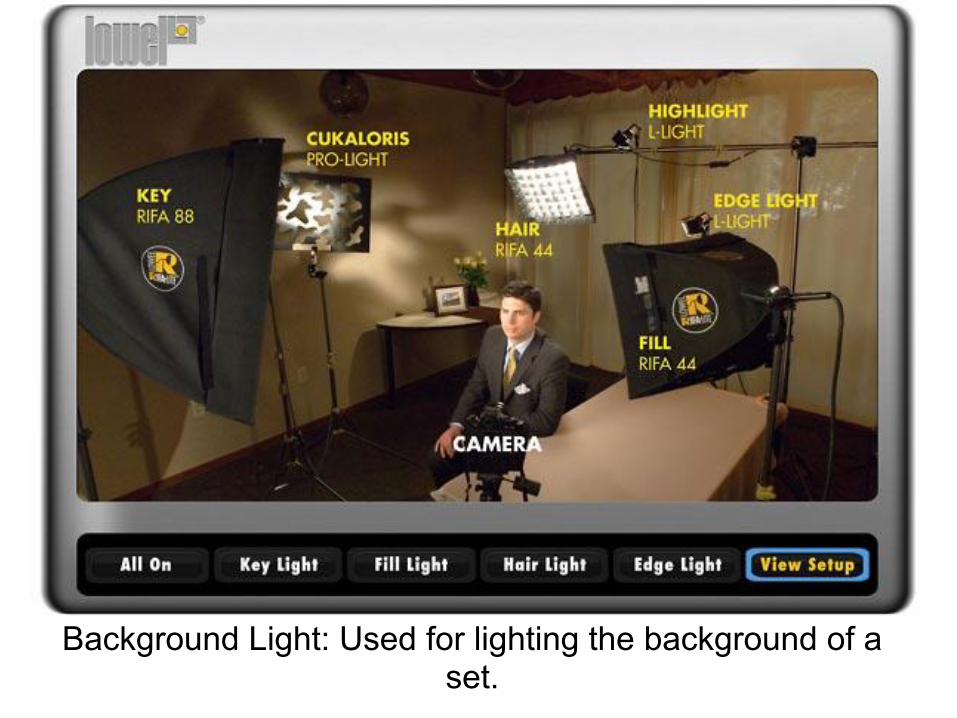
Background Light: Used for lighting the background of a set.
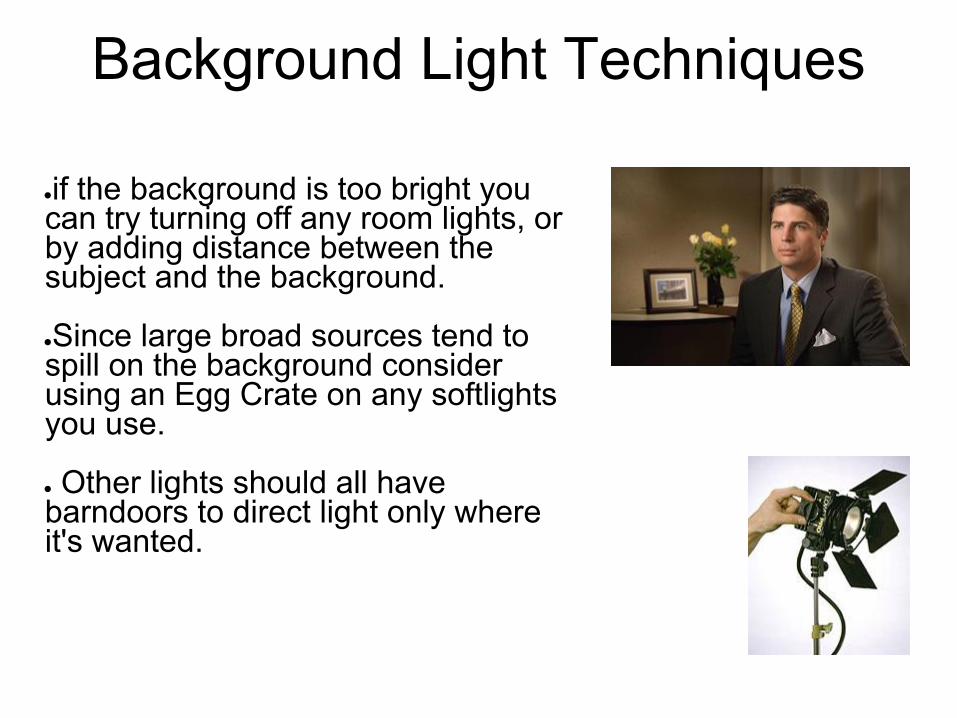
Background Light Techniques
●if the background is too bright you can try turning off any room lights, or by adding distance between the subject and the background. ●Since large broad sources tend to spill on the background consider using an Egg Crate on any softlights you use. ● Other lights should all have barndoors to direct light only where it's wanted.
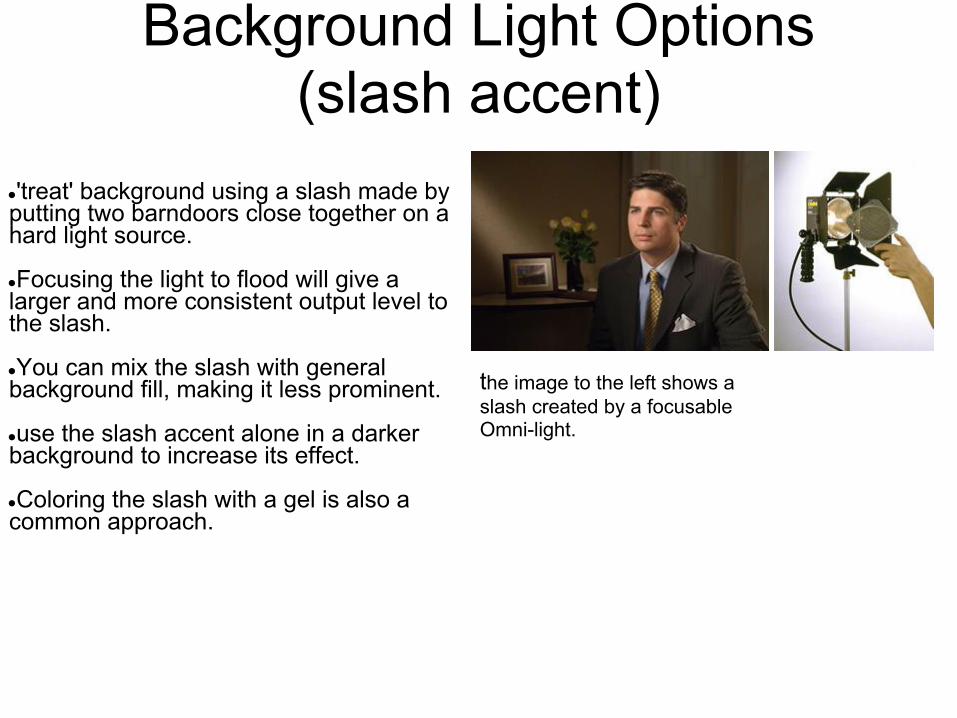
Background Light Options(slash accent)
●'treat' background using a slash made by putting two barndoors close together on a hard light source. ●Focusing the light to flood will give a larger and more consistent output level to the slash. ●You can mix the slash with general background fill, making it less prominent. ●use the slash accent alone in a darker background to increase its effect. ●Coloring the slash with a gel is also a common approach.
the image to the left shows a slash created by a focusable Omni-light.
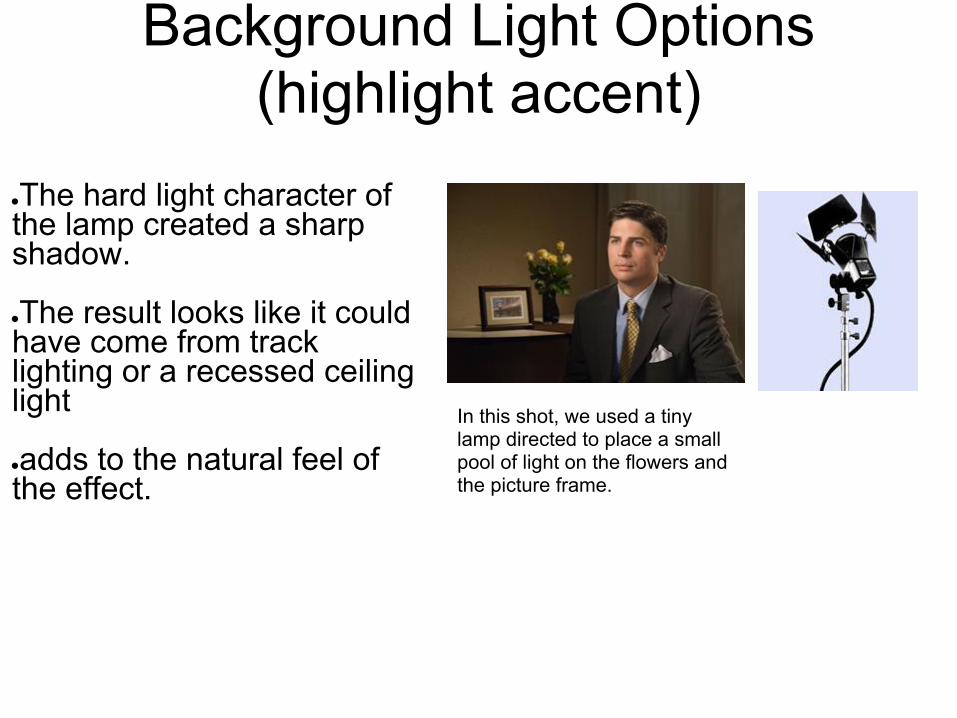
Background Light Options(highlight accent)
●The hard light character of the lamp created a sharp shadow. ●The result looks like it could have come from track lighting or a recessed ceiling light ●adds to the natural feel of the effect.
In this shot, we used a tiny lamp directed to place a small pool of light on the flowers and the picture frame.
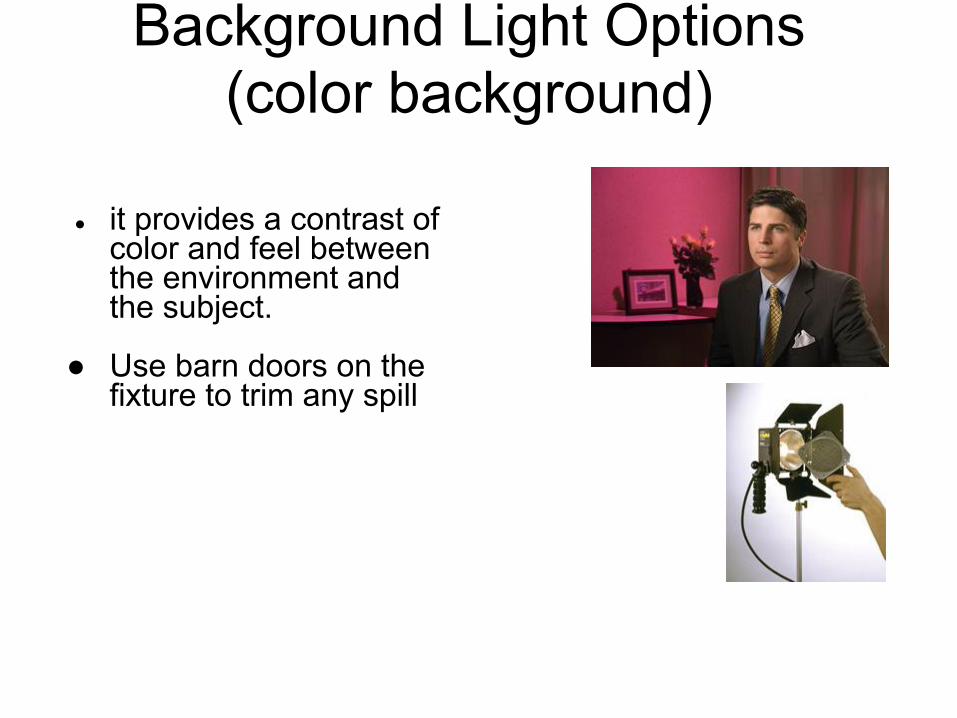
Background Light Options(color background)
● it provides a contrast of
color and feel between the environment and the subject.
● Use barn doors on the
fixture to trim any spill