32.0 open frame lcd monitor fa320n1- · pdf fileif an extension cord is used with this...
TRANSCRIPT

BASE MODEL :
Y.J.E. Display Tech CO., LTD.
SPECIFICATIONFOR
APPROVAL
MODEL :32.0" Open Frame LCD Monitor
Customer's ConfirmationApproved by:Reviewed by:Prepared by:
Supplier's ConfirmationApproved by:Reviewed by:Prepared by:
Please return 1 copy for our confirmation with your signature and comments. 1/19
FA320N1-NDBN

Important safety instructions
2/19
Product Specification
01. Please read these instructions carefully before using the product and save for later reference. 02. Follow all warnings and instructions marked on the product. 03. Unplug this product from the wall outlet before cleaning. Clean the product with a damp soft03. cloth. Do not use liquid or aerosol cleaners as it may cause permanent damage to the screen. 04. Do not use this product near water.05. Do not place this product on an unstable cart, stand, or table.05. The product may fall, causing serious damage to the product.06. Slots and openings in the cabinet and the back or bottom are provided for ventilation; to ensure06. reliable operation of the product and to protect it from overheating, these openings must not be06. blocked or covered.06. The openings should never be placed near or over a radiator or heat register, or in a built-in06. installation unless proper ventilation is provided.07. This product should be operated from the type of power indicated on the marking label.07. If you are not sure of the type of power available, consult your dealer or local power company.08. This product is equipped with a 3-wire grounding type plug, a plug having a third (grounding) pin.08. This plug will only fit into a grounding-type power outlet.08. This is a safety feature. If you are unable to insert the plug into the outlet, contact your08. electrician to replace your obsolete outlet.08. Do not defeat the purpose of the grounding-type plug.09. Do not allow anything to rest on the power cord.09. Do not locate this product where persons will walk on the cord.10. If an extension cord is used with this product, make sure that the total of the ampere ratings on10. the products plugged into the extension cord does not exceed the extension cord ampere rating.10. Also make sure that the total of all products plugged into the wall outlet does not exceed10. 15 amps.11. Never push objects of any kind into this product through cabinet slots as they may touch11. dangerous voltage points or short out parts that could result in a risk of fire or electric shock.11. Never spill liquid of any kind on the product.12. Do not attempt to service this product yourself, as opening or removing covers may expose you to12. dangerous voltage points or other risks and will void the warranty.12. Refer all servicing to qualified service personnel.13. Unplug this product from the wall outlet and refer servicing to qualified service personnel under13. the following conditions:13. a. When the power cord or plug is damaged or frayed.13. b. If liquid has been spilled into the product.13. c. If the product has been exposed to rain or water.13. d. If the product does not operate normally when the operating instructions are followed.13. d. Adjust only those controls that are covered by the operating instructions since improper13. d. adjustment of other controls may result in damage and will often require extensive work13. d. by a qualified technician to restore the product to normal operation.13. e. If the product has been dropped or the cabinet has been damaged.13. f. If the product exhibits a distinct change in performance, indicating a need for service.

First Edition for Customer
3/19
Product Specification
Record of Revision
Version & Date Page Old Description New Description
0.1 2014/07/16 All

Cover
Important safety insturctions
Record of Revision
Contents
1. Introduction
(1) Features
(2) Notice
(3) Check list
2. Installing the monitor
(1) Power & Signal connections
(2) Optional cable connections
(3) Dimensions
3. Using VGA LCD monitor
(1) Key definition
(2) Setup for Operation
(3) OSD menu system
4. Cleaning the monitor
5. Disclaimer
6. Trouble shooting
7. Specifications 19
06
07
08
08
09
10
17
17
18
05
05
05
05
06
06
Contents
4/19
Product Specification
No. Item Page
01
02
03
04

1. Introduction
1.1 Features
.High contrast color TFT-LCD Monitor support resolution up to 1920*1080.
.Power management system conforms to VESA DPMS and EPA Energy Star standards.
.Full consideration for touch screen installation and application.
.Universal Power adapter.
.Support DDC1 & DDC2B for Plug & Play compatibility.
.Advanced OSD control for picture quality adjustment.
.Detachable stand for wall-mounting adjustment.
.Heavy duty monitor with steel frame.
.Custom design by request.
1.2 Notice
Product Specification
.Do not touch the LCD panel surface with sharp or hard objects.
.Do not use abrasive cleaners, waxes or solvents for cleaning, use only a dry or damp,
.soft cloth.
.Use only with a high quality, safety-approved, AC/DC power adapter.
1.3 Check List
1 LCD monitor, 32.0" x1
2 Power cord x1
3 VGA Cable, L=1.8m x1
If any items are missing or damaged, please contact your dealer immediately.
Before using this monitor, please make sure that all the items listed below are present in yourpackage. Analog color TFT LCD monitor Accessory Box containing:
5/19

2. Installing the Monitor
The procedures for setting up your TFT LCD monitor are as followings:
2.1 Power & Signal connections
6/19
Product Specification
2.1.1 PowerSwitch off the power of your monitor and computer.The Power Switch is located on in the center of the monitor.2.1.2 Power cable connectionConnect the power cord to the AC outlet, and connect the power to the monitor through the AC/DCadapter.2.1.3 VGA cable connectionPlug 15-pin VGA signal cable to the VGA connector in the rear of PC system, and plug the other end tothe monitor. Secure cable connectors with screws.
2.2 Optional cable connectionsThe LCD monitor is designed to work with a variety of compatible video sources. Due to possibledeviations between these video sources, you may have to make adjustments to the monitor settingsfrom the OSD menu when switching between these sources.These adjustments are made from the OSD menu.

2.3 Dimensions
Product Specification
7/19

3. Using VGA LCD Monitor
3.1 Key Definition
Product Specification
OSD KEY Function
▼ ↓/ ← Down / value decrease
▲ ↑ / → Up / value increase
Auto Auto Adjust
Power Power ON / OFF
Menu Menu Select
8/19

3.2 Setup for Operation
Description
Contrast Adjust the contrast of the screen.
Brightness Adjust the brightness of the screen.
Color Adjust Choose "User color" can use to set value of Red/Green/Blue.
Color Temp Set color to 9300 , 6500 , 5500 , sRGB, User Color .
Clock Adjust frequency to fill display.
Phase Adjust the phase control of the image.
Gamma Adjust the value of GAMMA.
OSD H. Pos. Factory preset, OSD Horizontal Position.
OSD V. Pos. Factory preset, OSD Vertical Position.
OSD Timer It can adjust OSD display time.
Aspect Ratio Setting aspect ratio on or off.
Reset Return to factory original setting.
Image Setting
SharpnessThis functuon allows the user to optimize the sharpness of theimage.
OSD MENU
Product Specification
9/19
OSD Menu
LanguageSelect one of the 7 languages.(English, Français, Deutsch, Español, Japanese, Chinese Tradition,Chinese Simple)
Misc.
The OSD (On Screen Display) menu enables user to manipulate the image and settings OSD Mainmenu consists of source:
Auto AdjustmentAutomatically adjust the horizontal position, vertical position,horizontal size and phase Windows background or charactersshould display on your full screen after proceed this function.
Color

Product Specification
3.3 OSD menu system
[Color]
Press "+" to increase or "-" to decrease thebrightness, contrast or color adjust or color temp.
● Contrast
Adjust the contrast of the screen.
● Brightness
Adjust the brightness of the screen.
● Color Adjust
● Color Temp
Set color to 9300 , 6500 , 5500 , sRGB, USER .
(Notice: please do color temp setting first.After finish color temp, then do color adjust.)Choose "USER" option can set value ofRed/Green/Blue.
You can select the screen’s color level of the whitecolor field from the default color temperaturesettings.Also, you can fine tune the color temperature byUSER option if necessary.
10/19

[Image Setting]
You can adjust the value of screen quality
automatically.
Product Specification
● Clock
Adjust frequency to fill display.
● Phase
Adjust the phase control of the image.
● Gamma
Adjust the value of Gamma.
● Sharpness
This function allows the user to optimize
the sharpness of the image.
11/19

[Position]
You can adjust the screen's position
by horizontal and vertical manually.
Product Specification
● H. Position
Adjust the horizontal position of the
screen’s image.
● V. Position
Adjust the vertical position of the
screen’s image.
12/19

[OSD Menu]
You can adjust the OSD Menu screen's
position by horizontal and vertical
manually.
Product Specification
● OSD H. Pos.
Adjust the horizontal position of the
OSD Menu screen’s image.
● OSD V. Pos.
Adjust the vertical position of the
OSD Menu screen’s image.
● OSD Timer
Adjust OSD display time.
13/19

[Language]
Select one of the 7 languages.
Product Specification
14/19

[Misc.]
Product Specification
● Signal Source
The setting of singal input channel.
● Reset
Return to factory original setting.
15/19
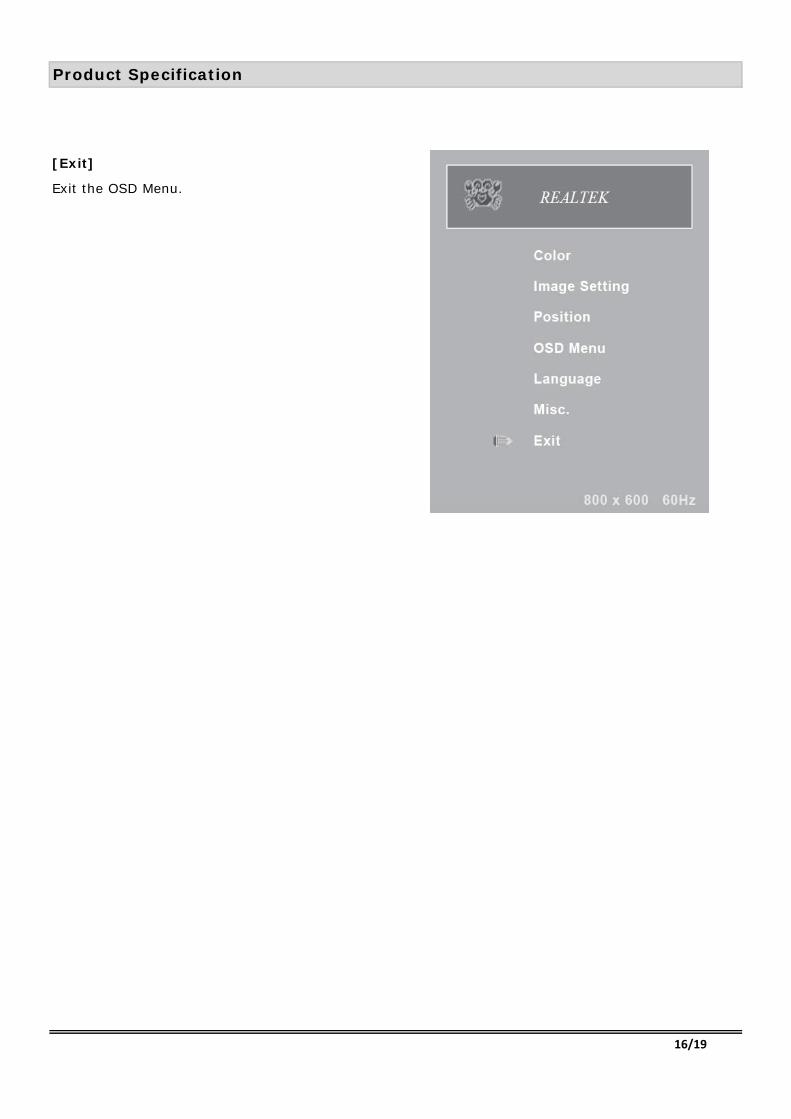
[Exit]
Exit the OSD Menu.
Product Specification
16/19

4. Cleaning the monitor
5. Disclaimer
17/19
Product Specification
1. Make sure the monitor is turned off.2. Never spray or pour any liquid directly onto the screen or case.3. Wipe the screen with a clean, soft, lint-free cloth. This removes dust and other particles.4. The display area is highly prone to be scratched. Do not use ketone-type material4. (ex. Acetone), Ethyl alcohol, toluene, ethyl acid or Methyl chloride to clean the panel.4. It may permanently damage the panel and void the warranty.5. If it is still not clean enough, apply a small amount of non-ammonia, non-alcohol based4. glass cleaner onto a clean, soft, lint-free cloth, and wipe the screen.6. Don't use water or oil directly on the monitor.4. If droplets are allowed to dry on the monitor, permanent staining or discoloration may occur.7. Cleaning Touch Screen: please use dry cloth or soft cloth with neutral detergent7. (after wring dry) or one with ethanol at cleaning.7. Do not use any organic solvent, acid or alkali solution.
We do not recommend using any ammonia or alcohol-based cleaners on the monitor screen orcase. Some chemical cleaners have been reported to damage the screen and/or case of themonitor.

6. Trouble shooting
The screen is notsynchronized
● Check if the signal cable is firmly seated in the socket.● Check if the output level matches the input level of your computer.● Make sure the signal timings of the computer system are within● the specification of the monitor.● If your computer was working with a CRT monitor, you should● check the current signal timing and turn off your computer before● you connect the VGA Cable to this monitor.
The position of the screen isnot in the center
Product Specification
If your monitor fails to operate correctly, consult the following chart for possible solution beforecalling for repairs:
Condition Check Point
The picture does not appear
● Check if the signal cable is firmly seated in the socket.● Check if the Power is ON at the computer● Check if the brightness control is at the appropriate position, not● at the Maximum .
● Adjust the H-position, and V-position, or Perform the Auto● adjustment.
The screen is too bright(too dark)
● Check if the brightness or contrast control is at the appropriate● position, not at the Maximum (Minimum).
The screen is shaking orwaving
● Press ”+” (the Auto - adjustment control) to adjust.● Moving all the objects, which emit a magnetic field, such as motor● or transformer, away from the monitor.● Check if the specific voltage is applied.● Check if the signal timing of the computer system is within● the specification of monitor.
18/19

7. Specifications
Item Specification
Panel Type 32.0-inch TFT LCD
Screen Diagonal 32.0-inch
Active Display Area (mm) 698.4 (H) x 392.85(V)
Pixel Pitch (um) 0.3637 (H) x 0.3637 (W)
Number of Pixels 1,920x1,080
Contrast Ratio 3000:1
Color Arrangement R.G.B. Vertical Stripe
Brightness (cd/m²) 350 cd/m²
Viewing Angle(Typ.) 89/89/89/89 (R/L/U/D)
Signal Connector 15 PIN D-Sub, DVI-D
Power Source AC100 ~ 240V, Universal +/- 10%
Power Management VESA DPMS Compliant
Product Specification
Operating Temperature 0 ~ +50°C
Storage Temperature -20 ~ +60°C
Plug & Play VESA DDC 1/2B
The LCD Products listed on this document are not suitable for use in aerospace, submarine, nuclearreactor control systems or life support systems. If customers intend to use these LCD products forthis type of mission critical applications they should contact our sales department for further input.
Suitable applications include, but are not limited to, the following: Computer and Office equipment,Communications equipment, Test and Measurement equipment, Machine tools, Industrial robots,Audio and Visual equipment.
*Specifications are subject to change without notice**
19/19