3rd topic creating flowchart and calendar
TRANSCRIPT

CREATING
FLOWCHATRS
AND
CALENDARSTOPIC NO 2

Process diagrams in Visio
Process diagrams are visualizations of any sort of step-by-step process. They are usually created as flowcharts, with shapes that represent steps in the process connected by arrows that indicate the next step.
Visio has a lot of process diagram templates, but they all can be put into one of two categories:
a. General purpose process diagrams
b. Process diagrams for specific methodologies

General purpose process
diagrams If you want to diagram a process and you
don’t have a specific methodology you
want to follow, one of these three
templates should work well:
Basic Flowchart
Cross Functional Flowchart
Work Flow Diagram

To find these templates:
Click the File tab.
Click New.
Click Flowchart.

Basic Flowchart
The Basic Flowchart template is useful for a
broad range of business processes, where
each step can be represented using simple
geometric shapes.
Cross Functional Flowchart
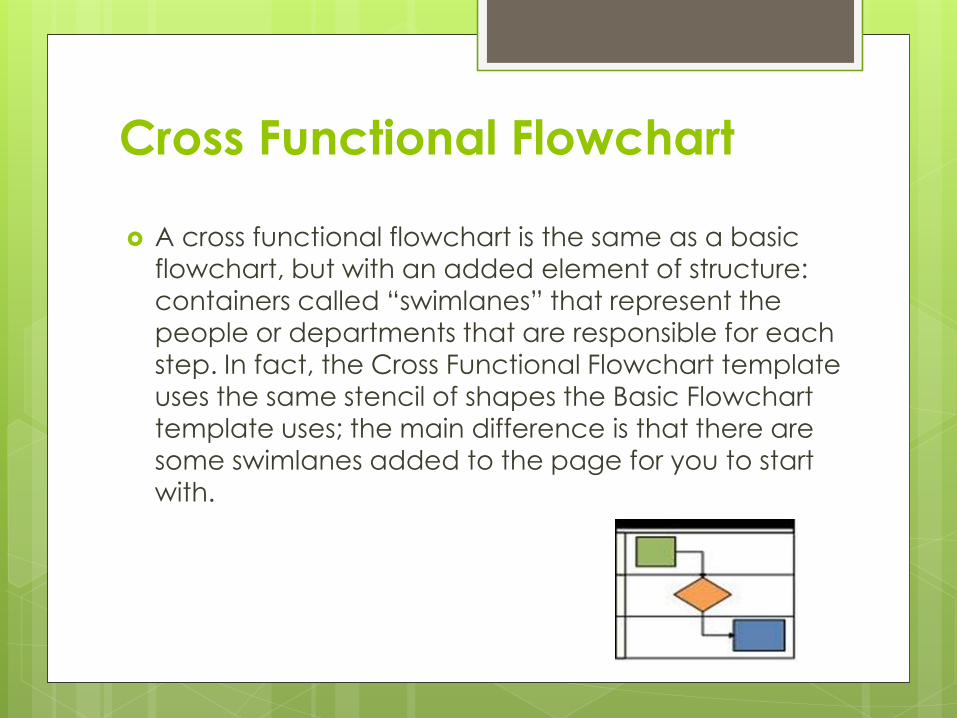
A cross functional flowchart is the same as a basic
flowchart, but with an added element of structure:
containers called “swimlanes” that represent the
people or departments that are responsible for each
step. In fact, the Cross Functional Flowchart template uses the same stencil of shapes the Basic Flowchart
template uses; the main difference is that there are
some swimlanes added to the page for you to start
with.

Work Flow Diagram
The Work Flow Diagram is a general-
purpose pictorial diagram. It has shapes
for many common business departments,
objects, and steps. You can use it instead
of the Basic Flowchart to show in a more
representational way how a process
moves through various stages.

Create a basic flowchart Flowcharts are diagrams that show the steps
in a process. Basic flowcharts are easy to create and, because the shapes are simple and visual, they are easy to understand.
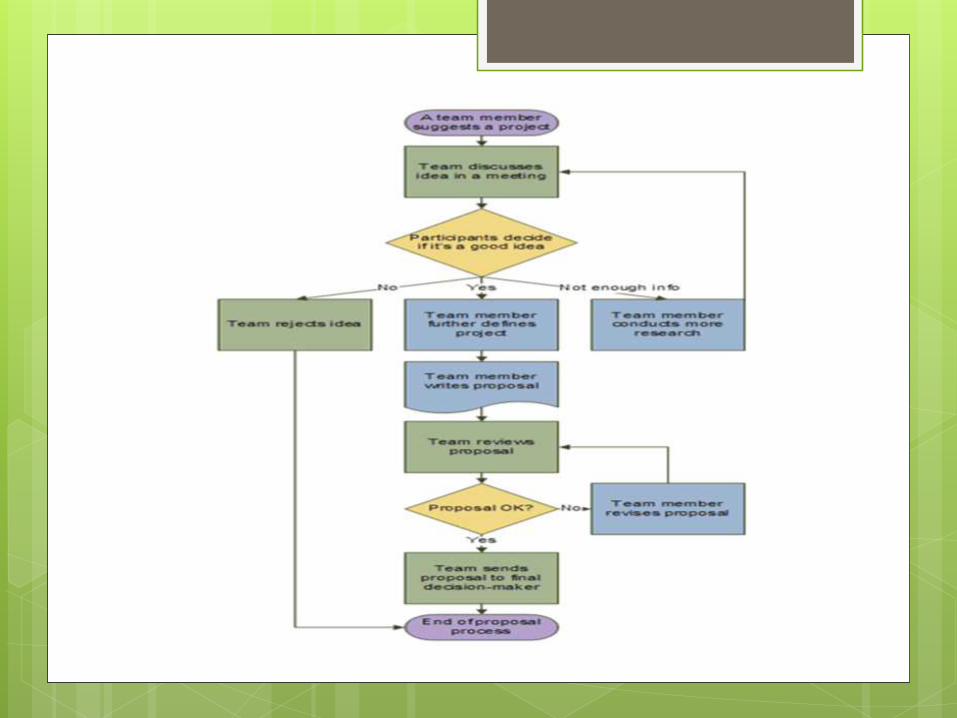
The Basic Flowchart template in Microsoft Visio 2010 comes with shapes that you can use to show many kinds of processes, and it is especially useful for showing basic business processes like the proposal development process shown in the following figure
In addition to the Basic Flowchart template, Visio provides a variety of templates for more specific kinds of diagrams, such as data flow diagrams, timelines, and software modeling.
What the flowchart shapes
represent
When you open the Basic Flowchart
template, the Basic Flowchart Shapes
stencil opens too. Each shape on the
stencil represents a different step in a
process.
Visio 2010 includes many other,
specialized stencils and shapes that you
can use in your flowchart diagram.

Shapes and their meanings
Start/End Use this shape for the first and
last step of your process.
Process This shape represents a step in
your process.
Subprocess Use this shape for a set of
steps that combine to create a sub-
process that is defined elsewhere, often
on another page of the same drawing.

Shapes and their meanings Document This shape represents a step that
results in a document.
Data This shape indicates that information is coming into the process from outside, or leaving the process. This shape can also be used to represent materials and is sometimes called an Input/Output shape.
On-page reference This small circle indicates that the next (or previous) step is somewhere else on the drawing. This is particularly useful for large flowcharts where you would otherwise have to use a long connector, which can be hard to follow.

Shapes and their meanings
Off-page reference When you drop this
shape onto your drawing page, a dialog
box opens where you can create a set of
hyperlinks between two pages of a
flowchart or between a sub-process
shape and a separate flowchart page
that shows the steps in that sub-process.
Create a flowchart
Click the File tab.
Don't see the File tab?
If you do not see the File tab, proceed to the next step in the procedure.
Click New, click Flowchart, and then under Available Templates, click Basic Flowchart.
Click Create .
For each step in the process that you are documenting, drag a flowchart shape onto your drawing.

Connect two shapes together
Connect the flowchart shapes in either of
the following ways.
a. On the Home tab, in the Tools group, click
Connector.
b. Drag from a connection point on the first shape to
a connection point on the second shape. The
connector endpoints turn red when the shapes are
connected.

Connect one shape to many from a single connection point. By default, connectors are set to Right-
Angle so that if you connect a single point on one shape to three other shapes it will look like the figure below.
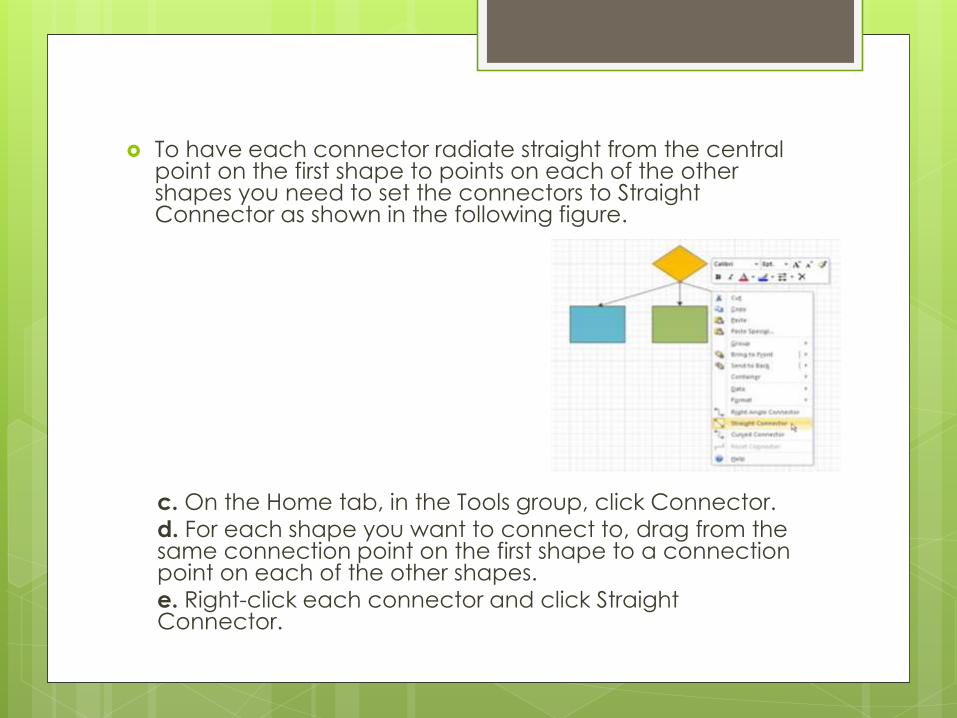
To have each connector radiate straight from the central point on the first shape to points on each of the other shapes you need to set the connectors to Straight Connector as shown in the following figure.
c. On the Home tab, in the Tools group, click Connector.d. For each shape you want to connect to, drag from the same connection point on the first shape to a connection point on each of the other shapes.e. Right-click each connector and click Straight Connector.
Contd.. To return to normal editing, on the Home tab,
in the Tool group, click Pointer Tool.
To add text to a shape or connector, select it, and then type. When you are finished typing, click on a blank area of the page.
To change the direction of a connector's arrow, select the connection, and then in the Shape group, click the arrow to the right of Line, point to Arrows, and select the arrow direction that you want.

Print a large flowchart
The easiest way to print a flowchart that is larger than your printer paper is to print it onto multiple pieces of paper and then tape the pieces together.
Before you start to print, it's important to make sure that the drawing page, as it appears in Visio, contains the whole flowchart. Any shapes that hang off the edge of the Visio drawing page will not print.

To print a large flowchart, do
the following:
With your flowchart open, on the Design
tab, in the Page Setup group, click Size,
and select Fit to Drawing.
Click the File tab.
Click Print, and then click Print Preview.
Dotted lines show
the drawing prints
onto separate sheets.

To print your flowchart onto
multiple pieces of paper, do
the following:
In Print Preview, in the Print group, click Page Setup. On the Print Setup tab, in the Printer paper box, select
the paper size you want if it isn't already selected. Click OK. In the Preview group, click Single Tile to see how your
drawing will print on each sheet. (You can switch between pages by clicking Next Tile or Previous Tile.)
When you are satisfied with how your drawing looks, in the Print group, click Print.
After the drawing is printed, you can trim the margins, overlap the pages, and tape them together.
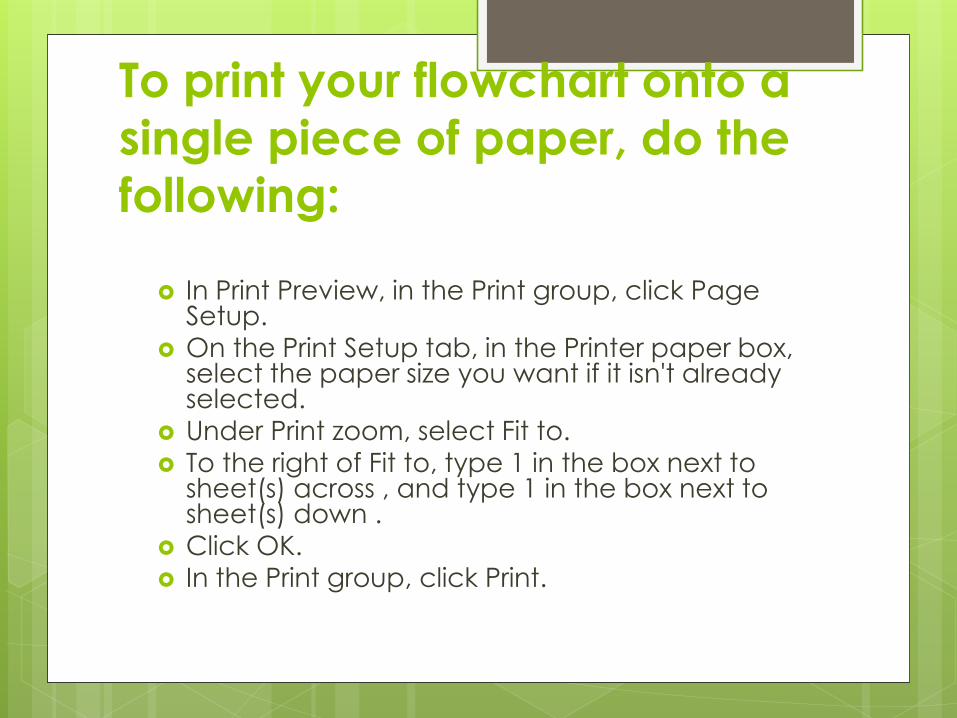
To print your flowchart onto a
single piece of paper, do the
following:
In Print Preview, in the Print group, click Page Setup.
On the Print Setup tab, in the Printer paper box, select the paper size you want if it isn't already selected.
Under Print zoom, select Fit to.
To the right of Fit to, type 1 in the box next to sheet(s) across , and type 1 in the box next to sheet(s) down .
Click OK. In the Print group, click Print.
Create a Calendar in Visio
The calendar template in Visio includes shapes
for creating several types of calendars:
Daily calendar
Weekly or multi-week calendar
Monthly calendar
Yearly calendar
You can add appointments, events, and
calendar art shapes to mark important days.
Create a calendar
Click the File tab, click New, and then click the Schedule category.
Double-click the Calendar template.
From Calendar Shapes, drag the shape for the type of calendar you want to create onto the page.
In the Configure dialog box that appears, specify the calendar options you want, and then click OK.

Mark important days
Add or change an appointment
From Calendar Shapes, drag the Appointment shape onto a calendar day.
In the dialog box, specify the appointment options, and then click OK.
The appointment is associated with the day and moves with the day if you reposition it. To change an appointment, right-click it, and then click Configure.
Mark important days
Add or change a single-day or multi-day event
From Calendar Shapes, drag the Multi-day
event shape onto the day on which the event
begins.
In the Configure dialog box, specify the
options and then click OK.
The event is associated with the day and moves
with the day if you reposition it. To change an
event, right-click it, and then click Configure.

Mark important days
Add calendar art
From Calendar Shapes, drag a shape,
such as Important, Celebration, or
Pushpin, onto the day you want to mark.
Calendar art doesn't move if you change
the date. However, if you delete the
calendar, the calendar art shape is also
deleted.

Mark important days
Add a thumbnail image of the previous or
next month
From Calendar Shapes, drag the
Thumbnail month shape onto your
drawing page.
In the Shape Data dialog box, specify the
calendar options that you want, and then
click OK.