5cm fold line square cushion: this refers to the two squares on the fabric allow for front and back...
TRANSCRIPT
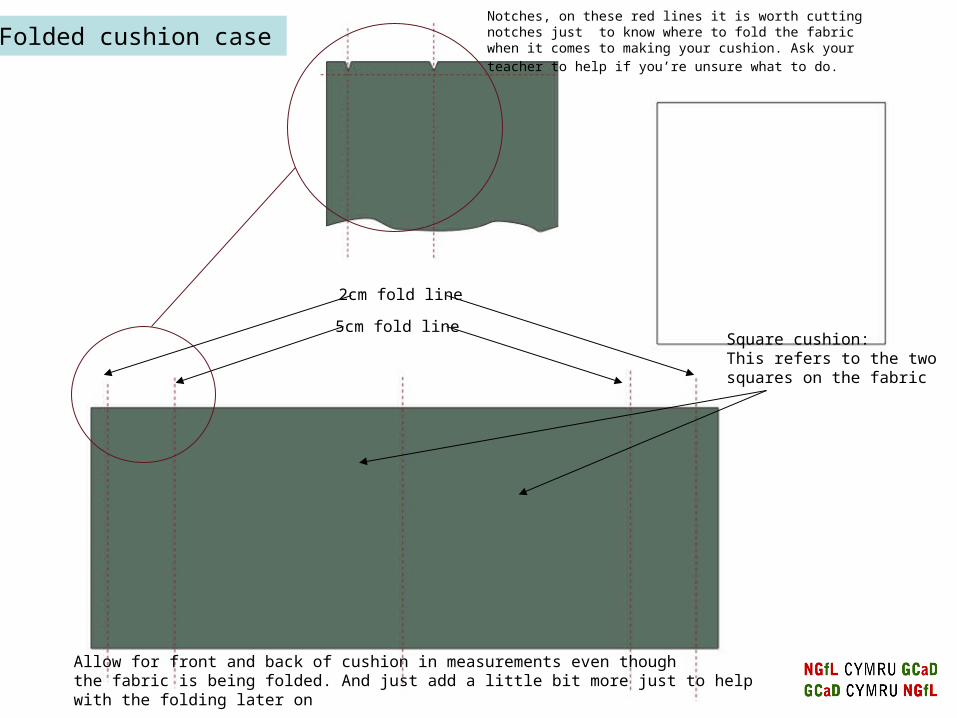
5cm fold lineSquare cushion:This refers to the two squares on the fabric
Allow for front and back of cushion in measurements even though the fabric is being folded. And just add a little bit more just to help with the folding later on
Folded cushion caseNotches, on these red lines it is worth cutting notches just to know where to fold the fabric when it comes to making your
cushion. Ask your teacher to help if you’re unsure what to do.
2cm fold line
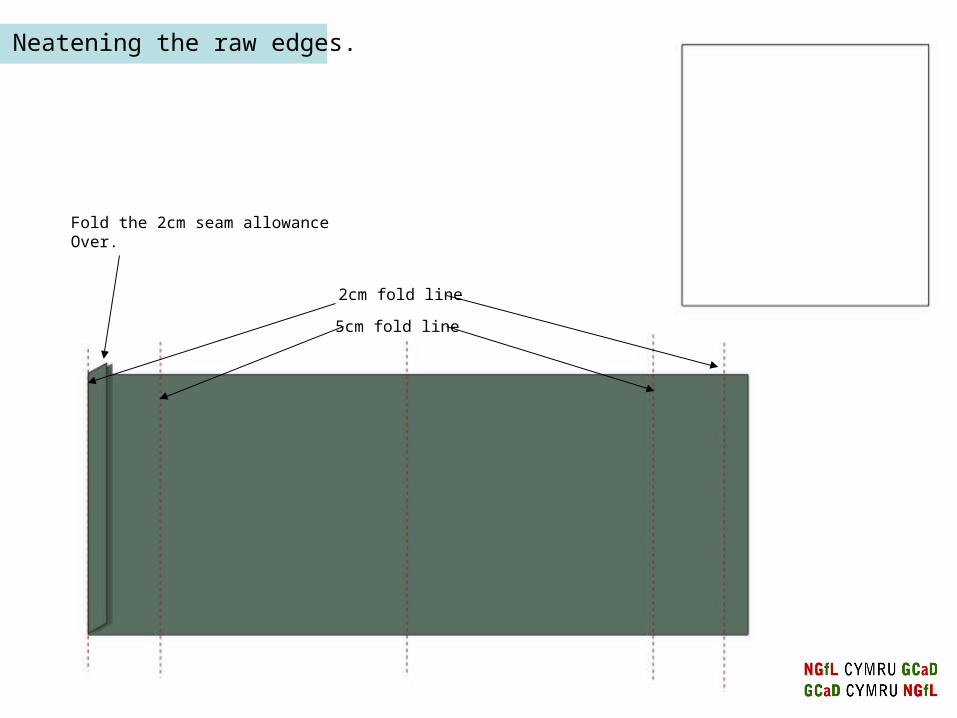
Fold the 2cm seam allowance Over.
5cm fold line
2cm fold line
Neatening the raw edges.

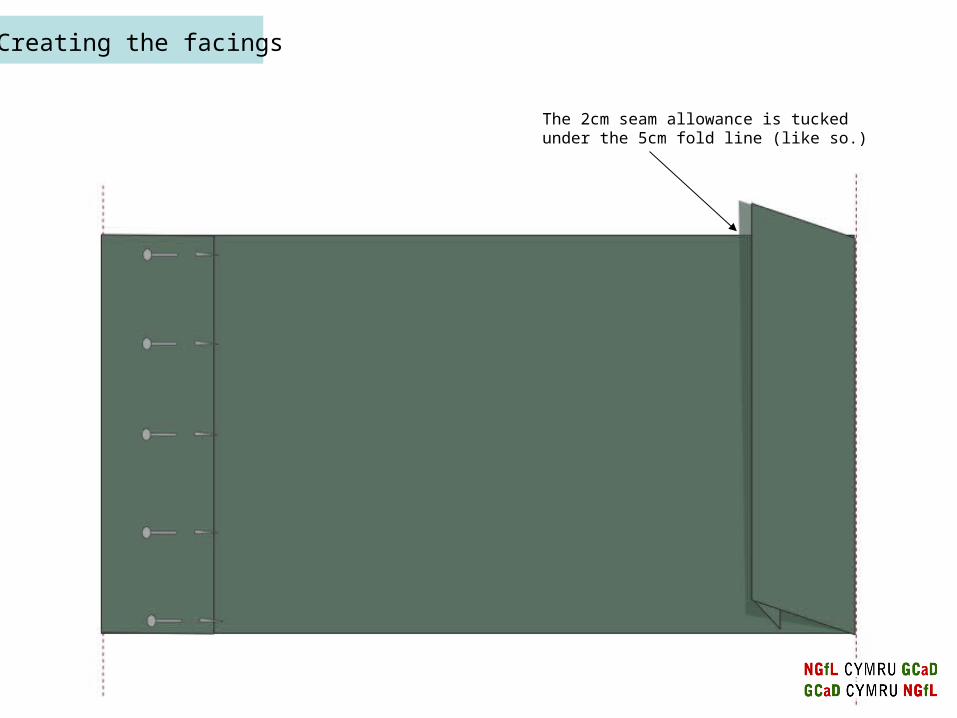
The 2cm seam allowance is tucked under the 5cm fold line (like so.)
5cm fold line
2cm fold line
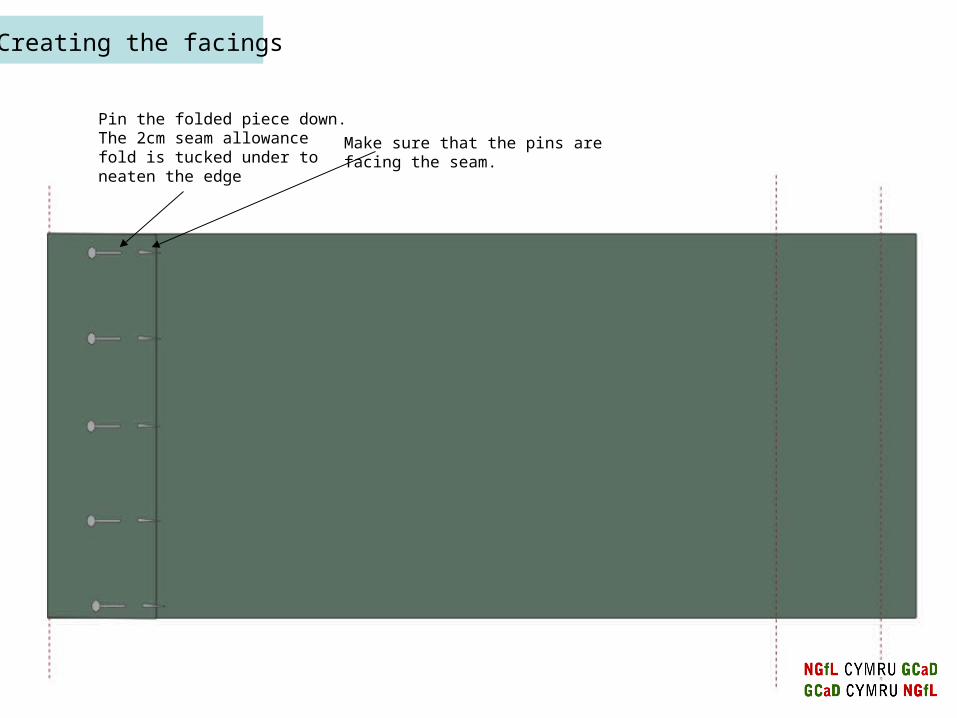
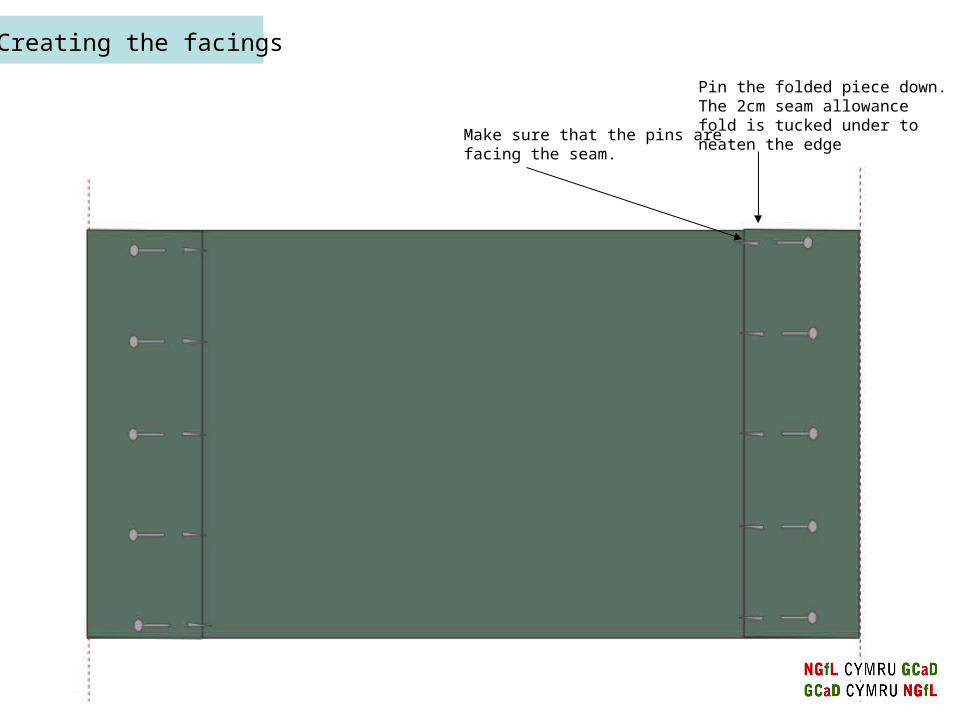
Pin the folded piece down.The 2cm seam allowance fold is tucked under to neaten the edge
Make sure that the pins arefacing the seam.
Creating the facings
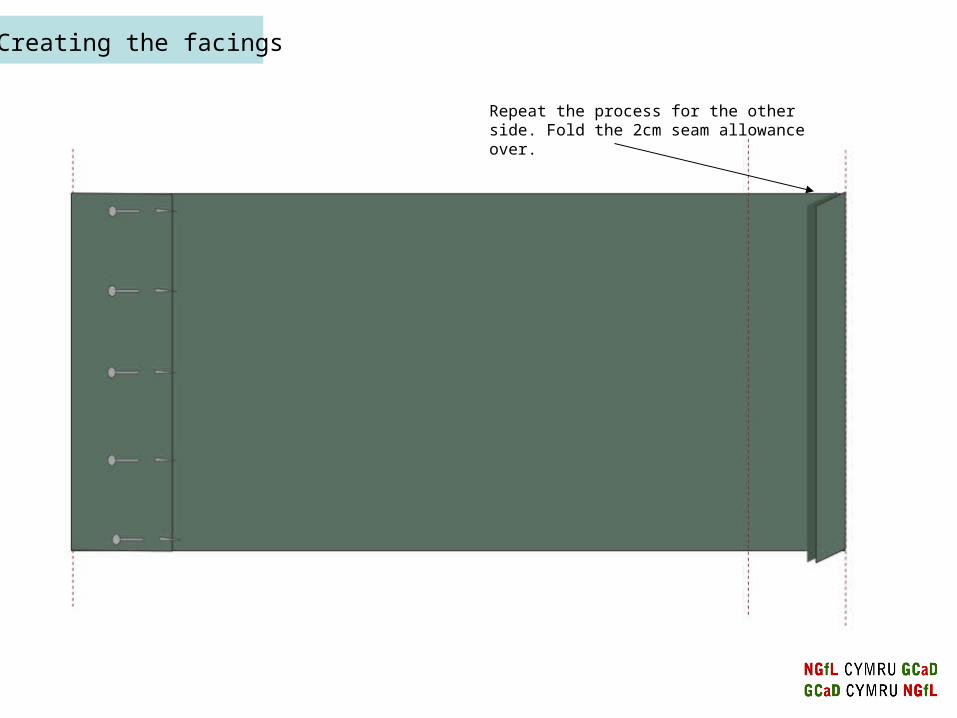
Repeat the process for the other side. Fold the 2cm seam allowance over.
Creating the facings
The 2cm seam allowance is tucked under the 5cm fold line (like so.)
Creating the facings
Pin the folded piece down.The 2cm seam allowance fold is tucked under to neaten the edge
Make sure that the pins arefacing the seam.
Creating the facings

Putting the edge of the sewing machine foot on the edge of the fold and sewing
Sew the facing down using straight stitch.
Tip: take out the pins as you go along.
Sewing the ‘facings’ down

The cushion is placed in thecentre of the fabric (illustrated here by the yellow square) the fabric to the sides are to be folded in.
Red line indicates front of the cushion
Front of cushion
The sides here are then used to make up the back of the cushion
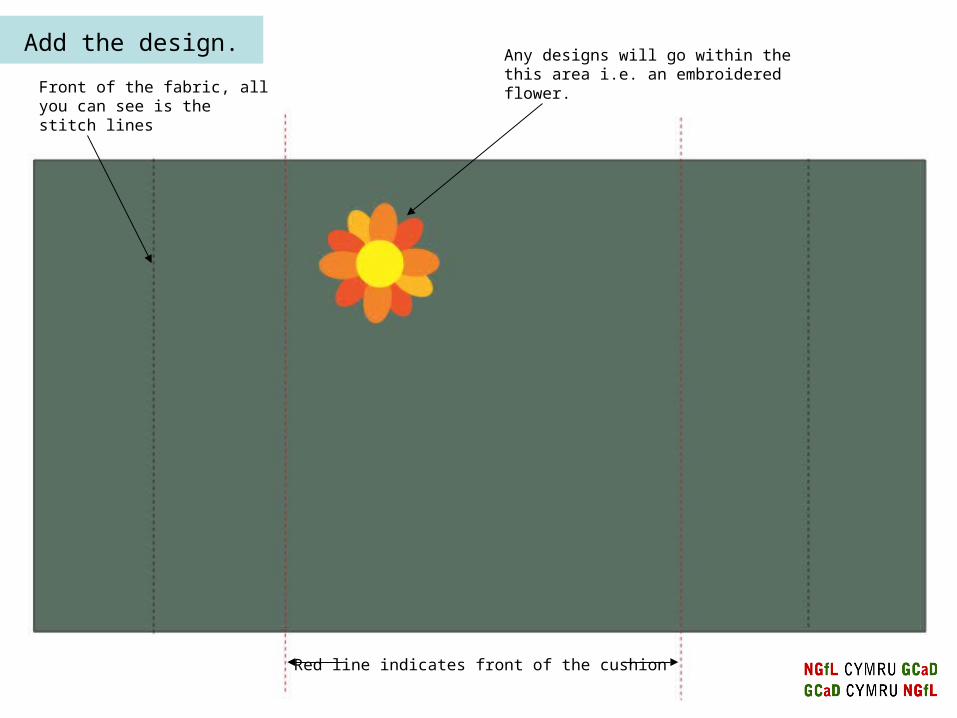
Any designs will go within thethis area i.e. an embroidered flower. Front of the fabric, all
you can see is the stitch lines
Red line indicates front of the cushion
Add the design.
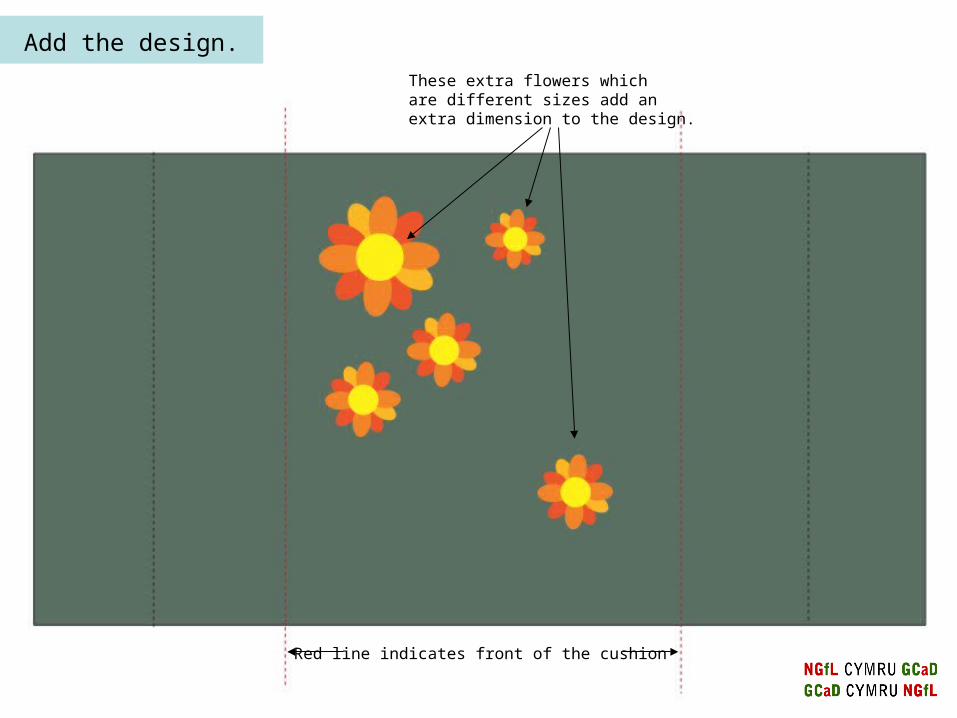
These extra flowers which are different sizes add an extra dimension to the design.
Red line indicates front of the cushion
Add the design.
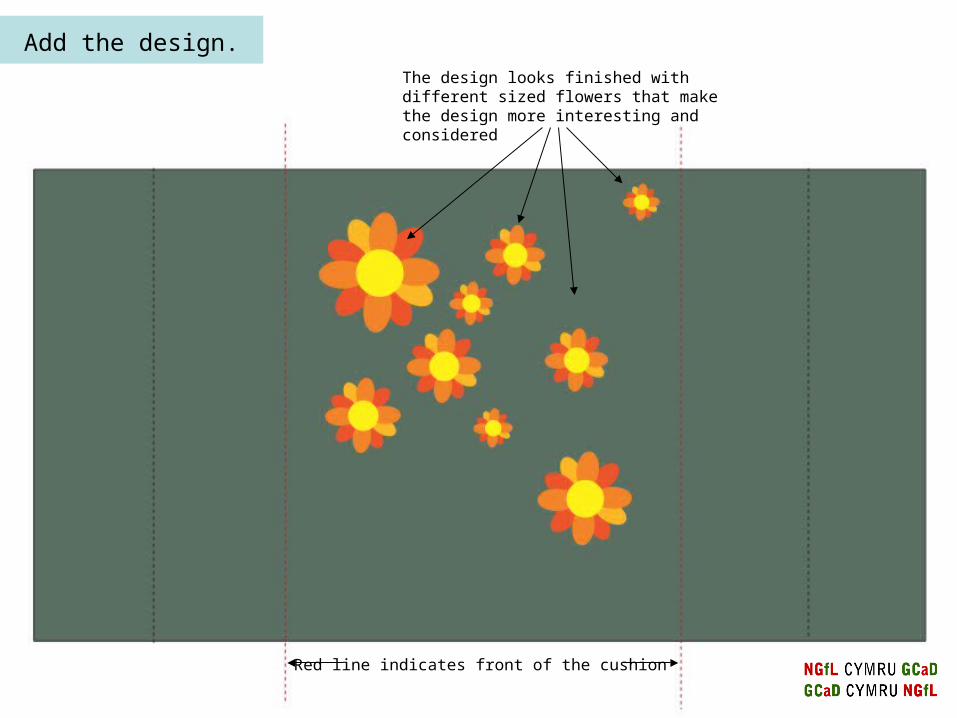
The design looks finished with different sized flowers that make the design more interesting andconsidered
Red line indicates front of the cushion
Add the design.
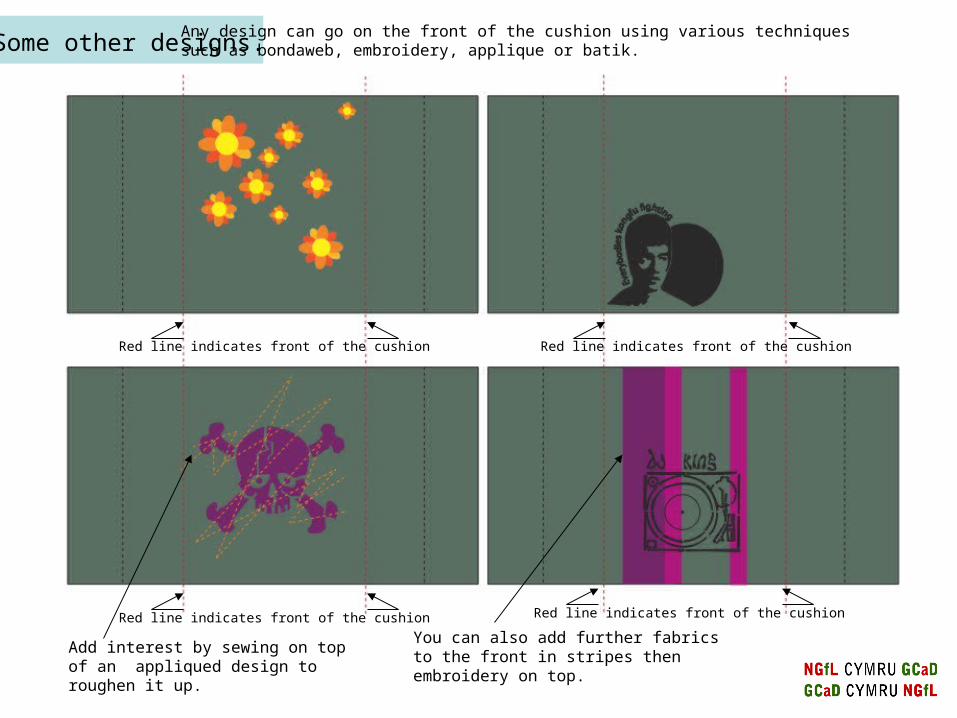
Any design can go on the front of the cushion using various techniques such as bondaweb, embroidery, applique or batik.
Red line indicates front of the cushion Red line indicates front of the cushion
Red line indicates front of the cushion Red line indicates front of the cushion
You can also add further fabrics to the front in stripes then embroidery on top.
Add interest by sewing on top of an appliqued design to roughen it up.
Some other designs.

Back of fabric, showsthe folded side
Creating the front and back of cushion.
Red line indicates front of the cushion

Creating the front and back of cushion.
Back of fabric, showsthe folded side
Iron the fabric to keep the fold nice and flat before you pin the sides down. MAKE sure the iron is clean and at the right temperature for the fabric you’re using or it may melt or ruin your work.
Iron: this is hot so be careful when using it!!
Red line indicates front of the cushion
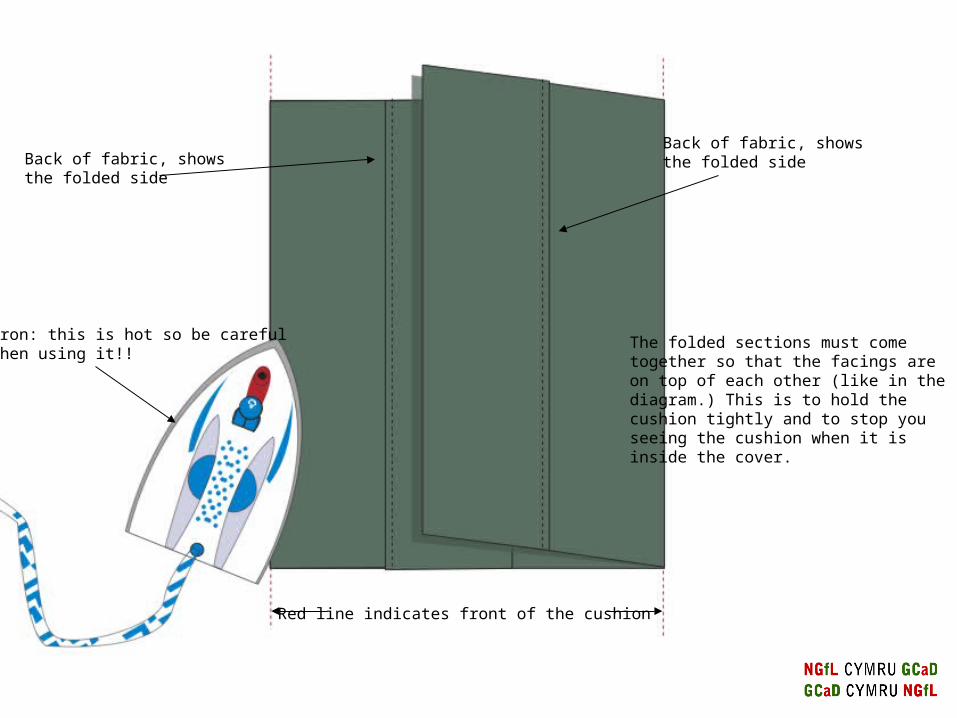
Back of fabric, showsthe folded side
The folded sections must come together so that the facings are on top of each other (like in the diagram.) This is to hold the cushion tightly and to stop youseeing the cushion when it is inside the cover.
Iron: this is hot so be careful when using it!!
Back of fabric, showsthe folded side
Red line indicates front of the cushion

Back of fabric, showsthe folded side
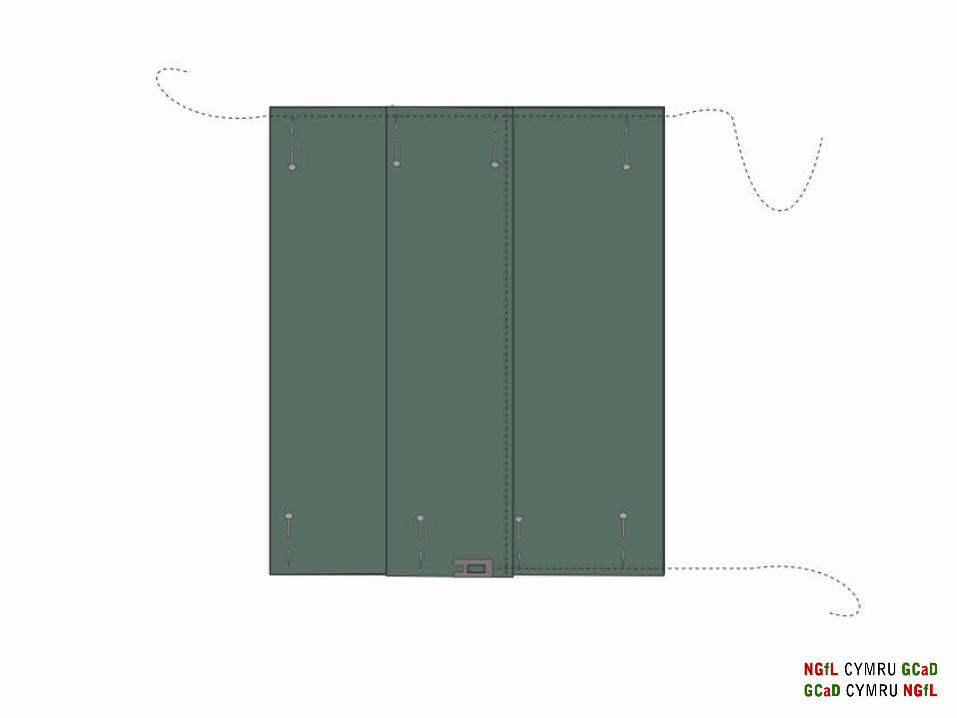
Folding both sides down and ironing. Place your pins facingthe seam ensuring that you pin down the facings so that they don’t move when your sewing.
Iron: this is hot so be careful when using it!!
Back of fabric, showsthe folded side
Red line indicates front of the cushion
Pins facing the seam.

Machine foot is placed on fabricwith seam allowance of 1.5cm
Be careful going over this part as it is very thick watch you don’t get wobbly.
You may find it easier to take thepins out as you go along

Zigzag stitch/overlocking must be on the edge of the fabric.
To neaten up your raw edges nowyou can either zig zag stitch over the edge or ask your teacher to overlockthe edges to stop the fabric from fraying
Don’t forget to do both sides

Give the fabric a last iron and stuff your cushion inside. Well done you’ve finished!
Now all you have to do is turn the cushion cover the right way roundby going through the opening and you’ve finished all the construction.
Th
e o
pe
nin
g is
he
re

This cushion looks amazing in my front room!!