7 & 8.1 driver installation for (mpcie) mi ni pci …€¦ · table of contents table ......
TRANSCRIPT
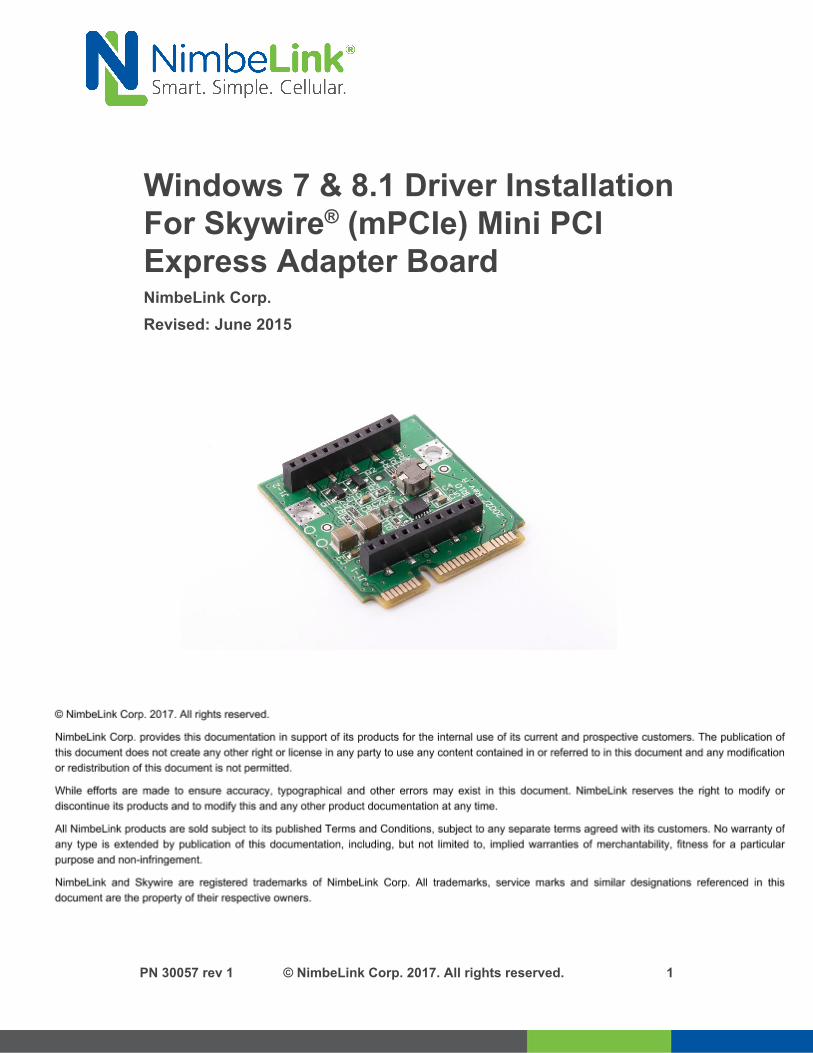
Windows 7 & 8.1 Driver Installation For Skywire® (mPCIe) Mini PCI Express Adapter Board NimbeLink Corp. Revised: June 2015
PN 30057 rev 1 © NimbeLink Corp. 2017. All rights reserved. 1

Table of Contents Table of Contents 2
Introduction 3 1.1. Applies to the Following Part Numbers 3 1.2. Prerequisites 3
Download and Install the Drivers 4 2.1. Overview 4 2.2. Download the Skywire USB Drivers 4 2.3. Unzip the Drivers 5 2.4. Install the Drivers 7
Set Up the Modem Connection – Windows 7 11 3.1. Overview 11 3.2. Enable the Mobile Broadband Connection 11
Set Up the Modem Connection – Windows 8.1 13 4.1. Overview 13 4.2. Enable the Connection 13
Troubleshooting 15 5.1. Set the APN manually 15
PN 30057 rev 1 © NimbeLink Corp. 2017. All rights reserved. 2

1. Introduction 1.1. Applies to the Following Part Numbers
Orderable Device Description Carrier Network Type
NL-AB-MCPIE Mini-PCI Express Adapter Board Any Any
NL-SW-1xRTT-A 2G 1xRTT Aeris CDMA
NL-SW-1xRTT-S 2G 1xRTT Sprint CDMA
NL-SW-1xRTT-V 2G 1xRTT Verizon CDMA
NL-SW-GPRS 2G GPRS
Any GSM (AT&T,
T-Mobile, etc.) GSM
NL-SW-EVDO-A 3G EVDO, GPS, GLONASS Aeris CDMA
NL-SW-EVDO-V 3G EVDO, GPS, GLONASS Verizon CDMA
NL-SW-HSPAP 3G HSPA+
Any GSM (AT&T,
T-Mobile, etc.) GSM
NL-SW-HSPAPE 3G HSPA+, European Version Any EU GSM GSM
NL-SW-HSPAPG 3G HSPA+, GPS, GLONASS
Any GSM (AT&T,
T-Mobile, etc.) GSM
NL-SW-LTE-TSVG LTE without Fallback, GPS, GLONASS Verizon CDMA
NL-SW-LTE-TNAG LTE with HSPA+ Fallback, GPS, GLONASS
Any GSM (AT&T,
T-Mobile, etc.) GSM
NL-SW-LTE-TEUG LTE with HSPA+ Fallback, GPS, GLONASS, EU Any EU GSM GSM
1.2. Prerequisites
This document assumes you have completed the initial setup of your modem and development kit. If you have not completed those steps, refer to the Skywire® Development Kit User Manual and complete the modem setup before proceeding.
PN 30057 rev 1 © NimbeLink Corp. 2017. All rights reserved. 3
2. Download and Install the Drivers 2.1. Overview
Skywiremodems have the ability to add mobile network data connectivity to multiple devices. Now, with our Mini PCI Express (mPCIe) Adapter Board, that connectivity comes to computers that have a mPCIe present on the motherboard. This includes laptop computers and desktop computers. Note: For Section 2, driver download and installation is very similar between Windows 7 and 8.1. The screenshots below are of Windows 7, but apply to Windows 8.1 as well.
2.2. Download the Skywire USB Drivers To download the USB driver for your specific modem, please visit the “Development Documentation” section of the NimbeLink page for your modem at www.NimbeLink.com, or consult the following table:
Part Number Description URL
NL-SW-1xRTT-A 2G 1xRTT
http://nimbelink.com/2g-cdma-1xrt
t/
NL-SW-1xRTT-S 2G 1xRTT
http://nimbelink.com/2g-cdma-1xrt
t/
NL-SW-1xRTT-V 2G 1xRTT
http://nimbelink.com/2g-cdma-1xrt
t/
NL-SW-GPRS 2G GPRS
http://nimbelink.com/skywire-gsmg
prs/
NL-SW-EVDO-A 3G EVDO, GPS, GLONASS
http://nimbelink.com/skywire-evdo
/
NL-SW-EVDO-V 3G EVDO, GPS, GLONASS
http://nimbelink.com/skywire-evdo
/
NL-SW-HSPAP 3G HSPA+ http://nimbelink.com/skywire-hspa/
NL-SW-HSPAPE 3G HSPA+, European Version http://nimbelink.com/skywire-hspa/
NL-SW-HSPAPG 3G HSPA+, GPS, GLONASS http://nimbelink.com/skywire-hspa/
NL-SW-LTE-TSVG LTE without Fallback, GPS, GLONASS
http://nimbelink.com/skywire-cellul
ar-modem-lte/
NL-SW-LTE-TNAG LTE with HSPA+ Fallback, GPS, GLONASS
http://nimbelink.com/skywire-cellul
ar-modem-lte/
NL-SW-LTE-TEUG LTE with HSPA+ Fallback, GPS, GLONASS, EU
http://nimbelink.com/skywire-cellul
ar-modem-lte/
The download is titled “Skywire Windows 7 – Drivers & Guides”. Click the link to download the ZIP file and save the download to your computer.
PN 30057 rev 1 © NimbeLink Corp. 2017. All rights reserved. 4
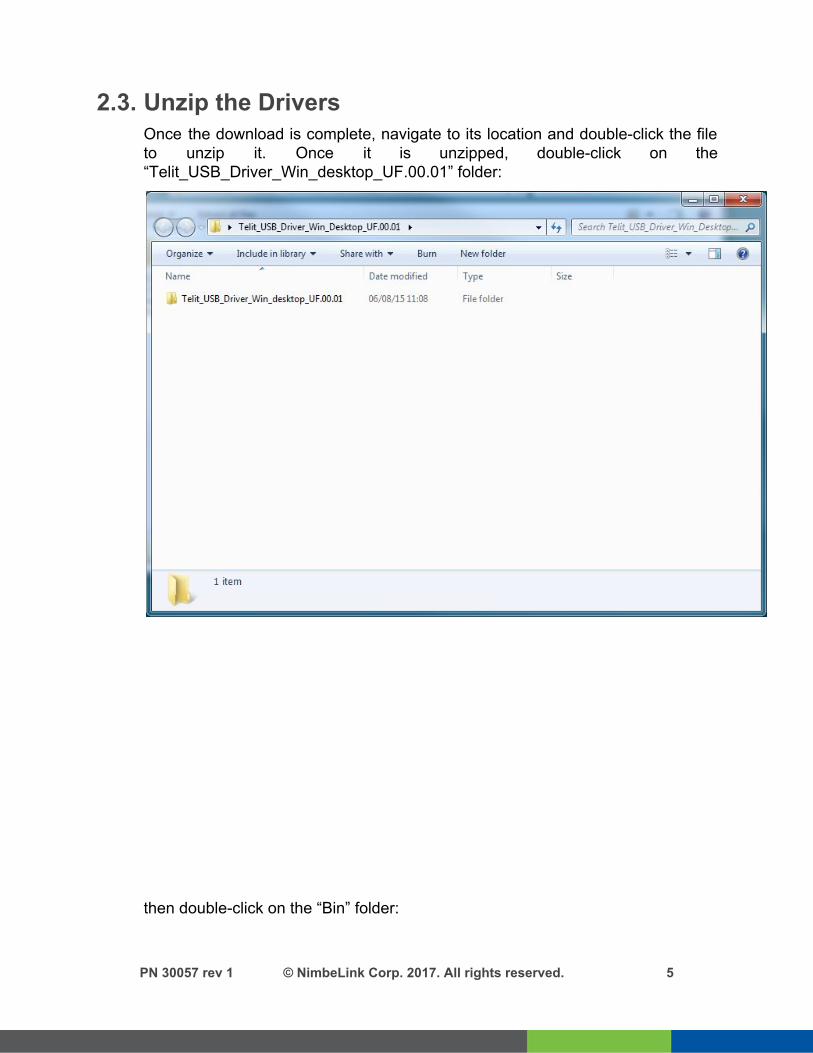
2.3. Unzip the Drivers Once the download is complete, navigate to its location and double-click the file to unzip it. Once it is unzipped, double-click on the “Telit_USB_Driver_Win_desktop_UF.00.01” folder:
then double-click on the “Bin” folder:
PN 30057 rev 1 © NimbeLink Corp. 2017. All rights reserved. 5
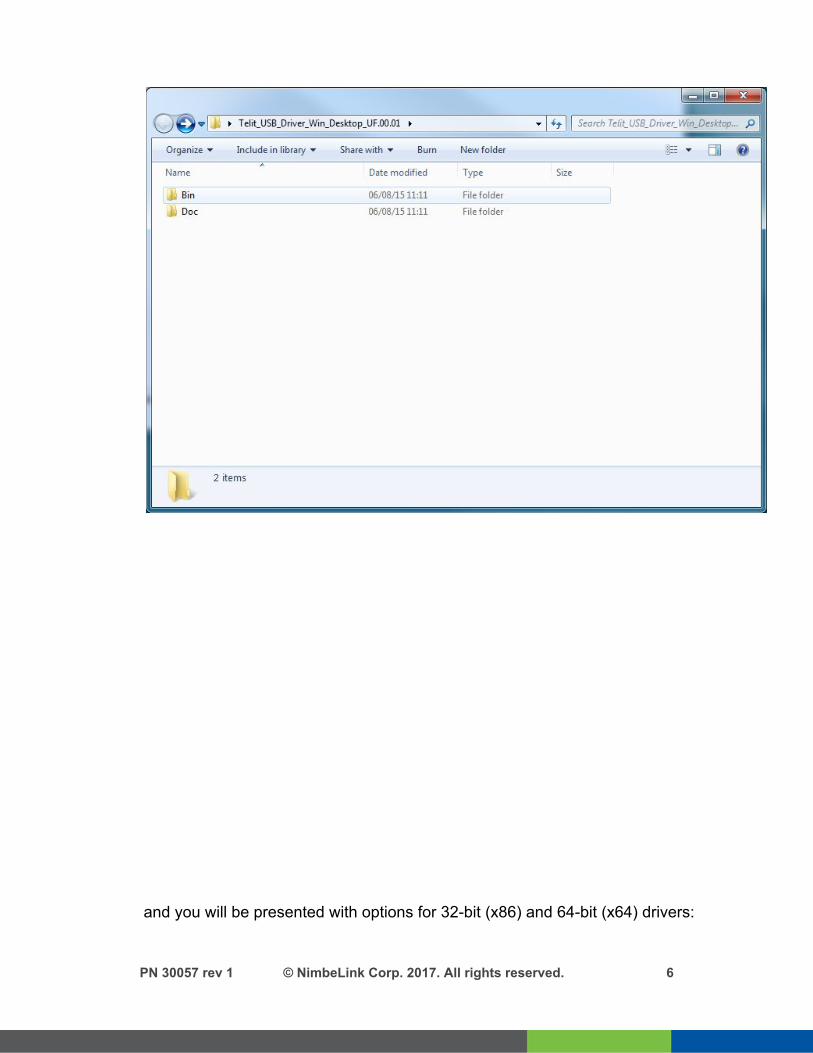
and you will be presented with options for 32-bit (x86) and 64-bit (x64) drivers:
PN 30057 rev 1 © NimbeLink Corp. 2017. All rights reserved. 6

Double-click the type of drivers that you need, unzip them to the same directory, and then double click on the unzipped application: either TelitModulesDrivers_x86 or TelitModulesDrivers_x64. You may get a dialog window that pops up, asking if you would like to run this program, and click “Yes” or “Allow”.
2.4. Install the Drivers You will be presented with the Telit Install Wizard. On the first screen, click “Next”:
PN 30057 rev 1 © NimbeLink Corp. 2017. All rights reserved. 7

and you will be presented with a screen that will ask which module you would like to install drivers for. If you know the particular module you will be using, you can select it. Otherwise, select “ALL”, and click “Next”:
PN 30057 rev 1 © NimbeLink Corp. 2017. All rights reserved. 8
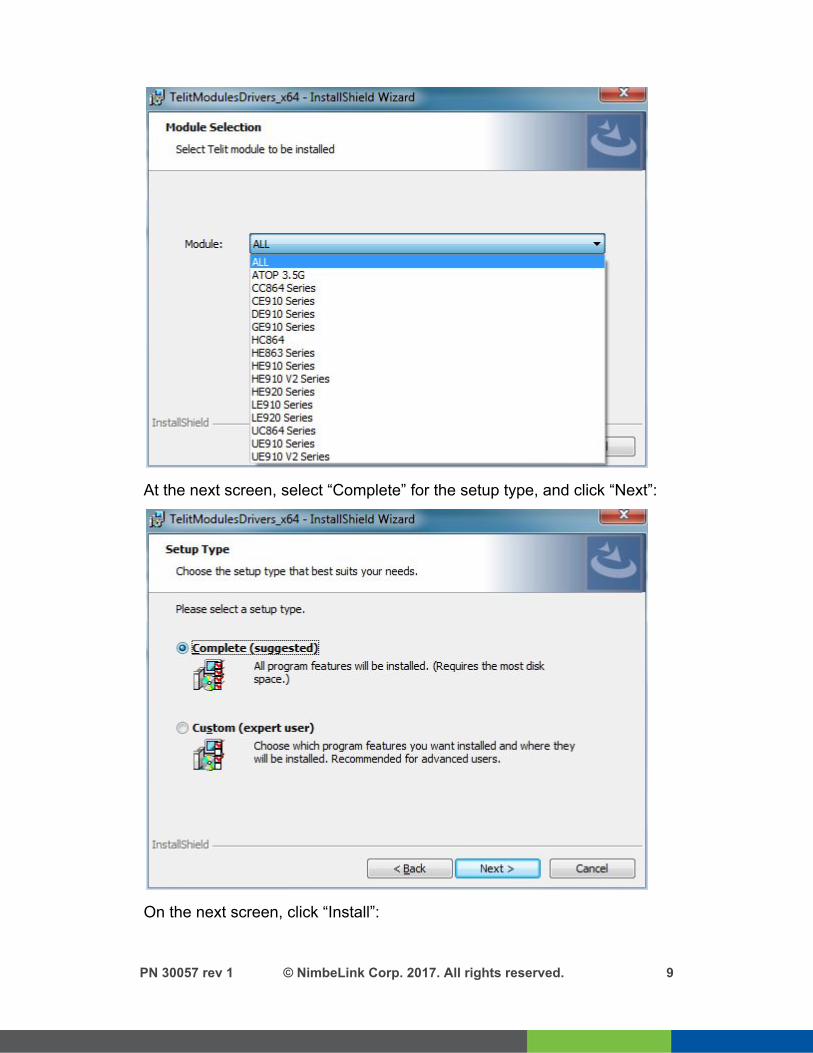
At the next screen, select “Complete” for the setup type, and click “Next”:
On the next screen, click “Install”:
PN 30057 rev 1 © NimbeLink Corp. 2017. All rights reserved. 9

There will be a dialog box that pops up. If prompted, type in your administrator password, and click “Yes”. After a short time, the drivers will install:
PN 30057 rev 1 © NimbeLink Corp. 2017. All rights reserved. 10

3. Set Up the Modem Connection – Windows 7 3.1. Overview
Now that you have the modem and the drivers installed, you should have an icon in your System Tray that says “Wireless Connections Are Available”. Click on it, and you should have something similar depending on the modem you’ve installed:
3.2. Enable the Mobile Broadband Connection Click your Mobile Broadband Connection (in this case, “Verizon”), and then click connect.
PN 30057 rev 1 © NimbeLink Corp. 2017. All rights reserved. 11
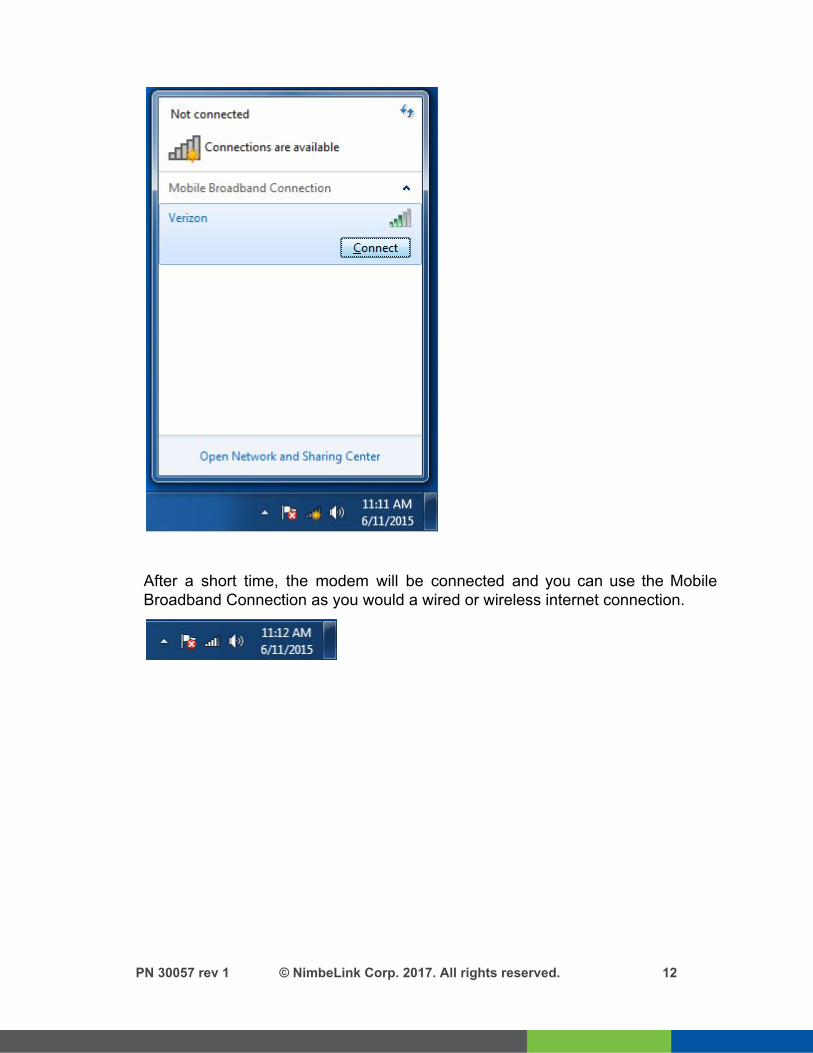
After a short time, the modem will be connected and you can use the Mobile Broadband Connection as you would a wired or wireless internet connection.
PN 30057 rev 1 © NimbeLink Corp. 2017. All rights reserved. 12
4. Set Up the Modem Connection – Windows 8.1 4.1. Overview
Setting up the modem connection is very similar to Windows 7. The process is the same, but looks different in Windows 8.1. In the System Tray, there will be an icon that says connections are available:
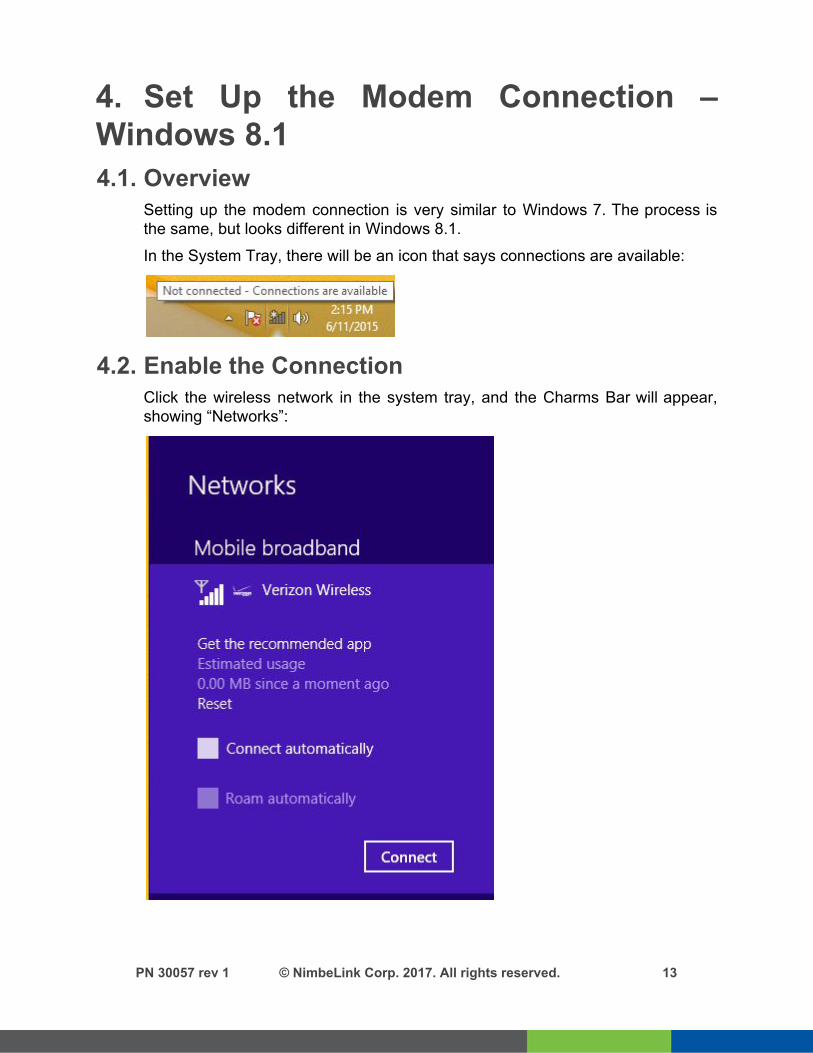
4.2. Enable the Connection Click the wireless network in the system tray, and the Charms Bar will appear, showing “Networks”:
PN 30057 rev 1 © NimbeLink Corp. 2017. All rights reserved. 13

Click “Connect”, and after a short time the Charms Bar will disappear and the modem will be connected to the network:
PN 30057 rev 1 © NimbeLink Corp. 2017. All rights reserved. 14

5. Troubleshooting 5.1. Set the APN manually
Right-click on your Mobile Broadband Connection, and click “Properties”:
On the dialog windows that appears, click the “Profile” tab, and in the APN field type in your APN:
PN 30057 rev 1 © NimbeLink Corp. 2017. All rights reserved. 15
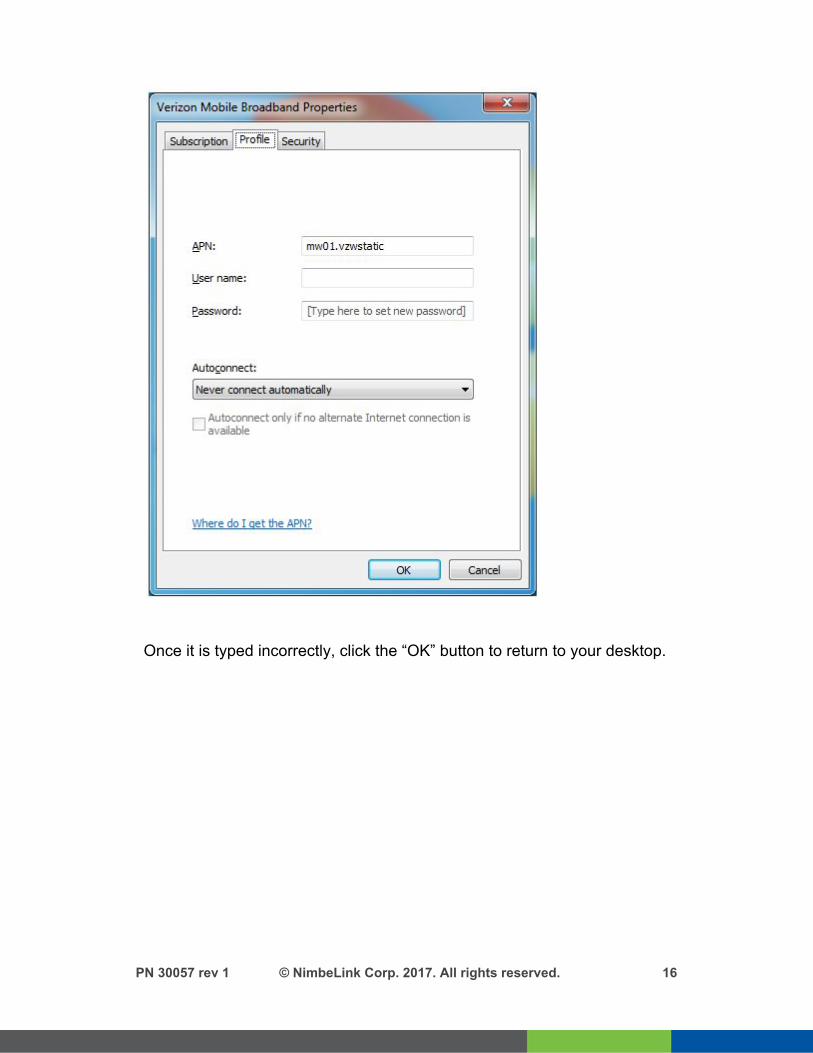
Once it is typed incorrectly, click the “OK” button to return to your desktop.
PN 30057 rev 1 © NimbeLink Corp. 2017. All rights reserved. 16