a bonsai close-up on forest plantings by pauline muth bonsai close-up on forest plantings by pauline...
TRANSCRIPT

A Bonsai Close-up on Forest Plantings by Pauline Muth
American Larch Chinese Elm American and Korean Hornbeam Bonsai forests create a wonderful view of real or imaginary forests in perfect miniature. Like all bonsai, a photograph of a bonsai forest would appear to be an actual growing forest. The forest may be a small composition of three trees or a dense forest of over 100 trees. Each case, regardless of size, shows one of an infinite variety of group compositions open to the creating artist. The basic rules of bonsai are applied to achieve well-proportioned forests. Forest design is greatly aided by observation of forest groupings created by nature. Close inspection of groups of trees that please the eye leads to several findings that can be applied to bonsai forests: • The silhouette of the group is a scalene triangle with the largest caliper (diameter) tree at
the apex. • The trees vary in caliper with the heavier trunks located near the main (largest) or number
one tree and/or placed as leaders of nearby separate groups in the same planting. • The youngest trees are found at the edges of the forest as if they have sprouted there in the
warm sunshine. • The distance between trees in the group varies giving a natural appearance rather than a
planned grid planting. • Trees are not placed directly behind or beside another tree when viewed from the direct
front or side of the container. • Trees in a forest can all grow perpendicular to the soil or can be angled to achieve a
particular effect. (e.g. Trees bending outward away from larger trees or from the forest’s edge in search of sunlight.)
• Leaves, and therefore branches, can only grow where sunlight penetrates the forest canopy. • The group follows the branch selection rules we know for singular trees but the rules are
applied to the group as a whole rather than each tree as an individual. • Older trees have the largest spacing between the branches that are lower on the tree trunk.
Younger trees are fuller. The fullness of the branches is dependent on the sunlight received. The spacing of the trees affects the amount of light that penetrates into the forest and is reflected in the branch development.
• Negative spaces add to the balance and beauty of the composition. • Groups of trees have different feelings of space based on the observer’s viewpoint. They can
be viewed as if the observer in standing within the group looking towards the outer edge or viewed from a distance looking into the forest. Hence the terms near view forest and far view or distant forest.
• Varied topography adds to the visual composition. • Forests have seasonal beauty. e.g. deciduous forests create winter beauty when the branch
ramification is well developed. Flowers and fruits can also give seasonal interest. • Mixed forests look the best when a few trees of another species accent the main species.
Small complimentary plants or shrubs used sparingly can add appeal. A mixed species planting is one of the most difficult to achieve. All species in the tray must share the same growing requirements.
• Careful attention must be paid to the leaf size of the trees chosen to be in the forest. Small leaf sizes produce a more realistic and proportional appearance.
• Ground coverings exist due to various light conditions. No ground covering is uniform throughout a forest. A variety of mosses/lichens mixed with bare areas give an established appearance to the planting.
Materials needed to create a single species forest ◊ Shallow tray with good drainage holes large enough for the size forest you are creating.
Select the color and finish using single bonsai guidelines. Be sure to use a “hardy tray” if you are using species that will be frozen in winter. A training tray can be made from treated lumber, cedar or redwood to use as the trees develop. The entire forest can then be transferred to an appropriate bonsai tray in the future.
◊ Plastic craft needlepoint screening large enough to cover the entire inside bottom of the tray.
◊ Bonsai soils and possibly bonsai muck if high elevation will be created. ◊ Bonsai wire of varying gauges to shape trees and to secure trees to the plastic mesh insert. ◊ An assortment of trees of varying calipers. Heights will be adjusted when placed in the
tray. Often trees that do not have enough development for single bonsai are used in forest plantings. Whips (young tree seedlings) are also used. They develop quickly and allow the artist good control over branch development.
◊ Accessory plants, mosses, lichens as desired. ◊ Bonsai tools including: chopstick, concave cutters, scissors, wire cutters, brush,
permanent ink marker, paper and pencil. ◊ Large work area equipped with water. ◊ Transplanting liquid and rooting hormone. Steps in Creating a Single Species Forest 1. Lay out all materials on the table. Take special care to prevent drying out if the plants
being used are bare root trees. 2. Cut a single piece of plastic needlepoint screen to fit the inside bottom of the tray. It
should be placed so that it will not curl up in the tray. 3. Line up your trees from largest caliper to smallest. 4. Wire the main trunk of each tree. 5. Check the root system. Spreading fibrous roots will develop over time. To promote their
development, cut any taproots while preserving the finer lateral roots. Again be careful to protect roots from drying out. Bare root trees can individually be enclosed with damp soil in a newspaper wrapped root ball. Trees that were already grown in pots must be removed from the pot and wrapped. The root ball should be placed in damp paper or a small plastic bag tied with scrap wire at this point. This will make it easier to plan placement in the tray later.
6. Arrange the wrapped trees in your tray. The largest caliper tree will be the main tree and must be placed first. Its height will be the tallest. Both whip material and developed trees have the height adjusted after planting. When placing the trees keep these principles in mind:
• The number one (main) tree may be planted over a ball of muck to add interest and height.
• Trees are placed nearby or in distant groups in decreasing order of each diameter. • The distances between each tree must vary. Do not place trees directly in front,
behind, or to the side of other trees. • Determine the view the forest will offer. If you are portraying the forest as if you are
close to it, put larger trees in the front. For a distant view, put larger tree towards the back.
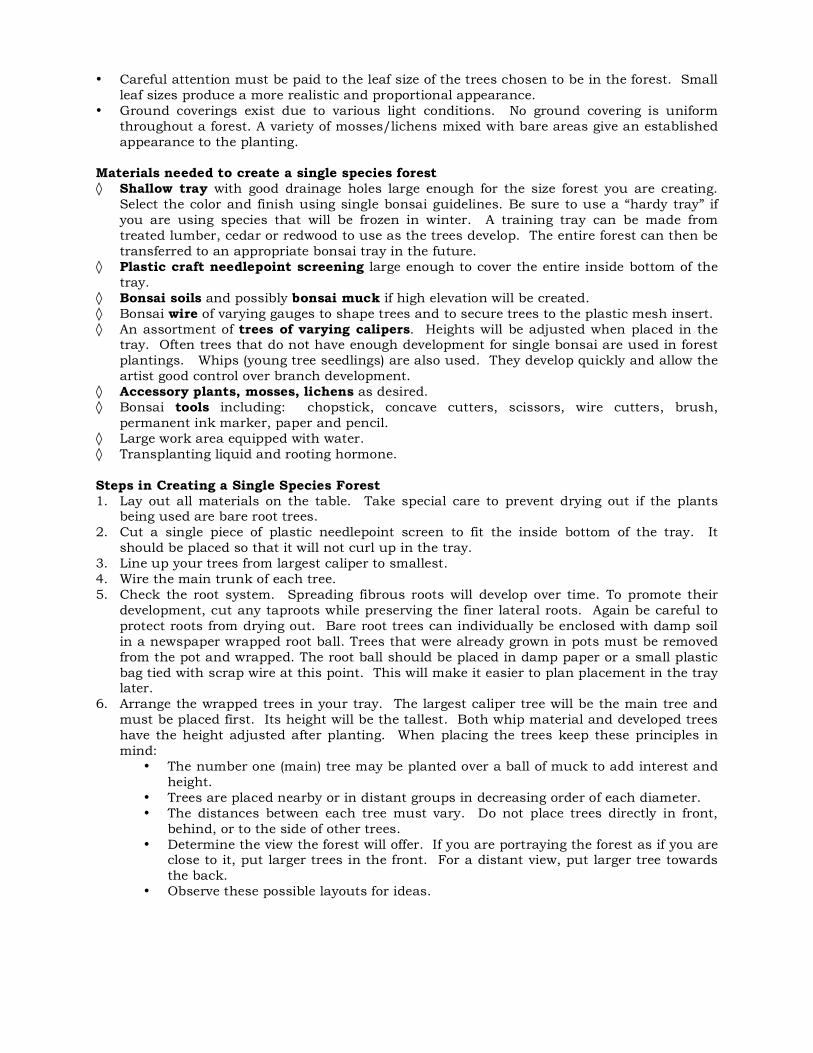
• Observe these possible layouts for ideas.
Using paper dots to plan 7. After developing placements, draw a placement diagram like the examples given, and then
remove the trees. As you remove the trees use a marker to indicate where each tree will be placed directly on the plastic grid.
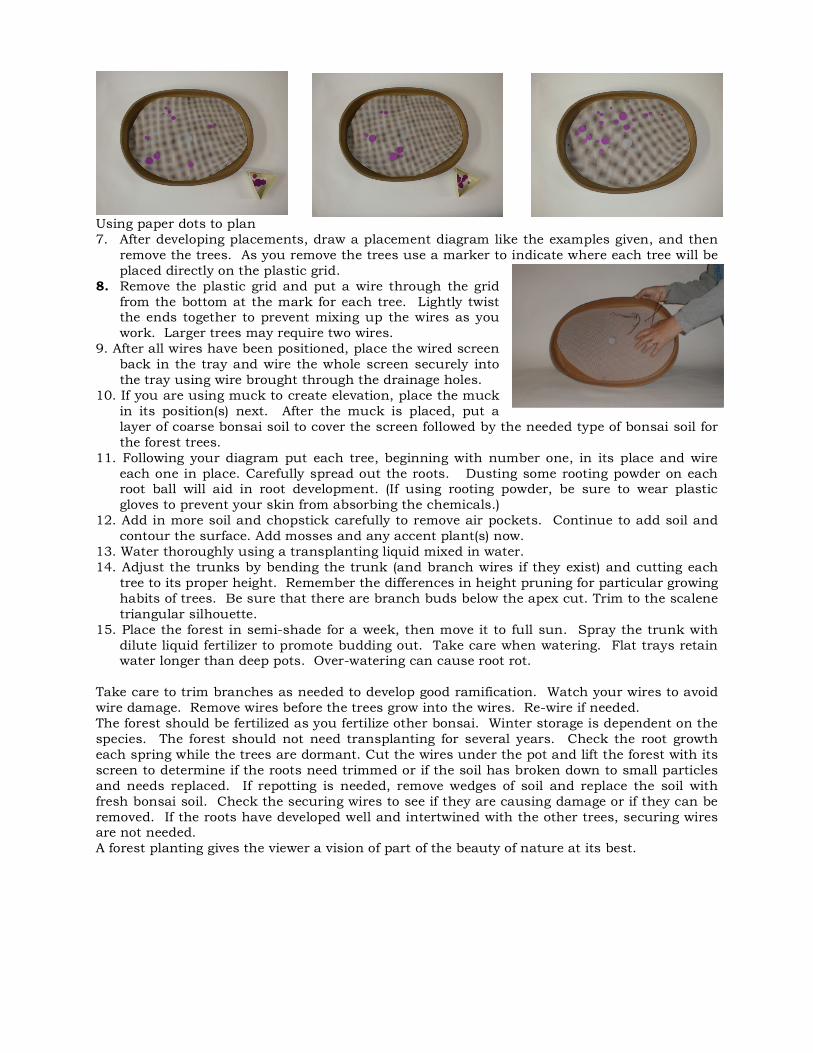
8. Remove the plastic grid and put a wire through the grid from the bottom at the mark for each tree. Lightly twist the ends together to prevent mixing up the wires as you work. Larger trees may require two wires.
9. After all wires have been positioned, place the wired screen back in the tray and wire the whole screen securely into the tray using wire brought through the drainage holes.
10. If you are using muck to create elevation, place the muck in its position(s) next. After the muck is placed, put a layer of coarse bonsai soil to cover the screen followed by the needed type of bonsai soil for the forest trees.
11. Following your diagram put each tree, beginning with number one, in its place and wire each one in place. Carefully spread out the roots. Dusting some rooting powder on each root ball will aid in root development. (If using rooting powder, be sure to wear plastic gloves to prevent your skin from absorbing the chemicals.)
12. Add in more soil and chopstick carefully to remove air pockets. Continue to add soil and contour the surface. Add mosses and any accent plant(s) now.
13. Water thoroughly using a transplanting liquid mixed in water. 14. Adjust the trunks by bending the trunk (and branch wires if they exist) and cutting each
tree to its proper height. Remember the differences in height pruning for particular growing habits of trees. Be sure that there are branch buds below the apex cut. Trim to the scalene triangular silhouette.
15. Place the forest in semi-shade for a week, then move it to full sun. Spray the trunk with dilute liquid fertilizer to promote budding out. Take care when watering. Flat trays retain water longer than deep pots. Over-watering can cause root rot.
Take care to trim branches as needed to develop good ramification. Watch your wires to avoid wire damage. Remove wires before the trees grow into the wires. Re-wire if needed. The forest should be fertilized as you fertilize other bonsai. Winter storage is dependent on the species. The forest should not need transplanting for several years. Check the root growth each spring while the trees are dormant. Cut the wires under the pot and lift the forest with its screen to determine if the roots need trimmed or if the soil has broken down to small particles and needs replaced. If repotting is needed, remove wedges of soil and replace the soil with fresh bonsai soil. Check the securing wires to see if they are causing damage or if they can be removed. If the roots have developed well and intertwined with the other trees, securing wires are not needed. A forest planting gives the viewer a vision of part of the beauty of nature at its best.