a complete guide to ceiling speakers
TRANSCRIPT

// A Complete Guide to Ceiling Speakers
A COMPLETE GUIDE TO CEILING SPEAKERS

GUIDE CONTENTS1. Introduction ........ 3
1.1. Are ceiling speakers worth it? ........ 4
2.Introducing Ceiling Speakers ........ 5
2.1. Basic Set Up ........ 6
2.2. A bit about Ceiling Speakers ........ 9
2.3. Placement Considerations ........ 10
3.What to look for ........ 12
3.1. How will they fit ........ 13
3.2. Room Size ........ 14
3.3. Speaker Placement ........ 15
3.4. Ceiling Speaker Terms ........17
3.4.1. Basic Features ........ 17
3.4.2 Advanced Features ........ 18
4.How to choose an Amplifier ........ 20
4.1. Amplifier Classifications ........ 21
4.2. How to connect an Amplifier ........ 22
4.3. How to choose the correct Amplifier ........ 23
5.Wiring and Installation ........ 27
5.1. Making Connections ........ 28
5.2. Common Questions ........ 29
6. Get in touch ........ 31
2
//Contents

At Smart Home Sounds, we’re passionate about filling homes with the joy of music. Whether it’s your favourite movie or a song that takes you back to a certain time or place, audio can conjure up emotions for us that deserve to be honoured with the best quality speakers. IN
TRO
DU
CTI
ON
ABOUT US
// LOREM IPSUM// Introduction

Embarking on a ceiling speaker installation project may seem like a daunting prospect. Unlike traditional bookshelf or stand-alone speakers, ceiling speakers require more leg work but we absolutely believe it’s worth it. The end result is a sleek and beautiful home or workplace audio solution which can even add value to your property.
Ceiling speakers are a long-term audio solution and will provide you with room-filling sound for decades to come. They are a great solution for those planning a new-build or renovation as preparations can be made ahead of time when walls or ceilings are down. Once wired, ceiling speakers are very simple to connect up to an amplifier, meaning you will not need to access the wiring again.
We naturally associate speakers with music, but installing ceiling speakers can take care of your TV audio as well. Ceiling speakers can be incorporated into a surround sound set-up to add depth to all the bangs and crashes of your favourite blockbusters. This makes them a great answer to your family audio needs.
Do ceiling speakers sound like the right path for you? This informative guide aims to walk through the ceiling speaker process, from choosing the correct speakers to installing them and finally on to the best part, using them for all your audio needs!
4
ARE CEILING SPEAKERS WORTH IT?
// Introduction

INTR
OD
UC
ING
CEI
LIN
G
SPEA
KER
S WHY AND HOW
// Introducing Ceiling Speakers
Daunted by the prospect of a ceiling speaker installation?We’re here to help.

Though ceiling speaker installation requires some forethought, the actual application of the wiring is very simple. The main consideration when installing wiring for a speaker is whether you’re going for a stereo pair or one single-stereo speaker in that spot. Stereo speakers, which are designed to be used as part of a pair, will only need one length of cable wired to them whereas single-stereo speakers, used individually, will need to run two. These speaker types are covered in more detail in our ‘Ceiling Speaker Terms’ section.
The speaker cable we recommend for most installations is 16 gauge 2-core speaker cable. This cable has 2 cores (hence the name), meaning it is essentially 2 wires housed inside a single plastic sheath. The cable contains both a red and black wire. You simply connect the red wire to the red inputs on the speaker and amp, then do the same with the black wire into the black inputs.
For installations in which the cable runs will be longer than 35m, we recommend upgrading to 14 gauge 2-core speaker cable. This will connect in the same way as 16 gauge but will better carry the power of the amp over longer distances.
If you do not wish to run two lengths of 2-core cable in single-stereo speaker installations, you could upgrade and run one length of 4-core cable instead. The rule regarding 16 and 14 gauge cable would still apply.
Ceiling speakers have binding posts supplied for each connection meaning you will not need to buy any additional connections for the ceiling speaker end. Depending on the amp you use, you may need to purchase banana plugs or binding posts for cable connection. It is possible to weld the wiring to the connection points on an amp, but this is not a commonly used solution due to its permanence. Some amps will come with the necessary banana plugs for solid connection.
6
BASIC SET-UP// Introducing Ceiling Speakers

The above diagram provides a basic guide as to how ceiling speakers would be wired back to a Sonos Amp, but this basic set-up is true for whatever Amp you’re using (unless it’s an internal Bluetooth amplifier - pictured next). Of course, if using 4-core speaker cable with a single-stereo speaker it would not be necessary to run two lengths of cable. The hardest part of any ceiling speaker installation is usually running cable through the ceiling cavity, so if you aren’t confident contact a trusted electrician for this project.
7
// Introducing Ceiling Speakers

This set up is true for bluetooth speakers which are amplified by an internal unit, meaning they only need to be wired back to mains power. This is a good option for those looking to avoid cutting holes in their ceiling as often the wiring can be connected back to an existing lighting circuit to avoid hassle. As explained in our How to choose an Amplifier section, however, there are drawbacks to Bluetooth operated systems meaning we tend to recommend Wifi when possible. Internal amplifiers tend to be less powerful than external ones.
8
// Introducing Ceiling Speakers

A BIT ABOUT CEILING SPEAKERSHOW ARE THEY POWERED?Ceiling speakers are passive, meaning they need to be connected to a power source.
Some speakers may have an inbuilt amplifier, but even these will need to be connected to mains electricity. This means you
will need to be able to access your ceiling cavity to run at least one cable (the power cable) in all installations.
If it’s possible financially, opt for a model which would require you to use an external amplifier as this will always give you more bass and a better sound.
9
HOW DO I CONTROL THEM?
There are many ways in which ceiling speakers can be controlled. This is mainly dictated by what you are powering your speakers with. Most modern systems such as Sonos or Bluesound are connected to your speakers via wifi and controlled through a dedicated app. This allows for the the amplifiers to be located out of sight. Some ceiling speaker systems such as Lithe audio are Bluetooth or wifi controlled but are not connected by a speaker cable. Â Instead these systems have an internal amplifiers and are powered by a mains feed
usually located in the ceiling void. This can limit functionality but offers a alternative solution for customers who can not run a speaker wire to their ceiling speaker.
HOW DO I CUT FOR THEM?You may be worried about cutting the correct sized hole for the speaker. Luckily, ceiling speakers provide you with a cut-out stencil. You can also find the dimensions (both total diameter and cut-out diameter) on the websites of the manufacturer or the supplier you buy from.
// Introducing Ceiling Speakers

PLACEMENT CONSIDERATIONS
HOW MUCH SPACE DO YOU HAVE?
The most common sizes for ceiling speakers are 6/6.5” and 8” diameters. You can get some smaller than this (for example with a 3” diameter), but you will sacrifice sound quality as speakers of this nature are only really suitable for vocals. The model diameter (e.g. 6.5”, 8”) refers to the diameter of the speaker driver, not the diameter of the speaker as a whole. Saying this, however, the bigger the internal driver generally means the bigger the unit.
As a rule, we would suggest leaving a gap of at least 2 meters between a left and right stereo speaker. If this isn’t possible in a smaller room, you may want to consider a single-stereo speaker positioned centrally. When using more than two stereo speakers in a room (e.g. 4,6 or upwards!), try and keep the spacing between stereo pairs at least 2 meters but no more than 5.
WHAT IS YOUR CEILING DEPTH?
Consider how much space you have behind your ceiling. If space is limited, many ceiling speaker manufacturers make a “super slim” version. Just bear in mind that these models may produce a less powerful sound due to the smaller driver. Added features such as back boxes will increase the depth your speaker requires. A back box is an outer casing you can purchase for the speaker which prevents sound leakage.
WHAT ARE YOU USING THE SPEAKERS FOR?
Ceiling speakers are used for two purposes, Music and TV, (or often both!). If you’re considering surround sound TV audio as part of your set-up, the positioning of your ceiling speakers should be parallel to the TV, just behind the heads of the viewing audience (perhaps just behind a sofa). If you aren’t using your ceiling speakers as surround rears but still want to play TV audio, it is still best to position them parallel to the TV so that stereo separation between the left and right speakers match the visuals.
If you aren’t thinking of using a TV with your ceiling speakers you have a little more freedom as to where the speakers can go. In short, we would suggest maintaining at least 2 metres between each part of a stereo pair and centring the speakers around central living spaces, such as dining tables, sofas, or breakfast bars. We’ll cover this in more detail later in the guide.
WHAT IS YOUR CEILING LIKE?
10
// Introducing Ceiling Speakers

Most ceilings are flat, and maintain the same height from the floor at all points. If you have a vaulted or sloped ceiling, however, ceiling speakers are still an option for you. You can install the speakers on an angled surface providing there is enough space in the ceiling cavity to enclose them. In this instance, it would be best to consider ceiling speakers with an angle-able tweeter. This will allow you to alter the direction of the sound towards the main area of the room.
If you have a ceiling that gets taller in certain spaces, it may be worth checking the Maximum SPL of the speaker. This will be explored further in our ‘Ceiling Speaker Terms’ chapter.
IS YOUR ROOM AN UNUSUAL SHAPE?
We realise that it is not always the case that ceiling speakers are installed in perfectly rectangular rooms. It may be that in some cases you have to switch between stereo and single stereo speakers within the same room. Our ‘What to Look For’ chapter will go into this in more detail, but keeping in mind that stereo speakers would require at least 2 metres of separation should help.
11
// Introducing Ceiling Speakers

Purchasing the correct speakers in the right number.
WH
AT
TO L
OO
K
FOR
HOW TO SUCCESSFULLY PLAN FOR A PROJECT
// LOREM IPSUM// What to look for
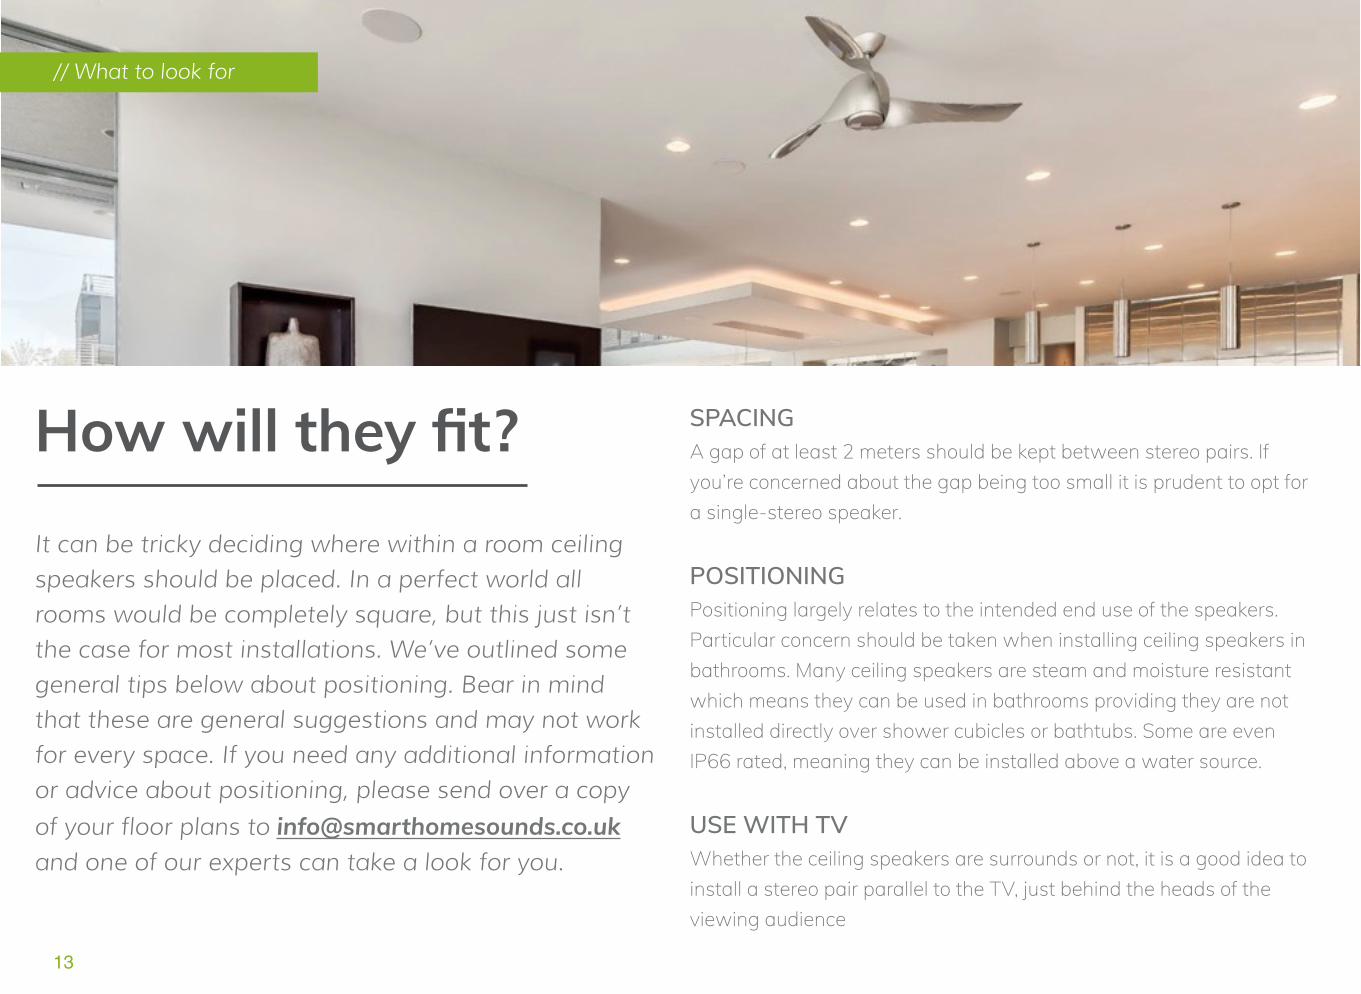
It can be tricky deciding where within a room ceiling speakers should be placed. In a perfect world all rooms would be completely square, but this just isn’t the case for most installations. We’ve outlined some general tips below about positioning. Bear in mind that these are general suggestions and may not work for every space. If you need any additional information or advice about positioning, please send over a copy of your floor plans to [email protected] and one of our experts can take a look for you.
SPACING A gap of at least 2 meters should be kept between stereo pairs. If you’re concerned about the gap being too small it is prudent to opt for a single-stereo speaker.
POSITIONINGPositioning largely relates to the intended end use of the speakers. Particular concern should be taken when installing ceiling speakers in bathrooms. Many ceiling speakers are steam and moisture resistant which means they can be used in bathrooms providing they are not installed directly over shower cubicles or bathtubs. Some are even IP66 rated, meaning they can be installed above a water source.
USE WITH TVWhether the ceiling speakers are surrounds or not, it is a good idea to install a stereo pair parallel to the TV, just behind the heads of the viewing audience
// LOREM // What to look for
How will they fit?
13

Room SizeVERY SMALL Some rooms, such as bathrooms or offices, will not be large enough to adequately space two stereo speakers. In this case, opt for a single-stereo speaker in the centre of the room.
SMALL-MEDIUMIn rooms of this size, as long as there is at least a 2 metre space between each speaker, 2 speaker set ups work perfectly for bedrooms and smaller sitting or dining rooms. The 2 stereo speakers can be centred around social areas of the room, such as tables, sofas or beds.
LARGE Most larger rooms, such as open plan kitchen-diners or living rooms, would require more than the standard 2 stereo speakers. 4 stereo speakers in a square configuration is quite common. If considering 4 speakers we would recommend going for either 4x 6/6.5 speakers or 2x 8” speakers, as 4x 8” speakers may be a bit of an overkill for most domestic installations.
EXTRA LARGESome rooms, particularly public settings like halls, restaurants or offices, will require many speakers. Try and keep to stereo pairs where possible, as the stereo separation between the speakers will make for a nicer sound. In rooms such as this that may have a few separate alcoves or areas, however, a good rule of thumb is to centre stereo pairs around pieces of furniture, such as either end of a table, stage or desk unit.
L-SHAPED For rooms that are L-Shaped, it’s better to have a pair of stereo speakers in each section of the room, rather than installing pairs either side of a corner. If one part of the room is too small to house a stereo pair, opt for a single-stereo speaker in this space and a pair of stereo speakers in the larger part of the room.
14
// What to look for

As a quick disclaimer, all of our speaker placement recommendations are based around what best works for most installations. If you don’t think these advised plans will work for you, don’t panic. Feel free to email us a copy of your floor plan to [email protected] and we can take a look at it. For the most accurate advice, it helps us to know as much about your room as possible. Including floor measurements and central pieces of furniture (such as sofas, kitchen units and dining tables) in your email will help us to give you the best advice for your space.
Whether this general advice works for you also depends on what else you have going on in the room. Features such as lighting or sky-lights may get in the way of this more general placement. Try and fit your ceiling speakers in around these features as best you can. It won’t matter too much if you have to alter this recommended placement slightly.
Ceiling speaker placement is dependent on the most well-used areas of the room. This typically means focusing speakers around the main pieces of furniture in the space, such as sofas or dining tables.
You will need to consider placement more carefully when using your ceiling speakers as surround rears. Surround rears, whether they are in-built ceiling speakers or stand alone speakers, should be positioned parallel to the TV and preferably centered around a sofa. The surround speakers should be positioned just behind the area where the viewing audience will sit and need at least 2 meters of separation between them. If you have more than one sofa in front of your TV, don’t try and space the surround rears to encompass all of the seating in the room. Instead focus the surround rears around one sofa, preferably the one directly opposite your TV. If you try to space the speakers to incorporate the whole seating area, you would not experience true surround sound as the left and right sound channels would not be balanced correctly for the viewing audience.
15
// What to look for
When using ceiling speakers as surround rears, position them parallel to the TV and just behind the heads of the viewing audience
SPEAKER PLACEMENT

For dining room tables or breakfast islands, it’s easy to correctly centre the sound. Simply position your ceiling speakers at either end of this furniture to ensure everyone sat around the table experiences great sounding stereo separation. This rule also works for sofas or seating areas in rooms where you only intend to use the ceiling speakers for music or radio. In this scenario the ceiling speakers would be working as a stereo pair and not as left and right surround sound channels, so you have a bit more flexibility with placement.
In bedrooms, we would again recommend centring your ceiling speakers around the key piece of furniture in the room: the bed. We would suggest installing the speakers towards the bottom end of the bed to ensure your early-morning radio shows aren’t too imposing.
Bathrooms tend to be among the smallest rooms in the house meaning it may be necessary to install a single-stereo speaker rather than a stereo pair. In this case, most ceiling speakers have inbuilt steam and moisture resistance so should be fine to use in a bathroom as long as they aren’t positioned directly above a bath or shower cubicle. If you want to position ceiling speakers directly above a water source, ensure you purchase speakers that are IP66 rated. Always double check both steam and moisture resistance and IP rating before purchase.
For open plan spaces incorporating multiple ‘rooms’, it may be more difficult to visualise a ceiling speaker plan. Try and piece together these rules within the open plan space. For example, centre one ceiling speaker pair around a sofa, another around a dining table and create your ceiling speaker plan this way.
16
// What to look for
In a dining room, try to position the ceiling speakers at either end of the table to ensure all listeners get the best stereo sound
Try and centre ceiling speakers around the main pieces of furniture in the space, such as kitchen units, sofas, tables or beds.
In small rooms such as bathrooms it may be necessary to use a single-stereo speaker rather than a stereo pair. Ensure speakers aren’t
positioned directly above a shower cubicle or bath unless they have IP66 certification.

Whilst reading up on the detailed specifications of different ceiling speaker models, it’s easy to get caught up on the technical jargon. When broken down, however, most of these different specifications are very simple in what they mean for the speakers’ performance.
This section aims to clarify what each of the common ceiling speaker terms means for real-life installations.
BASIC FEATURESThese specifications are important to consider for all prospective installers.
STEREO SPEAKERS
These are the most common and widely used variety of ceiling speakers. Stereo speakers need to be used as part of a pair, with one speaker providing the left sound channel and the other providing the right. A pair of stereo speakers is preferable to a single-stereo if possible. Stereo speaker pairs should be positioned at least 2 meters apart, but no more than 5 meters.
SINGLE-STEREO SPEAKERS
In some cases, it is just not practical to install a pair of ceiling speakers for lack of ceiling space. This is particularly common in bathrooms or other smaller rooms. To overcome this, the single stereo speaker was born to offer a left and right channel out of a single speaker, preserving space and opening up the options to have music in more rooms. Single-stereo speakers house both the left and right speaker driver meaning they can be used individually. You can see the two internal drivers in the center of the right-hand picture.
17
Ceiling Speaker Terms// What to look for

Single-stereo speakers are generally also better value than buying a pair of stereo speakers but bear in mind the stereo separation will not be as great as two separate monos. We would only recommend opting for a single stereo speaker when you have limited space.
CUT-OUT DIAMETER
This measurement will be given in millimeters and refers to the exact diameter of the circular hole you need to cut. Most ceiling speakers also come with a stencil to help you cut as accurately as possible.
SPEAKER DIAMETER
Unlike the cut-out diameter, the speaker size refers to the diameter of the internal driver in the speaker or internal drivers if you’re installing a single stereo speaker. The greater this diameter, the more bass and louder sound you will get. For this reason, in larger rooms we would recommend going for either a pair of 8” stereo speakers or 4x 6/6.5” stereo speakers.
MOUNTING DEPTH
This is the space needed in your ceiling cavity and can be a critical element to your in-ceiling speaker install. The measurement given is the depth that is required behind the finished ceiling’s plasterboard. This may be given from the surface (meaning the surface of the speaker) or the ceiling level itself, so double check what the measurement is referring to before purchase.
ADVANCED FEATURESIt may not be necessary to think about these for some installations, but if you’re interested in cherry picking the best speakers for your use read ahead.
IMPEDANCE RATING
Impedance is measured in Ohms and refers to the resistance that speakers give to any current or voltage being passed through them (the amplifier). The lower the impedance rating, the more amplifier power being transferred through to the speakers. The most common impedance rating is between 8 and 6 Ohms, with lower ratings such as 4 Ohms typically requiring more powerful amplifiers to work to their full potential.
A good analogy to use when thinking about impedance is a pipe running water. The lower the impedance rating, the wider the pipe allowing for more water to run through. A lower impedance rating doesn’t always make for a better sound, however, as a wider pipe (lower impedance) will only carry more water (audio) with a more powerful pump (amp).
18
// What to look for

SPEAKER SENSITIVITY
Speaker sensitivity links closely with Maximum SPL (below). In layman’s terms, Speaker Sensitivity refers to how well the speaker converts power from the amplifier into acoustic ‘sound’ energy. Speaker sensitivity is measured as the decibels detected when positioned 1 meter in front of the speaker powered by 1 watt. Speaker sensitivity will appear as something like this: 88dB (1w/1m).
MAXIMUM SPL
This refers to the Maximum ‘Sound Pressure Level’, which may sound complicated but in reality is quite simple. Maximum SPL is a measurement of the decibels detected 1 meter from the speaker at maximum volume. This measurement is taken using a standardised amp to power the speakers. The higher the Maximum SPL, the louder the speaker. Maximum SPL will appear as something like this: 107.4 dBA
RECOMMENDED AMPLIFIER REQUIREMENTS
Recommended Amplifier requirement is as easy as it sounds and refers to which amplifier power best matches with the speakers being installed. Recommended Amplifier Requirement will give you a range of amplifier powers that would suit a stereo pair of the given speaker. This measurement is taken based on using a single stereo pair of speakers with the amplifier, and refers to the recommended
wattage per channel that you should look for in an amplifier. If you are planning to install more than one pair of speakers to the same amplifier, you will require one that is more powerful than that specified.
FREQUENCY RESPONSE
In technical terms, frequency response describes the maximum and minimum range of sound a speaker can produce. This number is measured between 20 Hz (deepest bass) and 20kHz (piercingly high sound). The number at the lowest end of the range will give you an idea of how “bassy” the speaker is. The number at the higher end will give you an indication of how high a sound the speakers can produce.
19
// What to look for

Don’t be put off by the technical jargon
HO
W T
O C
HO
OSE
AN
A
MP
LIFI
ER
WHAT AMPLIFIER FOR WHAT USAGE
// How to choose an amplifier

AMPLIFIER CLASSIFICATIONS
It may seem daunting to consider the best amplifier for your requirements, especially if you’re new to audio installations. There are two main considerations when it comes to choosing an amplifier, EFFICIENCY and LINEARITY.
EFFICIENCY: This is a measurement of how well the amplifier converts power into sound energy. The higher the efficiency rating, the more energy is converted into sound and the less energy wasted as heat.
LINEARITY: This is the amplifier’s ability to reproduce a small input signal (your streamed or line-in music source) into a louder output (the speakers) whilst still retaining detail. A higher linearity rating means the amplified sound output is a truer representation of the input. Here is a quick guide to the most common amplifier types rated for their efficiency and linearity:
Class A: This is the simplest amplifier type with 1 output device. The output is always on meaning there is little sound distortion, equalling great linearity. This does result in a lot of power lost as heat though making the efficiency of this class of amplifier poor.
Class B: A Class B amplifier has two output devices and constantly alternates between the two. This alternation results in greater efficiency as less power is lost as heat, but can create switching distortion between the alternations giving Class B amplifiers lower linearity ratings.
Class AB: This is the best of both worlds in comparison with traditional A and B Class amplifiers. AB Amplifiers reduce the distortion of Class B but are more efficient than Class A.
Class D: Class D amplifiers are typically the most efficient and can be much smaller as they require less ventilation for heat lost. This efficiency does, however, mean that you may compromise somewhat in linearity but not to the extent of a Class B amplifier. Class D is most commonly used in home ceiling speaker projects.
21
// LOREM IPSUM// How to choose an amplifier

HOW TO CONNECT AMPLIFIERSAs explained in our earlier ‘Basic Set-Up’ section, setting up ceiling speakers with an amplifier actually requires less cabling than you may think.
Amplifiers don’t actually omit any sound themselves so can be stored discreetly and even in a different room to your ceiling speakers. Bear in mind, however, the further away you position your amplifier, the longer the lengths of speaker cable you will need to run to it.
For smart amps that are Wifi controlled, such as the Sonos Connect:Amp or Amp, it is often a good idea to store your amplifier near to the wifi router or even hardwire it to the router to ensure a strong connection.
Amplifiers most commonly have two RCA connections on the back to support speaker connection, in the form of a left and right speaker.
Most likely, the amplifier will only have 1 left and 1 right input (meaning 4 connections in total). It is possible to connect multiple ceiling speakers to each one of these connections, but double check how many speakers your amp can comfortably support before doing this.
IN-BUILT AMPLIFIERS
Some lower-end ceiling speakers may have an in-built amplifier meaning they only need to be connected back to mains power. This doesn’t diminish the need to enter the ceiling cavity so doesn’t make life easier in this way, as mains power cables still need to be run back to your power source.
The amplifiers typically housed in these speakers tend to be low quality and incapable of producing a powerful output, resulting in a ‘tinny’ sound.
If you’re going to go to the trouble of cutting into your ceiling, we’d suggest investing in a good external amplifier to ensure longevity and a worthy output.
22
// LOREM IPSUM// How to choose an amplifier

WHEN CHOOSING AMPLIFIERS, THERE ARE THREE MAIN CONSIDERATIONS: POWER, FUNCTIONALITY AND SIZE.
23
// How to choose an amplifier
These three criteria work in conjunction with each other and it’s prudent to consider your amplifier needs based on all three. For example, there is no point in having a great, powerful amplifier that isn’t functional for your home audio needs.
Lots of prospective ceiling speaker installers will aim to incorporate most of the household in the project, meaning multiple amps will be required. For this reason, space saving is paramount and amplifiers that are compact and can be stacked in a rack or storage cupboard are sought after.
Power is traditionally how we measure the mettle of an amplifier. This is even more important to ceiling speaker installation, as customers may seek to run multiple pairs of ceiling speakers back to a single amp.
This section aims to explain how to strike the correct balance between these three important elements.
How to choose the correct Amp

POWER
An amp’s power rating is measured in watts per channel, the more watts per channel= the greater the amount of power being sent to the speaker.
When thinking about amplifier power, it is worth considering the number of ceiling speakers you’re trying to power. The ‘watts per channel’ provided by your amplifier will be split across multiple ceiling speakers, rather than providing maximum power output to each ceiling speaker hooked up to a single channel.
An amplifier has two power channels, left and right. Because Stereo ceiling speakers are used as a pair, one speaker will feed into the left amplifier channel and the other into the right amplifier channel to create a left and right stereo pair. If you wanted to use another pair with the same amplifier, the left and right speakers would input into the same left and right channel connections as the previous pair.
This means, if you want to benefit from each of your 4 ceiling speakers being powered to their full capacity, it is worth opting for a more powerful amplifier, with at least double the ‘watts per channel’ as the watts stated in the speakers ‘recommended amplifier requirements’. If using 6 speakers, try and source an amplifier with at least 3x this measurement to use speakers to their full potential.
Speakers can be used with a less powerful amplifier than stated in the ‘recommended watts per channel’, but may be quieter than expected.
24
// How to choose an amplifier
An example amplifier connected back to 4 stereo ceiling speakers. The ceiling speakers would be connected back to the left and right
RCA connections on the back of the amp.

FUNCTIONALITY
Traditional amplifiers will support a line-in connection in order to allow music to be played through the speakers. Changing music or audio output this way is a bit more long-winded, and would require changing the music manually on whatever device you’re using with your amplifier (e.g. cd player, hifi, turntable, mp3 or phone dock etc.). This would require a physical line-in connection (either RCA-RCA or RCA-3.5mm jack), meaning the amplifier would need to be stored near to the audio source.
With the increase in ‘smart home’ and wireless technology, many prospective ceiling speaker installers will edge towards wifi or bluetooth controlled amplifiers. Considering many people carry their mobile phones on their person most of the time, it seems wasteful not to use this technology to your advantage and stream music directly to your ceiling speaker amp. Most bluetooth and wifi amplifiers will still support line-in connection from a turntable, hifi system or mp3/ phone dock, giving you the best of both worlds.
For us, when deciding between wifi or bluetooth capability, wifi connectivity takes first place. Wifi connectivity ensures both privacy and lack of disturbance. The system would be connected to your home router ensuring that no one can connect to your speakers who doesn’t have your wifi password. It also cancels the possibility of music cutting when you get a push notification or leave the room.
Bluetooth amplifiers do have their benefits though. They are often a bit cheaper than wifi capable amplifiers and make it easy for anyone in your home (such as guests) to get involved without having to connect to your wifi or download a dedicated app. On the right we’ve created a handy comparison table between the two:
// LOREM IPSUM// How to choose an amplifier
Functionality Wifi Bluetooth
Can be controlled
anywhere in the home Yes No
Requires an App Yes No
Is a private networkYes - only those on your
home wifi can control
No - but users need to
be within a given range
of the amp
Disturbance from push
notificationsNo Yes
Able to support pairing
with a voice assistant
device
Yes No
25

SIZE
To create different zones of audio and have rooms work separately it is necessary to purchase multiple amps. Amplifiers don’t need to be kept on show, but it may be challenging to try hiding several large Class A or B amplifiers without sacrificing excessive floor or storage space.
For this reason, Class D amplifiers tend to be favoured in ceiling speaker installations. These amplifiers require less cooling components allowing them to be much more compact than their traditional counterparts. Class D amplifiers also tend to be more rack or wall bracket friendly to allow for sleek storage (such as the Flexson Sonos Amp bracket in the image to the left).
When considering size, always make sure you have an amplifier with enough power output for your respective speakers. Ceiling speakers tend to have a reduced bass output in comparison to stand alone alternatives due to their compact size so it may not be necessary to use a massively powerful amplifier if you’re only using one pair of speakers.
26
// How to choose an amplifier

Hopefully you’re starting to feel a bit more confident in choosing the correct speakers and amplifier for your needs. This section aims to piece together the installation of your speakers for a great home audio set up.
WIR
ING
AN
D
INST
ALL
ATI
ON
HOW TO MAKE IT ALL HAPPEN
// Wiring and Installation

Making ConnectionsCeiling speakers are designed to be wired as simplistically as possible. As discussed previously, stereo speakers would need to be wired back to an amplifier using only one length of cable, with this number doubling to two when installing single-stereo speakers.
In terms of connecting this cable, most ceiling speakers will come with the necessary binding posts to secure the wiring into place. These posts will look something like the two pictured to the left. You will strip back the plastic sheath at the end of each cable core and insert this neatly through the hole in the metal post so that it pokes through to the other side. You then twist the plastic top downwards to secure the cable in place and there you have it, one correctly wired ceiling speaker!
Both wiring and connection points on the amp and ceiling speakers are stratified by colour, making it easy to identify which wire core goes where (red matches to red, black matches to black). As you can see in the 2-core cable pictured, the two inner cores are encased in coloured plastic sheaths to indicate which wire connects to which binding post or input.
Another option for cable connection is banana plugs. This is suitable for some amplifiers which don’t arrive with the necessary connection posts. There are a few different types of banana plug and each is simple to use. A common type is the close-screw, pictured to the right. To use this banana plug, you unscrew the top and feed the stripped cable core through the centre of the bottom part of the plug. The exposed core is made up of lots of tiny wire strands, push the core up so that it is slightly taller than the height of the plug base and fan the wire strands out so that they create a fringe around the top of the plug base. Then simply screw the top of the plug back onto the base, enclosing the cable strands in the process. The banana plug would then insert into your amplifier RCA inputs.
Welding is another option to fix wiring to the amplifier or ceiling speaker but we don’t tend to recommend this due to its permanence and potential to go wrong.
28
// LOREM IPSUM// Wiring and Installation
Binding Posts
2-core Speaker Cable
Banana Plugs

Common Questions Just incase there are still things you are unsure of, here are some FAQs that we hear a lot when discussing ceiling speaker projects with customers. Is there anything that we haven’t covered or that you want to go over in a bit more detail? Please don’t hesitate to get in touch on [email protected]
How do the speakers fix into the ceiling?
All ceiling speakers are different, but most will arrive with everything you’ll need to properly fix them into the ceiling. Most ceiling speakers will clamp the ceiling plasterboard in between the main speaker and the speaker grille, allowing you to fix them securely to the ceiling by screwing this clamp in place.
What if my speakers are in-wall?
If you’re installing speakers into the wall cavity, follow the exact same set up guide as for in-ceiling speakers. In-wall speakers will also come with a cutting guide to make life easier. When using in-wall speakers with a TV, try and use them on either side of the television, or parallel to the TV at the back of the room.
What if I’m installing speakers outdoors?
If you’re doing this, ensure your speakers are IP66 rated or are suitable for ‘All Weather Conditions’. Consult with your electrician to ensure the speaker cable you are using is suitable for this use.
29
// Wiring and Installation

How long do ceiling speakers last?
Ceiling speakers are designed for longevity due to the fact that they require structural changes to your home or workplace. Many users keep the same ceiling speakers for decades and reputable brands such as Monitor Audio even offer a lifetime warranty on their products showing that they are designed to last. The length of use will depend on the quality of the ceiling speaker. This is why we’d suggest investing in a solid system with good reviews rather than cutting holes in your ceiling just for your speakers to pack up soon after!
How much will it cost?
How long is a piece of string? A good ceiling speaker is going to cost you upwards of £100 simply because they are built for extended use and great performance. Cost is also going to depend on how many rooms you want to install speakers in and what you want the speakers to do. Single-stereo and waterproof speakers tend to be more expensive than their stereo counterparts, but this is worth it if they’re the right product for the job. Amplifiers also range in price drastically but considering your intended function, necessary power and available space will help in narrowing down the contenders.
Where can I purchase my ceiling speakers from?
At Smart Home Sounds we specialise in Sonos systems and integrated ceiling speaker projects. We’re more than happy to help, whether it’s in planning the project, drawing up a quote or simply to answer any burning questions.
30
// LOREM IPSUM// Wiring and Installation

GET
IN T
OU
CH
// Get in touch
@SmartHomeSounds
@SmartHomeSounds
Smart Home Sounds
EMAIL: [email protected]
TELEPHONE: 0800 677 1100
(9AM-5PM MON-FRI)
www.smarthomesounds.co.uk