a discus sion on needleturn applique
TRANSCRIPT
Standard Online Quilt Magazine – Vol. 3 No. 7
© Online Quilt Magazine.com All Rights Reserved P a g e | 1
Online Quilt Magazine.com
Standard Issue – Vol. 3 No. 7 July 2012
Fabric
Thermofax
Screen Printing
– See Just How
Easy It Is!
PROJECT –
Morris Quilt
Pattern
A Discussion on
Needleturn
Applique
Check out
What’s New –
Fabric, Book
and Tips!

Standard Online Quilt Magazine – Vol. 3 No. 7
© Online Quilt Magazine.com All Rights Reserved P a g e | 2
Online Quilt Magazine Table of Contents
Needleturn Applique ……………..….………………………………………….…………………………………………………………………………. Page 4
Printing With A Thermofax Screen ………….……………………………………………………………………………………………………….. Page 8
PROJECT – Morris Quilt Pattern ……………………………………………………………………………………………………………………….. Page 18
What’s New from the Fat Quarter Shop …………………………………………………………………………………………………………… Page 21
Book Review – ‘Liberated Medallion Quilts’ by Gwen Marston ……………..………………………………………………………… Page 23
BLOCK OF THE MONTH – Whirlpool Block ............................................................................................................. Page 25
Today's Tips............................................................................................................................................................. Page 27
YES – We Want To hear From You.......................................................................................................................... Page 28
Upgrade Today to our Premium Online Quilt Magazine for Only $10 for the
Year – that’s less than $1 per issue!
This Month’s Premium Issue has More Than 60 Pages Packed Full of More Great Articles and Projects
for You to Make. To Upgrade, go to www.OnlineQuiltMagazine.com and register in the Right-Hand
Box and don’t miss another issue!

Standard Online Quilt Magazine – Vol. 3 No. 7
© Online Quilt Magazine.com All Rights Reserved P a g e | 3
Letter from the Editor
Jody Anderson
Hi!
Welcome to our Brand-New-Hot-Off-The-Press July Issue! I can’t believe we’ve reached the middle of
the year already – there’s still a rather disturbing number of ‘to-do’ things on my list, and I really need to
knuckle down and find some time to get it all done. Kids on school holidays for most of this month will
not ease this pressure either, but I do really love having them home.
At least this month we unofficially celebrate our “Christmas in July” so we can enjoy the cold-weather
big baked dinner that those of you in the ‘north’ can have in December. That’s our excuse anyway, and
what’s not to love about two Christmasses in a year? Maybe the kids could make a start on some
Christmassy craft things in the next couple of weeks…?
There’s a special article this month from Judie on needleturn applique, and a wonderful fabric printing
article from Linda that show you just how easy it can be to create your own unique fabrics. There’s new
fabric from the Fat Quarter Shop, and a new project from Rose, and a fun new book to check out too!
Have a great month!
Jody

Standard Online Quilt Magazine – Vol. 3 No. 7
© Online Quilt Magazine.com All Rights Reserved P a g e | 4
After quilting for some 36 years, I know what is
my “quilting niche”. What I mean by “quilting
niche” is the genre of quilting I like and do best.
Notice I say “like and do” because there are many
quilt genres that I really like but do really badly.
So my quilting niche is Needleturn appliqué.
There are many Needleturn techniques so which
one do I use? The Needleturn technique I now
use has morphed over the years.
After completing that series of needleturn classes
with various tutors, I realized that I learnt more
about techniques in Needleturn appliqué I DIDN’T
like and was not going to continue to practice. I
still wanted to create beautiful needle turned
pieces, that was a given. So I needed to work out
my own technique of Needleturn appliqué that
satisfied my creative and practical needs.
One of the techniques that the tutors espoused
was marking the design directly onto the
background paper using a type of carbon paper
or artists’ graphite paper. The idea was that the
lines indicated correct placement and the
appliqué fabric would be sewn down following
the line, creating the required shape.
This was a method I simply couldn’t master. I
endeavoured to cut the appliqué shape with the
utmost concentration, yet, when I laid it down
onto the background to fit into its outlined
position, it was never accurate. No matter how
hard I tried, when I needleturned the piece on,
the outlines marked on the background peeped
Needleturn Applique
By Judie Bellingham from www.bellaonline.com/site/Quilting

Standard Online Quilt Magazine – Vol. 3 No. 7
© Online Quilt Magazine.com All Rights Reserved P a g e | 5
out and were on show for all the world to see.
And worse still, these marks did not rub or wash
off. It frustrated me almost to tears, so I decided
that that was one method I was abandoning with
glee. Having rejected the technique of marking
the outline on the background, I needed to
develop a method where I could place the
appliqué piece in its correct place, without having
any residual marks showing.
The eyes have it!! Yes, I figured that these eyes of
mine were a pretty good tool. They have certainly
served me well over 55 years or so. I wasn’t
running around banging into things, I could park
my car pretty well between the lines and I was
able to thread a fairly fine needle. So why not use
my eyes as a tool for ascertaining the placement
of my appliqué pieces?
After all, I know where my eyes are at all times. I
can’t mislay them like I can patchwork
equipment. And my idea worked!! I can place the
appliqué pieces into position using my eye,

Standard Online Quilt Magazine – Vol. 3 No. 7
© Online Quilt Magazine.com All Rights Reserved P a g e | 6
comparing with my pattern diagram as I go along.
There seemed to be many tens of different ways
of preparation for your appliqué pieces. I was
shown various techniques on how to use freezer
paper, tack the seam allowance, or press the
seam allowance in preparation for laying down
onto the fabric.
One was expected to spend a large amount of
time preparing the appliqué piece prior to
stitching onto the background fabric. This seemed
to me to be extremely time consuming, as well as
resource consuming. I also found that the more
handling of the delicate piece the more frayed
and messy the edges became. It also seemed a
dreadful waste of precious sewing time. So I
needed to devise a way to Needleturn the pieces
on, that didn’t require preparation time and
unnecessary over handling.
This is where I discovered my left THUMB. (I am a
right-handed stitcher). This fat, chubby digit has
been sitting in the same place, minding its own
business for as long as I can remember, but now I
realise it’s my most valuable quilting tool. It’s my
own personal mini-iron that doesn’t need
plugging in, thereby not contributing to
greenhouse gases!!! (Pardon the pun, but it's a
GREEN thumb).
This is how I do it. To begin with, I cut the
appliquéd piece plus ⅛” seam allowance and
place it onto the background fabric and using a
small pin to temporarily fix it in place. Then using
a fine needle (No.12 Piecemakers) and matching
thread, and using the tip of the needle, I gently
turn under the ⅛” seam allowance and make a
small stitch.
Now, this is where the thumb comes in. With my
needle I continue to turn under about 1” ahead
from where my last stitch is made, and using my
left thumb, press down firmly, thus “pressing” the
seam allowance under with my thumb. Voila!! All
the preparation is done in one easy action. While
I’m busy sewing the piece down, my thumb is

Standard Online Quilt Magazine – Vol. 3 No. 7
© Online Quilt Magazine.com All Rights Reserved P a g e | 7
pressing the seam allowance under 1" ahead
ready for stitching. It works for me and I find I can
achieve a lot of appliqué in a small space of time.
Hooray!
About the author: Judie Bellingham has been quilting
since 1976 and has taught in Queensland, Interstate and
Internationally since 2000.
Judie is a past vice president of Queensland Quilters Inc and
is the current Editor of the Quilting site at Bellaonline. This
site has loads of information about quilting and offers many
free patterns for readers.
Judie is involved with several quilting and craft groups in
her home town of Brisbane, and is the President of
Sunshine Linus on the Sunshine Coast. Website:
www.bellaonline.com/site/Quilting
Stop Press! BRAND NEW
BAG PATTERNS SET To Be
Released by mid-July!!
Standard Online Quilt Magazine – Vol. 3 No. 7
© Online Quilt Magazine.com All Rights Reserved P a g e | 8
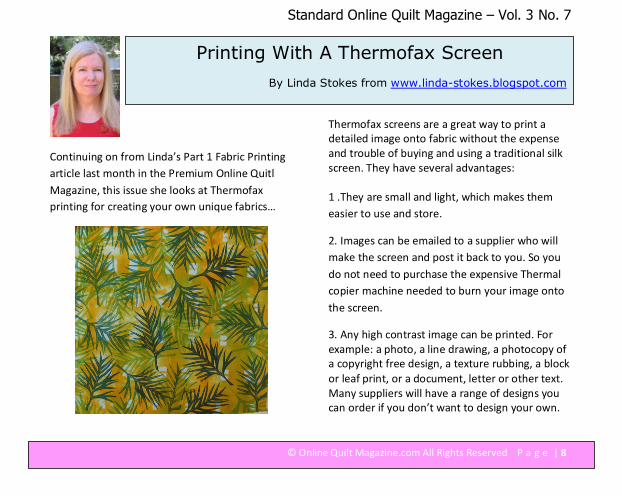
Continuing on from Linda’s Part 1 Fabric Printing
article last month in the Premium Online Quitl
Magazine, this issue she looks at Thermofax
printing for creating your own unique fabrics…
Thermofax screens are a great way to print a
detailed image onto fabric without the expense
and trouble of buying and using a traditional silk
screen. They have several advantages:
1 .They are small and light, which makes them
easier to use and store.
2. Images can be emailed to a supplier who will
make the screen and post it back to you. So you
do not need to purchase the expensive Thermal
copier machine needed to burn your image onto
the screen.
3. Any high contrast image can be printed. For
example: a photo, a line drawing, a photocopy of
a copyright free design, a texture rubbing, a block
or leaf print, or a document, letter or other text.
Many suppliers will have a range of designs you
can order if you don’t want to design your own.
Printing With A Thermofax Screen
By Linda Stokes from www.linda-stokes.blogspot.com

Standard Online Quilt Magazine – Vol. 3 No. 7
© Online Quilt Magazine.com All Rights Reserved P a g e | 9
A line drawing
A texture rubbing
A print from bubble wrap
4. Your screen can be ordered mounted in a
plastic frame with double sided tape, or without a
frame. If you already own a traditional silkscreen,
a thermofax screen can be used as a stencil,
taped to the front of the screen in the same way
you would use a cut stencil.
5. You don’t need to buy an expensive squeegee -
a small, light one is best. I use a plastic baking
scraper, $3 from a kitchen shop. Hardware stores
have various scrapers or small squeegees for

Standard Online Quilt Magazine – Vol. 3 No. 7
© Online Quilt Magazine.com All Rights Reserved P a g e | 10
spreading glue which could be suitable. Even a
credit card or sponge roller can be used.
6. The screens last for 100s of prints as long as
they are properly cared for. The plastic frames
can be re-used too.
The only disadvantages with Thermofax screens
are their size limitation and that they will break
down eventually after long use. They can be
ordered up to A3 size, although A4 is the largest
size I can do on my machine. Warning: thermofax
printing can be addictive!
How to use and care for your thermofax screen
The smooth side of the mesh is more fragile so
this side should be against the fabric when
printing. Keep this in mind if attaching it to a
frame – it’s a good idea to mark the upper side.
You can print with the screen reversed, but it will
Standard Online Quilt Magazine – Vol. 3 No. 7
© Online Quilt Magazine.com All Rights Reserved P a g e | 11
last longer if you print with the slightly rough side
of the mesh facing up.
If your screen comes without a frame, the edges
of the mesh should be reinforced by taping with
silver duct tape on both sides, or painting with
acrylic house paint. Take care not to cover any
part of the design. I recommend ordering your
screen with a frame because it’s much easier to
print without getting paint where it is not
wanted.
If you screen has a frame, you may wish to tape
around the inside edge of the frame with the
tape on the frame and over the edge of the mesh,
on both sides. This is not really necessary, but
does make it easier to clean after use.
OK, your screen is ready for printing. You can
print with Permaset or other thick textile paints
as well as thickened dyes or discharge paste. Be
careful if using acrylic paints or Lumiere – these
dry more quickly than textile paints and if they
dry in your screen, it will be permanently blocked.
Tape or pin washed and ironed fabric to table. For
a good printing surface, tape down 2 layers of
Don't keep this Online Quilt
Magazine all to yourself –share it
with your Quilting Guilds and
Friends!
Don't wait - Invite them to
www.OnlineQuiltMagazine.com to
Subscribe and receive each New
Issue as soon as it's Published!

Standard Online Quilt Magazine – Vol. 3 No. 7
© Online Quilt Magazine.com All Rights Reserved P a g e | 12
acrylic felt and top with a layer of calico or
sheeting which can be washed when needed.
Do a test print on a scrap fabric first so you know
how many pulls you will need. This varies with
the thickness of the paint and the type of fabric. 1
or 2 pulls is usually enough.
Position your screen on the fabric for the first
print. Have your squeegee ready - it must fit
within the frame - and paint mixed (for more
about paints, see my previous article on block
printing last month).
Spoon or pour a line of paint across the top of the
screen mesh. Hold the squeegee almost upright
in one hand , while holding the frame with your
other hand (see pic opposite) and use the
squeegee to pull the paint over the design,
towards you.
Use the squeegee to scoop up left over paint at
the end of the pull so you can do another pull if
needed. Keep the paint loaded squeegee over the
screen so it doesn’t drip onto the fabric.
Reposition your screen for the next print and add
more paint if necessary.
Standard Online Quilt Magazine – Vol. 3 No. 7
© Online Quilt Magazine.com All Rights Reserved P a g e | 13
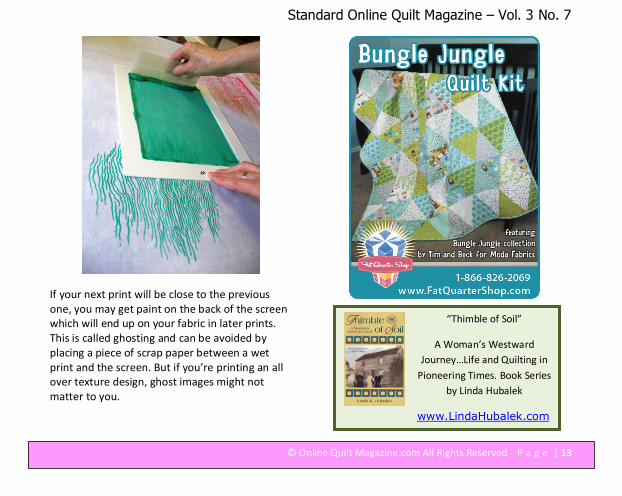
If your next print will be close to the previous
one, you may get paint on the back of the screen
which will end up on your fabric in later prints.
This is called ghosting and can be avoided by
placing a piece of scrap paper between a wet
print and the screen. But if you’re printing an all
over texture design, ghost images might not
matter to you.
“Thimble of Soil”
A Woman’s Westward
Journey…Life and Quilting in
Pioneering Times. Book Series
by Linda Hubalek
www.LindaHubalek.com

Standard Online Quilt Magazine – Vol. 3 No. 7
© Online Quilt Magazine.com All Rights Reserved P a g e | 14
You can continue printing until the fabric is
covered, but don’t allow the screen to sit for long
with paint drying on it, especially in hot, dry
weather – it’s better to wash it out. It will dry
quickly, and you can continue printing.
Wash the paint off the screen as soon as you
finish your print run – gently, under cold running
water with a soft sponge. I use a paintbrush to
clean any paint from the under the edge of the
frame. (Only necessary if you don’t tape around
the edge) Sometimes paint will stain the mesh
but that is not a problem. You can see if the mesh
is clean by holding it up to the light and making
sure the design areas are not clogged. Dry screen
between 2 layers of old towel or stand to dry.
When the printed fabric is dry it can be heat set
by ironing so it will be washable (instructions
should be on the paint jar).
A cat litter tray with some water in it is handy to
have near your printing area. When you finish
printing, scrape excess paint back into the jar and
place screen in the tray before washing. Also
sheets of newspaper in case you need
somewhere to quickly put down the screen or
squeegee between prints.
Silk scarf printed with thickened procion dyes. Thermofax screen
used to print lace image with deColourant discharge paste.

Standard Online Quilt Magazine – Vol. 3 No. 7
© Online Quilt Magazine.com All Rights Reserved P a g e | 15
Store thermofax screens upright, away from heat
or direct sunlight.
For more information on designs, sizes and
prices, see my blog: www.linda-
stokes.blogspot.com
About the Author
Linda Stokes is a Western Australian textile artist. Since
completing a BA in Art, majoring in fibre textiles, at Curtin
University 1999, she enjoys working in her home studio as
well as teaching and exhibiting. Surface design on fabric -
print and dye, is her main passion but she enjoys most
forms of textile practice. Other favourites are free machine
embroidery, cloque, mixed media, quilting, etc. Really,
anything that involves colour and texture. Linda is a
member of several textile associations and has been
blogging since 2006. www.linda-stokes.blogspot.com
* Exclusive Offer - Mention this Ad
for FREE POSTAGE within Australia

Standard Online Quilt Magazine – Vol. 3 No. 7
© Online Quilt Magazine.com All Rights Reserved P a g e | 16
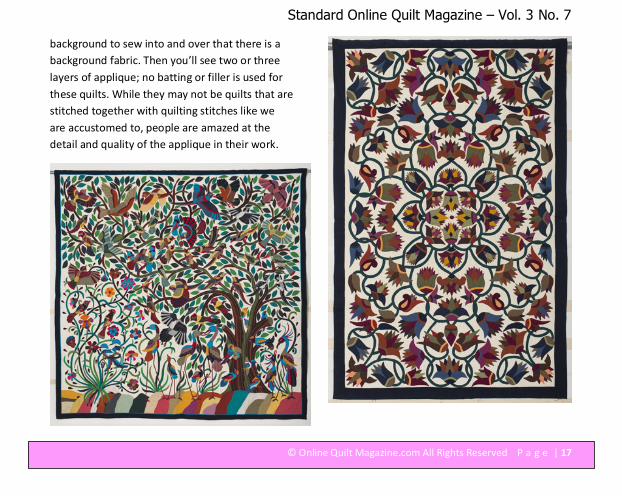
More than 900 quilts will be exhibited at the 1st
Annual AQS Quilt Show at the DeVos Place
Convention Center in Grand Rapids, Michigan,
August 22-25, 2012.
The American Quilter’s Society has chosen Grand
Rapids, Michigan, as a new show location in part
because the city has a huge reputation as being
an art lover's paradise.
Also featured at this new Show will be the “Stitch
Like an Egyptian” Special Exhibit of 95 selected
quilts.
Curated by Australia’s own Jenny Bowker, this
display features appliquéd quilts made by the
Tentmakers of Cairo, Egypt and it is the first time
these wonderful quilts have been seen in the US.
Two of the tentmakers will be attending the show
to demonstrate their applique technique. For the
quilts, these artists use a soft thick cotton
Special Exhibit at New AQS Show
Grand Rapids, Michigan USA
Standard Online Quilt Magazine – Vol. 3 No. 7
© Online Quilt Magazine.com All Rights Reserved P a g e | 17
background to sew into and over that there is a
background fabric. Then you’ll see two or three
layers of applique; no batting or filler is used for
these quilts. While they may not be quilts that are
stitched together with quilting stitches like we
are accustomed to, people are amazed at the
detail and quality of the applique in their work.

Standard Online Quilt Magazine – Vol. 3 No. 7
© Online Quilt Magazine.com All Rights Reserved P a g e | 18
PROJECT – Morris Quilt Pattern
By Rose Smith from www.ludlowquiltandsew.co.uk
I have called this quilt the Morris quilt purely because I used William
Morris fabrics to make it. It measures 32” by 48” and I have made it using
six blocks sewn together in three rows of two.
The quilt top uses 1/2 yard of black fabric, 1 yard of cream fabric and
1.1/4 yards of red fabric.
You will need to cut:
Cream: twenty four 2.1/2" squares, twelve rectangles 4.1/2" by 2.1/2", eighty 2.7/8" squares.
Black: seventy two 2.7/8" squares
Red: forty eight 2.1/2" squares, forty eight 4.1/2" by 2.1/2" rectangles, fifty six 2.7/8" squares.
All the 2.7/8" squares are used to make half square triangle units. These
are made by placing two fabric squares with right sides together and
marking a line along the diagonal. Sew a 1/4" seam either side of the
marked line and then cut along the line. This produces two half square
triangle units.

Standard Online Quilt Magazine – Vol. 3 No. 7
© Online Quilt Magazine.com All Rights Reserved P a g e | 19
You'll need these combinations of colours:
• twenty four squares each of black and red
• forty eight squares each of black and cream
• thirty two squares each of red and cream.
I know it's a lot of half square triangles to make, but it does give a very pretty quilt.
Each quilt block is made using eight rows of six - eight squares each. It is
symmetrical, but I'll list the way all the rows are made up:
Row 1: red 4.1/2" rectangle, black/red triangle, two black/cream triangles,
black/red triangle, red rectangle.
Row 2: red rectangle, red square, two red/cream triangles, red square, red
rectangle.
Row 3: black/red triangle, red square, black/cream triangle, cream
rectangle, black/cream triangle, red square, red/black triangle
Row 4: black/cream triangle, red/cream triangle, cream square, two
black/cream triangles, cream square, red/cream triangle, red/black
triangle
Standard Online Quilt Magazine – Vol. 3 No. 7
© Online Quilt Magazine.com All Rights Reserved P a g e | 20
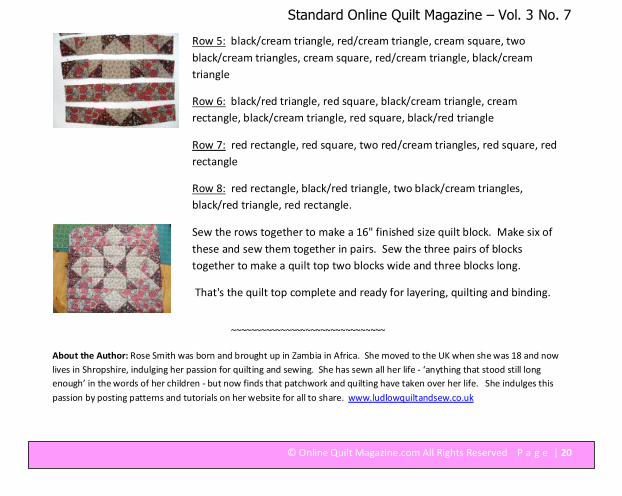
Row 5: black/cream triangle, red/cream triangle, cream square, two
black/cream triangles, cream square, red/cream triangle, black/cream
triangle
Row 6: black/red triangle, red square, black/cream triangle, cream
rectangle, black/cream triangle, red square, black/red triangle
Row 7: red rectangle, red square, two red/cream triangles, red square, red
rectangle
Row 8: red rectangle, black/red triangle, two black/cream triangles,
black/red triangle, red rectangle.
Sew the rows together to make a 16" finished size quilt block. Make six of
these and sew them together in pairs. Sew the three pairs of blocks
together to make a quilt top two blocks wide and three blocks long.
That's the quilt top complete and ready for layering, quilting and binding.
~~~~~~~~~~~~~~~~~~~~~~~~~~~~~~~
About the Author: Rose Smith was born and brought up in Zambia in Africa. She moved to the UK when she was 18 and now
lives in Shropshire, indulging her passion for quilting and sewing. She has sewn all her life - ‘anything that stood still long
enough’ in the words of her children - but now finds that patchwork and quilting have taken over her life. She indulges this
passion by posting patterns and tutorials on her website for all to share. www.ludlowquiltandsew.co.uk
Standard Online Quilt Magazine – Vol. 3 No. 7
© Online Quilt Magazine.com All Rights Reserved P a g e | 21
We're pleased to be able to bring you a selection
each month of the Newest Fabric Releases and
the new season fabric "must haves".
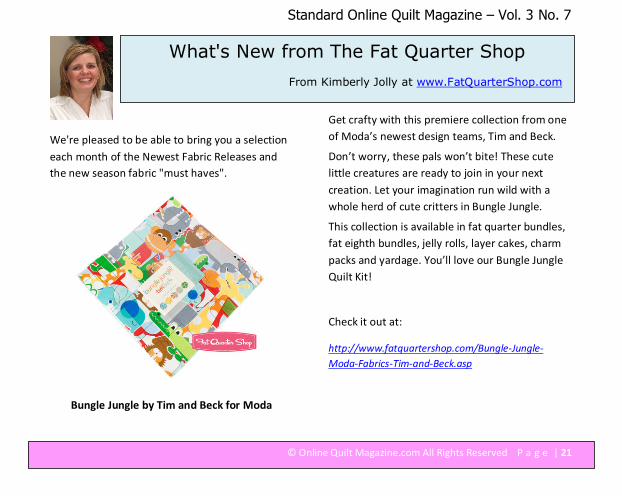
Bungle Jungle by Tim and Beck for Moda
Get crafty with this premiere collection from one
of Moda’s newest design teams, Tim and Beck.
Don’t worry, these pals won’t bite! These cute
little creatures are ready to join in your next
creation. Let your imagination run wild with a
whole herd of cute critters in Bungle Jungle.
This collection is available in fat quarter bundles,
fat eighth bundles, jelly rolls, layer cakes, charm
packs and yardage. You’ll love our Bungle Jungle
Quilt Kit!
Check it out at:
http://www.fatquartershop.com/Bungle-Jungle-
Moda-Fabrics-Tim-and-Beck.asp
What's New from The Fat Quarter Shop
From Kimberly Jolly at www.FatQuarterShop.com

Standard Online Quilt Magazine – Vol. 3 No. 7
© Online Quilt Magazine.com All Rights Reserved P a g e | 22
Winter Elegance by Sentimental Studios for
Moda
Moonlight shines through the wintery night sky
illuminating beautiful snow white magnolia
blooms and crimson poinsettias nestled among
flourishing holly branches.
Cheerful cardinals perch on pine boughs, while
delicate snowflakes are all a flurry dancing on the
wind. This collection captures the beauty and
serenity of nature during the winter and will
surely add a touch of classic elegance to your
home.
Winter Elegance by Sentimental Studios for Moda
Fabrics is available in fat quarter bundles, jelly
rolls, charm packs, layer cakes and yardage.
See more at:
http://www.fatquartershop.com/Winter-Elegance-
Sentimental-Studios-Moda-Fabrics.asp
LUDLOW QUILT AND SEW
Discover new and exciting projects to quilt
and sew each month with clear and easy to
follow instructions.
Visit our website and subscribe to Ludlow
Quilt and Sew’s free monthly newsletter
now.
www.ludlowquiltandsew.co.uk
Standard Online Quilt Magazine – Vol. 3 No. 7
© Online Quilt Magazine.com All Rights Reserved P a g e | 23
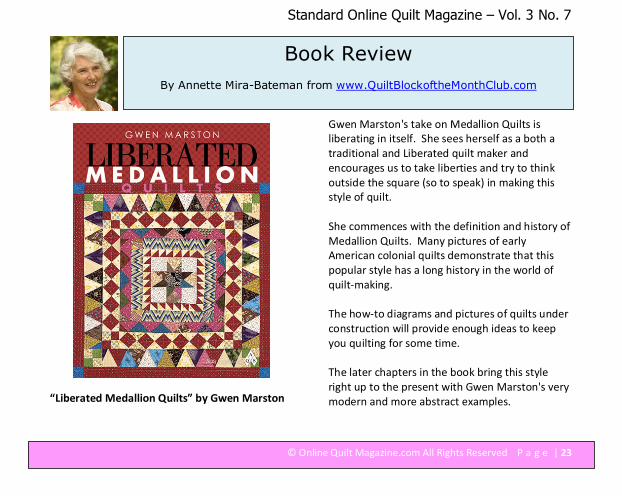
“Liberated Medallion Quilts” by Gwen Marston
Gwen Marston's take on Medallion Quilts is
liberating in itself. She sees herself as a both a
traditional and Liberated quilt maker and
encourages us to take liberties and try to think
outside the square (so to speak) in making this
style of quilt.
She commences with the definition and history of
Medallion Quilts. Many pictures of early
American colonial quilts demonstrate that this
popular style has a long history in the world of
quilt-making.
The how-to diagrams and pictures of quilts under
construction will provide enough ideas to keep
you quilting for some time.
The later chapters in the book bring this style
right up to the present with Gwen Marston's very
modern and more abstract examples.
Book Review
By Annette Mira-Bateman from www.QuiltBlockoftheMonthClub.com
Standard Online Quilt Magazine – Vol. 3 No. 7
© Online Quilt Magazine.com All Rights Reserved P a g e | 24
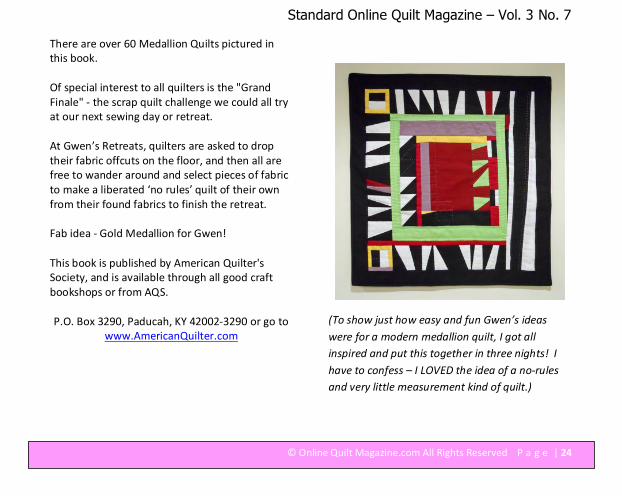
There are over 60 Medallion Quilts pictured in
this book.
Of special interest to all quilters is the "Grand
Finale" - the scrap quilt challenge we could all try
at our next sewing day or retreat.
At Gwen’s Retreats, quilters are asked to drop
their fabric offcuts on the floor, and then all are
free to wander around and select pieces of fabric
to make a liberated ‘no rules’ quilt of their own
from their found fabrics to finish the retreat.
Fab idea - Gold Medallion for Gwen!
This book is published by American Quilter's
Society, and is available through all good craft
bookshops or from AQS.
P.O. Box 3290, Paducah, KY 42002-3290 or go to
www.AmericanQuilter.com
(To show just how easy and fun Gwen’s ideas
were for a modern medallion quilt, I got all
inspired and put this together in three nights! I
have to confess – I LOVED the idea of a no-rules
and very little measurement kind of quilt.)

Standard Online Quilt Magazine – Vol. 3 No. 7
© Online Quilt Magazine.com All Rights Reserved P a g e | 25
This Month’s block is called the Whirlpool Block.
This is an easy block made from half square
triangles, but you can change the colours for
quite different effects. Keep with our Christmas
in July theme, and try reds and greens for a
pieced Christmas Wreath!
To make this 12 inch block as shown, you will
need 3 different fabrics, and once you have
rotary cut the pieces according to the Cutting
Diagram, you can piece them together as shown.
Block of the Month

Standard Online Quilt Magazine – Vol. 3 No. 7
© Online Quilt Magazine.com All Rights Reserved P a g e | 26
Try a simple layout, or turn into a wreath for a table runner or wallhanging you could add 3D embellishments to.

Standard Online Quilt Magazine – Vol. 3 No. 7
© Online Quilt Magazine.com All Rights Reserved P a g e | 27
Today’s Tips:
You may have come across this binding hint
before, but if not, it’s well worth a try…
How often do you want the binding to disappear
into the back of your quilt, by making it in the
same fabric, rather than having to match a fabric
on the front? And sometimes, you want a
different fabric binding on the back for a smart
contrast, and you're stuck with whatever matches
the front?
Try this way of making two colour binding next
time, and we guarantee you'll be thrilled with just
how easy it is. Cut a 1 inch strip to the length you
require in the colour for the binding on the top of
your quilt, and cut a 2 inch strip for the colour
you want on the back.
Sew together with a 1/4 inch seam and press
seam open. Fold the strip in half lengthways with
wrong sides together, and press.
With the 1 inch (top colour) strip facing the top of
your quilt, pin and sew your binding in place as
you usually do. When you fold your binding over
to the back, the seam that joins your two colours
will be exactly on the edge of your folded binding,
so that the colours are split half and half - one on
each side.
~~~~~~~~~~~~~~~
With so many quilters travelling - whether on
vacation, or just to different classes, we came
across a couple of tips this month that may help -
* When doing hand applique and travelling, Load
your bobbins with the colour thread you require
and place them in a medicine bottle. Drill tiny
holes through the top of bottle and pull up your
thread colours. They will stay neat and easy to
use! You will be able to fit several bobbins in a
single container too.
* Since you can't take scissors on the plane, if
you don’t have a little thread cutter, take your
dental floss container along to cut your thread. It
works great!!

Standard Online Quilt Magazine – Vol. 3 No. 7
© Online Quilt Magazine.com All Rights Reserved P a g e | 28
YES, We Want to Hear From
You!
As our Online Magazine continues to grow each
month, we need your feedback in order for us to
continue to improve our publication for you.
• We want to know how you liked it.
• We want to know the topics you're
interested in.
• We want to know if you have any
suggestions, Hints or Tips of your own that
you'd like included, or if you know anyone
we should include a story on!
Please send me an email with your Testimonial,
Tip, Suggestion or Enhancement – I'd love to hear
from you!
Send all emails to:
If you'd like to submit an Article, or a Project for
Publication, or take advantage of our Very Very
Reasonable Advertising Rates, please email
details or queries to Jody at
To subscribe to our Monthly Online
Quilt Magazine, please go to
www.OnlineQuiltMagazine.com and
register so you don’t miss another
issue!
"Quilt-y" Sayings…
• Quilters aren't greedy, they're
just materialistic.
• A yard a day keeps the blues
away.
• Fabricologist Resource
Center"...now does that sound
more impressive than "fabric
stash"?