a short history of tomato grafting in the greenhouse · pdf filea short history of tomato...
TRANSCRIPT

A short history of
tomato grafting in the
greenhouse industry

My history, my grandfather
Established his greenhouse
business in the early 50’s.
Concrete structures with
glass in tar.
Manual climate control.
• Course in pest and
disease control 1961

Greenhouses 1960’s
Oostvoorne, The Netherlands
Crops:
Grapes
Lettuce
Field vegetables

Grafting 1960’s
Gutter connect greenhouses offered the possibility to grow larger areas of the
same crop under glass.
Soil fatigue - Production crops such as tomatoes in soil, in the greenhouse,
year after year, led to nutrient deficiencies and recurrence of disease. These
were the early years of actual greenhouse production in the Netherlands.
Diseases such as Corky root, Verticillium, Fusarium and the lack of resistant
varieties at that time.
The first grafting method used on a “commercial scale” for the greenhouse
industry in The Netherlands was the “Brielse method”.
Grafting happened at the greenhouses as propagators had not been
established yet.

My history, my father
Built his first greenhouse in
1963.
This first greenhouse was
heated with kerosene
heaters.
Switched to hot water
heating using heavy oil
early 70’s.
Produced tomatoes,
lettuce, cucumbers and
french beans.

“Brielse Method” or Approach grafting
In this image:
Rootstock is on the right.
Scion is on the left.
Plants are transplanted side by
side.
Rootstock is cut from
top down.
Scion is cut from
bottom up.
Stems are combined and
taped.
Stems are combined and
taped.
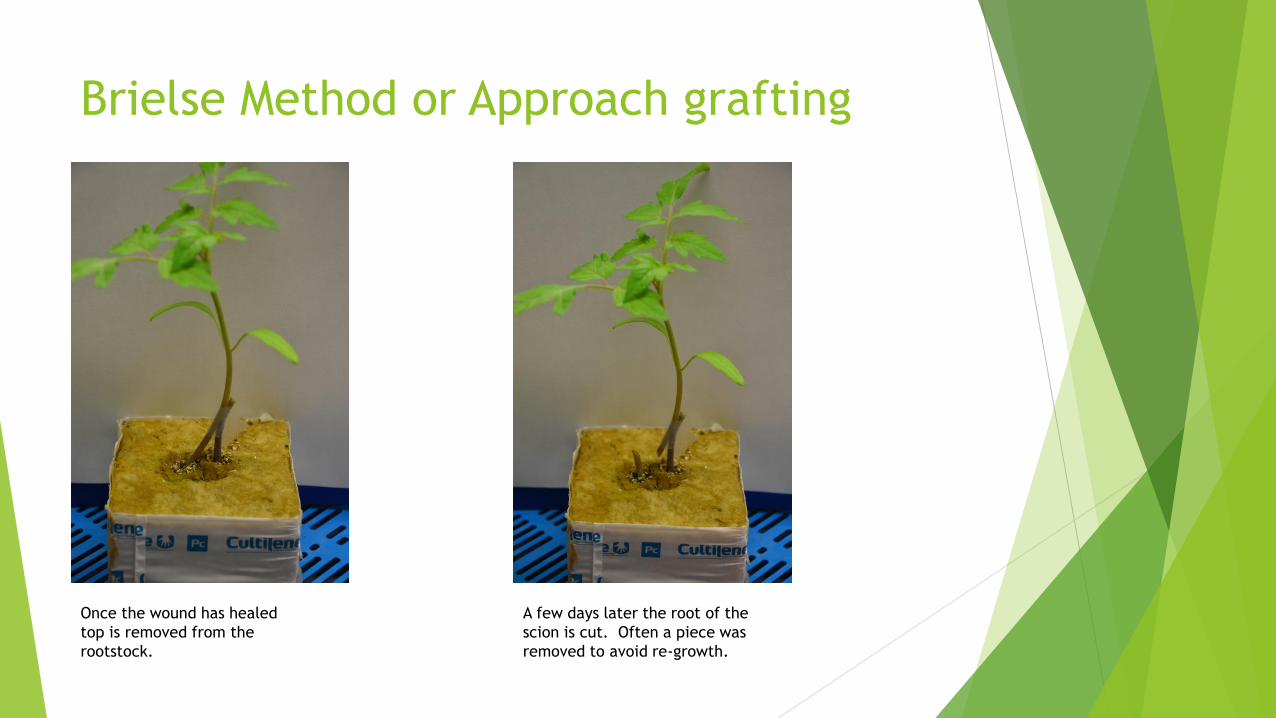
Brielse Method or Approach grafting
Once the wound has healed
top is removed from the
rootstock.
A few days later the root of the
scion is cut. Often a piece was
removed to avoid re-growth.

1970’s and 1980’s
The need for grafting diminished due to:
- Improved varieties: Resistant to Corky Root, Fusarium
- Use of Methyl Bromide and Vapam to prevent Corky Root
and Fusarium.
- The ability to now steam greenhouse soils.
- Increased use of crop rotation.
- Transition from soil production to hydroponic production during the late 1970’s

The late 1990’s
Grafting is re-introduced to the greenhouse industry due to:
- The constant drive to produce more kilo’s per square meter.
- High wire systems using one planting per year, with plants 15 meters in length by the end of the crop, requiring a better root system.
- Improved fruit quality.
- The ability to influence the vegetative/generative habits of a variety.
- The rapid introduction of new varieties.
- Introduction of the Japanese method of grafting.

Japanese method or Tube Grafting
Disadvantages - Precision work, plants are ideally grafted at 12-14 days
after seeding.
- Excellent climate and crop management are required for
the first five to seven days after grafting.
- The need to produce rootstock and scion seedlings that
are close to the same in diameter.
Advantages - Less labour intensive compared to the Brielse Method.
- Success rate is known within days after grafting.
- No grafting related actions required after the actual
grafting.
- Lower risk of the development of advantageous roots out
of the graft area.

Current Process to produce a grafted and
pinched tomato plant.
Steps:
1) Seeding of rootstock
2) Seeding of scion
3) Grading of rootstock
4) Grafting
5) Transplanting
6) Pinching
7) Sticking
8) Spacing
9) Clipping
10)Shipping

Seeding of rootstock and scion
- Drum seeder
- Vermiculite covering
- Optional watering pre
and post vermiculite.
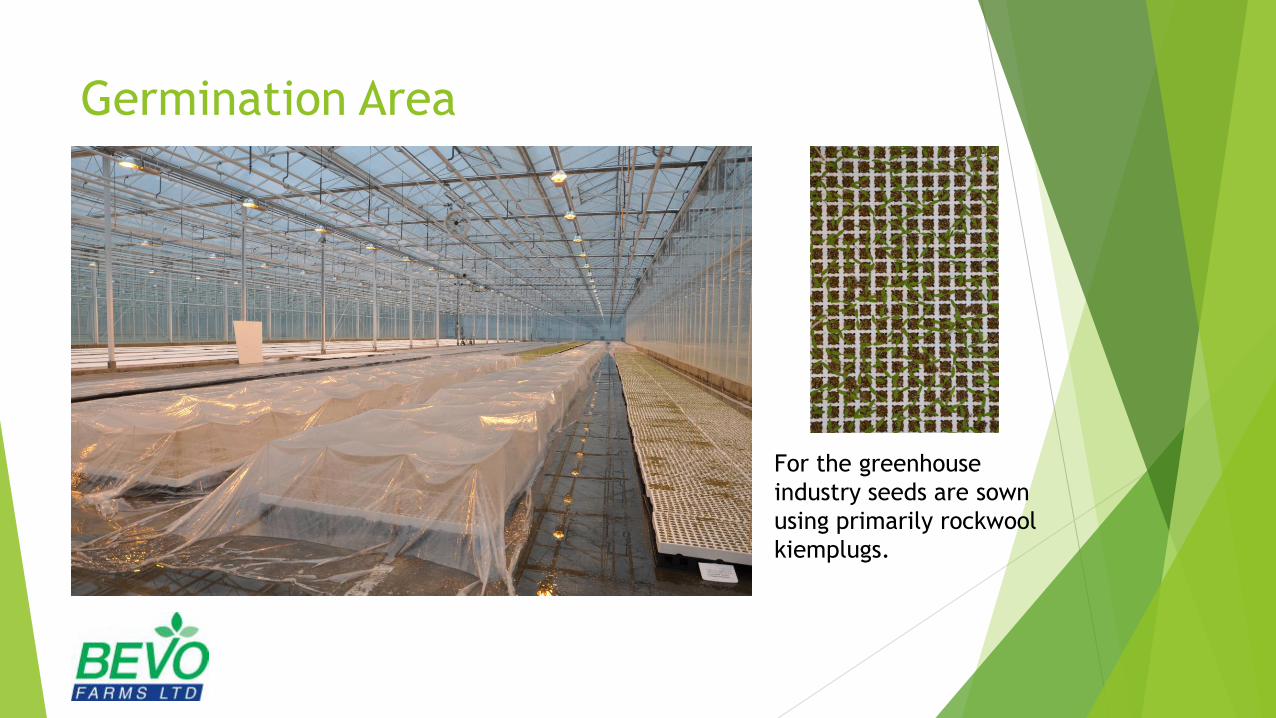
Germination Area
For the greenhouse
industry seeds are sown
using primarily rockwool
kiemplugs.

Rootstock Grading
To generate trays of rootstock
seedlings that are consistent in
size.

Grafting
- Manually grafted at 250-300/hour.
- Placed into tents for 4 to 7 days.
- Gradual climatization.
- Extreme hygiene protocol in
place.

Automatic Grafting
Full automatic
except for scion
placement in
machine.
Possible
continuous
hygiene actions.
Proven robotics.
Single person
operated for 1000
grafts/hour.

Grafted plant for field production
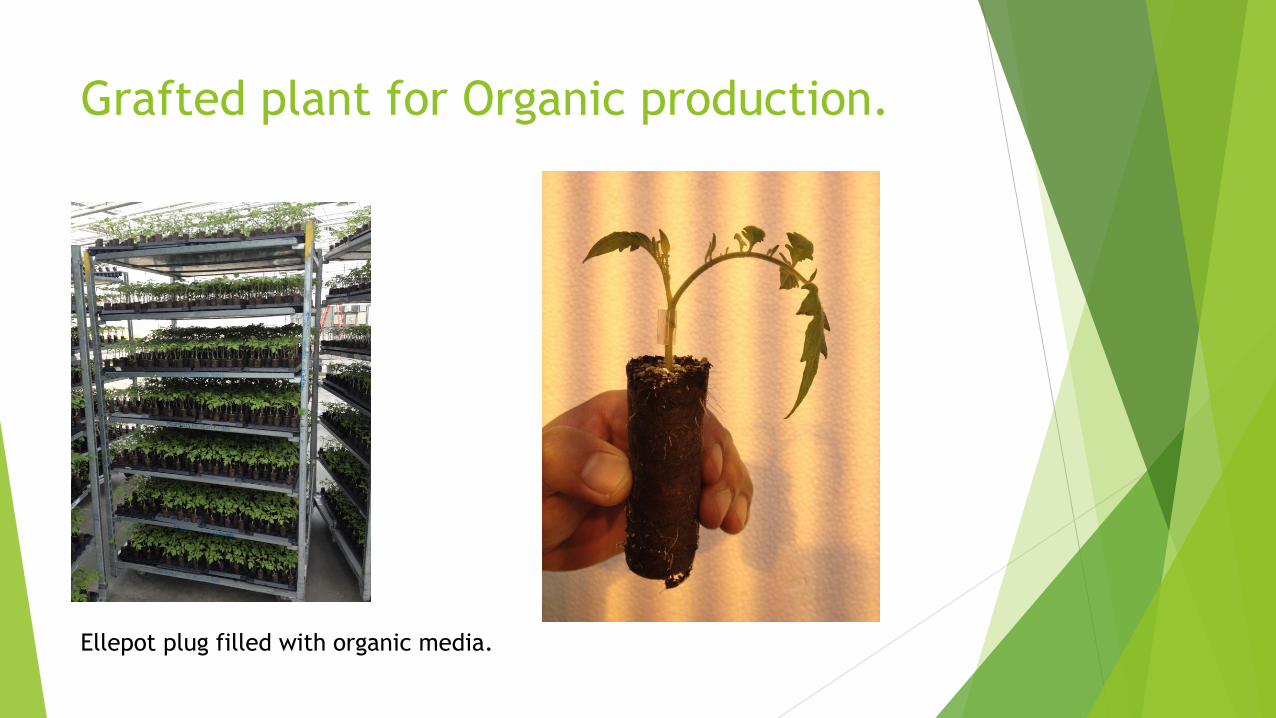
Grafted plant for Organic production.
Ellepot plug filled with organic media.

Transplanting

High graft vs Low graft

Pinching
45 day

Spaced

Ready to ship

Thank you