abila mip fund accounting general ledger transaction entry · general ledger transaction entry the...
TRANSCRIPT

Abila MIP Fund AccountingTM
General Ledger Transaction Entry
Important Notice:
Authentic Abila MIP Fund AccountingTM training guides display a holographic image on the front cover. If you have received a counterfeit copy, please
notify Abila Learning Services at 877-879-0456.
The text, logos and images contained within this Training Guide, including all lectures and any supplementary materials, are protected under the Trademark
and Copyright laws of the United States, as well as other countries. Any downloading, reproduction or further distribution of any original material within
this manual without prior written permission of Abila is strictly prohibited.
© 2015 Abila
STUDENT WORKBOOKABILA LEARNING SERVICES
NPS-FA104-SG

NOTICEVisit our Web site at www.abilauniversity.com, or call 1-877-879-0456 to learn about training classes that are added throughout the year.
Information in this document is intended solely as general information with respect to common business issues and is not to be construed as professional advice. It is always best to consult a tax or accounting professional for all tax and account related questions. THE INFORMATION HEREIN IS PROVIDED “AS IS” AND ALL WARRANTIES ARE EXPRESSLY DISCLAIMED, INCLUDING BUT NOT LIMITED TO ANY WARRANTY: OF MERCHANTABILITY; OF FITNESS FOR ANY PARTICULAR PURPOSE; OF NON-INFRINGEMENT OF ANY PROPRIETARY RIGHT OF ANY THIRD PARTY IN ANY COUNTRY; OTHERWISE ARISING OUT OF ANY PRODUCT, PROPOSAL, SPECIFICATION OR SAMPLE; AND ANY WARRANTY THAT THE DOCUMENT IS ERROR FREE. No license, express, implied, by estoppel or otherwise, to any intellectual property right is granted by this document. Abila may make changes to the information in this document at any time, without notice. Recipient is solely responsible for assessing the suitability of the information and assumes all risk of use.
Copyright © 2015 Abila, Inc. All Rights Reserved. All Abila product names appearing herein are trademarks and registered trademarks of Abila, Inc. in the United States and other countries. All other product names mentioned herein are the trademarks of their respective owners.
GID: 2015.08.19.2015.2 PN: NPS-FA104-SG

TABLE OF CONTENTS
General Ledger Transaction Entry . . . . . . . . . . . . . . . . . . . . . . . . . . . . 1
Organization Preferences . . . . . . . . . . . . . . . . . . . . . . . . . . . . . . . . . . . . . . . . . . . . . . . . . . . . . . . . . . . . . 1Entering Transactions . . . . . . . . . . . . . . . . . . . . . . . . . . . . . . . . . . . . . . . . . . . . . . . . . . . . . . . . . . . . . . . 10
Session Entry . . . . . . . . . . . . . . . . . . . . . . . . . . . . . . . . . . . . . . . . . . . . . . . . . . . . . . . . . . . . . . . . . . . . 10Entry Overview . . . . . . . . . . . . . . . . . . . . . . . . . . . . . . . . . . . . . . . . . . . . . . . . . . . . . . . . . . . . . . . . . . . 14Document Entry . . . . . . . . . . . . . . . . . . . . . . . . . . . . . . . . . . . . . . . . . . . . . . . . . . . . . . . . . . . . . . . . . . 15Transaction Entry . . . . . . . . . . . . . . . . . . . . . . . . . . . . . . . . . . . . . . . . . . . . . . . . . . . . . . . . . . . . . . . . . 16Transaction Entry Rules . . . . . . . . . . . . . . . . . . . . . . . . . . . . . . . . . . . . . . . . . . . . . . . . . . . . . . . . . . . . 18Manage Attachments . . . . . . . . . . . . . . . . . . . . . . . . . . . . . . . . . . . . . . . . . . . . . . . . . . . . . . . . . . . . . . 19Check Budget and Encumbrance Balances . . . . . . . . . . . . . . . . . . . . . . . . . . . . . . . . . . . . . . . . . . . . . 25Using Offsets . . . . . . . . . . . . . . . . . . . . . . . . . . . . . . . . . . . . . . . . . . . . . . . . . . . . . . . . . . . . . . . . . . . . 28Using Distribution Codes . . . . . . . . . . . . . . . . . . . . . . . . . . . . . . . . . . . . . . . . . . . . . . . . . . . . . . . . . . . 30
Entry Options . . . . . . . . . . . . . . . . . . . . . . . . . . . . . . . . . . . . . . . . . . . . . . . . . . . . . . . . . . . . . . . . . . . . . . 33Copy Posted Document . . . . . . . . . . . . . . . . . . . . . . . . . . . . . . . . . . . . . . . . . . . . . . . . . . . . . . . . . . . . 33Reverse Posted Document . . . . . . . . . . . . . . . . . . . . . . . . . . . . . . . . . . . . . . . . . . . . . . . . . . . . . . . . . 36Memorize/Recurring Document . . . . . . . . . . . . . . . . . . . . . . . . . . . . . . . . . . . . . . . . . . . . . . . . . . . . . . 39Recall Memorized/Recurring Document . . . . . . . . . . . . . . . . . . . . . . . . . . . . . . . . . . . . . . . . . . . . . . . 42Manage Recurring Entries . . . . . . . . . . . . . . . . . . . . . . . . . . . . . . . . . . . . . . . . . . . . . . . . . . . . . . . . . . 45Transaction Entry Defaults . . . . . . . . . . . . . . . . . . . . . . . . . . . . . . . . . . . . . . . . . . . . . . . . . . . . . . . . . . 53Review Session Information . . . . . . . . . . . . . . . . . . . . . . . . . . . . . . . . . . . . . . . . . . . . . . . . . . . . . . . . . 57Reversing Entries . . . . . . . . . . . . . . . . . . . . . . . . . . . . . . . . . . . . . . . . . . . . . . . . . . . . . . . . . . . . . . . . . 58Adjust Current Year . . . . . . . . . . . . . . . . . . . . . . . . . . . . . . . . . . . . . . . . . . . . . . . . . . . . . . . . . . . . . . . 61
Year End Adjustments . . . . . . . . . . . . . . . . . . . . . . . . . . . . . . . . . . . . . . . . . . . . . . . . . . . . . . . . . . . . . . . 63Beginning Balances . . . . . . . . . . . . . . . . . . . . . . . . . . . . . . . . . . . . . . . . . . . . . . . . . . . . . . . . . . . . . . . . . 63
Beginning of the Fiscal Year Implementation . . . . . . . . . . . . . . . . . . . . . . . . . . . . . . . . . . . . . . . . . . . . 63Mid- Fiscal Year Implementation . . . . . . . . . . . . . . . . . . . . . . . . . . . . . . . . . . . . . . . . . . . . . . . . . . . . . 63Subsidiary Ledger Considerations . . . . . . . . . . . . . . . . . . . . . . . . . . . . . . . . . . . . . . . . . . . . . . . . . . . . 64
Reports . . . . . . . . . . . . . . . . . . . . . . . . . . . . . . . . . . . . . . . . . . . . . . . . . . . . . . . . . . . . . . . . . . . . . . . . . . . 65Checklists . . . . . . . . . . . . . . . . . . . . . . . . . . . . . . . . . . . . . . . . . . . . . . . . . . . . . . . . . . . . . . . . . . . . . . . . . 68Reinforcement Exercises . . . . . . . . . . . . . . . . . . . . . . . . . . . . . . . . . . . . . . . . . . . . . . . . . . . . . . . . . . . . . 72
© 2015 Abila Student Curriculum i-1Attention: Authentic curriculum displays a holographic image on the front cover.

Abila MIP Fund AccountingTM
i-2 Student Curriculum © 2015 AbilaAttention: Authorized copies contain a holographic image on the front cover.

General Ledger Transaction Entry Organization Preferences
General Ledger Transaction Entry
The General Ledger Module provides separate menu selections for the different types of accounting transactions. On the Transaction menu, you will find Enter Cash Receipts, Enter Cash Disbursements, Enter Journal Vouchers, Enter Budget, and Edit System Generated Documents.
Depending on the modules installed, you may also find selections for Accounts Payable, Accounts Receivable, and/or Encumbrance Transactions. These transaction selections will be discussed separately in chapters relating to each respective transaction type.
You will use the two basic transaction entry forms (Session ID form and Transaction Detail form) for all transaction types.
Before you begin your transaction entry in Accounting, it is important to set up Processing Preferences under Organization Preferences.
Organization PreferencesYou may preset your organization preferences within Administration. These preferences effect all transactions entered for your organization. The preferences are set using the menu item Organization > Organization Preferences.
Processing Tab
Specifying organization preferences is an optional step to setting up your Application because the required preference items use option box controls with default values.The form is separated into four tabs: one for processing options, one for entry dates, one for Session IDs, and one for document numbers. Open the form using the Organization > Organization Preferences menu selection.
Processing Mode: Batch, On-Line, Combined - You may accept the default processing mode of Combined, or select one of the other processing modes. You may change the processing mode later, as long as transaction entry is not in progress at the time of the change. The processing mode determines when transactions are posted, as shown in the table below:
Processing Mode Description
Batch Transactions saved in a session are accumulated and posted using the Activities > Manage Sessions > Post Transactions menu.
On-Line During transaction entry, all transactions are posted as soon as they are saved.
© 2015 Abila Student Curriculum 1Attention: Authentic curriculum displays a holographic image on the front cover.

Organization Preferences Abila MIP Fund AccountingTM
Enable Document ID Control – Select this box to allow multiple users in different sessions of the same transaction type to auto increment Document IDs.
For example, if Jane is working on her workstation entering cash receipts and Susie is on her workstation entering a separate session of receipts if this box is checked, they may use the plus (+) key to auto increment the receipt numbers to ensure they do not duplicate the receipt numbers used.
Also, the Enable Document ID Control box must be selected on the Processing tab In order for the system to keep track of the Last Document Number. If Enable Document ID Control box is not selected, the system disregards any document numbers entered on the Document Numbers tab.
Summarize Transaction Entries: Select this check box to combine the detail transaction lines in the Transactions > Transaction Entry forms. The lines are summarized after clicking Use Offsets or when using the Use Distribution Code Process. The Application automatically summarizes all Application generated, fixed assets, and allocation transactions, regardless if this box is selected. The box is not selected by default.
Transfer Assets to Sage Fixed Assets: Use this group box to set up the features for transferring your assets to Sage Fixed Assets. The Sage Fixed Assets product must be installed in order to select the database and unit.
Enable Sage Fixed Asset Quick Entry - Deselect this check box if you do not desire to enable the Sage Fixed Asset Quick Entry feature. If selected, the Application activates the following forms in Accounting:
Transactions > Enter Cash Disbursement > Sage Fixed Assets Quick Entry
Transactions > Accounts Payable > Enter A/P Invoices > Sage Fixed Assets Quick Entry
Combined A processing mode of Batch or On-Line is determined for each individual session at the time of transaction entry.
2 Student Curriculum © 2015 AbilaAttention: Authentic curriculum displays a holographic image on the front cover.

General Ledger Transaction Entry Organization Preferences
Activities > Check Writing > Write Checks > Sage Fixed Assets Quick Entry
Activities > Accounts Payable > Transfer to Sage Fixed Assets
Database, Organization Unit: Select an existing Sage Fixed Assets database or accept <default>. Select a unit name to serve as the default when you transfer assets, Activities > Accounts Payable > Transfer Assets to Sage Fixed Assets. You may select a different unit when you transfer.
Account Code Combinations
In Abila MIP Fund AccountingTM’s table-driven chart of accounts, any combination of account codes is valid during transaction entry, making it possible to charge expenditures to an incorrect account code for example, grant. However, you may use account combinations to ensure accurate transaction entry. Account combinations allow you to specify which combinations of codes apply to your organization. You may do this in either of two ways: you may define the valid account combinations or you may define the invalid account combinations.
Options - Select Valid Account Combinations, Invalid Account Combinations, or No Account Combinations. You will use these designations when you specify which codes are valid or invalid with other codes using the Maintain > Account Code Combinations form in Accounting.
If you define valid account combinations, the Application looks at the account combination table during data entry and accepts only those combinations that are present in the table. If you define invalid account combinations, the Application looks at the account combination table and rejects those combinations that are present in the table.
Using the account combinations feature is entirely optional. If you have a relatively simple account structure and a low probability of coding error, you may elect not to use the feature.
If you choose to use account combinations, choose the approach that will be easier to set up and maintain. In other words, if most of the account combinations you created with your account structure were valid, you would choose to set up invalid combinations. However, if most of the account combinations you create with your account structure would be invalid, you would choose to set up valid combinations.
Segments - You may also choose which segments you would like to include in your account combinations. The example provided earlier stated that some grants cannot fund some expenditures, therefore in that example you would define your account combinations to include the GL and Grant segments. If used, your account combinations must include at least two segments, but you may include as many segments as are necessary to ensure correct transaction entry. However, the more segments you include in the account combinations, the more time it will require to set up and maintain the account combinations. Therefore you should plan carefully before deciding which segments to include in your account combinations.
Verify Account Code Combinations during Setup, Transaction Entry, and Processing - Select this check box to activate account code combinations in the Accounting Application. The Application then checks for proper account code combinations during setup, transaction entry, and processing. Consequently, this affects system generated checks. It also affects entries created during the JVA (Allocation Management), ARB (A/R Billing), and JVD (Fixed Assets) processes.
© 2015 Abila Student Curriculum 3Attention: Authentic curriculum displays a holographic image on the front cover.

Organization Preferences Abila MIP Fund AccountingTM
NOTE: This feature does not apply to Budget transactions. Also if you use account code combinations, this box is rarely, if ever, cleared.
Entry Dates Tab
The Application provides the flexibility to enter transactions for any valid date, regardless of current period or status of the year-end close. While this adds to the power and flexibility of the software, it also provides the opportunity for transaction entry errors. For example, your transaction entry clerk may accidentally type the wrong date for a transaction and post to a future or prior month.
You may set the acceptable date ranges for each type of transaction using the Entry Dates tab on the Organization Preferences form. You may enter any combination of dates on any row. For example, you may enter only prohibit dates, only warn dates, only prior to dates, only after dates or any combination. You may change the information whenever necessary by returning to this tab and erasing or replacing the dates.
Prohibit and Warn dates do not apply to the following forms, since they automatically generate entries:
A/P System Generated Checks and Vouchers: Activities > Check Writing > Write Checks; or Pay Selected A/P Invoices; or Void Checks/Vouchers
A/R System Generated Invoices: Transactions > Accounts Receivable > Edit A/R Invoices
Receipt Writing: Activities > Receipt Writing
System Close Year End: Activities > Close Fiscal Year
Any Copied or Reversed Posted Session
NOTE: The Close Fiscal Year and the updated database process, Activities > Close Fiscal Year, updates the entry dates on this tab.
Transaction - The Application displays all of the transaction entry forms where you may enter a document date or an effective date.
Prohibit Prior To - During transaction entry, if you enter an Effective Date that is prior to the date in this column, the Application will not allow the transaction to be entered.
Warn Prior To - During transaction entry, if you enter an Effective Date that is prior to the date in this column, the Application will give you a warning, but will still allow you to enter the transaction.
Warn After - During transaction entry, if you enter an Effective Date that is after the date in this column, the Application will give you a warning, but will still allow you to enter the transaction.
Prohibit After - During transaction entry, if you enter an Effective Date that is after the date in this column, the Application will give you an error and it will not allow you to enter any transactions.
4 Student Curriculum © 2015 AbilaAttention: Authentic curriculum displays a holographic image on the front cover.

General Ledger Transaction Entry Organization Preferences
© 2015 Abila Student Curriculum 5Attention: Authentic curriculum displays a holographic image on the front cover.

Organization Preferences Abila MIP Fund AccountingTM
Session Tab
When you are starting a new transaction entry session, you may have the Application automatically assign a Session ID by pressing the plus (+) key. When you automatically assign Session IDs, the Application looks at the ID in the Last Session ID record and adds one (1) to create the new Session ID. If the last Session ID used ended in a letter instead of a number, the Application creates the new ID by appending 001 to the last Session ID used. For each transaction type, you may insert the value at which you would like to begin incrementing Session IDs on the Session Tab of the Organization Preferences form.
Transaction - The Application displays all of the transaction entry forms where you may enter a Default Session ID.
Last Session ID - Enter a Default ID that will be used to identify a particular batch of documents. This ID will be used as the basis for any use of the plus (+) key (auto increment) during transaction entry.
6 Student Curriculum © 2015 AbilaAttention: Authentic curriculum displays a holographic image on the front cover.

General Ledger Transaction Entry Organization Preferences
Document Number Tab
When you are entering documents in a new transaction entry session, you may have the Application automatically assign the Document ID by pressing the plus (+) key. When you automatically assign document numbers, the Application looks at the ID in the Last Document Number record and adds one (1) to create the new document number. If the last document number used ended in a letter instead of a number, the Application creates the new number by appending 001 to the last document number used. For each transaction type, you may insert the value at which you would like to begin incrementing document numbers on the Document Number Tab of the Organization Preferences form.
Transaction - The Application displays all of the transaction entry forms where you may enter a Default Document Number.
Last Document Number - Enter a default document number that will be used as the basis for any use of the plus (+) key (auto increment) during transaction entry.
NOTE: In order for the system to keep track of the Last Document Number, the Enable Document ID Control box must be selected on the Processing tab. If Enable Document ID Control box is not selected, the system disregards any document numbers entered here.
© 2015 Abila Student Curriculum 7Attention: Authentic curriculum displays a holographic image on the front cover.

Organization Preferences Abila MIP Fund AccountingTM
Activity: Edit the Organization Preferences
Navigator: Administration > Settings > Organization Preferences
Classic View: Organization > Organization Preferences
Processing Tab Processing Mode: No Changes
Enable Document ID Control: Select
Summarize Transaction Entries: No
Account Code Combinations:
Segments: No Changes
Verify Account Code Combinations during
Setup, Transaction Entry and Processing: No
Enable Sage Fixed Assets Quick Entry: Not Available
Entry Dates Tab Change Entry Dates for all rows in the table:
Prohibit Prior To: 01-01-20XX (prior year)
Warn Prior To: 01-01-20XX (current year)
Warn After: 12-31-20XX (last day of current year)
Prohibit After: 12-31-20XX (last day of next year)
Change Entry Dates for Journal Vouchers:
Prohibit Prior To: 12-01-20XX (last closed FY)
Warn Prior To: 01-01-20XX (current year)
Warn After: 12-31-20XX (last day of current year)
Prohibit After: 12-31-20XX (last day of next year)
Click OK to close the warning message.
<Activity Continued on Next Page>
8 Student Curriculum © 2015 AbilaAttention: Authentic curriculum displays a holographic image on the front cover.

General Ledger Transaction Entry Organization Preferences
Activity: Edit the Organization Preferences <continued>
Session Tab Change last session ID for:
Cash Disbursements: CDXX0000 (XX = last 2 digits of the current year)
Cash Receipts: CRXX0000 (XX = last 2 digits of the current year)
Receipt Writing: CRSXX0000 (XX = last 2 digits of the current year)
Document Number Tab Change last Document Number for:
Journal Voucher: JVXX000 (XX = last 2 digits of the current year)
Click OK to save and close the form.
© 2015 Abila Student Curriculum 9Attention: Authentic curriculum displays a holographic image on the front cover.

Entering Transactions Abila MIP Fund AccountingTM
Entering TransactionsTo make entries into your general ledger, begin with a transaction entry. The transaction entry lines are grouped into documents. The documents are grouped into sessions. Every type of transaction you will enter begins with a session and a transaction source.
Session EntryAfter opening a transaction entry session in the Session ID form, you repeat a series of steps for detailing each transaction in the Transaction Detail form. You will:
Identify the document
Make the accounting entry
Save the transaction
Use the above form to identify the session you would like to open. You may start a new session or reopen a previous session that has not been posted. The drop-down list at the Session ID prompt displays the unposted sessions related to the transaction type selected, that are available for reopening. All fields are required except for the session description field.
Use the Find form or type a posted session ID to view previous sessions and their documents. Once a session or document is posted, it cannot be edited. However, you may view (read-only) the session or document.
Session ID - Identify the session. The Session ID is used to link each transaction to the session, in which it was entered, making it possible to track the origin of any entry. For example, if you print a general ledger report and include the Session ID field in the report, you may see the Session ID for each debit or credit listed in the report.
The Session ID is a 31character alphanumeric field and must be unique within each transaction type. You may select an unposted Session ID from the drop down combo box, enter a unique new ID, or use the Application’s auto increment feature by pressing the plus (+) key. When you press the plus key, the Application refers to the last Session ID that was used for the selected transaction type and increments the value by one. If the last Session ID ended with a character or symbol, the Application appends 001 to the last Session ID to create the new Session ID.
Sometimes it is helpful for you to recognize types of entries within the Application easily and quickly. It is also important that there is no duplication within the Application of session names. Because of this, we suggest that you establish a naming convention for your organization. What is a naming convention? It is a method for you to easily recognize who is responsible for a particular session and what types of entries are in the session. Review the following example as a suggested method for using naming conventions in your organization.
APIxx01001 – API (Accounts Payable Invoice) Session, for the year 20xx, the month of January (01) and the first session (001).
10 Student Curriculum © 2015 AbilaAttention: Authentic curriculum displays a holographic image on the front cover.

General Ledger Transaction Entry Entering Transactions
You could use the following Application abbreviations for common session types. These are what we refer to as the Transaction Source.
Trans. Source Description
APC A/P Manual Checks
API A/P Invoices
APM A/P Credit Memos
APR A/P Revaluation
APS A/P System Generated Checks
APV A/P Void Checks
ARB A/R Invoices
ARC A/R Receipts
ARM A/R Credit Memos
ARP A/R Prepayments
ARR A/R Revaluation
ARS A/R System Generated Invoices
ARV A/R Void Invoices
BD Budget
BDH Budget - Consolidate History
CD Cash Disbursements
CDS Write Checks
CL System Close Year-End
CR Cash Receipts
CRS System Generated Receipts
CSR Cash Revaluation
ENC Encumbrances
ENH Encumbrances - Consolidate History
ENL Encumbrance Liquidations
IAA Adjust Purchase Order Receipts
IAB Build Inventory Assemblies
IAC Customer Inventory Returns
IAF Requisition Fulfillment
IAM Manual Inventory Adjustments
IAR Process Purchase Order Receipts
© 2015 Abila Student Curriculum 11Attention: Authentic curriculum displays a holographic image on the front cover.

Entering Transactions Abila MIP Fund AccountingTM
Another common Activity is to use your initials somewhere in the session name.
Status – Choose from the following status codes. You determine your default status codes in Administration, Organization > Organization Preferences > Processing menu selection.
Batch to Post – Transactions are saved in a file until the session is posted, at which time the ledgers are updated. You may reopen the session to edit the transactions or add new transactions.
Batch to Suspend - Like a Batch to Post, transactions that are saved in a file that may be reopened and modified. A Batch-to Suspend session is not available for posting until the status is changed to Batch-to Post. You may save an out-of-balance or incomplete document within a suspended batch.
On-Line Posting - The ledgers are updated each time a transaction is completed and saved. You cannot retrieve individual transaction entries from within the session to make corrections. You must reverse entire sessions or documents before correct entries may be posted.
NOTE: If your session status is set to OL (On-Line Posting), then on your transaction entry form you will see a Post button instead of a Save button.
You may change the session status from Batch to Post to Batch to Suspend (and vice versa) at any time. However, you may only change any Batch status to On-line (and vice versa) if NO transactions have been saved or posted in the session.
Session Date: The Application supplies the current date as the default value when a new session is created. The session date may be the date the session was created, the date the session was posted, or the date of the transactions in the session. You may include the session date in many detail reports such as the general ledger. The session date also serves as the default document date for each transaction in the session.
You may change the session date at any time until the session is completed. If you change the session date, the last date used in the session will be stored as the session date and used in reports.
IAS Sales Order Fulfillment
IVR Vendor Inventory Returns
JV Journal Vouchers
JVA Allocation Management
JVD Depreciation/ Disposals
JVH Consolidate History
PRC Payroll Manual Checks
PRS Payroll System Generated Checks/Vouchers
PRV Payroll Void Checks/Vouchers
VCK Void Checks
Trans. Source Description
12 Student Curriculum © 2015 AbilaAttention: Authentic curriculum displays a holographic image on the front cover.

General Ledger Transaction Entry Entering Transactions
Description - You determine the length of this field when you create your organization’s database. You may include the session description in many detail reports such as the general ledger. The session description also serves as the default document description for each transaction in the session.
You may change the session description at any time until the session is completed. If you change the session description, the last description used in the session will be stored as the session description and used in reports.
Cash Account: Select the General Ledger cash account for this batch of checks. You must credit the selected account at least once to save or post the document. This option is only available on the Enter Cash Disbursements, Transactions > Enter Cash Disbursements, the Write Checks, Activities > Check Writing > Write Checks, and Enter Manual A/P Checks, Transactions > Accounts Payable > Enter Manual A/P Checks Session forms.
Version: Select a budget version from the drop-down list for the current session. This option is available only in Budget sessions.
Session Totals: The Application displays the total number of documents and the total amount of the documents entered during the current session. Some sessions, such as Budget, Journal Vouchers, Encumbrances, and Encumbrance Liquidations, do not have a total amount.
TIP: Rather than manually entering a Session ID each time, you may have the Application assign the next available Session ID. With the cursor in the Session ID box, simply press the plus (+) key to automatically increment the Session ID by one from the last Session ID used. To change the last Session ID, use the Organization > Organization Preferences > Session tab.
© 2015 Abila Student Curriculum 13Attention: Authentic curriculum displays a holographic image on the front cover.

Entering Transactions Abila MIP Fund AccountingTM
Entry OverviewThe Transaction Entry Form is comprised of seven areas. These areas are discussed in detail below.
The title bar, or caption bar, indicates the form name and status. The title bar dynamically changes to indicate the forms state. As documents are created or edited, the title bar displays the current document number and status; new, editing, etc.
A row of auxiliary command buttons is displayed just below the title bar. The pictures on the buttons indicate the buttons purpose. Alternately, you may rest your mouse pointer on any button for a few seconds and a Tool Tip indicating the buttons purpose will appear. The function of each button will be discussed later in this chapter.
Record document level information immediately below the auxiliary command buttons. The term document generically applies to all transaction types.
The sample form pictured above is a cash disbursement transaction form. In this case, the document is referred to as a check. Other transaction entry forms refer to the document as a receipt, voucher, invoice, or other applicable term. The fields in the document section of the form vary based on transaction type and modules installed. For example, the amount field on the form pictured is a control field and only appears for transactions that affect subsidiary ledgers such as the Bank Reconciliation or Accounts Payable and Accounts Receivable subsidiary ledgers.
You may use the next section of the form to record the accounting information for the transaction. The accounting area looks like a grid with the information entered into cells. The number of segments in your organizations account structure determines the width of the grid. If the entry grid is larger than the display area, scroll bars reposition the grid to ensure all cells may be accessed. Each transaction will have a minimum of two detail lines containing account codes and debit or credit amounts.
14 Student Curriculum © 2015 AbilaAttention: Authentic curriculum displays a holographic image on the front cover.

General Ledger Transaction Entry Entering Transactions
You will find at the bottom of the form the document status, displayed titles and standard command buttons. The document status display shows the total debits, total credits, net difference, current row (record) and total number of rows (records) in the current document.
The display titles section of the transaction entry form displays the titles for the codes on the current selected line. This serves as an excellent reference to ensure the correct codes were entered. The title
display may be toggled off and on with the Display/Hide Titles button.
The command buttons at the bottom of the form conform to standard command button behavior with one minor difference – the New/Save button is replaced with a Post button when the current session status is On-line posting.
Document EntryDocument (Check) – Use this field for the Document or Check Number. Use the Application’s auto increment feature for document numbers by pressing the plus (+) key. When you press the plus key, the Application refers to the last document number that was used for the selected transaction type in Administration and increments the value by one. If the last document number ended with a character or symbol, the Application appends 001 to the last document number to create the new document number.
Date - Defaults to Session Date. You may change this date if necessary.
Amount – The Application uses the amount as a Control Field. It appears only for transactions that affect subsidiary ledgers such as Bank Reconciliation (in this example) or Accounts Payable and Accounts Receivable subsidiary ledgers.
The net amount to the Control Account (Cash GL-Account in this example) in the accounting area must equal the amount entered in the amount field.
Description - Defaults to the session description. You may change the document description if necessary.
Payee ID - Is only available if one of the Accounts Payable, Accounts Receivable or Payroll modules is installed.
Reverse - When entering monthly and annual adjustments you may use the Application’s Reversing feature to automatically create the reversing entry. This feature facilitates clearing accrued expenses, accrued revenues, and other adjusting type entries. The reversing feature is only available with Journal Voucher (transaction source JV) transactions.
You may elect to create the reversing entries in the current document, in a new document in the current session, or in a new document in a new session. You may also enter the journal voucher without creating reversing entries.
© 2015 Abila Student Curriculum 15Attention: Authentic curriculum displays a holographic image on the front cover.

Entering Transactions Abila MIP Fund AccountingTM
TIP: The Automatic Reverse feature is only available for Journal Vouchers.
FOR MORE INFORMATION: See the Reversing Entries section of this chapter.
1099 Type - Accept the default entered on the Maintain > Vendors > 1099 Information tab or select a 1099 form type from the drop-down list. Available types include MISC, DIV, INT, or R. 1099 Type is only available if the Accounts Payable module is installed and you choose a Vendor from the Payee ID box that is selected to receive a 1099, Maintain > Vendors.
Transaction EntryThe Application contains automatic edits, called Transaction Entry Edits, to verify the accounting entry conforms to Application guidelines.
Line level edits ensure that all required information is entered in the transaction line and the account combination validation rules are followed. For example, the line level edits ensure that a general ledger code is entered, and codes are entered for all fund and balancing segments. Additionally the edits ensure that codes are entered for non-balancing segments and the restriction segments for revenue and expense line entries.
Form level edits ensure that debits equal credits within funds, balancing segments, entry type, and effective dates. Form level edits also ensure that entries to the subsidiary ledger accounts equal the document amount.
You do not need to remember all the validation rules. If you try to create an entry that does not conform, the Application displays a message indicating the problem and prevents saving or posting the transaction until the problem is resolved.
Segment Codes (Fund, Grant, etc.) - Enter the codes manually or select from the drop-down box.
1099 Box - Enter the 1099 box number (Form Type-Box Number) for this line or accept the default (if any). If you select a vendor in the Payee ID box on this form and the vendor is set up to receive a 1099, Maintain > Vendors > 1099 Information tab you are required to enter a 1099 Box number. The available 1099 box numbers change depending on the 1099 Type selected for the document.
Debit/Credit - Enter the appropriate Debit or Credit amount.
Entry Type – You specify the entry type for each line item on the transaction entry form. The entry type defaults to N (Normal), but you may make changes as necessary. Valid entry types are discussed below:
N (Normal) - is used for all accounting activity during the fiscal year (daily and month-end transactions).
A (End of Year Adjustments) - is used to indicate adjustments made on the last day of your organization's fiscal year. It requires that the line's effective date is the last month and day of a fiscal year.
16 Student Curriculum © 2015 AbilaAttention: Authentic curriculum displays a holographic image on the front cover.

General Ledger Transaction Entry Entering Transactions
AO (Adjust Opening Balance) - is used to indicate that an adjustment is being made to opening balances for an entry made to any fiscal year. It requires that the line's effective date is the first day and first month of the fiscal year you are adjusting.
UO (Beginning Balance) - is used to indicate that opening balances are being entered for the first day and first month of the organization's fiscal year. You might also use this entry type when you begin using the Application and enter your balances for the first time.
SO (System Opening) - The Application creates transaction entries effective on the first day of the new fiscal year when you close a fiscal year. These SO entries are created and posted by the Application. You cannot create or edit these transactions.
NOTE: All entry types are allowed, however, a Revenue or Expense type account cannot be used in a UO (Beginning Balance) or AO (Adjust Opening Balance) transaction. Either the account must be changed to a type that is not a Revenue or Expense type account, or the Entry Type must be changed to N (Normal) or A (End of Year Adjustment), whichever is appropriate for the effective date of the transaction line.
Effective Date - Defaults to document date. You may change this date as necessary to post entries to the correct effective date.
NOTE: The Effective Date is the date the transaction will post to the ledgers.
Description - Defaults to document description. You may change this description as necessary. (Also referred to as transaction description.)
{User Defined Field}: This column displays any User Defined Field with a Transaction Lines type and transaction source of the appropriate transaction source. The Application automatically appends one column for each field to the right of the transaction entry table. These fields were created using Organization> Set Up User Defined Fields> Setup tab.
NOTE: Account level security is available for the transaction entry form. This feature allows you to define the account codes and related amounts a user may view or use on transaction forms.
NOTE: The Over Budget form appears if the transaction being entered exceeds budget and you are using On-Line posting for the current organization and the Check Available Budget During Posting check box is selected.
© 2015 Abila Student Curriculum 17Attention: Authentic curriculum displays a holographic image on the front cover.

Entering Transactions Abila MIP Fund AccountingTM
User Defined Fields Tab
Use this tab to enter data for any User Defined Field with a Transaction Documents type and the applicable transaction source to the open document. You may only enter data on this tab after entering a document number on the Transaction Entry tab.
These fields were previously created and assigned characteristics using Organization > Set Up User Defined Fields > Setup tab. When entering data in the value column, you must adhere to the predefined settings (e.g., field type, length, and decimal places).
Once fields have been created, the Application automatically creates the Transaction Entry tab and User Defined Fields tab. Otherwise, the Transaction Entry form is available, but without the tabs and any User Defined Fields.
TIP: Any transaction type UDFs may be printed on the following reports:
Journals > Revenue Journal
Transactions > Unposted General Ledger Transactions and Posted General Ledger Transactions
General Ledger Analysis > Expanded General Ledger
TIP: If a UDF was created with a transaction line type and the appropriate transaction source, it will display as a column on the Transaction Entry tab.
Transaction Entry RulesThe general ledger account codes determine what other segment codes are required. For revenues and expenditures, all segment codes are required.
For balance sheet accounts, the Application verifies that segments designated as Fund and Balancing types have codes. See the table below for complete information.
GL Account Type Entered
Segments
Fund Balancing Non-Balancing Restrictions
Revenue and Expense Required Required Required Required
Net Assets/Equity Required Required Optional Required
Other Balance Sheet Accounts (Assets & liabilities
Required Required Optional Optional
18 Student Curriculum © 2015 AbilaAttention: Authentic curriculum displays a holographic image on the front cover.

General Ledger Transaction Entry Entering Transactions
Hot Keys
The Application provides data entry tools for faster transaction entry.
Use Tab to move the cursor to the next cell. If the cursor is at the end of the line, it wraps to the next line.
Use Shift+Tab to move the cursor to the previous cell.
Use F2 to select or deselect text.
If you use F4 in a drop-down list, the Application drops the list or pulls it up, if it is down.
Use F5 to copy the contents of the cell immediately above the active cell (starting with the second row) into the active cell.
Use F6 to copy the contents of the row immediately above the active row (beginning with the second row) into the active row.
Use F7 to pull in all of the values from the entry defaults form.
Manage AttachmentsSelect Attachments button, the button changes to when attachments already exist, to display the Attachments form.
Use the attachment form to add, view, or delete an attachment that applies to the current menu selection. The form collects the basic information needed to manage and maintain attachments. The list of attachments are limited to the specific form (transaction source\session ID\document number for transactions).
Before using attachments, you must first enable the attachments feature at Organization > Attachments > Set Up Locations. You should also review and set up attachment categories using Organization > Attachments > Set Up Categories.
Category/Sub-Categories: The Application displays a list of category and sub-category folders available for the current menu selection. You may expand or collapse folders by selecting the plus or minus sign.
Attachments: The Application displays the existing attachments for the selected category or sub-category. You cannot change the information in the attachment panel.
Name - The name given to the attachment when it was saved.
Type - The type assigned to the attachment when it was saved, either L (Linked) or E (Encrypted).
Path - The location where the attachment was saved.
User ID - The user who created and saved the attachment.
Date - The date the attachment was created and saved.
To view or delete an attachment left mouse click on the box to the left of the attachment name and select
View button or Delete button. To add an attachment select New
button enter the Attachment name, browse to the attachment and select Save button.
© 2015 Abila Student Curriculum 19Attention: Authentic curriculum displays a holographic image on the front cover.

Entering Transactions Abila MIP Fund AccountingTM
Add Attachment: Use the Add Attachment Panel to attach an image or file to the selected category or sub-category.
The Application displays the category or sub-category selected in the category/sub-categories panel. The category or sub-category may not be changed after an attachment is saved.
Type: Select the type of attachment.
Linked - Linking to a document means that you browse to the document location and the Application saves the path to the document. To view the linked document, it has to remain in the exact location to be viewed.
Encrypted - Encrypting a document means that the document will be scrambled by the Application to prevent unauthorized access, and copied to a location defined at Organization > Attachments > Set Up Locations. Encrypting a document provides basic security and prevents unauthorized individuals from viewing the document outside of the Application.
Name - Enter a unique name for the attachment.
Source - Click the Browse button to define the attachment location.
TIP: Any transaction line having debits and credits that equal zero is treated as a memo entry. Memo entries are related to the account code combination on their transaction line.
TIP: Once a session or document is posted, it cannot be edited. However, you may view (read-only) the session or document. Initially, the Session ID drop-down list only includes unposted sessions. To view posted sessions, select the posted Session by entering the ID or using the Find button.
20 Student Curriculum © 2015 AbilaAttention: Authentic curriculum displays a holographic image on the front cover.

General Ledger Transaction Entry Entering Transactions
TIP: To have the Application combine the detail transaction lines, select the Summarize Transaction Entries check box, Organization > Organization Preferences, and then click the Use Offset or Use Distribution Code buttons, and complete the process. The Application automatically summarizes all system generated, fixed assets and allocation transactions.
TIP: The Transaction Entry table contains an unlimited number of lines available to record the document. As you complete each line another becomes available. Use the scroll bars to move up and down in the table if the entry has too many lines to be seen at one time.
TIP: Initially the transaction lines appear in the order in which they were entered; however, they may be moved to the order you would like them to appear. Simply highlight the entire row, and then drag the row to the appropriate place using the mouse.
TIP: By default, the Application displays the same effective date and description in the Transaction Entry table as the document date and description, unless defaults were specified using Entry Defaults.
TIP: A transaction may be entered to a closed fiscal year. However, you may wish to change entry dates, Organization > Organization Preferences> Entry Dates tab) to warn or prohibit the user from making an entry to a closed fiscal year.
TIP: A document’s debits and credits may be out of balance for a combination (document number, fund code, balancing segment, effective date or entry type) when the session status is Batch-to-Suspend.
© 2015 Abila Student Curriculum 21Attention: Authentic curriculum displays a holographic image on the front cover.

Entering Transactions Abila MIP Fund AccountingTM
Activity: Enter Session Information
Navigator: Accounting > Basic Transactions > Enter Cash Disbursements
Classic View: Transactions > Enter Cash Disbursements
Session Information:
Session ID: Use the plus (+) key to auto increment
Status: BP - Batch-to Post
Description: Manual Disbursement Checks
Date: <Today’s Date>
Cash Account: 11001
Click Start
22 Student Curriculum © 2015 AbilaAttention: Authentic curriculum displays a holographic image on the front cover.

General Ledger Transaction Entry Entering Transactions
Activity: Enter Document Level Information
Navigator: Accounting > Basic Transactions > Enter Cash Disbursements
Classic View: Transactions > Enter Cash Disbursements
Document Information: Check: 59001
Date: <Today’s Date> (Use also for all effective dates)
Amount: $150.00
Description: Supplies for Child Care
Payee ID: Rapid <Rapid Supplies Provider>
Check Address: Main <Accept Default>
1099 Type: N/A (Not Available)
Click Display/Hide Titles to hide the display the Titles section of the Transaction Entry form.
First Transaction line:
Press Tab key to advance to the first cell of the second transaction line.
Second Transaction line: Press the F5 key in each segment field. The Application will copy the cell above.
Change the Program code to: 301
The Application fills in Entry Type, Effective Date, and Description automatically from the previous transaction line.
Press the Down Arrow key to advance the cursor into the third transaction line.
<Activity Continued on Next Page>
© 2015 Abila Student Curriculum 23Attention: Authentic curriculum displays a holographic image on the front cover.

Entering Transactions Abila MIP Fund AccountingTM
Activity: Enter Document Level Information <continued>
Third Transaction line: Press the F6 key. The Application creates a new line that is identical to the previous line.
Change the Program code to: 401
Press the Down Arrow key to advance the cursor into the fourth transaction line.
Fourth Transaction line: Use the F5 key or manually enter the last line of data to complete the accounting entry:
Click the Save button to save this document.
Do not close the form.
You may get a message indicating its time to buy more checks.
Click OK and continue.
24 Student Curriculum © 2015 AbilaAttention: Authentic curriculum displays a holographic image on the front cover.
General Ledger Transaction Entry Entering Transactions
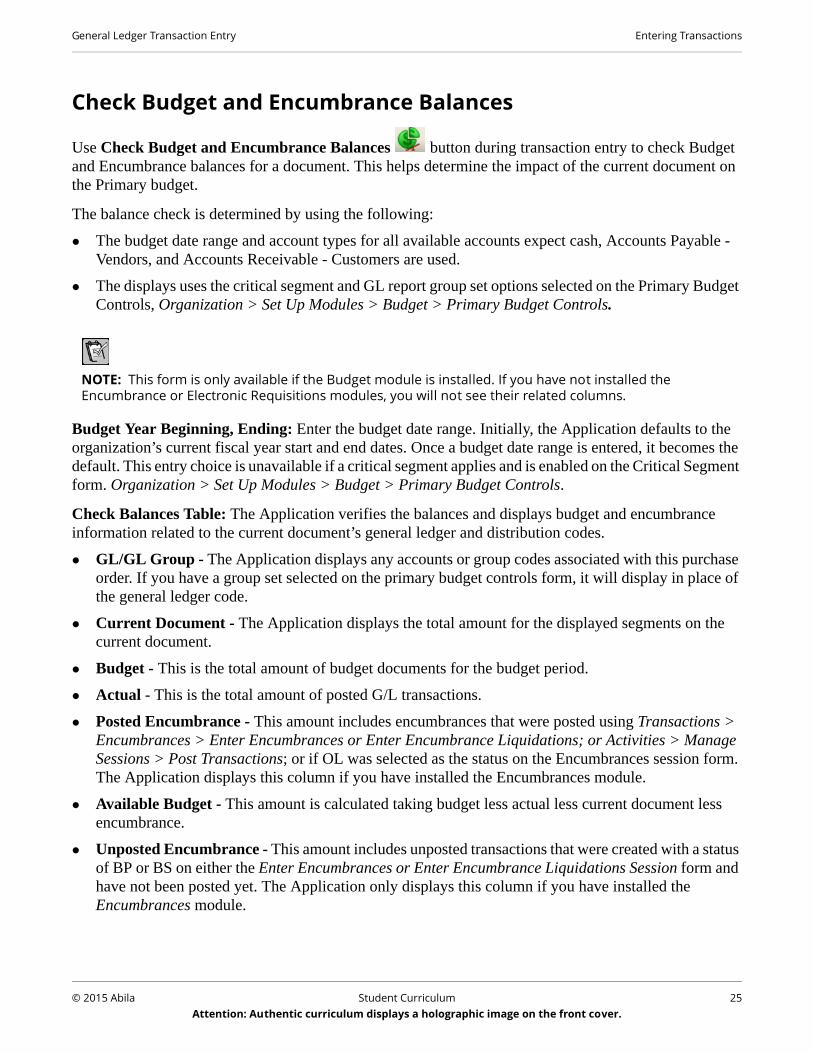
Check Budget and Encumbrance Balances
Use Check Budget and Encumbrance Balances button during transaction entry to check Budget and Encumbrance balances for a document. This helps determine the impact of the current document on the Primary budget.
The balance check is determined by using the following:
The budget date range and account types for all available accounts expect cash, Accounts Payable - Vendors, and Accounts Receivable - Customers are used.
The displays uses the critical segment and GL report group set options selected on the Primary Budget Controls, Organization > Set Up Modules > Budget > Primary Budget Controls.
NOTE: This form is only available if the Budget module is installed. If you have not installed the Encumbrance or Electronic Requisitions modules, you will not see their related columns.
Budget Year Beginning, Ending: Enter the budget date range. Initially, the Application defaults to the organization’s current fiscal year start and end dates. Once a budget date range is entered, it becomes the default. This entry choice is unavailable if a critical segment applies and is enabled on the Critical Segment form. Organization > Set Up Modules > Budget > Primary Budget Controls.
Check Balances Table: The Application verifies the balances and displays budget and encumbrance information related to the current document’s general ledger and distribution codes.
GL/GL Group - The Application displays any accounts or group codes associated with this purchase order. If you have a group set selected on the primary budget controls form, it will display in place of the general ledger code.
Current Document - The Application displays the total amount for the displayed segments on the current document.
Budget - This is the total amount of budget documents for the budget period.
Actual - This is the total amount of posted G/L transactions.
Posted Encumbrance - This amount includes encumbrances that were posted using Transactions > Encumbrances > Enter Encumbrances or Enter Encumbrance Liquidations; or Activities > Manage Sessions > Post Transactions; or if OL was selected as the status on the Encumbrances session form. The Application displays this column if you have installed the Encumbrances module.
Available Budget - This amount is calculated taking budget less actual less current document less encumbrance.
Unposted Encumbrance - This amount includes unposted transactions that were created with a status of BP or BS on either the Enter Encumbrances or Enter Encumbrance Liquidations Session form and have not been posted yet. The Application only displays this column if you have installed the Encumbrances module.
© 2015 Abila Student Curriculum 25Attention: Authentic curriculum displays a holographic image on the front cover.

Entering Transactions Abila MIP Fund AccountingTM
Pending Requisitions - The Application displays the amount for all requisition items coded to the account combinations that are not included in the document. The Application only displays this column if you have installed the Electronic Requisitions module.
Adjusted Available Budget - The Application calculates this amount by taking the available budget less requisition amounts. The Application only displays this column if you have installed the Electronic Requisitions module.
Budget Year Beginning, Ending - Initially, the Application defaults to the organization's current fiscal year start and end dates. Once a budget date range is entered, it becomes the default. This entry choice is unavailable if a critical segment applies and is enabled using Organization > Set Up Modules > Budget > Primary Budget Controls > Critical Segment.
TIP: The Check Budget and Encumbrance Balances form processes different amounts depending on the options selected on the Primary Budget Controls form, Organization > Set Up Modules > Budget > Primary Budget Controls.
TIP: When Budget Year Beginning and Ending dates are entered, this budget date range becomes the default dates on any Check Budget and Encumbrance Balances form. If you have a critical segment selected and have changed the beginning and ending dates for a code(s) in that segment, then these dates will be used instead of the budget date range.
TIP: If you have installed the Encumbrance module, you may run the Encumbrance Budget report to obtain information related to encumbrance and budget data, Reports > Encumbrances.
26 Student Curriculum © 2015 AbilaAttention: Authentic curriculum displays a holographic image on the front cover.

General Ledger Transaction Entry Entering Transactions
Activity: Check Budget and Encumbrance Balances
Navigator: Accounting > Basic Transactions > Enter Cash Disbursements
Classic View: Transactions > Enter Cash Disbursements
Select Check: 59001
Select Check Budget and Encumbrance Balances
NOTE: The available Budget surplus or deficit.
Close the Check Budget and Encumbrance Balances window.
Click New to clear the entry form.
© 2015 Abila Student Curriculum 27Attention: Authentic curriculum displays a holographic image on the front cover.

Entering Transactions Abila MIP Fund AccountingTM
Using Offsets
Use the Use Offsets button to create the other half of transactions based on the transaction type; for example, Cash Receipts offset to cash. Offsets may be set up to generate interfund transactions as well.
You may apply offsets manually to a document by selecting the Use Offsets button or the Application may apply offsets for you when you save the document.
To have the Application apply offsets, select the Apply Offsets on Save/Post check box, Options > Customize Workstation Settings > Preferences tab. If the document is not in balance, the Application will automatically apply offsets when you click the Save or Post button on the document entry form.
Next, enter a check using the offset feature. This is much faster and creates more accurate balancing accounting transactions.
Offset account assignments must be set up in the Navigator using Accounting > Accounting Setup > Offset Account Assignments.
Account level security is available with Offsets. Account level security allows you to define (filter) the account codes and related amounts a user may view.
NOTE: If a user has Account Level Security enabled, he may not see all account codes.
28 Student Curriculum © 2015 AbilaAttention: Authentic curriculum displays a holographic image on the front cover.

General Ledger Transaction Entry Entering Transactions
Activity: Use Offset Auxiliary Button
Navigator: Accounting > Basic Transactions > Enter Cash Disbursements
Classic View: Transactions > Enter Cash Disbursements
Check Number 59002
Date: <Today’s Date> (Use also for all effective dates)
Amount: $100.00
Description: Purchase Office Supplies
Payee ID: Rapid <Rapid Supplies Provider>
Check Address: Main <Accept Default>
1099 Type: N/A (Not Available)
First Transaction Line:
Second Transaction Line: Click the F6 key.
Change the Grant code to 201
Third and Fourth Transaction Lines: Click Use Offsets Auxiliary to create a balancing entry.
Click Save to save this transaction.
Do not close the transaction form.
© 2015 Abila Student Curriculum 29Attention: Authentic curriculum displays a holographic image on the front cover.

Entering Transactions Abila MIP Fund AccountingTM
Using Distribution CodesDistribution codes speed transaction entry and reduce both calculation and data entry errors. They are used to allocate transaction amounts across different funds, programs, grants, etc. based along predefined allocation parameters. You may add or modify a distribution code by selecting the Distribution Code
Information auxiliary button or by navigating to Maintain > Distribution Codes. For a complete discussion of distribution codes please refer to the Accounting Administration and Set Up chapter.
The Use Distribution Code auxiliary button becomes available after you have entered a document number. If you enter the document date, amount, description, and/or vendor ID (if applicable) before clicking on the Use Distribution Codes button, that information will automatically display on the Use Distribution Codes form after you select a distribution code to use. You may accept the description for your entry, edit the description, or replace it to suit your needs.
Distribution Code: Enter an existing distribution code or select one from the drop-down list.
Description: The document description will display as the default for this prompt, if already entered. If not, the distribution code’s description will display as the default. Accept the default description or type in a new description to use for the current entry. The description entered represents the line description in the transaction entry form.
Date: The document date, if entered, serves as the default value for this date field. Accept or change the date shown. A drop-down calendar is available for selecting a date. The date entered represents the effective date in the transaction entry.
General Ledger Account: Type in a GL account code or select one from the drop-down list. The Application inserts the GL code into the transaction entry lines it creates as specified by the distribution code.
Amount to Distribute: Enter a dollar amount greater than $0.00. If your transaction entry form contains an Amount prompt, that amount entered serves as the default value for the Amount to Distribute.
30 Student Curriculum © 2015 AbilaAttention: Authentic curriculum displays a holographic image on the front cover.

General Ledger Transaction Entry Entering Transactions
Distribute As: Debit/Credit. Select the distribution a debit or as a credit entry. If entering a budget or an encumbrance, distribute the transaction as a decrease or an increase.
TIP: Use the following table to determine if a distribution is entered as a debit or credit or as an increase or decrease.
NOTE: Accounts Payable, Encumbrances or Accounts Receivable are only available if the modules are installed.
NOTE: Notice through the next Activity, that the Application did not include program, department, or restriction codes. This is because of the rules applying to segment types. The offset assignment specified the fund code, grant code, and general ledger code that would be included in the offset transaction lines. The Application will only create balancing entries by segments set up as balancing segments in the NTO account structure. The Application did not include codes for the non-balancing segments, program, and department or the restriction segment 117 because they are not required for balance sheet GL accounts, like cash.
When entering...and the Document amount is...
the Distribution is Entered as a...
Cash receipt positive credit
Cash disbursement positive debit
A/P invoice positive debit
A/P credit memo positive credit
A/P manual check N/A N/A
A/R invoices positive credit
A/R credits positive debit
Journal voucher N/A debit
Budget N/A increase
Encumbrance N/A increase
© 2015 Abila Student Curriculum 31Attention: Authentic curriculum displays a holographic image on the front cover.

Entering Transactions Abila MIP Fund AccountingTM
Activity: Use Distribution Code Auxiliary Button
Navigator: Accounting > Basic Transactions > Enter Cash Disbursements
Classic View: Transactions > Enter Cash Disbursements
Document Information: Check number: 59003
Date: <Today’s Date> (Use also for all effective dates)
Amount: $1,000.00
Description: Professional Fees
Payee ID: CPA <Williams and Errickson, CPA’s>
Check Address: Main <Accept Default>
1099 Type: MISC <Accept Default>
Distribution Code Form:
Click Use Distribution Code.
Distribution Code: Prof <Accept Default>
Transaction Description: <Accept Default>
Transaction Date: <Today’s Date>
Transaction GL: 52201 <Accept Default>
Amount to Distribute: <accept $1,000.00>
Distribute As: Debit
Click OK
The Application creates the following three transaction lines:
Click Use Offsets
The Application completes the entry with three balancing transaction lines:
Click Save to save this document, then Close the transaction form.
32 Student Curriculum © 2015 AbilaAttention: Authentic curriculum displays a holographic image on the front cover.

General Ledger Transaction Entry Entry Options
Entry OptionsMany reasons exist to create a copy or to reverse a previously posted document. You may reverse last month’s accrual entries in the current month. Alternatively, if your month-end closing entries are very similar each month, it may be easier to edit a copy of last months entry, rather than to create this month’s entry from scratch. Reversing an incorrect entry and replacing it with a correct one may simplify error recovery.
TIP: You may use the Automatic Reverse feature for Journal Vouchers. For more information, see the Reversing Entries section of this chapter.
You may copy or reverse single documents from within the transaction entry process that created the original entry. For example, to copy or reverse a posted journal voucher document select Transactions > Enter Journal Vouchers.
The procedures for copying or reversing posted documents are similar. The only differences involve terminology on the form (Copy and Reverse) and the resulting entry. Whereas the Copy Posted
Documents button duplicates a posted entry, Reverse Posted Documents button reverses the debits and credits in the resulting entry.
The Copy Posted Document and Reverse Posted Document auxiliary command buttons are only available on a blank transaction entry form. As soon as you enter a document number, the Copy and Reverse buttons become unavailable.
Copy Posted Document
Click on the Copy Posted Document auxiliary button. The Copy Posted Document form opens.
Use this form to copy a single posted document from an existing session, and add it to the current session. After clicking OK, the Application displays the new document you created.
The new document (named when the copy is created) contains the same document information as the document you copied. Therefore, any changes made to the applicable vendor or customer (like an address change), after the original document was created, are reflected in the copy.
Account level security is available for this form. It allows you to define (filter) the account codes and related amounts a user may view.
NOTE: If a user has account level security enabled, they may not see all account codes.
Session ID - Type in a posted Session ID to be copied or select one from the drop-down list. The Application responds by displaying the description of the session you selected.
© 2015 Abila Student Curriculum 33Attention: Authentic curriculum displays a holographic image on the front cover.

Entry Options Abila MIP Fund AccountingTM
Document - Type the document number to be copied or choose it from the drop-down list. The Application responds by displaying the selected document’s description and date.
Copy to Document – The copied document number defaults to the source document number. You may accept the document number or change it.
NOTE: Within a Session ID, you may use a specific document number only once.
Document Date - The document date defaults to the source document date. Accept the original document date or change it.
Effective Date - The effective date defaults to the source effective date. Accept the original effective date or change it.
Use Original Document Date - If you would like to use the same document date as the original (the one you are copying from), select this box.
Use Original Effective Date - If you would like to use the same effective date as the original (the one you are copying from), select this box.
Document Description - Enter a description for the new document you are creating.
Use Document Description for Line Items - If you would like the document description you entered above to display as the description in the transaction entry table, select this box.
TIP: You may copy an entire posted session using Activities > Manage Sessions > Copy Posted Sessions.
34 Student Curriculum © 2015 AbilaAttention: Authentic curriculum displays a holographic image on the front cover.

General Ledger Transaction Entry Entry Options
Activity: Use Copy Posted Documents Auxiliary Command Button
Navigator: Accounting > Basic Transactions > Enter Cash Receipts
Classic View: Transactions > Enter Cash Receipts
Session Information: Session ID: Use the plus (+) key to auto increment
Status: BP - Batch-to Post
Description: Receipts
Date: <Today’s Date>
Click Start
Document Information: Click Copy Posted Documents
Copy Posted Document Form: Session ID: select CR0402003
Document: select 210409
Copy to Document: 100
Document Date: Deselect Original Document Date
Accept Today’s Date
Effective Date: Deselect Original Document Date
Accept Today’s Date
Document Description: Accept Default
Document Description for Line Items: <Select>
Click OK
Review the entry made by the Application.
Correct the Fund and Program codes as shown below:
Click Save to save the transaction.
© 2015 Abila Student Curriculum 35Attention: Authentic curriculum displays a holographic image on the front cover.

Entry Options Abila MIP Fund AccountingTM
Reverse Posted Document
Click on the Reverse Posted Document auxiliary button to open the reverse posted document form. Use this form to make a copy of a single, posted document, with its debits and credits reversed. The reversed document will be included in the current session. This document has the same account code information as the original document with the debits and credits reversed, and if applicable, the sign of the document amount reversed. After clicking OK, the Application displays the new document you created.
Session ID - Type in a posted Session ID to be reversed or select one from the drop-down list. The Application responds by displaying the description of the session you selected.
Document - Type the document number to be reversed or choose it from the drop-down list. The Application responds by displaying the selected document’s description and date.
Reversed Document – The reversed document number defaults to the source document number. Accept the document number.
Document Date - The document date defaults to the source document date. You may accept the original document date or change it.
Effective Date - The effective date defaults to the source effective date. You may accept the original effective date or change it.
Use Original Document Date - If you would like to use the same document date as the original, select this check box.
Use Original Effective Date - If you would like to use the same effective date as the original, select this check box.
Document Description - The document description defaults to the source document description. You may accept the original document description or change it.
Use Document Description for Line Items - The transaction line description defaults to the source transaction line description. If you change the document description and use that description for the line items, mark Use Document Description for Line Items by clicking into the selection box to the left.
36 Student Curriculum © 2015 AbilaAttention: Authentic curriculum displays a holographic image on the front cover.

General Ledger Transaction Entry Entry Options
Account level security is available for this form. It allows you to define (filter) the account codes and related amounts a user may view.
NOTE: If a user has account level security enabled, he may not see all account codes.
TIP: You may reverse an entire posted session using Activities > Manage Sessions > Reverse Posted Sessions.
TIP: Do not change the reversed document number. Frequently, the document number refers to a document number in a subledger, like an Accounts Payable Invoice Number. Posting to the original document number will net that document number to $0.00 that represents the desired effect of the reversal.
© 2015 Abila Student Curriculum 37Attention: Authentic curriculum displays a holographic image on the front cover.

Entry Options Abila MIP Fund AccountingTM
Activity: Use Reverse Posted Documents Auxiliary Command Button
Navigator: Accounting > Basic Transactions > Enter Cash Receipts
Classic View: Transactions > Enter Cash Receipts
Session ID: (already in a session)
Click Start
Click Reverse Posted Documents
Reverse Posted Document Form: Session ID: select CR0402003
Document: select 210409
Reversed Document: 210409 (same document number)
Document Date: Deselect Original Document Date
Accept Today’s Date
Effective Date: Deselect Original Document Date
Accept Today’s Date
Document Description: Day Care Receipts Reversal
Document Description for Line Items: <Select>
Click OK and review the entry made by the Application.
NOTE: Observe the debit entry to a revenue account and a credit to the cash account. Because of a net credit balance to the cash type account, the document (control) amount is negative.
Click Save to save the document.
38 Student Curriculum © 2015 AbilaAttention: Authentic curriculum displays a holographic image on the front cover.

General Ledger Transaction Entry Entry Options
Memorize/Recurring Document
The Application provides an easy method of memorizing, recalling and scheduling recurring documents. The Application also provides a recurring entry manager, Activities > Manage Recurring Entries, allowing you to quickly review, modify, and process your recurring documents. Examples of recurring documents are rent payment checks, journal vouchers for depreciation expense or prepaid assets, and cash receipts to record the monthly draw-down of grant funds.
Memorized documents may be manually recalled at any time. Memorized documents may also be scheduled as recurring documents. If a memorized document is saved as a recurring document the Application will create a schedule based on the selected First Transaction Date, Frequency, and Ending Transaction Date (if used). When you process the scheduled items, Activities > Manage Recurring Entries, the Application creates unposted sessions with the recurring document.
Memorizing a document requires a completed transaction that is ready to be saved. All required information must be entered on the transaction entry form and the transaction information must meet all transaction entry edits.
NOTE: The available transaction sources for recurring entries are CR, CD, API, ARB, BD, JV, ENC, and ENL.
Save Document As
Name – Either type in a name for your memorized document or select a previously memorized name from the drop-down list. If you select a previously memorized name, the new transaction entry overwrites the existing memorized entry.
Actual Amounts - Select Actual Amounts if the amount of the memorized document will remain the same each time you recall or process the memorized entry.
© 2015 Abila Student Curriculum 39Attention: Authentic curriculum displays a holographic image on the front cover.

Entry Options Abila MIP Fund AccountingTM
Percentages - Select Percentages if the dollar amount will vary each time the memorized document is recalled. If you select this option, the Application converts the amount for each line item to percentages and then applies the percentages to the new document amount entered when the memorized transaction is recalled.
NOTE: You may select Actual Amounts or Percentages when using the Recurring Document Setup options.
Recurring Document Setup
Recurring Entry - Select this check box to schedule the document as a recurring entry.
First Transaction Date - Enter the first transaction date. This is the first day the recurring transaction is available for processing in the Manage Recurring Entries form, Activities > Manage Recurring Entries.
Frequency - Select the recurring frequency from the drop-down list:
On Hold (Recurrence On Hold),
Weekly (Weekly Recurrence),
Biweekly (Biweekly Recurrence),
Every Four Weeks (Every Four Weeks Recurrence),
Semimonthly (Semimonthly Recurrence),
Monthly (Monthly Recurrence),
Quarterly (Quarterly Recurrence),
Semiannually (Semiannually Recurrence), or
Annually (Annually Recurrence)
Ending Transaction Date - Enter the ending transaction date. This is the last day the recurring transaction is available for processing. If the No Ending Date check box is selected, the Ending Transaction Date is disabled.
No Ending Date - Select the No Ending Date check box if the recurring entries do not have a specific end date. If you select this option the Application will display entries for a 12 month period.
TIP: In order for Memorize Document to be available, you must have entered data in all of the required boxes of the document; it must be in balance and cannot be posted.
TIP: When you memorize a document with User Defined Fields, those fields are copied to the new document.
40 Student Curriculum © 2015 AbilaAttention: Authentic curriculum displays a holographic image on the front cover.

General Ledger Transaction Entry Entry Options
Activity: Memorize a Recurring Document
Navigator: Accounting > Basic Transactions > Enter Cash Receipts
Classic View: Transactions > Enter Cash Receipts
Session ID: (already in a session)
Click Start
Receipt: select receipt 100
Click Memorize/Recurring Document
Memorize/Recurring Document Form: Name: Day Care Annuity
Save Memorized Document As: Actual Amounts
Recurring Entry: Selected
First Transaction Date: <last day of next month>
Frequency: Monthly (Monthly Recurrence)
Ending Transaction Date: <2 years from last day of this month)
Click OK to save the recurring document.
Click New to prepare for the next Activity.
© 2015 Abila Student Curriculum 41Attention: Authentic curriculum displays a holographic image on the front cover.

Entry Options Abila MIP Fund AccountingTM
Recall Memorized/Recurring Document
Recall a memorized document from within a blank transaction entry form for the transaction type needed to create the entry. For example, to recall a memorized Journal Voucher, open a blank Journal Voucher transaction entry form and click on the Recall Memorized Document auxiliary button.
Use this form to recall a previously memorized document to include in the current session. If you decide to change the document’s name after it has been memorized, the original name displays, not the new name you assigned when recalling it. However, if you change a vendor or customer address after the document is memorized, the change is reflected when the document is recalled.
WARNING: Recalling a memorized document that is scheduled as a recurring document does not update Manage Recurring Entries, Activities > Manage Recurring Entries.
Recall Memorized Document
Name - Enter the name of an existing memorized document or select it from the drop-down list.
Document
New Document ID – Accept the default document ID, or enter a new one. This ID cannot be the same as an existing ID in this session. This field defaults to the document number from the selected memorized document.
NOTE: The Application does not allow the same document number more than once in the current session ID.
Description – Accept the default description, or enter a new one.
Use Document Description for Line Items – If you would like the document description you entered above to display as the description in the transaction entry table, click this check box.
Document Effective Date – Accept the default date, or enter a new effective date for this document.
Amount - If the document you are recalling was memorized as Actual Dollars the amount displays here, but cannot be changed. If you memorized the original document using Percentages, enter the amount you would like the Application to apply. The Application uses the percentages from the original document.
42 Student Curriculum © 2015 AbilaAttention: Authentic curriculum displays a holographic image on the front cover.

General Ledger Transaction Entry Entry Options
You may delete memorized documents that you no longer use. If you delete a memorized document, that is scheduled as a recurring document, posted or pending transactions will not be deleted or reversed. However, the recurring history, Activities > Manage Recurring Entries will be deleted.
To delete a memorized document enter the name of the memorized document or select it from the drop-
down list. Click the Delete button to remove the memorized document.
TIP: Entry types are copied from the memorized document and applied to the current document.
TIP: When you recall a document with User Defined Fields, those fields are copied to the new document.
© 2015 Abila Student Curriculum 43Attention: Authentic curriculum displays a holographic image on the front cover.

Entry Options Abila MIP Fund AccountingTM
Activity: Use Recall Memorize Document Auxiliary Command Button
Navigator: Basic Transactions > Enter Cash Receipts
Classic View: Transactions > Enter Cash Receipts
Session Information:
Session ID: (already in a session)
Click Start
Document Information:
Click Recall Memorize Document
Recall Memorize Document Form:
Name: Grant Revenue
New Document ID: 101
Description: <this month> grant revenue
Document Descriptions Line Items: <Select>
Document Effective Date: <15th of this month>
Amount: $100.00
Click OK
Deposit Number: <15th of this month>
Review the entries made by the Application.
Observe that the document control amount is $100.00 and the debits and credits are $100.00 each. The Application uses a percentage distribution for the accounting detail lines based on the original document.
Click Save to save the document.
Click Close to close the session.
44 Student Curriculum © 2015 AbilaAttention: Authentic curriculum displays a holographic image on the front cover.

General Ledger Transaction Entry Entry Options
Manage Recurring Entries
Use Manage Recurring Entries, Activities > Manage Recurring Entries to quickly review, modify, and process your recurring entries.
The Manage Recurring Entries form displays scheduled and processed recurring entries with Recurring Dates one year before and one year after the system date. However, the Application will not display recurring entries with Recurring Dates in a closed fiscal year.
For example, assume today’s date and the system date on your workstation is 1/15/2014. If you create a recurring entry with a First Transaction Date of 02/15/2014, a Frequency of Monthly, and an Ending Date of 01/15/2018, only the Recurring Dates between 02/15/2014 and 01/15/2015 will display in the Recurring Entries table.
Two months later, on 3/15/2014, the Recurring Dates between 02/15/2014 and 03/15/2015 will display in Recurring Entries table.
One year later on, 1/15/2015, the Recurring Dates between 02/15/2014 and 01/15/2016 will display in Recurring Entries table, if you have not closed fiscal year 2014. If you have closed fiscal year 2014, the Recurring Dates between 01/15/2015 and 01/15/2016 will display in Recurring Entries table..
NOTE: Memorized/Recurring entries with a frequency of On Hold (Recurrence on Hold) do not display in the recurring entry table.
© 2015 Abila Student Curriculum 45Attention: Authentic curriculum displays a holographic image on the front cover.

Entry Options Abila MIP Fund AccountingTM
Use this form to select the entry that you would like to process. In the Recurring Entries table, you may click in a check box to check or uncheck individual items, or use the buttons at the top of the form to check or uncheck multiple items. A check mark appears next to selected items. Items with a status of Pending or Posted are grayed out and cannot be selected. The Filter at the top of the form allows you to limit which recurring entries are displayed in the Recurring Entries table.
If the Display Filter button is not currently selected, you may click it to display the Filter section at the top of the Manage Recurring Entries form. This allows you to set view criteria for the entries listed in the Recurring Entries table. For example, you may wish to view only entries for a specific memorized document, or Name.
Click the Display Records button on the Manage Recurring Entries form to have the Application display only the records that match the filter criteria. If you are not using the filter (it is blank at the top of your form), then clicking the Display Records button will display all of the scheduled and processed recurring entries.
The display grid for recurring entries lists up to 1000 entries per page. If all of your entries cannot display
on one form, due to the volume of scheduled entries, use the View Next Page button to see the next incremental block of records.
You may use the View Previous Page button to move back through records.
After you make your selection, click on the Process button to have the Application create a session and document to record the recurring entries. The session status will be BP (Batch-to Post) regardless of the processing mode preference selected from Organization > Organization Preferences > Processing tab. You may edit the entries by selecting and starting the related session(s).
NOTE: If you use the same session for two types of transactions the Application will create two separate sessions, one for each transaction source.
Filters Table – Use the filter to narrow and more explicitly define the entries you would like to display on the Manage Recurring Entries form. The filter is for display purposes only; it simply allows you to limit which entries are listed in the Recurring Entries table. By default, the filter is set to display recurring entries with a status equal to due.
Available Filter, Selected Filter - Select an item in the Available Filter column, and click the Mover button to move it to the Selected Filter column. Your choices for filtering entries are: Recurring Date, Name, Session ID, Source, ID, Frequency, and Status.
Compares To - Select an operator from the drop-down list. The operator compares the value in the Selected Filter column with the values in Criteria 1 and Criteria 2 to determine which entries will be displayed in the Recurring Entries table.
Criteria 1- Enter a value to compare with the item in the Selected Filter column. When using Like or Not Like, you may use % as a wild card to represent any number of characters.
Criteria 2 - Enter a value for the end of a range if the Compares To column contains the Between or Not Between operators.
46 Student Curriculum © 2015 AbilaAttention: Authentic curriculum displays a holographic image on the front cover.

General Ledger Transaction Entry Entry Options
Recurring Entries Table
Entries are initially sorted in Recurring Date order. You may choose to sort records based on any column by clicking the Column Title. By clicking the Column Title again, you may change the displayed items from ascending to descending order, as indicated by the arrow appearing next to the column title.
Click the check box to select the entries you would like to process. The first time you open the form, there are no entries selected.
Records per Page - Select how many documents per page to display using the Records per Page drop-down list. You may view documents in the table in increments of 10, 25, 50, 100, 250, 500, or 1000.
NOTE: The Default Value for the Records per Page drop-down list was selected using the Options > Customize Workstation Settings > Preferences tab.
Recurring Date - This column displays the date. The recurring date becomes the document and effective dates when the transaction is processed.
Name - This column displays the name of the recurring transaction.
Session ID - Enter a unique Session ID, select one from the drop-down list, or press the plus (+) key to have the Application assign one.
NOTE: Only unposted Session IDs created using this form are available in the drop-down list. Unposted sessions created outside of this form are not available.
Document ID - Enter a unique Document ID, or press the plus (+) key to have the Application assign one.
Source - This column displays the transaction source of the Memorized/Recurring Transaction. The available transaction sources are CR, CD, API, ARB, BD, JV, ENC, and ENL.
ID - This column displays the customer or vendor ID for transaction sources API, AR, CD, or CDS. Otherwise it is left blank.
© 2015 Abila Student Curriculum 47Attention: Authentic curriculum displays a holographic image on the front cover.

Entry Options Abila MIP Fund AccountingTM
Frequency - This column displays the frequency of the Memorized/Recurring Transaction. However, On Hold items cannot be displayed because records are not created for these items.
Amount - This column displays the amount of the recurring transaction. However, for transaction source JV, <None> will display.
Currency - This column displays the currency code of the Memorized/Recurring Transaction. This column only displays if the Multicurrency module is installed for the current organization.
Ending Date - This column displays the ending date entered on the recurring transaction. However, if the No Ending Date check box is selected, <None> will display.
Status - This column displays the status of the recurring transaction, such as Due, Future, Pending, or Posted. The Due status are transactions where the recurring date precedes the system date, Future are transactions where the recurring date exceeds the system date, Pending are transactions where the session that the recurring document is attached to has not been posted, and Posted are transactions where the recurring document was posted.
NOTE: If you delete a processed recurring document prior to posting (status of Pending), the scheduled date will become available in Manage Recurring Entries from Activities > Manage Recurring Entries.
Modifying Recurring Entries
You may modify the transaction dates, frequency, and ending date of the recurring entries as well as the Memorized Document from the Manage Recurring Entries form.
To change the recurring dates or place the recurring entry on hold, use the filter section of the form to filter
for the name of the memorized document and select the Display Records button.
Select the Memorize/Recurring Document button to display the Memorize/Recurring Document form.
The Name displays for informational purposes and cannot be changed. You may change the Recurring Entry check box selection, First Transaction Date, Frequency, or Ending Date of the recurring entries.
48 Student Curriculum © 2015 AbilaAttention: Authentic curriculum displays a holographic image on the front cover.

General Ledger Transaction Entry Entry Options
After making your changes select the OK button to update the Manage Recurring Entries form.
To change the recurring document use the filter section of the form to filter for the name of the memorized
document and select the Display Records button. In the Recurring Entry grid double left mouse click on a recurring entry to display the memorized document form.
The fields in gray are for information purposes only and cannot be changed. The available fields, including amounts and segment codes, may be changed. After making your changes select the Save button to save the memorized document.
NOTE: Changing the recurring dates will not delete, reverse, or modify entries with a status of Posted or Pending.
NOTE: If you uncheck the Recurring Entry check box the Application will delete all unprocessed Recurring Entry Dates. Recurring Entry Dates with a status of Pending or Posted will not be deleted.
NOTE: The Memorize/Recurring Document button is not available on the Manage Recurring Entries form for recurring entries with a frequency of On Hold (Recurrence on Hold).
NOTE: Changing the memorized document does not change recurring entries with a status of Posted or Pending.
© 2015 Abila Student Curriculum 49Attention: Authentic curriculum displays a holographic image on the front cover.

Entry Options Abila MIP Fund AccountingTM
NOTE: If you delete a processed recurring document prior to posting, the scheduled date remains with a status of Pending in Manage Recurring Entries, Activities > Manage Recurring Entries.
NOTE: If you select Warn for Recurring Entries Due, Options > Customize Workstation Settings > Alerts tab the Application will open the Recurring Entries Manager form and display a list of recurring transaction entries that are due when you open Accounting.
50 Student Curriculum © 2015 AbilaAttention: Authentic curriculum displays a holographic image on the front cover.

General Ledger Transaction Entry Entry Options
Activity: Modify and Process a Recurring Entry
Navigator: Accounting > Basic Transactions > Manage Recurring Entries
Classic View: Activities > Manage Recurring Entries
Selected Filter: Selected Filter: Status
Use Left Arrow to move Status from Selected Filter to Available Filter.
Selected Filter: Name
Use Right Arrow to move Name from Available Filter to Selected Filter.
Operator: = Equal to
Criteria 1: Day Care Annuity
Click Display Records
Recurring Entries Table Double left-mouse click on the <last day of next month> Recurring Date line.
Memorized Document
Receipt: Display Only
Date: Display Only
Amount: $2,000.00
Description: No Changes
Deposit Number: <last day of next month>
Recipient ID: No Changes
Change the Debit and Credit for the transaction lines to $2,000.00:
Click Save to save your changes.
<Activity continued on next page>
© 2015 Abila Student Curriculum 51Attention: Authentic curriculum displays a holographic image on the front cover.

Entry Options Abila MIP Fund AccountingTM
Activity: Modify and Process a Recurring Entry <continued>
Select Recurring Date: <last day of next month> (for $2,000.00)
Session ID: Use the plus (+) key to auto increment
Document ID: 102
Click Process to create the recurring entries.
Click Finish to close the Processing form.
Click Cancel to close the Manage Recurring Entries form.
Activity: Review a Processed Recurring Entry
Navigator: Accounting > Basic Transactions > Enter Cash Receipts
Classic View: Transactions > Enter Cash Receipts
Session Information
Session ID: <Session created in last activity>
Click Start
Document Information:
Receipt: 102
Review the document.
Activity: Move a Transaction Line
Navigator: Accounting > Basic Transactions > Enter Cash Receipts
Classic View: Transactions > Enter Cash Receipts
Session ID: (already in a session)
Document ID: 102
Select the second line of the recalled document
Drag the transaction line above the first transaction line and drop.
Click Save to save the document
Do not close the session
52 Student Curriculum © 2015 AbilaAttention: Authentic curriculum displays a holographic image on the front cover.

General Ledger Transaction Entry Entry Options
Transaction Entry Defaults
You may assign default values to all document level information and transaction entry detail fields except for the document ID. Defaults are set by transaction type. This means, for example, that you may:
Assign one set of default values for Journal Voucher entries
AND
Assign another set of default values for Cash Disbursement entries.
When you set a transaction entry default, it remains in effect until you remove or change it.
To use this feature, first open a transaction entry session from the Transaction Menu selections. Once a
session form opens, the Transaction Entry Defaults auxiliary button is available. The auxiliary button is also available on the transaction entry form.
Field - (Display Only) The fields available for default values display here.
Default Value - (Optional) If you would like the Application to provide a particular value during transaction entry, specify it here. For example, if the majority of your transactions pertain to a particular fund or grant, you may set up that fund or grant code as the default. Notice that the Application provides the default for the Line Entry Type of N.
Copy From Prior Document/Line - (Optional) If you would like the Application to default to the value that was entered in the same field on the previous line enter <YES> for that field. For example, if a particular transaction entry session pertains to a specific department, you may instruct the Application to default - each time you enter a new line - the department code that was entered on the previous line.
TIP: The options listed in the fields column vary according to the transaction entry form you are using; therefore you cannot see the same fields on every entry default form.
© 2015 Abila Student Curriculum 53Attention: Authentic curriculum displays a holographic image on the front cover.

Entry Options Abila MIP Fund AccountingTM
TIP: If the entry defaults form that you are using shows a field for line entry type, you are able to select N (Normal), UO (Beginning Balances), A (End of Year Adjustments), or AO (Adjust Opening Balances), as a default value.
TIP: If you enter a default value for document date, it is available in the date box on transaction entry forms, as well as on the Copy Posted document, Reverse Posted document, and Recall Memorized document forms.
54 Student Curriculum © 2015 AbilaAttention: Authentic curriculum displays a holographic image on the front cover.
General Ledger Transaction Entry Entry Options
Activity: Use Entry Defaults in Transactions
Navigator: Accounting > Basic Transactions > Enter Cash Receipts
Classic View: Transactions > Enter Cash Receipt
Session Information: Session ID: (already in a session)
Click Entry Defaults
Select the following entry defaults:
Line Fund Code: 01
Line Grant Code: 108
Line Entry Type: N
Line Description: Grant Receipts
Click OK.
Document Information: Receipt: 1001
Date: Today's Date
Amount: $10,000.00
Description: Grantor’s Supplemental Transfer of Funds
Deposit Number: <today’s date>_01
Recipient ID: <blank>
<Activity continued on next page>
© 2015 Abila Student Curriculum 55Attention: Authentic curriculum displays a holographic image on the front cover.

Entry Options Abila MIP Fund AccountingTM
Activity: Use Entry Defaults in Transactions <continued>
First transaction line: Click <F7> for the following fields: Fund, Grant, Entry Type, Effective Date,
Description
GL: 40001
Program: 101
Dept.: 101
117: 1
Credit: $5000.00
Second transaction line: Repeat the use of <F7> for the above fields.
GL: 40101
Program: 201
Dept: 101
117: 1
Credit: $5000.00
Click Use Offsets
Click Save to save the transaction and Close button to exit the form.
56 Student Curriculum © 2015 AbilaAttention: Authentic curriculum displays a holographic image on the front cover.

General Ledger Transaction Entry Entry Options
Review Session Information
You may wish to review or change current session information without closing and reopening the session. For example, you may be using the session date or session description as default values in your transaction entry. After entering all the transactions for one date, you may need to change the session date to ensure your default will be correct for subsequent documents.
The Application provides an auxiliary command button to accommodate that need. You may use the
Review Session Information button to change the session description, session date, or session status.You may change the session status from one of the batch modes; Batch-to-Post or Batch-to-Suspend, to the other at any time.
You may only change from On-Line status to Batch status or Batch status to On-Line status if no documents have been saved or posted in the session.
TIP: When you set up your organization, Organization > Organization Preferences > Processing tab, you designated a processing mode. The status appears in the drop-down list according to the processing mode that you chose for the organization.
TIP: If the process mode is combined and a document has been saved or posted the following rules apply:
If the document has a status of OL, it cannot be changed.
If the document has a status of either BP or BS, you may switch between BP and BS. Consequently, OL does not display in the drop-down list.
© 2015 Abila Student Curriculum 57Attention: Authentic curriculum displays a holographic image on the front cover.

Entry Options Abila MIP Fund AccountingTM
Reversing Entries
When entering monthly and annual adjustments, you may use the Application’s Reversing feature to automatically create the reversing entry. This feature facilitates clearing accrued expenses, accrued revenues, and other adjusting type entries. The reversing feature is only available with Journal Voucher, transaction source JV, transactions.
You may elect to create the reversing entries in the current document, in a new document in the current session, or in a new document in a new session. You may also enter the Journal Voucher without creating reversing entries.
To create reversing entries, enter the document information selecting a reversing option other than No, from the drop down list. Complete the transaction entry grid. When you select Save or Post the Application will display the Reverse Current Transaction form. The available and required fields on the Reverse Current Transaction form will vary depending on the reverse option you select.
Reverse
No - If you accept the default of <No> the Application will not create reversing entries.
In Current Document - If you select In Current Document, the Application will add reversing transaction lines in the current document. Enter an Effective Date for the reversing transaction lines. You may also enter an optional line description.
58 Student Curriculum © 2015 AbilaAttention: Authentic curriculum displays a holographic image on the front cover.

General Ledger Transaction Entry Entry Options
New Document, Current Session - If you select New Document, Current Session, the Application will create a new reversing document in the current session. You must enter an Effective Date, Reverse Document number, and Document Date. You must also enter a Document Description. Select the Use Document Description for Line Items check box to use the entered document description for the transaction lines description. If you do not select the check box, the Application will use the current session description for the transaction lines description.
New Document, New Session - If you select New Document, New Session, the Application will create a new reversing document in a new session. You must enter an Effective Date, Reverse Session ID, Session Date, Reverse Document number, Document Date, and Document Description. You may also enter a Session Description. Select the Use Document Description for Line Items check box to use the entered document description for the transaction lines description. If you do not select the check box the Application will use the current session description for the transaction lines description.
After completing the Reverse Current Transaction form, select the OK button to create the
reversing entries or the Cancel button to save/post the document without creating reversing entries.
If the Application creates a document in a new session, the session status will be BP (Batch-to Post) regardless of the processing mode preference selected from Organization > Organization Preferences > Processing tab. You may edit the entries by selecting and starting the related session(s).
© 2015 Abila Student Curriculum 59Attention: Authentic curriculum displays a holographic image on the front cover.

Entry Options Abila MIP Fund AccountingTM
Activity: Create Accrual and Reversing Entries
Navigator: Accounting > Basic Transactions > Enter Journal Vouchers
Classic View: Transactions > Enter Journal Vouchers
Session Information: Session ID: Use the plus (+) key to auto increment
Status: BP
Description: Adjusting Entries
Date: Today's Date
Click Start
Document Information: Document: Use the plus (+) key to auto increment
Date: <last day of this month> (Also use for effective
dates)
Reverse: New Document, Current Session
Description: Accrue Building Rent
Transaction Lines:
Click Save.
Reverse Current Transaction Effective Date: <First day of next month>
Reverse Document: Use the plus (+) key to auto increment
Document Date: <First day of next month>
Document Description: Reverse building rent accrual
Use Document Description for Line Items: Selected
Click OK.
Reopen the document to Review the reversing entries created by the Application.
Click New to clear the form.
60 Student Curriculum © 2015 AbilaAttention: Authentic curriculum displays a holographic image on the front cover.

General Ledger Transaction Entry Entry Options
Adjust Current Year
In some situations, you may need to record transactions for a fiscal year that has already been closed in the Application.
Perhaps you omitted an accrual or year-end adjusting entry, or you made an error in recording your annual audit adjustments. The Application provides the capability to process transactions in a year that has already been closed. Because of this flexibility, some organizations close their year before the annual audit is done, and then enter the audit adjustments at the completion of the audit.
When you close a fiscal year in the Application, the Application creates SO (System-Opening Balances entries) for the open year. These System-Opening Balances are used in a variety of reports. As a result, when you make an entry after the year has been closed you also need to adjust the current year’s opening balances. Since each fiscal year may be closed only once, you need to adjust opening balances through the transaction entry process.
You may adjust opening balances by making an AO (Adjust Open Balance) type entry using the first day of the current year.
The Application provides a much easier way to adjust current year balances when done in conjunction with an entry to the most recently closed prior year. Simply make your prior year entry as normal, and then click
on the Adjust Current Year auxiliary button before you save or post the document. The Application displays a Warning Message to alert you that you need to adjust the current year
Closing account assignments must be set up using Maintain> Closing Account Assignments.
The Application automatically creates a beginning balance type entry using the first day of the current fiscal year. It takes closing account assignments into consideration in making the entry. This ensures that if your prior year entry included amounts to revenue or expenditure accounts, the current year adjustment will be made to the correct net asset account instead of the revenue or expenditure accounts.
© 2015 Abila Student Curriculum 61Attention: Authentic curriculum displays a holographic image on the front cover.

Entry Options Abila MIP Fund AccountingTM
Activity: Use Adjust Current Year Auxiliary Command Button
Navigator: Accounting > Basic Transactions > Enter Journal Vouchers
Classic View: Transactions > Enter Journal Vouchers
Session Information: Session ID: (already in a session)
Click Start.
Document Information: Document: Use the plus (+) key to auto increment
Date: 12/31/20XX (Last closed FY)
(Also use for effective dates)
Reverse: No
Description: Record prepaid subscriptions
Transaction Lines:
NOTE: After entering the effective date you will receive a message stating “From within the Administration module, a preference for this organization has been set requesting this warning for any entry prior to 01/01/20XX”. The message displays because a warn prior to entry date of 01/01/20XX was selected on the Organization > Organization Preferences > Entry Dates tab. Select OK to continue entering the transaction.
Click Save.
The Application displays the Warning Message “Document <XXX> contains at least one transaction line with an effective date in a previous fiscal year.”
Click Cancel.
Click Adjust Current Year
Review the transaction entries created by the Application. Notice the Entry type: AO, the Effective Date: 01/01/20XX +1, the Transaction Description: Adjustment Generated from a Prior Year Entry, and the entry to the Fund Balance Account: 30001.
Click Save to save the transaction and Close to exit the form.
62 Student Curriculum © 2015 AbilaAttention: Authentic curriculum displays a holographic image on the front cover.

General Ledger Transaction Entry Year End Adjustments
Year End AdjustmentsThe entry type A (End of Year Adjustment) is used to indicate adjustments made on the last day of your organization's fiscal year. It requires that the line's effective date is the last month and day of a fiscal year.
End of year adjustments may be included or excluded in the following reports:
Check Register
Journals
General Ledger Analysis
A/P Analysis
A/R Analysis
Allocations Analysis
Budget Analysis
Financial Statements
Beginning BalancesThere are three different situations to consider when implementing the Application. The following examples discuss options for entering your beginning balances. You may choose from a Beginning of the Fiscal Year Implementation or a Mid Fiscal Year Implementation. Additionally we will discuss Accounts Payable and/or Account Receivable subsidiary ledger considerations.
Beginning of the Fiscal Year ImplementationFor a beginning of the fiscal year implementation, make a JV (Journal Voucher) entry to record your opening balances as a UO (Beginning Balance) type entry using the first day of the fiscal year as the effective date. This entry would, of course, only include balance sheet accounts.
NOTE: You cannot make a journal voucher entry to a subsidiary control account, like the Accounts Payable account. Create an Accounts Payable - Other (APO) type account that will be the clearing account for Accounts Payable transactions. You may make a Journal Voucher entry to an APO-type account.
Mid- Fiscal Year Implementation For a Mid- Fiscal Year Implementation, make a JV (Journal Voucher) entry to record your ending balances from your old accounting application. The entry is a N (Normal) type entry with an effective date of the last day of the month represented by the trial balance.
© 2015 Abila Student Curriculum 63Attention: Authentic curriculum displays a holographic image on the front cover.

Beginning Balances Abila MIP Fund AccountingTM
NOTE: You cannot make a journal voucher entry to a subsidiary control account, like the Accounts Payable account. Create an Accounts Payable - Other (APO) type account that will be the clearing account for Accounts Payable transactions. You may then make a Journal Voucher entry to an APO-type account.
Subsidiary Ledger ConsiderationsYou need to make entries to establish the beginning balance for each open Accounts Payable and/or Accounts Receivable invoice. Income and/or expenses were already entered when the invoice was posted into the old accounting application. Remember that the Application does not allow Journal Voucher entries to the AP (Accounts Payable) type or AR (Accounts Receivable) type accounts. Use a two-step approach to make these entries.
First Step - Create an Accounts Payable and/or Accounts Receivable clearing account. The account type is APO (Accounts Payable Other) and ARO (Accounts Receivable respectively. Use these accounts in the Journal Voucher entry to record the opening balance.
Second Step - Enter each invoice that is included in the opening balance entry using the Transactions > Accounts Payable > Enter A/P Invoices or Transactions > Accounts Receivable > Enter A/R Invoices. These transactions are N (Normal) type entries.
Accounts Payable: Usually, make a debit entry to the Accounts Payable clearing account and a credit entry to the Accounts Payable control account for each open invoice.
Accounts Receivable: Usually, make a debit entry to the Accounts Receivable control accounts and a credit entry to the Accounts Receivable clearing account for each open invoice.
When both steps have been completed and posted, the clearing accounts will have a zero balance and the Accounts Payable and/or Accounts Receivable accounts will have the open balances.
Accounts Payable Example
This example applies to beginning of the fiscal year implementation of the Application.
Menu: Transactions > Enter Journal Vouchers
Use the trial balance for beginning balances for each account.
Account Debit Credit Entry Type
Asset Accounts <xxx> UO
AP Clearing Account <xxx> UO
Other Liability Accounts <xxx> UO
Fund Balance <xxx> UO
64 Student Curriculum © 2015 AbilaAttention: Authentic curriculum displays a holographic image on the front cover.

General Ledger Transaction Entry Reports
Menu: Transactions > Accounts Payable > Enter A/P Invoices
Use to create each outstanding invoice by vendor.
ReportsPrint the Unposted General Ledger Transactions report to review the accounting entries for accuracy before posting them.
Print the Posted General Ledger Transactions report to provide an audit trail for internal use and for your auditors of transaction entries posted.
Account Debit Credit Entry Type
AP Clearing Account <xxx> N
AP Control Account <xxx> N
© 2015 Abila Student Curriculum 65Attention: Authentic curriculum displays a holographic image on the front cover.

Reports Abila MIP Fund AccountingTM
Activity: Unposted General Ledger Transaction Report
Navigator: Accounting > Basic Transactions > Process Manager-Reports > Transaction Reports > Unposted General Ledger Transactions
Classic View: Reports > Transactions > Unposted General Ledger Transactions
Setup Tab Report Name: <By Session then Document>
Content Tab No Changes
Filter Tab Selected Filter: Transaction Source
Compares To: = Equal to (Criteria 1)
Criteria 1: CR
Option Tab No Changes
Layout Tab No Changes
Security Tab No Changes
Setup Tab Report Name: Unposted Cash Receipts Transactions
Click Print to Screen
Review the report.
Close Print screen by clicking Close
Click Save to save the report and Close button to exit the report setup.
66 Student Curriculum © 2015 AbilaAttention: Authentic curriculum displays a holographic image on the front cover.

General Ledger Transaction Entry Reports
Activity: Reports - Posted General Ledger Transactions
Navigator: Accounting > Basic Transactions > Reports Manager > Transaction Reports > Posted General Ledger Transactions
Classic View: Reports > Transactions > Posted General Ledger Transactions
Setup Tab Report Name: <By Session then Document>
Content Tab No Changes
Filter Tab Selected Filter: Session ID
Compares To: = Equal to (Criteria 1)
Criteria 1: CR0402003
Option Tab No Changes
Layout Tab No Changes
Security Tab No Changes
Setup Tab Report Name: Posted Transactions
Click Print to Screen
Review the report.
Close Print screen by clicking Close
Click Save to save the report and Close button to exit the report setup.
© 2015 Abila Student Curriculum 67Attention: Authentic curriculum displays a holographic image on the front cover.

Checklists Abila MIP Fund AccountingTM
ChecklistsEntering Opening Balances
This checklist discusses entering opening balances. Beginning of the year implementation applies to those users who are entering balances at the beginning of the organization’s fiscal year.
Beginning of the Year Implementation
1. Obtain or prepare a trial balance as of the beginning of the fiscal year being implemented. The trial balance should show each fund individually, not combined.
2. The amounts to Accounts Payable must be entered through the appropriate module. Therefore, the subsidiary amounts on this initial trial balance must be made to fund balance or a clearing amount.
3. Enter the account balances using the Transactions > Enter Journal Vouchers form on a fund by fund basis using the beginning of the year date and entry type UO (Beginning Balance).
4. Make sure the total of the Accounts Payable invoices agrees with the Opening Accounts Payable balance. Then, enter each invoice individually using the Transactions >Accounts Payable > Enter A/P Invoices form. Debit the account used in Step 2 above, to offset these Accounts Payable Opening balances using the beginning of the year date and entry type UO (Beginning Balance).
5. Follow the A/P steps to enter A/R balances also.
6. Post all of these transactions, then, to verify balances, print a trial balance, Reports > General Ledger Analysis > Normal Trial Balance and Accounts Receivable and Accounts Payable ledgers, Reports > Accounts Receivable> Detail A/R Ledger and Reports > Accounts Payable > Detail A/P Ledger.
Mid-Year Implementation
1. Obtain or prepare a trial balance as of the beginning of the month for the opening balances. This trial balance should include only those revenue and expenditure balances for the organization’s current fiscal year. Any funding sources open at the beginning of the organization’s fiscal year will be addressed below. The trial balance should show each fund individually, not combined. The amounts to Accounts Payable must be entered through the appropriate module. Therefore, the subsidiary balances on this initial trial balance must be made to a fund balance or a clearing account. Enter the Account Balances by using the Transactions > Enter Journal Vouchers form on a fund-by-fund basis using the date for which the trial balance was prepared.
2. Manually prepare a worksheet showing all revenues and expenditures for reporting periods that were open at the end of the organization’s fiscal year, if there are overlapping fiscal periods. For example, if the organization is on a January 1st to December 31st fiscal year, and has a grant with a fiscal year beginning July 1st, there are six months of revenues and expenditures open for this grant on December 31st, which would be included in the worksheet. When preparing the worksheet, each fund should be shown separately. Enter the revenues and expenditures as a Journal Voucher. Use the fund balance to record the net difference between the revenues and expenditures.
3. Make sure the total of the Accounts Payable invoices agrees with the Opening Accounts Payable balance, and then enter each invoice individually using the Transactions > Accounts Payable > Enter
68 Student Curriculum © 2015 AbilaAttention: Authentic curriculum displays a holographic image on the front cover.

General Ledger Transaction Entry Checklists
A/P Invoices form. Debit the account used in Step 2 above, to offset these Accounts Payable Opening balances using the same date.
4. Post all of these transactions, then, to verify balances, print a trial balance and Accounts Receivable and Accounts Payable ledgers.
Entering Transactions
Session Information
The status available on the session form depends on the organization’s preferences specified on the Organization > Organization Preferences form. The organization may select a processing mode of Batch, On-Line, or a combination of the two in Accounting.
For a Batch processing mode, choose Batch-To Post or Batch-To Suspend posting.
For an On-Line processing mode, choose On-Line Posting only.
For a Combined processing mode, choose any of the three posting statuses: Batch-To Post, Batch-To Suspend, or On-Line Posting.
Entry Types
The Entry Type field is specified for each line item on the transaction entry form. The default Entry Type for all transactions is Normal and may be changed for each line or by using Entry Defaults. Valid Entry Types are shown below.
N (Normal) is used for all accounting activity during the fiscal year (daily and month-end transactions).
A (End of Year Adjustments) are used to indicate adjustments made on the last day of the organization’s fiscal year. It requires that the line’s effective date be the last month and day of the fiscal year.
AO (Adjust Opening Balance) is used to indicate that an adjustment is being made to opening balances for an entry made to any closed fiscal year. It requires that the line’s effective date be the first day and first month of the fiscal year.
UO (Beginning Balance) is used to indicate that opening balances are being entered for the beginning of the organization’s fiscal year. This entry type might be used when using the Application for the first time.
NOTE: All entry types are allowed, however, a Revenue or Expense type account cannot be used in a UO (Beginning Balance) or AO (Adjust Opening Balance) transaction. Either the account must be changed to a type that is not a Revenue or Expense type account, or the Entry Type must be changed to N (Normal) or A (End of Year Adjustment), whichever is appropriate for the effective date of the transaction line.
© 2015 Abila Student Curriculum 69Attention: Authentic curriculum displays a holographic image on the front cover.

Checklists Abila MIP Fund AccountingTM
Faster Transaction Entry Use the auto increments available (by pressing the plus (+) key) for Session ID, document, and
deposit to save keystrokes. The default session ID was set up using the Organization > Organization Preferences > Session tab.
Use Entry Defaults if the same information is repeated in several lines. Entry Defaults are identified by transaction type and once they are set up, they are available for the current session.
Use Distribution Codes to allocate amounts to predetermined segments combinations. Distributions may be based on units, percentages, or fixed amounts. They were set up using the Maintain > Distribution Codes form.
Use manual or automatic Offsets to create the other half of transactions based on the transaction type (for example, CR (Cash Receipts) offset to cash). Offsets may be set up to generate interfund transactions.
Use Tab to move the cursor to the next cell. If the cursor is at the end of the line, focus moves through the bottom buttons, then through the document, then through the table again.
Use Shift+Tab to move the cursor to the previous cell. When the cursor is at the beginning of the line, focus moves back through the document, then the bottom buttons. Focus does not return to the table.
Use F2 to select or deselect text.
Use F4 to drop the list or pull it up, if it is down.
Use F5 to copy the contents of the cell immediately above the active cell (starting with the second row) into the active cell.
Use F6 to copy the contents of the row immediately above the active row (beginning with the second row) into the active row.
Use F7 to pull in all of the values from the Entry Defaults form.
Recurring entries may be made by copying posted sessions (Activities > Manage Sessions > Copy Posted Session), copying posted documents, and/or recalling memorized documents.
Transaction Entry
1. Open a session. Any transactions with a status of BP also need to be posted.
2. Use the following forms to enter various transactions:
Transactions > Enter Cash Receipts - use to record Cash Receipts.
Transactions > Enter Cash Disbursements - use to record Cash Disbursements.
Transactions > Enter Journal Vouchers - use to record Journal Vouchers.
3. Run the unposted transactions report for a status of BP or BS, Reports > Transactions > Unposted General Ledger Transactions. This report contains accounting entries that have been entered, but not yet posted.
4. Post the transactions, Activities > Manage Sessions > Post Transaction. Remember, any sessions with a status of BS need to be changed to BP. All sessions should be posted.
70 Student Curriculum © 2015 AbilaAttention: Authentic curriculum displays a holographic image on the front cover.

General Ledger Transaction Entry Checklists
5. Print a report to see a list of posted account entries, Reports > Transactions > Posted General Ledger Transactions.
Application Edits During the Transaction Entry Process: Verifies codes are in the chart of accounts.
Checks status of codes for Active, Inactive, and Discontinued.
Verifies account code combinations, if applicable.
Verifies that each transaction has an entry type, effective date, and description.
Debits and credits must equal by effective date, entry type, fund, and balancing segments.
For Cash Receipts and Cash Disbursements, net credit/debit to cash must equal the document amount.
If the entry type is Adjust Opening Balance, verifies that the effective date is the first day of the organization’s fiscal year.
If the entry type is End of Year Adjustments, verifies that the effective date is the last day of the fiscal year.
Verifies that the proper segments have been entered for general ledger accounts. For revenues and expenditures, all segment codes are required. For balance sheet accounts, the Application verifies that segments designated as fund and/or balancing have codes.
Correcting Transactions
Follow these steps to correct or change a document after it has been entered.
1. If a document is in an unposted batch, either make changes to it or delete it.
2. If the document has been posted, click Reverse Posted Document to reverse a posted document, and then re-enter it correctly. For quicker entry, copy the incorrect document, and then edit the incorrect items before posting.
© 2015 Abila Student Curriculum 71Attention: Authentic curriculum displays a holographic image on the front cover.

Reinforcement Exercises Abila MIP Fund AccountingTM
Reinforcement Exercises1. Some of the Child Welfare grant award is restricted for providing vaccinations to qualifying pre-school
children. During the current month, several hundred children were vaccinated under program guidelines. Open a Journal Voucher session to make the entry recording the satisfaction of grant restrictions. Use the plus (+) key to auto increment the Session ID. Assign a Status of Batch – To Post, enter Monthly accrual and closing entries as the Description, and use <the last day of this month> as the session date. Start the session and enter the following voucher:
Document Information:
Voucher Date Reversing Description
plus (+) key <Last day/this month> No Record satisfaction of grant restrictions
Accounting Information:
After completing the entry, Save the transaction but Do Not Close the session.
2. Now you are going to make a Journal Voucher entry to record depreciation expense using the following information:
Document Information:
Voucher Date Reversing Description
plus (+) key <Last day of this month> No Record monthly depreciation
Accounting Information:
After completing the entry, Save the transaction but Do Not Close the session.
72 Student Curriculum © 2015 AbilaAttention: Authentic curriculum displays a holographic image on the front cover.

General Ledger Transaction Entry Reinforcement Exercises
3. You are getting ready to close out the month and prepare reports for the Board of Directors. You have been awaiting an invoice for supplies you received earlier in the month. You have decided to make an accrual entry for the expense in order for you to begin printing reports for the Board and Management. Create a JV (use the plus (+) key to auto increment) using the last day of the current month as the document date and effective date. Have the Application create the reversing entries in the same session in a new document. Enter Accrue supplies expense as the document description.
Accounting Information:
After completing the entry, Save the transaction and create the reversing entries. Use the plus (+) key to auto increment the document number and an effective and document date of the first day of next month for the reversal with a description of Reverse supplies expense accrual. Use the document description for the line items.
Do Not Close the session.
4. You have just completed the monthly billing for one of your state grantors. You need to enter a journal voucher entry to record the billing. Use the plus (+) key to auto increment for the Voucher number, today’s date for the Date and Record Monthly Child Welfare Day Care billing for the Description. Do not create reversing entries. Then enter the following accounting information:
Accounting Information:
After completing the entry, Save the transaction and Close the session.
5. The next transaction you will enter is a cash disbursement made on today’s date from the Federal Grant fund (05). Check #59004 is for $245.00 of Supplies. For this task, multiply this amount by the percentages shown below as each applies to the various grants, programs, departments and restrictions. Then write the account code representing each segment, along with the dollar amounts, in the space provided. Each line represents one line of transaction entry. There are three lines of debits to Expense and one line of credit to the Cash in Checking account.
Grant Program Department 117 Percent
Child Welfare Social Service Program Services Unrestricted 42%
Child Welfare Health Care Program Services Unrestricted 38%
Child Welfare Day Care Program Services Unrestricted 20%
© 2015 Abila Student Curriculum 73Attention: Authentic curriculum displays a holographic image on the front cover.

Reinforcement Exercises Abila MIP Fund AccountingTM
Fill out the voucher form below to prepare for the transaction entry.
DISBURSEMENT VOUCHER CHECK #________________ DATE ______________________
Enter the session Information, using the plus (+) key to auto increment the Session ID. Choose Batch to Post Status, using the current date as the Session Date. The description will be Manual Disbursement Checks. Select or enter the Cash Acct.: 11001 (Cash in Checking). Enter document and transaction lines according to the above voucher form, then Save the document. Utilize short-cut keys when applicable.
6. Check #59005 is to pay Legal fees (GL code 52201). The check amount is for $1,800.00 and the date will be today’s date. The check will be distributed equally to 3 programs:
Charge the first transaction entry line to the Federal Grant Fund, Child Welfare grant, Social service program, Administration department and Unrestricted 117.
On the second line, use the F5 key to copy all information from the previous line except for the program code. Select Food Service as the program.
On the third line, use the F6 key to copy the entire previous line and change the program to Day Care.
On the last line, enter the Fund, Grant, Cash GL Account 11001 and leave the Program, Department, 117 and Amount blank. Enter or Tab through the Entry Type, Effective Dates and Line Description fields. The Application will calculate the amount of the credit required for a balanced entry.
When the entry is complete, Save the document.
7. The next Cash Disbursement you will enter was also made on today’s date for Building Rent expense. Check #59006 was issued for $1,280.00. Use the RENT distribution code and GL 55001 to allocate the amount to the accounts previously established. Once the debits have been allocated, click on the Use Offsets auxiliary button to create the credits to cash. Review the entry that was created by the offset feature. Memorize the document as an Actual Amounts transaction using the name Rent. Do not schedule the memorized document as a recurring entry. Save the entry and close the session.
Fund Grant GL Acct Program Department 117 Debit Credit
05 57001
05 57001
05 57001
05 11001
74 Student Curriculum © 2015 AbilaAttention: Authentic curriculum displays a holographic image on the front cover.

General Ledger Transaction Entry Reinforcement Exercises
8. Open a new cash disbursement Batch – To Post session using the Auto Increment feature to assign a Session ID. Leave the session description blank, assign a session date of one month from today, select or enter the Cash Acct.: 11001 (Cash in Checking).and start the session. Recall the Memorized Document Rent from the previous exercise. Assign a check number of 59007 and indicate that you would like to use the document description for line items. Use the session date as the document and effective date. After completing the entry, Save the transaction and Close the session.
9. You have received a check in the mail from one of your grantors. Record the payment in a cash receipt transaction. Use the plus (+) key to auto increment the Session ID. Select On-Line Posting as the Status, enter Record Grant Receipts as the Description and use today’s date as the session Date.
Document Information:
Receipt Date Amount Description Deposit Number
111731 Today’s Date 10000.00 Health Appeals grant <today’s date_002>
Accounting Information:
Hint: If you completed the Activity in the Setup Offsets section of this guide, you may use the automatic offset feature to create the cash line of the entry.
Post the entry and close the form when you have finished the exercise.
© 2015 Abila Student Curriculum 75Attention: Authentic curriculum displays a holographic image on the front cover.

Reinforcement Exercises Abila MIP Fund AccountingTM
76 Student Curriculum © 2015 AbilaAttention: Authentic curriculum displays a holographic image on the front cover.