adding content and editing your lib guide
TRANSCRIPT
Adding Content and Editing Your LibGuide
THE BASICS
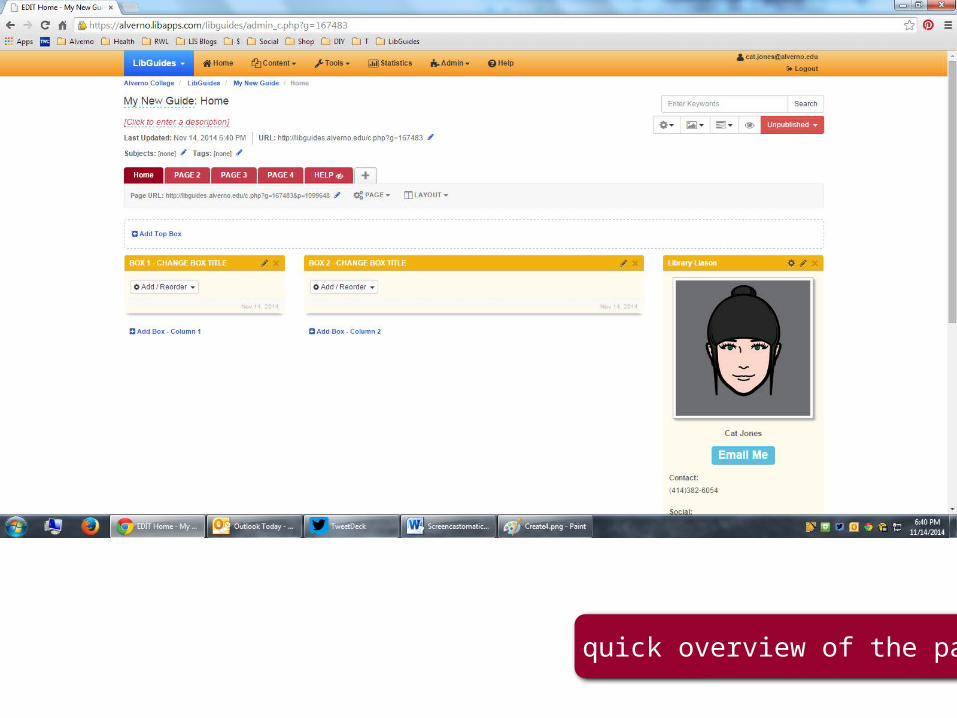
A quick overview of the page
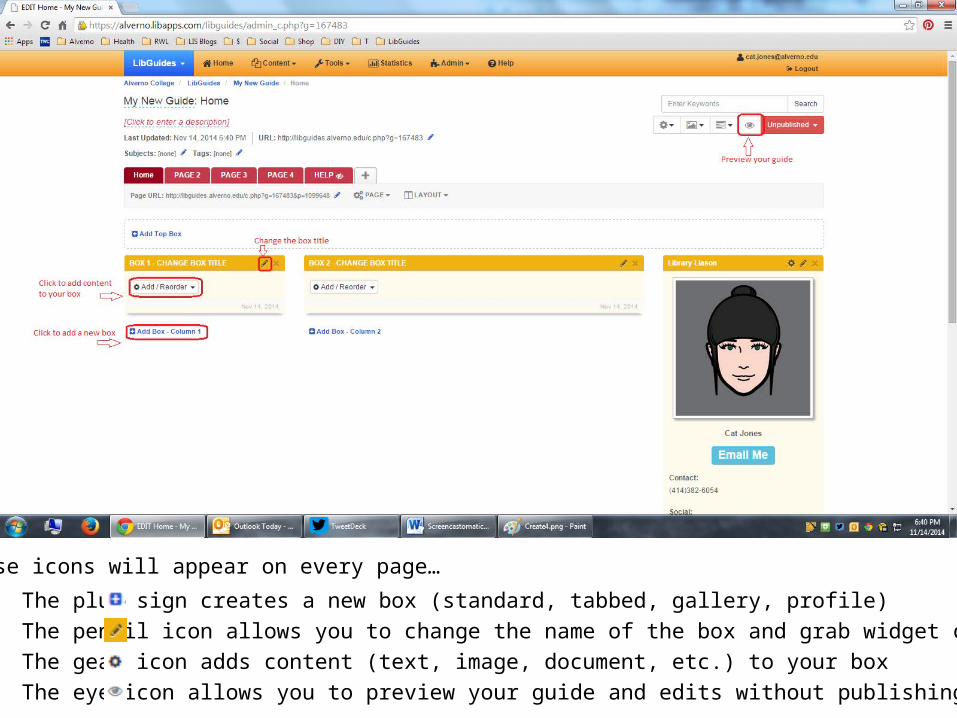
The plus sign creates a new box (standard, tabbed, gallery, profile) The pencil icon allows you to change the name of the box and grab widget code The gear icon adds content (text, image, document, etc.) to your box The eye icon allows you to preview your guide and edits without publishing
These icons will appear on every page…
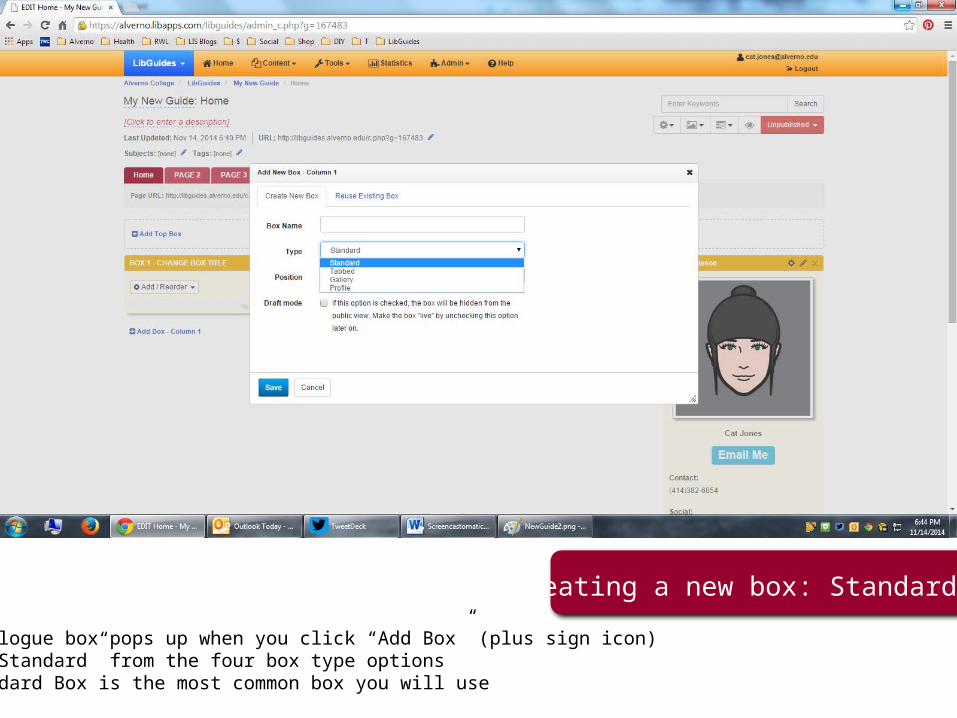
Creating a new box: Standard Box
This dialogue box pops up when you click “Add Box” (plus sign icon)Select “Standard” from the four box type options The Standard Box is the most common box you will use
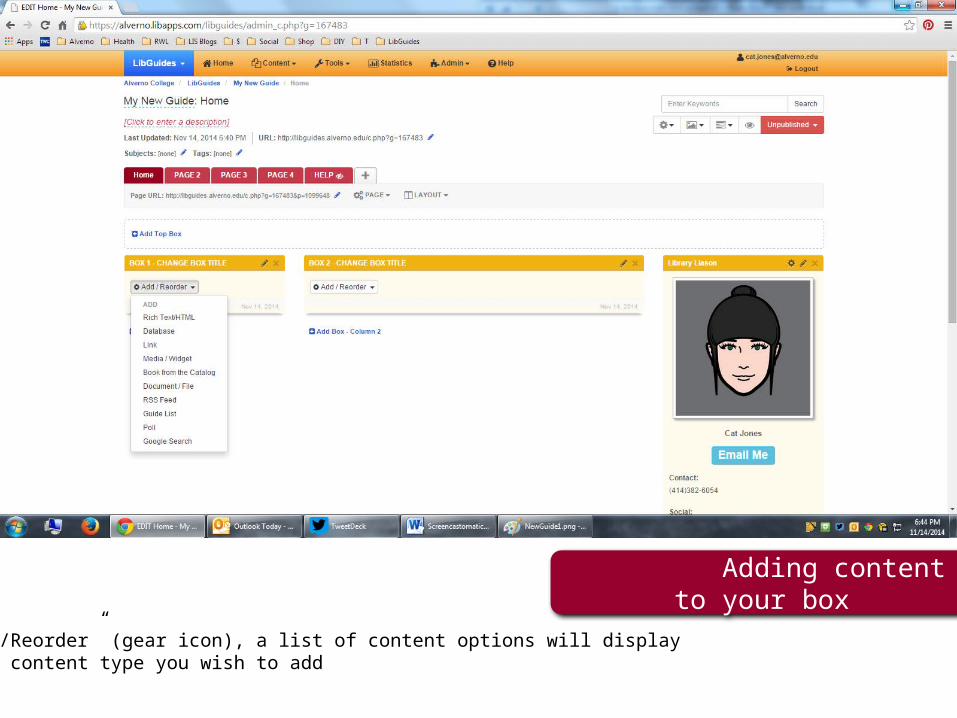
Click “Add/Reorder” (gear icon), a list of content options will displaySelect the content type you wish to add
Adding content to your box

Adding a Rich Text/HTML box - this allows you to format text using standard Rich Text options.-Fonts: size, style, formatting-Create lists, hyperlinks, tables, embed images-Click the <>Source icon to format using HTML
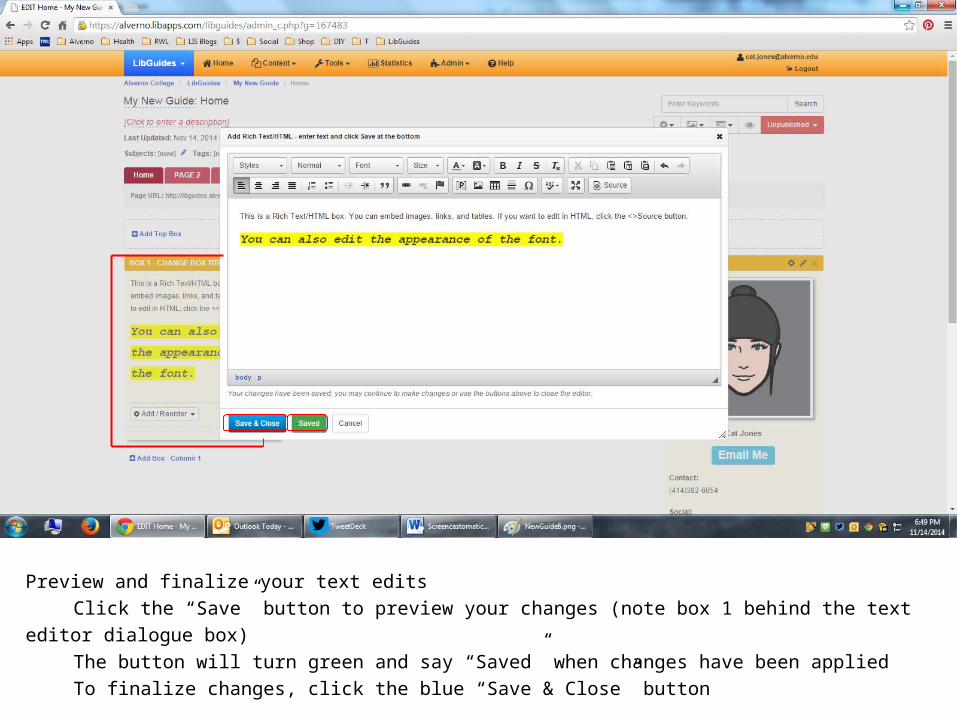
Preview and finalize your text editsClick the “Save” button to preview your changes (note box 1 behind the text editor dialogue box)The button will turn green and say “Saved” when changes have been appliedTo finalize changes, click the blue “Save & Close” button
Adding a book from the catalog
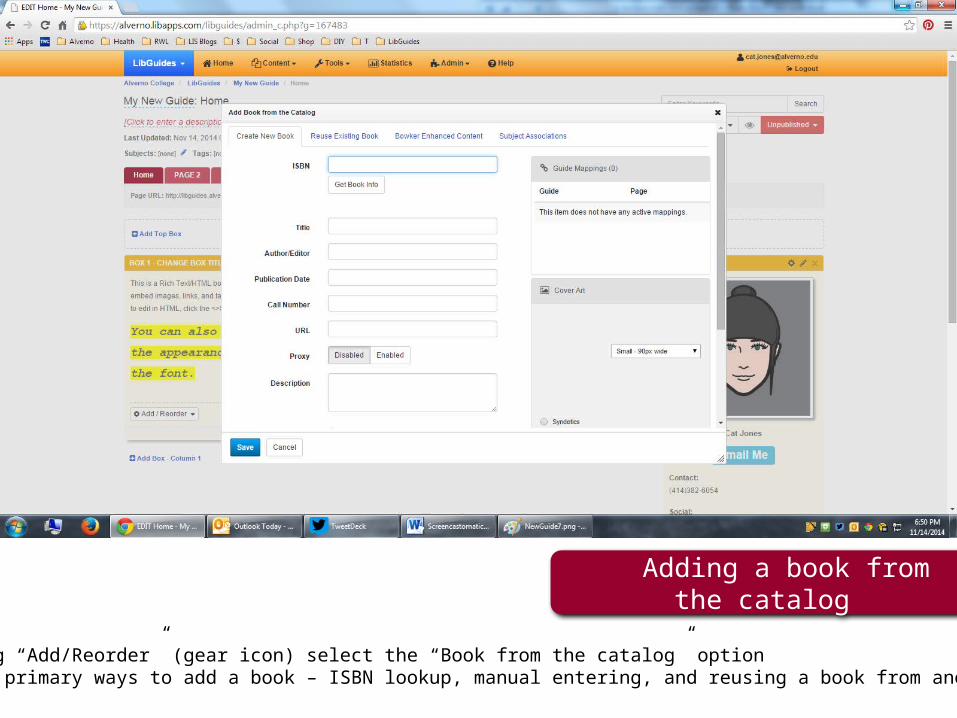
After clicking “Add/Reorder” (gear icon) select the “Book from the catalog” optionThere are two primary ways to add a book – ISBN lookup, manual entering, and reusing a book from another guide
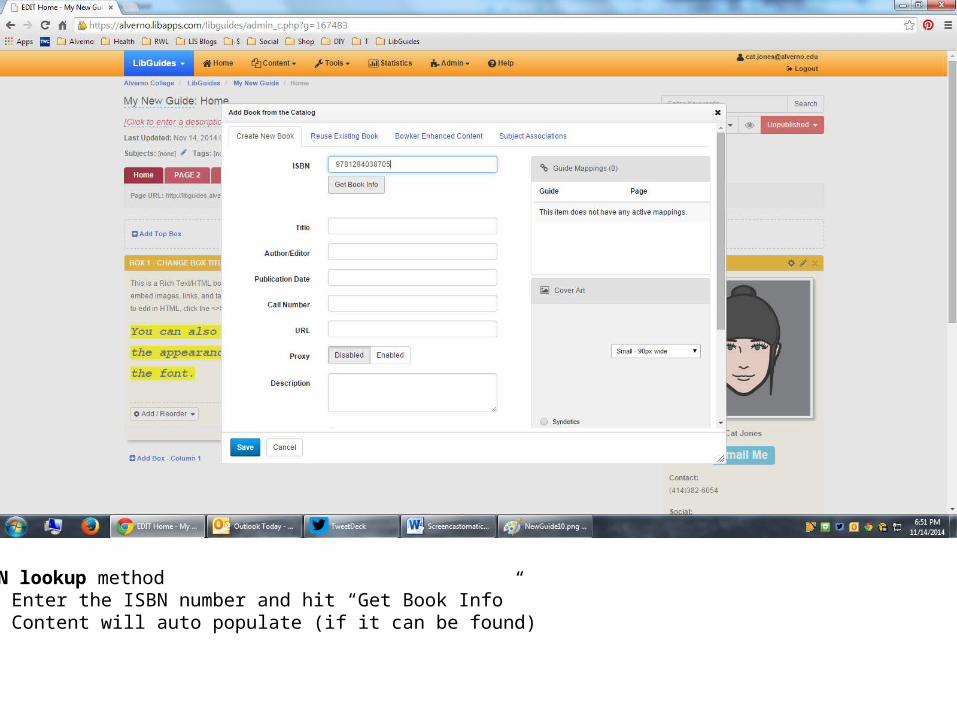
ISBN lookup methodEnter the ISBN number and hit “Get Book Info”Content will auto populate (if it can be found)
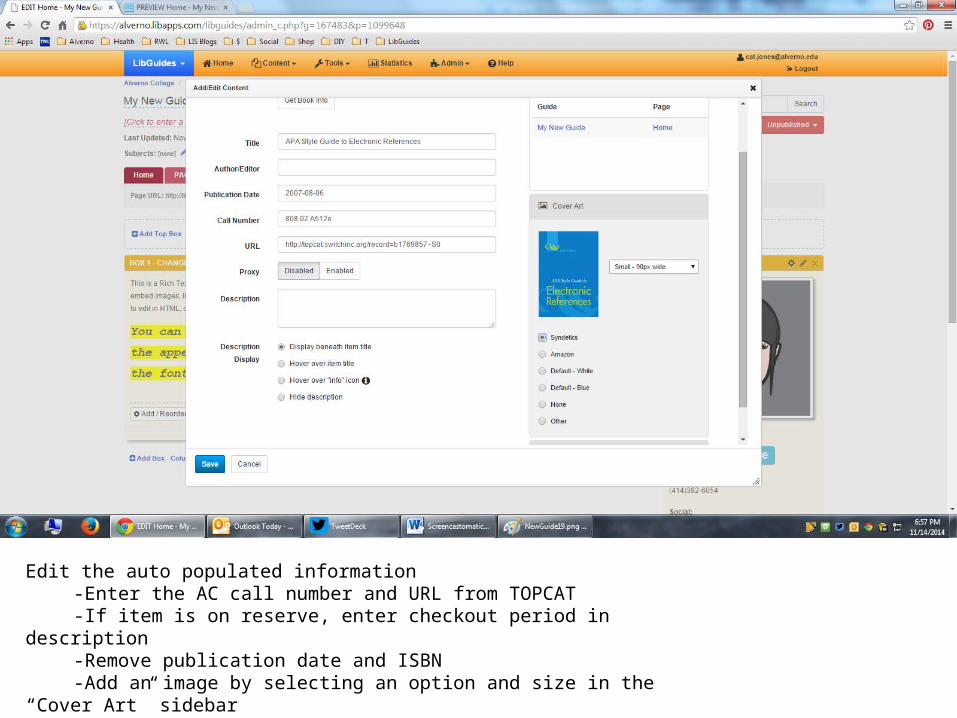
Edit the auto populated information-Enter the AC call number and URL from TOPCAT-If item is on reserve, enter checkout period in description-Remove publication date and ISBN-Add an image by selecting an option and size in the “Cover Art” sidebar
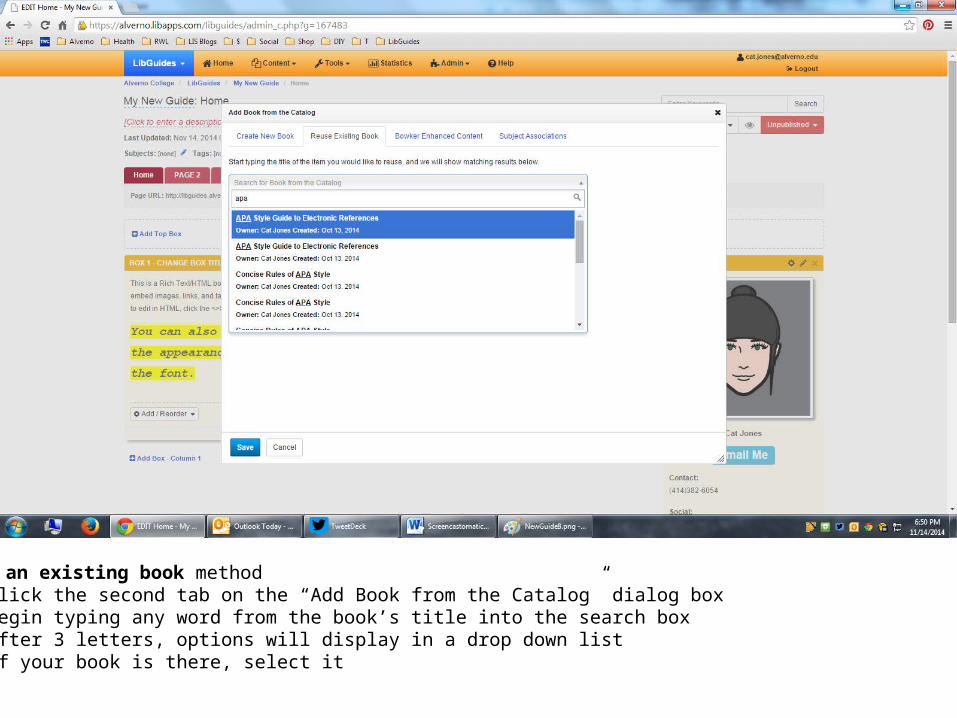
Reuse an existing book methodClick the second tab on the “Add Book from the Catalog” dialog boxBegin typing any word from the book’s title into the search boxAfter 3 letters, options will display in a drop down listIf your book is there, select it
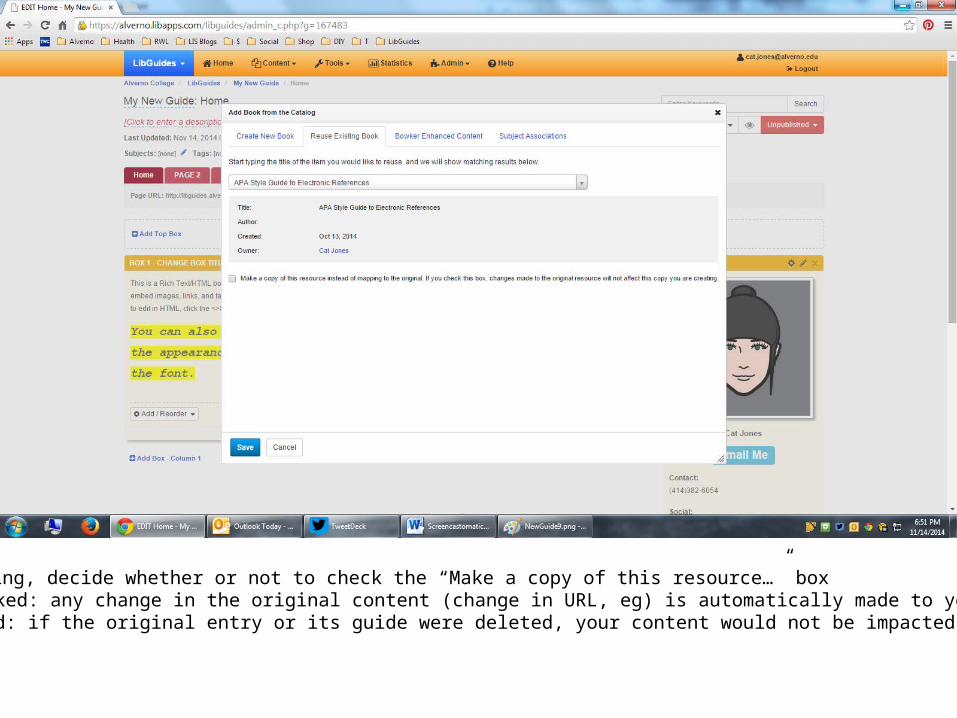
Before saving, decide whether or not to check the “Make a copy of this resource…” box Unchecked: any change in the original content (change in URL, eg) is automatically made to your contentChecked: if the original entry or its guide were deleted, your content would not be impacted
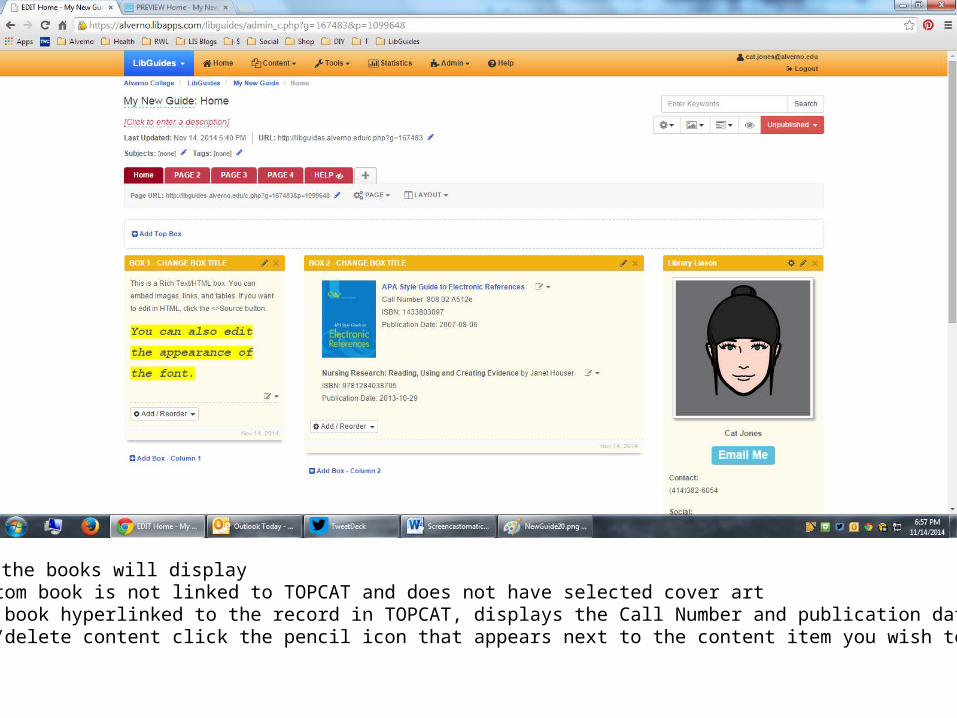
This is how the books will displayThe bottom book is not linked to TOPCAT and does not have selected cover artThe top book hyperlinked to the record in TOPCAT, displays the Call Number and publication dateTo edit/delete content click the pencil icon that appears next to the content item you wish to update
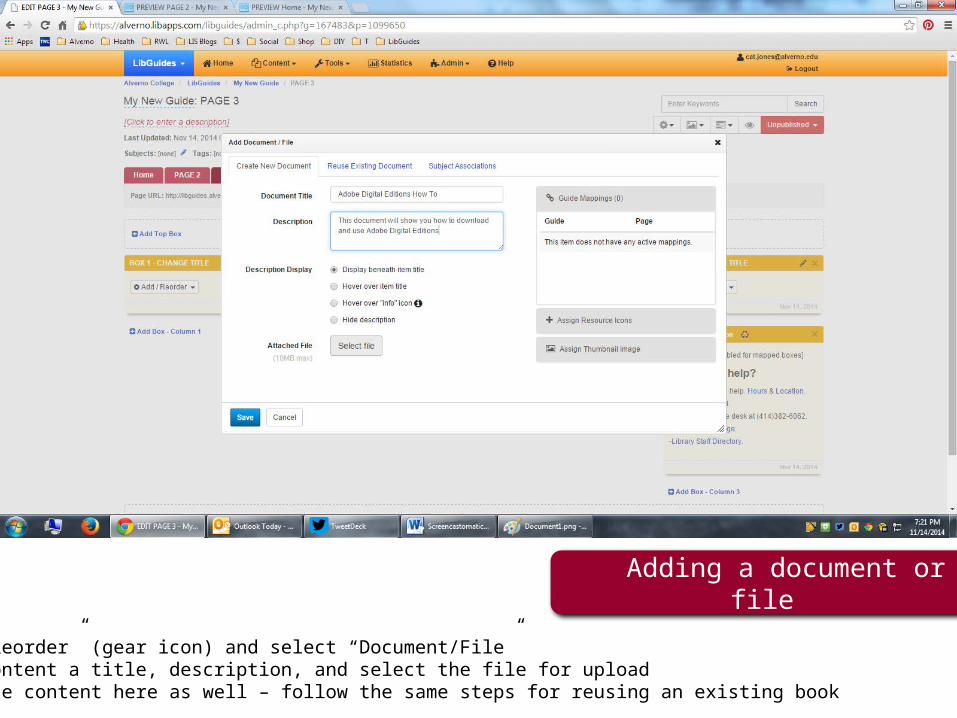
Adding a document or file
Click “Add/Reorder” (gear icon) and select “Document/File”Give your content a title, description, and select the file for uploadYou can reuse content here as well – follow the same steps for reusing an existing book

This is the default presentation for a document/file
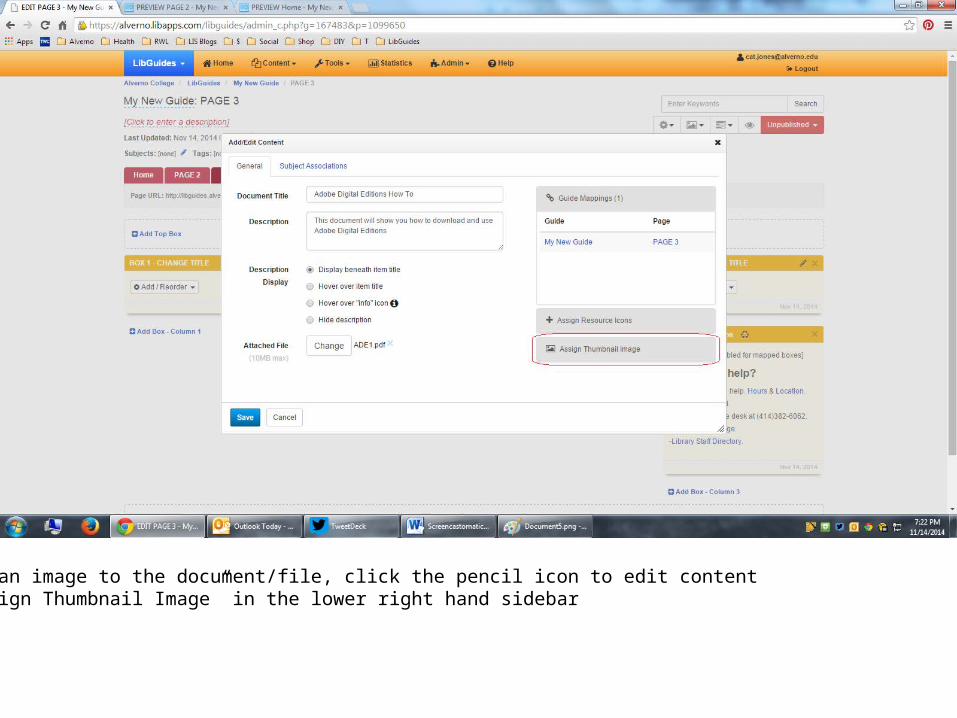
To assign an image to the document/file, click the pencil icon to edit contentClick “Assign Thumbnail Image” in the lower right hand sidebar
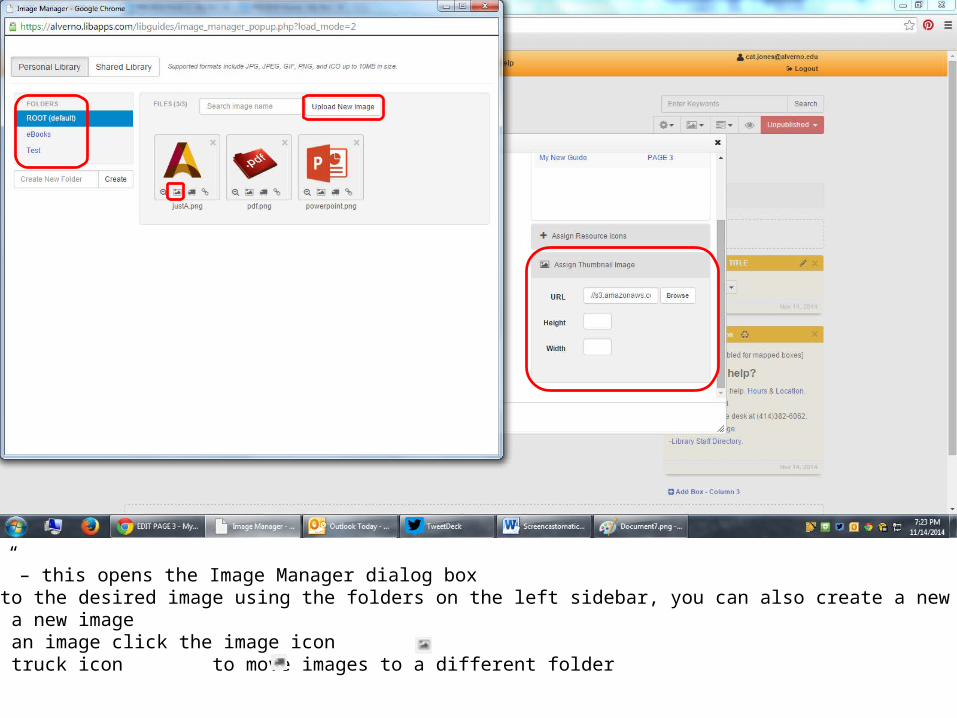
Click “Browse” – this opens the Image Manager dialog boxNavigate to the desired image using the folders on the left sidebar, you can also create a new folder here Or upload a new imageTo select an image click the image iconClick the truck icon to move images to a different folder
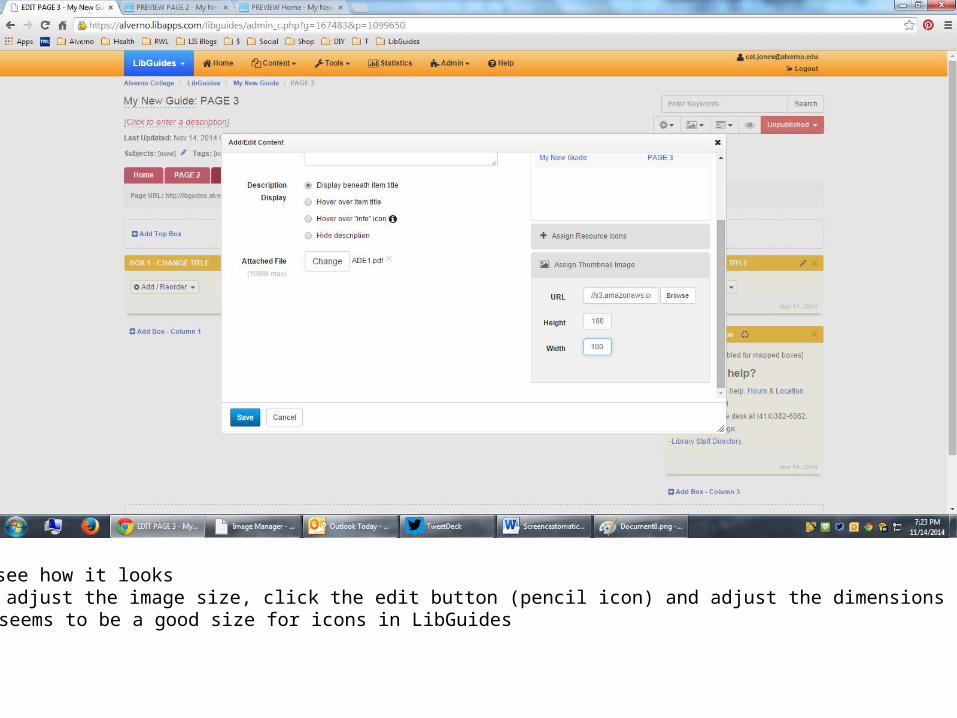
Hit “Save” to see how it looksIf you need to adjust the image size, click the edit button (pencil icon) and adjust the dimensions
100 x 100 seems to be a good size for icons in LibGuides
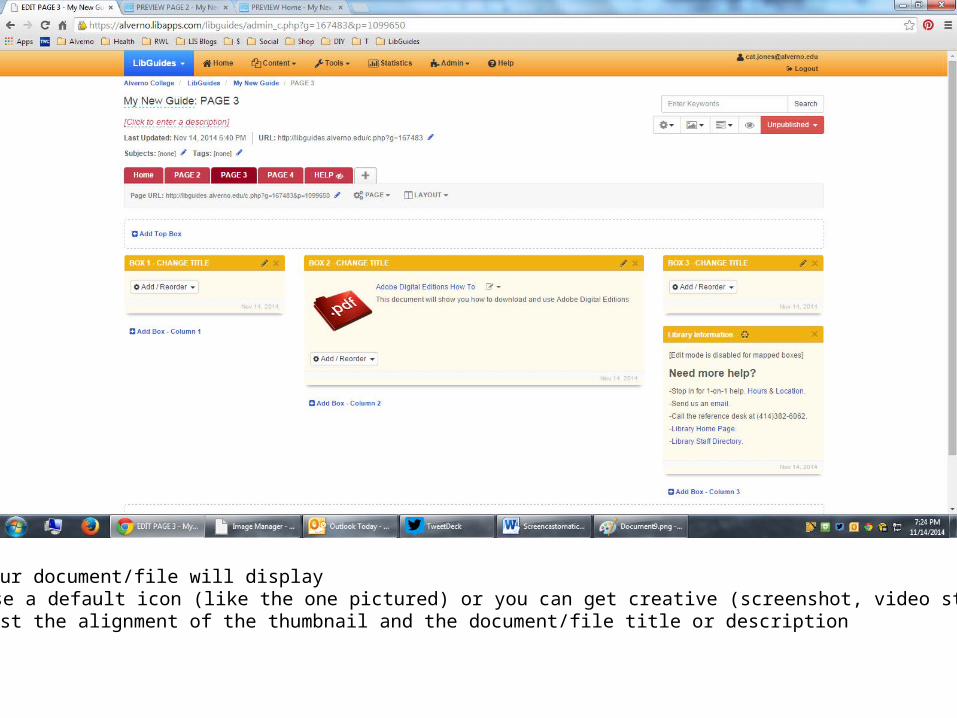
This is how your document/file will displayYou can use a default icon (like the one pictured) or you can get creative (screenshot, video still, etc.)
We cannot adjust the alignment of the thumbnail and the document/file title or description
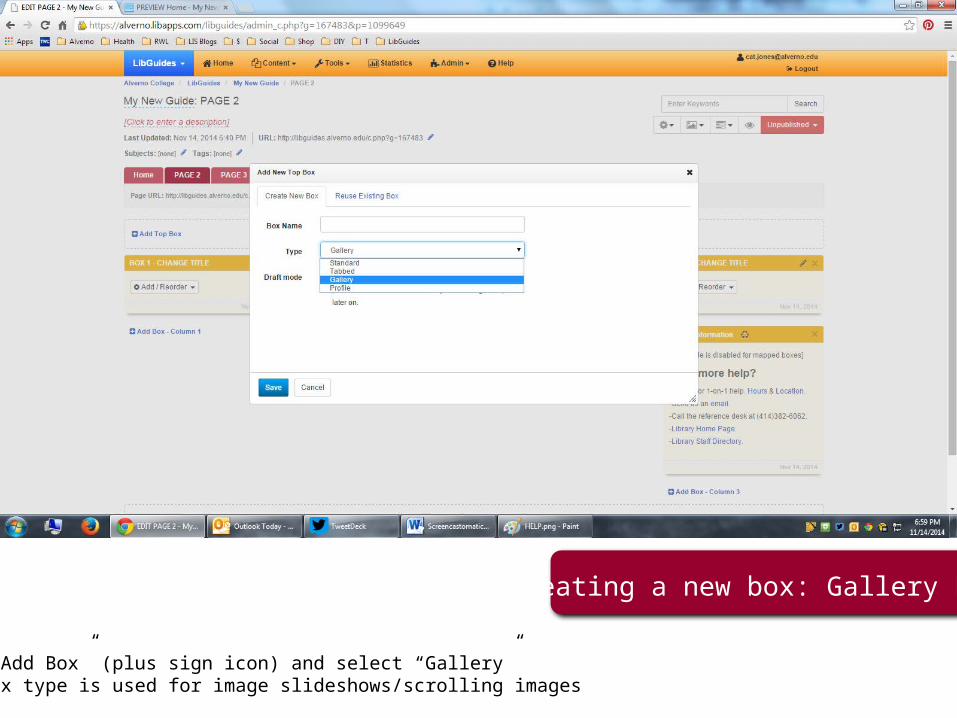
Creating a new box: Gallery Box
Click “Add Box” (plus sign icon) and select “Gallery”This box type is used for image slideshows/scrolling images
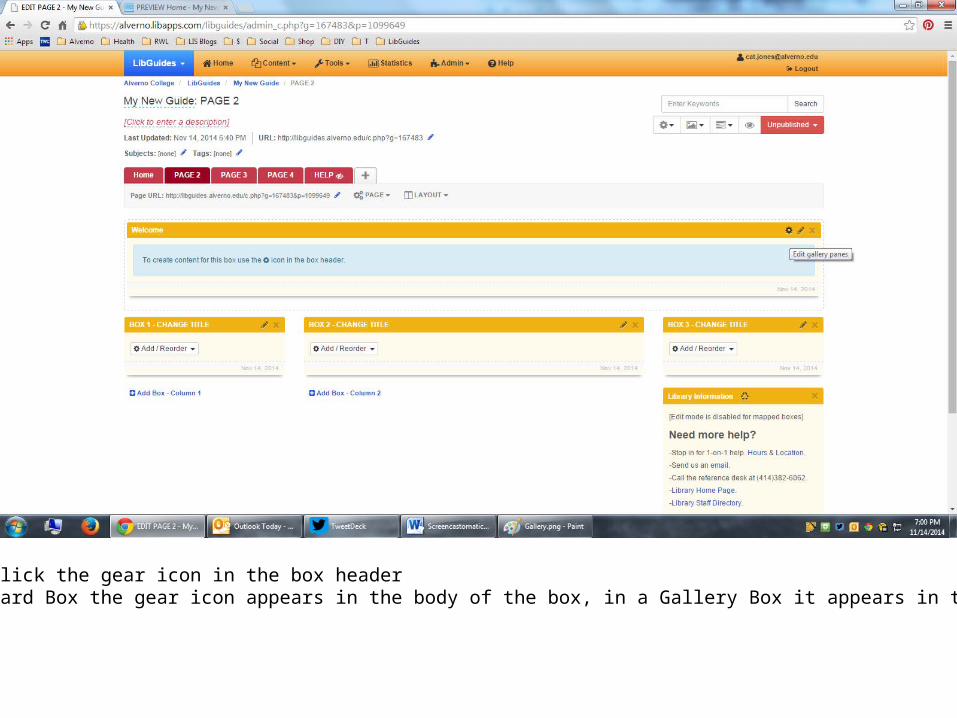
To add images, click the gear icon in the box headerNOTE: in a Standard Box the gear icon appears in the body of the box, in a Gallery Box it appears in the box header
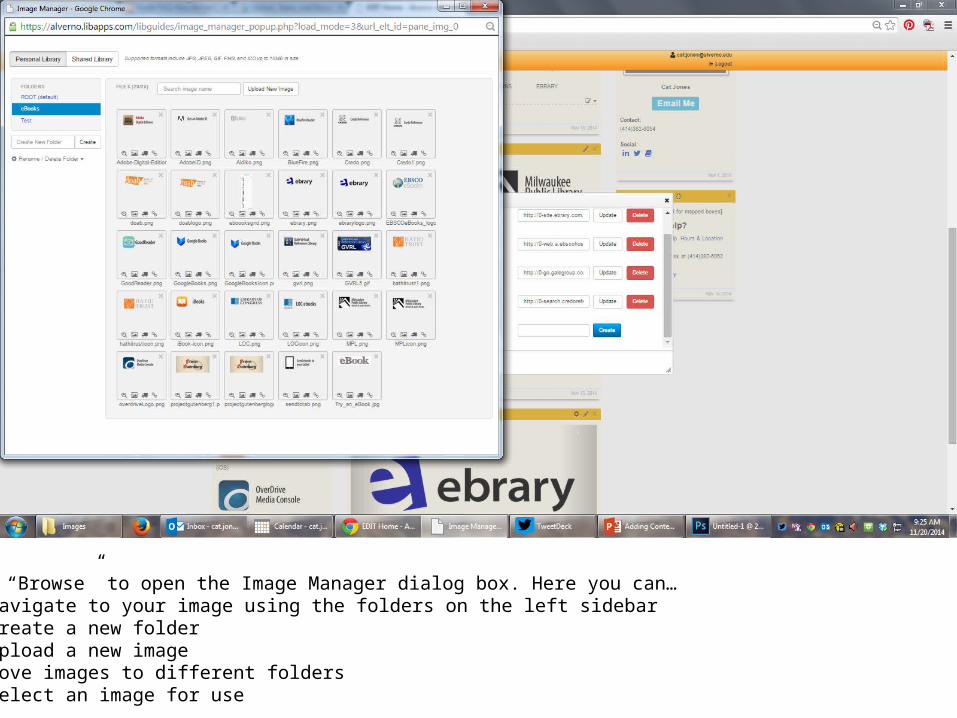
Click “Browse” to open the Image Manager dialog box. Here you can…Navigate to your image using the folders on the left sidebarCreate a new folderUpload a new imageMove images to different foldersSelect an image for use
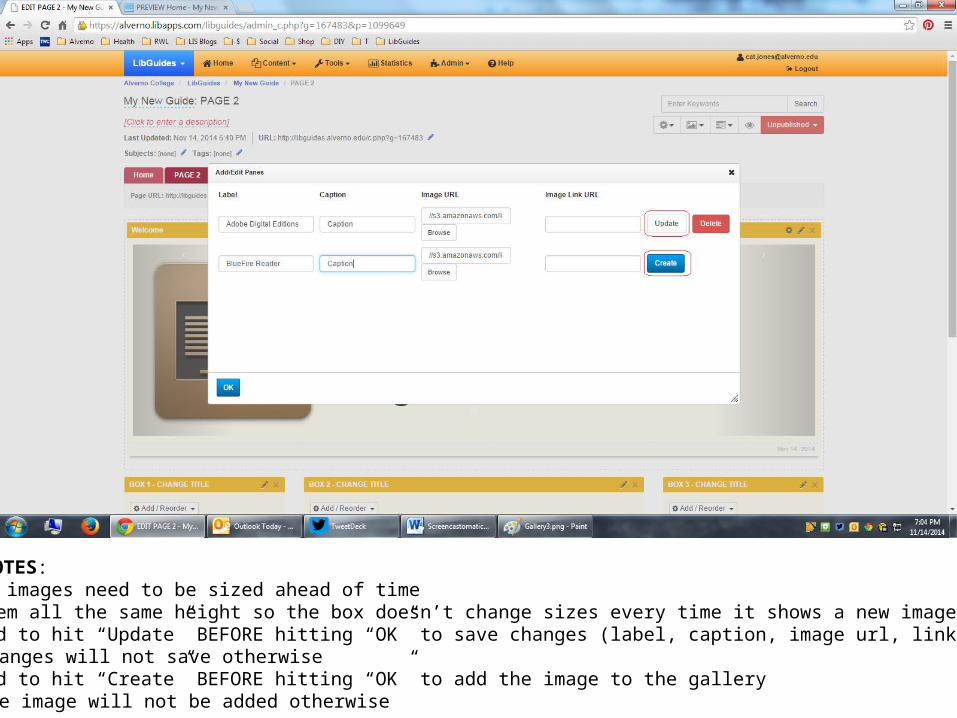
IMPORTANT NOTES:Gallery images need to be sized ahead of time Make them all the same height so the box doesn’t change sizes every time it shows a new imageYou need to hit “Update” BEFORE hitting “OK” to save changes (label, caption, image url, link url)
-Changes will not save otherwiseYou need to hit “Create” BEFORE hitting “OK” to add the image to the gallery
-The image will not be added otherwise
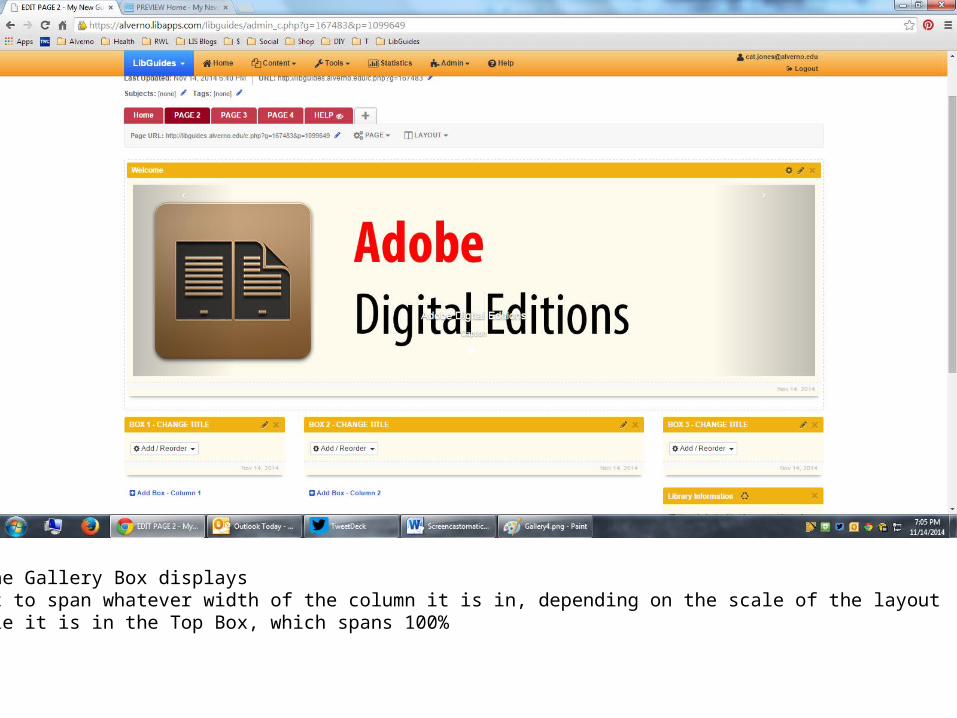
This is how the Gallery Box displaysIt will adjust to span whatever width of the column it is in, depending on the scale of the layoutIn this example it is in the Top Box, which spans 100%
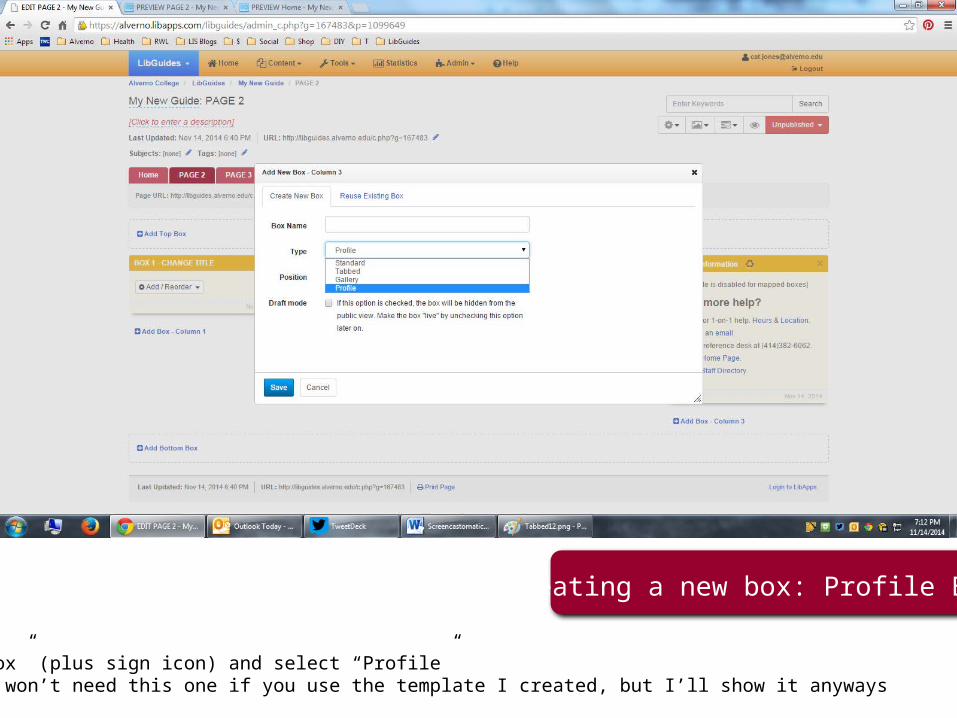
Creating a new box: Profile Box
Click “Add Box” (plus sign icon) and select “Profile”You probably won’t need this one if you use the template I created, but I’ll show it anyways
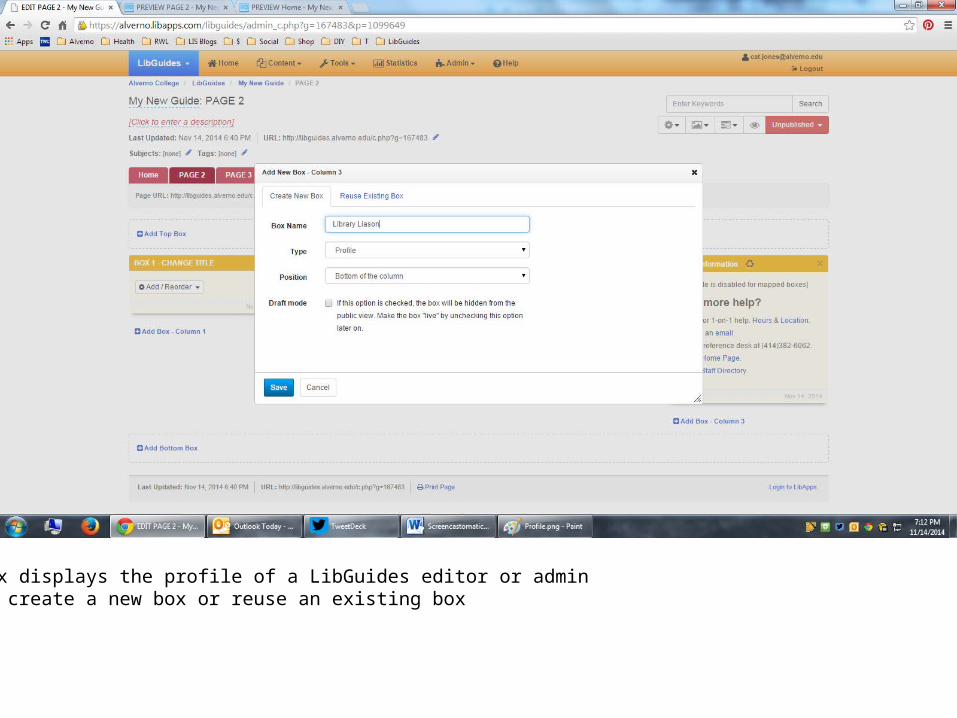
This box displays the profile of a LibGuides editor or adminYou can create a new box or reuse an existing box
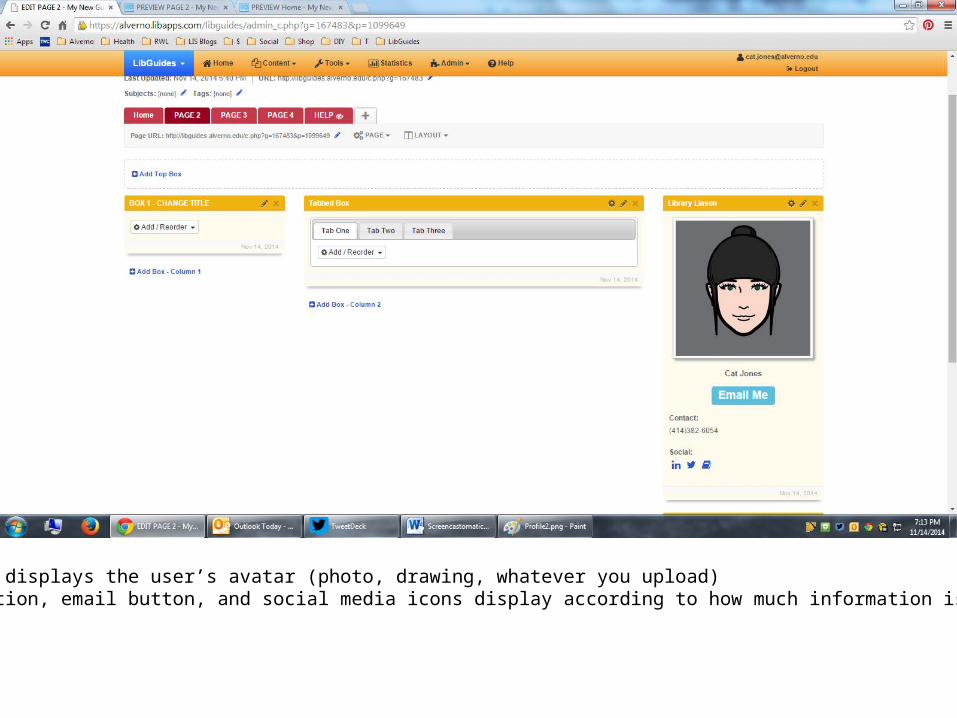
The profile box displays the user’s avatar (photo, drawing, whatever you upload)Contact information, email button, and social media icons display according to how much information is on your profile
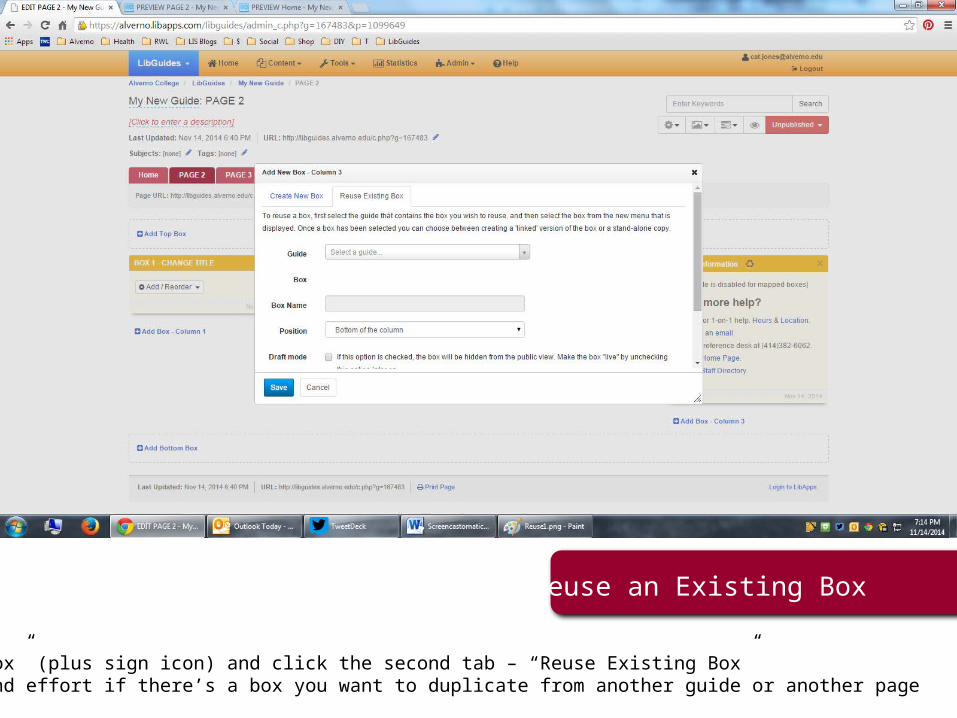
Reuse an Existing Box
Click “Add Box” (plus sign icon) and click the second tab – “Reuse Existing Box”Saves time and effort if there’s a box you want to duplicate from another guide or another page
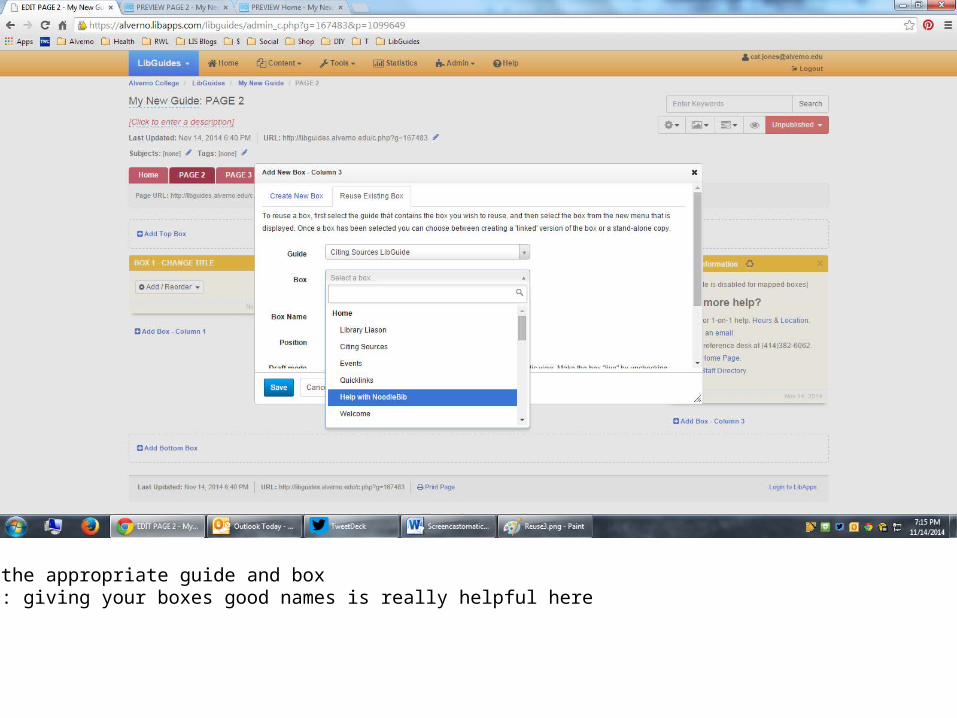
Select the appropriate guide and box PRO TIP: giving your boxes good names is really helpful here
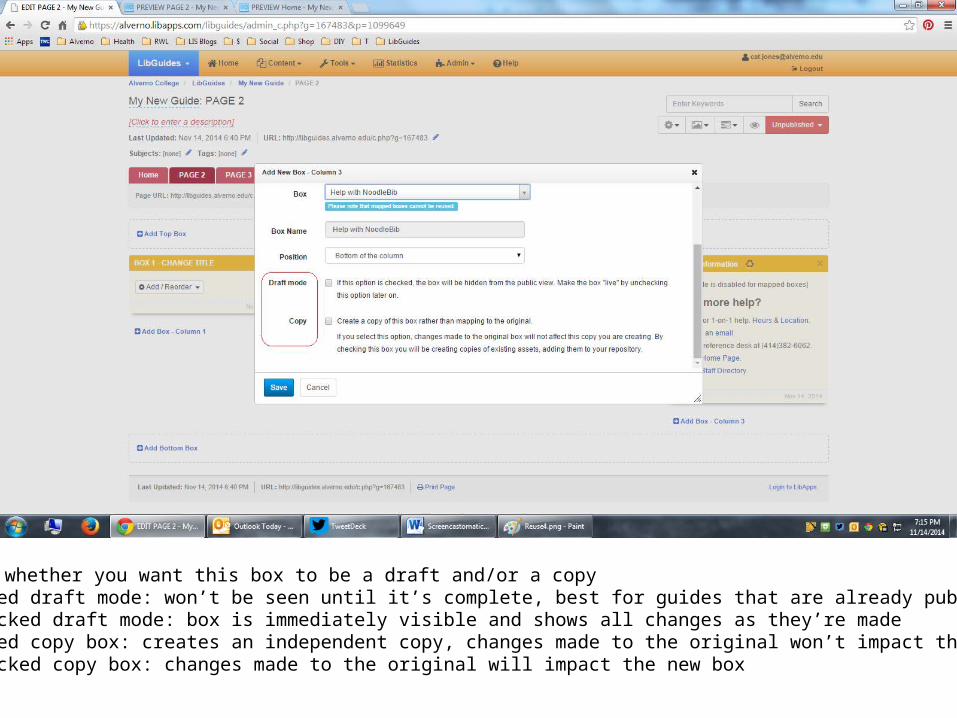
Determine whether you want this box to be a draft and/or a copyChecked draft mode: won’t be seen until it’s complete, best for guides that are already publishedUnchecked draft mode: box is immediately visible and shows all changes as they’re madeChecked copy box: creates an independent copy, changes made to the original won’t impact the new boxUnchecked copy box: changes made to the original will impact the new box
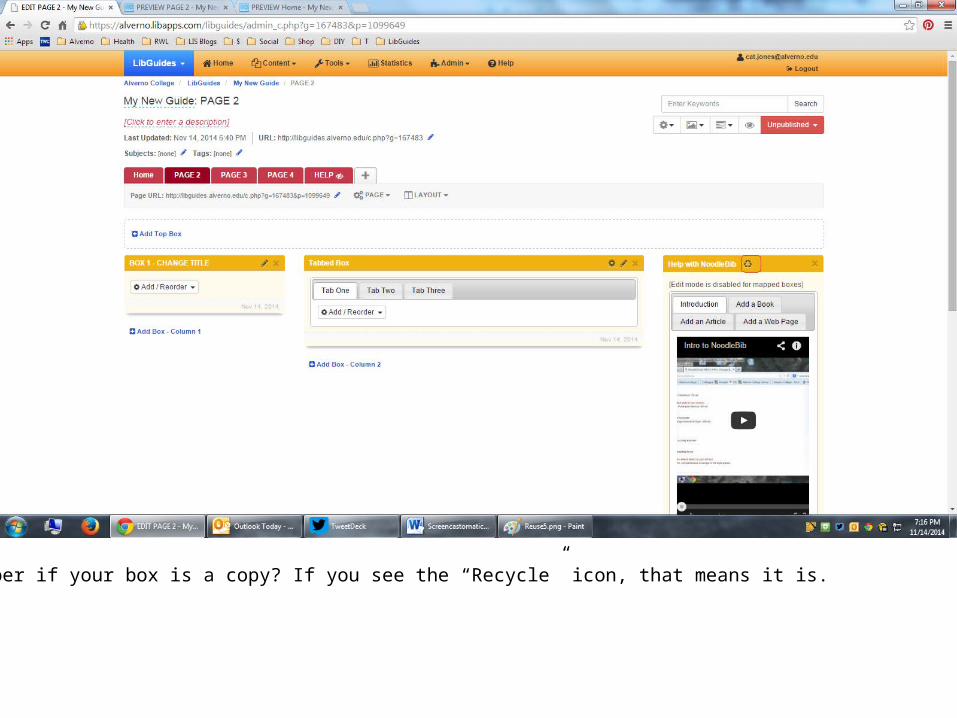
Can’t remember if your box is a copy? If you see the “Recycle” icon, that means it is.
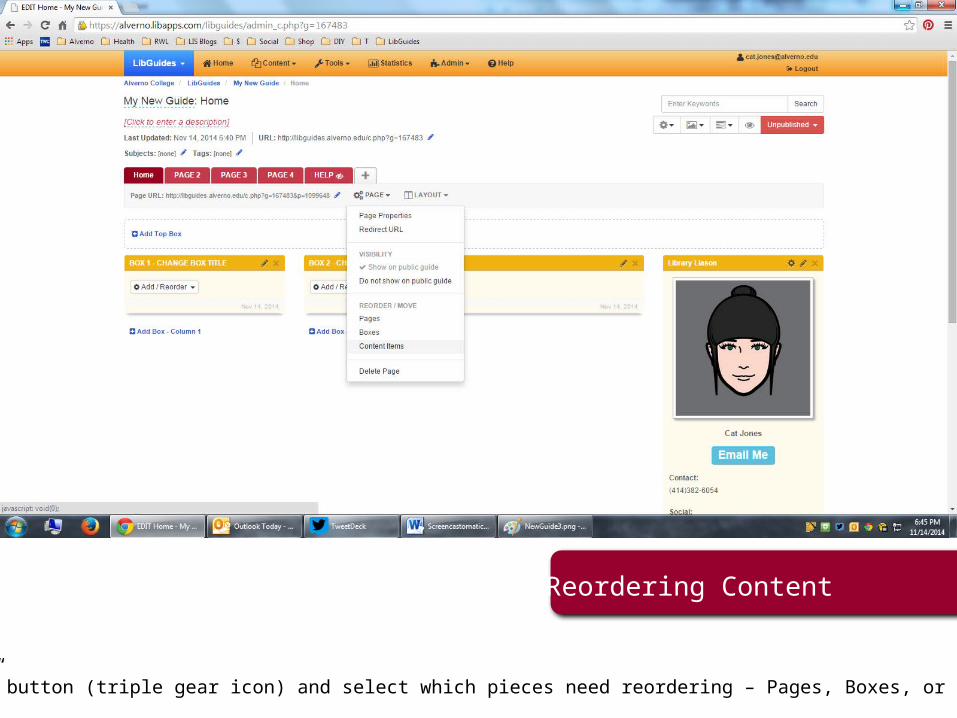
Reordering Content
Click the “Page” button (triple gear icon) and select which pieces need reordering – Pages, Boxes, or Content Items
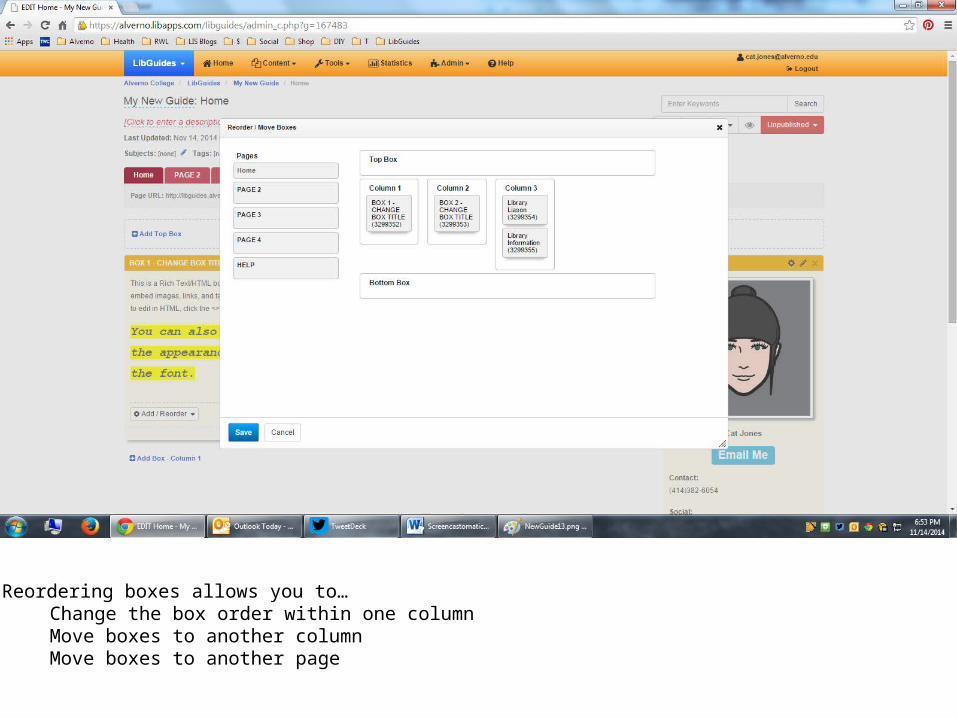
Reordering boxes allows you to…Change the box order within one columnMove boxes to another columnMove boxes to another page
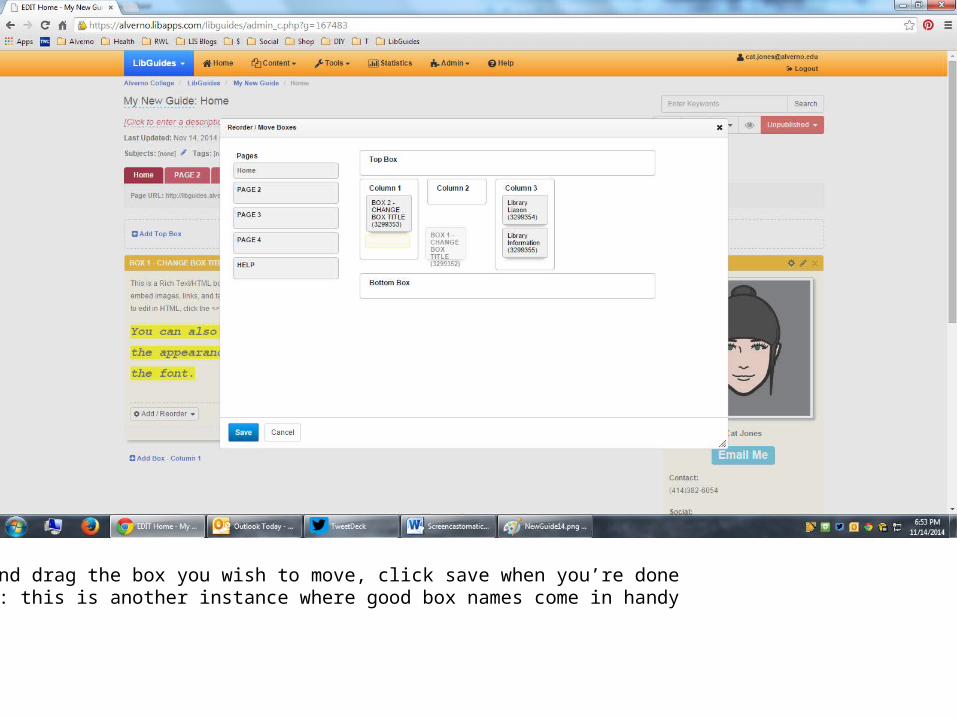
Click and drag the box you wish to move, click save when you’re donePRO TIP: this is another instance where good box names come in handy
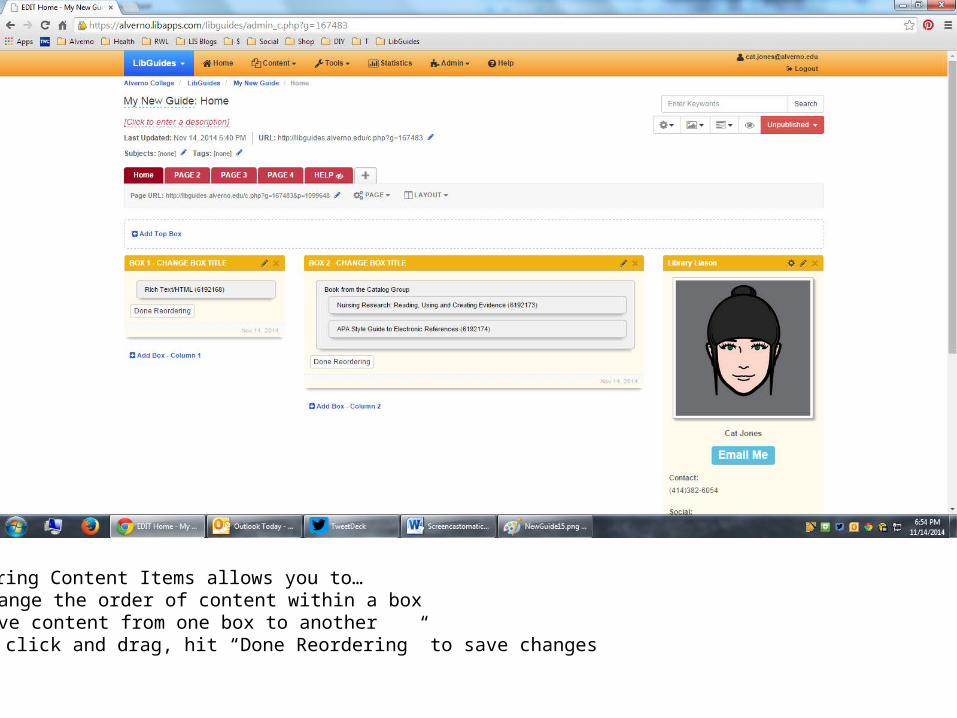
Reordering Content Items allows you to…Change the order of content within a box Move content from one box to another
Simply click and drag, hit “Done Reordering” to save changes
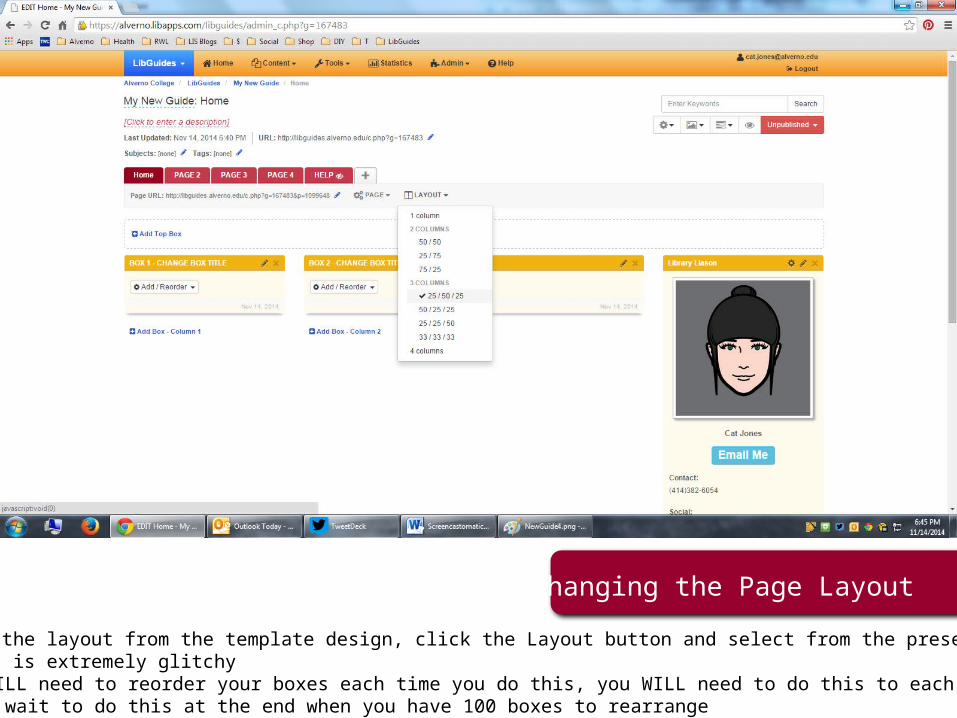
Changing the Page Layout
To change the layout from the template design, click the Layout button and select from the presetsNOTE: this is extremely glitchy
You WILL need to reorder your boxes each time you do this, you WILL need to do this to each pageDon’t wait to do this at the end when you have 100 boxes to rearrange
More questions?
Check back soon for more tutorials or contact me directly.
Thanks!