adobe after effects
TRANSCRIPT
Adobe After EffectsHow the effects were created
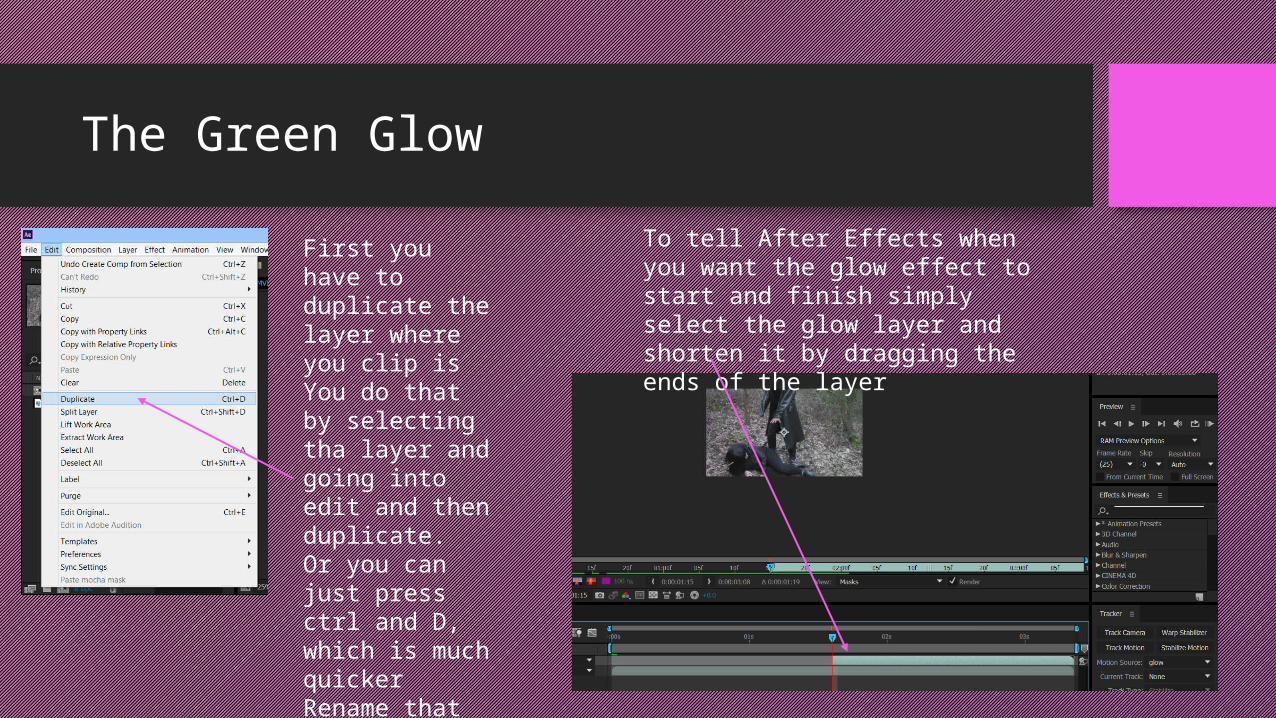
The Green Glow
First you have to duplicate the layer where you clip isYou do that by selecting tha layer and going into edit and then duplicate.Or you can just press ctrl and D, which is much quickerRename that layer to glow
To tell After Effects when you want the glow effect to start and finish simply select the glow layer and shorten it by dragging the ends of the layer

Now select the Roto Brush Tool at the top and literally draw the out line of the object you wish to have the effect
You can hold the alt button to draw an outline of the things you don’t want selected.
Go to Effects and Presents, stylize and choose the glow effect.Double click it to apply it to the layer selected
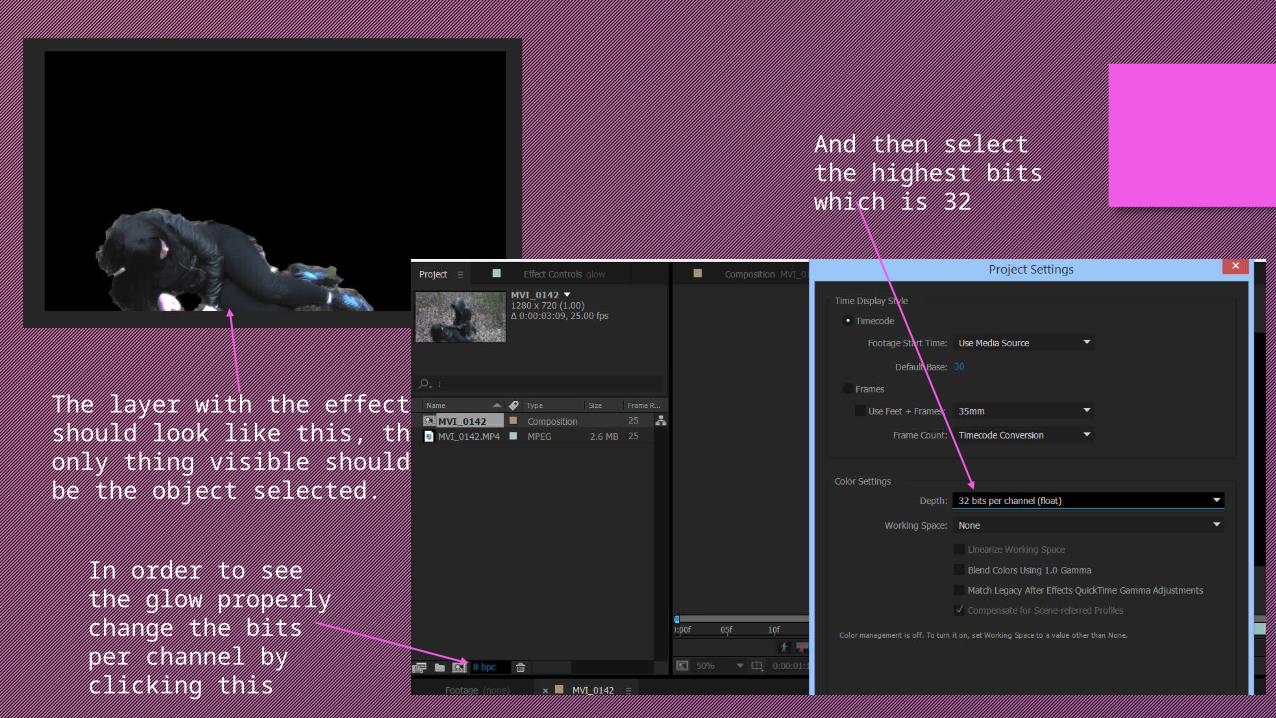
The layer with the effect should look like this, the only thing visible should be the object selected.
In order to see the glow properly change the bits per channel by clicking this
And then select the highest bits which is 32
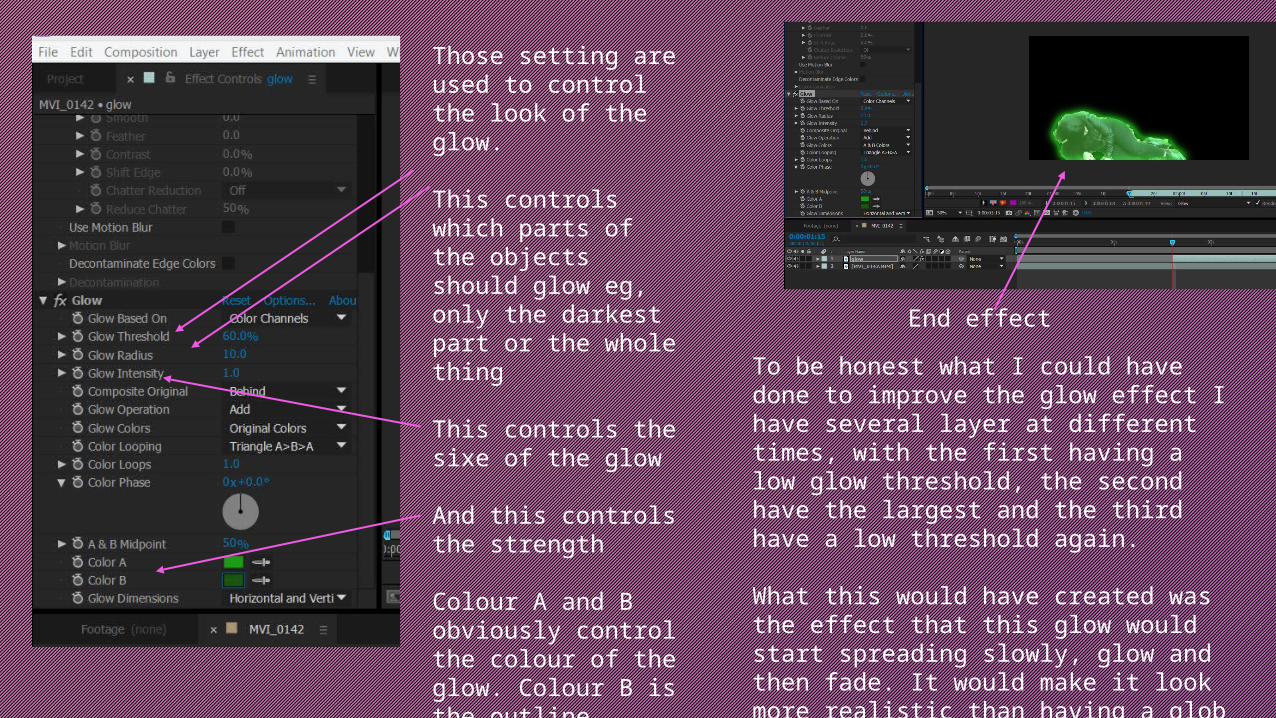
Those setting are used to control the look of the glow.
This controls which parts of the objects should glow eg, only the darkest part or the whole thing
This controls the sixe of the glow
And this controls the strength
Colour A and B obviously control the colour of the glow. Colour B is the outline, therefore I made it a bit darker
End effect
To be honest what I could have done to improve the glow effect I have several layer at different times, with the first having a low glow threshold, the second have the largest and the third have a low threshold again.
What this would have created was the effect that this glow would start spreading slowly, glow and then fade. It would make it look more realistic than having a glob of green suddenly appear at random.
Lightning Effect
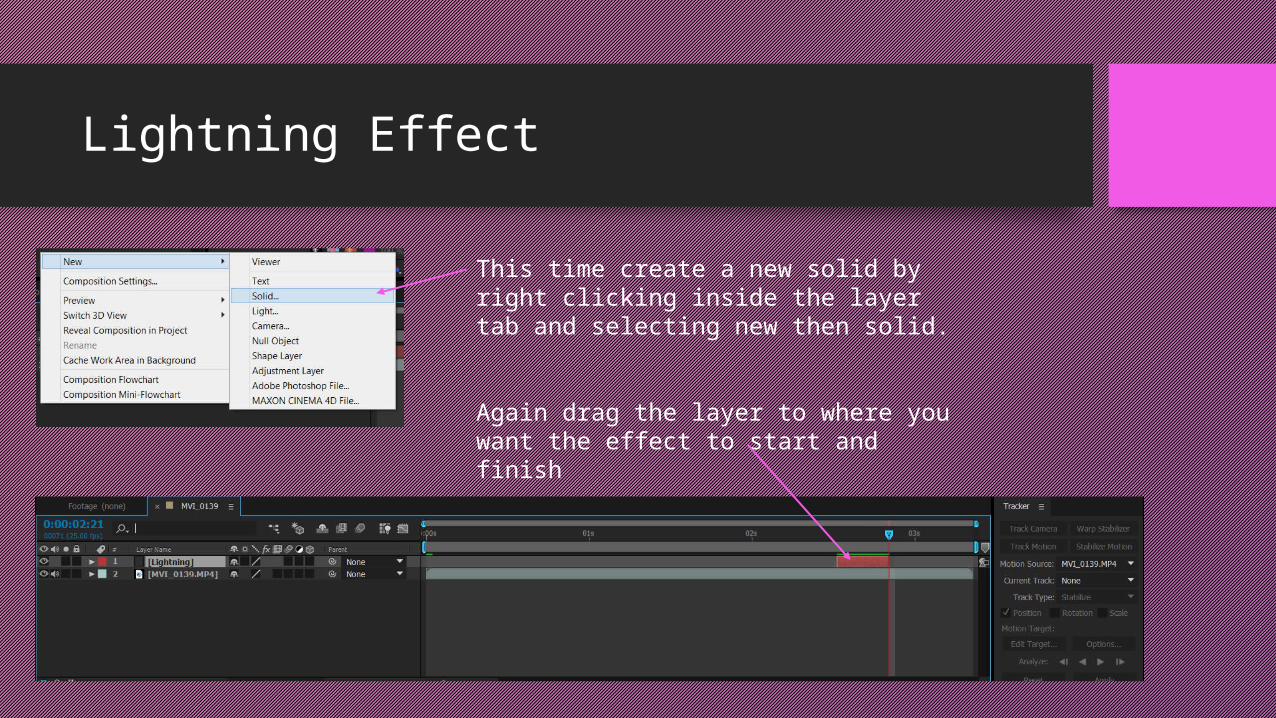
This time create a new solid by right clicking inside the layer tab and selecting new then solid.
Again drag the layer to where you want the effect to start and finish
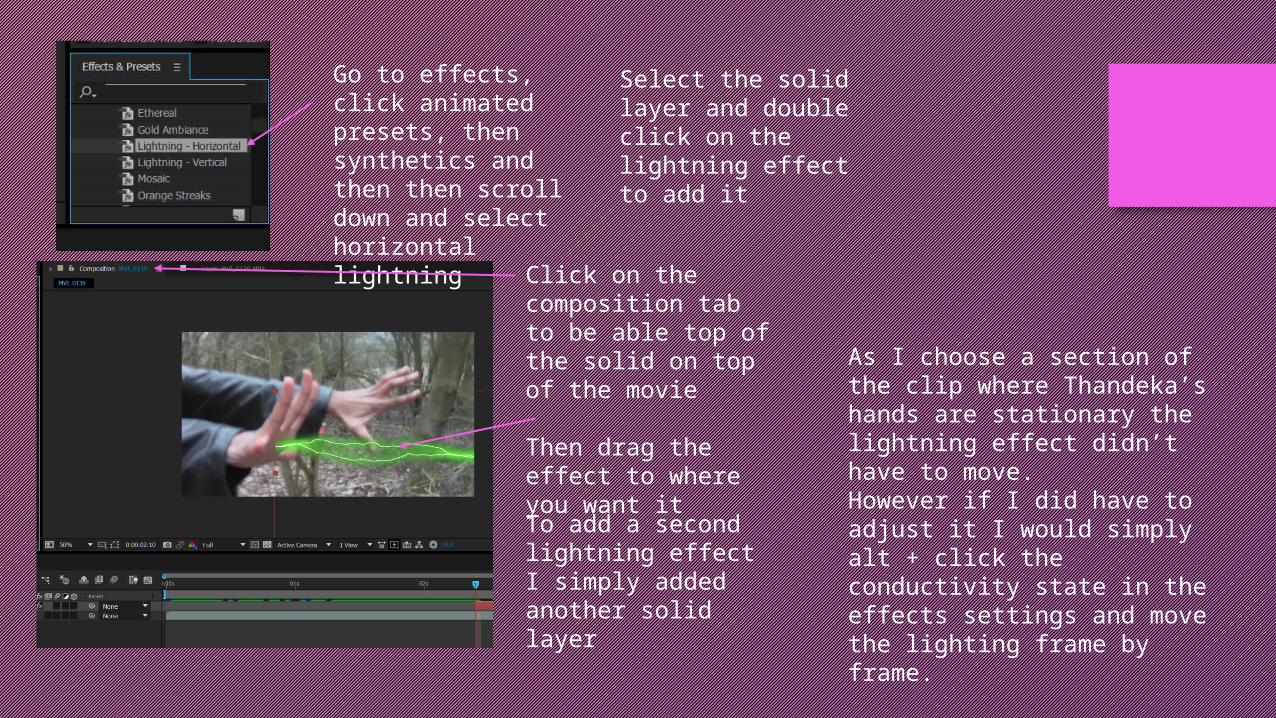
Go to effects, click animated presets, then synthetics and then then scroll down and select horizontal lightning
Select the solid layer and double click on the lightning effect to add it
Click on the composition tab to be able top of the solid on top of the movie
Then drag the effect to where you want itTo add a second lightning effect I simply added another solid layer
As I choose a section of the clip where Thandeka’s hands are stationary the lightning effect didn’t have to move.However if I did have to adjust it I would simply alt + click the conductivity state in the effects settings and move the lighting frame by frame.