adobe photoshop cc - chris will
DESCRIPTION
el abs del photochotTRANSCRIPT

ADOBEPHOTOSHOPTHEULTIMATEGUIDEONHOWTOUSEPHOTOSHOP
CC.LEARNPHOTOSHOPIN20HOURSORLESS!
(ADOBEPHOTOSHOPCC)
TableofContent
Introduction
Chapter1-Interface
Chapter2-BasicCommands
Chapter3-Layers
Chapter4-Selections
Chapter5-Colors
Chapter6-Removingandchangingthebackground
Conclusion
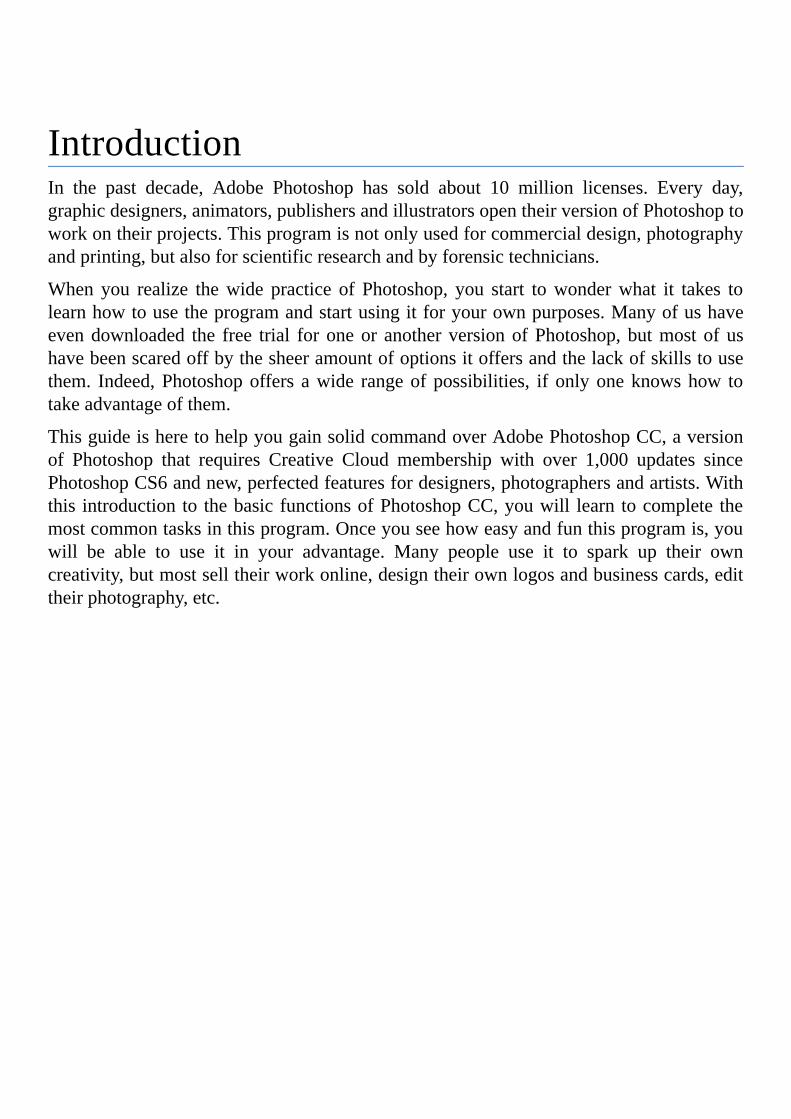
IntroductionIn the past decade, Adobe Photoshop has sold about 10 million licenses. Every day,graphicdesigners,animators,publishersandillustratorsopentheirversionofPhotoshoptoworkontheirprojects.Thisprogramisnotonlyusedforcommercialdesign,photographyandprinting,butalsoforscientificresearchandbyforensictechnicians.
When you realize thewide practice of Photoshop, you start towonderwhat it takes tolearnhowtousetheprogramandstartusingitforyourownpurposes.Manyofushaveevendownloaded the free trial foroneor anotherversionofPhotoshop,butmostofushavebeenscaredoffbythesheeramountofoptionsitoffersandthelackofskillstousethem. Indeed,Photoshopoffers awide rangeofpossibilities, if onlyoneknowshow totakeadvantageofthem.
ThisguideisheretohelpyougainsolidcommandoverAdobePhotoshopCC,aversionof Photoshop that requires Creative Cloud membership with over 1,000 updates sincePhotoshopCS6andnew,perfectedfeaturesfordesigners,photographersandartists.Withthis introduction to thebasicfunctionsofPhotoshopCC,youwill learn tocomplete themostcommontasksinthisprogram.Onceyouseehoweasyandfunthisprogramis,youwill be able to use it in your advantage. Many people use it to spark up their owncreativity,butmostselltheirworkonline,designtheirownlogosandbusinesscards,edittheirphotography,etc.
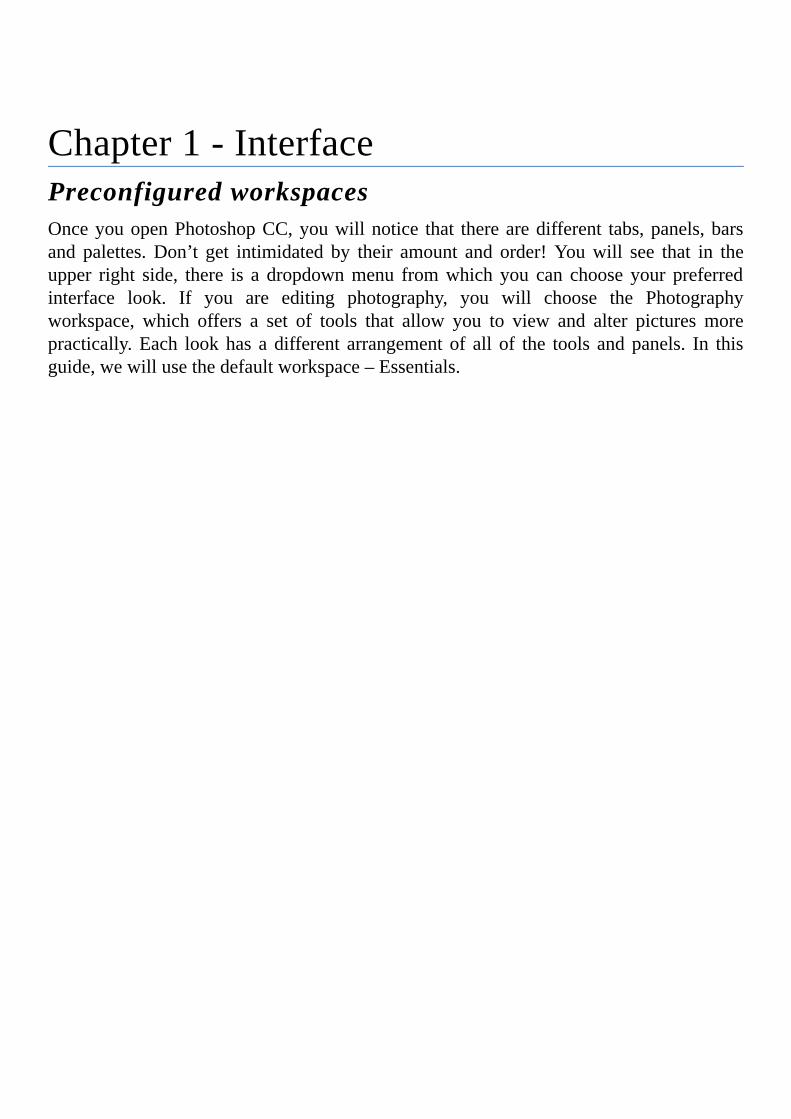
Chapter1-InterfacePreconfiguredworkspacesOnceyouopenPhotoshopCC,youwillnotice that therearedifferent tabs,panels,barsand palettes.Don’t get intimidated by their amount and order!Youwill see that in theupper right side, there is a dropdownmenu fromwhich you can choose your preferredinterface look. If you are editing photography, you will choose the Photographyworkspace, which offers a set of tools that allow you to view and alter pictures morepractically.Each lookhas a different arrangementof all of the tools andpanels. In thisguide,wewillusethedefaultworkspace–Essentials.
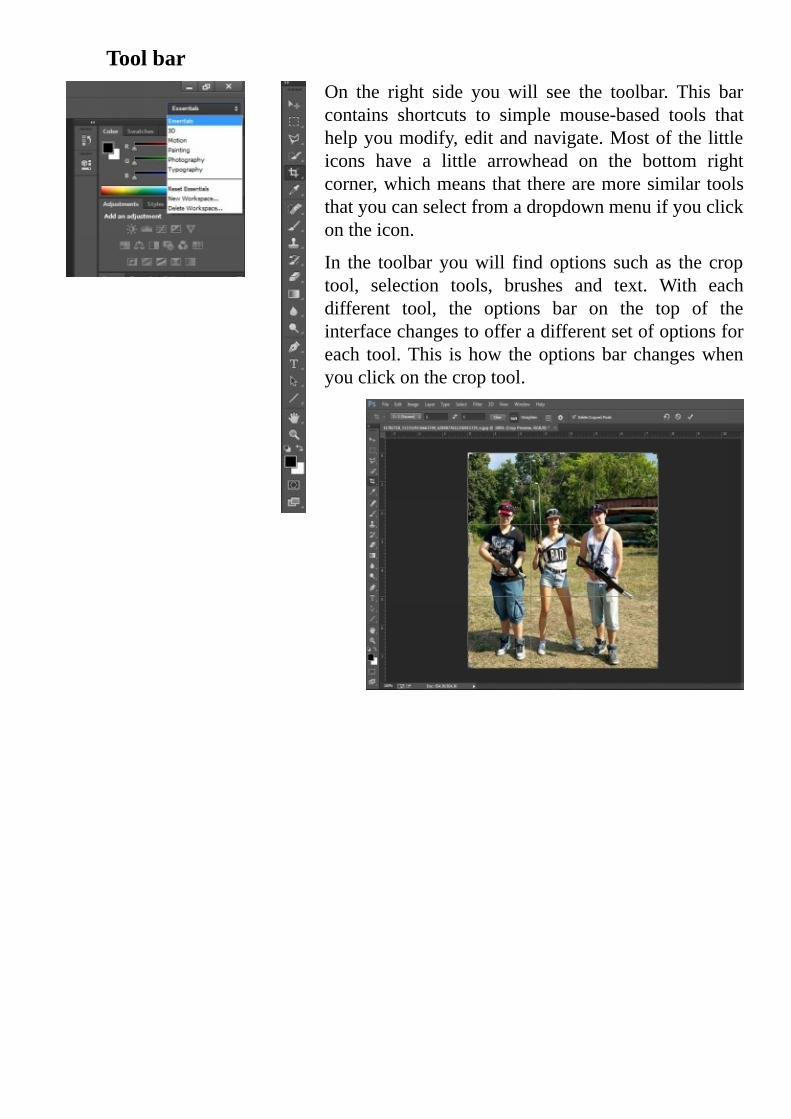
ToolbarOn the right side you will see the toolbar. This barcontains shortcuts to simple mouse-based tools thathelpyoumodify,editandnavigate.Mostof thelittleicons have a little arrowhead on the bottom rightcorner,whichmeansthattherearemoresimilartoolsthatyoucanselectfromadropdownmenuifyouclickontheicon.
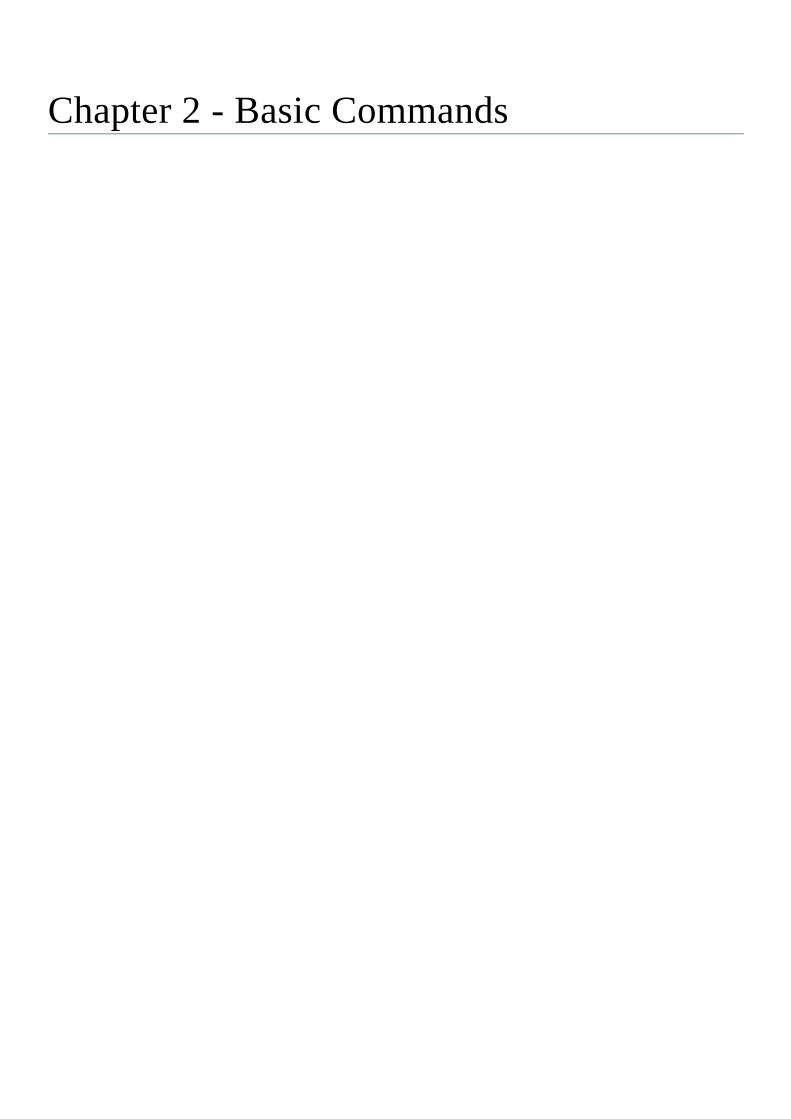
In the toolbaryouwill findoptions suchas the croptool, selection tools, brushes and text. With eachdifferent tool, the options bar on the top of theinterfacechangestoofferadifferentsetofoptionsforeach tool.This ishow theoptionsbarchangeswhenyouclickonthecroptool.

MenubarMost of the options from the menu bar can be accessed simply through keyboardshortcuts,andalotofthemcanbefoundinthepanelsandbarsontheleftandrightsideoftheinterface.Themenubarisconsistedof11separatesub-menus,thatwhenclickedon,expandtoseparatedropdownmenus,wholaterexpandtomoreandmoredropdownbars.Alotoftheoptionsplacedinthesemenuswillbecoveredlateron.
Chapter2-BasicCommands
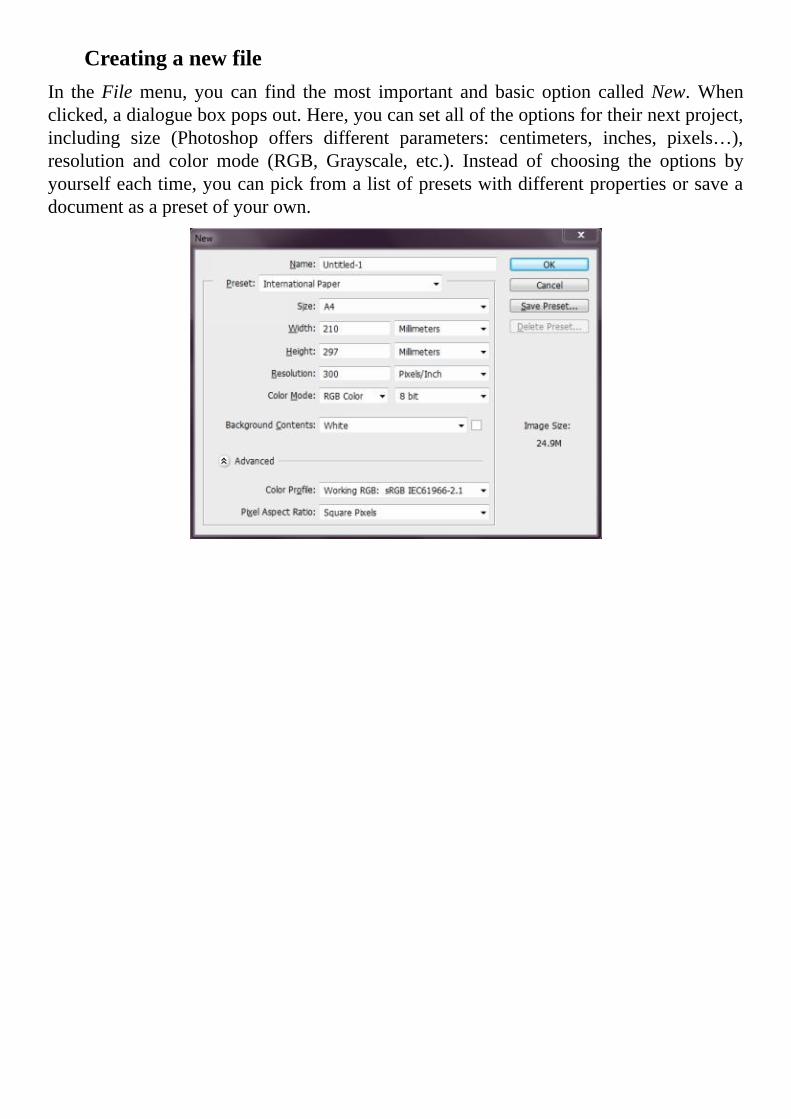
CreatinganewfileIn theFilemenu, you can find themost important and basic option calledNew.Whenclicked,adialogueboxpopsout.Here,youcansetalloftheoptionsfortheirnextproject,including size (Photoshop offers different parameters: centimeters, inches, pixels…),resolution and color mode (RGB, Grayscale, etc.). Instead of choosing the options byyourselfeachtime,youcanpickfromalistofpresetswithdifferentpropertiesorsaveadocumentasapresetofyourown.

OpeningfilesThesimplestwaytoopenafileinPhotoshopCC,istojustdragtheimageanddropitontheworkspace.However, the standard command for opening a file can be found in theFilemenu.
TheoptionOpenallowstheusertobrowsethefilesinaWindowsExplorerwindow.TheoptionOpenAsisjustthesame,exceptforthefactthattheusercanopenthedesiredfilein a different format.Open as Smart Object is used mostly when you want to makecomplicatedchangestotheimage.Whenopenedasasmartobject,everychangetheusermakesonthepictureshowsinthelayerstab.Thesechangesarenotpermanent,andfromthere,youcanfurtheraltertheimage.


SavingfilesAswell as opening,Photoshophas variousways for saving files.Theseoptions canbefoundintheFilemenu.Thesecommandsworkalmostthesameasinanyprogram.
Ifthefilehasbeensavedbefore,theuserchoosesSavetosimplysavethechangesmadetothefile. If thefilehasn’tbeensavedbefore, theuserchoosesSaveas,whichopensaWindowsExplorerwindow,wheretheusercanchoosethefileformatandname.SaveforWebmakesiteasiertoviewthefileinaparticularinternetbrowserandletstheuserdecideif thequalityof the image issatisfyingandsavehighresolutionpicturesandGIFs.Theoptionsthatcanbefoundinthisdialogueboxincludechangesinthesize,format,quality,colortable,etc.
Commonlyusedfileformats
Whensavingafile,theuserneedstoknowwhichformatofthefileisthemostappropriatefortheoccasion.Eachformatoffersdifferentfilecompressionanddifferentpresentationof the imagedata.Correctly choosing the formatwill lead to an easier experiencewithPhotoshop.
PSD
PSDisthemostflexiblefileformatbecauseitretainsallofthefeaturesaddedtothefileduring the editing process, such as layers andmasks, so next timeyouopen the file inPhotoshop, you will be able to add or remove the effects. This comes in handy whenPhotoshopneedstobeclosedwhiletheprojectisinthemaking.TheonlysetbackisthatPSDfilescanbeopenedinPhotoshopandPhotoshoponly,sotheuser is limitedtothisparticulareditor.PSDsupportsfilesupto2GBinsize.
JPEG
When an image ismeant to be posted on theweb or displayed inHTML, it is usuallysaved in JPEG format.Saving the file as JPEG reduces the file sizeby selectingwhichdata toexcludefromthecompressionprocess.Theendresult isa file thathas thesamecolor and size properties as the original image. However, this format does not supporttransparency.Repeatedlyeditingandsaving the imageasJPEGwill result innoticeablylesserqualityduetothedatacompression.

GIF
This file format supports up to 256 colors, which is why it isn’t very practical forphotography.However,itsusefulqualityisthatitsupportsanimationsandtransparency.Alotof thosemoving imagesyouhavemostprobablyseenon9gag.comorotherpopularsitesareGIFfiles.Needlesstosay,GIFfilesareusedfordisplayingontheweb.
PNG
Alsomeantfortheweb,PNGfilesaremostlyknownforsupportingtransparencyandalotmorecolormodesthantheGIF.
Chapter3-LayersWhat makes working in Photoshop so easy is the existence of layers. Layers can begrouped,renamed,turnedoffandon,locked,duplicated,merged,etc.Butwhatarelayers?Many beginners can’t understand the purpose of layers. To put it simply, layers arebasicallysheetsthatyoucreatewitheveryeffect,textorobjectyouaddtoyourdocument.Foreveryadjustmentyouaddtothephoto,youcreateanotherlayerintheLayerspanel.Here you will learn about the different types of layers and how to use them to youradvantage.
LayertypesAdjustmentlayers
Adjustment layers are layers you add to better the image quality in terms of color andtone. On the left side of the Photoshop workspace, you will notice a panel namedAdjustments with three rows of icons in it. During the editing process, you can eitherchooseyouradjustmentsfromthispanelorfromthemenuImage→Adjutments.Onceyoupickthetypeof layeryouwant tocreate, theProperties tabopenswhereyoucantweakthelayer’sparameters.Anadjustmentslayerwillaffectthelayersunderit,butnotthoseaboveit.
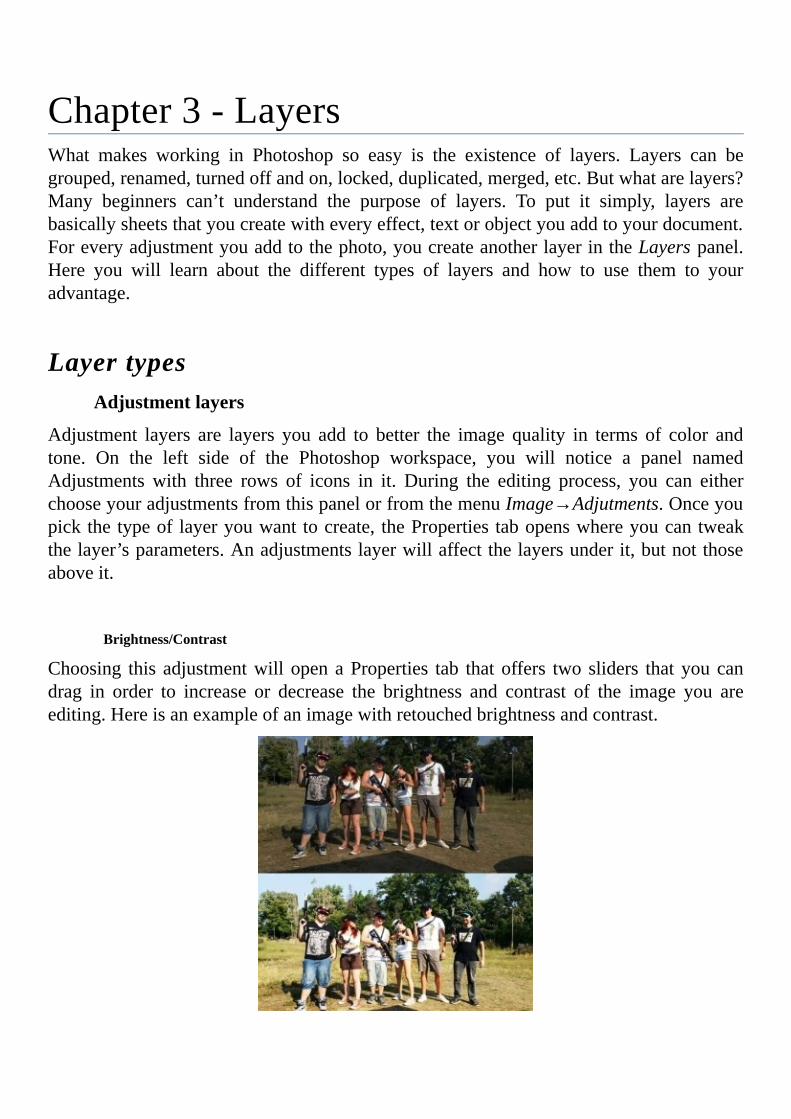
Brightness/Contrast
Choosing this adjustmentwill openaProperties tab thatoffers two sliders thatyoucandrag in order to increase or decrease the brightness and contrast of the image you areediting.Hereisanexampleofanimagewithretouchedbrightnessandcontrast.

Levels
Thislayerismainlymeanttoadjustthedarkandlightareasinthepicture.TheslidersintheInputLevelssectionwillbethetoolsthatyouwillusethemost.Thearrowontherightadjustsshadows, the layeron the leftadjustshighlightsand theone in themiddle is theGammaslider.Thisonemakesdifferentresultswhenadjustedtotheleftandtotheright.Ifyoumoveitmoretowardstheshadowsside,itwillmakethemidtoneslighter,whereasifyoumoveittothehighlightsside,itwillmakethemidtonesdarker.
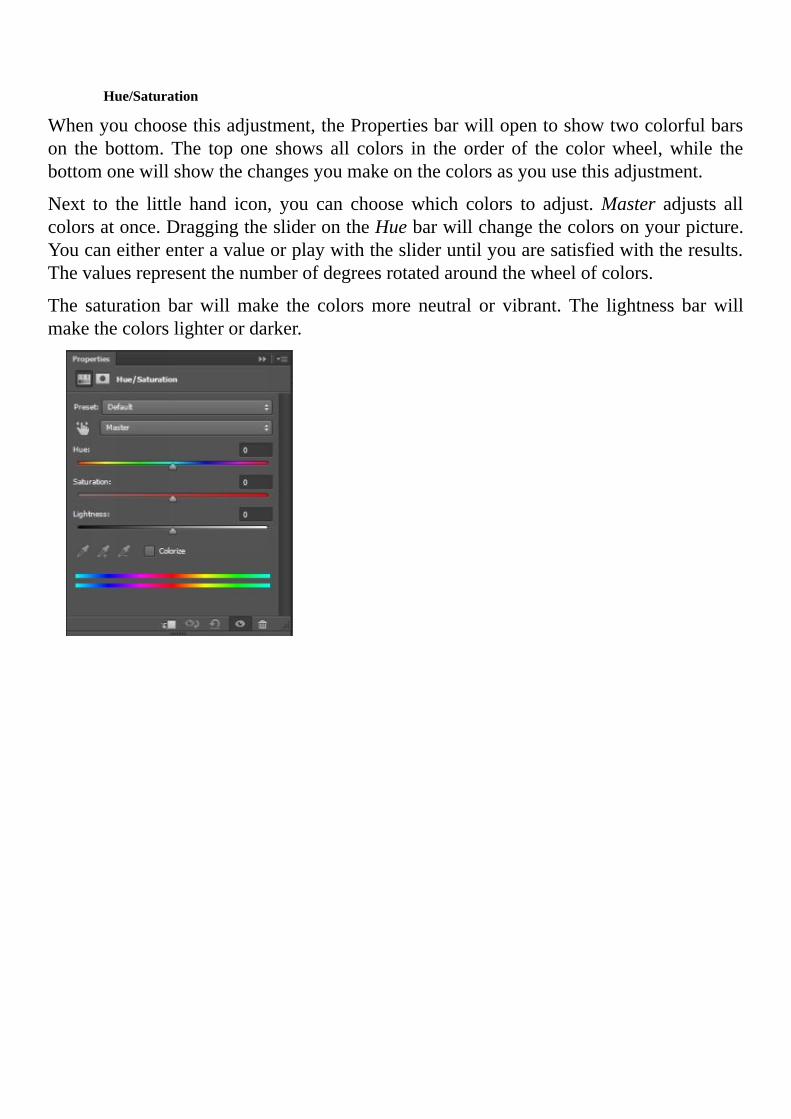
Hue/Saturation
Whenyouchoosethisadjustment,thePropertiesbarwillopentoshowtwocolorfulbarson the bottom.The top one shows all colors in the order of the colorwheel,while thebottomonewillshowthechangesyoumakeonthecolorsasyouusethisadjustment.
Next to the little hand icon, you can choosewhich colors to adjust.Master adjusts allcolorsatonce.DraggingthesliderontheHuebarwillchangethecolorsonyourpicture.Youcaneitherenteravalueorplaywiththeslideruntilyouaresatisfiedwiththeresults.Thevaluesrepresentthenumberofdegreesrotatedaroundthewheelofcolors.
The saturation barwillmake the colorsmore neutral or vibrant. The lightness barwillmakethecolorslighterordarker.
Textlayers
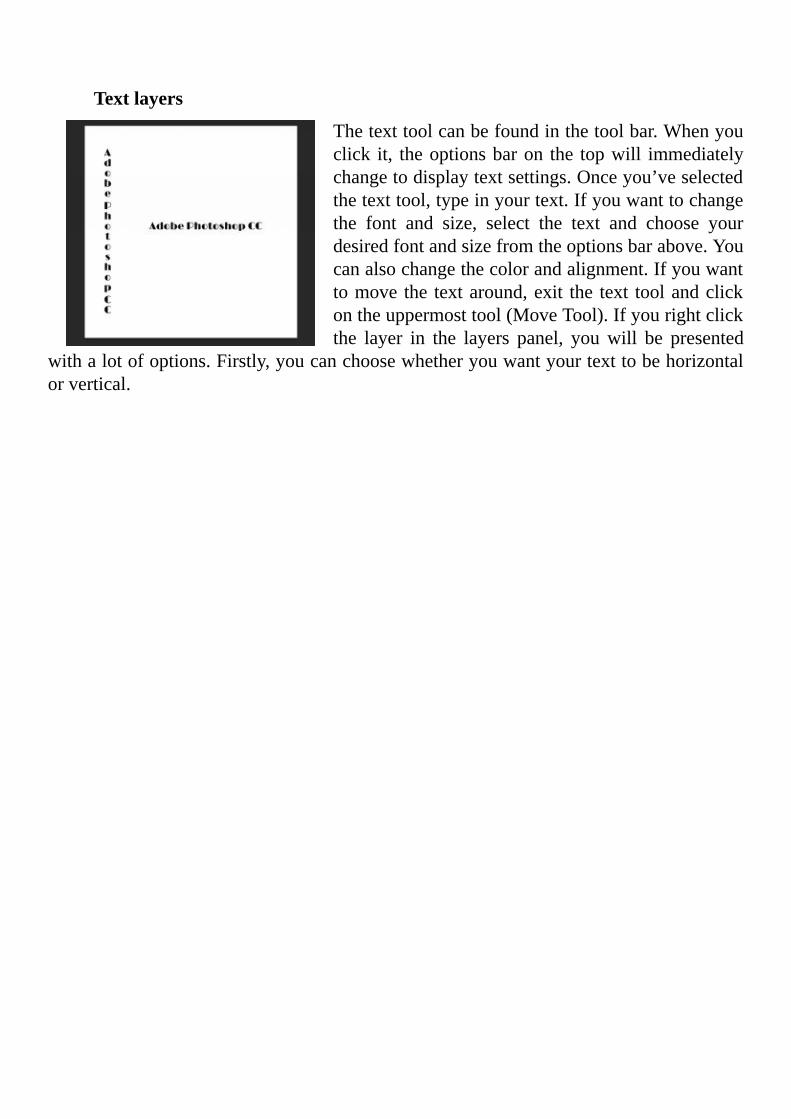
Thetexttoolcanbefoundinthetoolbar.Whenyouclick it, theoptionsbaron the topwill immediatelychangetodisplaytextsettings.Onceyou’veselectedthetexttool,typeinyourtext.Ifyouwanttochangethe font and size, select the text and choose yourdesiredfontandsizefromtheoptionsbarabove.Youcanalsochangethecolorandalignment.Ifyouwanttomove the textaround,exit the text toolandclickontheuppermosttool(MoveTool).Ifyourightclickthe layer in the layers panel, youwill be presented
withalotofoptions.Firstly,youcanchoosewhetheryouwantyourtexttobehorizontalorvertical.
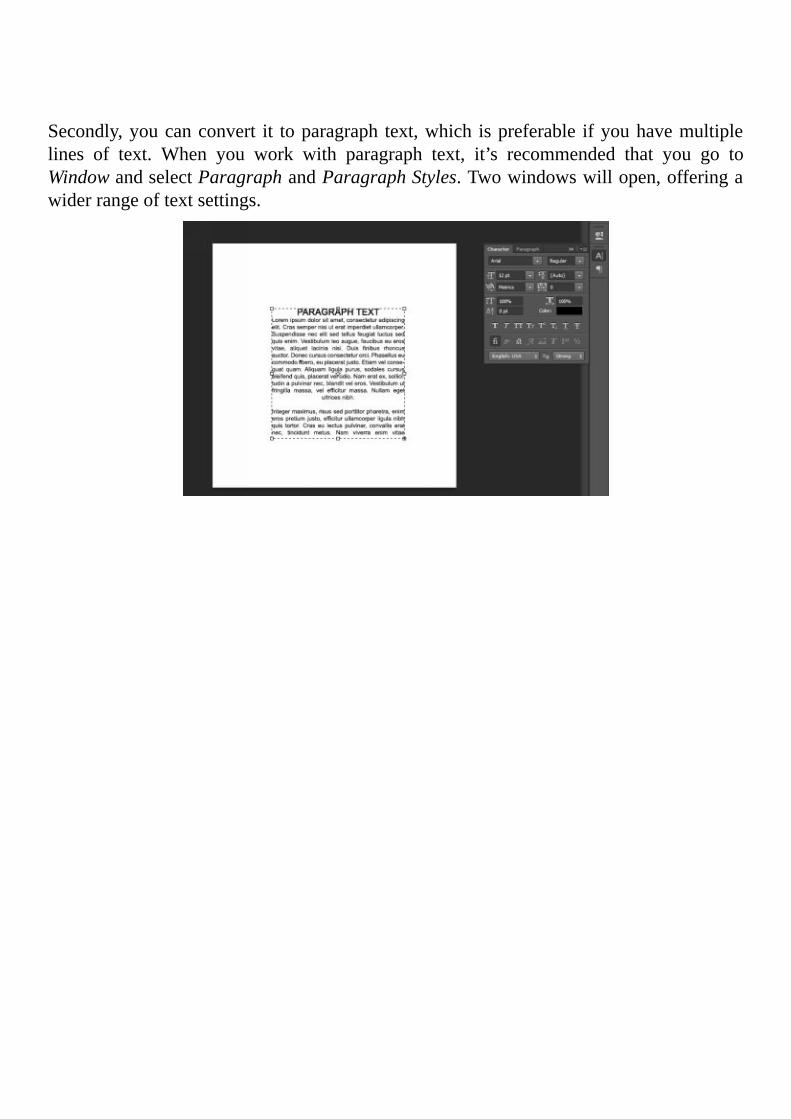
Secondly,youcanconvert it toparagraph text,which ispreferable ifyouhavemultiplelines of text. When you work with paragraph text, it’s recommended that you go toWindowandselectParagraphandParagraphStyles.Twowindowswillopen,offeringawiderrangeoftextsettings.

Shapelayers
Inthelowerpartofthetoolbaryouwillfindtheshapetool.Ifyourightclickonit,itwillshow a menu of different shapes that you can choose from. The standard ones areRectangle, Rounded Rectangle, Ellipse, Polygon and Line Tool. If you’re looking forsomethingmore complicated, you can choose theCustomShapeTool. The options barwill change to offer a drop down menu of different shapes you can choose from andparameters and color of the shape that you can adjust. This tool comes in handy forgraphicdesigners.
Layeroptions
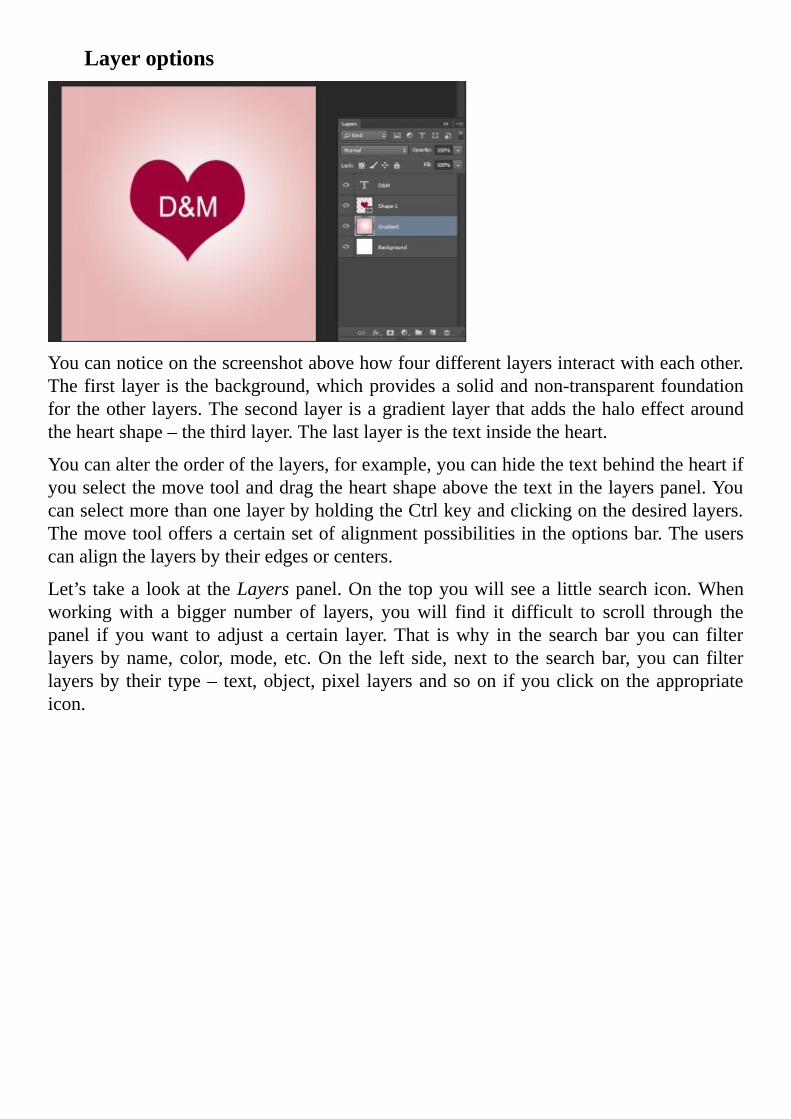
Youcannoticeonthescreenshotabovehowfourdifferentlayersinteractwitheachother.Thefirstlayeristhebackground,whichprovidesasolidandnon-transparentfoundationfortheotherlayers.Thesecondlayerisagradientlayerthataddsthehaloeffectaroundtheheartshape–thethirdlayer.Thelastlayeristhetextinsidetheheart.
Youcanaltertheorderofthelayers,forexample,youcanhidethetextbehindtheheartifyouselectthemovetoolanddragtheheartshapeabovethetextinthelayerspanel.YoucanselectmorethanonelayerbyholdingtheCtrlkeyandclickingonthedesiredlayers.Themovetooloffersacertainsetofalignmentpossibilitiesintheoptionsbar.Theuserscanalignthelayersbytheiredgesorcenters.
Let’s takea lookat theLayerspanel.Onthetopyouwillseea littlesearchicon.Whenworkingwith a bigger number of layers, youwill find it difficult to scroll through thepanel if youwant to adjust a certain layer.That iswhy in the searchbar you can filterlayersbyname,color,mode,etc.On the left side,next to the searchbar,youcan filterlayersby their type– text,object,pixel layersandsoon ifyouclickon theappropriateicon.
BlendingMode,OpacityandFill
Below the search icons, youwill find three bars namedMode,Opacity andFill.All oftheseplayaveryimportantroleforeverydesigner.KnowinghowtheseoptionsworkwillhelpyougetthebestoutofyourPhotoshopexperience.
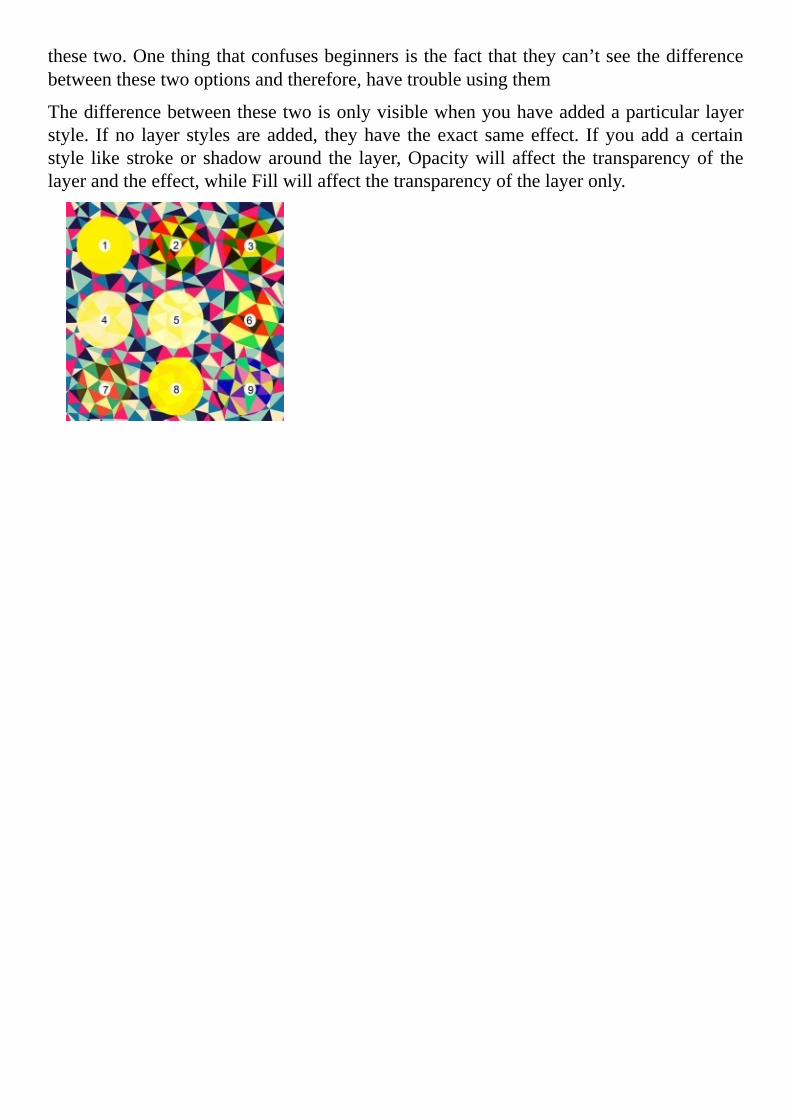
Thebarontherightsidecontainsallof thepossibleBlendingModes.Selectingamodemeans choosing a way in which the layers will blend together, in other words, howpaintingoraddinganeffectwillaffectthepixelsinthelayer.Blendingmodesworkwiththreedifferentcolors–basecolor(originalcoloroftheimage),blendcolor(coloraddedwith the effect, object or any kind of different layer) and result color(the result of theblend).Asyoucansee,theBlendingModesmenuisahugelistofpossibilities.Intime,youwill learnwhat each one does.Now, Iwill take some of themost frequently usedmodesandshowexamplesofhowtheywork.
On this picture you can see a colorful background, the base color, and 9 circleswhoseoriginalcolorisyellow.WewillbechangingtheBlendingModesofthecircles,whichiswhyinthiscasetheblendcolorwillbeyellow.ThefirstcircleisinNormalmode,wheretheresultcoloristhesameastheblendcolor.Everynextcircleisaduplicateofthefirstyellowcircle,justinadifferentBlendingMode.
1.Normal
2.Darken
3.Multiply
4.Lighten
5.Screen
6.Overlay
7.SoftLight
8.HardLight
9.Difference
TheOpacityandFilloptionsareuse for controlling the transparencyof the layers.Youcanmakealayermoreandlessvisiblebyadjustingthesliderwhenyouclickononeof
thesetwo.Onethingthatconfusesbeginnersisthefactthattheycan’tseethedifferencebetweenthesetwooptionsandtherefore,havetroubleusingthem
Thedifferencebetweenthesetwoisonlyvisiblewhenyouhaveaddedaparticularlayerstyle. Ifno layer stylesareadded, theyhave theexact sameeffect. Ifyouaddacertainstyle like strokeor shadowaround the layer,Opacitywill affect the transparencyof thelayerandtheeffect,whileFillwillaffectthetransparencyofthelayeronly.
Layereffectsandstyles
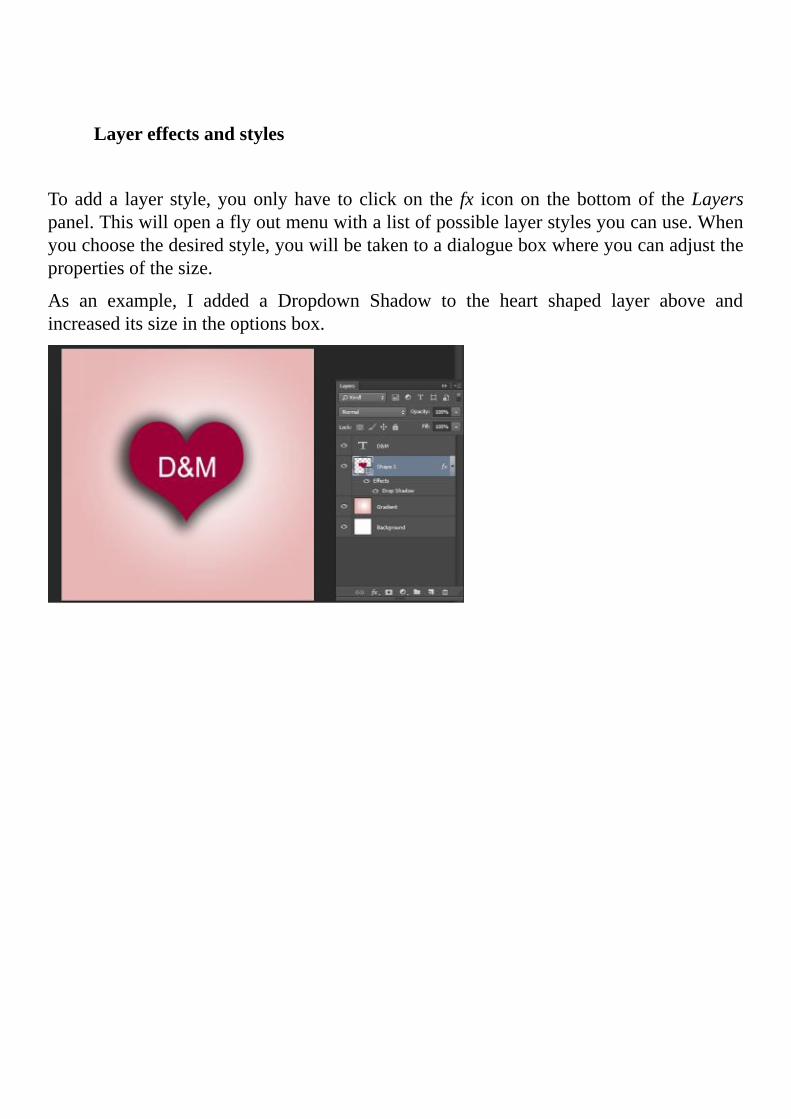
Toadda layer style,youonlyhave toclickon the fx iconon thebottomof theLayerspanel.Thiswillopenaflyoutmenuwithalistofpossiblelayerstylesyoucanuse.Whenyouchoosethedesiredstyle,youwillbetakentoadialogueboxwhereyoucanadjustthepropertiesofthesize.
As an example, I added a Dropdown Shadow to the heart shaped layer above andincreaseditssizeintheoptionsbox.

Chapter4-SelectionsInthetoolbaryoucanfindmultipletypesofselectiontools.Thankstothesetools,theusercan literally select anypart of the image theywant.After that, the selectedpart canberemoved,copied,oradjustedwithoutchangingtherestoftheimage.Eachtoolismeantforadifferenttypeofselectionandinthissectionyouwilllearnhowtouseeachoneofthem.
1.Selectiontools2.Marqueetool
TheMarquee toolcanbe found in the toolbar rightbelow theMove tool.This toolhasdifferent selection shapes: Rectangular marquee, Elliptical marquee, Single row andSingle columnmarquee. The choice of the rightMarquee tool depends on the type ofselection you want to make. If you want the cut out area to be rectangular, use theRectangular marquee tool. If you want it to be round, use the Elliptical one. Afterselecting the right tool, click in one spot of the area and drag it until you reach theboundaries.
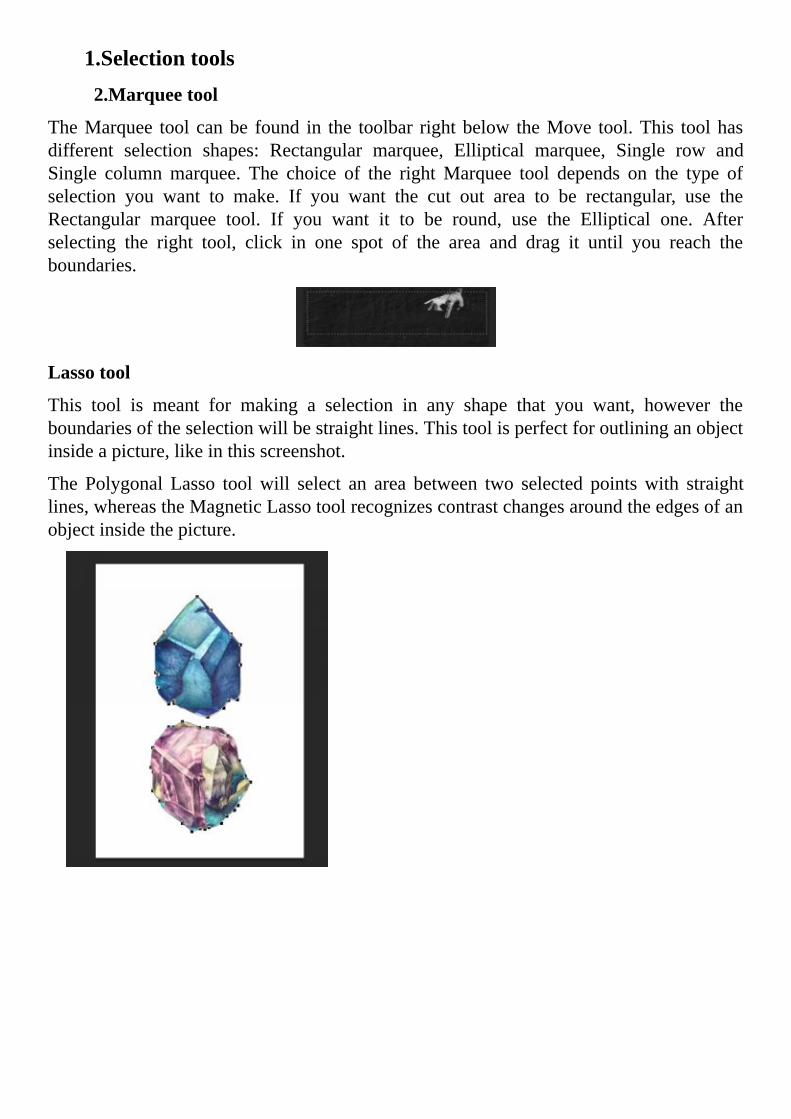
Lassotool
This tool is meant for making a selection in any shape that you want, however theboundariesoftheselectionwillbestraightlines.Thistoolisperfectforoutlininganobjectinsideapicture,likeinthisscreenshot.
The Polygonal Lasso toolwill select an area between two selected pointswith straightlines,whereastheMagneticLassotoolrecognizescontrastchangesaroundtheedgesofanobjectinsidethepicture.

MagicWandandQuickSelectiontool
TheMagicWandtoolhascertainadvantagestowardstherestoftheselectiontools.Firstofall,whenmakingaselection,theuserselectsnotonlythehighlightedbutalsotherestofthelayers.Furthermore, thistoolmakestheedgesofthecutoutareasmootherandithasatoleranceoptionthatyouusetodeterminehowmuchoftheimagethetoolselects.
TheQuick Selection tool is a bit similar to theMagicWandtool because it recognizeschangesincontrastandtoneinordertomakeanaccurateselection.OnepropertythattheMagicWand lacks is theability to recognize textures.Simplyclickinga fewtimesovertheareawill result inperfect selectionwithmuchbetteraccuracy than theMagicWandtoolcanprovide.
SelectionOptionsOnceyou’vedrawnyourselection,it’stimetostartworkingwithit!Ifyourightclickovertheselection,amenuwillshowupwhereyoucanpickfromadozenofoptions.
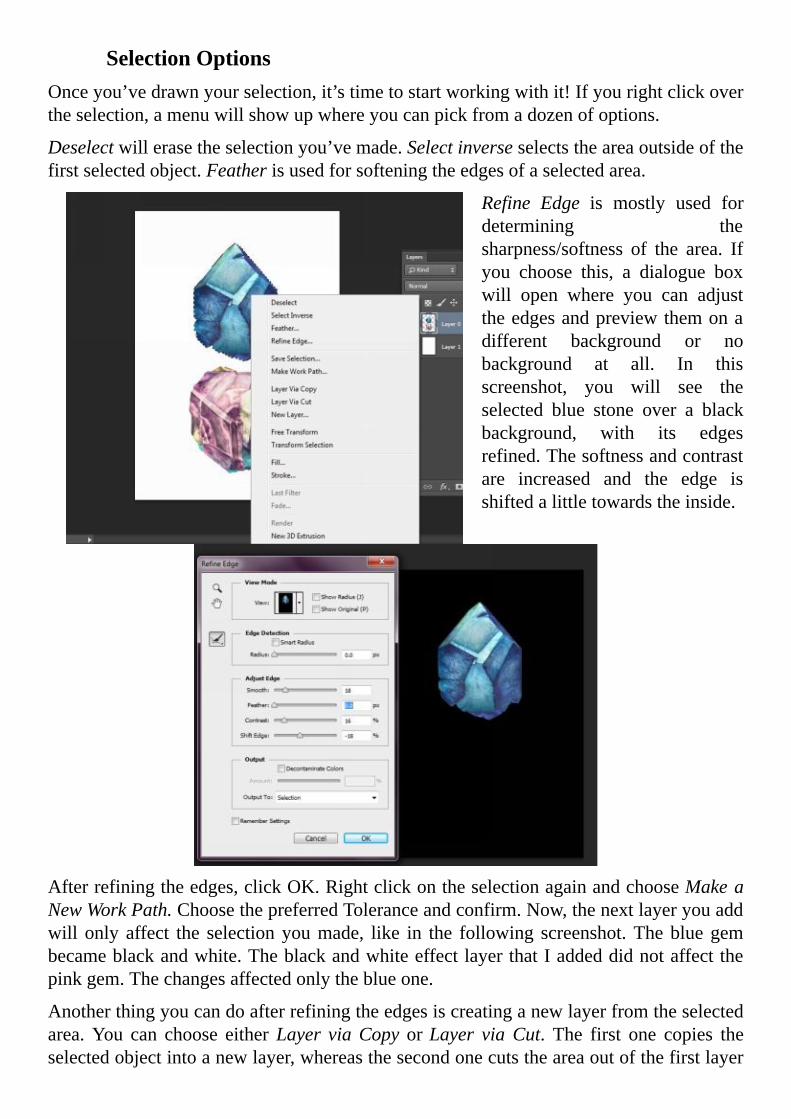
Deselectwillerasetheselectionyou’vemade.Selectinverseselectstheareaoutsideofthefirstselectedobject.Featherisusedforsofteningtheedgesofaselectedarea.
Refine Edge is mostly used fordetermining thesharpness/softness of the area. Ifyou choose this, a dialogue boxwill open where you can adjusttheedgesandpreviewthemonadifferent background or nobackground at all. In thisscreenshot, you will see theselected blue stone over a blackbackground, with its edgesrefined.Thesoftnessandcontrastare increased and the edge isshiftedalittletowardstheinside.
Afterrefiningtheedges,clickOK.RightclickontheselectionagainandchooseMakeaNewWorkPath.ChoosethepreferredToleranceandconfirm.Now,thenextlayeryouaddwill only affect the selectionyoumade, like in the following screenshot.Thebluegembecameblackandwhite.TheblackandwhiteeffectlayerthatIaddeddidnotaffectthepinkgem.Thechangesaffectedonlytheblueone.
Anotherthingyoucandoafterrefiningtheedgesiscreatinganewlayerfromtheselectedarea.You can choose eitherLayer viaCopyorLayer viaCut. The first one copies theselectedobjectintoanewlayer,whereasthesecondonecutstheareaoutofthefirstlayer
andaddsittoanewlayer.
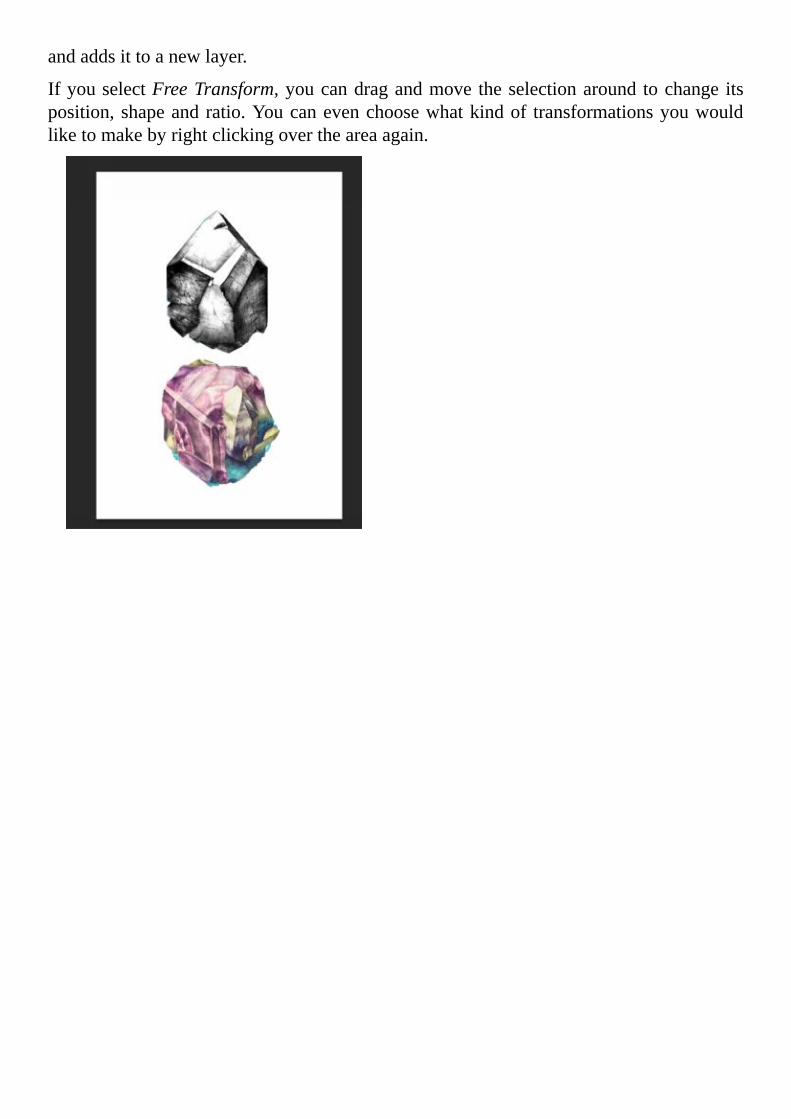
IfyouselectFreeTransform,youcandragandmove theselectionaround tochange itsposition,shapeandratio.Youcanevenchoosewhatkindof transformationsyouwouldliketomakebyrightclickingovertheareaagain.

Chapter5-Colors

ForegroundandbackgroundcolorsThepurposeof theforegroundcolor is thatwheneveryouchooseapaintingordrawingtool in Photoshop, the paint, text or drawing will be in the foreground color. Thebackgroundcolorismostlytiedtothebackgroundlayer.Theforegroundandbackgroundcolorscanbefoundatthebottomofthetoolbox.Youcanswitchthemifyouclickonthelittle arrows icon and switch them back if you click it again. These colors can also bechangedifyouclickthemouseontopoftheoneyouwantaltered.Adialogueboxwillopeninwhichyouwillbeabletochooseanycoloryouwant.AnotherwaytochangetheforegroundcoloristousetheEyedroppertool.
SwatchesSwatchesarebasicallypresetcombinationsofcolors.Theycanbefoundontherightsidein the Swatches panel, or in theWindows menu on the top. You can create your ownswatchesifyouneedto.Mostdesignersusethisoption,becauseitoftenhappensthattheyhavetousethesamecolorpalettefromapreviousproject.Swatchescomeinhandyifthedesignerdecidestosavethepalettesforfuturereference.
In the Swatchespanel, you can combine the desired colors. If youwish to save them,simplyclickonthelittleiconinthetopleftcornerandchooseSaveSwatches.ThiswillleadyoutoaWindowsExplorerdialogueboxandyoucansavetheswatches.Nexttimeyouwanttousethesamecolors,youwillfindthemintheSwatchesmenuoryoucangotothemenu,clickonLoadSwatchesandfindthefileyoupreviouslysaved.
FiltersUsing Filters, the user can retouch, clean up or sharpen their images. Default filtersprovided byAdobe can be found in theFiltermenu and accesses through there.Whenaddingafilter,ititisnormallyappliedtotheselectedlayer.Ifyouhaveaddedadjustmentlayers,shapesoranyotherlayerstothepicture,youfirstneedtocombineallofthemintooneusingtheFlattenLayersoption.Thiswillturnalloftheactivelayersintoone.
ManypeoplealsodownloadfiltersandmountthemontoPhotoshop.TherearenumerousBlur filters that can blur out the pictures inmany different ways. Sharpen reduces theblurringandNoiseaddstexture.
Chapter 6- Simpleexercise:Removingandchangingthebackground
Inthischapter,Iwillshowyouhowtoputallofthethingsyou’ve just learned into practice. The following exercisesare thesimplest thingsyoucanusePhotoshopforandwillbe good examples for your future experience withPhotoshop.Let’sgetstarted.
With every picture that’s in good quality you have theopportunitytoplayaroundwithselectionsandbackgrounds.Let’susethepictureontheleftasanexample.
Iwanttoaddadifferentbackgroundbehindthegirl,whichis why I need the existing background deleted. Now, todeletethebackground,Ifirstneedtoselectit.Forthis,Iwillbe using the Quick Selection tool. However, because the
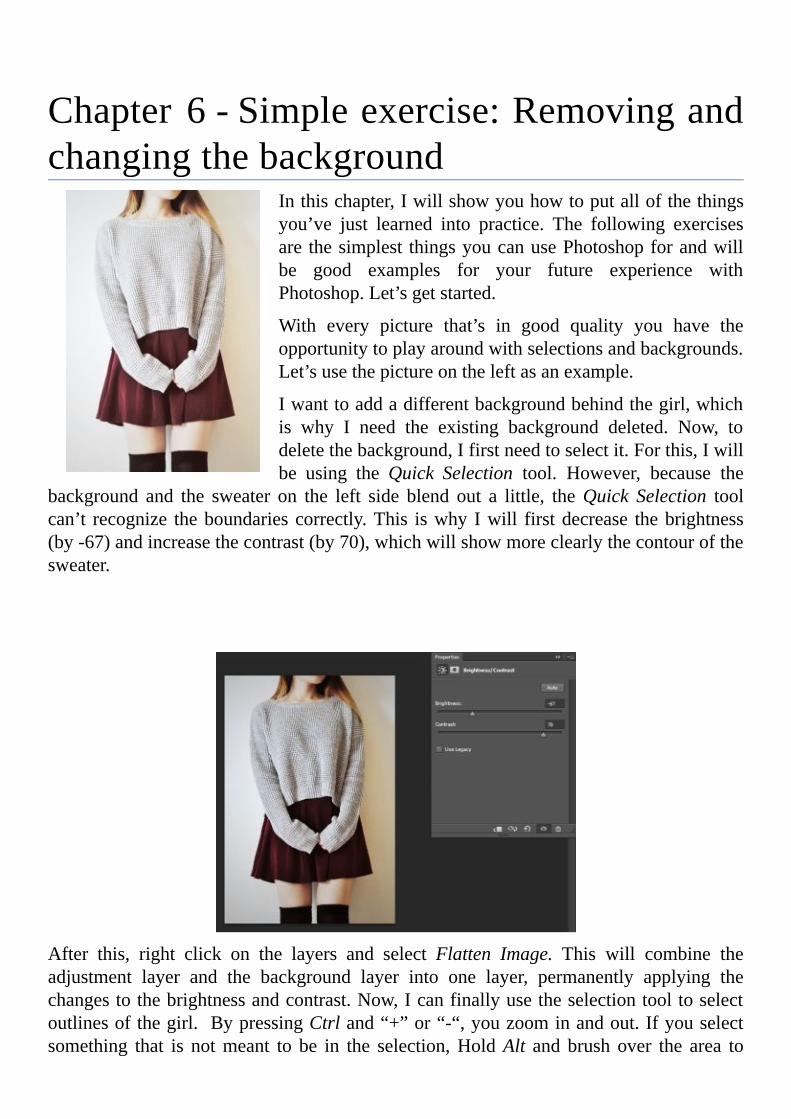
background and the sweater on the left side blend out a little, theQuick Selection toolcan’t recognize theboundariescorrectly.This iswhy Iwill firstdecrease thebrightness(by-67)andincreasethecontrast(by70),whichwillshowmoreclearlythecontourofthesweater.
After this, right click on the layers and select Flatten Image. This will combine theadjustment layer and the background layer into one layer, permanently applying thechangestothebrightnessandcontrast.Now,Icanfinallyusetheselectiontooltoselectoutlinesofthegirl. BypressingCtrland“+”or“-“,youzoominandout.Ifyouselectsomething that is notmeant to be in the selection,HoldAlt and brush over the area to
deselect.
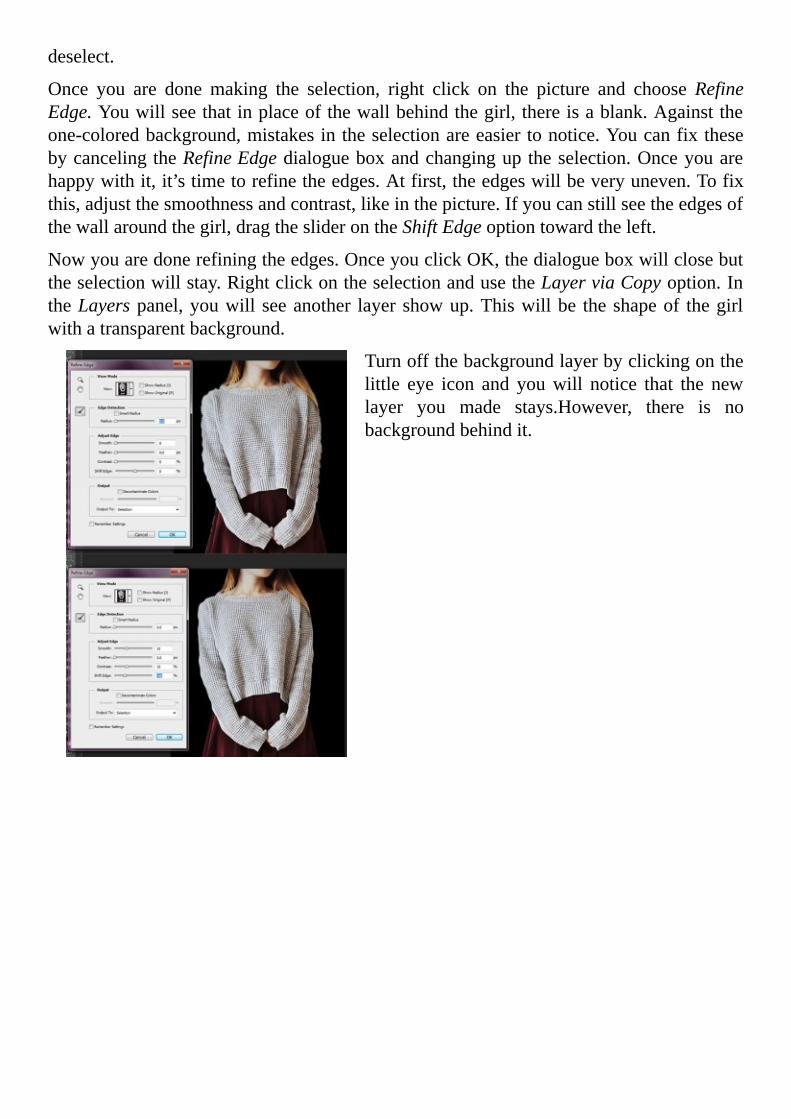
Once you are done making the selection, right click on the picture and chooseRefineEdge.Youwillseethatinplaceofthewallbehindthegirl,thereisablank.Againsttheone-coloredbackground,mistakesintheselectionareeasiertonotice.YoucanfixthesebycancelingtheRefineEdgedialogueboxandchanginguptheselection.Onceyouarehappywithit,it’stimetorefinetheedges.Atfirst,theedgeswillbeveryuneven.Tofixthis,adjustthesmoothnessandcontrast,likeinthepicture.Ifyoucanstillseetheedgesofthewallaroundthegirl,dragthesliderontheShiftEdgeoptiontowardtheleft.
Nowyouaredonerefiningtheedges.OnceyouclickOK,thedialogueboxwillclosebuttheselectionwillstay.RightclickontheselectionandusetheLayerviaCopyoption.IntheLayerspanel,youwill seeanother layer showup.Thiswillbe theshapeof thegirlwithatransparentbackground.
Turnoffthebackgroundlayerbyclickingonthelittle eye icon and youwill notice that the newlayer you made stays.However, there is nobackgroundbehindit.
Asabackground,Iwouldliketouseadifferentpicture.DragthebackgroundpicturetothePhotoshopcanvas.Thepicturewillopenasanewlayer.Makesurethatthislayerisunderthelayerwiththegirl’sshape.Onceyoudothat,youcanselectthenewbackground,holdCtrl+Tandincreaseordecreasethelayersize.Ifyouwanttokeeptheproportionseven,selecttheMaintainaspectratiobuttonintheoptionsbar(betweentheWidthandHeightbars).
Afteryouhaveadjustedthebackgroundlayertoyourliking,youcanincreasethecanvassize. This can be done in variousways, but in this tutorialwewill select Image in theMenubarandclickonCanvasSize.Adialogueboxwillopen,whereyoucanchoosebyhowmuchyouwantthelayersizeincreased.Thelittleanchorsquareshowsfromwhichpoint youwant the canvas to expand. It’s always best to leave the point in themiddle.Changetheunitsfrominches topixelsandtick theRelativebox.Type inbyhowmuchyouwantthecanvastoincreaseinbothwidthandheight.Inthiscase,Iwon’tincreasetheheight,butIwilladd300pixelstothewidth.Whenyouaredone,clickOK.
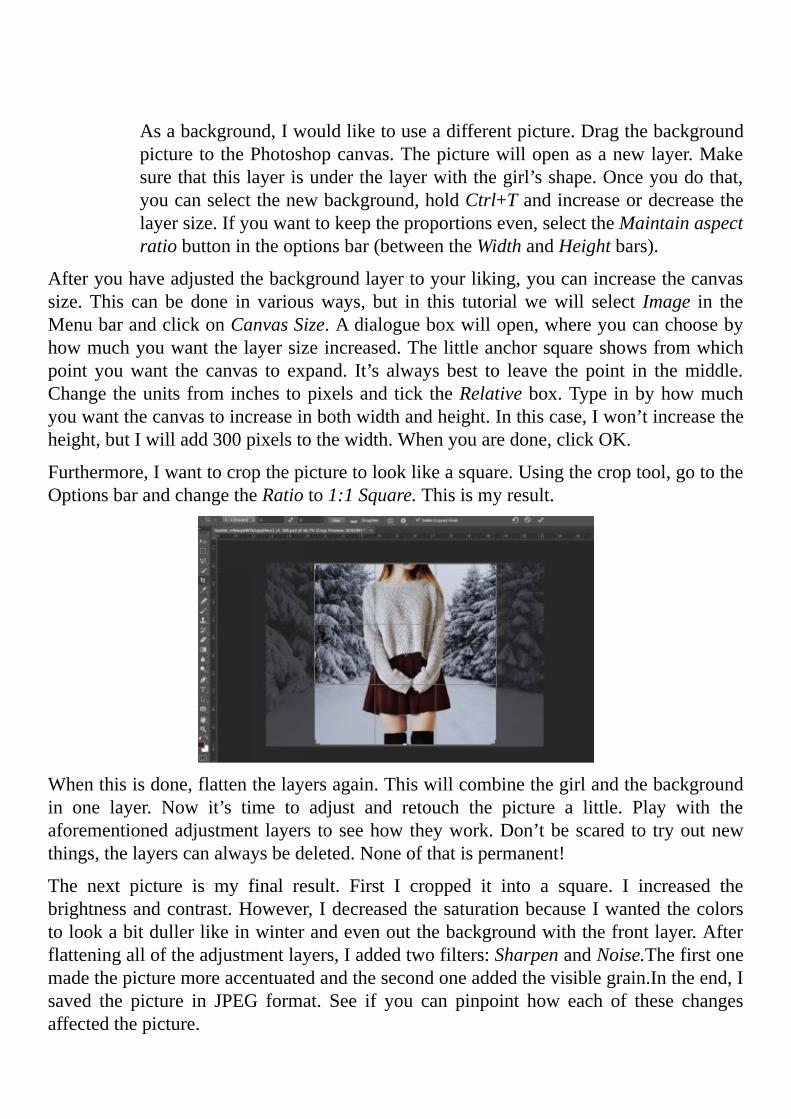
Furthermore,Iwanttocropthepicturetolooklikeasquare.Usingthecroptool,gototheOptionsbarandchangetheRatioto1:1Square.Thisismyresult.
Whenthisisdone,flattenthelayersagain.Thiswillcombinethegirlandthebackgroundin one layer. Now it’s time to adjust and retouch the picture a little. Play with theaforementionedadjustment layers toseehowtheywork.Don’tbescared to tryoutnewthings,thelayerscanalwaysbedeleted.Noneofthatispermanent!
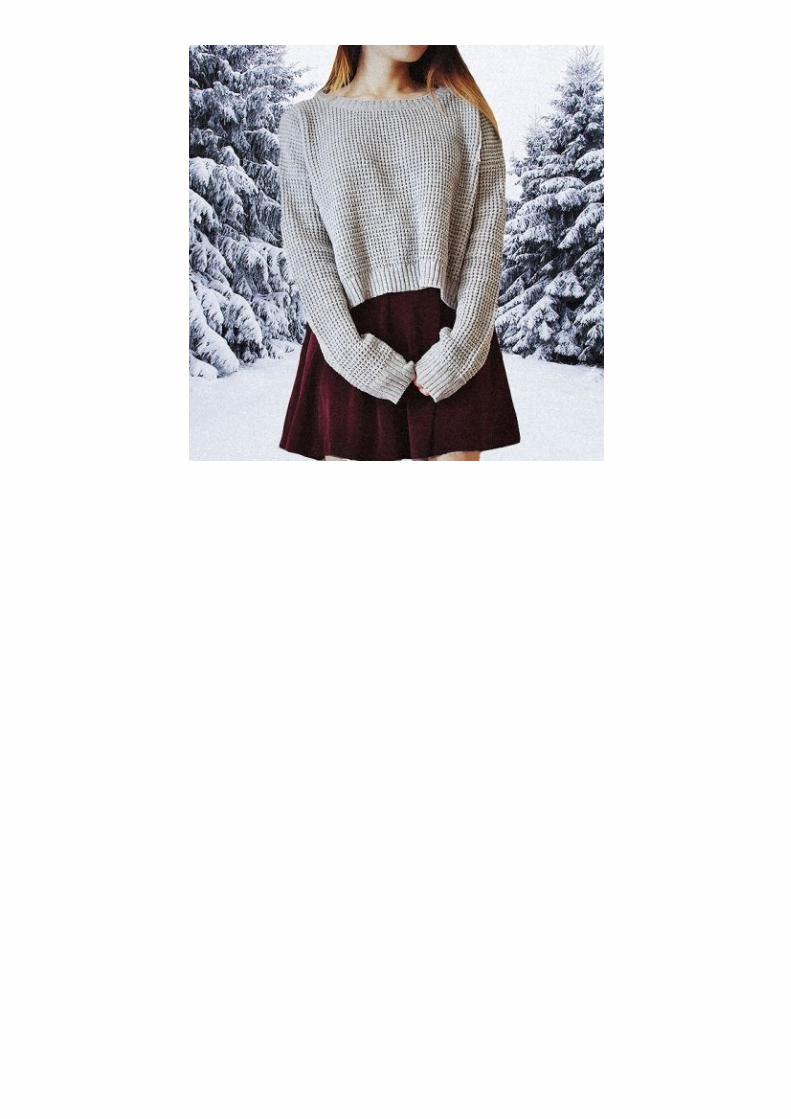
The next picture is my final result. First I cropped it into a square. I increased thebrightnessandcontrast.However,IdecreasedthesaturationbecauseIwantedthecolorstolookabitdullerlikeinwinterandevenoutthebackgroundwiththefrontlayer.Afterflatteningalloftheadjustmentlayers,Iaddedtwofilters:SharpenandNoise.Thefirstonemadethepicturemoreaccentuatedandthesecondoneaddedthevisiblegrain.Intheend,Isaved the picture in JPEG format. See if you can pinpoint how each of these changesaffectedthepicture.
ConclusionAfter reading this book, all you need is to installAdobePhotoshopCC andget startedwith your own projects. It was up to me to help you learn the fundamental rules andoptions, but it is up to you to act on your creative ideas and help them come to life.Together, we covered the basics from opening and saving files, to something morecomplicated such as using selection tools to remove and change the background of apicture. I sincerelyhope that thisguidehelpedyouunderstandhow this softwareworksandmadeyousee thepossibilities itopens forpeoplewhoknowhow touse it.Duringyour journey with Photoshop, there will be multiple times when you will run intoobstaclesandhardpatches.It’simportanttonotlosethemotivationandkeeplookingforasolution.Iwishyouthebestofluckwithyourfutureprojects!
