adobe photoshop cs2: introduction -...
TRANSCRIPT
Adobe Photoshop CS2/CS3: introduction
Lessons
Lesson 1: Overview of Adobe Photoshop CS2/CS3 After you learn about the Photoshop workspace, you'll learn to create a new image, select it, and make an example to show the difference between a pixel image and a vector image. You'll also learn how to capture a screen image, crop it, and perform some transformations. Lesson 2: Selection and deletion methods Building on what you learned in the first lesson, this lesson introduces you to selection and deletion tools and methods, which you'll apply by creating mirrored and reflection images. Then, you'll learn how to create a vignette effect for an image and add an artistic background. Lesson 3: Photo retouching and color adjustments In this lesson, you'll learn several techniques for touching up images using the Healing Brush, Patch, and Clone Stamp tools. In addition, you'll learn basic information about color, how to change the color mode of an image, and explore the color correction options. Lesson 4: Image resizing and resolution You'll wrap up this introduction to Adobe Photoshop CS2 with an overview of image size and resolution, and their importance in image preparation. You'll learn about the size of digital images and how to resize images for print, onscreen presentations, and email.
1 of 21
Introduction to Adobe Photoshop CS2/CS3
Welcome to Beginning Adobe Photoshop CS2/CS3. Adobe Photoshop is the industry-standard image editing program. It's a powerful program with many features for a wide variety of users including photographers, illustrators, graphic designers, fine artists, scientists, and many other professionals.
In this course, you'll learn general knowledge of image editing and program fundamentals. You'll be introduced to concepts, methods, and the basic operation of Photoshop, such as:
• Bitmap and vector images • Photoshop work area and its basic operation • Introduction to selections for image editing • Introduction to layers • Introduction to color • Image size and resolution basics
This class uses Photoshop CS2 (version 9.0) for Windows. Any new features of CS2 that do not apply to prior versions are indicated throughout the text. For Macintosh users, instructions and notes are included that point out any major differences. Although the majority of the basics in this class also apply to Photoshop Elements -- the version for the consumer market -- this class is written for Photoshop. Users of other versions of Photoshop will still benefit from this class.
Overview of Photoshop
Photoshop belongs to the group of image editing programs, often called paint or bitmap programs, with pixel-based environments. As you learn the fundamentals of Photoshop, you'll imagine many fun and creative ways to work with images from many sources, and even create your own. You'll find an abundance of image resources at your fingertips, including digital photographs, scanned photographs, images from other computer programs, and images from the Internet.
Be sure to check each image source carefully to avoid using copyrighted material.
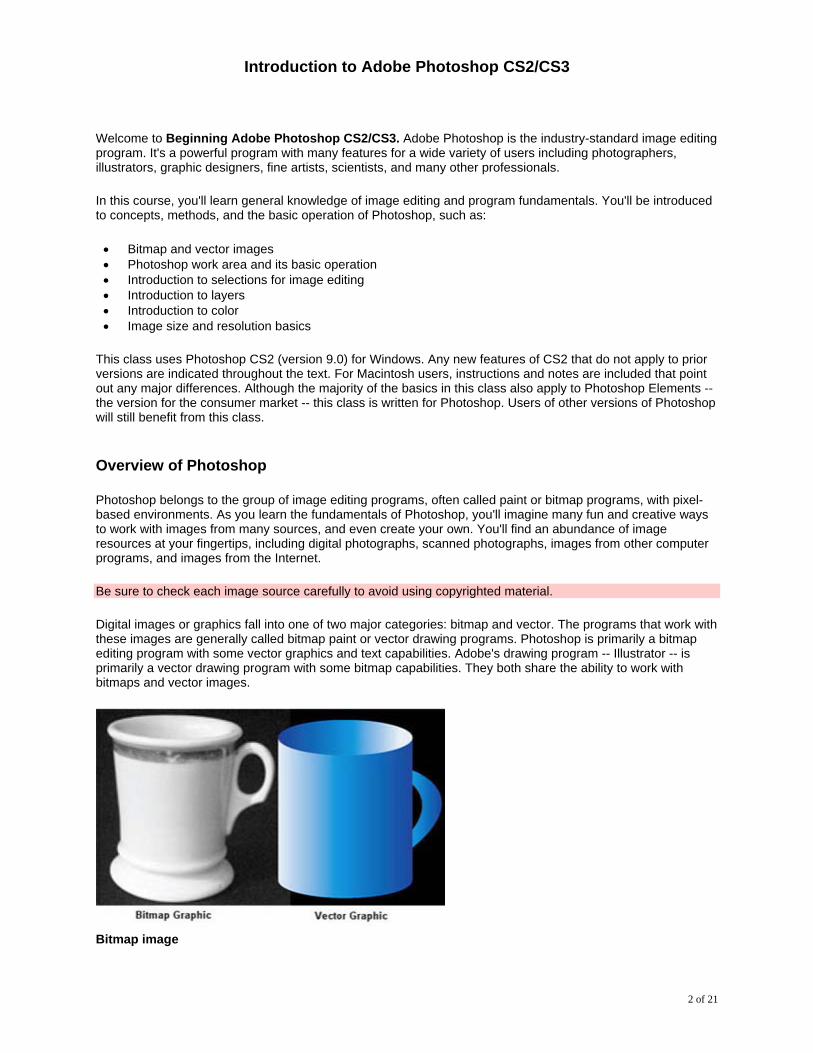
Digital images or graphics fall into one of two major categories: bitmap and vector. The programs that work with these images are generally called bitmap paint or vector drawing programs. Photoshop is primarily a bitmap editing program with some vector graphics and text capabilities. Adobe's drawing program -- Illustrator -- is primarily a vector drawing program with some bitmap capabilities. They both share the ability to work with bitmaps and vector images.
Bitmap image
2 of 21
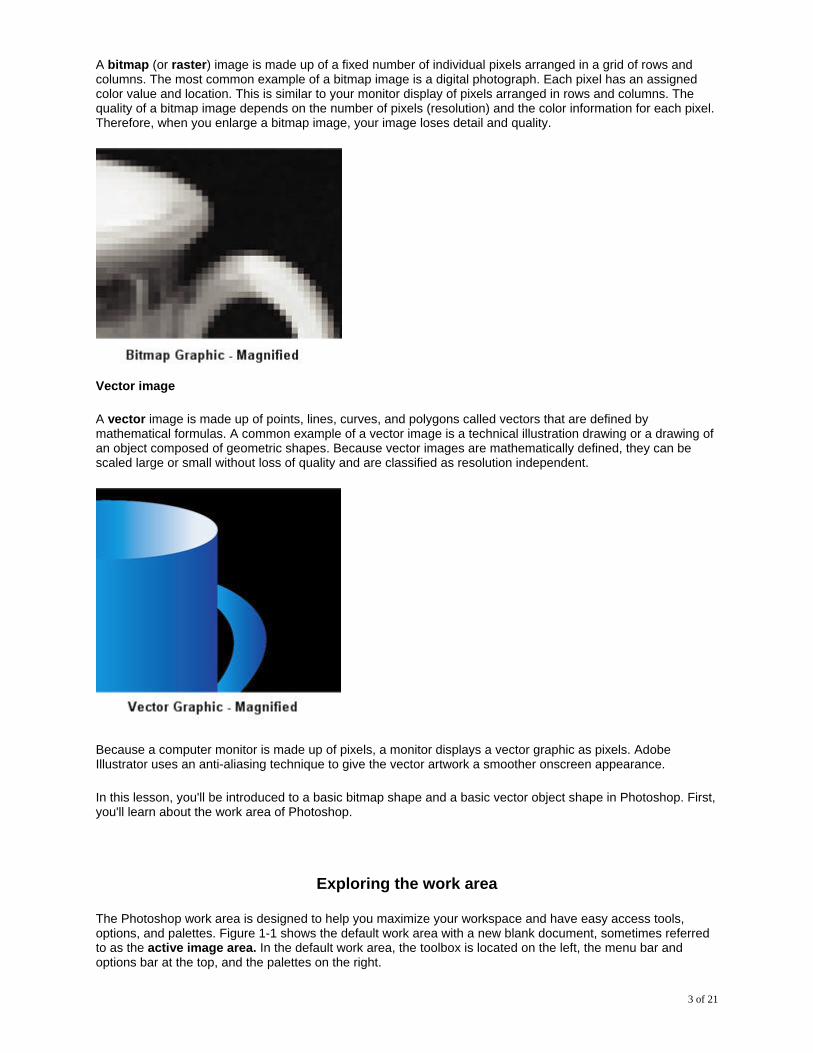
A bitmap (or raster) image is made up of a fixed number of individual pixels arranged in a grid of rows and columns. The most common example of a bitmap image is a digital photograph. Each pixel has an assigned color value and location. This is similar to your monitor display of pixels arranged in rows and columns. The quality of a bitmap image depends on the number of pixels (resolution) and the color information for each pixel. Therefore, when you enlarge a bitmap image, your image loses detail and quality.
Vector image
A vector image is made up of points, lines, curves, and polygons called vectors that are defined by mathematical formulas. A common example of a vector image is a technical illustration drawing or a drawing of an object composed of geometric shapes. Because vector images are mathematically defined, they can be scaled large or small without loss of quality and are classified as resolution independent.
Because a computer monitor is made up of pixels, a monitor displays a vector graphic as pixels. Adobe Illustrator uses an anti-aliasing technique to give the vector artwork a smoother onscreen appearance.
In this lesson, you'll be introduced to a basic bitmap shape and a basic vector object shape in Photoshop. First, you'll learn about the work area of Photoshop.
Exploring the work area
The Photoshop work area is designed to help you maximize your workspace and have easy access tools, options, and palettes. Figure 1-1 shows the default work area with a new blank document, sometimes referred to as the active image area. In the default work area, the toolbox is located on the left, the menu bar and options bar at the top, and the palettes on the right.
3 of 21
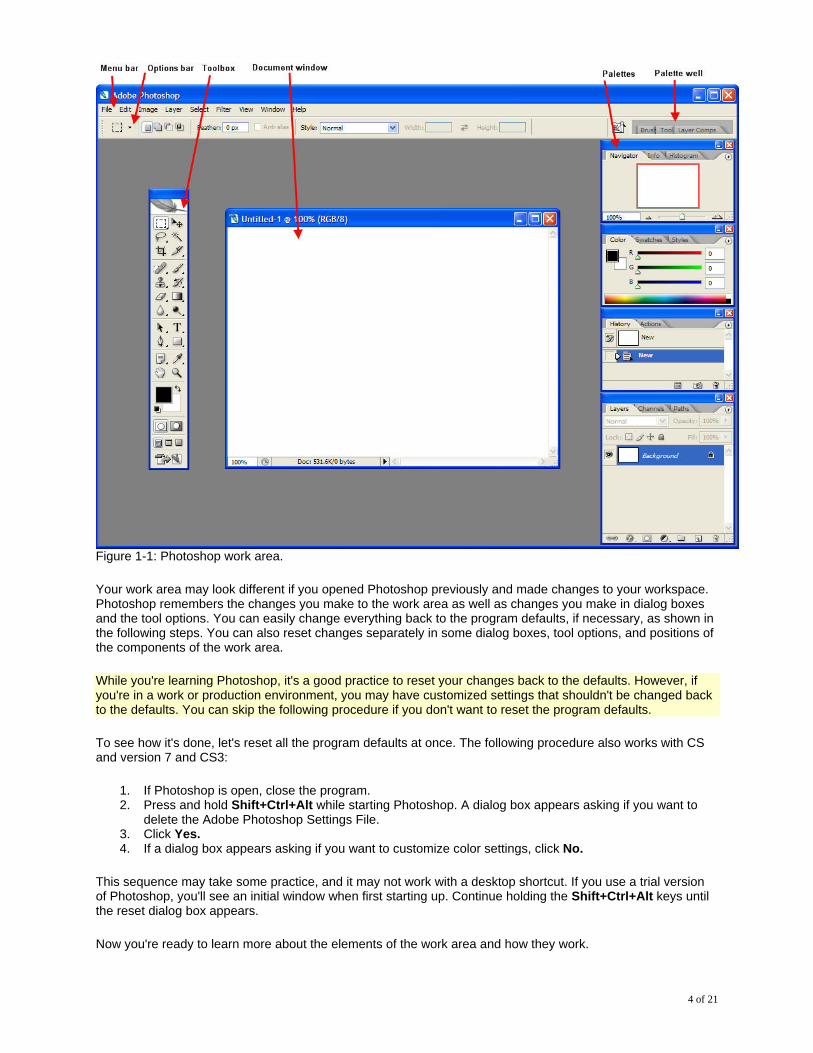
Figure 1-1: Photoshop work area.
Your work area may look different if you opened Photoshop previously and made changes to your workspace. Photoshop remembers the changes you make to the work area as well as changes you make in dialog boxes and the tool options. You can easily change everything back to the program defaults, if necessary, as shown in the following steps. You can also reset changes separately in some dialog boxes, tool options, and positions of the components of the work area.
While you're learning Photoshop, it's a good practice to reset your changes back to the defaults. However, if you're in a work or production environment, you may have customized settings that shouldn't be changed back to the defaults. You can skip the following procedure if you don't want to reset the program defaults.
To see how it's done, let's reset all the program defaults at once. The following procedure also works with CS and version 7 and CS3:
1. If Photoshop is open, close the program. 2. Press and hold Shift+Ctrl+Alt while starting Photoshop. A dialog box appears asking if you want to
delete the Adobe Photoshop Settings File. 3. Click Yes. 4. If a dialog box appears asking if you want to customize color settings, click No.
This sequence may take some practice, and it may not work with a desktop shortcut. If you use a trial version of Photoshop, you'll see an initial window when first starting up. Continue holding the Shift+Ctrl+Alt keys until the reset dialog box appears.
Now you're ready to learn more about the elements of the work area and how they work.
4 of 21
Basic operations
You can control the options bar, palettes, and toolbox as follows:
• To move and float the options bar, point to the vertical dotted line along the left edge, which is called the gripper bar. Drag and drop the options bar into the work area. You can also place it along the bottom of the work area. You may find this location works better if you tend to focus your attention on the middle and lower half of the screen as you work. To return the options bar to its default position, simply drag and drop it back into place just below the menu bar.
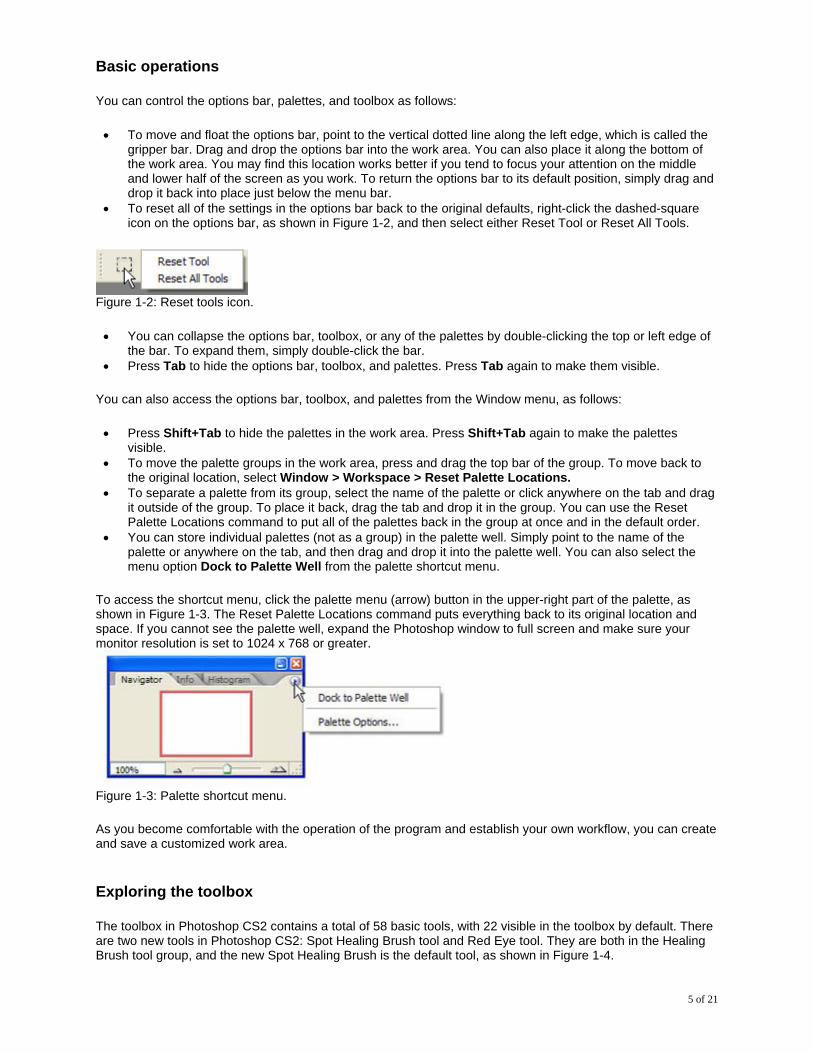
• To reset all of the settings in the options bar back to the original defaults, right-click the dashed-square icon on the options bar, as shown in Figure 1-2, and then select either Reset Tool or Reset All Tools.
Figure 1-2: Reset tools icon.
• You can collapse the options bar, toolbox, or any of the palettes by double-clicking the top or left edge of the bar. To expand them, simply double-click the bar.
• Press Tab to hide the options bar, toolbox, and palettes. Press Tab again to make them visible.
You can also access the options bar, toolbox, and palettes from the Window menu, as follows:
• Press Shift+Tab to hide the palettes in the work area. Press Shift+Tab again to make the palettes visible.
• To move the palette groups in the work area, press and drag the top bar of the group. To move back to the original location, select Window > Workspace > Reset Palette Locations.
• To separate a palette from its group, select the name of the palette or click anywhere on the tab and drag it outside of the group. To place it back, drag the tab and drop it in the group. You can use the Reset Palette Locations command to put all of the palettes back in the group at once and in the default order.
• You can store individual palettes (not as a group) in the palette well. Simply point to the name of the palette or anywhere on the tab, and then drag and drop it into the palette well. You can also select the menu option Dock to Palette Well from the palette shortcut menu.
To access the shortcut menu, click the palette menu (arrow) button in the upper-right part of the palette, as shown in Figure 1-3. The Reset Palette Locations command puts everything back to its original location and space. If you cannot see the palette well, expand the Photoshop window to full screen and make sure your monitor resolution is set to 1024 x 768 or greater.
Figure 1-3: Palette shortcut menu.
As you become comfortable with the operation of the program and establish your own workflow, you can create and save a customized work area.
Exploring the toolbox
The toolbox in Photoshop CS2 contains a total of 58 basic tools, with 22 visible in the toolbox by default. There are two new tools in Photoshop CS2: Spot Healing Brush tool and Red Eye tool. They are both in the Healing Brush tool group, and the new Spot Healing Brush is the default tool, as shown in Figure 1-4.
5 of 21
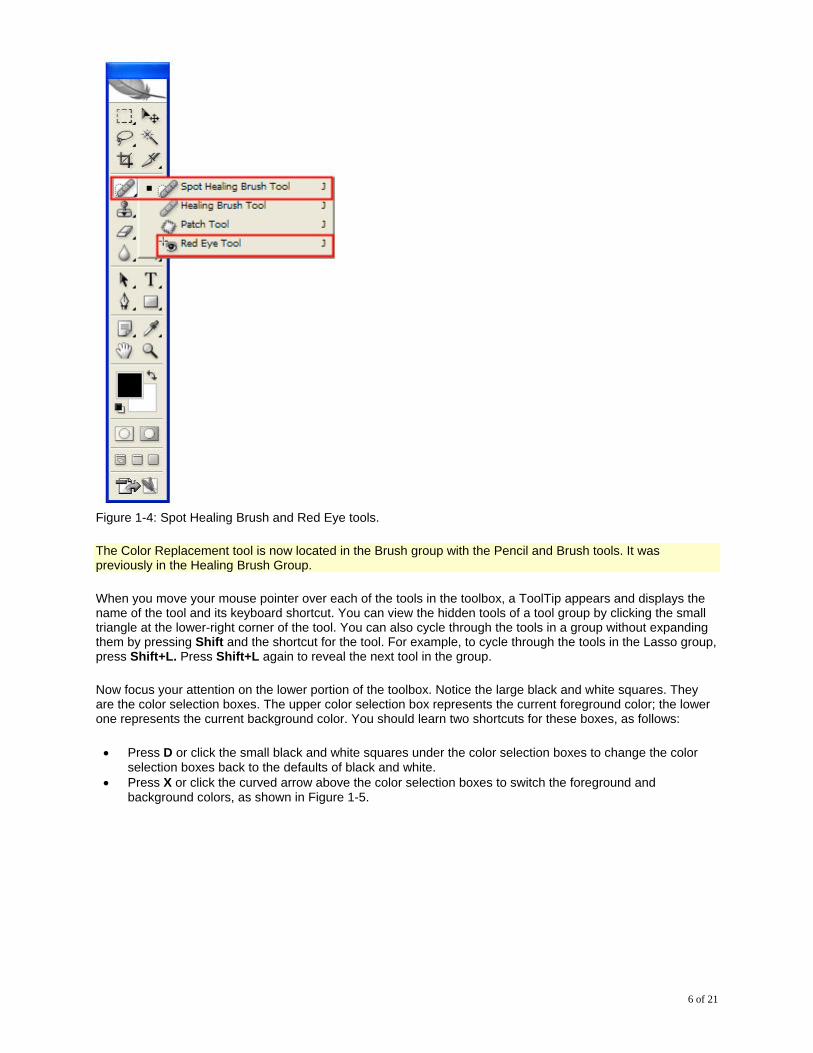
Figure 1-4: Spot Healing Brush and Red Eye tools.
The Color Replacement tool is now located in the Brush group with the Pencil and Brush tools. It was previously in the Healing Brush Group.
When you move your mouse pointer over each of the tools in the toolbox, a ToolTip appears and displays the name of the tool and its keyboard shortcut. You can view the hidden tools of a tool group by clicking the small triangle at the lower-right corner of the tool. You can also cycle through the tools in a group without expanding them by pressing Shift and the shortcut for the tool. For example, to cycle through the tools in the Lasso group, press Shift+L. Press Shift+L again to reveal the next tool in the group.
Now focus your attention on the lower portion of the toolbox. Notice the large black and white squares. They are the color selection boxes. The upper color selection box represents the current foreground color; the lower one represents the current background color. You should learn two shortcuts for these boxes, as follows:
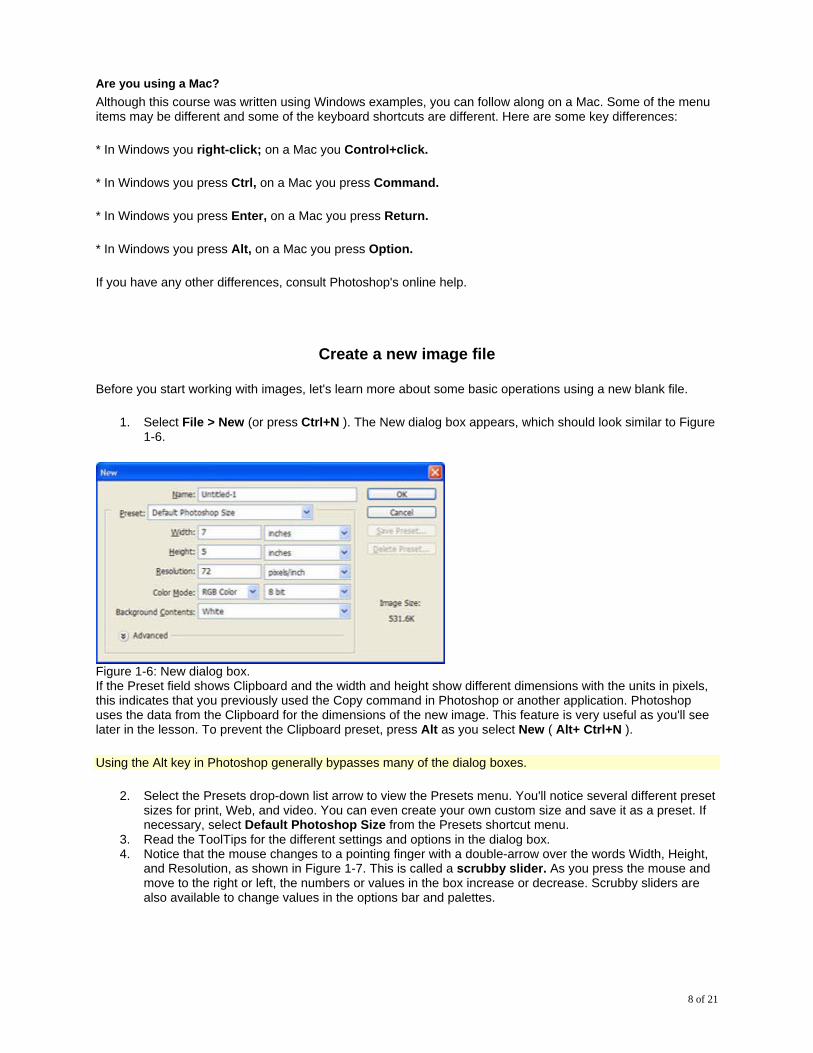
• Press D or click the small black and white squares under the color selection boxes to change the color selection boxes back to the defaults of black and white.
• Press X or click the curved arrow above the color selection boxes to switch the foreground and background colors, as shown in Figure 1-5.
6 of 21
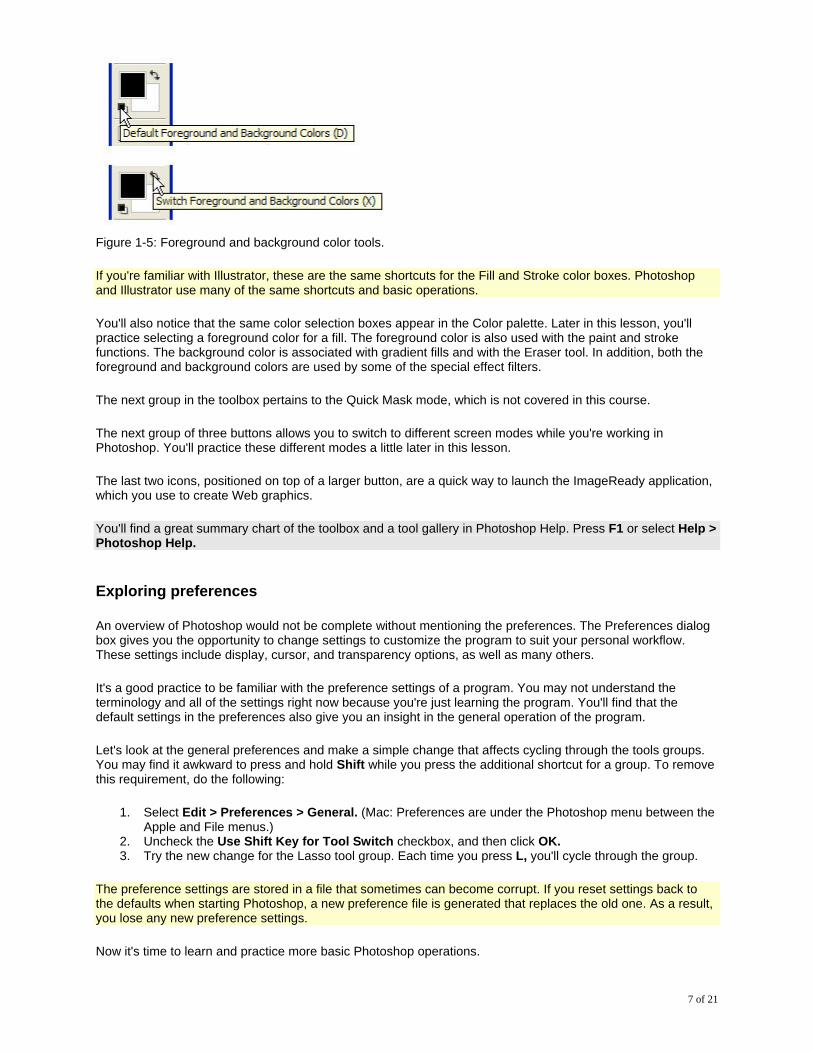
Figure 1-5: Foreground and background color tools.
If you're familiar with Illustrator, these are the same shortcuts for the Fill and Stroke color boxes. Photoshop and Illustrator use many of the same shortcuts and basic operations.
You'll also notice that the same color selection boxes appear in the Color palette. Later in this lesson, you'll practice selecting a foreground color for a fill. The foreground color is also used with the paint and stroke functions. The background color is associated with gradient fills and with the Eraser tool. In addition, both the foreground and background colors are used by some of the special effect filters.
The next group in the toolbox pertains to the Quick Mask mode, which is not covered in this course.
The next group of three buttons allows you to switch to different screen modes while you're working in Photoshop. You'll practice these different modes a little later in this lesson.
The last two icons, positioned on top of a larger button, are a quick way to launch the ImageReady application, which you use to create Web graphics.
You'll find a great summary chart of the toolbox and a tool gallery in Photoshop Help. Press F1 or select Help > Photoshop Help.
Exploring preferences
An overview of Photoshop would not be complete without mentioning the preferences. The Preferences dialog box gives you the opportunity to change settings to customize the program to suit your personal workflow. These settings include display, cursor, and transparency options, as well as many others.
It's a good practice to be familiar with the preference settings of a program. You may not understand the terminology and all of the settings right now because you're just learning the program. You'll find that the default settings in the preferences also give you an insight in the general operation of the program.
Let's look at the general preferences and make a simple change that affects cycling through the tools groups. You may find it awkward to press and hold Shift while you press the additional shortcut for a group. To remove this requirement, do the following:
1. Select Edit > Preferences > General. (Mac: Preferences are under the Photoshop menu between the Apple and File menus.)
2. Uncheck the Use Shift Key for Tool Switch checkbox, and then click OK. 3. Try the new change for the Lasso tool group. Each time you press L, you'll cycle through the group.
The preference settings are stored in a file that sometimes can become corrupt. If you reset settings back to the defaults when starting Photoshop, a new preference file is generated that replaces the old one. As a result, you lose any new preference settings.
Now it's time to learn and practice more basic Photoshop operations.
7 of 21
Are you using a Mac? Although this course was written using Windows examples, you can follow along on a Mac. Some of the menu items may be different and some of the keyboard shortcuts are different. Here are some key differences:
* In Windows you right-click; on a Mac you Control+click.
* In Windows you press Ctrl, on a Mac you press Command.
* In Windows you press Enter, on a Mac you press Return.
* In Windows you press Alt, on a Mac you press Option.
If you have any other differences, consult Photoshop's online help.
Create a new image file
Before you start working with images, let's learn more about some basic operations using a new blank file.
1. Select File > New (or press Ctrl+N ). The New dialog box appears, which should look similar to Figure 1-6.
Figure 1-6: New dialog box. If the Preset field shows Clipboard and the width and height show different dimensions with the units in pixels, this indicates that you previously used the Copy command in Photoshop or another application. Photoshop uses the data from the Clipboard for the dimensions of the new image. This feature is very useful as you'll see later in the lesson. To prevent the Clipboard preset, press Alt as you select New ( Alt+ Ctrl+N ).
Using the Alt key in Photoshop generally bypasses many of the dialog boxes.
2. Select the Presets drop-down list arrow to view the Presets menu. You'll notice several different preset sizes for print, Web, and video. You can even create your own custom size and save it as a preset. If necessary, select Default Photoshop Size from the Presets shortcut menu.
3. Read the ToolTips for the different settings and options in the dialog box. 4. Notice that the mouse changes to a pointing finger with a double-arrow over the words Width, Height,
and Resolution, as shown in Figure 1-7. This is called a scrubby slider. As you press the mouse and move to the right or left, the numbers or values in the box increase or decrease. Scrubby sliders are also available to change values in the options bar and palettes.
8 of 21
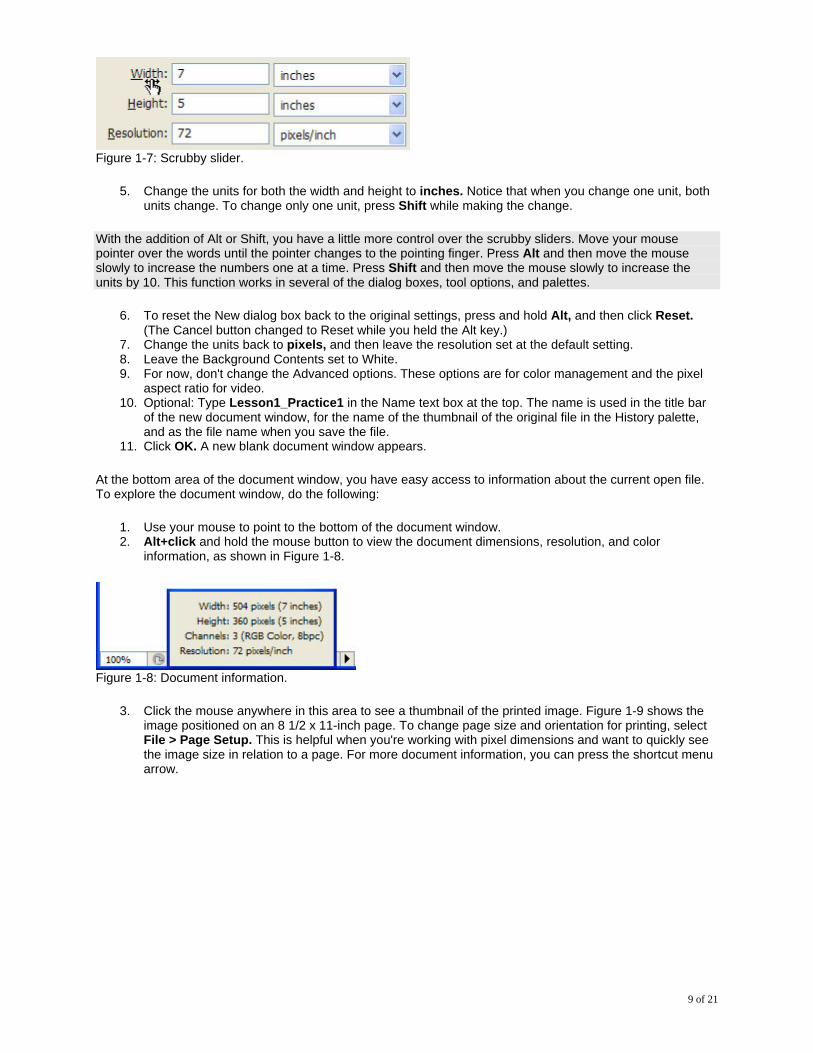
Figure 1-7: Scrubby slider.
5. Change the units for both the width and height to inches. Notice that when you change one unit, both units change. To change only one unit, press Shift while making the change.
With the addition of Alt or Shift, you have a little more control over the scrubby sliders. Move your mouse pointer over the words until the pointer changes to the pointing finger. Press Alt and then move the mouse slowly to increase the numbers one at a time. Press Shift and then move the mouse slowly to increase the units by 10. This function works in several of the dialog boxes, tool options, and palettes.
6. To reset the New dialog box back to the original settings, press and hold Alt, and then click Reset. (The Cancel button changed to Reset while you held the Alt key.)
7. Change the units back to pixels, and then leave the resolution set at the default setting. 8. Leave the Background Contents set to White. 9. For now, don't change the Advanced options. These options are for color management and the pixel
aspect ratio for video. 10. Optional: Type Lesson1_Practice1 in the Name text box at the top. The name is used in the title bar
of the new document window, for the name of the thumbnail of the original file in the History palette, and as the file name when you save the file.
11. Click OK. A new blank document window appears.
At the bottom area of the document window, you have easy access to information about the current open file. To explore the document window, do the following:
1. Use your mouse to point to the bottom of the document window. 2. Alt+click and hold the mouse button to view the document dimensions, resolution, and color
information, as shown in Figure 1-8.
Figure 1-8: Document information.
3. Click the mouse anywhere in this area to see a thumbnail of the printed image. Figure 1-9 shows the image positioned on an 8 1/2 x 11-inch page. To change page size and orientation for printing, select File > Page Setup. This is helpful when you're working with pixel dimensions and want to quickly see the image size in relation to a page. For more document information, you can press the shortcut menu arrow.
9 of 21
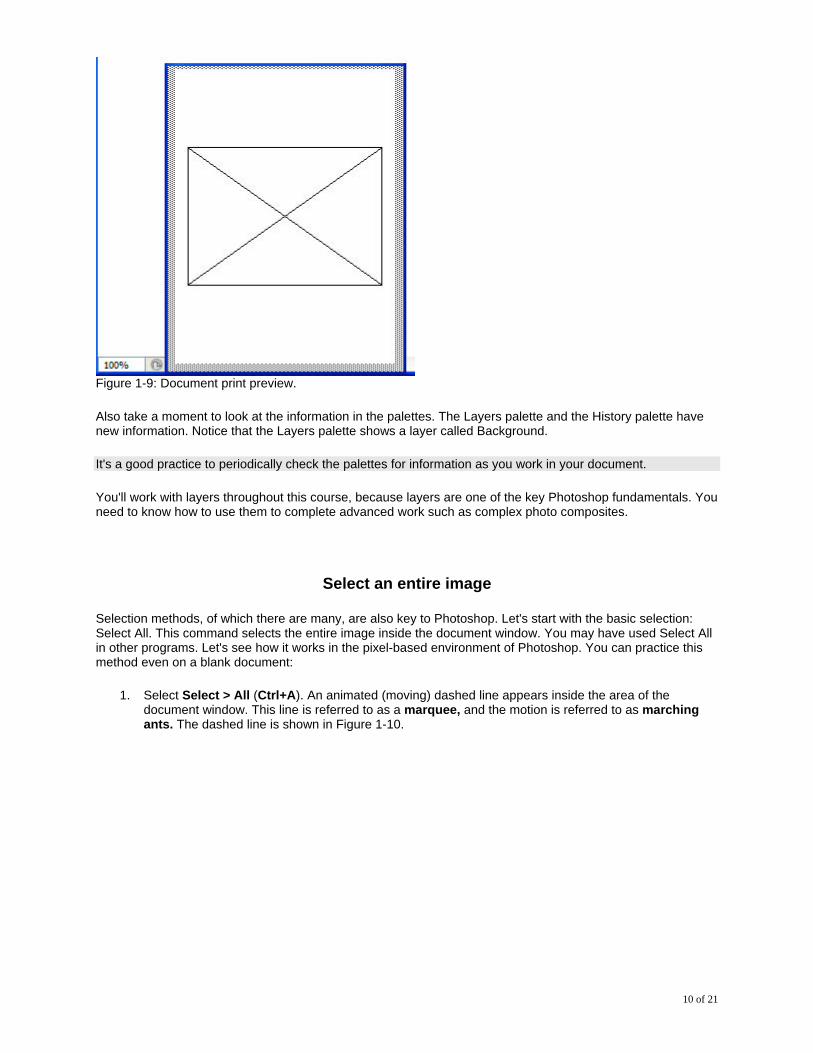
Figure 1-9: Document print preview.
Also take a moment to look at the information in the palettes. The Layers palette and the History palette have new information. Notice that the Layers palette shows a layer called Background.
It's a good practice to periodically check the palettes for information as you work in your document.
You'll work with layers throughout this course, because layers are one of the key Photoshop fundamentals. You need to know how to use them to complete advanced work such as complex photo composites.
Select an entire image
Selection methods, of which there are many, are also key to Photoshop. Let's start with the basic selection: Select All. This command selects the entire image inside the document window. You may have used Select All in other programs. Let's see how it works in the pixel-based environment of Photoshop. You can practice this method even on a blank document:
1. Select Select > All (Ctrl+A). An animated (moving) dashed line appears inside the area of the document window. This line is referred to as a marquee, and the motion is referred to as marching ants. The dashed line is shown in Figure 1-10.
10 of 21
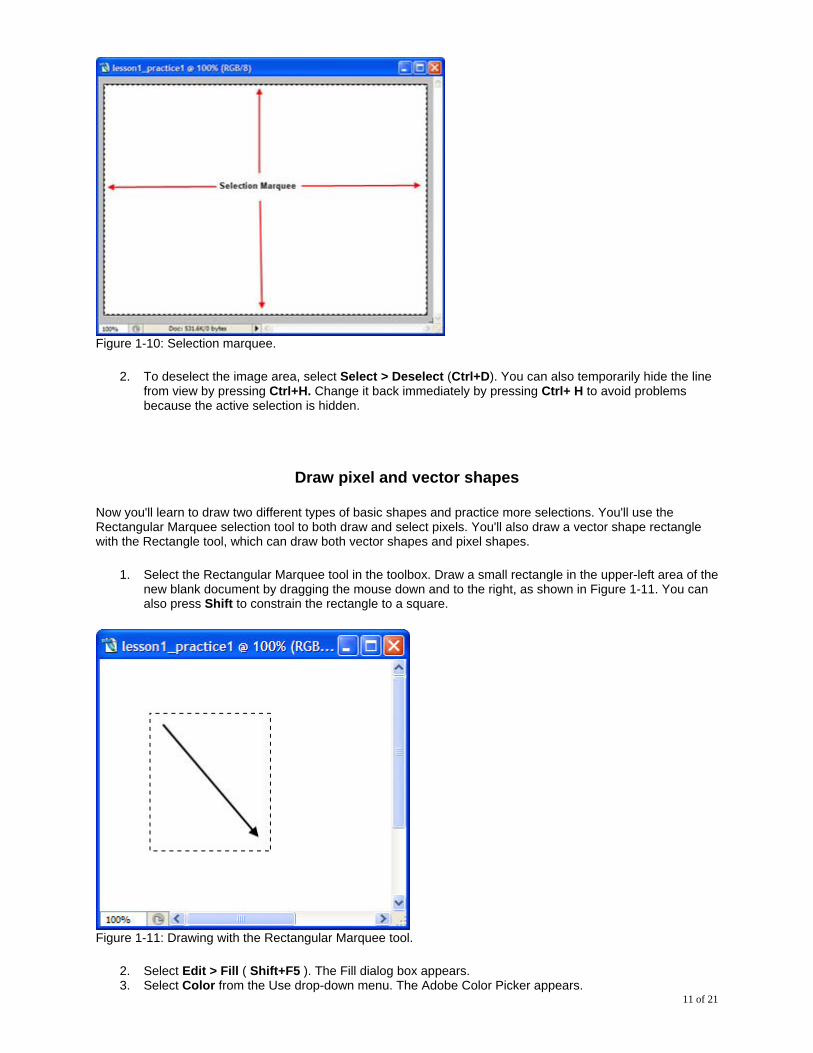
Figure 1-10: Selection marquee.
2. To deselect the image area, select Select > Deselect (Ctrl+D). You can also temporarily hide the line from view by pressing Ctrl+H. Change it back immediately by pressing Ctrl+ H to avoid problems because the active selection is hidden.
Draw pixel and vector shapes
Now you'll learn to draw two different types of basic shapes and practice more selections. You'll use the Rectangular Marquee selection tool to both draw and select pixels. You'll also draw a vector shape rectangle with the Rectangle tool, which can draw both vector shapes and pixel shapes.
1. Select the Rectangular Marquee tool in the toolbox. Draw a small rectangle in the upper-left area of the new blank document by dragging the mouse down and to the right, as shown in Figure 1-11. You can also press Shift to constrain the rectangle to a square.
Figure 1-11: Drawing with the Rectangular Marquee tool.
2. Select Edit > Fill ( Shift+F5 ). The Fill dialog box appears. 3. Select Color from the Use drop-down menu. The Adobe Color Picker appears.
11 of 21

4. Select a color either by moving the small circle in the large color field, moving the color sliders along the vertical color bar, or typing the color values. For example, type the following RGB values: 255 , 0 , 0 for the color red, as shown in Figure 1-12.
Figure 1-12: Color Picker.
5. Click OK to close the Color Picker, and then click OK again to close the Fill dialog box. The rectangle is now filled with a red color and the lines around it (the marquee) indicate that it's selected.
6. Select Select > Deselect ( Ctrl+D ).
In the Layers palette, notice the red shape is on the Background layer. Because this image is a pixel image, you need to have a way to select all or part of the pixels to change or move them. In addition, all images on the Background layer must be selected before you can edit or move them. To select and move images:
1. Select Select > Reselect ( Shift+Ctrl+D ). 2. Select the Move tool in the toolbox, and then move the colored rectangle around on the page. 3. Press Ctrl+D to deselect.
Now you'll draw a rectangle in a blank area of the document that's a vector shape, learn a different way to pick a color, and learn that a vector shape has a different type of selection requiring a different tool. Perform the following steps:
1. If necessary, press D to set the color selection boxes back to the defaults. 2. In the Color palette, pick a color from the Color Spectrum bar at the bottom, move the slider bars for
the colors, or type in the color values. For example, in the RGB boxes, type 0 , 0 , and 255 for the color blue, as shown in Figure 1-13.
Figure 1-13: Color palette.
3. Select the Rectangle tool in the toolbox. It's located just below the Text tool. 4. On the options bar, make sure the Shape layers button is selected, or right-click and select Reset
Tool. 5. Drag and draw a rectangle below the first one or anywhere in a blank area. 6. Select the Path Selection tool in the toolbox, located to the left of the Text tool, and then click the
rectangle. It's now selected and you can move it around on the page.
12 of 21
This second rectangle is a vector shape object, which is different than the first pixel image. There's an indicator that this shape is different. Look at the Layers palette -- there's a new Shape layer with different types of thumbnails. Yours will look similar to the one in Figure 1-14. For now, simply note that a vector shape is on a separate layer.
Figure 1-14: Layers palette.
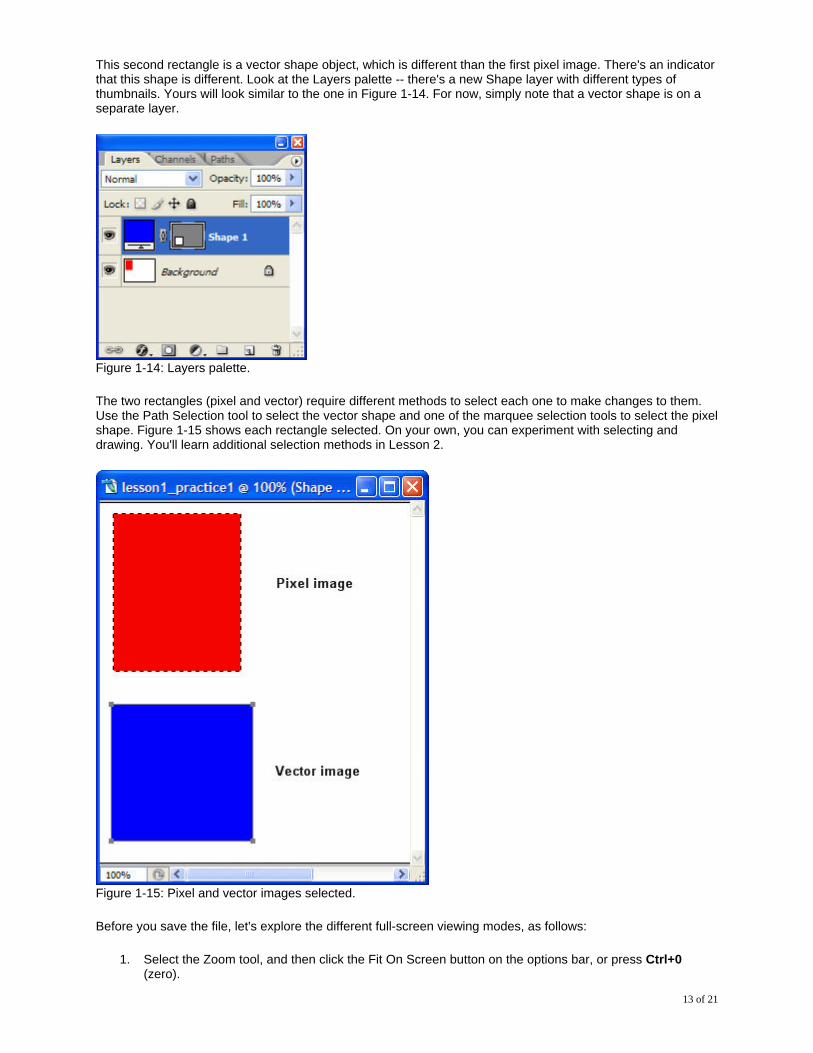
The two rectangles (pixel and vector) require different methods to select each one to make changes to them. Use the Path Selection tool to select the vector shape and one of the marquee selection tools to select the pixel shape. Figure 1-15 shows each rectangle selected. On your own, you can experiment with selecting and drawing. You'll learn additional selection methods in Lesson 2.
Figure 1-15: Pixel and vector images selected.
Before you save the file, let's explore the different full-screen viewing modes, as follows:
1. Select the Zoom tool, and then click the Fit On Screen button on the options bar, or press Ctrl+0 (zero).
13 of 21
14 of 21
2. Select the middle of the three Screen Mode tools in the toolbox, or press F. This shows your image on the screen with the menu bar at the top and a 50% gray background.
3. Press Tab to hide the toolbox and palettes and, if necessary, go to the Window menu and uncheck Options to hide the options bar.
4. Move the image around by pressing the spacebar to temporarily activate the Hand tool. 5. Press F again to display your image onscreen with no menu bar and a black background. You can
cycle through several open images by pressing Ctrl+Tab. 6. To return to the standard mode, press F, or press Tab to display the toolbox and then click the
Standard Screen Mode tool.
You can save your practice file, if you wish, in a new folder for your lesson files. Select File > Save, type Lesson1_Practice1 in the File name text box, and then select Photoshop (*.PSD;*.PDD) in the Format text box. This allows you to save the file as a Photoshop file rather than a JPEG (Joint Photographic Experts Group). When you save a file, a dialog box may appear regarding maximizing compatibility. It's a good idea to leave this option checked, and then turn off the dialog box in Preferences in the section on File Handling. For more information about saving compatible files, check Photoshop Help.
By now, you're getting comfortable with the basic operation of Photoshop and you've learned some simple selection and drawing methods.
Capture, crop, and transform
In this last section of the lesson, you'll learn how to capture a screen image, use the Crop tool to perform a basic image crop, use the Navigator palette to zoom in on areas of your image, and apply some basic transformations.
Capture a screen image
It's a good idea as you're learning the basics of the program to use simple images, because a complex image may be too distracting and overwhelming. In this section, you'll learn how to capture a screen image.
First, you'll create a screen capture of a folder of image files in Thumbnail view. If you're already familiar with the file browser from a previous version of Photoshop or Bridge -- , the new file browser in CS2 -- you can use it for your screen capture. To capture a screen image, do the following:
• If Photoshop is open, minimize the program and open My Computer to locate a file folder with images. For example, use a file folder in the Sample folder of the Photoshop program files.
• If necessary, change to the Thumbnails view. (Mac: Use the Icon view.) • Press Alt+Print Screen. This takes a picture or screen capture of the active window, and the
image is saved as data to the Clipboard. You'll not see the image until you paste it into Photoshop. (Mac: Press Command+Shift+4, and then press Control as you drag to select the area of the screen.)
• Close the window and maximize Photoshop. • Select File > New. Notice the Preset field in the New dialog box displays Clipboard. Photoshop
automatically opens a new file with the dimensions and resolution based on the Clipboard data. • Click OK, and then select Edit > Paste ( Ctrl+V ) to paste the image into the new blank window.
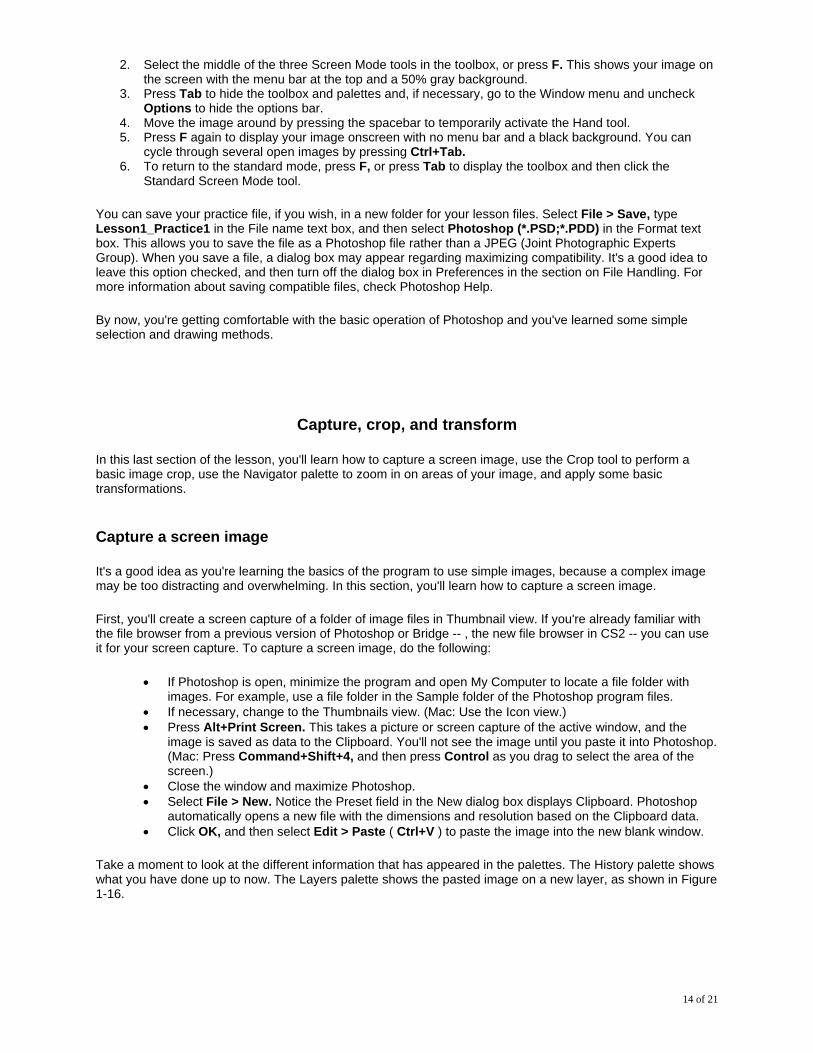
Take a moment to look at the different information that has appeared in the palettes. The History palette shows what you have done up to now. The Layers palette shows the pasted image on a new layer, as shown in Figure 1-16.
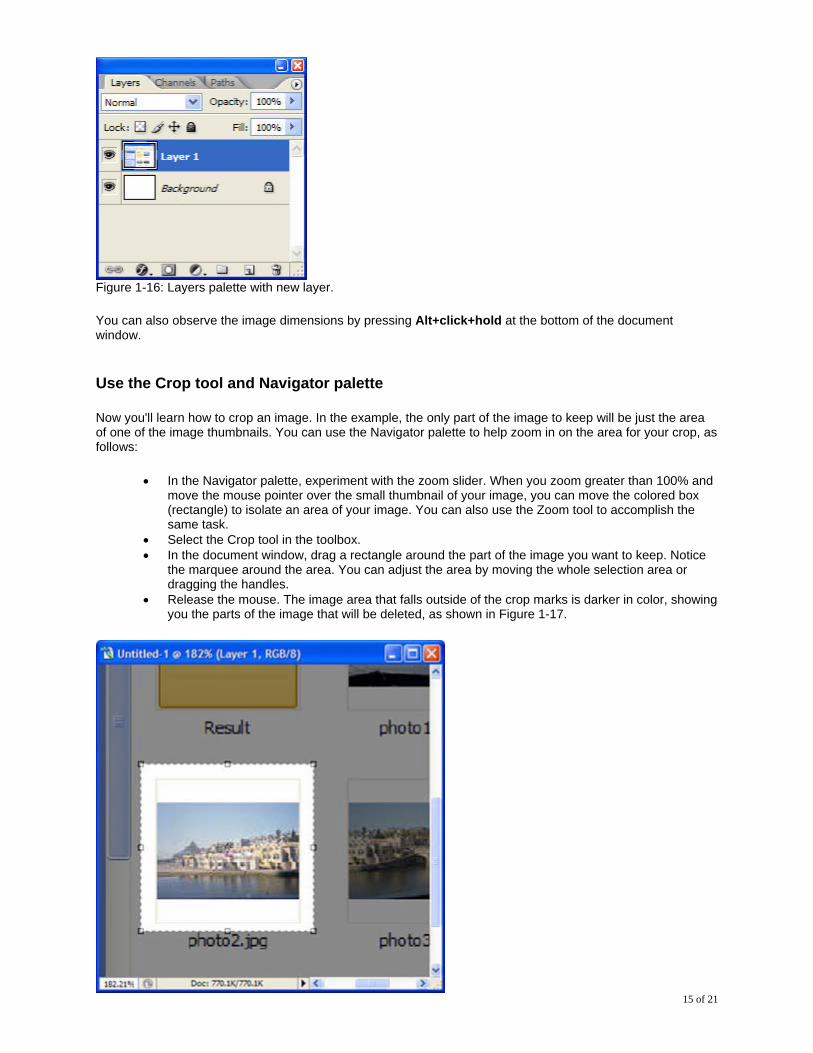
Figure 1-16: Layers palette with new layer.
You can also observe the image dimensions by pressing Alt+click+hold at the bottom of the document window.
Use the Crop tool and Navigator palette
Now you'll learn how to crop an image. In the example, the only part of the image to keep will be just the area of one of the image thumbnails. You can use the Navigator palette to help zoom in on the area for your crop, as follows:
• In the Navigator palette, experiment with the zoom slider. When you zoom greater than 100% and move the mouse pointer over the small thumbnail of your image, you can move the colored box (rectangle) to isolate an area of your image. You can also use the Zoom tool to accomplish the same task.
• Select the Crop tool in the toolbox. • In the document window, drag a rectangle around the part of the image you want to keep. Notice
the marquee around the area. You can adjust the area by moving the whole selection area or dragging the handles.
• Release the mouse. The image area that falls outside of the crop marks is darker in color, showing you the parts of the image that will be deleted, as shown in Figure 1-17.
15 of 21
16 of 21
Figure 1-17: Crop selection area.
• To finish the cropping task, either right-click and select Crop, double-click inside the marquee, click the check mark near the right side of the options bar, or press Enter.
• To cancel the crop before you complete the task, right-click and select Cancel, click the Cancel button on the options bar, or press Esc.
The Cancel button is a red circle with a diagonal line through the middle.
• Look at the image dimensions in the document information at the bottom of the screen. The width and height are now smaller. When you crop an image, you delete the pixels.
Apply a transformation
A transformation is a change in the size, orientation, perspective, or other alteration of an image. The transformations in Photoshop are scale, rotate, skew, distort, perspective, and flip. CS2 offers a new transformation called warp. Another new feature in CS2 is called vanishing point. Although you think of vanishing point and perspective together, it's not in the Transformation group. The vanishing point feature is located in the Filters menu, and when selected, launches in a separate window. Remember that perspective is a transformation.
You can apply transformations to an entire image or parts of an image. The image can be a pixel or vector image. If you're going to apply a transformation to the entire image or part of the pixels and the images are on the Background layer, you need to make a selection. You'll learn more about selections in Lesson 2.
You can apply and execute transformations one at a time or in continuous succession. The command for continuous transformations is called Free Transform. If you're going to apply more than one transformation to the same image, it's best to use the Free Transform tool because the pixels' dimensions are changed only once. The process of changing the dimensions of pixels is called resampling.
To transform the cropped image, do the following: • Select Edit > Transform > Flip Horizontal. To commit to this transformation, press Enter. To
cancel, select Edit > Undo ( Ctrl+Z ). • Select Edit > Transform > Rotate. Notice the handles that appear, and then look at the settings
on the options bar. You can rotate the image visually or type in an angle of rotation in the options bar. To rotate visually, move the mouse cursor outside of the boundary area until it changes to a curved double arrow. Drag the image to the right or left to rotate it. Notice you cannot make additional transformations without committing first.
Photoshop sometimes refers to the mouse "pointer" as a "cursor." You'll find both terms used throughout this course.
3. To cancel the rotation, click Cancel on the options bar. 4. Select Edit > Free Transform ( Ctrl+T ). Notice that handles, called Transform controls, appear on the
image and transform options appear on the options bar. 5. Move the mouse cursor outside the controls until it changes to the rotate symbol and then rotate the
image. 6. To reduce the size of the image, right-click inside the box and select Scale, or press Shift and drag
the top or bottom corner inward. Press Enter or check the check mark on the options bar to apply both the rotate and the scale.
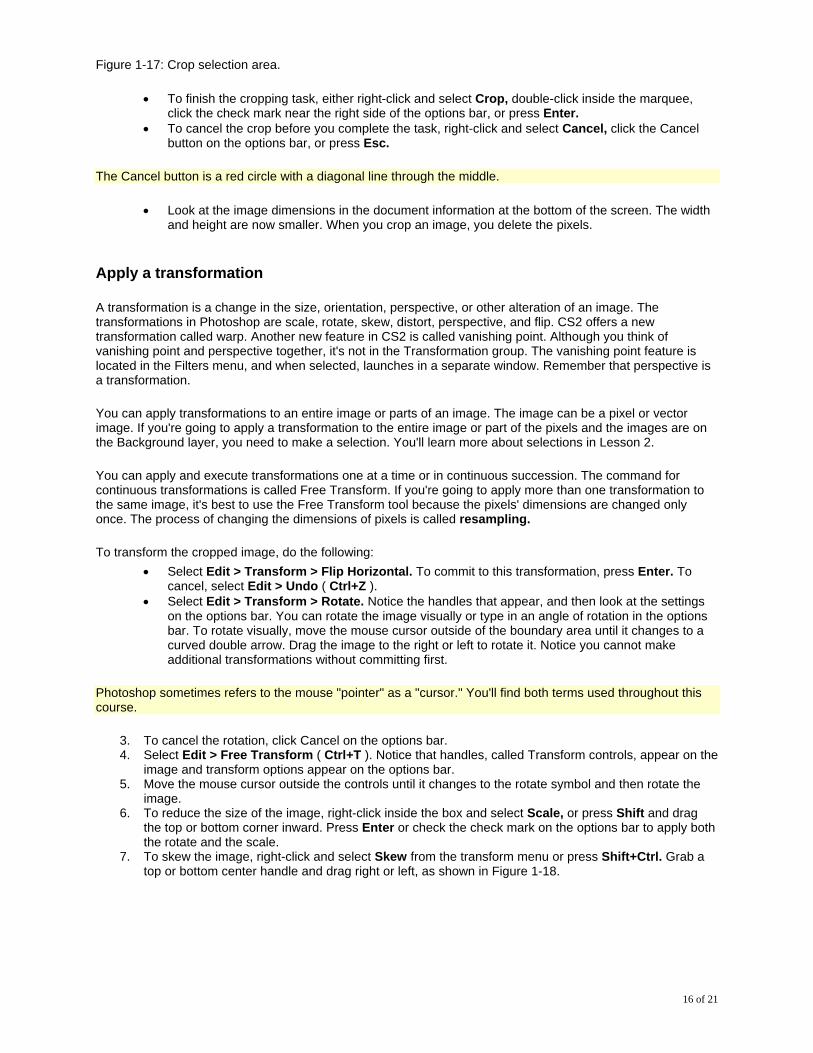
7. To skew the image, right-click and select Skew from the transform menu or press Shift+Ctrl. Grab a top or bottom center handle and drag right or left, as shown in Figure 1-18.
Figure 1-18: Performing a skew. The display may appear somewhat pixilated. It looks betters after you apply the transformation, as shown in Figure 1-19. If you have your image magnified with the zoom, you'll see the pixels.
17 of 21
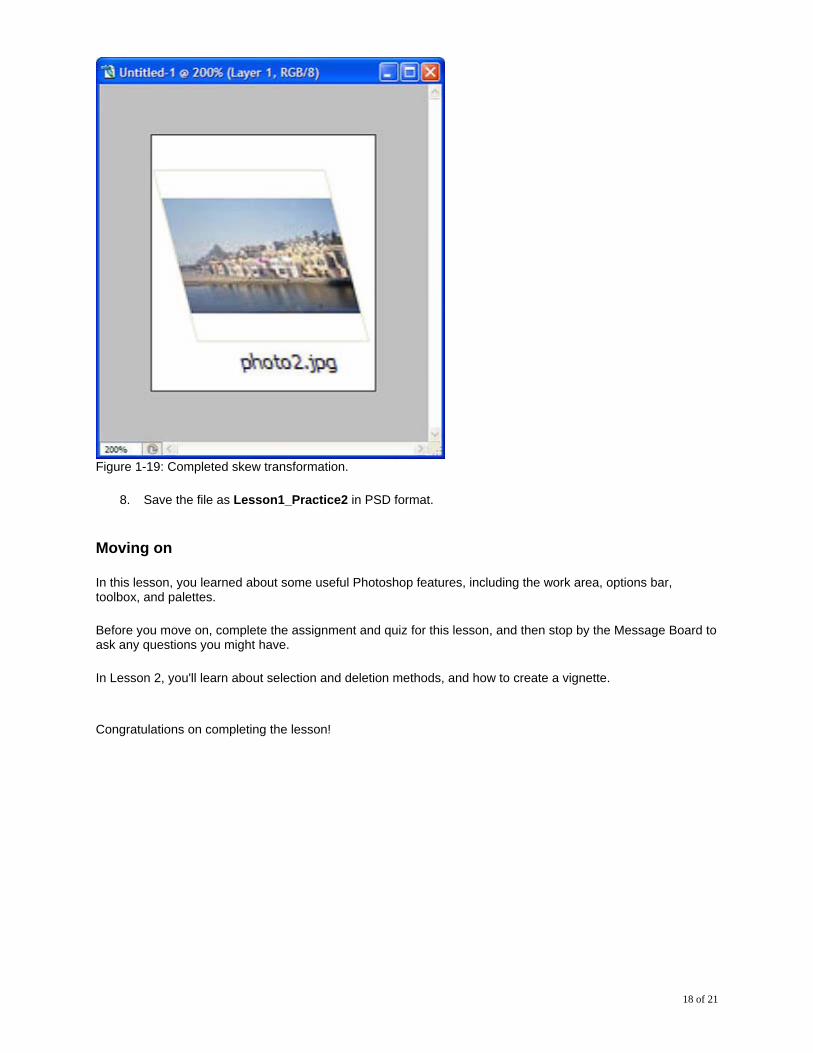
Figure 1-19: Completed skew transformation.
8. Save the file as Lesson1_Practice2 in PSD format.
Moving on
In this lesson, you learned about some useful Photoshop features, including the work area, options bar, toolbox, and palettes.
Before you move on, complete the assignment and quiz for this lesson, and then stop by the Message Board to ask any questions you might have.
In Lesson 2, you'll learn about selection and deletion methods, and how to create a vignette.
Congratulations on completing the lesson!
18 of 21
Overview of Adobe Photoshop CS2/CS3 Assignment
Assignments are designed to help you apply the information learned in the lessons.
Practice with the Photoshop environment
To try out the skills you learned in Lesson 1, practice working with the toolbox and options bar so that you can set up Photoshop for your convenience. In addition, create and copy files and work with some of the tools to enhance your basic Photoshop skills.
If you have problems with any of the assignment instructions, review the lesson material or consult the solution at the end of this assignment for detailed step-by-step instructions.
1. Close Photoshop if you've previously been using it, and then restart it, resetting the program defaults when you do so.
2. Open the Preferences dialog box, review the settings in the various categories in the dialog box, and then close the dialog box.
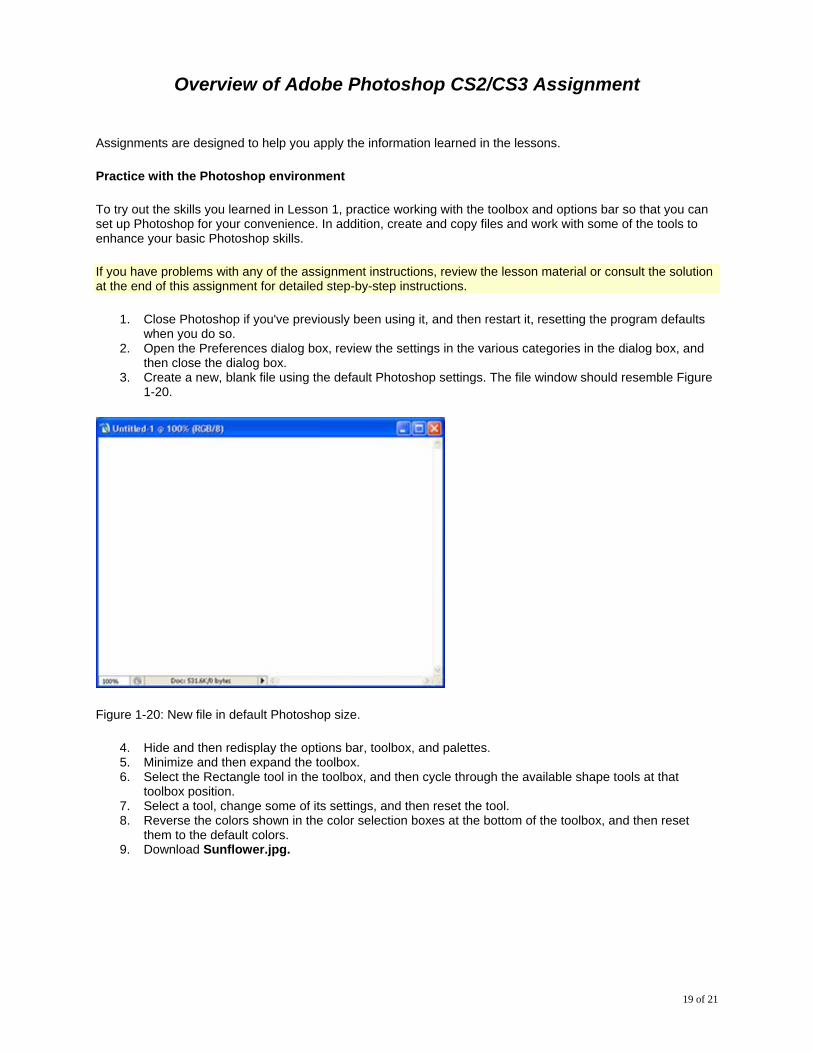
3. Create a new, blank file using the default Photoshop settings. The file window should resemble Figure 1-20.
Figure 1-20: New file in default Photoshop size.
4. Hide and then redisplay the options bar, toolbox, and palettes. 5. Minimize and then expand the toolbox. 6. Select the Rectangle tool in the toolbox, and then cycle through the available shape tools at that
toolbox position. 7. Select a tool, change some of its settings, and then reset the tool. 8. Reverse the colors shown in the color selection boxes at the bottom of the toolbox, and then reset
them to the default colors. 9. Download Sunflower.jpg.
19 of 21
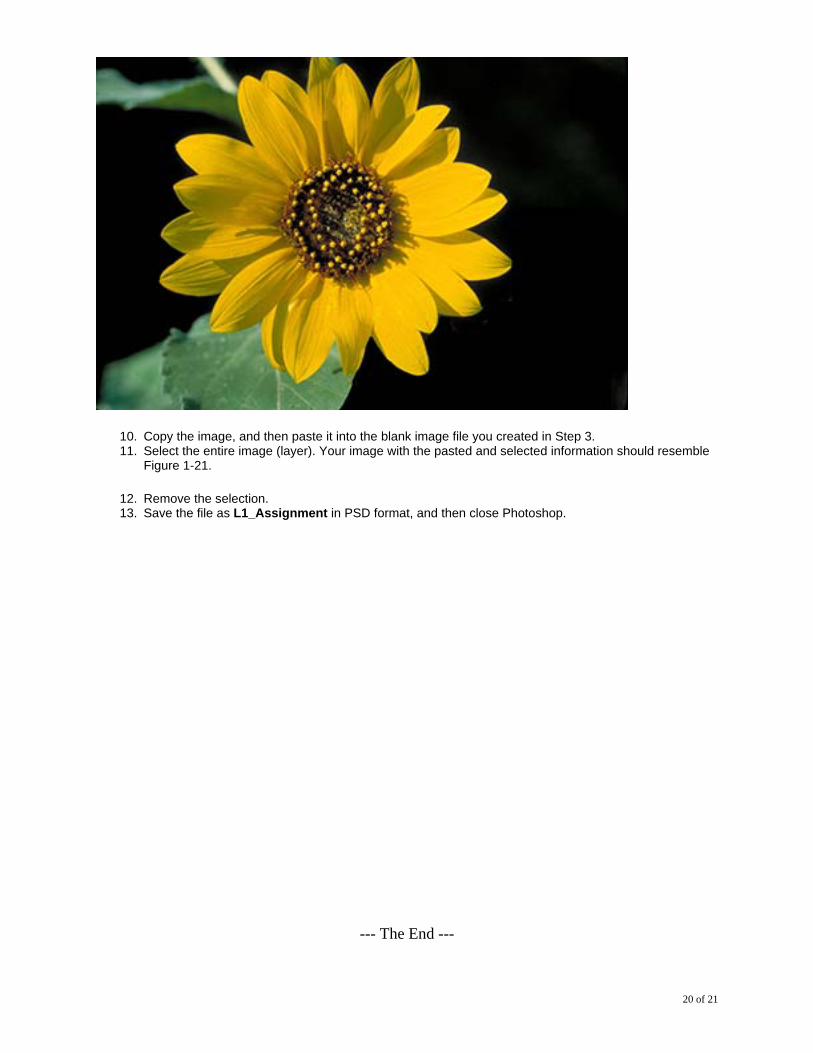
10. Copy the image, and then paste it into the blank image file you created in Step 3. 11. Select the entire image (layer). Your image with the pasted and selected information should resemble
Figure 1-21.
12. Remove the selection. 13. Save the file as L1_Assignment in PSD format, and then close Photoshop.
--- The End ---
20 of 21
21 of 21
Here is the solution:
1. Select Start > All Programs > Adobe Photoshop CS2, and press and hold Shift+Ctrl+Alt during startup. Click Yes if asked whether to delete prior settings, and No when asked if you want to customize color.
2. Select Edit > Preferences > General, use the Prev and Next buttons to move through the various choices, and then click Cancel.
3. Select File > New (Ctrl+N). Select Default Photoshop Size from the Preset drop-down list, and then click OK.
4. Press Tab to hide the screen elements, and then press Tab again to redisplay them.
5. Double-click the toolbox title bar to collapse it, and then double-click the title bar again to re-expand it.
6. Click the Rectangle tool (U). Press Shift+U to cycle through the available tools, or click and hold the Rectangle tool and then click a tool in the menu that appears.
7. Select the tool you want in the toolbox, and then change settings as you'd like on the options bar. To reset the tool, right-click the tool icon at the left end of the options bar, and then select Reset Tool in the shortcut menu.
8. Press X, and then press D.
9. Open Sunflower.jpg. Select Select > All (Ctrl+A) to select the image, and then select Edit > Copy (Ctrl+C) to copy the image to the Clipboard. Switch to the new, blank document, and then select Edit > Paste (Ctrl+V ) to paste the copied image into the file.
10. Select Select > Select All (Ctrl+A).
11. Select Select > Deselect (Ctrl+D).
12. Select File > Save (Ctrl+S) to open the Save As dialog box where you can name and save the file, and then select File > Close (Ctrl+W) to close it.