aeramax pro am ii · aeramax® pro am ii please read these instructions before use. do not discard:...
TRANSCRIPT
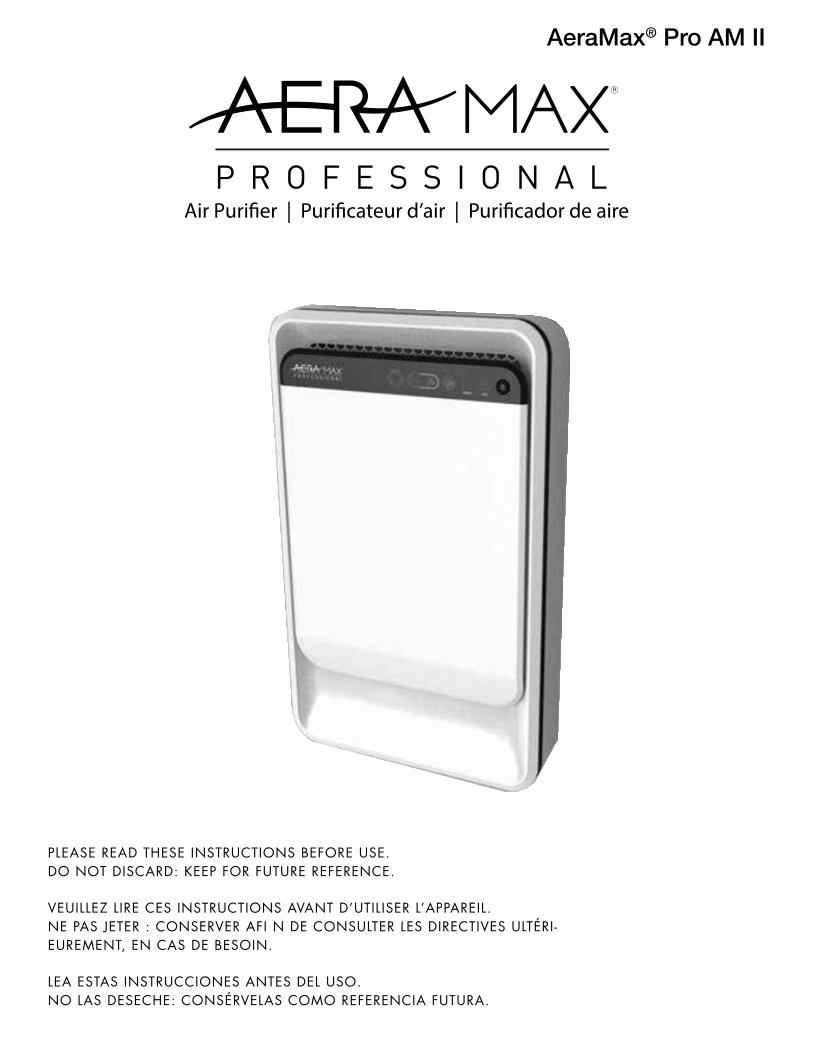
Air Purifier | Purificateur d’air | Purificador de aire
AeraMax® Pro AM II
PLEASE READ THESE INSTRUCTIONS BEFORE USE. DO NOT DISCARD: KEEP FOR FUTURE REFERENCE.
VEUILLEZ LIRE CES INSTRUCTIONS AVANT D’UTILISER L’APPAREIL. NE PAS JETER : CONSERVER AFI N DE CONSULTER LES DIRECTIVES ULTÉRI-EUREMENT, EN CAS DE BESOIN.
LEA ESTAS INSTRUCCIONES ANTES DEL USO. NO LAS DESECHE: CONSÉRVELAS COMO REFERENCIA FUTURA.

2
ENGLISHAeraMax® PRO Commercial-Grade Air Purifier: AM II
SAFETY INSTRUCTIONS/WARNING
WARNING: Follow the instructions in this manual to reduce the risk of electric shock, short circuit, and/or fire:
Thank you for purchasing the AeraMax® PRO AM II.Please read and save these instructions. Read carefully before attempting to operate or maintain this product. Protect yourself and others by observing all safety information. Failure to comply with instructions could result in personal injury and/or property damage. Retain instructions for future reference.
IMPORTANT CAUTIONS AND INSTRUCTIONS FOR USING AIR PURIFIER:
LIMITED PRODUCT WARRANTY Limited Warranty: Fellowes, Inc. (“Fellowes”) warrants the AeraMax® PRO air quality control system (the “Product”) to be free of defects in material and workmanship for 3 years from date of purchase. In the event that the Product is installed into new construction, the warranty period shall commence on the date of the occupancy permit or one year after the date of purchase, whichever is earlier. If any part is found to be defective during the warranty period, your sole and exclusive remedy will be repair or replacement, at Fellowes’ option and expense, of the defective part. This warranty does not cover damage caused by use of non-Fellowes approved filters or failure to follow the recommended replacement schedule. This warranty does not apply in cases of abuse, mishandling, failure to comply with product usage standards, operation using an improper power supply (other than listed on the label), or unauthorized repair. Fellowes reserves the right to charge the consumers for any additional costs incurred by Fellowes to provide parts or services outside of the country where the Product was initially sold by an authorized reseller. This warranty does not cover replaceable filters. In the event that the Product is not readily accessible to Fellowes designated service personnel, Fellowes reserves the right to supply customer with replacement parts or Product in full satisfaction of its obligations under this warranty and any service obligations. ANY IMPLIED WARRANTY, INCLUDING THAT OF MERCHANTABILITY OR FITNESS FOR A PARTICULAR PURPOSE, IS HEREBY LIMITED IN DURATION TO THE APPROPRIATE WARRANTY PERIOD SET FORTH ABOVE. In no event shall Fellowes be liable for any consequential, incidental, indirect or special damages. This warranty gives you specific legal rights. The duration, terms, and conditions of this warranty are valid worldwide, except where different limitations, restrictions, or conditions may be required by local laws.
• Do not use this air purifier as sole protection against harmful pollutants.
• Use this unit only in the manner intended by the manufacturer. If you have questions, contact the manufacturer.
• Do not repair or modify the unit unless specifically recommended in this manual. All repairs should be completed by a qualified technician.
• The plug for this unit is polarized with one blade wider than the other. Do not force the plug into an electrical outlet.
• Do not alter the plug in any way. If the plug does not fit into the outlet, reverse the plug. If it still does not fit, contact a qualified technician to install a proper outlet.
• Do not use if the power cord or plug is damaged or the connection to the wall outlet is loose.
• Use AC 120V only.
• Do not damage, break, forcefully bend, pull, twist, bundle coat, pinch, run under carpets, cover with throw rugs or place heavy objects on the power cord.
• Periodically remove dust from the power plug. This will reduce the chance that humidity will accumulate, which increases the risk of electric shock.
• If the power plug is damaged, it must be replaced by the manufacturer or a qualified technician.
• Remove the power plug from the outlet before cleaning the unit. When removing the power plug, grasp by holding the plug itself, never hold by the cord.
• Remove the power plug from the outlet when the unit is not in use.
• Do not handle the power plug with wet hands.
• Before servicing or cleaning the unit, switch power off at service panel. Lock service panel, or affix a warning tag, to prevent power from being switched back on accidentally.
• Use only the electrical power cord (voltage and frequency) specified for the model air purifier being installed.
• Do not obstruct the air inlet or air outlet of the air purifier.
• Do not use unit without filters installed.
• Do not wash and reuse any of the filters.
• Do not use attachments or filters other than AeraMax® PRO brand, as unit will not function.
• Do not spray aerosols on, or into the unit.
• Do not use detergent to clean the unit.
• Do not insert fingers, liquids, or foreign objects into the air intake or outlet.
• Do not use the unit for anything other than air purification.
• This appliance is not intended for use by persons whose physical, sensory or mental capabilities are different, reduced or lack the experience and knowledge for the operation of the appliance.
• Children should be supervised to ensure that they do not use the appliance as a toy.

For additional replacement filter and accessory information please visit: www.aeramaxpro.com
PACKAGING CONTENTS
• AeraMax® PRO Commercial-Grade Air Purifier
• 2” Hybrid Filter (includes 1” True HEPA & 1” Activated Carbon)
• Wall mount screws (4) and installation bracket
• Drywall Anchors (4)
• Registration information
AeraMax® PRO AM II
Dimensions (H x W x D) 22.3 x 13.7 x 4 inches / 56.5 x 34.9 x 10.2 cm
Weight of System (including filters) 10.6 lbs. / 4.81 kg
Power Requirements 120 volt, 60 Hz, 1.37 amp
Power Consumption (5 fan speeds) 6.90, 9.53, 14.22, 40.09, 70.36 watts
Air Delivery (5 fan speeds) 35, 43, 51, 64, 100 CFM*
Decibels 45, 48, 51, 60, 64 dB
Display Capacitive Touch
Sensors EnviroSmart™
Sensor Controlled Operation Modes 2 Primary modes - Auto Mode and Manual Mode
Supplied Filters(1) 2” Hybrid Filter (includes 1” True HEPA & 1” Activated Carbon) with an estimated average filter life of 1 year.
Cleaning SystemHybrid filter includes High Efficiency Particulate Air (HEPA) filter rated efficiency of 99.97% of airborne particulate at 0.3 microns. Carbon Filter adsorbs odor and volatile organic compounds, PlasmaTRUE ™ bipolar ionizer.
* CFM tested with hybrid filter only and machine in vertical orientation
3
PRODUCT SPECIFICATIONS
REPLACEMENT FILTERS
5/8” Carbon Boosters Additional granular activated carbon filters. Average filter life 6 months: 9544401 - 2 sets
2” True HEPA True HEPA filter replacement with AeraSafe™ treatment. Average filter life 2 years: 9544301 - 1 pack
2” Carbon Carbon Granular activated carbon replacement filter. Average filter life 1 year: 9544601 - 1 pack
2” Hybrid 1” True HEPA and 1” Carbon with hybrid replacement filter. Average filter life 1 year: 9544501 - 1 pack

4
DISPLAY PANEL
AIR QUALITY SENSOR – This indicator monitors the air quality and adjusts the fan speed to keep your air purified. Blue indicates a low level of contaminants detected, amber indicates a moderate level of contaminants and red indicates a high level of contaminants.
AUTO MODE – To select, press and hold the button until icon illuminates. This mode monitors air quality, motion, and noise level to adjust the fan speed in order to keep your air purified as quickly as possible. The fan has 5 speeds and can reach turbo speed to clean the room in the case of high levels of contaminant. The number of tick marks illuminated around this icon indicates fan speed.
MANUAL MODE – To select, press the button until icon illuminates. This mode allows you to choose one of the 5 fan speeds and keep the unit at this speed until AUTO MODE is chosen again. The internal sensors will not adjust the fan speed in this mode. The number of tick marks illuminated around the AUTO MODE icon indicates fan speed.
PlasmaTRUE™ TECHNOLOGY – Creates an ionized field to help safely remove airborne pollutants. To turn on and off the PlasmaTRUE™ TECHNOLOGY, touch and hold the PLASMA indicator. A blue light illuminates when the PlasmaTRUE™ TECHNOLOGY is enabled. To disable the PlasmaTRUE™ TECHNOLOGY, press and hold “Plasma” indicator until light is off.
CARBON FILTER REPLACEMENT INDICATOR* – If the light is red this indicates the filter needs replacing. The replacement period will vary depending on the filters used, hours of use, air quality, and rate of air flow. For filter replacement indicator descriptions see FILTER REPLACEMENT section.
HEPA FILTER REPLACEMENT INDICATOR* – If the light is red this indicates the filter needs replacing. The replacement period will vary depending on the filters used, hours of use, air quality, and rate of air flow. For filter replacement indicator descriptions see FILTER REPLACEMENT INDICATORS section.
1
2 5
63
NOTE: after the unit is turned on the “AQ” light will flash for a few minutes while the system self-calibrates.
*Note - if hybrid filter is being used, both the HEPA and Carbon indicators will be lit.
4
1 2 3 4 5 6
HEPACARBON
5
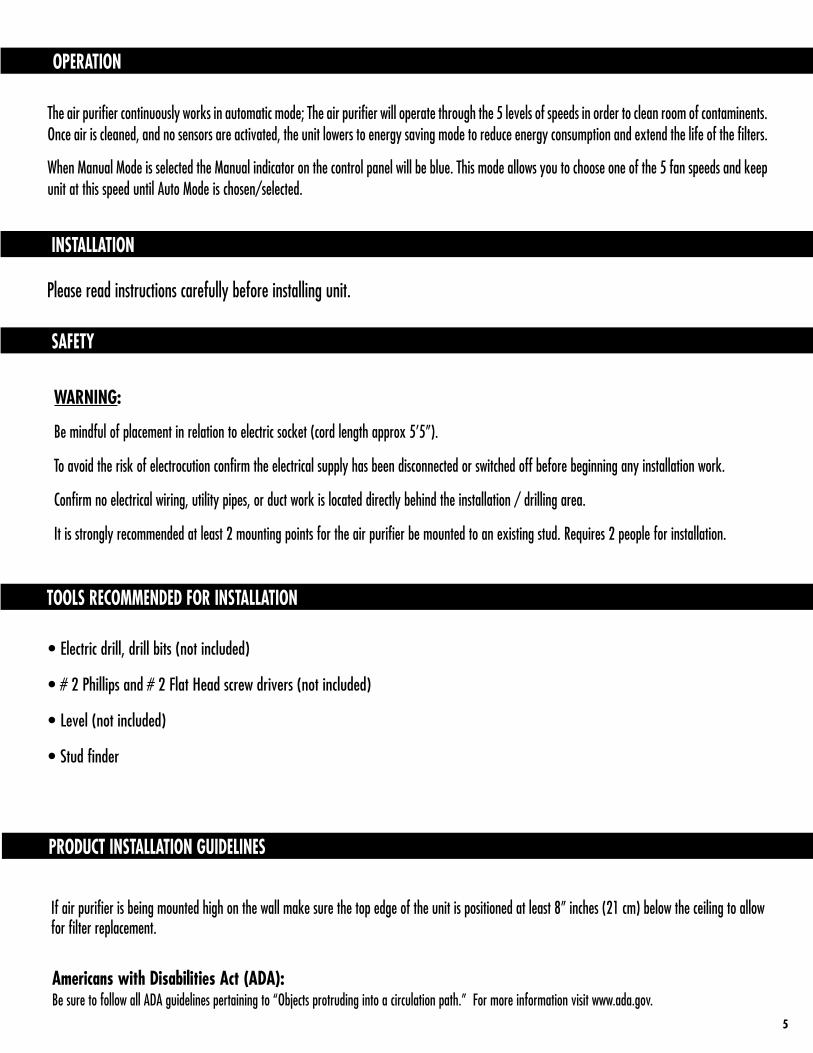
INSTALLATION
Please read instructions carefully before installing unit.
SAFETY
TOOLS RECOMMENDED FOR INSTALLATION
PRODUCT INSTALLATION GUIDELINES
WARNING:
Be mindful of placement in relation to electric socket (cord length approx 5’5”).
To avoid the risk of electrocution confirm the electrical supply has been disconnected or switched off before beginning any installation work.
Confirm no electrical wiring, utility pipes, or duct work is located directly behind the installation / drilling area.
It is strongly recommended at least 2 mounting points for the air purifier be mounted to an existing stud. Requires 2 people for installation.
• Electric drill, drill bits (not included)
• # 2 Phillips and # 2 Flat Head screw drivers (not included)
• Level (not included)
• Stud finder
If air purifier is being mounted high on the wall make sure the top edge of the unit is positioned at least 8” inches (21 cm) below the ceiling to allow for filter replacement.
Americans with Disabilities Act (ADA): Be sure to follow all ADA guidelines pertaining to “Objects protruding into a circulation path.” For more information visit www.ada.gov.
OPERATION
The air purifier continuously works in automatic mode; The air purifier will operate through the 5 levels of speeds in order to clean room of contaminents. Once air is cleaned, and no sensors are activated, the unit lowers to energy saving mode to reduce energy consumption and extend the life of the filters.
When Manual Mode is selected the Manual indicator on the control panel will be blue. This mode allows you to choose one of the 5 fan speeds and keep unit at this speed until Auto Mode is chosen/selected.

6
MOUNTING MAIN ASSEMBLY
SET UP - Reference KEY section
1. Choose an area to mount the unit near a standard outlet receptacle (Cord length about 5’5 [1.6m]).2. Install the provided mounting bracket to the wall using the 4 screws and 4 anchors provided.
(Recommended: Use level to install bracket) Note: It is recommended that 2 of the 4 screws are installed into a stud. • If installed to a stud, no anchor is needed. • If mounting location is over drywall or other surface requiring additional support, use anchors provided. [Anchor use only] Use the bracket provided to mark the desired locations on the wall for installation. To use anchors, drill a 3/8” (9.5mm) hole in the mounting hole location(s) and press anchors into the wall. Install screw through the mounting bracket and into the anchor.3. Hang the unit at an angle on the top hooks of the mounting bracket first as shown in the illustration.4. Once the top hooks are engaged, press the bottom of the unit flush to the bracket.5. Remove the filter(s) from the unit and remove their packaging.6. Place the stickers provided (2) over the top mounting hole locations to maximize performance.7. Install the filters in the unit. Note: The “AeraMax Pro Certified Filter Sticker” on the filter must align with the identical sticker found on the unit. If the filter is not installed properly, the unit will not power on.8. Plug the power cord into standard outlet receptacle.9. Reach behind the unit on the back bottom right to access the power switch and turn unit on. Note: Manual mode will not be available for 1 minute upon initial power-up.
1. Open unit by pressing the access panel latch (4) down while pulling the front access panel towards you.2. Remove bag from filter and place back in unit.
Back of Unit
3
2
1
1. Control Panel
2. Motion Sensor
3. Front Access Panel
4. Access Panel Latch
5. Certified Filter Sticker
6. Hybrid Filter
7. Cord Management
8. Power Switch
KEY
6
5
4
8
7
Step 3
Step 2

7
CARE AND MAINTENANCECLEANING:
• Clean external housing as necessary by wiping with a dry, soft cloth; for stains, use a warm, damp cloth.• Do not use volatile fluids such as benzene, paint thinner, scouring powder or other cleaners that may damage the unit surface.• Clean intake and exhaust vents by wiping with a dry, soft cloth.
Press the access panel latch down while pulling front panel towards you.
Remove old filter(s). When inserting new filters, be sure to remove the plastic bag. When inserting new Hybrid or HEPA filters, align the AeraMax® PRO Certified Filter stickers on the filter and the inside of the unit. The arrow should point towards the back of the unit. Reference (4) on the KEY section.
FILTER REPLACEMENT:The replacement filter indicators will signal when to replace the HEPA Filter and/or Carbon filters. The replacement period will vary depending on the hours of use, air quality, and rate of air flow. However, under normal usage, most HEPA Filters need to be replaced every 1 year, and Carbon filter every 6 months. When a filter needs to be replaced the following color will be shown on any one of the HEPA or CARBON filter replacement indicators: Amber flashing = 90% filter wear (recommendation to order new filters) Red = 100% filter wear (replace with new filters)Do not wash and reuse any of the filters – they will not work effectively. Only use AeraMax® PRO brand replacement filters as units will not function using any other replacements.
FILTER REPLACEMENT PROCEDURE:
FILTER LIGHT RESET:When installing a new filter the unit will automatically detect the filter type but the user will have to manually reset the filter replacement indicators. To reset any of the filter replacement indicators, press and hold filter type button that was replaced (HEPA or Carbon) until the light turns off. Repeat for other filter types as needed. When replacing the hybrid filter, reset both the HEPA and carbon indicator lights.
TROUBLESHOOTING
PROBLEM: POSSIBLE SOLUTION:The air quality control system fails to start. • Check to assure unit is connected to power supply.
• Make sure filters are genuine AeraMax® PRO filters, as unit will not function with other brands. IMPORTANT: Make sure to align the AeraMax PRO Certified Stickers on the filter and the inside of the unit. The arrows should point towards the back of the unit.
• Review Filter Replacement Method section for further detail.• Make sure front access panel is closed completely.• Make sure power switch is on.
The unit makes a faint ticking sound. • This indicates that the “PlasmaTRUE™” bipolar ionizer is working.The HEPA and/or Carbon Filter replacement indicator light remain lit after replacing the filter(s). • Repeat filter light reset instruction.
321
AeraMax® Pro AM II
1789 Norwood Avenue, Itasca, Illinois 60143 • 1-800-955-0959 • www.fellowes.comB r a nd s
© 2016 Fellowes, Inc. | Part #409516
U.S.: 1-800-955-0959Canada: 1-800-665-4339Mexico: 001-800-514-9057
CUSTOMER SERVICE & SUPPORTwww.fellowes.com