alexander installation and configuration guide - satpro.se installation and... · alexander...
TRANSCRIPT

1 www.alex-cs.info
Alexander installation and configuration guide.
Contents 1. First time installation ................................................................................................... 2 2. Configuration ............................................................................................................... 5 2.1. Client Configuration ................................................................................................ 5 2.2. Server Settings ......................................................................................................... 6 2.3. System Settings ........................................................................................................ 8 2.4. Status Page ............................................................................................................. 10 2.5. Reboot .................................................................................................................... 11 2.6. Enter first time installation ..................................................................................... 11 2.7. Software download ................................................................................................ 12 3. LED information........................................................................................................ 14 4. Factory reset .............................................................................................................. 15 5. Trouble shooting ........................................................................................................ 16 6. Revision history ......................................................................................................... 16

2 www.alex-cs.info
1. First time installation
1 Install the Gladestone Gander program on your PC. 2 Connect Ethernet Cable to Alexander. 3 Connect Power to Alexander (See chapter LED information). 4 Wait until LED got 2.5Hz status. 5 Invoke Gladestone SW. 6 Select correct HOST address. (Your network IP, not your IP address). 7 Press “Seek” button and the program will scan for the connected Alexander.

3 www.alex-cs.info
The result will look like this:
Note: If several Alexander are connected on same NET then enable “All” checkbox, then program will scan complete NET .0 – 255. Select found IP address (check that MAC address is correct) and press the “Configure” button (Will be enabled when an item is selected). The program will now launch Internet Explorer with URL: http://192.168.1.233/ . If it doesn’t work then open your favorite WEB browser and use the URL as described above. If you don’t have a local network with DHCP, Alexander will get the static IP-address of 192.168.1.71 after at least 2 minutes. To start download server see chapter 2.7.

4 www.alex-cs.info
If succeeded it will look like this:
To get the system up and running you need to setup Server- and System Configuration. Then reboot the system and if the server is working the LED will stop flashing.

5 www.alex-cs.info
2. Configuration
2.1. Client Configuration Start configuration by selecting the “Client Configuration” page, it will look like this:
Normally you don’t need to change anything here. DHCP: Remove this if you would like to set your own ip’s. Servers: should be 1 (Support for several servers is not implemented yet). Keep Alive: Interval between sending dummy bytes to server to prevent it from
dropping the connection when STB or TV is off. Permitted values are 0-99. The function is disabled when the value is 0. Note! Frequent Keep Alive bytes increases the load on the server, do not enable unless you have to.
Receive Timeout: Numbers of seconds to wait for server response on ECM’s and EMM’s. Should be less than 10, but never 0. Not available in Alexander ver 2.
Enable EMM: EMM’s will be sent to server.
6 www.alex-cs.info
User: Username for login to Alexander configuration interface, max 5 characters.
Password: Password for login to Alexander configuration interface, max 5 characters.
Disable crypto: Data to server will not be encrypted, used when connected to proxy-server.
Extend SC timeout: Sends extended command bytes tp smartcard until codeword has received.
Debug Rx/Tx: Used for debugging. Note! If you set the username and password for Alexander configuration interface you must remember these. If you forget them the only way to remove them is to do a factory reset. Press “Submit” to save configuration, “Back” to exit the configuration page. “Reset” will restore all values on the page, can only be used before you press Submit.
2.2. Server Settings Setup your server connection at this page

7 www.alex-cs.info
Address: IP address to the server (URL works, max 31 characters). Port: IP port to the server. [1] Login: User name defined in server configuration file, max 19 characters. [2] Password: Defined in server configuration file, max 19 characters. [3] Key(hex): 14 byte key, will be used to decrypt IP communication must match key in server. [4] Press “Submit” to save configuration, “Back” to exit the configuration page. “Reset” will restore all values on the page, can only be used before you press Submit. References to configuration file newcs.xml. [1] <newcamd_port> section in <device> [2] <name> in section <user> [3] <password> in section <user> [4] <deskey> in section <newcamdserver>

8 www.alex-cs.info
2.3. System Settings Setup what kind of coding system that should be used.
Type: Supported decryption systems are:
Viaccess Boxer Conax Canal Digital, ComHem Videoguard “Not implemented yet” Videoguard-C Viasat (tunneled via Conax CI (Common Interface))
Atr: ATR string that Alexander send to Set-top box.
Press “Submit” to save configuration, “Back” to exit the configuration page. “Reset” will restore all values on the page; can only be used before you press Submit.

9 www.alex-cs.info
ATR’s: Viaccess 3F 67 00 00 C1 14 00 A2 68 90 00 Conax 3B 24 00 80 72 A4 45 3B 24 00 30 42 30 30 ( some boxes require this ATR ) Videoguard 3F 7F 13 25 03 40 B0 0B 69 4C 4A 50 C0 00 00 53 59 00 00 00 Videoguard-C 3B 24 00 80 72 A4 45
10 www.alex-cs.info
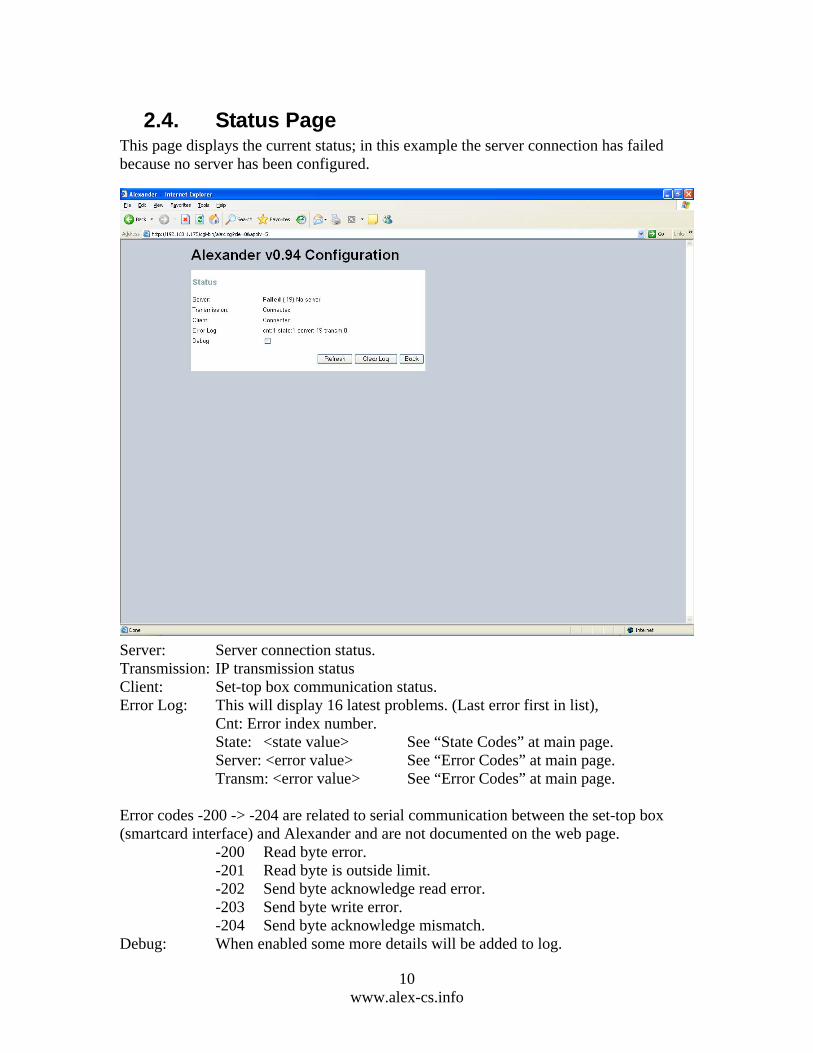
2.4. Status Page This page displays the current status; in this example the server connection has failed because no server has been configured.
Server: Server connection status. Transmission: IP transmission status Client: Set-top box communication status. Error Log: This will display 16 latest problems. (Last error first in list), Cnt: Error index number. State: <state value> See “State Codes” at main page. Server: <error value> See “Error Codes” at main page. Transm: <error value> See “Error Codes” at main page. Error codes -200 -> -204 are related to serial communication between the set-top box (smartcard interface) and Alexander and are not documented on the web page. -200 Read byte error. -201 Read byte is outside limit. -202 Send byte acknowledge read error. -203 Send byte write error. -204 Send byte acknowledge mismatch. Debug: When enabled some more details will be added to log.
11 www.alex-cs.info
Press “Refresh” to update the screen, “Back” to exit the status page. “Clear log” will clear all errors from the log. Note for Alexander ver 2: The list is limited to 16 entries. To get 16 new you have to clear the log.
2.5. Reboot This command is equivalent with powercycling Alexander.
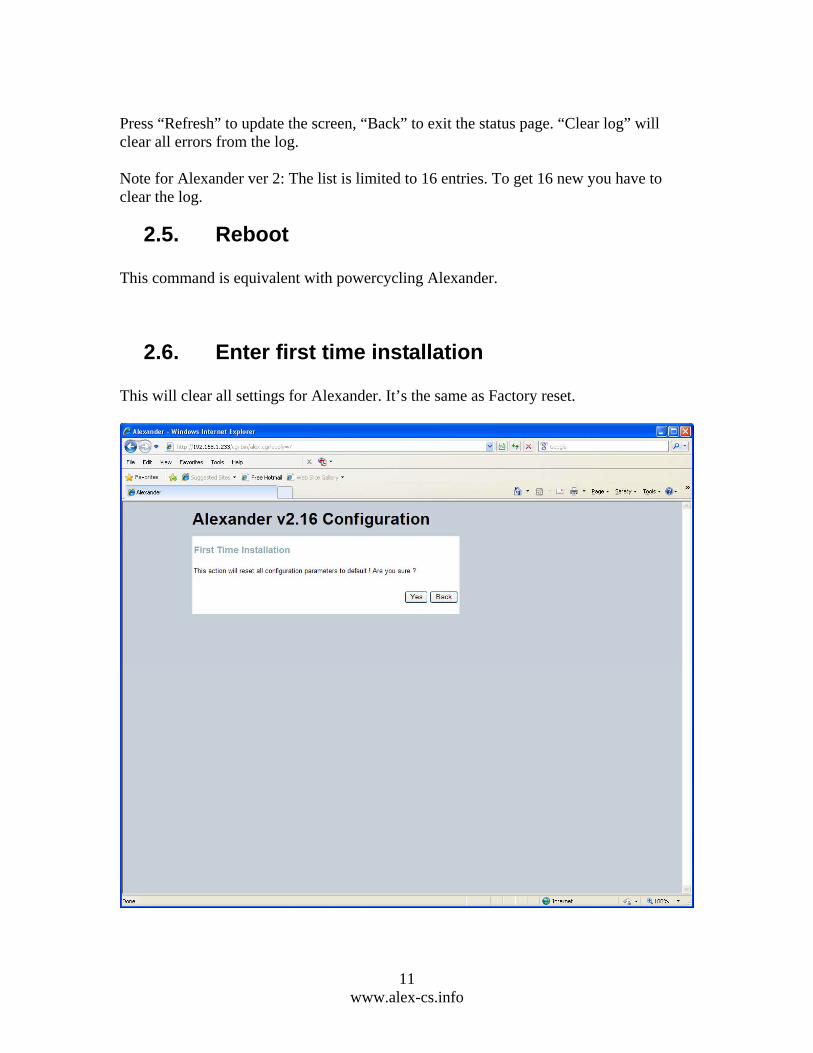
2.6. Enter first time installation This will clear all settings for Alexander. It’s the same as Factory reset.
12 www.alex-cs.info
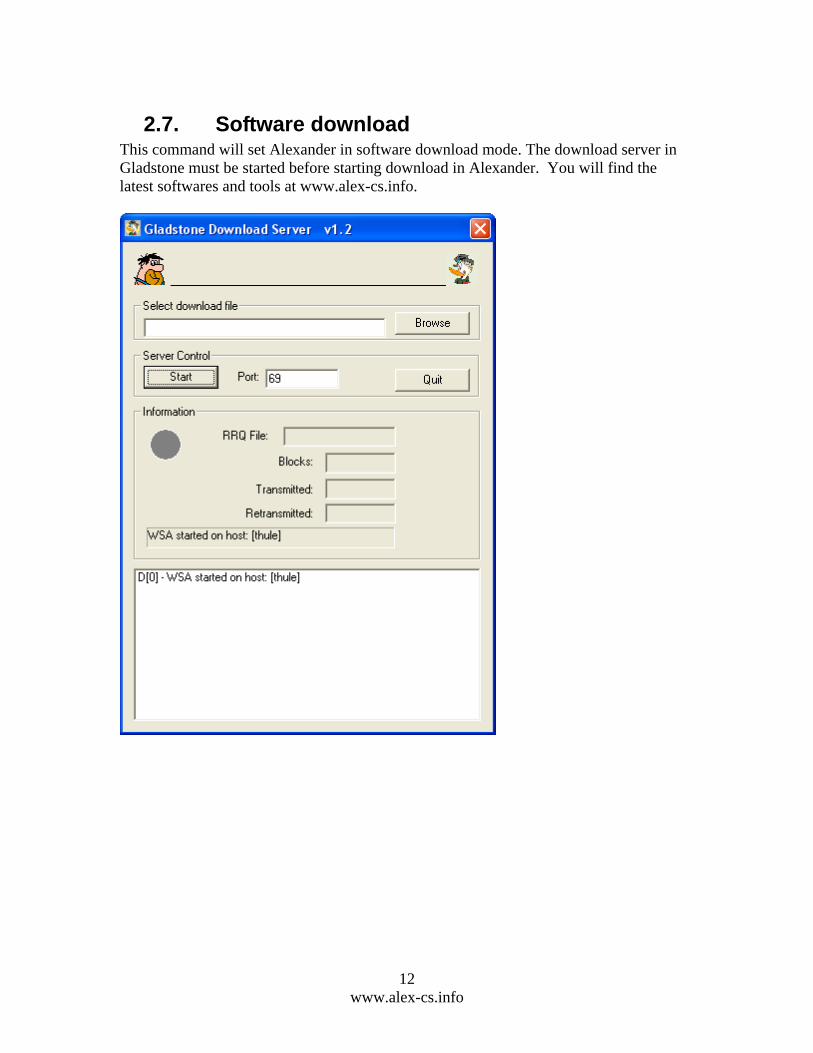
2.7. Software download This command will set Alexander in software download mode. The download server in Gladstone must be started before starting download in Alexander. You will find the latest softwares and tools at www.alex-cs.info.

13 www.alex-cs.info
Pressing YES will set Alexander in software download mode. After reset the LED will be turned on and the bootloader will load new software from Gladstone. Make sure that the Download server is started.

14 www.alex-cs.info
3. LED information 5Hz (every 200ms) Initialization Phase: Module loads configuration parameters and retrieves an IP address via DHCP, if there is no DHCP server available it will timeout after 120 seconds and then using a static IP address (192.168.1.71). 2.5Hz (every 400ms). Connection phase: The module tries to connect the card sharing server and initialize selected decryption module. 1.67Hz (every 600ms). Error from server: Server has reported an error. Permanent Light Module is ready. LED Off – On For every ECM/EMM update the LED is turned off when sending message to server and LED is turned on when it receives result from server. If error occour then LED will flash every 600 ms.

15 www.alex-cs.info
4. Factory reset
Picture of Alexander ver 1. To remove all settings in Alexander, you have to make an electrical connection between the 2 holes showed in the picture. Then power up the unit for 10 seconds, then power down and remove the connection. Alexander will be in the state as it was from factory.
Picture of Alexander ver 2
Connection between these 2 holes.
Connection between these 2 holes.

16 www.alex-cs.info
5. Trouble shooting Description LED is constant on. The unit shows up when scanning with Gladstone, but unable to access it through the web interface. Cause Alex is in boot mode and is waiting for a new SW. Remedy Start the Download server in Gladstone, select a file and press Start. Power cycle Alex and the SW will start to download. Description LED is flashing with 2.5Hz and then off and then the cycle repeats. The unit is difficult to access through the web interface. Cause Alex can not connect to the server and is trying to get a connection by rebooting itself. Remedy Check that the server is online and that the network is working. Power cycle Alex.
6. Revision history Document version Alexander version Comment 1.0 0.94 First draft 1.1 0.998 Client Configuration updated and
Factory reset added 1.2 1.008 Bootloader added 1.3 2.16 Alexander ver 2 1.5 2.16 Reviewed 1.6 2.16 FTI documentation error