allison webber 756580 assignment
DESCRIPTION
assignment 1TRANSCRIPT
1
DIGITAL DESIGN + FABRICATION SM1, 2016 M1 JOURNAL - YOUR PROJECT TITLE
Allison Webber756580
Michelle- group #5
2
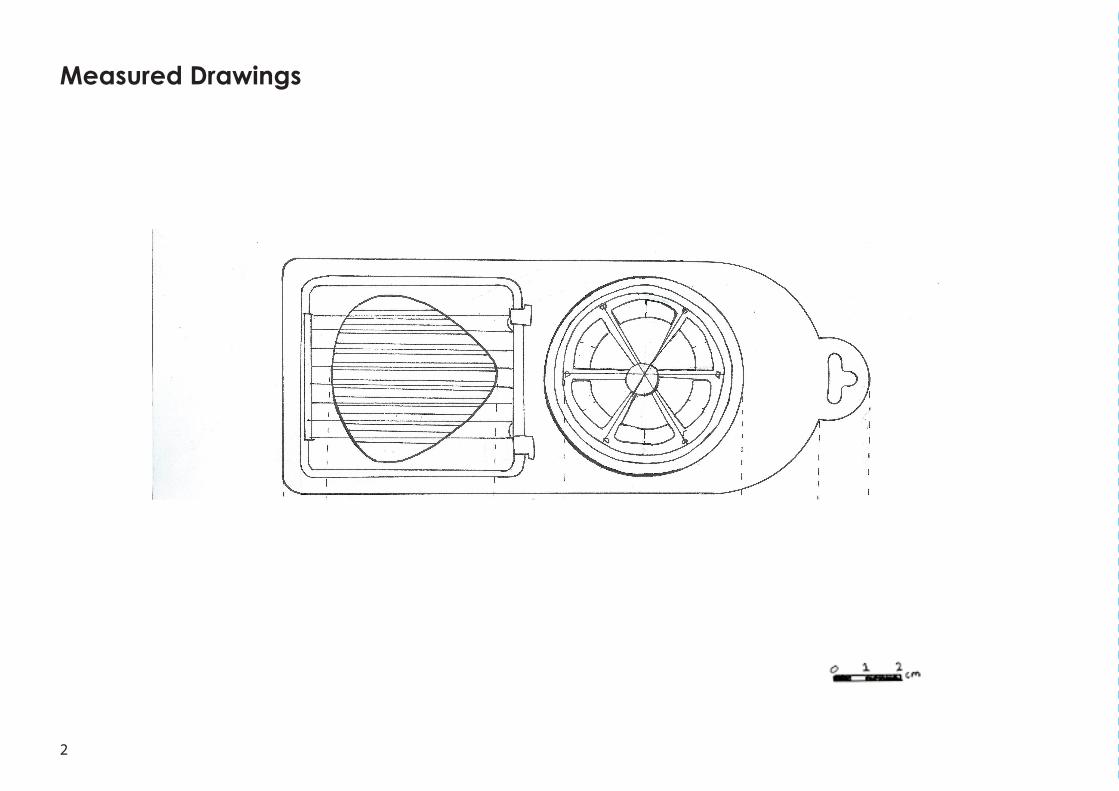
Measured Drawings
3
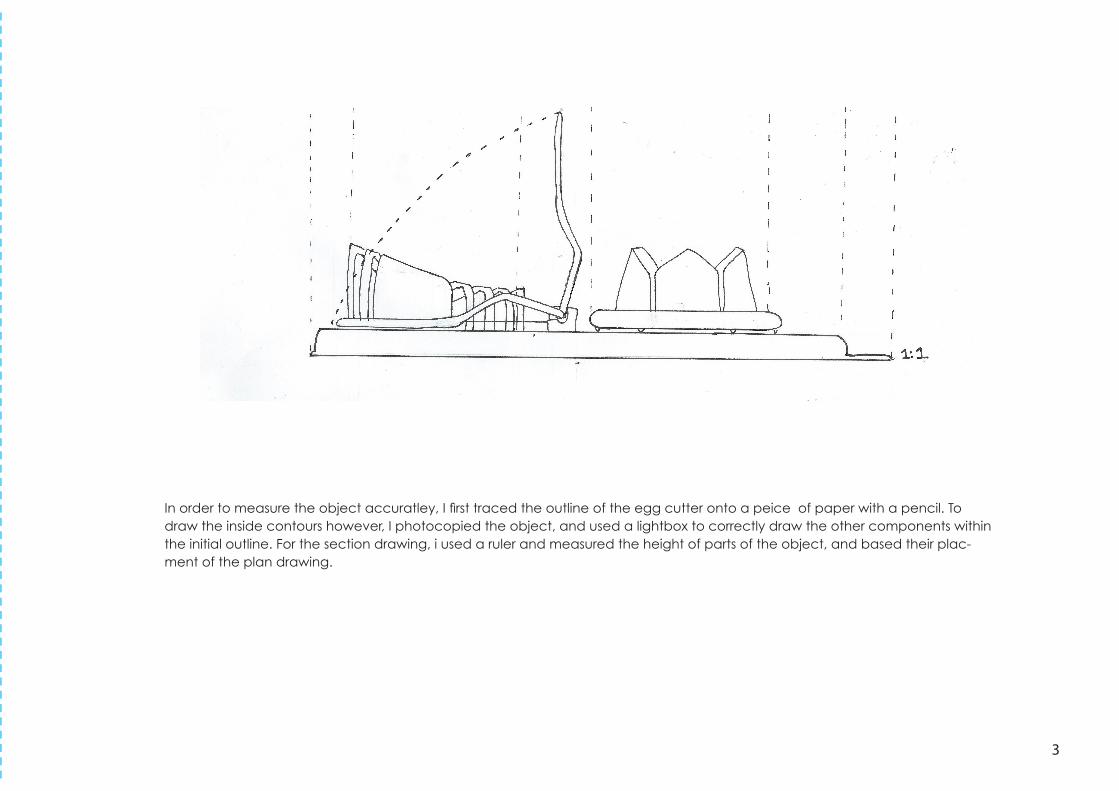
In order to measure the object accuratley, I first traced the outline of the egg cutter onto a peice of paper with a pencil. To draw the inside contours however, I photocopied the object, and used a lightbox to correctly draw the other components within the initial outline. For the section drawing, i used a ruler and measured the height of parts of the object, and based their plac-ment of the plan drawing.

4
Analysis

5
Here, I drew some drawings to analyse the functions of the egg cutter, showing where the egg is positioned in order to be cut, as well as showing the removable round cutter. The shape of the hinge was also very inter-esting, so I sketched it in.
Furthermore, I explored the wires of the cutter, discover-ing that they are actually four loops of wire as oopsed to eight seperate wires, and werespaced apart evenly. The circular rest for the egg is also comprised of six inter-estingly shaped indentical components, and I drew one in isolation to show this.

6
Digital Model

7
In order to model the object, I imported my plan and section drawings with the picture frame tool, and used curves to trace around the outline of the egg cutter. I extruded this curve, and extruded the interior shapes from other curves. To cut the holes, and make the part where the egg sits have its curved hole and seperations for the knife, I used the boolean difference tool, mak-ing a model of an egg to subtract.
Similarly, to make the round egg holder, I first extruded the circu-lar base, and boolean subtracted the egg, as well as the divi-sions in the shape, and making blocks to subtract to create the sloped corners of the shape.
The cutter sections were both modelled seperatley and placed onto the model. The round cutter was made by extruding a circular curve and adding very thin cubes for the wires, and the slicer was made by extruding curves in the shape of the metal cage, and adding the wires in the same way.

8
Sketch Model

9
For my abstracted design, I chose to base its appreance on the seperaated, curved lines of the egg slicer. Here, i tried to visualise how it could look with greater volume, as well as how it would look inverted. To make this model, I first cut a strip of cardstock, and bent it into my desired shape. I did the same for another four of these, and positioned them onto another piece of cardstock to act as a base for the model. Using thinner strips, I made the same shape again with cardstock, al-though intead of attaching it to the base, I inverted it, and positioned it so the thinner strips would sit between them. This was supported by four toothpicks with the points cut off, and attached with blutac.
10
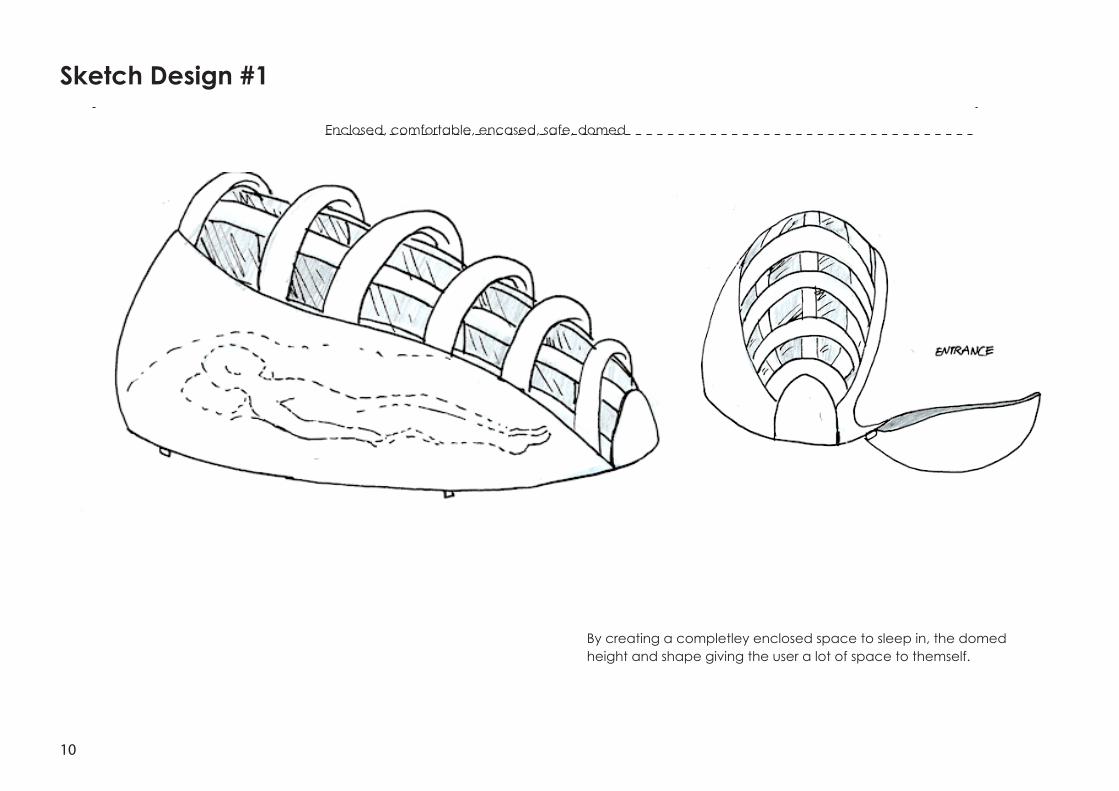
Enclosed, comfortable, encased, safe, domed
Sketch Design #1
By creating a completley enclosed space to sleep in, the domed height and shape giving the user a lot of space to themself.

11
Sketch Design #2
SKETCH YOUR IDEA IN THIS SPACEUSE PLAN, ELEVATION OR ISOMETRIC DRAWING TO HELP YOU EXPLAIN YOUR IDEA. REMEMBER: THERE IS NO BAD IDEA JUST POORLY EXECUTED ONES. YOU CAN INCLUDE ONE INSPIRATION IMAGE - THIS CAN BE YOUR PROTOTYPE/S OR CHOOSE FROM THE LIST
OF PRECEDENT STUDIES ON THE LMS
panelled, openable, hinged, ergonomic, opaque
Through the hinged entry users can be they cant be seen due to the entry being opaque, while the sectioned outside makes it breathable

12
Sketch Design #3open, curved, encasing, breathable
Though the pod is open, the curved wooden panels clearly encase the user, and make it so others cannot get too close.

13

14
Appendix

15