an all-in-one photo enhancer and project maker
TRANSCRIPT

WindowsMacintosh
Quick Start Guide
An all-in-one photo enhancer and project maker.4

ArcSoft PhotoStudio®
The complete photo editing program for the home and office. Tons of ways toimprove your photos, such as brightness, contrast, hue, and saturation. Fixproblems like red-eye, tone and sharpness. Or, apply special effects likesketch, ripple, oil painting and much more. Work with multiple layers to createstunning and dynamic images.
Windows 98/Me/2000/XP. Macintosh OS 8.6/9/X.
ArcSoft PhotoImpression™
A powerful, full-featured image-manipulation program for everyone! Edit, retouch, and enhance images or apply effects with point-'n-click simplicity. Numerous templates for cards and calendars are included. Digital photography has never been so easy and fun!
Windows 98/Me/2000/XP. Macintosh OS 8.6/9/X.
ArcSoft PhotoPrinter®
An advanced printing program that lets you lay out multiple images in manysizes, quickly and effortlessly, on a single sheet of paper. Enhance, crop, applyspecial effects, or add text. Create calendars, or add frames, edges and back-grounds. You can even customize your templates.
Windows 98/Me/2000/XP. Macintosh OS 8.6/9/X.
ArcSoft Panorama Maker™
Instantly stitch multiple photos together and create dynamic panoramic pic-tures. Stitch together images using four style options: vertical, horizontal, 360∫and tiled panoramics. Panorama Maker is the fastest, most effective way tomake panoramic photos from regular photos.
Windows 98/Me/2000/XP. Macintosh OS 8.6/9/X.
ArcSoft PhotoMontage®
Create your own montage masterpieces! PhotoMontage creates a singleimage made up of thousands of micro images. Personalize the main picture byincluding photos of your pets, friends or family.
Windows 98/Me/2000/XP. Macintosh OS 8.6/9/X.
ArcSoft ShowBiz®
A complete movie-making and editing system. ShowBiz is easy to use,designed around a user-friendly interface, full of exciting features, and has ahuge library of effects and sample content. Make home or business movies foremail, the Internet, or CD-ROM, supporting DV camcorders and a wide rangeof file formats. Instant full-screen previews of movies makes it fast and fun!
Windows 98SE/Me/2000/XP.

ArcSoft VideoImpression™
Create multimedia desktop presentations for home, business, and even theInternet like a pro! Edit and enhance video clips and still images, or add cap-tions, sounds, and special effects with a click of the button. Powerful and fea-ture-rich, yet extremely easy to use.
Windows 98/Me/2000/XP. Macintosh OS 8.6/9/X.
ArcSoft PhotoBase™
Manage image, audio, video, HTML, and document files, and create stunningphoto presentations. Tree View works with albums or folders. Produce a slideshow complete with sound and slide transitions, or design your own videopostcard greetings.
Windows 98/Me/2000/XP. Macintosh OS 8.6/9/X.
ArcSoft Multimedia Email™
Create emailable electronic greeting cards with your own content, for alloccasions. Produce stand-alone Windows EXE (program) files to send fromyour email applications, including AOL. Your recipient can easily view yourcard, with stills, video, and animation. Easy-to-use, intuitive step-by-stepprocess lets you make great cards right away.
Windows 98/Me/2000/XP.
ArcSoft Funhouse™
Create fun digital scenes - put yourself on a magazine or launch yourselfinto space. Be a rock star or a star quarterback. Print your Funhouse images,or send them to friends and family directly from the program using AOL oranother MAPI-compliant mail program.
Windows 98/Me/2000/XP. Macintosh OS 8.6/9/X.
ArcSoft Greeting Card Creator™
Greeting cards for all occasions can be made with this application.Personalize them with your own designs, photos, and clip art. Email themdirectly or print them out for display. Built-in layouts and greetings do half the work for you.
Windows 98/Me/2000/XP.
ArcSoft PhotoBase™ - Mobile Edition
Take your photos on-the-go, with ArcSoft PhotoBase for Pocket PC, andArcSoft PhotoBase for Palm® OS. Manage photos, play slide shows, sharewith other handhelds, and do simple editing. Works with standard system features such as folders and categories. Write notes on your photos with the stylus.
Installs from Windows 98/Me/2000/XP.
For more details, please visit www.arcsoft.com


ArcSoft Inc. is a leading global provider or digital
imaging technologies and services for business and
consumer use. The company develops world-class
scalable imaging software and infrastructure solutions
for internet and network environments, delivering
fully integrated, comprehensive visual capabilities
to corporate Web sites in all major markets. Its
award-winning desktop software is licensed to
leading global manufacturers of still and video
cameras,wireless and mobile devices, printers,
scanners and headquartered in Fremont, California,
ArcSoft has research and development centers in
California’s Silicon valley and Hangzhou, China, as
well as sales and support offices throughout Asia,
Europe and the Americas.
About ArcSoft
ArcSoft Inc.46601 Fremont Blvd., Fremont, CA 94538 USATel: 1.510.440.9901 • Fax: 1.510.440.1270www.arcsoft.com

The following is a legal software license agreement between you,the software end user, and ArcSoft, Inc. Carefully read this licenseagreement before using the product. Using the product indicates thatyou have read this license agreement and agree to its terms. If you donot agree to the terms, promptly return the package to the place it waspurchased within 10 days of the date you acquired it for a full refund.
Grant of License. This license permits you to use one copy of thesoftware included in this package on any single computer. For eachsoftware licensee, the program can be in use on only one computerat any given time. The software is in use when it is either loaded intoRAM or installed into the hard disk or other permanent memory.
A multi-seat license permit from ArcSoft is required if the programis going to be installed on a network server for the sole purpose ofdistribution by other computers, or if the program is going to beinstalled on and used by more than one computer.
Copyright. The software contained in this package is owned by ArcSoftand is protected by United States copyright laws, international treatyprovisions, and all other applicable national laws. The software mustbe treated like all other copyrighted materials (e.g. books and musicalrecordings). This license does not allow the software to be rented orleased, and the written materials accompanying the software (if any)may not be copied.
Limited Warranty. ArcSoft, Inc., warrants that the software containedherein will perform substantially in accordance with the accompanying
Software Licensing Agreement

documentation. No Other Warranties. ArcSoft disclaims all otherwarranties, either express or implied, including but not limited to impliedwarranties of merchantability and fitness for a particular purpose, withrespect to the software, the accompanying written materials, and anyaccompanying hardware (if any).
No Liability for Consequential Damages. In no event shall ArcSoft orits suppliers be liable for any damages whatsoever (including but not liited to damages for loss of business profits, business interruption,loss of business information, or any other pecuniary loss) which resultfrom an inability to use this software, even if ArcSoft, Inc. has beenadvised of the possibility of such damages. Because some states andjurisdictions do not allow the exclusion or limitation of consequential orincidental damages, the above limitations may not apply to you.
U.S. Government Restricted Rights. The software and documentationare provided with Restricted Rights. Use, duplication, or disclosure bythe U.S. Government is subject to restrictions as set forth in subpara-graph (c)(1)(ii) of the Rights in Technical Data and Computer Softwareclause at DFARS 252.227-7013 or subparagraphs (c)(1),(2), and (3)of the Commercial Computer Software - Restricted Rights at 48 CFR52.227-19, as applicable, and any amendments thereto. The manufac-turer is ArcSoft, Inc., 46601 Fremont Blvd., Fremont, CA 94538.
If this product was purchased in the United States, this Agreement isgoverned by the laws of the State of California; otherwise, local lawsmay apply.
Software Licensing Agreement


Welcome to ArcSoft PhotoImpression . . . . . . . . . .2
Highlights of ArcSoft PhotoImpression . . . . . . . .3
System Requirements . . . . . . . . . . . . . . . . . . . . . . . . . .4
Installing ArcSoft PhotoImpression . . . . . . . . . . . .5
Working with ArcSoft PhotoImpression . . . . . . . .6
Getting Started . . . . . . . . . . . . . . . . . . . . . . . .6
Options on the Main Screen . . . . . . . . . . . . . .7
Opening an Image from a Disk Drive . . . . . .9
Acquiring Images from a TWAIN Device . .10
Working with Albums . . . . . . . . . . . . . . . . . .11
Editing Images . . . . . . . . . . . . . . . . . . . . . . . .12
Creative Project Templates . . . . . . . . . . . . . .17
Saving Images . . . . . . . . . . . . . . . . . . . . . . . .19
Printing Images . . . . . . . . . . . . . . . . . . . . . . .20
Getting Help . . . . . . . . . . . . . . . . . . . . . . . . .21
Table of Content

ArcSoft PhotoImpression™ is an easy-to-use image-editing program specifically designed for generalconsumers. The program enables you to edit, retouch,enhance or add special effects to digital images withpoint-n-click simplicity. From cookie-cutter prints and calendars to greeting cards and contact sheets,PhotoImpression brings you a complete photo editor andproject-maker that’s both rich in features and easy to use.
2
1 Welcome to ArcSoft PhotoImpression
• A robust, easy-to-understand graphical user interface ensuresthat you can learn the program in the shortest time possible.
• Powerful, comprehensive editing and retouching tools provide atotal digital image-editing solution.
• A wide variety of special effect and enhancement options giveyou the incredible power to manipulate images like a pro.
• Huge collections of frames, brushes and shapes let you add anartistic appeal to your images.
• An easy-to-use text tool allows you to add catchy titles andcaptions to images. You can even add a shadow to create a 3-D effect.
• A dynamic image layer feature enables you to work on onespecific image layer at a time without affecting the whole picture.
• Multiple undo/redo functionality makes it possible for you toexperiment with various commands and options without thefear of making irreversible errors.
• Huge assortments of project templates enable you to createcustomized greeting cards and calendars with your ownimages.
• TWAIN compliance allows you to acquire images directly fromdevices such as digital cameras and scanners.
3
2 Highlights of ArcSoft PhotoImpression

For Windows:
• Windows 98/Me/2000/XP
• Pentium-based processor or equivalent(Pentium II 300 or equivalent recommended)
• 275 MB free hard disk space
• 64 MB RAM (128 MB recommended)
• 16-bit color display at 800 x 600
For Macintosh
• Macintosh OS 8.6/9/X
• Power PC
• 275 MB free hard disk space
• 64 MB RAM (128 MB recommended)
• 16-bit color display at 800 x 600
4
3 System Requirements

For Windows:
1. Insert the ArcSoft PhotoImpression CD into yourCD-ROM drive. The software will start runningautomatically on your system.
2. Follow the instructions onscreen to complete theinstallation.
Note: If the Autorun feature on your PC is turned off, you’ll haveto install the software manually by taking the following steps:
1. Insert the CD into your CD-ROM drive.
2. Click Start>Run.
3. In the Run dialog box, type in D:/Setup.exe (where "D" is yourCD-ROM drive).
4. Click OK.
5. Follow the instructions onscreen to complete the installation.
For Macintosh:
1. Insert the CD into your CD-ROM drive. A CD-ROM iconwill appear onscreen.
2. Double-click the CD-ROM icon. A window entitled“PhotoImpression” will pop up.
3. In the PhotoImpression window, double-click thePhotoImpression Installer. The installation will start.
4. Follow the instructions onscreen to complete the installation.
5
4 Installing ArcSoft PhotoImpression

6
5
Getting Started For Windows:
1. Click Start.
2. Select Programs>ArcSoft PhotoImpression 4>PhotoImpression 4. The PhotoImpression MainScreen will appear on your desktop.
For Macintosh:
1. Locate the PhotoImpression folder on your hard drive,and double-click to open it.
2. In the PhotoImpression window, find the PhotoImpressionprogram icon, and double-click it. The program will start.
Working with ArcSoft PhotoImpression
MagnificationControls
Command
Buttons
NavigationWindow
Toolbar
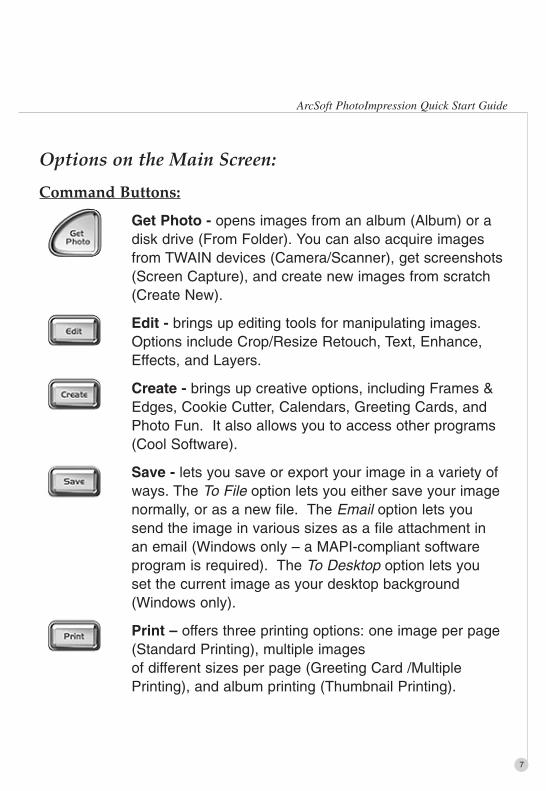
Options on the Main Screen:
Command Buttons:
Get Photo - opens images from an album (Album) or adisk drive (From Folder). You can also acquire imagesfrom TWAIN devices (Camera/Scanner), get screenshots(Screen Capture), and create new images from scratch(Create New).
Edit - brings up editing tools for manipulating images.Options include Crop/Resize Retouch, Text, Enhance,Effects, and Layers.
Create - brings up creative options, including Frames &Edges, Cookie Cutter, Calendars, Greeting Cards, andPhoto Fun. It also allows you to access other programs(Cool Software).
Save - lets you save or export your image in a variety ofways. The To File option lets you either save your imagenormally, or as a new file. The Email option lets yousend the image in various sizes as a file attachment inan email (Windows only – a MAPI-compliant softwareprogram is required). The To Desktop option lets you set the current image as your desktop background(Windows only).
Print – offers three printing options: one image per page(Standard Printing), multiple imagesof different sizes per page (Greeting Card /MultiplePrinting), and album printing (Thumbnail Printing).
ArcSoft PhotoImpression Quick Start Guide
7
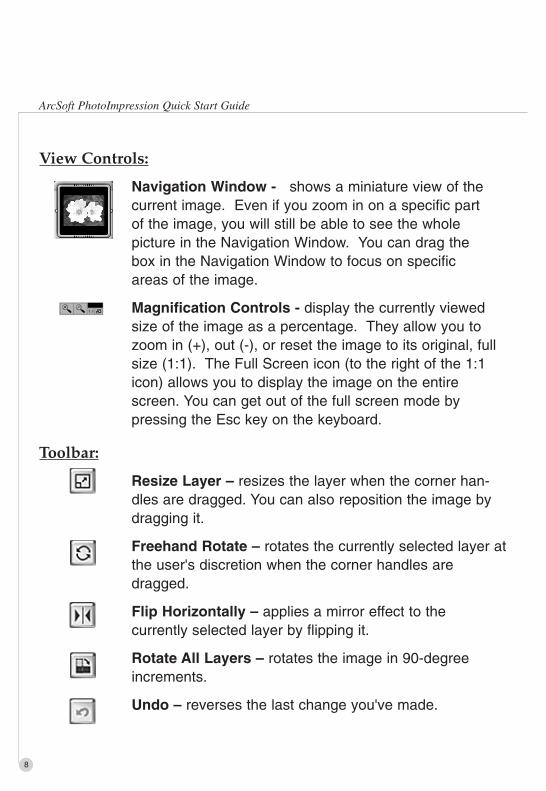
View Controls:
Navigation Window - shows a miniature view of the current image. Even if you zoom in on a specific partof the image, you will still be able to see the wholepicture in the Navigation Window. You can drag thebox in the Navigation Window to focus on specificareas of the image.
Magnification Controls - display the currently viewed size of the image as a percentage. They allow you tozoom in (+), out (-), or reset the image to its original, fullsize (1:1). The Full Screen icon (to the right of the 1:1icon) allows you to display the image on the entirescreen. You can get out of the full screen mode bypressing the Esc key on the keyboard.
Toolbar:
Resize Layer – resizes the layer when the corner han-dles are dragged. You can also reposition the image bydragging it.
Freehand Rotate – rotates the currently selected layer atthe user's discretion when the corner handles aredragged.
Flip Horizontally – applies a mirror effect to thecurrently selected layer by flipping it.
Rotate All Layers – rotates the image in 90-degreeincrements.
Undo – reverses the last change you've made.
ArcSoft PhotoImpression Quick Start Guide
8

Redo – reverses the last action you’ve undone.
Copy – copies the selected area, layer, or image ontothe Clipboard.
Paste – pastes what’s on the Clipboard onto the selectedimage as a new layer.
Delete Layer – deletes the currently selected layer.
Close Image – closes the currently selected image.
Opening an Image from a Disk Drive
You can open an image that is stored on your hard drive or anyremovable media.
1. Click the Get Photo button on the Main Screen, and select FromFolder.
2. Click the Browse button to select the desired drive or folder.Once you select it, you'll see the images within the folder appearas thumbnails on the screen.
3. Highlight the desired file, and then click Ok.
ArcSoft PhotoImpression Quick Start Guide
9
Acquiring Images from a TWAIN Device
PhotoImpression accepts images acquired via standard TWAINdevices.
1. Click the Get Photo button on the Main Screen, and selectCamera/Scanner. A list of your TWAIN devices will appear.
2. Select your desired device from the Select Source pull-down.
3. Select the album to which you wish to link the acquired image(s).
4. Click the Acquire Options button to set your acquire parameters:
a. Specify the file format for the acquired images.
b. Specify the save directory for the acquired images.
c. Choose whether or not to retain the original file format (forexample, some cameras may save in a specific format—youcan have the program convert the files to an option of yourchoice, or retain the original format).
d. Set the file names for the incoming files. You can choose tohave the program automatically name the files using the cur-rent date, or you can specify your own unique file name.
5. Click the Acquire button if you are capturing from a still camera orscanner; click the Video Camera button if you are capturing a stillfrom a video. Follow the procedures specific to your device to importthe image into PhotoImpression.
ArcSoft PhotoImpression Quick Start Guide
10
Working with Albums
Photo albums allow easy identification and access to images forviewing, editing, printing, etc. Simply click on the Get Photo buttonon the Main Screen, and select Album to view the album options. It isimportant to remember that albums do not store images. When analbum is created, thumbnails are generated and a reference to wherethe files are located is recorded in the album file. For example, if athumbnail is added into an album from a floppy disk, that floppy diskmust be in the floppy drive in order to view the file.
Album Tools:
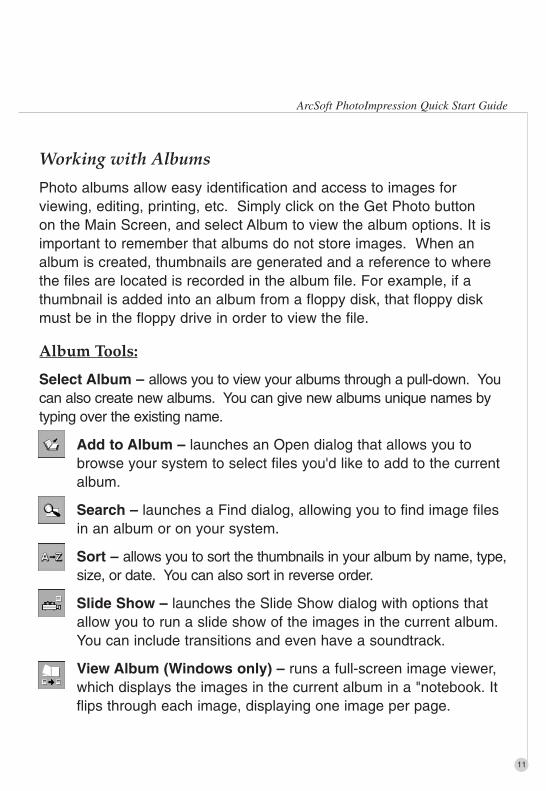
Select Album – allows you to view your albums through a pull-down. Youcan also create new albums. You can give new albums unique names bytyping over the existing name.
Add to Album – launches an Open dialog that allows you tobrowse your system to select files you'd like to add to the currentalbum.
Search – launches a Find dialog, allowing you to find image filesin an album or on your system.
Sort – allows you to sort the thumbnails in your album by name, type,size, or date. You can also sort in reverse order.
Slide Show – launches the Slide Show dialog with options thatallow you to run a slide show of the images in the current album.You can include transitions and even have a soundtrack.
View Album (Windows only) – runs a full-screen image viewer,which displays the images in the current album in a "notebook. Itflips through each image, displaying one image per page.
ArcSoft PhotoImpression Quick Start Guide
11

ArcSoft PhotoImpression Quick Start Guide
12
Album Screen Saver (Windows only) – lets you make a ScreenSaver Slide Show for your system.
Delete – removes the selected thumbnail(s) from your album.You have the option of removing only the thumbnails or both thethumbnails and the actual image files. Removing the image fileswill delete them permanently from your system.
Editing Images
Click the Edit button on the Main Screen to display the variousediting options.
Crop/Resize:
Rectangle - allows you to select a rectangular area on an image.
Circle - works the same as the Rectangle tool except a circle isdrawn instead of a rectangle.
Polygon - allows you to make a "freehand" selection by clickingand dragging over the image in a desired path or shape. You canselect a polygonal area by clicking on the points of the desiredshape in a connect-the-dots fashion.
Magic - selects an area of an image based on color similarity.
Inverse - inverts the selection on an image. For example, ifyou’ve created a rectangular selection and then used the Inversetool, the area selected would be outside of the box instead ofinside.
Copy Selection As New Layer - creates a new layer out ofthe selected area.

Soft Edge Slider - gives cropped edges a warm fade basedon the position of the slider.
Apply To All Layers - crops all layers to the selected area when checked.
Crop – crops the image to only show areas that have been selected.
Width – displays the current image's width in pixels. You can changethis to any desired value to resize the image.
WScale – displays the image width as a percentage, with "100" beingthe current actual image width. You can change this to any desiredvalue to resize the image. For example, if you changed it to "50," thenew image width would be half the size of the original.
Height – displays the current image's height in pixels. You can changethis to any desired value to resize the image.
Hscale – displays the image height as a percentage, with "100" beingthe current actual image height. By changing this, you can change theheight of the image. For example, if you changed it to "200," the newimage height would be twice the size of the original.
Keep Aspect Ratio – retains the original image proportions when you change either the width or the height. For example, when this box ischecked and you change the pixel width of the image, the program willautomatically adjust the pixel height to maintain proper image propor-tion (otherwise you'd get a distorted image). You'll almost always wantthis box checked.
Resize – finalizes any resizing that you’ve done.
ArcSoft PhotoImpression Quick Start Guide
13

Retouch:
Brush Palette – offers various sizes for certain editingtools. The larger the brush size, the larger the affectedarea when a tool is used. The Intensity slider adjusts thedegree of effect applied.
Color Palette – offers various colors for use when paint-ing or doing other color editing. The two color squares onthe left of the Color Palette show you the active (top) andalternative (bottom) colors. You can change the alterna-tive color to the active color simply by clicking on it.
Paintbrush – turns the mouse pointer into a paintbrush tip andapplies an opaque layer of the active color to the current layer.
Pen – works similar to the Paintbrush tool but draws like a felt-tippen or marker.
Airbrush – simulates the effect of a spray can, putting a lightlayer of color on the active layer.
Eraser – removes color on a layer, making it a transparent back-ground (white).
Clone – duplicates a selected area of an image to another loca-tion. Right-click (Windows) or Shift-click (Macintosh) to select theclone source, which will be indicated by a plus (+) sign. Then clickand drag over the area of the image to be painted with the clonesource.
Smudge – simulates the effect of a finger smearing wet paint.
Red Eye – reduces the red-eye effect common in flash =photography.
ArcSoft PhotoImpression Quick Start Guide
14

ArcSoft PhotoImpression Quick Start Guide
15
Blur – smoothes rough edges.
Sharpen – sharpens fuzzy areas.
Darken – lowers brightness.
Lighten – raises brightness.
EyeDropper – lets you set a color on your image as the active color.
Bucket Fill – covers the area you click on (based on color similarity)with the active color.
Pattern Fill – fills a layer or image with a selected pattern.
Gradient Fill – fills the current image or layer with a gradientfrom the alternative color to the active color. Select the desiredcolors in the Color Palette, click at the point where you want thegradient to start, and drag to designate the length and direction ofthe transition.
Text:
When text is added, a new layer will be automatically created. Settingsinclude font, style, size, and color. You can add a shadow to the text as well.
Enhance:
Auto Enhance – applies a quick, overall enhancement to animage with one click.
Brightness/Contrast – allows you to adjust the brightness andcontrast of the current layer.
Hue/Saturation – allows all the colors on the same layer to beshifted by the same degree (hue), and adjusts the intensity of thecolors (saturation).

Tone – can be used to adjust the highlight, midtones, and shad-ow of the selected layer. It offers more control than Brightness/Contrast.
Blur – decreases the contrast between adjacent pixels, creating afuzzy effect over the entire layer.
Sharpen – pixelates the entire layer, eliminating smoother edgesin the image.
Equalization – evenly redistributes the grayscale or colorvalues of the pixels in an image. The effects are varied dependingon the image, but in general, the lines in the highlight and shadowareas will be sharpened.
Negative – inverts the grayscale or color brightness values forthe entire layer. This will make your image look like a photograph-ic negative.
Effects:
PhotoImpression includes a variety of special effects to transformimages in a number of interesting ways. Click on a desired effect topreview it on your image. You can use the Intensity slider to adjust theintensity of the effect. To keep the effect, click Apply. To cancel, chooseany other effect or click a different button.
ArcSoft PhotoImpression Quick Start Guide
16

ArcSoft PhotoImpression Quick Start Guide
17
Layers:
The Layers Palette shows thumbnails of each layer. The currentlyselected layer will have a highlight around the thumbnail. Toggling thegreen light above the thumbnail on and off displays and hides the layer,respectively. The slider above the thumbnail adjusts the transparency ofthe layer.
Note: An image can have multiple layers. You can retain separation of the multiple layers ofan image only if it is saved as a PSF file.
Creative Project Templates
Click on the Create button on the Main Screen to see the createoptions.
Frames & Edges:
You can add a frame or edge to an image by selecting the option youwish, and then clicking Apply. (You can preview different options beforesettling on a particular one.)
Cookie Cutter:
You can "stamp" out a template of your image by selecting the shapeyou want to use, and then clicking Apply.
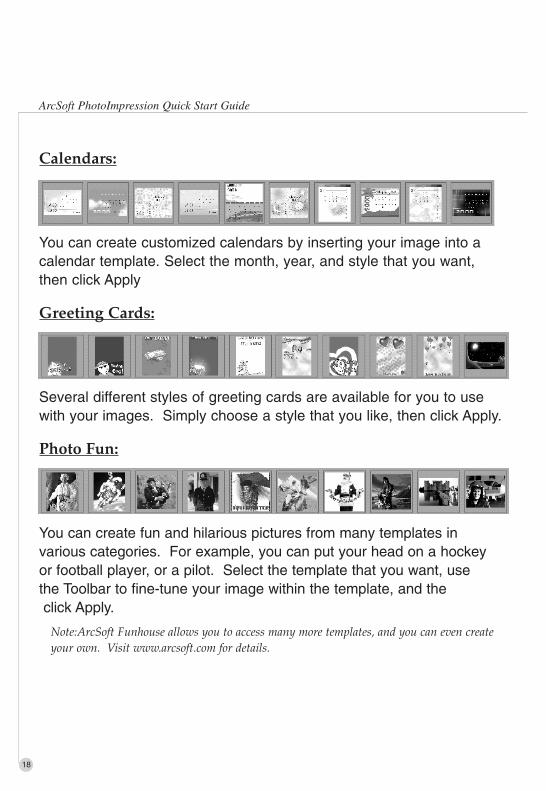
Calendars:
You can create customized calendars by inserting your image into acalendar template. Select the month, year, and style that you want,then click Apply
Greeting Cards:
Several different styles of greeting cards are available for you to usewith your images. Simply choose a style that you like, then click Apply.
Photo Fun:
You can create fun and hilarious pictures from many templates invarious categories. For example, you can put your head on a hockeyor football player, or a pilot. Select the template that you want, usethe Toolbar to fine-tune your image within the template, and theclick Apply.
Note:ArcSoft Funhouse allows you to access many more templates, and you can even createyour own. Visit www.arcsoft.com for details.
ArcSoft PhotoImpression Quick Start Guide
18
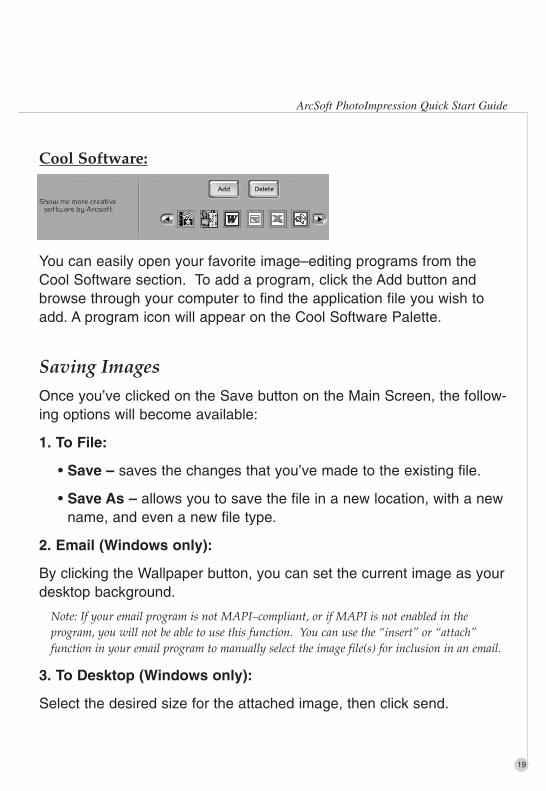
Cool Software:
You can easily open your favorite image–editing programs from theCool Software section. To add a program, click the Add button andbrowse through your computer to find the application file you wish toadd. A program icon will appear on the Cool Software Palette.
Saving Images
Once you’ve clicked on the Save button on the Main Screen, the follow-ing options will become available:
1. To File:
• Save – saves the changes that you’ve made to the existing file.
• Save As – allows you to save the file in a new location, with a newname, and even a new file type.
2. Email (Windows only):
By clicking the Wallpaper button, you can set the current image as yourdesktop background.
Note: If your email program is not MAPI–compliant, or if MAPI is not enabled in theprogram, you will not be able to use this function. You can use the “insert” or “attach”function in your email program to manually select the image file(s) for inclusion in an email.
3. To Desktop (Windows only):
Select the desired size for the attached image, then click send.
ArcSoft PhotoImpression Quick Start Guide
19
Printing Images
PhotoImpression provides three different print options:
Standard Printing
Prints one image on a page. You can add a title, center theimage and title, change the paper orientation, add a frame(a black outline) around the image, resize the image, andselect the number of copies (Windows only) that you want
printed. You can also crop your print to preset dimensions. Select yourcrop area from the Select Crop Templates pull–down. The Auto Rotateand Auto Crop buttons can be clicked to have your image maximizedfor the largest possible print. The Nudge command can be used tomake minor alignment adjustments to the top and/or left margins inpixels or 1/64" increments. Check the PIM box to enable PIM (EpsonPRINT Image Matching) printing. This option will only be available ifthe image has PIM information and you have a PIM printer. PIMimages print at a much higher quality than standard images,but take longer to do so. Also, PIM is not available for all versionsof PhotoImpression.
Greeting Card / Multiple Printing
Prints more than one image per page. There are severaltemplates for you to choose from, one set which consistsof greeting card layouts. Your albums will be displayedso if you can easily drag and drop images to specific areas
on the selected template. Click the Add All button to add all of theimages in the current album to the current template. PhotoImpressionsupports the printing of multiple pages at one time, so you have moreimages than cells on your template, new pages will be made to accommodate all of your images. You can scroll through each page to
ArcSoft PhotoImpression Quick Start Guide
20
preview them. At this point, you can also add text to images just forprinting. Auto Rotate, Auto Crop, and Nudge commands are available.
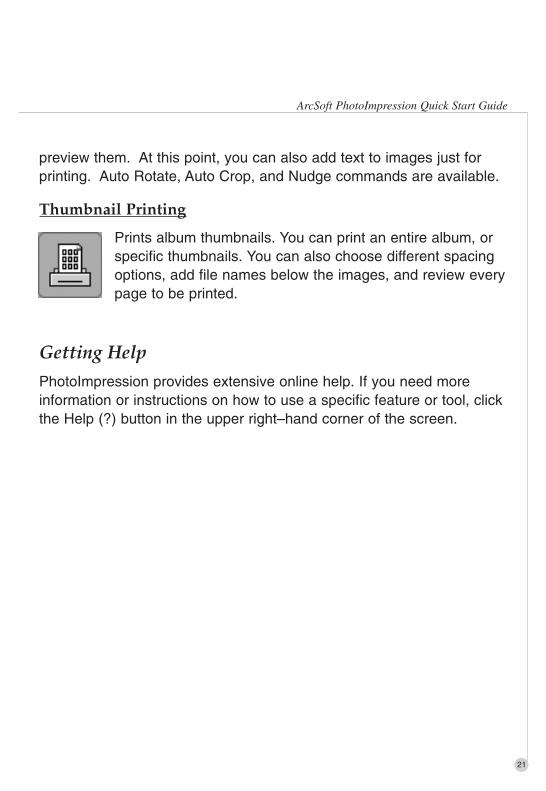
Thumbnail Printing
Prints album thumbnails. You can print an entire album, orspecific thumbnails. You can also choose different spacingoptions, add file names below the images, and review everypage to be printed.
Getting Help
PhotoImpression provides extensive online help. If you need moreinformation or instructions on how to use a specific feature or tool, clickthe Help (?) button in the upper right–hand corner of the screen.
ArcSoft PhotoImpression Quick Start Guide
21

Copyright 1999-2003 by ArcSoft, Inc. All rights reserved. ArcSoft PhotoImpression is a trademark of ArcSoft, Inc.All other brands and product names are trademark or registered trademarks of their respective holders.
How to Register:Register your program online at www.arcsoft.com.
Quick Start Guide:Edit by Steve ToribioLayout and design by Vickie Wei
N. America
46601 Fremont BlvdFremont, CA 94538Tel: 1.510.440.9901Fax: 1.510.440.1270Website: www.arcsoft.comEmail: [email protected]
Central EuropeUnit 14, Shannon Industrial EstateShanon, Co. Clare, IrelandTel: +353 (0) 61-702087Fax: +353 (0) 61-702001Email: [email protected]
JapanJapan Support CenterM.D.S., Inc.JTT Building 3F3-3-4 Ueno, Taito-kuTokyo 101-0005, JapanTel: +81-3-3834-5256Fax: +81-3-5816-4730Website: www.arcsoft.jpEmail: [email protected]
ChinaArcSoft Beijing Co., Ltd.No. 6 South Capital Gym RoadBeijing New Century Hotel Office Building#1060Beijing 100044, ChinaTel: 8610-68491368Email: [email protected]
TaiwanArcSoft Inc. Taiwan BranchTel: +886 (0) 2-27181869Fax: +886 (0) 2-27190256Email: [email protected]
Latin AmericaTel (Brazil): 00817-200-0709Tel (Chili): 800-202-797Email: [email protected]
ArcSoft Inc. Worldwide Customer Support Contacts
Visit our website at www.arcsoft.com