an introduction to the m9 pistol and basic pistol marksmanship
TRANSCRIPT

An Introduction To The M9 Pistol And Basic Pistol Marksmanship
M9 Pistol Basics M9 Pistol Basics PistolPistol
M9 Pistol is a 9-MM, semi-automatic,
magazine fed, recoil-operated, double-
action gun.
The magazine holds up to 15 rounds.


SAFETY FEATURES SAFETY FEATURES • To prevent accidental discharge:
o De-cocking/safety levero Firing pin block o Half-cock hammer notch
WARNINGWARNINGThe half-cocked position catches the hammer The half-cocked position catches the hammer
and stops your gun from firing if the hammer is and stops your gun from firing if the hammer is
released after manually cocking your gun. The released after manually cocking your gun. The
half-cocked position is NOT considered a safety half-cocked position is NOT considered a safety
position as if you pull the trigger from the half-position as if you pull the trigger from the half-
cocked position the M9 will fire. cocked position the M9 will fire.

FUNDAMENTALSFUNDAMENTALS• Engaging the enemy closely with quick and
accurate fire is the main purpose for a pistol. Knowing how to accurately shoot can only be accomplished by knowing and using the fundamentals of marksmanship.

THE ELEMENTS OF THE ELEMENTS OF COMBAT PISTOL COMBAT PISTOL MARKSMANSHIPMARKSMANSHIP
• Proper Grip• Aiming• Breath control• Trigger squeeze• Target engagement• Shooting Positions

GRIPGRIPYour Pistol should be thought of as an extension of
your hand and arm. Using your finger to point at an object is a good analogy.

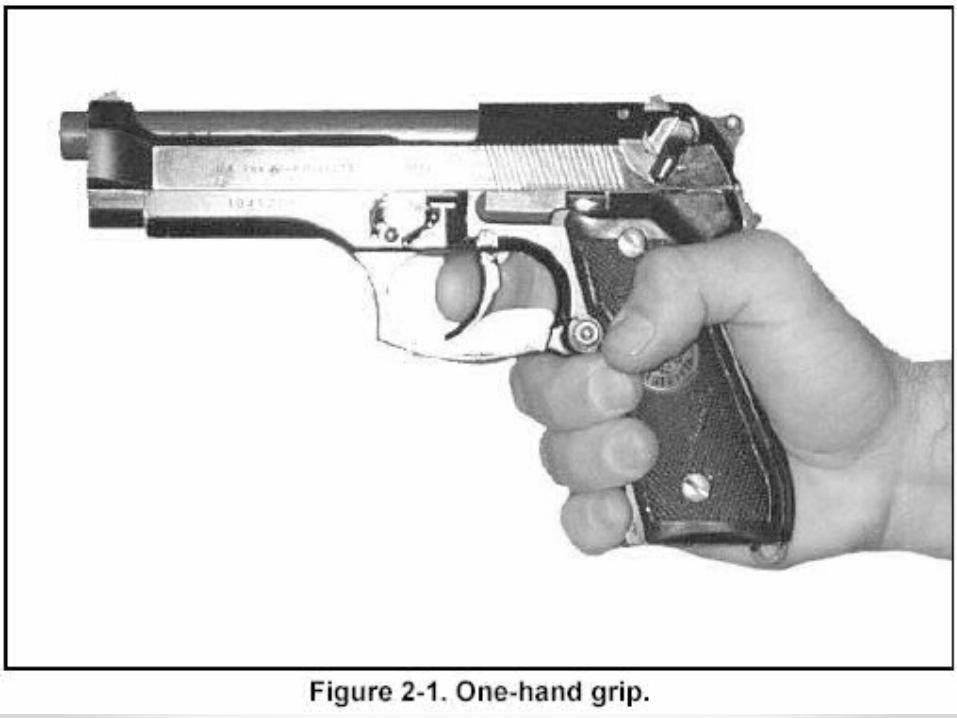
ONE-HAND GRIPONE-HAND GRIPHold the pistol in the non-firing hand and with the firing hand form a V with the thumb and forefinger. Place the pistol in the V and wrap the firing hand around the pistol. Grip the pistol tightly until you begin to tremble; relax until the trembling has stopped. At this point, the necessary pressure for a proper grip is being applied.

FIST GRIPFIST GRIPGrip the pistol with the one-hand grip; close the fingers of the non-firing hand over the fingers of the firing hand. You should make sure that the index finger of the non-firing hand is between the middle finger of the firing hand and the trigger guard. Place the thumb of the non-firing hand alongside the thumb of the firing hand.

PALM-SUPPORTED PALM-SUPPORTED GRIPGRIP
Grip the pistol with the one-hand grip. Place the non-firing hand under the firing hand, wrapping the non-firing hand around the firing hand.

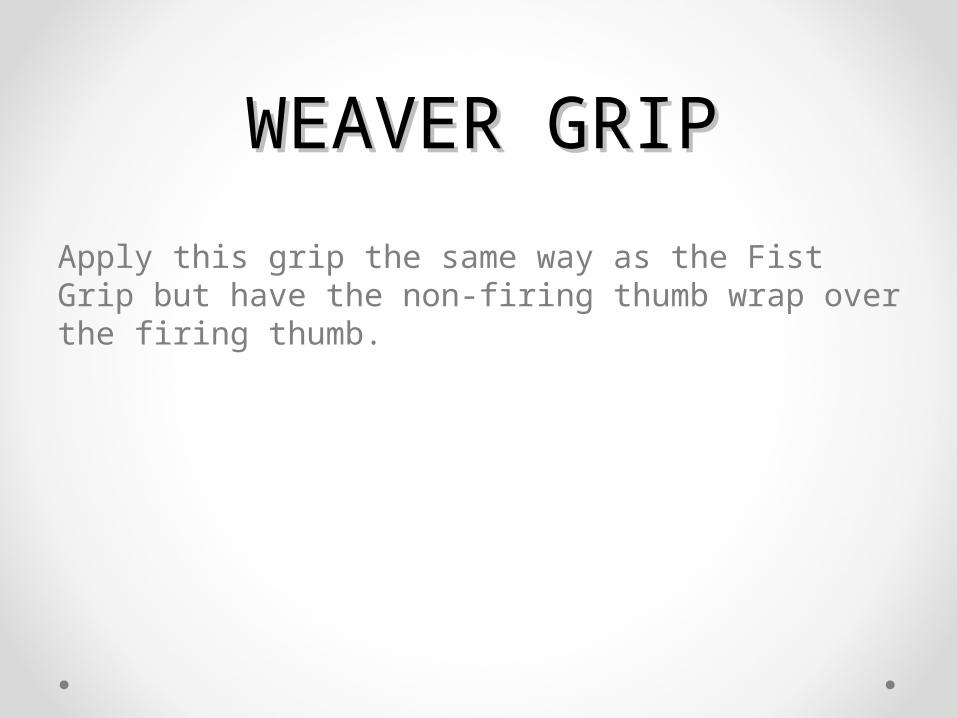
WEAVER GRIPWEAVER GRIPApply this grip the same way as the Fist Grip but have the non-firing thumb wrap over the firing thumb.

AIMINGAIMING

1. Grip the gun properly and at arms length.
2. The front sight post needs to be visually aligned with the rear sight post. The top of the two site posts need to be on the same level.
3. The gap of light between the sides of the front sight and inside vertical edge of the rear notch should be equal.
4. After the sites are aligned, you then aim where you want to shoot and fire away!
Aiming Steps

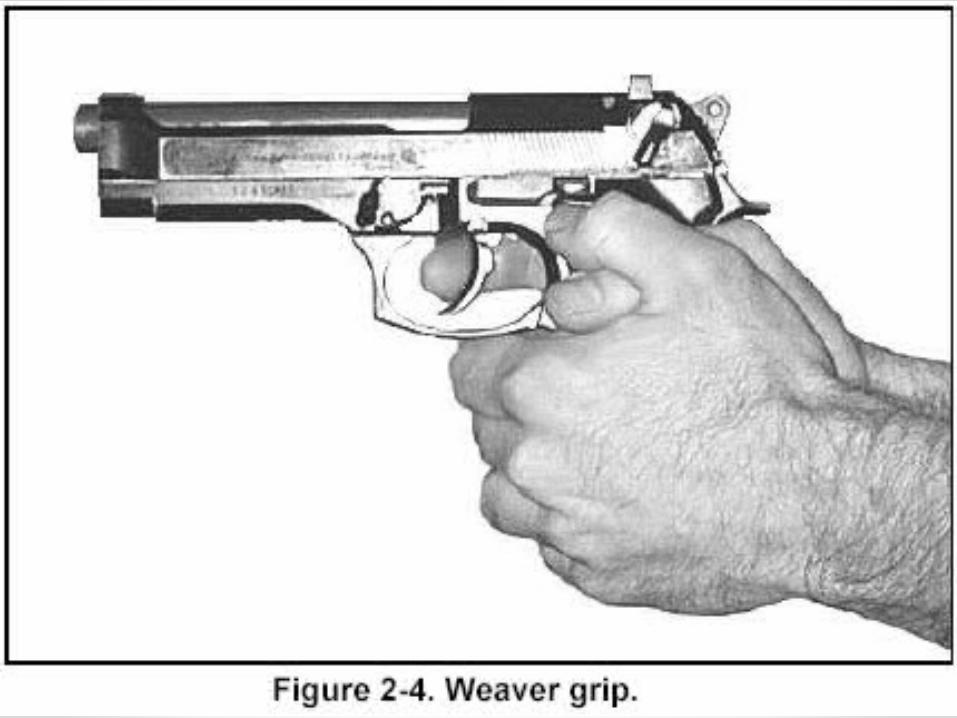
BREATH CONTROLBREATH CONTROL
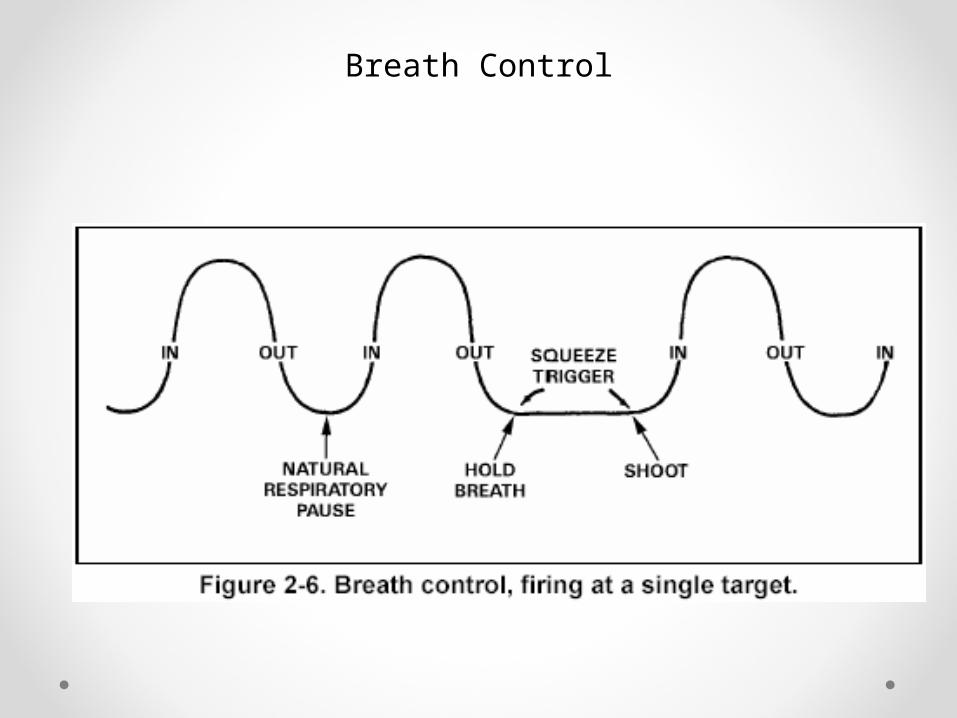
Breath Control


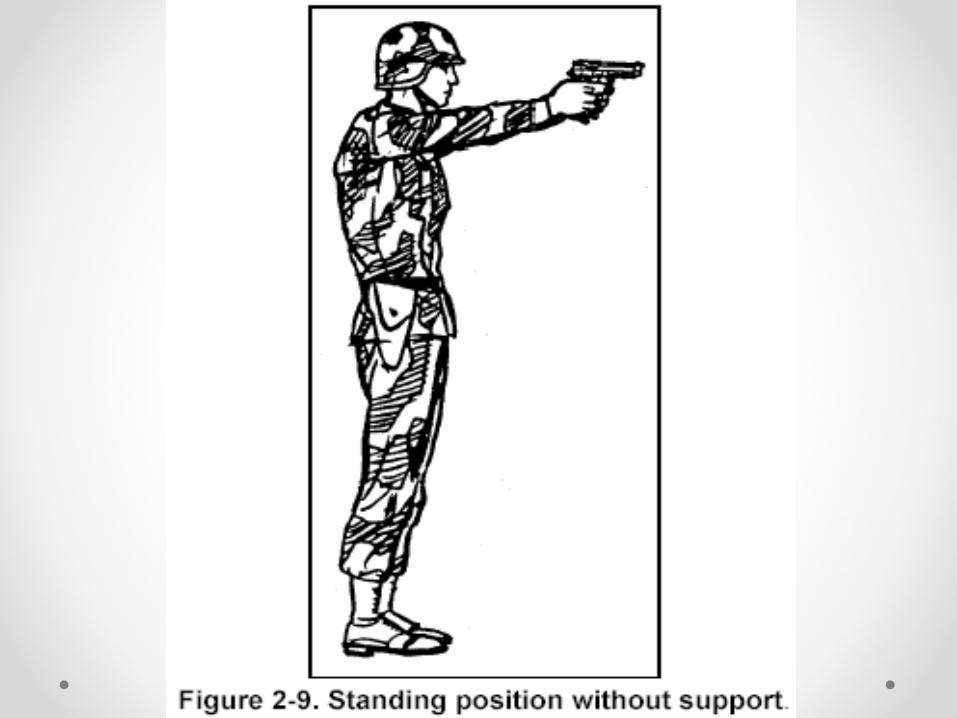
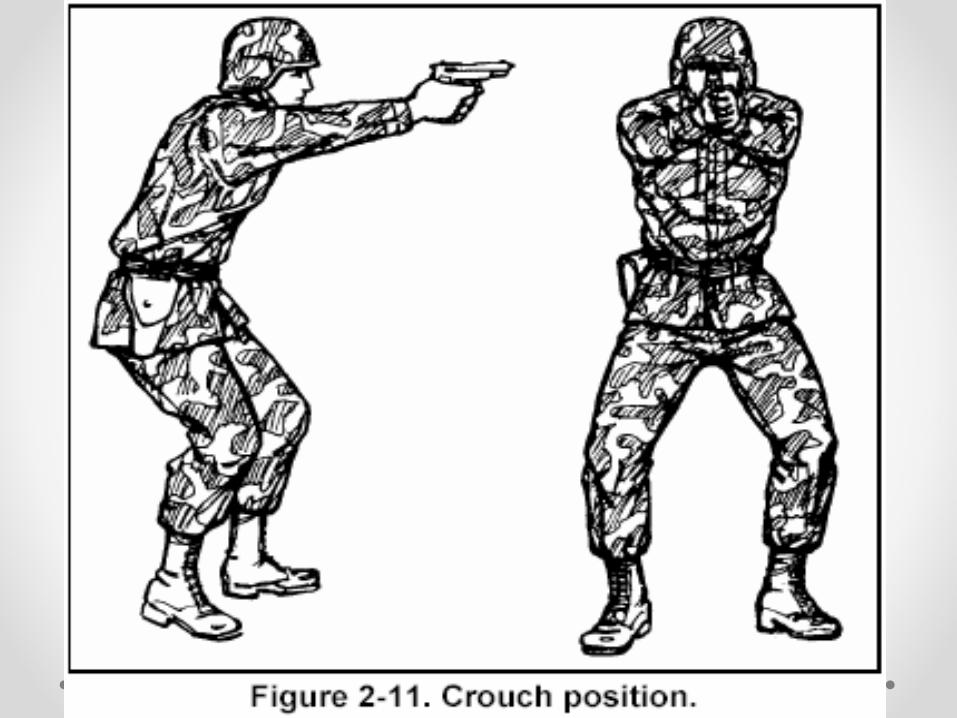
SHOOTING SHOOTING POSITIONSPOSITIONS


THE ENDTHE END