antminer c1 manual - zeusmining
TRANSCRIPT
BITMAIN
C1 Manual
C1 Manual Last updated: 10/30/2014
Page 2 of 9
Page2 / 9
Contents 1 Overview .......................................................................................................................................... 3
2 Connect to Server............................................................................................................................ 3
3 Server Configuration ....................................................................................................................... 4
3.1 Pool Setting ............................................................................................................................... 4
3.2 Advanced Setting ...................................................................................................................... 5
4 Server Status .................................................................................................................................... 5
5 System Configuration and status .................................................................................................... 6
5.1 System Upgrading ............................................................................................................... 6
5.2 Password Modification....................................................................................................... 7
5.3 Software Version Checking ................................................................................................ 7
5.4 Restore Initial Setting ......................................................................................................... 8
C1 Manual Last updated: 10/30/2014
Page 3 of 9
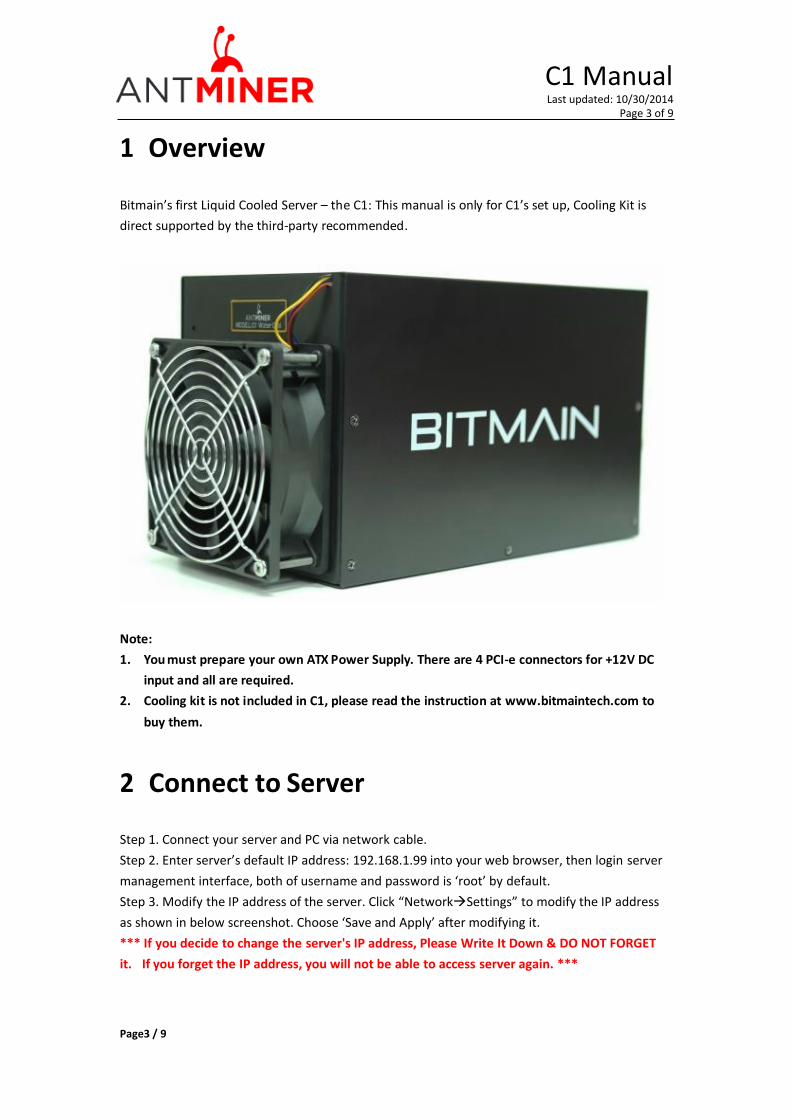
1 Overview
Bitmain’s first Liquid Cooled Server – the C1: This manual is only for C1’s set up, Cooling Kit is
direct supported by the third-party recommended.
Note:
1. You must prepare your own ATX Power Supply. There are 4 PCI-e connectors for +12V DC
input and all are required.
2. Cooling kit is not included in C1, please read the instruction at www.bitmaintech.com to
buy them.
2 Connect to Server
Step 1. Connect your server and PC via network cable.
Step 2. Enter server’s default IP address: 192.168.1.99 into your web browser, then login server
management interface, both of username and password is ‘root’ by default.
Step 3. Modify the IP address of the server. Click “NetworkSettings” to modify the IP address
as shown in below screenshot. Choose ‘Save and Apply’ after modifying it.
*** If you decide to change the server's IP address, Please Write It Down & DO NOT FORGET
it. If you forget the IP address, you will not be able to access server again. ***
Page3 / 9

C1 Manual Last updated: 10/30/2014
Page 4 of 9
Page4 / 9
3 Server Configuration
3.1 Pool Setting
Through ‘ Configuration-> General Settings ‘, you will be able to configure your server. Pool
URL-In this field you should enter the URL of your desired pool.
Worker- This is your worker ID on the selected pool.
Password- This is the password for your selected worker.
Comment:
1. One server can be set up with three mining pools, the priority decreases from first pool
(pool 1) to third pool (pool 3). The low priority pool will start to work, only when the highpriority pool encounter fault.2. When ‘Beeper ringing’ is chosen, beeper will ring once the server stops mining, otherwisebeeper won’t alert, even if the Server stops mining.3. When ‘Stop running when temperature is over 80℃’ is chosen, Server won’t mine if thetemperature is over 80℃ to protect the server. If it’s not chosen, the Server will continue miningeven if it’s with high temperature.Click ‘Save & Apply’ to save the settings and restart server.
C1 Manual Last updated: 10/30/2014
Page 5 of 9
Page5 / 9
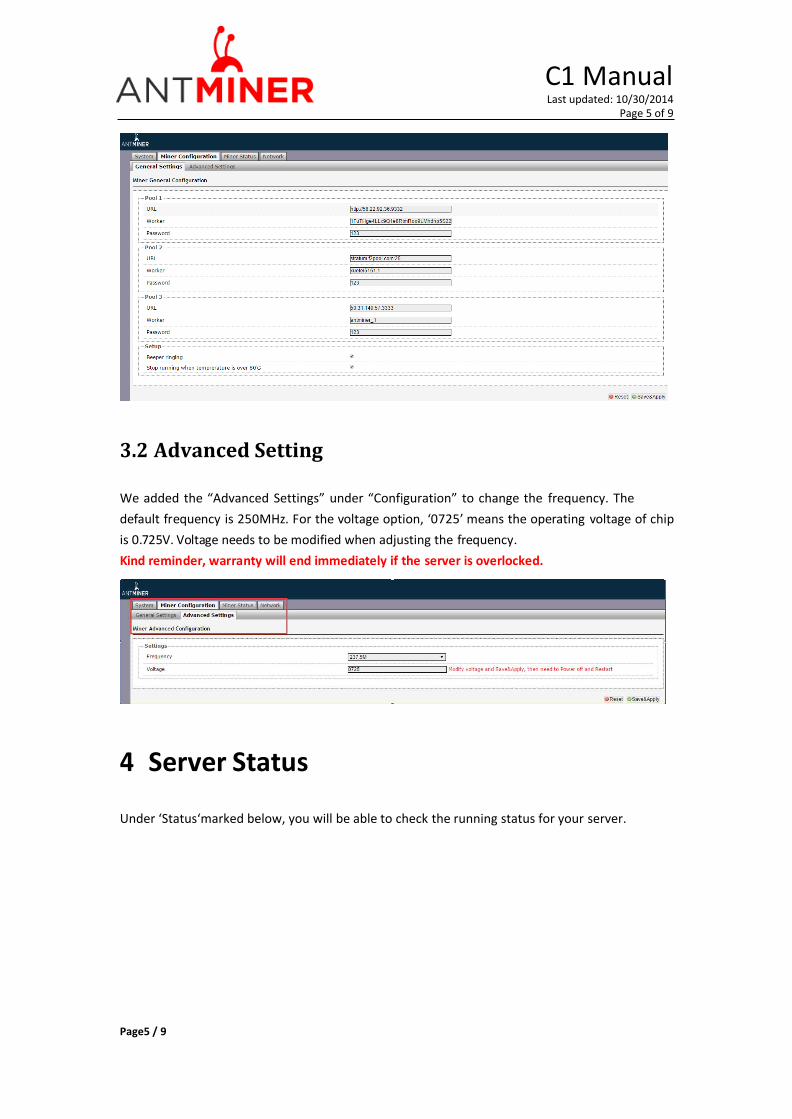
3.2 Advanced Setting
We added the “Advanced Settings” under “Configuration” to change the frequency. The
default frequency is 250MHz. For the voltage option, ‘0725’ means the operating voltage of chip
is 0.725V. Voltage needs to be modified when adjusting the frequency.
Kind reminder, warranty will end immediately if the server is overlocked.
4 Server Status
Under ‘Status‘marked below, you will be able to check the running status for your server.

C1 Manual Last updated: 10/30/2014
Page 6 of 9
ASIC#: ASIC number in the chain
Frequency: ASIC setting frequency
Temp: Temperature, centigrade
ASIC status: o stands for OK, x stands for error.
5 System Configuration
5.1 System Upgrading
Through ‘System->Upgrade’ you will be able to upgrade your server.
‘Keep setting’ is chosen by default, you should choose it if you hope to preserve the current
settings. You should uncheck this option if you hope to restore to initial settings.
Click ‘Browse’ button to choose upgrade file. After choosing upgrade file, click ’Flash
image...’button, it will remind if you confirm to upgrade firmware, start to download software
after choosing upgrading software. During the upgrade process, you need to wait patiently, and
must keep power on. You will see below screenshot after upgrading successfully.
Page6 / 9
C1 Manual Last updated: 10/30/2014
Page 7 of 9
Page7 / 9
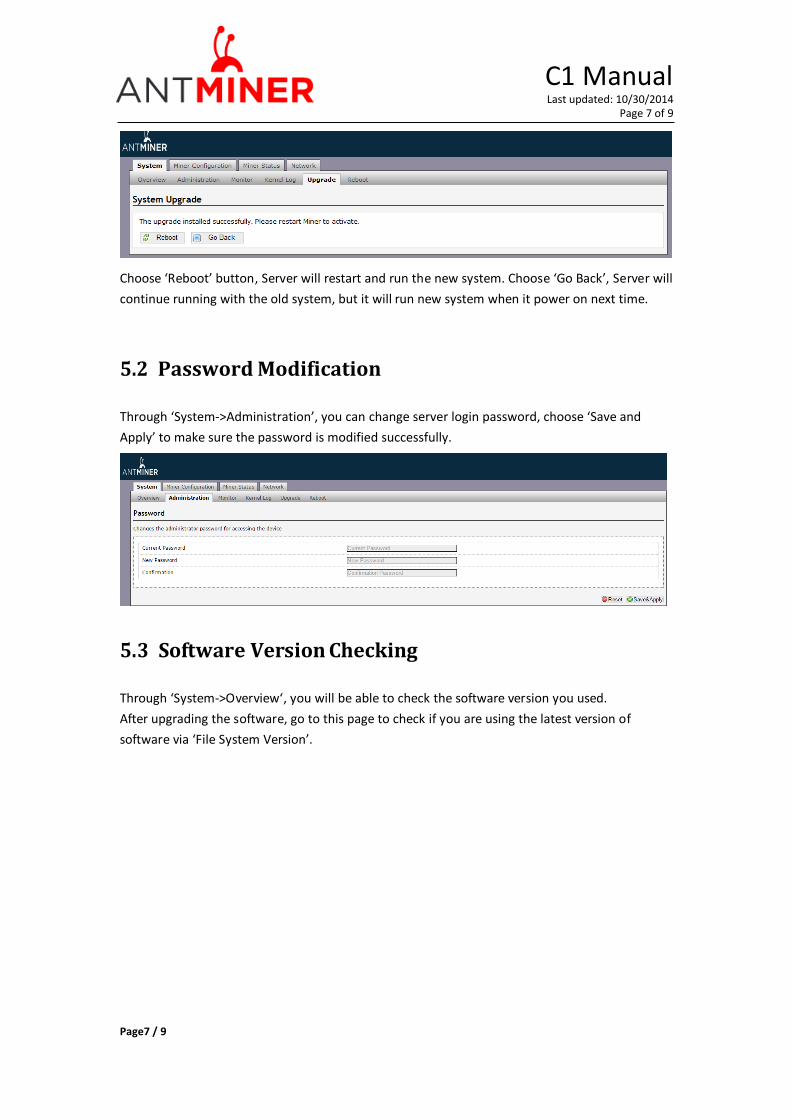
Choose ‘Reboot’ button, Server will restart and run the new system. Choose ‘Go Back’, Server will
continue running with the old system, but it will run new system when it power on next time.
5.2 Password Modification
Through ‘System->Administration’, you can change server login password, choose ‘Save and
Apply’ to make sure the password is modified successfully.
5.3 Software Version Checking
Through ‘System->Overview‘, you will be able to check the software version you used.
After upgrading the software, go to this page to check if you are using the latest version of
software via ‘File System Version’.

C1 Manual Last updated: 10/30/2014
Page 8 of 9
Page8 / 9
5.4 Restore Initial Setting
Press the ‘Reset’ button on top of the Ethernet port and hold it on for 3 seconds, Red LED
flashing every one second/ 1S. Then release ‘Reset’ button, Server will restore the initial setting
and restart automatically.

Page 9/ 9
C1 Manual Last updated: 10/30/2014
Page 9 of 9