“fabrizia” earrings - beadsmith · “fabrizia” earrings classy and elegant oval shaped...
TRANSCRIPT
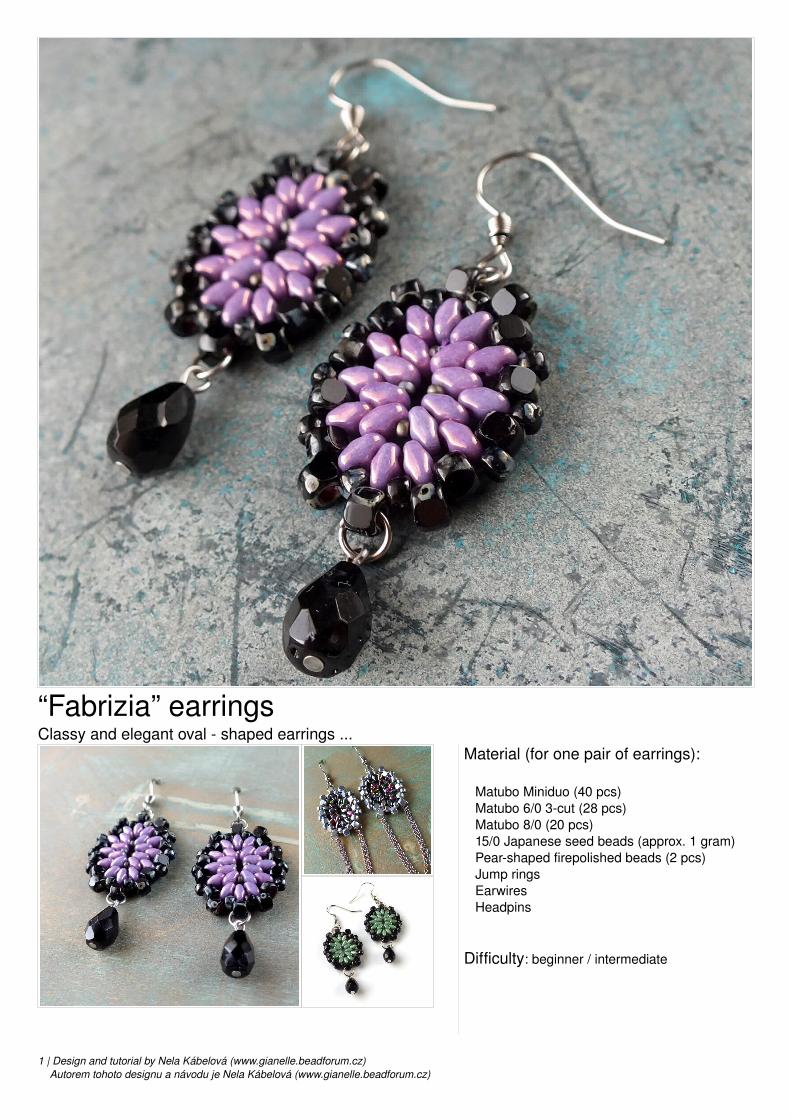
“Fabrizia” earringsClassy and elegant oval shaped earrings ...
Material (for one pair of earrings):
Matubo Miniduo (40 pcs)Matubo 6/0 3cut (28 pcs)Matubo 8/0 (20 pcs)15/0 Japanese seed beads (approx. 1 gram)Pearshaped firepolished beads (2 pcs)Jump ringsEarwiresHeadpins
Difficulty: beginner / intermediate
1 | Design and tutorial by Nela Kábelová (www.gianelle.beadforum.cz) Autorem tohoto designu a návodu je Nela Kábelová (www.gianelle.beadforum.cz)
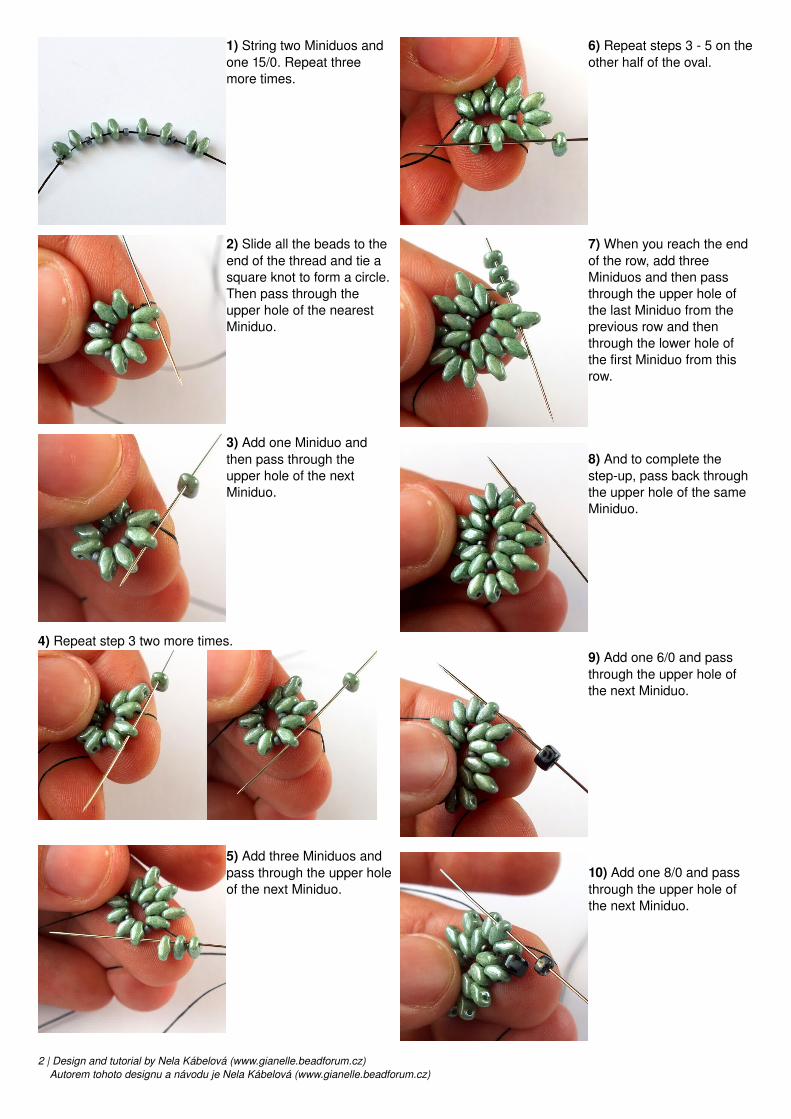
1) String two Miniduos and one 15/0. Repeat three more times.
2) Slide all the beads to the end of the thread and tie a square knot to form a circle.Then pass through the upper hole of the nearest Miniduo.
3) Add one Miniduo and then pass through the upper hole of the next Miniduo.
4) Repeat step 3 two more times.
5) Add three Miniduos and pass through the upper hole of the next Miniduo.
6) Repeat steps 3 5 on the other half of the oval.
7) When you reach the end of the row, add three Miniduos and then pass through the upper hole of the last Miniduo from the previous row and then through the lower hole of the first Miniduo from this row.
8) And to complete the stepup, pass back through the upper hole of the same Miniduo.
9) Add one 6/0 and pass through the upper hole of the next Miniduo.
10) Add one 8/0 and pass through the upper hole of the next Miniduo.
2 | Design and tutorial by Nela Kábelová (www.gianelle.beadforum.cz) Autorem tohoto designu a návodu je Nela Kábelová (www.gianelle.beadforum.cz)
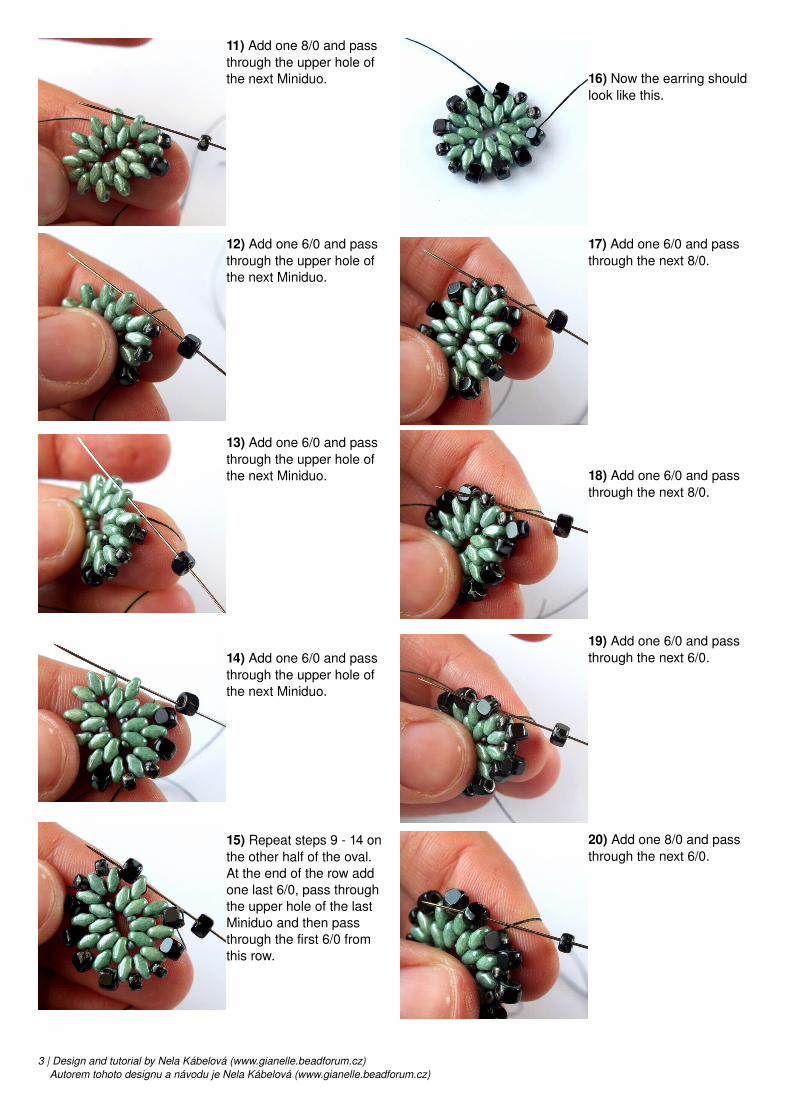
11) Add one 8/0 and pass through the upper hole of the next Miniduo.
12) Add one 6/0 and pass through the upper hole of the next Miniduo.
13) Add one 6/0 and pass through the upper hole of the next Miniduo.
14) Add one 6/0 and pass through the upper hole of the next Miniduo.
15) Repeat steps 9 14 on the other half of the oval.At the end of the row add one last 6/0, pass through the upper hole of the last Miniduo and then pass through the first 6/0 from this row.
16) Now the earring should look like this.
17) Add one 6/0 and pass through the next 8/0.
18) Add one 6/0 and pass through the next 8/0.
19) Add one 6/0 and pass through the next 6/0.
20) Add one 8/0 and pass through the next 6/0.
3 | Design and tutorial by Nela Kábelová (www.gianelle.beadforum.cz) Autorem tohoto designu a návodu je Nela Kábelová (www.gianelle.beadforum.cz)
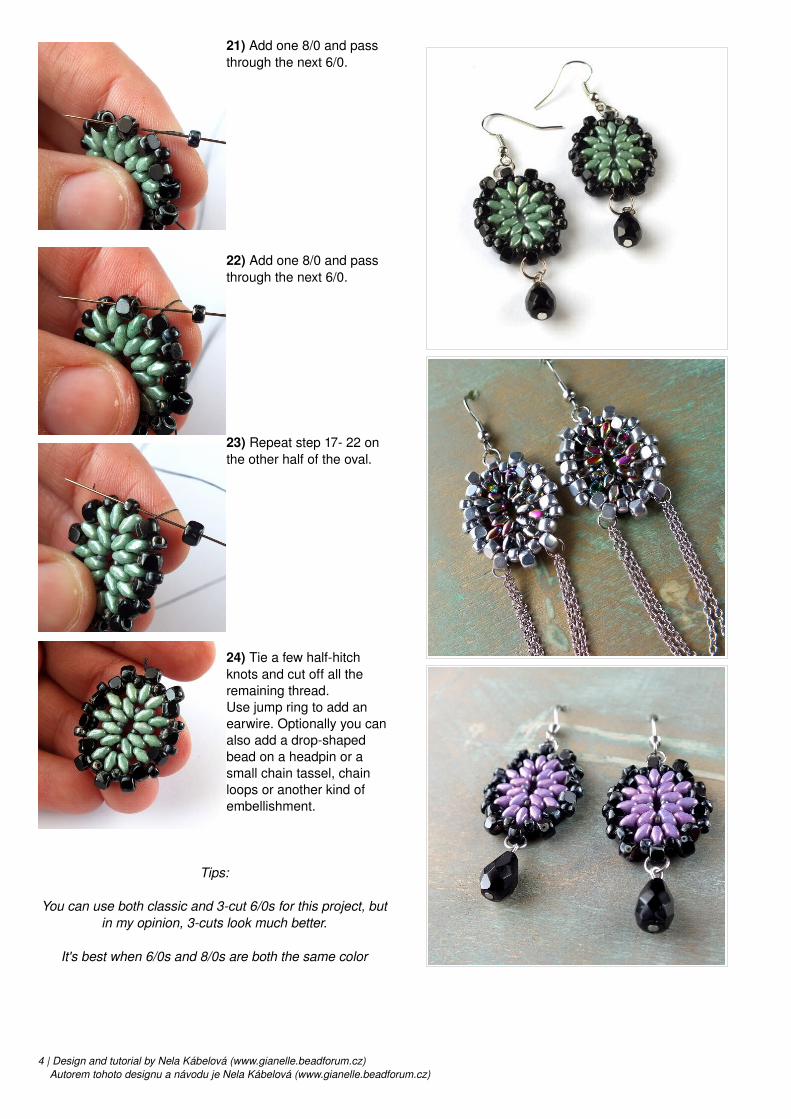
21) Add one 8/0 and pass through the next 6/0.
22) Add one 8/0 and pass through the next 6/0.
23) Repeat step 17 22 on the other half of the oval.
24) Tie a few halfhitch knots and cut off all the remaining thread. Use jump ring to add an earwire. Optionally you can also add a dropshaped bead on a headpin or a small chain tassel, chain loops or another kind of embellishment.
Tips:
You can use both classic and 3cut 6/0s for this project, but in my opinion, 3cuts look much better.
It's best when 6/0s and 8/0s are both the same color
4 | Design and tutorial by Nela Kábelová (www.gianelle.beadforum.cz) Autorem tohoto designu a návodu je Nela Kábelová (www.gianelle.beadforum.cz)