appendix c standard operating procedures
TRANSCRIPT

APPENDIX C STANDARD OPERATING PROCEDURES

Ross-Adams Mine EE/CA And Risk Assessment
Page 1 of 2
CATEGORY: Standard Operating Procedure
TITLE: Decontamination of Field Instrumentation and Equipment
No.: SOP 1 Date: 5/1/09
STANDARD OPERATING PROCEDURE 1
DECONTAMINATION OF FIELD INSTRUMENTATION AND
EQUIPMENT
Equipment List
The following is a list of equipment that may be needed to perform decontamination:
Brushes
Wash tubs
Buckets
Paper towels
Alconox detergent (or equivalent)
Potable water
Deionized or distilled water
Garden type water sprayers
Clean plastic sheeting and/or trash bags
Aluminum foil
Procedures Field instrumentation and equipment (water quality meters, sampling spoons, etc.) will be
decontaminated prior to sampling and between sample locations. The following steps will be used
to decontaminate sampling equipment and field instrumentation
Personnel directly involved in equipment decontamination will wear appropriate protective
clothing, as stated in the Site Safety and Health Plan.
Physically remove any gross contamination by scraping or wiping it off, if practical.
Always proceed from the area with the least contamination to the area with the highest
contamination. Rinse water is discharged at the sampling site or decontamination area.
Cleaning materials shall be surveyed and released or controlled.
Equipment that will not be damaged by water will be washed with an Alconox solution or
low-sudsing detergent and potable water and scrubbed with a bristle brush or similar utensil

Ross-Adams Mine EE/CA And Risk Assessment
Page 2 of 2
CATEGORY: Standard Operating Procedure
TITLE: Decontamination of Field Instrumentation and Equipment
No.: SOP 1 Date: 5/1/09
(if possible). Equipment will be triple rinsed with potable water followed by a triple rinse
with deionized or distilled water.
Equipment that may be damaged by water should be wiped clean using clean towels and
detergent water (alconox or equivalent) or using a spray bottle with a towel moistened with
distilled or de-ionized water
Following decontamination, equipment will be placed in a clean area, on or in clean plastic sheeting
to prevent contact with contaminated soil. If the equipment is not used immediately it may be
wrapped in new aluminum foil and stored until it is ready for use.
Decontamination of sampling equipment will be kept to a minimum in the field, and wherever
possible, dedicated disposable sampling equipment will be used.

Ross-Adams Mine EE/CA And Risk Assessment
Page 1 of 2
CATEGORY: Standard Operating Procedure
TITLE: Field Logbook Keeping No.: SOP 2 Date: 5/1/09
STANDARD OPERATING PROCEDURE 2
FIELD LOGBOOK KEEPING
Purpose
This procedure describes the process for keeping a field logbook.
Scope
The field logbook is a weather resistant booklet that documents and records all major on-site
activities during this site investigation. At a minimum, the following information should be recorded
in field logbooks:
Sample, sample collection, and site measurements or monitoring information
o Date and time of individual sampling activities
o Sample ID numbers
o Location descriptions
o GPS coordinates
o Notes on location conditions, difficulties, or other special observations at each
location that could impact analytical results.
Responsibilities
Field logbooks will be maintained by all site sampling personnel. It is the responsibility of each
person to keep detailed records of all field sampling activities. Following the completion of the
fieldwork, the logbooks (or electronically scanned copies) will be provided to the PM for inclusion
in the permanent project files.
Guidelines The cover of each field logbook should contain the following information:
Project name
Project number
Sampler name
Project Start date
Project End date

Ross-Adams Mine EE/CA And Risk Assessment
Page 2 of 2
CATEGORY: Standard Operating Procedure
TITLE: Field Logbook Keeping No.: SOP 2 Date: 5/1/09
Daily entries into the logbook may contain a variety of information. At the beginning of each day,
the following information should be recorded:
Date
Start time
Weather conditions
Any visitors present
Presence of wildlife and activities
During each day, a summary of site activities should be recorded in the logbook. The information
need not duplicate anything recorded in other field notebooks (e.g. notes of personnel working in
teams). All entries should be made in waterproof black ink. If an incorrect entry is made, the data
should be crossed out with a single strike mark, initialed, and dated.
Photographs
The record of photographs taken at a site for the purpose of project documentation should be
recorded in the field notebook. When photographs are taken of a site or any monitoring location,
they are numbered to correspond to logbook entries. The date, time, site location and ID number (if
applicable) should be entered in the logbook as the photographs are taken. A series entry may be
used for rapid-sequence photographs. Once processed, the slides of photographic prints shall be
serially numbered and labeled according to the logbook descriptions.

Ross-Adams Mine EE/CA And Risk Assessment
Page 1 of 3
CATEGORY: Standard Operating Procedure
TITLE: Sample Packaging and Shipment No.: SOP 3 Date: 5/1/09
STANDARD OPERATING PROCEDURE 3
SAMPLE PACKING AND SHIPMENT
Required Equipment
Sampling and Analysis Plan (Section 4 of Project Plans document)
Indelible black ink pens
Field logbook
Ziploc bags
Coolers
Blue Ice (or equivalent)
Strapping tape or duct tape
Garbage bags
Sample logs
Sample labels
Chain-of-Custody Forms
Custody seals
Radiological exit survey gear (provided at the exit survey station) Responsibilities
FIELD MANAGER (or trained designee)
Oversees general activities related to sample packing and shipping
Ensures that sample coolers are cleared for transport off site, and that DOT exemption limits
for transport and shipment of radioactive materials are met for routine samples.
In the case that it becomes necessary to ship a limited number of samples with radioactivity
levels in excess of DOT exemption limits, the Field Manager will ensure compliance with
all DOT regulations for shipping of such material.
FIELD PERSONNEL

Ross-Adams Mine EE/CA And Risk Assessment
Page 2 of 3
CATEGORY: Standard Operating Procedure
TITLE: Sample Packaging and Shipment No.: SOP 3 Date: 5/1/09
Each sampler is responsible for properly collecting, labeling, securing, managing samples
and coolers that contain samples, as well as documenting all required information in field
logbooks and filling out Chain-of-Custody forms.
Procedures Note: Before packing, all samples will be individually sealed and labeled in the field during sample collection and recorded in the field logbook. Labels will be completed with all required information. The sample ID numbers and information in the field logbook will be used to complete the Chain-of-Custody Forms.
Place each sample in a plastic Ziploc bag and align the label so it can be easily read. Seal
the bag.
Record all required sample information in the field logbook in accordance with Standard
Operating Procedure 2.
Double bag the sample and seal to provide a second barrier of containment
Place individual samples into the cooler.
At the end of the day’s sample collection activities, transport the cooler(s) containing the
samples back to the exit survey station.
Samples must be evaluated by the Field Manager (or trained designee) with survey
instruments to evaluate potential removable surface contamination, and to ascertain
approximate levels of radioactivity that may be present in the samples.
Once the double-bagged samples have been cleared for removal from the site and transport
to the laboratory, the coolers may be transported to the boat or barge for storage in a safe,
secure location until demobilization from the site has commenced. This location should be
in a cool, dry location if at all possible.
In the case of heavy precipitation or other problematic circumstances, Chain-of-Custody and
analyte request forms may be filled out at the boat or barge in the evening based on field
logbook entries. Once on the boat or barge, the coolers should not be opened until the day
of departure from the site. At that time, Blue Ice (or equivalent) should be packed around
the samples inside the coolers for subsequent transport and shipping to the laboratory. If
water ice will be used, the coolers should be lined in advance of sample collection with a
heavy-duty plastic bag prior to loading with samples.
Place the chain-of-custody form in a sealed plastic Ziploc bag and place in the cooler.

Ross-Adams Mine EE/CA And Risk Assessment
Page 3 of 3
CATEGORY: Standard Operating Procedure
TITLE: Sample Packaging and Shipment No.: SOP 3 Date: 5/1/09
Close and latch the cooler. Wrap the cooler and lid with at least two turns of strapping or
duct tape. Affix signed custody seals over the edge of the lid and the top of the cooler body
at front and rear.
Label coolers with up arrows and information to comply with Department of Transportation
(DOT) requirements.

Ross-Adams Mine EE/CA And Risk Assessment
Page 1 of 2
CATEGORY: Standard Operating Procedure
TITLE: Stream Sediment Sampling No.: SOP 4 Date: 5/1/09
P:\181862 Kendrick Bay\Work Plans\SAP\SOPs\final 5.7.09\SOP4_Stream Sediment Sampling_ERM edits_5.7.09.doc
STANDARD OPERATING PROCEDURE 4
STREAM SEDIMENT SAMPLING
Required Equipment
Field Sampling Plan
Sampling and Analysis Plan, site logbook, sample labels,
Field logbook
Indelible black-ink pens and markers
Camera
Unpowdered disposable gloves
Stainless-steel bowls or buckets, spoons, or scoops
Sample containers and labels
Sample log forms
Aluminum foil
Cooler and Blue Ice®
Procedure
Stream sediment samples will be collected adjacent to the flow discharge transect prior to discharge
measurement, but after any water samples have been collected. Samples will consist of grab
samples at each location within 25 feet upstream or downstream of the discharge transect location.
Take care to minimize disturbance of sediments and creation of turbidity in the water column.
When multiple locations on the same stream will be sampled in the same day begin at the most
downstream location and work upstream.
1. Decontaminate all sampling equipment prior to use in accordance with Standard
Operating Procedure 1
2. If possible, select a location within the stream where fine-grained sediments are found.
3. Using a clean spoon or scoop collect only sediment from the upper 0.5 feet of the stream
bed. Take care that when lifting the spoon out of the water no fine material is washed
away by the stream. Discard any grains larger than ¼”.

Ross-Adams Mine EE/CA And Risk Assessment
Page 2 of 2
CATEGORY: Standard Operating Procedure
TITLE: Stream Sediment Sampling No.: SOP 4 Date: 5/1/09
P:\181862 Kendrick Bay\Work Plans\SAP\SOPs\final 5.7.09\SOP4_Stream Sediment Sampling_ERM edits_5.7.09.doc
4. If deposits of sediment smaller than ¼” are not apparent, it may be necessary to look
under shallow cobbles. If sediment is to be collected from the banks it must be within the
portion of the bank which retains moisture from the stream. In other words, dry sediment,
or sediment away from the stream edge should not be collected. If cobbles must be
overturned to find sediment, they should be in shallow water. Place a bucket with the
bottom removed around the cobbles to still the water and gently remove the cobble from
the stream bed. Scoop up any appropriate sediment taking care none is washed away as
the scoop is lifted through the water. Do not attempt to move rocks larger than cobbles
(~256 millimeters).
5. Place the sediment collected in a stainless-steel bowl or bucket and cover immediately
with aluminum foil to prevent airborne contamination. When a sufficient sample has been
obtained, mix the sample bowl or bucket using a clean stainless steel or plastic spoon.
The sample will be mixed until the sample is of uniform color and texture and the analyst
is confident the sample has been completely homogenized. .
6. Transfer the mixed sample to a USS #10 -mesh sieve (2mm) and sieve to obtain a sample
of uniform particle size. The sample will be inspected for any remaining foreign debris
(rocks, metal, wood, etc.); any such debris will be removed. Transfer the material that has
passed through the sieve to appropriate sample containers using a stainless steel spoon,
scoop, or spatula, and sea container. Material retrained on the sieve or any other excess
sample material will by disposed on the ground adjacent to the sample location.
7. Label the sample containers, and record the sample identifications and analyses on the
chain-of-custody form. Place immediately into a cooler for shipment and maintain at 4°C.
Manage the sample containers in accordance with Standard Operating Procedure 3 for
shipping and handling of samples.
8. Photograph the area(s) from which sediment was collected and note in the field logbook.
9. If appropriate sediment can not be found after 30 minutes note in the logbook that no
sample was collected and move to the next location.

Ross-Adams Mine EE/CA And Risk Assessment
Page 1 of 5
CATEGORY: Standard Operating Procedure
TITLE: Marine Sediment Sampling No.: SOP 5 Date: 5/1//09
P:\181862 Kendrick Bay\Work Plans\SAP\SOPs\final 5.7.09\SOP5_Marine Sediment Sampling_ERM edits_5.7.09.doc
STANDARD OPERATING PROCEDURE 5
MARINE SEDIMENT SAMPLING
Required Equipment:
Sampling and Analysis Plan, site logbook, sample labels, sample logs
Indelible black ink pens
Camera
Sample containers
Ziploc® bags
Aluminum foil
Unpowdered disposable gloves
Cooler and Blue Ice®
Double van Veen Bottom Grab sampler (0.1 m2, stainless steel with frame)
Hydraulic winch with power source
Hydrowire (or approved alternative), swivels, and shackles for sampler
Teflon® or Tygon® tubing and suction bulb (decanting water from sampler)
Stainless-steel bowls or buckets, spoons, or scoops
Tools for assembly and disassembly of equipment
Metal floats (to adjust sampler penetration, if necessary)
Stainless steel nuts, bolts, and washers
Sampler tray (large, flat plastic or metal tray used to stabilize sampler during sampling and to
contain sediment emptied from sampler)
Decontamination equipment (see Standard Operating Procedure 1)
Ross-Adams Mine EE/CA And Risk Assessment
Page 2 of 5
CATEGORY: Standard Operating Procedure
TITLE: Marine Sediment Sampling No.: SOP 5 Date: 5/1//09
P:\181862 Kendrick Bay\Work Plans\SAP\SOPs\final 5.7.09\SOP5_Marine Sediment Sampling_ERM edits_5.7.09.doc
Procedures:
Preparation:
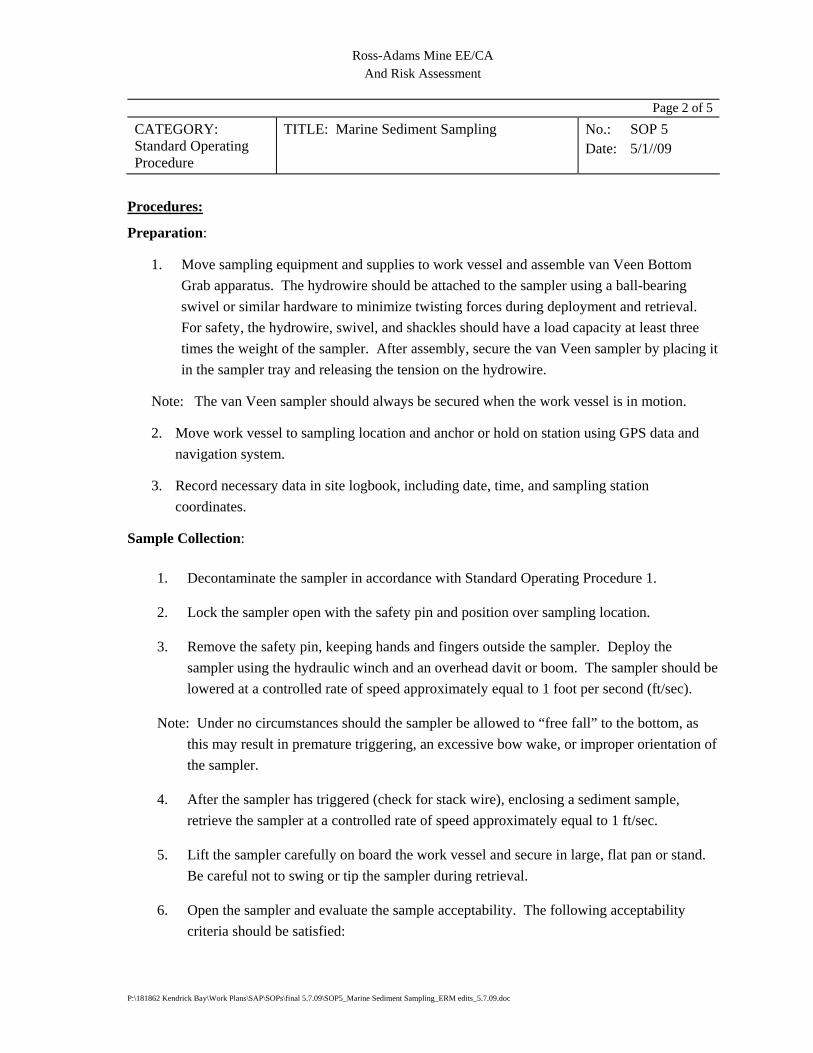
1. Move sampling equipment and supplies to work vessel and assemble van Veen Bottom
Grab apparatus. The hydrowire should be attached to the sampler using a ball-bearing
swivel or similar hardware to minimize twisting forces during deployment and retrieval.
For safety, the hydrowire, swivel, and shackles should have a load capacity at least three
times the weight of the sampler. After assembly, secure the van Veen sampler by placing it
in the sampler tray and releasing the tension on the hydrowire.
Note: The van Veen sampler should always be secured when the work vessel is in motion.
2. Move work vessel to sampling location and anchor or hold on station using GPS data and
navigation system.
3. Record necessary data in site logbook, including date, time, and sampling station
coordinates.
Sample Collection:
1. Decontaminate the sampler in accordance with Standard Operating Procedure 1.
2. Lock the sampler open with the safety pin and position over sampling location.
3. Remove the safety pin, keeping hands and fingers outside the sampler. Deploy the
sampler using the hydraulic winch and an overhead davit or boom. The sampler should be
lowered at a controlled rate of speed approximately equal to 1 foot per second (ft/sec).
Note: Under no circumstances should the sampler be allowed to “free fall” to the bottom, as
this may result in premature triggering, an excessive bow wake, or improper orientation of
the sampler.
4. After the sampler has triggered (check for stack wire), enclosing a sediment sample,
retrieve the sampler at a controlled rate of speed approximately equal to 1 ft/sec.
5. Lift the sampler carefully on board the work vessel and secure in large, flat pan or stand.
Be careful not to swing or tip the sampler during retrieval.
6. Open the sampler and evaluate the sample acceptability. The following acceptability
criteria should be satisfied:

Ross-Adams Mine EE/CA And Risk Assessment
Page 3 of 5
CATEGORY: Standard Operating Procedure
TITLE: Marine Sediment Sampling No.: SOP 5 Date: 5/1//09
P:\181862 Kendrick Bay\Work Plans\SAP\SOPs\final 5.7.09\SOP5_Marine Sediment Sampling_ERM edits_5.7.09.doc
o The sampler is not over-filled so that sample is pressing against the top of the
sampler.
o Overlying water is present (indicates minimal leakage).
o The overlying water is not excessively turbid (indicates minimal sample
disturbance).
o The sediment surface is relatively flat (indicates minimal disturbance or
winnowing).
o The desired penetration depth was achieved (10 to 20 cm for a 10-cm deep
surficial sample).
For biological and chemical replicates, the difference in penetration depth between replicates
within a station can be no more than 10 percent. Sampling must continue until the criteria
are met. The following are minimum penetration depths.
Medium-coarse
sand
4 to 5 centimeters
(cm)
Fine sand 6 to 7 cm
Silt/clay 10 cm
o Note: If the sample does not substantially meet the acceptability criteria, it
should be rejected. The FOL will be responsible for all decisions regarding
sample acceptability.
7. Remove the water overlying the sediment sample. The preferable method for removing
the water is by slowly siphoning it off near one corner of the sampler.
8. Record the physical description of the sample in the site logbook. This description should
include:
o Gross characteristics of the surficial sediment such as texture, color, biological
structures present (shells, tubes, macrophytes), debris present (wood chips, wood
fiber, human artifacts), oily sheen present on the sample, and odor.
o Gross characteristics of the vertical sediment profile, such as changes in any of the
surficial characteristics listed above.
o Penetration depth for the sample.
o Comments related to sample quality such as leakage when the sampler retrieved,
the presence of winnowing, or visible disturbance of the sediment. Note: In order

Ross-Adams Mine EE/CA And Risk Assessment
Page 4 of 5
CATEGORY: Standard Operating Procedure
TITLE: Marine Sediment Sampling No.: SOP 5 Date: 5/1//09
P:\181862 Kendrick Bay\Work Plans\SAP\SOPs\final 5.7.09\SOP5_Marine Sediment Sampling_ERM edits_5.7.09.doc
to obtain acceptable grab samples, it may be necessary to decrease the weight of
the sampler (to reduce penetration). This can be done by removing the lead
weights on the sampler and/or attaching metal (non-crush) floats to the frame. If
weights are removed, the holes in the sampler should be plugged using stainless-
steel nuts and bolts.
9. Photograph the sediment.
10. Remove any unrepresentative material from the sediment using a stainless-steel spoon or
scoop and record this action in the site logbook. The types of materials considered
unrepresentative should include large pieces (greater than 2 inches in diameter) of
wood/bark, large shell fragments, man-made artifacts, and rocks.
11. Don a clean pair of unpowdered (zinc-free) disposable gloves and collect the top 10 cm of
sediment using a clean stainless steel spoon or scoop. Avoid contact with the sides of the
sampler and do not touch the sediment sample with ungloved hands.
Note: Avoid airborne pollutants such as cigarette smoke or stack emissions from the work
vessel.
12. Place the sediment collected in a stainless-steel bowl or bucket and cover immediately
with aluminum foil to prevent airborne contamination.
13. Empty the sampler and repeat the sampling procedures until sufficient sediment is
obtained for all required analyses. Be sure to record the total number of grabs taken at the
sampling site.
o Note: Excess sediment (and rejected sample) from the sampler should be carefully placed back into the water as far away from the sampling location as possible.
14. When a sufficient sample has been obtained, mix the sample bowl or bucket using a clean
stainless steel or plastic spoon. The sample will be mixed until the sample is of uniform
color and texture and the analyst is confident the sample has been completely
homogenized. For biological stations where large volumes of sediments will be collected,
a power drill fitted with a stainless-steel mixing paddle may be used to homogenize the
sediment composite.
15. Transfer the mixed sample to a USS #10 -mesh sieve (2mm) and sieve to obtain a sample
of uniform particle size. The sample will be inspected for any remaining foreign debris

Ross-Adams Mine EE/CA And Risk Assessment
Page 5 of 5
CATEGORY: Standard Operating Procedure
TITLE: Marine Sediment Sampling No.: SOP 5 Date: 5/1//09
P:\181862 Kendrick Bay\Work Plans\SAP\SOPs\final 5.7.09\SOP5_Marine Sediment Sampling_ERM edits_5.7.09.doc
(rocks, metal, wood, etc.); any such debris will be removed. Transfer the material that has
passed through the sieve to appropriate sample containers using a stainless steel spoon,
scoop, or spatula, and sea container. Material retrained on the sieve or any other excess
sample material will be disposed of in manner specified by the Sampling and Analysis
Plan..
16. Label the sample containers, and record the sample identifications and analyses on the
chain-of-custody form. Place immediately into a cooler for shipment and maintain at 4°C.
Manage the sample containers in accordance with Standard Operating Procedure 3 for
shipping and handling of samples.
17. Decontaminate the van Veen sampler, Teflon® tubing, and sampling tools; secure the
sampler; and move the work vessel to the next sampling location.
o Note: The van Veen sampler should always be decontaminated prior to leaving a
sampling station to begin work at a new station. This prevents transport of
sediments between the stations.
Ross-Adams Mine EE/CA And Risk Assessment
Page 1 of 6
CATEGORY: Standard Operating Procedure
TITLE: Stream Discharge Measurement No.: SOP 6 Date: 5/1/09
STANDARD OPERATING PROCEDURE 6
STREAM DISCHARGE MEASUREMENT
This SOP outlines the two methods for measuring stream flow (1) portable flumes or (2) the
velocity-area method using Price AA, pygmy, or Marsh-McBirney meters
Required Equipment
Field Sampling Plan
Field logbook
Stream discharge form
Indelible black-ink pens and markers
Camera
Fiberglass surveying tape
Price AA, pygmy, or Marsh McBirney flowmeter
Collapsible portable flume
Life vest
Chest waders/boots
Top-setting wading rod
Flagging tape
Calculator
Assorted tools (shovels, wrenches, etc.)
Procedure using Velocity Area Method
1. If possible, select a straight reach where the streambed is uniform and relatively free of
boulders and aquatic growth. The flow should be uniform and free of eddies, dead water
near banks, and excessive turbulence. If necessary and possible, modify the measuring
cross section to provide acceptable conditions by building dikes to cut off dead water or
removing rocks, weeds, and debris in the reach of the stream 1 to 2 meters upstream from
the cross section. Photograph the location facing downstream.
2. After modifying the streambed, allow the flow to stabilize before starting the flow
measurement

Ross-Adams Mine EE/CA And Risk Assessment
Page 2 of 6
CATEGORY: Standard Operating Procedure
TITLE: Stream Discharge Measurement No.: SOP 6 Date: 5/1/09
3. Determine the width of the stream by stringing the fiberglass surveying tape from bank to
bank at right angles to the direction of flow.
4. Calculate the number and spacing of vertical profiles required for discharge measurement.
If the stream width is 5 feet or less, space the profiles at 0.5 foot increments. If the stream
width is greater than 5 feet, divide the width by 21. This will give the spacing for 20
vertical profiles.
5. Beginning at the left bank, measure stream depth and velocity at the first vertical profile
location. Stand at least 2 feet downstream of the surveying tape and to the side of the
flowmeter. Measure the stream depth using the wading rod prior to measurement of
velocity. The wading rod will be placed in the stream so the base plate rests on the
streambed, and the depth of water will then be read from the graduated main rod. The
required number of velocity measurements at each profile is based upon the stream depth
at that profile. If the depth is 2.5 feet or less, make a single measurement at 0.6 of the
total depth. If the depth is greater than 2.5 feet, make velocity measurements at 0.2 and
0.8 of the total depth and average these two velocities together for the discharge
calculation.
6. Use the vernier scale on the upper handle of the wading rod to position the flowmeter to
the proper depth. Keep the wading rod vertical and the flow sensor perpendicular to the
tape rather than perpendicular to the flow as velocity measurements are being taken.
Record the stream velocity and depth measurements in field logbook.
7. Use survey flagging to mark the location of the measurement.
8. Document time, relevant conditions (e.g. weather, rain) in field logbook.
9. Repeat Procedure Steps 5-8 for each vertical profile
10. Calculate discharge (Q) as shown below

Ross-Adams Mine EE/CA And Risk Assessment
Page 3 of 6
CATEGORY: Standard Operating Procedure
TITLE: Stream Discharge Measurement No.: SOP 6 Date: 5/1/09
Procedure using Portable Flume
1. Remove any material that hinders ability to form a flat surface for flume to be level, plumb,
and square. Use a leveling device to ensure the flume is level and plumb
2. A bed slope of less than one percent for a distance of four to six feet upstream of a portable
cutthroat flume is necessary for proper operation for throat widths ranging from one to six
inches. Also, a flow width equal to at least two times the front width of the flume is
recommended upstream of the flume.
3. All of the flow must be diverted into the flume inlet. After the flow has equilibrated, the up
and downstream staff gages provided in the flume should be read and flow depths recorded.
The flume should be installed so free-flow occurs, that is the flow through the flume reaches
critical depth in the vicinity of minimum width in the flume. If free-flow conditions exist,
only the upstream gage needs to be read. For submerged flow conditions both the upstream
gage (head) and downstream gage needs to be read to determine discharge.
4. Measure and record the throat width to the nearest 0.01 of a foot.
5. Record the time and date of the site visit.

Ross-Adams Mine EE/CA And Risk Assessment
Page 4 of 6
CATEGORY: Standard Operating Procedure
TITLE: Stream Discharge Measurement No.: SOP 6 Date: 5/1/09
6. Use the staff gage to measure and record the gage height to the nearest 0.02 of a foot.
7. Calculate discharge using tables or equations suitable for the width and type of flume
located in Table SOP6-1.
8. Record the calculated discharge (Should any leakage occur around the flume, the amount of
leakage is estimated as a percent of the total measured flow and added to the calculated flow
value).

Ross-Adams Mine EE/CA And Risk Assessment
Page 5 of 6
CATEGORY: Standard Operating Procedure
TITLE: Stream Discharge Measurement No.: SOP 6 Date: 5/1/09
Table SOP 6-1 Collapsible Cutthroat Flume Discharge Chart For free discharge, downstream height ÷ by upstream height must be less than 0.5.
gpm gpm gpm gpm cfs cfs cfs cfs Upstream Gauge (ft) 1" 2" 4" 8" 1" 2" 4" 8"
0.10 2.25 4.58 9.32 19.0 0.005 0.010 0.021 0.042 0.11 2.72 5.54 11.3 23.0 0.006 0.012 0.025 0.051 0.12 3.24 6.60 13.4 27.4 0.007 0.015 0.030 0.061 0.13 3.80 7.74 15.8 32.1 0.008 0.017 0.035 0.072 0.14 4.41 8.98 18.3 37.2 0.010 0.020 0.041 0.083 0.15 5.06 10.3 21.0 42.8 0.011 0.023 0.047 0.095
0.16 5.76 11.7 23.9 48.6 0.013 0.026 0.053 0.108 0.17 6.50 13.2 26.9 54.9 0.014 0.029 0.060 0.122 0.18 7.29 14.8 30.2 61.6 0.016 0.033 0.067 0.137 0.19 8.12 16.5 33.6 68.6 0.018 0.037 0.075 0.153 0.20 9.00 18.3 37.3 76.0 0.020 0.041 0.083 0.169
0.21 9.92 20.2 41.1 83.8 0.022 0.045 0.092 0.187 0.22 10.9 22.2 45.1 92.0 0.024 0.049 0.101 0.205 0.23 11.9 24.2 49.3 101 0.027 0.054 0.110 0.224 0.24 13.0 26.4 53.7 109 0.029 0.059 0.120 0.244 0.25 14.1 28.6 58.3 119 0.031 0.064 0.130 0.265
0.26 15.2 31.0 63.0 128 0.034 0.069 0.140 0.286 0.27 16.4 33.4 67.9 139 0.037 0.074 0.151 0.309 0.28 17.6 35.9 73.1 149 0.039 0.080 0.163 0.332 0.29 18.9 38.5 78.4 160 0.042 0.086 0.175 0.356 0.30 20.3 41.2 83.9 171 0.045 0.092 0.187 0.381
0.31 21.6 44.0 89.6 183 0.048 0.098 0.200 0.407 0.32 23.0 46.9 95.4 195 0.051 0.104 0.213 0.434 0.33 24.5 49.9 101 207 0.055 0.111 0.226 0.461 0.34 26.0 52.9 108 220 0.058 0.118 0.240 0.489 0.35 27.6 56.1 114 233 0.061 0.125 0.254 0.519
0.36 29.2 59.4 121 246 0.065 0.132 0.269 0.549 0.37 30.8 62.7 128 260 0.069 0.140 0.284 0.580 0.38 32.5 66.1 135 274 0.072 0.147 0.300 0.611 0.39 34.2 69.7 142 289 0.076 0.155 0.316 0.644 0.40 36.0 73.3 149 304 0.080 0.163 0.332 0.677 0.41 37.8 77.0 157 319 0.084 0.172 0.349 0.712 0.42 39.7 80.8 164 335 0.088 0.180 0.366 0.747

Ross-Adams Mine EE/CA And Risk Assessment
Page 6 of 6
CATEGORY: Standard Operating Procedure
TITLE: Stream Discharge Measurement No.: SOP 6 Date: 5/1/09
Table SOP 6-1 Collapsible Cutthroat Flume Discharge Chart (continued)
For free discharge, downstream height ÷ by upstream height must be less than 0.5. gpm gpm gpm gpm cfs cfs cfs cfs Upstream
Gauge (ft) 1" 2" 4" 8" 1" 2" 4" 8" 0.43 41.6 84.7 172 351 0.093 0.189 0.384 0.783 0.44 43.6 88.7 180 368 0.097 0.198 0.402 0.820 0.45 45.6 92.7 189 385 0.102 0.207 0.421 0.857 0.46 47.6 96.9 197 402 0.106 0.216 0.439 0.896 0.47 49.7 101 206 420 0.111 0.225 0.459 0.935 0.48 51.8 106 215 438 0.116 0.235 0.478 0.975 0.49 54.0 110 224 456 0.120 0.245 0.499 1.02 0.50 56.3 115 233 475 0.125 0.255 0.519 1.06
0.51 58.5 119 242 494 0.130 0.265 0.540 1.10 0.52 60.8 124 252 514 0.136 0.276 0.562 1.14 0.53 63.2 129 262 534 0.141 0.287 0.583 1.19 0.54 65.6 134 272 554 0.146 0.298 0.606 1.23 0.55 68.1 139 282 575 0.152 0.309 0.628 1.28
0.56 70.6 144 292 596 0.157 0.320 0.651 1.33 0.57 73.1 149 303 617 0.163 0.332 0.675 1.38 0.58 75.7 154 314 639 0.169 0.343 0.699 1.42 0.59 78.3 159 324 661 0.175 0.355 0.723 1.47 0.60 81.0 165 336 684 0.180 0.367 0.748 1.52
0.61 83.7 170 347 707 0.187 0.380 0.773 1.58 0.62 86.5 176 358 730 0.193 0.392 0.798 1.63 0.63 89.3 182 370 754 0.199 0.405 0.824 1.68 0.64 92.2 188 382 778 0.205 0.418 0.851 1.73 0.65 95.1 194 394 803 0.212 0.431 0.877 1.79
0.66 98.0 200 406 828 0.218 0.444 0.905 1.84 0.67 101 206 418 853 0.225 0.458 0.932 1.9 0.68 104 212 431 879 0.232 0.472 0.96 1.96 0.69 107 218 444 905 0.239 0.486 0.989 2.02 0.70 110 224 457 931 0.246 0.500 1.02 2.07
0.71 113 231 470 958 0.253 0.514 1.05 2.13 0.72 117 237 483 985 0.26 0.529 1.08 2.19 0.73 120 244 497 1013 0.267 0.544 1.11 2.26 0.74 123 251 510 1040 0.275 0.559 1.14 2.32 0.75 127 258 524 1067 0.282 0.574 1.17 2.38

Ross-Adams Mine EE/CA And Risk Assessment
Page 1 of 2
CATEGORY: Standard Operating Procedure
TITLE: Surface Water Sampling No.: SOP 7 Date: 6/2/09
STANDARD OPERATING PROCEDURE 7
SURFACE WATER SAMPLING
Required Equipment
• Field Sampling Plan
• Field logbook
• Field Sampling Form
• Indelible black-ink pens and markers
• Camera
• Life vest
• Chest waders/boots
• Rod
• Multiparameter or individual water quality meters for measurement of temperature, pH,
turbidity, oxidation-reduction potential (ORP), specific conductance, and dissolved oxygen.
• Collection Container (beaker)
• Sample bottles
Surface water samples will be collected adjacent to the flow discharge transect prior to the discharge
measurement. Samples will consist of grab samples at each location in the approximate center of
the stream at the mid-depth. Take care to minimize disturbance of sediments and creation of
turbidity in the water column.
Procedure
1. Before sampling of water or before sampling begins, all sampling equipment and field
instrumentation shall be decontaminated in accordance with Standard Operating Procedure
1. Single use disposable sampling equipment such as inline filters and tubing are not
decontaminated but rinsed with sample water before use
Record the ambient conditions. Document the weather (rainfall accumulation), odor, color,
and sheen, if any in the field logbook. Photograph the location facing downstream.
2. The following parameters will be measured and logged on the field sampling form prior to
sampling: pH, specific conductance, temperature, dissolved oxygen (DO), and oxidation-
reduction potential (ORP). Field parameters will be measured in-situ by placing water
Ross-Adams Mine EE/CA And Risk Assessment
Page 2 of 2
CATEGORY: Standard Operating Procedure
TITLE: Surface Water Sampling No.: SOP 7 Date: 6/2/09
quality probes directly into the stream at the sampling location. If unable to make a direct
measurement from the sampling point, fill a decontaminated beaker and measure field
parameters from beaker.
3. Don new, clean gloves and use an unpreserved sample bottle from the set of sample bottles
to obtain water directly from the stream. Slowly lower the sample container below the
water surface and allow it to fill. If necessary, attach the sample bottle to a rod to allow
greater reach. Take care not to remove the sample bottle cap until after it is attached to the
rod. Withdraw the sample bottle from the collection area slowly to avoid disturbing the
sediments. Decant water into other sample bottles until all sample bottles are full. Cap each
bottle as it is filled. Preserve as required.
4. Label the sample containers, and record the sample identifications and analyses on the
chain-of-custody form. Place immediately into a cooler for shipment and maintain at 4°C.
Manage the sample containers in accordance with Standard Operating Procedure 3 for
shipping and handling of samples

Ross-Adams Mine EE/CA And Risk Assessment
Page 1 of 3
CATEGORY: Standard Operating Procedure
TITLE: Groundwater Sampling and Low-Flow Purging
No.: SOP 8 Date: 5/1/09
STANDARD OPERATING PROCEDURE 8
GROUNDWATER SAMPLING AND LOW-FLOW PURGING
Required Equipment
Field Sampling Plan
Field logbook
Water Sampling Log
Indelible black-ink pens and markers
Camera
Peristaltic Pump
Multiparameter water quality meter, including temperature, pH, turbidity, oxidation-
reduction potential (ORP), specific conductance, and dissolved oxygen probes
Polyethylene Tubing
Flow-through Cell
0.45 micron disposable filters
Sample Containers
Potable Water
Electric water level indicator capable of producing measurements to a precision of 0.01 ft
Plastic sheeting
Procedure
Groundwater samples will be collected from piezometers installed at the site. All piezometer
samples will be analyzed as discussed in the SAP.
1. Calibrate the water quality meter at the beginning of each day it will be used according to
the manufacturer’s instructions. Check calibration using appropriate standards at the end of
each day.
2. Check and record the condition of the piezometer for any damage or evidence of tampering.
3. Remove the piezometer cap.

Ross-Adams Mine EE/CA And Risk Assessment
Page 2 of 3
CATEGORY: Standard Operating Procedure
TITLE: Groundwater Sampling and Low-Flow Purging
No.: SOP 8 Date: 5/1/09
4. If the piezometer head is under pressure, allow to equilibrate for 5 minutes before
proceeding. Measure and record the depth to water and record the measurement on the
Water Sampling Log. Measure the depth to the bottom of the well at this time.
5. Use water level indicator to measure the static water level. Decontaminate the water level
probe prior to use in accordance with Standard Operating Procedure 1. Lower the water
level probe into the well until the buzzer/light indicates that the probe tip has contacted
water. By raising and lowering the water level probe and adjusting the sensitivity to
indicate when the probe is contacting the water, the depth to water shall be measured to the
nearest 0.01 foot. Record the water level depth in the field logbook or field data sheet.
Then recheck the measurement before removing the water level probe from the well.
6. To avoid cross-contamination, do not let any polyethylene tubing or downhole equipment
touch the ground. Place clean plastic sheeting on ground surrounding the piezometer to
prevent contamination of downhole equipment or tubing.
7. Assemble the peristaltic pump system, which includes a discharge line connected to a flow-
through cell and unused, disposable downhole tubing. Attach the tubing to the peristaltic
pump. Position the water quality meter probe in the flow-through cell.
8. Slowly lower the tubing to approximately the middle of the screen. Be careful not to place
the end of the tubing less than 0.5 feet above the bottom of the piezometer because this may
cause mobilization of any sediment present in the bottom of the piezometer. Start purging
the piezometer at 0.1 to 0.5 liters per minute. Monitor the water level in the piezometer
periodically during pumping. Pumping rates should, if needed, be reduced to avoid
drawdown in the well. Drawdown should not exceed 25% of distance from top of well
screen to the pump intake.
9. After the cell has been “flushed” at least two volumes, begin monitoring the field
parameters (temperature, pH, turbidity, redox, specific conductance, and dissolved oxygen)
approximately every 3 to 5 minutes. All water quality measurements will be recorded in the
Water Sampling Log. .
10. The piezometer is considered stabilized and ready for sample collection when the following
indicator parameters have stabilized (within 10 percent) for three consecutive readings:
temperature
pH
specific conductance
turbidity (or below 20 NTUs)

Ross-Adams Mine EE/CA And Risk Assessment
Page 3 of 3
CATEGORY: Standard Operating Procedure
TITLE: Groundwater Sampling and Low-Flow Purging
No.: SOP 8 Date: 5/1/09
9. Once these parameters have stabilized, remove the flow-through cell from the tubing and
collect the samples directly from the end of the tubing. If the readings do not stabilize after
60 minutes or 5 casing volumes have been purged (whichever comes first) collect the
samples. The bottles should be preserved and filled according to the procedures specified in
the work plan.
10. If the recharge rate of the piezometer is very low and it is purged dry, then wait until it has
recharged to a sufficient level and collect the appropriate volume of sample with the
peristaltic pump.
11. Fill all sample bottles by allowing the pump discharge to flow gently down the inside of the
bottle with minimal turbulence. Volatiles and analytes that degrade by aeration must be
collected first. The filling and preservation procedures are as follows:
11. Volatile Organic Compounds (VOCs)—Fill each container with sample to just overflowing
so that no air bubbles are trapped inside.
12. Other Parameters—Fill each container and preserve immediately as required. For dissolved
metals sample bottle, attach a 0.45 disposable filter to discharge tubing. Allow filter to fill
and discharge before filling sample bottle.
13. Cap each bottle as it is filled.
12. Label the sample containers, and record the sample identifications and analyses on the
chain-of-custody form. Place immediately into a cooler for shipment and maintain at 4°C.
Manage the sample containers in accordance with Standard Operating Procedure 3 for
shipping and handling of samples
13. Carefully remove the tubing from the piezometer. The tubing should be disposed of.
14. Close the piezometer.
15. Decontaminate the flow-through cell in accordance with Standard Operating Procedure 1.
16. Purge and excess sample water will be discharged to te ground adjacent to the piezometer.

Ross-Adams Mine EE/CA And Risk Assessment
Page 1 of 2
CATEGORY: Standard Operating Procedure
TITLE: Soil Sampling No.: SOP 9 Date: 5/1/09
STANDARD OPERATING PROCEDURE 9
SOIL SAMPLING
Required Equipment
• Sampling and Analysis Plan, site logbook, sample labels
• Gamma survey meter (NaI scintillometer)
• Color-coded gamma survey maps
• Handheld GPS Unit
• Field logbook
• Indelible black-ink pens and markers
• Camera
• Small pick axe and shovel
• Stainless-steel garden trowel
• Zip-lock baggies (gallon sized)
• Sample Chain-of-Custody / analyte request forms
Procedure
Soil sampling locations will be dependent on historical data, visual observations, gamma survey
results, and previously demonstrated indications of significant correlations between gamma survey
readings and soil parameters of concern (including certain radionuclides and metals). Locations will
be selected to characterize concentrations across impacted areas and to define the spatial limits of
impacts from historic mining activities.
1. Correlation plot soil samples will be collected as composite samples across 100 m2 plots
according to the procedures outlined in Standard Operating Procedure 12 for Gamma
Survey. In some cases, 100 m2 plots with uniform gamma readings (a key plot
selection criterion) may not be possible and plot dimensions may require adjustment.
Composite samples will consist of 10 randomly spaced sub-samples.
2. Grid-based soil samples will consist of discrete grab samples collected along sampling
transects across disturbed/impacted areas and beyond. Sampling intervals along each
transect will depend on the size of the area being characterized. Sampling transects will

Ross-Adams Mine EE/CA And Risk Assessment
Page 2 of 2
CATEGORY: Standard Operating Procedure
TITLE: Soil Sampling No.: SOP 9 Date: 5/1/09
extend beyond impacted areas until gamma maps and direct gamma readings, along with
any visual indications, suggest that the limits of potential impacts have been exceeded by a
reasonable distance (e.g. 20-40 meters).
3. Using a clean stainless-steel garden trowel, collect each sample to a soil depth of 6 inches
(15 cm). Place the sediment collected in a stainless-steel bowl or bucket and cover
immediately with aluminum foil to prevent airborne contamination. When a sufficient
sample has been obtained (approximately 2 quarts), mix the sample bowl or bucket using a
clean stainless steel or plastic spoon. The sample will be mixed until the sample is of
uniform color and texture and the analyst is confident the sample has been completely
homogenized.
4. The composite samples will be homogenized and split for independent XRF (metals)
and gamma (radionuclide) scanning and analytical testing.
5. The sample will be inspected for any remaining foreign debris (rocks, metal, wood, etc.);
any such debris will be removed. Transfer the material to appropriate sample containers
using a stainless steel spoon, scoop, or spatula, and sea container. Any excess sample
material will by disposed on the ground adjacent to the sample location.
6. Label the sample bags, and record the sample identification and analyses on the chain-of-
custody form. Double bag the sample and place into a cooler for shipment. Manage the
sample containers in accordance with Standard Operating Procedure 3 for shipping and
handling of samples.
7. Take a GPS reading and record the data in the field log book, along with all pertinent
information (sample ID number, Date, GPS coordinates, location description).
8. Photograph the area(s) from which location was collected and note in the field logbook.
9. Fill out the sample and analyte request information on the Chain-of-Custody form (if
necessary, e.g. during significant precipitation, the Chain-of-Custody form may be filled out
in the evenings from log book entries).
10. Physically remove any gross contamination from sampling equipment by scraping or wiping
it off, if practical. Cleaning materials shall be surveyed and released or controlled.

Ross-Adams Mine EE/CA And Risk Assessment
Page 1 of 3
CATEGORY: Standard Operating Procedure
TITLE: Drive Point Piezometer Installation No.: SOP 10 Date: 5/1/09
STANDARD OPERATING PROCEDURE 10
DRIVE POINT PIEZOMETER INSTALLATION
Required Equipment
Field Sampling Plan
Field logbook
Indelible black-ink pens and markers
Camera
Electronic water sounding tape
Assorted tools (shovels, wrenches, etc.)
Filter fabric
Drive point piezometer
Assorted lengths of steel pipe
Pipe couplers
“Hi-lift” jacks and slip rings
Slide hammer
Hand-operated auger (see SOP 5, Soil/Sediment Sampling)
Peristaltic pump
Flow-through cell
tubing
Decontamination equipment

Ross-Adams Mine EE/CA And Risk Assessment
Page 2 of 3
CATEGORY: Standard Operating Procedure
TITLE: Drive Point Piezometer Installation No.: SOP 10 Date: 5/1/09
Installation Procedure
1. Select the location for the piezometer and if possible, use the slide hammer to drive the
piezometer to a depth of five feet.
2. If it is not possible to drive the piezometer to the desired depth, use a hand-operated auger
to advance the borehole to the appropriate depth. Record observations and measurements
in the field logbook.
3. Remove the auger from the boring and install the piezometer. Depth measurements will
be taken during the installation procedure and verified by the Field Operations Lead.
Record installation measurements and materials used in the field logbook.
4. Backfill from bottom of boring to ground surface with native material.
5. Record the piezometer stick-up length in the field logbook.
6. Upon completion of well development and sample collection, remove the piezometer
using the jacks and slip ring and fill the borehole with native material.
Well Development Procedure
1. Calibrate and decontaminate field instrumentation for measurement of water parameters
including pH, specific conductance, dissolved oxygen, temperature, and turbidity
temperature, pH, and conductance.
2. Begin development of well by pumping and surging or by bailing.
3. Record parameter data and approximate volumes of water produced on well development
record.
4. Continue development of well until discharge is clear and parameters have stabilized
(temperature, pH, specific conductance, within ±10 percent, turbidity within ± 10 percent
or below 20 NTU).
5. Remove development equipment and clean up site.
6. Decontaminate all equipment in accordance with Standard Operating Procedure 1
7. Document activities in the field logbook.

Ross-Adams Mine EE/CA And Risk Assessment
Page 3 of 3
CATEGORY: Standard Operating Procedure
TITLE: Drive Point Piezometer Installation No.: SOP 10 Date: 5/1/09

Ross-Adams Mine EE/CA And Risk Assessment
Page 1 of 4
CATEGORY: Standard Operating Procedure
TITLE: Radon Monitoring No.: SOP 11 Date: 5/1/09
STANDARD OPERATING PROCEDURE 11
RADON MONITORING
Purpose and Scope This Standard Operating Procedure (SOP) describes the monitoring of ambient Rn-222 (radon) at the
site and related equipment and procedures. The purpose of radon monitoring is to measure the natural
background concentration of radon in air at selected locations at the project site for purposes of
establishing current conditions for EE/CA and Risk Assessment purposes.
Overview
Radon gas is a radioactive decay product of radium isotopes found in natural uranium and thorium.
When radium in the near-surface soil decays, some of the radon gas produced is released into the
atmosphere. Indoor radon is typically responsible for about 50 percent of annual radiation doses to
people from normal background sources. Outdoor radon usually contributes little to the average
background dose, but elevated radon concentrations are known to be present in certain areas of the
Ross Adams site.
Measurement of radon at the site will be conducted using “alpha track” detectors (Radtrak detectors
supplied by Landauer, Inc.). These detectors contain a sensitive polycarbonate material that records
the passing of alpha particles from radon and its short-lived decay products in the form of small
tracks that are “etched” into the plastic as a result of ionizations. Air (and radon) diffuses through a
special membrane to enter the detector chamber. The number of tracks observed in the
polycarbonate material is proportional to the average concentration of radon in air during the
monitoring period. These detectors are small and require no power source. For outdoor monitoring,
each monitor requires a protective housing to keep moisture away from the membrane and sensitive
volume of the detector.
Responsibilities
FIELD MANAGER Provides expertise and resources to support the radon monitoring program Selects locations and installs the monitoring stations Oversees all monitoring activities, including training of other personnel to handle station
maintenance and detector collection as needed Ensures that all personnel involved in radon monitoring are properly trained in safety
aspects of working near sources of potentially elevated radon gas.

Ross-Adams Mine EE/CA And Risk Assessment
Page 2 of 4
CATEGORY: Standard Operating Procedure
TITLE: Radon Monitoring No.: SOP 11 Date: 5/1/09
FIELD TECHNICIAN
Observes all safety requirements Collects radon detectors and ships to the vendor in accordance with this SOP Maintains required documentation (i.e. detector log forms and field logbook entries)
Precautions
The radon monitors must remain sealed in film-foil bags as supplied by the vendor until ready to install in the protective housing at each location. The seals of each film-foil package should be carefully inspected prior to deployment to the field or opening to insure that the integrity of the seal has not been compromised during transit.
Wildlife such as bears, wolves, or poisonous snakes/insects/plants may be encountered at
the radon monitoring stations, particularly when located in or near densely vegetated areas. Personnel working at the monitoring stations must use the “buddy” system, always working in pairs. Personnel must follow precautions outlined in the Site Safety and Health plan with regard to biological hazards.
Required Equipment
Radon monitors in sealed film-foil bags
Metallic labels to seal each monitor upon retrieval, detector log sheets (provided by radon monitor supplier)
Plastic zip-lock bags to contain detectors during detector collection
Protective housing for each monitor deployed in the field along with Industrial Strength sticky-backed Velcro tape to firmly secure clear plastic radon cups inside of the housing (a pair of sharp scissors will be required for this)
Hammer, screws, nails, hose clamps as needed for fastening the protective housing at each monitoring location to a fencepost or other sturdy object.
Appropriate posts to which the protective housings will be attached (e.g., metal fence posts or heavy-duty wooden stakes that can be securely anchored into the ground)
Field log book
GPS unit

Ross-Adams Mine EE/CA And Risk Assessment
Page 3 of 4
CATEGORY: Standard Operating Procedure
TITLE: Radon Monitoring No.: SOP 11 Date: 5/1/09
Monitoring Locations, Duration and Setup
General areas where monitoring stations will be located have been determined in advance. The
Field Manager will select actual locations onsite based on this information and site conditions.
The monitoring period will be approximately 90 days (spanning the period between the 1st and 3rd site sampling trips). There will be additional deployments of separate detectors near mine portals for a short, 10-12 day period during the second sampling trip.
At each sampling location, radon monitors will be secured in protective housings to reduce the potential for damage due to water, animals, etc. The housings will be securely attached to a sturdy vertical post at about 1 meter above the ground surface.
Procedure
PRE- DEPLOYMENT
1. Obtain the required number of detectors for the project from Landauer, along with
protective housings, fence posts or stakes, and all necessary supplies/equipment to fasten the protective housings at the monitoring locations. All of this equipment must be shipped to the site and be available on the 1st sampling trip.
2. Keep the radon monitors in the sealed film-foil bags until ready to install into the
protective housings at each location. Carefully inspect the integrity of the film-foil packaging seals before deployment to the field. If a seal is compromised, contact the vendor for an immediate replacement detector or batch of detectors as needed.
. 3. Before opening the film-foil packages in the field, re-check the integrity of the seals and
the packages in general. If at this point an air-tight condition of the package believed to be compromised, detail in the field log book the batch number on the package, individual detector ID numbers involved, cover one detector with the metallic seal for immediate shipment back to the vendor (to serve as a control), and deploy the remaining detectors at the monitoring stations as scheduled.
RADON MONITOR PLACEMENT
1. Drive the metal fencepost or stake securely into the ground (such that it can withstand
considerable lateral force without coming loose).
2. Open the sealed film-foil bag and label the detector with the station ID number and date in the space provided with a permanent marking pen.

Ross-Adams Mine EE/CA And Risk Assessment
Page 4 of 4
CATEGORY: Standard Operating Procedure
TITLE: Radon Monitoring No.: SOP 11 Date: 5/1/09
3. Fill in the field log book and detector log sheet with the serial number on the monitor
label, date installed, time installed and the location information in the location/comments area (e.g., GPS coordinates).
4. Secure the radon monitor to the bottom of the clear plastic cup (pre-attached Velcro
fasteners are provided from the vendor for this)
5. Fasten the radon cup to the inside of the housing using Industrial Strength Velcro tape with the cup opening facing down.
6. Attach the protective housing (e.g. using hose clamps) to the mounting post.
RADON MONITOR RETRIEVAL
1. Prior to retrieving the radon monitors, verify that the vendor-supplied metallic detector
opening seals are packed with the items going for retrieval. 2. Remove the radon monitor from the plastic cup (i.e., separate the Velcro between the
radon monitor and the plastic cup). 3. Attach the metallic seal over the detector openings. Ensure that all openings are
completely sealed off in order to prevent further exposure to radon. 4. Mark on the detector label the date removed in the provided spaces on the detector label 5. Record the date on the detector log sheet. Make notes of any unusual conditions of the
monitors, including any comments or observations about the general condition of the equipment at time of change outs (e.g. the general condition of the station and monitoring device, including any apparent damage or intrusion of moisture on or near the monitoring device).
6. Place radon monitor in a plastic Ziploc bag and seal.
RETURN TO MONITOR SUPPLIER
1. Return all radon monitors and the detector log sheet to the monitor supplier as soon as is
feasible for analysis. Copies of all forms should be retained with the field logbook
notes.

Ross-Adams Mine EE/CA And Risk Assessment
Page 1 of 12CATEGORY: Standard Operating Procedure
TITLE: Direct Gamma Field Survey No.: SOP 12 Date: 5/1/09
STANDARD OPERATING PROCEDURE 12
DIRECT GAMMA FIELD SURVEY
Note: This Standard Operating Procedure is primarily for information. The baseline gamma scan will be performed by experienced technicians who are qualified to make changes in specific procedures in the field as required by site conditions. For this reason, the Standard Operating Procedure is in the form of a work plan and is generally narrative rather than a step-by-step outline format.
Ross-Adams Mine EE/CA And Risk Assessment
Page 2 of 12CATEGORY: Standard Operating Procedure
TITLE: Direct Gamma Field Survey No.: SOP 12 Date: 5/1/09
1.0 PURPOSE OF GAMMA SURVEY
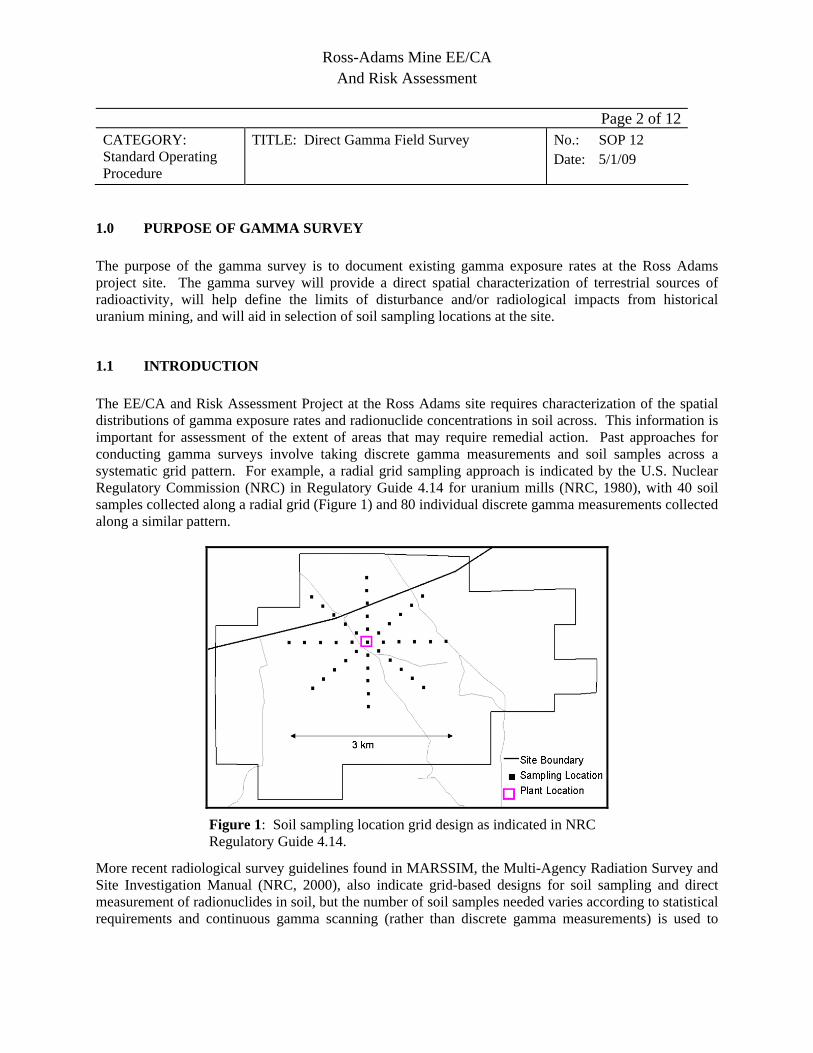
The purpose of the gamma survey is to document existing gamma exposure rates at the Ross Adams project site. The gamma survey will provide a direct spatial characterization of terrestrial sources of radioactivity, will help define the limits of disturbance and/or radiological impacts from historical uranium mining, and will aid in selection of soil sampling locations at the site.
1.1 INTRODUCTION
The EE/CA and Risk Assessment Project at the Ross Adams site requires characterization of the spatial distributions of gamma exposure rates and radionuclide concentrations in soil across. This information is important for assessment of the extent of areas that may require remedial action. Past approaches for conducting gamma surveys involve taking discrete gamma measurements and soil samples across a systematic grid pattern. For example, a radial grid sampling approach is indicated by the U.S. Nuclear Regulatory Commission (NRC) in Regulatory Guide 4.14 for uranium mills (NRC, 1980), with 40 soil samples collected along a radial grid (Figure 1) and 80 individual discrete gamma measurements collected along a similar pattern.
More recent radiological survey guidelines found in MARSSIM, the Multi-Agency Radiation Survey and Site Investigation Manual (NRC, 2000), also indicate grid-based designs for soil sampling and direct measurement of radionuclides in soil, but the number of soil samples needed varies according to statistical requirements and continuous gamma scanning (rather than discrete gamma measurements) is used to
Figure 1: Soil sampling location grid design as indicated in NRC Regulatory Guide 4.14.

Ross-Adams Mine EE/CA And Risk Assessment
Page 3 of 12CATEGORY: Standard Operating Procedure
TITLE: Direct Gamma Field Survey No.: SOP 12 Date: 5/1/09
augment the soil sampling by detection of any radiologically elevated areas between grid soil sampling locations. At the Ross Adams site, concentrations of natural uranium and thorium (U-nat and Th-232) along with their decay products in surface soils are expected to strongly influence the spatial distribution of gamma survey readings. Spatial variability in these parameters is expected to be high due to the nature of disturbances and impacts from historic mining activities, as well as from natural mineralization of U-nat and Th-232 at or near the ground surface in certain areas. Because of the potential for a high degree of small-scale spatial variability in soil radionuclide concentrations (e.g. large concentration differences within just a few feet), and because of the need to differentiate between natural mineralization and actual historical impacts in any areas where both may be present, a comprehensive high-density gamma survey is necessary. This survey will utilize state-of-the-art GPS-based radiological survey systems and characterization techniques, and if possible, will also include gamma-based characterizations of the spatial distributions of radionuclides and metals in surface soils. This information will be developed based on accepted scientific principles and methods, as well as on applicable regulatory guidance protocols. 1.2 GENERAL APPROACH Advanced GPS-based gamma scanning systems with automated electronic data collection have been developed by Tetra Tech Inc. (Fort Collins, CO) and used extensively in the field (Meyer et al., 2005a; Meyer et al., 2005b; Johnson et al., 2005; Whicker et al., 2008). These systems can record up to 3,600 individual gamma readings and corresponding GPS measurements per hour, providing a detailed record of gamma exposure rate conditions across scanned areas. Multiple scanning systems mounted on vehicles or backpacks can quickly survey large areas and rough terrain while providing a high spatial density of measurements. GPS-based gamma scanning technologies have become widely used and are consistent with radiological survey guidelines outlined in MARSSIM (NRC, 2000). Tetra Tech has developed a variety of such systems specifically for radiological characterization surveys at uranium recovery sites, and has also refined associated methods for application of this technology to meet challenging analytical objectives and regulatory requirements (Whicker et al., 2008). For this project, gamma surveys will utilize two GPS-based gamma scanning systems mounted on backpacks (Figure 2). Depending on the nature of terrain to be covered, each backpack will have 1 or 2 independent scanning systems coupled to a central data collection computer. The mounting system configuration may be modified to suit site conditions, but the functionality of the basic system will not change. In conjunction with the gamma scanning, the NaI-based scintillometers used for scanning will be cross-calibrated against a micro-rem meter (a tissue-equivalent plastic scintillometer). These data will be used to statistically convert raw NaI scan data to estimates of gamma dose rate. This will allow a common (instrument independent) basis of comparison for evaluations with future gamma surveys

Ross-Adams Mine EE/CA And Risk Assessment
Page 4 of 12CATEGORY: Standard Operating Procedure
TITLE: Direct Gamma Field Survey No.: SOP 12 Date: 5/1/09
(surveys that may use different gamma survey instruments, configurations, or measurement technologies), and will also provide information that may be used for risk assessment purposes. Furthermore, attempts will be made to develop statistically significant correlations between NaI gamma readings and concentrations of radionuclides and certain metals in surface soils (0-15 cm). Depending on the statistical strength of such regressions, spatial and statistical information about soil radionuclide and metal concentrations can be extracted from raw NaI gamma survey data. If successful, this approach will generate statistical and spatial information that can be used to guide direct soil sampling locations and to better characterize small-scale spatial variability in soil parameter distributions across all scanned areas (including areas between sampling locations). Once the data are collected and analyzed, geographical information systems (GIS) software will be used for any statistical conversions of raw scan data sets, interpolation with kriging methods, and for data mapping and presentation purposes. 2.0 RESPONSIBILITIES
FIELD MANAGER
Provides appropriate equipment, resources and expertise to conduct gamma survey activities.
Oversees all gamma scanning activities.
Reviews field activities and associated documentation to ensure that all instruments are functioning properly and that data quality objectives are being met.
Ensures that all individuals involved in gamma scanning are properly trained in the procedures outlined in this SOP.
Ensures compliance with radiation safety requirements during sampling operations.
Figure 2: 2-detector (left) and 1-detector (right) backpack systems.
Ross-Adams Mine EE/CA And Risk Assessment
Page 5 of 12CATEGORY: Standard Operating Procedure
TITLE: Direct Gamma Field Survey No.: SOP 12 Date: 5/1/09
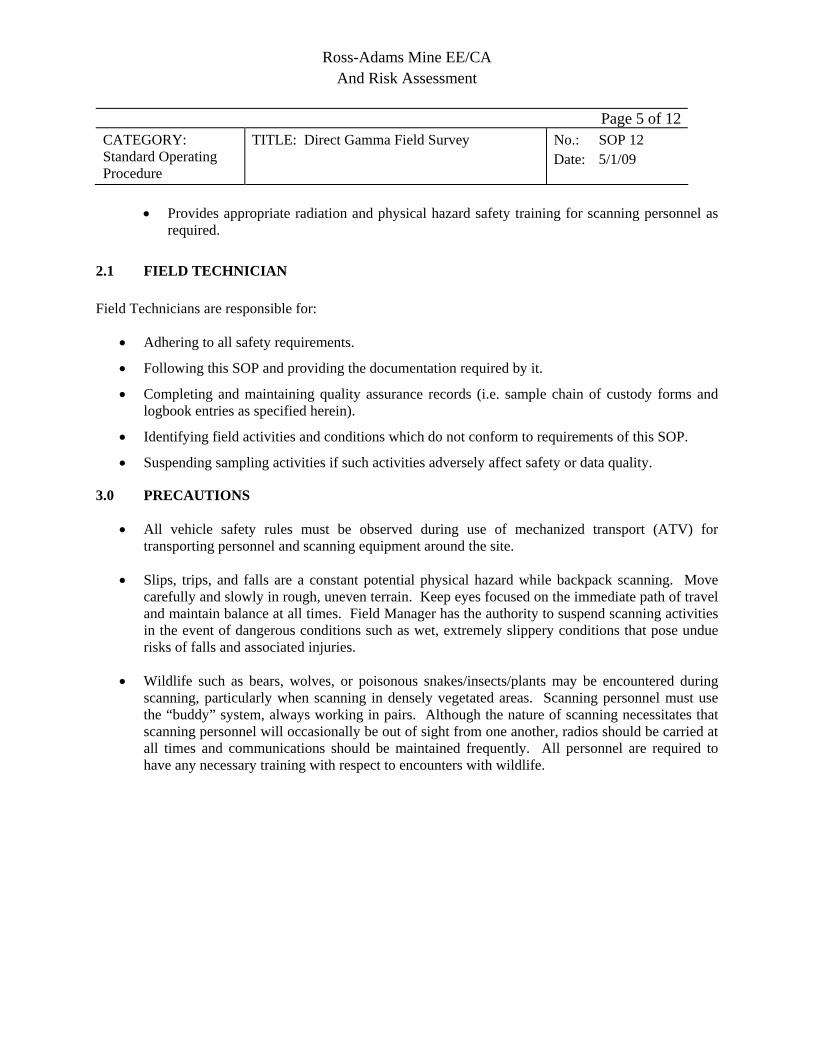
Provides appropriate radiation and physical hazard safety training for scanning personnel as
required.
2.1 FIELD TECHNICIAN
Field Technicians are responsible for:
Adhering to all safety requirements.
Following this SOP and providing the documentation required by it.
Completing and maintaining quality assurance records (i.e. sample chain of custody forms and logbook entries as specified herein).
Identifying field activities and conditions which do not conform to requirements of this SOP.
Suspending sampling activities if such activities adversely affect safety or data quality.
3.0 PRECAUTIONS
All vehicle safety rules must be observed during use of mechanized transport (ATV) for transporting personnel and scanning equipment around the site.
Slips, trips, and falls are a constant potential physical hazard while backpack scanning. Move carefully and slowly in rough, uneven terrain. Keep eyes focused on the immediate path of travel and maintain balance at all times. Field Manager has the authority to suspend scanning activities in the event of dangerous conditions such as wet, extremely slippery conditions that pose undue risks of falls and associated injuries.
Wildlife such as bears, wolves, or poisonous snakes/insects/plants may be encountered during scanning, particularly when scanning in densely vegetated areas. Scanning personnel must use the “buddy” system, always working in pairs. Although the nature of scanning necessitates that scanning personnel will occasionally be out of sight from one another, radios should be carried at all times and communications should be maintained frequently. All personnel are required to have any necessary training with respect to encounters with wildlife.

Ross-Adams Mine EE/CA And Risk Assessment
Page 6 of 12CATEGORY: Standard Operating Procedure
TITLE: Direct Gamma Field Survey No.: SOP 12 Date: 5/1/09
4.0 REQUIRED EQUIPMENT
All Terrain Vehicle (ATV) Multiple GPS-based gamma scanning systems mounted on backpacks Compact PCs loaded with data collection and GPS tracking software Assortment of common tools, bungee cords, tape, etc. Spare NaI scintillometers Micro-rem meter Handheld GPS Unit Field logbook Indelible black-ink pens and markers Camera Small pick axe and shovel Stainless-steel garden trowel Zip-lock baggies (gallon sized)
5.0 SAMPLING FREQUENCY AND LOCATIONS At a minimum, the gamma survey will cover the areas of the site that are readily and safely accessible by foot while carrying backpacks, and that may have been impacted by past mining activities in the area. Every attempt will be made to survey enough of a survey margin around such areas to identify where disturbed areas and associated radiological impacts are no longer visibly or measurably apparent. Specific target areas will include all areas identified in the scope of work such as waste rock piles at the 300, 700, and 900-foot levels, mine portal entrance areas (no entry into portals or other enclosed spaces is allowed), surface mining pits (only if safe to survey), the former ore stockpile area, and all haul roads around the site. Additional scanning may be required in some areas to characterize and delineate suspected natural occurrences of uranium/thorium mineralization at or near the soil surface. In many cases, dense vegetation is likely to limit or prevent scanning in areas deemed useful for data collection. Practical judgment must be exercised and in all cases, safety is of paramount importance. With respect to correlation plot gamma measurements and associated soil sampling, locations will be determined based on gamma survey results across key areas. The Field Manager is highly experienced in this regard and will determine correlation plot sampling locations on site. 6.0 PROCEDURES The following subsections describe the basic procedures that will be followed for the gamma survey. 6.1 SCANNING SYSTEMS EQUIPMENT, SETUP, AND USE Each individual scanning system will consist of a Ludlum 44-10 NaI gamma detector and paired SiiRF III GPS receiver (WAAS enabled). The NaI detector will be coupled to a Ludlum 2350 rate meter carried in the backpack. Simultaneous GPS and gamma exposure rate data for each independent scanning system

Ross-Adams Mine EE/CA And Risk Assessment
Page 7 of 12CATEGORY: Standard Operating Procedure
TITLE: Direct Gamma Field Survey No.: SOP 12 Date: 5/1/09
will be recorded every 1-2 seconds on a personal computer using special data acquisition software developed by Tetra Tech (Tetra Tech, 2007). The detectors will be positioned at approximately 3 feet above the ground surface. During scanning, GPS-based tracking software will also be used with a separate GPS receiver to track the progress and coverage of each day’s scan trajectories. Base maps of site boundaries or other site features of primary interest will be loaded on the tracking software to help guide and limit coverage to intended survey areas. This will minimize trajectory overlap and help to insure adequate ground coverage. In general the target ground coverage will be greater than 50%. In areas of particular interest, higher density scanning may be conducted if safe and practical to do so. Scanning speeds may range from about 1-4 mph, depending on terrain and the observed amount of spatial variation in readings across given areas (e.g. small areas with higher readings or highly variable readings are typically scanned at slower speeds and higher density of measurements). After each day of gamma scanning, the data will be downloaded into a project database and mapped using Gamma Viewer® software (Tetra Tech Inc., 2006). This will enable immediate onsite assessment of results for adequacy of coverage and for any problems that may have occurred during data acquisition throughout the day by assessment of consistency in readings between onboard detectors. Problems or inconsistencies will result in close investigation of affected system performance and may result in elimination of respective data until problems are resolved. 6.2 CROSS-CALIBRATION OF NAI DETECTORS AGAINST A MICRO-REM METER Gamma exposure rates measured by NaI detectors are only relative measurements as response characteristics of NaI detectors are energy dependent. True gamma exposure rates are best measured with less energy dependent systems such as the high-pressure ionization chamber (HPIC) or a micro-rem meter (tissue equivalent plastic scintillometer). Depending on the radiological characteristics of a given site, NaI detector readings can differ significantly from corresponding HPIC or microrem meter measurement values. Such differences are usually proportional to the magnitude of exposure rate being measured (Figure 3). To estimate true exposure rates or approximate dose rates, instrument cross-calibrations are necessary. Due to the difficulty of shipping a large HPIC filled with pressurized argon gas, the micro-rem meter will be used for instrument cross-calibrations at the Ross Adams site. Previous secondary cross-calibrations between the HPIC and the micro-rem meter may be used to estimate true exposure rates at the site if needed. To perform NaI/micro-rem cross-calibrations, static measurements will be taken at 6-10 discrete locations that span a representative range of exposure rates found at the site. At each measurement location, 10 individual readings are collected from the micro-rem meter as well as from one or more randomly chosen NaI detectors used for site scanning. Values for each instrument type will be averaged for each location. The resulting paired NaI/micro-rem data will be analyzed by linear regression to enable conversion of NaI-based gamma survey data to approximate tissue equivalent dose rates. Validity of applying cross-

Ross-Adams Mine EE/CA And Risk Assessment
Page 8 of 12CATEGORY: Standard Operating Procedure
TITLE: Direct Gamma Field Survey No.: SOP 12 Date: 5/1/09
calibration results from a randomly selected subset of NaI detectors used for the survey to all scan data will be established from the data quality control results (Section 6.4). 6.3 SOIL SAMPLING AND GAMMA/SOIL PARAMETER CORRELATIONS The primary objective of soil sampling conducted in conjunction with the gamma survey will be to develop a predictive statistical correlation between gamma readings and concentrations of select radionuclides and metals in surface soils (e.g. Ra-226, U-nat, Th-232, As, Pb) in order to estimate concentrations of these soil parameters across scanned areas. Concentrations of Ra-226 and Th-232 and their decay products are expected to correlate well with gamma readings. In areas of past mining disturbance, these decay series are also expected to be elevated along with certain metals associated with uranium ore. However, the two decay series may confound individual correlations, depending on the relative consistency of Ra-226/Th-232 concentration ratios. Cosmic sources of gamma radiation are relatively constant at locations with a given latitude and elevation (Stone et al., 1999). Differences in gamma survey readings at the Site are thus expected to be due to differences in gamma-emitting radionuclides in soils at or near the ground surface.
= Soil Sampling Location = Detector Scan Trajectory
10 meters
10
met
ers
Gamma/soil sampling correlation data will be collected at locations covering a representative range of gamma readings found at the site. Composite soil samples will be collected at these locations across 100 m2 plots. A diagram depicting the approximate sampling design for 100 m2 plot sampling and gamma measurements is shown in Figure 3. Within each 100 m2 plot, 10 soil sub-samples will be collected to a depth of 15 cm then composited into a single sample. A separate gamma scan of each 100 m2 plot will also be conducted, and the average reading for the plot will be subsequently calculated to pair with the corresponding soil sampling result for Ra-226. GPS readings will be collected at the center of each correlation plot location and recorded in the field log book. Soil samples will be placed in plastic baggies and labeled. An analytical request and chain-of-
Figure 3: Approximate design of 100 m2 soil sampling/scanning correlation plots.

Ross-Adams Mine EE/CA And Risk Assessment
Page 9 of 12CATEGORY: Standard Operating Procedure
TITLE: Direct Gamma Field Survey No.: SOP 12 Date: 5/1/09
custody form will be filled out and shipped with the samples to a qualified commercial laboratory for Ra-226 analysis.
6.4 DATA QUALITY ASSURANCE / QUALITY CONTROL
All radiological characterization projects conducted by the Tetra Tech include data QA/QC protocols. In general, quality assurance (QA) includes qualitative factors that provide confidence in the results, while quality control (QC) includes quantitative evidence that supports the validity of results (e.g. data accuracy and precision). Quality control documentation for this project includes the following:
Just prior to the gamma survey of each site, instrument QC measurements will be performed for each NaI detector used for scanning. This will be done in a controlled indoor environment to quantify the consistency of readings between detectors under identical measurement geometries. The mean of 20 individual QC measurements of background, as well as a Cs-137 check-source will be determined under a designated and consistent geometry. For normally distributed count data, over 99% of measurements are expected to fall within ± 3 standard deviations from the mean. Any instrument with measurements falling outside ± 3 standard deviations from the mean of all QC measurements on both background and check source charts indicates unacceptable instrument performance. All detectors used for field scanning must perform within acceptable QC limits under these criteria. Control charts will be constructed to document instrument QC data (example instrument control charts are shown in Figure 4).
For each day of the survey(s), onsite QC measurements for each scanning system will be performed along a designated “field strip” with relatively uniform background readings in the scan staging area. This provides an indication of total measurement variability for the systems under actual field conditions (e.g. includes variations due to temporal fluctuations in ambient gamma fields, small differences in measurement location/geometry, etc.). The same criteria used for instrument QC assessment apply to field strip QC measurements and all detectors must demonstrate acceptable performance for the survey (Figure 5).
Instrument Background QC Chart
10
11
12
13
14
15
16
1 2 3 4 5 6 7 8 9 10
Detector
Mea
n G
amm
a R
ead
ing
(uR
/hr)
Upper Control Limit
Mean + 2σ
Mean + 1σ
Mean
Mean - 1σ
Mean - 2σ
Lower Control Limit
Data
Instrument Source QC Chart
708090
100110
120130140150
1 2 3 4 5 6 7 8 9 10
Detector
Mea
n G
amm
a R
ead
ing
(uR
/hr)
Upper Control Limit
Mean + 2σ
Mean + 1σ
Mean
Mean - 1σ
Mean - 2σ
Lower Control Limit
Data
Figure 4: Example background and source instrument control charts for scan system detectors.

Ross-Adams Mine EE/CA And Risk Assessment
Page 10 of 12CATEGORY: Standard Operating Procedure
TITLE: Direct Gamma Field Survey No.: SOP 12 Date: 5/1/09
With respect to soil sample analysis results from the commercial lab, QC data and information will be included with the analytical report to note any flags or analytical problems with respect to quality control (e.g. certified reference material standards, duplicate sample analyses, etc.) as conducted according to certified laboratory standards.
Data quality assurance factors for this project include the following:
All detectors used for gamma scanning at the site(s) will have been calibrated by the manufacturer within one year prior to the date of use on this project (calibration certificates will be included in the radiological baseline report).
The micro-rem meter will have been calibrated within one year prior to the dates of use on the project (calibration certificate will be included in the survey report).
Chain-of-custody protocols were followed for soil sampling and contract laboratory analyses (relevant forms will be included in the survey report).
Tetra Tech’s Radiation Protection and Measurements Group staff has extensive qualifications and well over 100 years of combined experience for performing radiological measurements and related site assessments (CV’s provided on request).
Tetra Tech’s radiological survey methodologies and technologies are published in peer-reviewed radiation protection and measurement research publications (Johnson et al., 2006; Meyer et al. 2005a; Meyer et al. 2005b; Whicker et al., 2008; Whicker et al., 2006).
Figure 5: Example field strip control charts for 2-detector scan systems.

Ross-Adams Mine EE/CA And Risk Assessment
Page 11 of 12CATEGORY: Standard Operating Procedure
TITLE: Direct Gamma Field Survey No.: SOP 12 Date: 5/1/09
7.0 DOCUMENTATION AND RECORD KEEPING
A field log will be maintained daily during the scan. Date, field strip data, site conditions, scan areas for the day, unusual occurrences, and all other pertinent data will be recorded. Gamma scan data will be backed up on external storage devices and Tetra Tech servers.
REFERENCES
Johnson, J.A. Meyer, H.R., and Vidyasagar, M. 2006. Characterization of Surface Soils at a Former
Uranium Mill. Operational Radiation Safety. Supplement to Health Physics, Vol. 90, February, 2006.
Meyer, R.; Shields, M.; Green, S. 2005a. A GPS-based system for preliminary or remedial action
gamma scanning. American Nuclear Society Topical Meeting on Decommissioning, Decontamination, & Reutilization. Denver, Colorado, August 7-11, 2005. Meyer, R.; Shields, M.; Green, S.; Johnson, J. 2005b. A GPS-based system for radium/uranium
contamination gamma scanning. Uranium Mining and Hydrogeology IV. Broder J. Merkel, Andrea Hasche-Berger (Editors). Uranium in the Environment, conference proceedings, Freiberg, September 2005.
Stone, J.M.; Whicker, R.D. Ibrahim, S.A.; Whicker, F.W. 1999. Spatial Variations in Natural
Background Radiation: Absorbed Dose Rates in Air in Colorado. Health Physics, Vol. 9(5), May, 1999.
Tetra Tech. 2007. comReader data acquisition software. Tetra Tech, 3801 Automation Way, Fort
Collins, CO 80525. Tetra Tech Inc. 2006. Gamma Data Map Viewer software. Tetra Tech Inc., 3801 Automation Way, Ft.
Collins, CO 80525. U.S. Nuclear Regulatory Commission (NRC). 2000. Multi-Agency Radiation Survey and Site
Investigation Manual (MARSSIM), Revision 1. NUREG 1575. Washington, D.C. U.S. Nuclear Regulatory Commission (NRC). 1980. Regulatory Guide 4.14. Radiological Effluent and
Environmental Monitoring at Uranium Mills. Revision 1. Nuclear Regulatory Commission Office of Standards Development. Washington, D.C.
Whicker, R.; Cartier, P.; Cain, J.; Milmine, K.; Griffin, M. 2008. Radiological Site Characterizations:
Gamma Surveys, Gamma/Ra-226 Correlations and Related Spatial Analysis Techniques. Operational Radiation Safety, supplement to Health Physics, January 15, 2008. In Press (for November, 2008 issue).

Ross-Adams Mine EE/CA And Risk Assessment
Page 12 of 12CATEGORY: Standard Operating Procedure
TITLE: Direct Gamma Field Survey No.: SOP 12 Date: 5/1/09
Whicker, R., Whicker, M, Johnson, J. Meyer, B. 2006. Mobile soils lab: on-site radiological analysis
supporting remedial activities. Operational Radiation Safety. Supplement to Health Physics, Vol. 91(2), August, 2006.

Ross-Adams Mine EE/CA And Risk Assessment
Page 1 of 5
CATEGORY: Standard Operating Procedure
TITLE: Field Portable X-Ray Fluorescence (XRF) for Measurement of Metal Concentrations In Soils
No.: SOP 13 Date: 5/1/09
STANDARD OPERATING PROCEDURE 13
FIELD PORTABLE X-RAY FLUORESCENCE (XRF) FOR
MEASUREMENT OF METAL CONCENTRATIONS IN SOILS
Scope and Applicability
The following procedures describe the protocol for performing in-situ and ex-situ (intrusive)
analysis of soil using a field-portable, NITON Corporation X-Ray Fluorescence (XRF)
Spectrometer, in accordance with EPA Method 6200, Field Portable X-Ray Fluorescence
Spectrometry for the Determination of Elemental Concentrations in Soil and Sediment, Revision 0,
January 1998. These procedures will also be used in conjunction with the NITON Corporation
operation manual for the XRF 700 series instrument. Any changes or modifications to these
procedures will be documented by the field technician and approved by the project manager.
Health and Safety Issues
Proper training for safe use of the instrument and radiation training will be completed by the user
prior to use of the instrument. This will include participation in a formal training session by the
NITON representative. Information and procedures contained herein are specific to the operation of
NITON XRF 700 series instrument. The user will also refer to the operation manual for the NITON
XRF 700 series instrument for proper operation of that instrument. The instrument user should also
be aware of local, state and national regulations that pertain to the use of radiation producing
equipment and radioactive materials. Compliance with all applicable regulations is required.
Safety precautions, as specified by NITON Corporation, for use of the XRF instrument are as
follows:
• Never point the XRF at yourself or anybody else with the shutter open.
• Stand to the rear or side of the XRF when the shutter is open. Do not operate the instrument in a seated position; this may expose your lower body to radiation.
• Do not fix the shutter in an open position (except in provided test stands).
• Do not leave the XRF unattended.
• Only trained people will operate an XRF.
• Open the shutter only with the sample in place.
• Never open the probe.
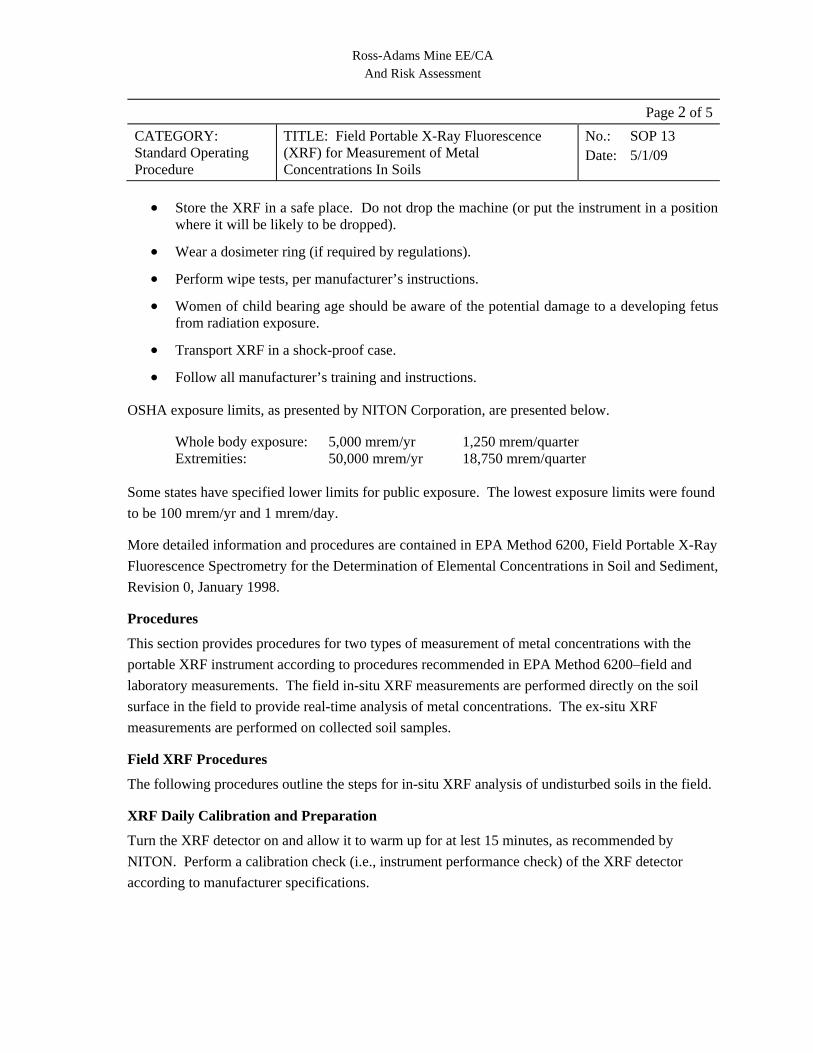
Ross-Adams Mine EE/CA And Risk Assessment
Page 2 of 5
CATEGORY: Standard Operating Procedure
TITLE: Field Portable X-Ray Fluorescence (XRF) for Measurement of Metal Concentrations In Soils
No.: SOP 13 Date: 5/1/09
• Store the XRF in a safe place. Do not drop the machine (or put the instrument in a position where it will be likely to be dropped).
• Wear a dosimeter ring (if required by regulations).
• Perform wipe tests, per manufacturer’s instructions.
• Women of child bearing age should be aware of the potential damage to a developing fetus from radiation exposure.
• Transport XRF in a shock-proof case.
• Follow all manufacturer’s training and instructions.
OSHA exposure limits, as presented by NITON Corporation, are presented below.
Whole body exposure: 5,000 mrem/yr 1,250 mrem/quarter Extremities: 50,000 mrem/yr 18,750 mrem/quarter
Some states have specified lower limits for public exposure. The lowest exposure limits were found
to be 100 mrem/yr and 1 mrem/day.
More detailed information and procedures are contained in EPA Method 6200, Field Portable X-Ray
Fluorescence Spectrometry for the Determination of Elemental Concentrations in Soil and Sediment,
Revision 0, January 1998.
Procedures
This section provides procedures for two types of measurement of metal concentrations with the
portable XRF instrument according to procedures recommended in EPA Method 6200–field and
laboratory measurements. The field in-situ XRF measurements are performed directly on the soil
surface in the field to provide real-time analysis of metal concentrations. The ex-situ XRF
measurements are performed on collected soil samples.
Field XRF Procedures
The following procedures outline the steps for in-situ XRF analysis of undisturbed soils in the field.
XRF Daily Calibration and Preparation
Turn the XRF detector on and allow it to warm up for at lest 15 minutes, as recommended by
NITON. Perform a calibration check (i.e., instrument performance check) of the XRF detector
according to manufacturer specifications.

Ross-Adams Mine EE/CA And Risk Assessment
Page 3 of 5
CATEGORY: Standard Operating Procedure
TITLE: Field Portable X-Ray Fluorescence (XRF) for Measurement of Metal Concentrations In Soils
No.: SOP 13 Date: 5/1/09
Field In-Situ XRF Measurement
Attach the NITON test guard to the NITON XRF detector. Determine and prepare the location or
sample to be sampled. Composite samples may be placed in ziplock bags for testing. If testing the
ground surface, remove any debris on the soil surface consisting of rocks, pebbles, leaves,
vegetation, twigs or roots. Level and smooth the soil surface with a stainless-steel or plastic trowel
so that the probe window is in direct contact with the soil surface. Lightly tamp the soil surface with
the trowel to increase soil density and compactness. The soil should not be saturated or have a
moisture content exceeding approximately 20 percent.
When ready for analysis, press the XRF down on the soil surface or sample bag, thus opening the
XRF shutter. Maintain the XRF shutter open for the specified count time (60 seconds is
recommended) then remove/release the XRF from the sample to stop the analysis. The measured
metal concentrations are recorded by the XRF datalogger. Three tests are to be performed on bag
samples.
Decontamination
After every test the XRF detector shutter and the NITON test guard will be wiped clean with tissue
or wipes. If a stainless-steel trowel or other non-disposable equipment is used for the XRF in-situ
measurements, decontaminate equipment in accordance with Standard Operating Procedure 1.
Ex-Situ XRF Analysis
The following method outlines procedures for preparing soil samples collected in the field for ex-
situ XRF measurements under laboratory conditions, according to procedures recommended in EPA
Method 6200.
Supplies
Stainless steel trowel or spoon XRF instrument and mini lab kit Disposable plastic spoons Sieves Paper towels Mortar and pestle (ceramic) Toaster oven Polyethylene specimen cups, collar, and Deionized water bottom Alconox detergent (or similar) X-ray window film (Mylar, or similar) Scrub brushes USS No. 60 sieve Sample bags/containers Dust Masks
Sample Collection and Preparation
Soil samples will be collected in such a manner that the sample is representative of the soil matrix
analyzed at the field in-situ XRF measurement location. Sample soils in accordance with Standard
Operating Procedure 9. Typically, the soil sample will be collected from a 4-inch by 4-inch square

Ross-Adams Mine EE/CA And Risk Assessment
Page 4 of 5
CATEGORY: Standard Operating Procedure
TITLE: Field Portable X-Ray Fluorescence (XRF) for Measurement of Metal Concentrations In Soils
No.: SOP 13 Date: 5/1/09
area to a depth of one to two inches. However, a larger soil volume may be required to provide a
sufficient sample for drying and sieving depending on the soil texture and moisture content, and if
necessary splitting for QC testing or laboratory analysis. Rocks, pebbles, vegetation matter, and
other foreign debris will be removed from the sample. The minimum soil sample volume will be
sufficient to fill a 4-ounce plastic sample bag after sieving. The sample will be placed in a clean
sample container suitable for thorough mixing of the sample, such as a Ziploc® bag or stainless steel
bowl.
Homogenize the Sample
The sample will be mixed by kneading within the Ziploc® bag or mixing in a stainless steel bowl
using a clean stainless steel or plastic spoon. The sample will be mixed until the analyst is confident
the sample has been completely homogenized.
Drying the Sample
If the sample is visibly wet, the sample will be air-dried or dried in a conventional or toaster oven at
a temperature no greater than 150 degrees Celsius. A microwave oven will not be used to dry the
sample. If the sample is air-dried, it will be allowed to dry in a protected environment to prevent
contamination by dust deposition. The sample will be inspected for any remaining foreign debris
(rocks, metal, wood, etc.); any such debris will be removed. The sample should be dry enough for
sieving; however, drying time may need adjustment, depending on the initial moisture content of the
sample.
Prepare a Specimen Cup
Pass the sample through a USS No. 60 sieve to collect enough sample to prepare an XRF
specimen cup. A dust mask shall be used during this procedure to prevent inhalation of dust
particles. Label the specimen cup.
XRF Measurement
Place the specimen cup in the Niton test apparatus and begin test. Maintain the XRF shutter open
for the specified count time (60 seconds is recommended) then remove/release the XRF from the
sample to stop the analysis. The measured metal concentrations are recorded by the XRF
datalogger.
Documentation
The following information will be recorded in a notebook or logbook for laboratory XRF analysis:
• Site-specific calibration standards used, or field standards if any

Ross-Adams Mine EE/CA And Risk Assessment
Page 5 of 5
CATEGORY: Standard Operating Procedure
TITLE: Field Portable X-Ray Fluorescence (XRF) for Measurement of Metal Concentrations In Soils
No.: SOP 13 Date: 5/1/09
• Instrument make and model number, supplier of instrument, radioactive source used
• Date of analyses
• Name of analyst
• Sample locations and identification numbers
• Documentation of instrument performance checks
• Sample preparation method, sieve size used, if any
• Samples submitted to the laboratory for analyses
• Any problems encountered in instrument set up and operation or sample preparation and analysis.

Ross-Adams Mine EE/CA And Risk Assessment
Page 1 of 3
CATEGORY: Standard Operating Procedure
TITLE: Low-Level Mercury Analysis Sample Collection
No.: SOP 14 Date: 5/14/09
STANDARD OPERATING PROCEDURE 14
LOW-LEVEL MERCURY ANALYSIS SAMPLE COLLECTION
This Standard Operating Procedure (SOP) describes the collection of surface and groundwater for
low-level mercury analysis using the clean hands-dirty hands method. SOP7, Surface Water
Sampling and SOP8, Groundwater Sampling and Low-Flow Purging, provides general procedures
for surface water and groundwater sampling.
Required Equipment
Pre-cleaned certified sample bottles
Cleanroom disposable gloves’
Sample Collection equipment
Procedure
Water samples collected for low-level mercury analysis will be performed in accordance with
Method 1669: Sampling Ambient Water for Trace Metals at EPA Water Quality Criteria Levels.
Pre-cleaned and certified sample bottles for collection of low-level mercury samples will be
provided in kit form by the laboratory. The kit will consist of double-bagged sample bottles, reagent
water for field blank(s), gloves, and ice.
Collection of samples is performed using the “clean hands-dirty hands” technique (EPA Method
1669, Section 2.4). Bottles are sealed tightly and re-bagged using the opposite series of steps as
were used to open them. Samples bottles will be shipped to the analytical laboratory via overnight
courier for preservation and analysis (no filtering and no addition of a preservative to the sample
bottles will be performed in the field). Ideally, at least two persons each wearing fresh cleanroom
gloves (EPA Method 1669, Section 4.2.2.2) are required on a sampling crew. Cleanroom gloves
should be worn at all times when handling samples or sampling equipment. The gloves should be
changed between samples and whenever anything not known to be trace metal clean is touched.
The following procedures describe methods for collecting samples directly into the sample
container. If other sampling methods (e.g. grab sampling device, sample collection container, or
peristaltic pump) are required for sampling, procedures recommended in EPA Method 1669 should
be followed. Collect water samples for mercury analysis as follows:

Ross-Adams Mine EE/CA And Risk Assessment
Page 2 of 3
CATEGORY: Standard Operating Procedure
TITLE: Low-Level Mercury Analysis Sample Collection
No.: SOP 14 Date: 5/14/09
1. Obtain all necessary sample collection equipment.
2. Make sure that the sample labels have been filled out for the sampling location.
3. Obtain sample kit provided by laboratory.
4. All sampling personnel must put on clean latex gloves before commencing sample
collection activities.
5. Make sure that no activities are occurring or have recently occurred immediately
upstream that would affect the integrity of the sample. Approach the sampling site
from downstream and downwind if possible. To avoid disturbing stream sediments
or otherwise contaminating samples, stand downstream of the location from which
you collect the sample.
6. “Dirty hands” removes a bagged bottle from the box or cooler, and opens the outer
bag, avoiding touching the inside surface of that bag.
7. “Clean hands” reaches in, opens the inner bag, and removes the sample bottle.
“Clean hands” should not touch anything but the outside surface of the sample
bottle and cap, and the water being sampled. If anything other than the sample
bottle, cap or water is touched, “clean hands” must change gloves.
8. “Clean hands” opens the sample bottle and holds the bottle in one hand and the cap
in the other. If it is necessary to set the cap down, it should be placed in the inner
bag from which the sample bottle was removed.
The person collecting the sample should be wary of disturbing the flow upstream of
the sampling point. The insertion of the bottle into a flowing stream creates eddies
(disturbances in the upstream flow) that can re-suspend solids near the sampling
point. Entry of such re-suspended solids into the sample may produce a non-
representative sample and could increase the mercury concentration.
9. “Clean hands” directly submerges the sample bottle in the water to be sampled.
Rinse the sample bottle and inside surface of the cap three times with sample water.
Then, fill the bottle to the top with sample until no more air bubbles appear, and
while the bottle is still inverted so that the mouth of the bottle is underwater, “clean
hands” replaces the cap of the bottle (Method 1669, Section 8.2.5.5). Tighten the
cap securely.
10. Re-bag the bottle in the opposite order that it was removed using the “clean hands-
dirty hands” technique.
11. Place the samples on ice in a cooler.

Ross-Adams Mine EE/CA And Risk Assessment
Page 3 of 3
CATEGORY: Standard Operating Procedure
TITLE: Low-Level Mercury Analysis Sample Collection
No.: SOP 14 Date: 5/14/09
12. Record the time of sampling.
13. Complete the field documentation and chain-of-custody form(s).
EPA Method 1631 requires collection of a field blank with every 10 samples from a given site
(Method 1631, Section 9.4.3.1). A sample bottle for the field blank will be provided by the
laboratory as part of the sampling kit. A separate sample bottle as well as a bottle filled with reagent
water are used to collect the field blank.
The following procedures are used to collect the field blank:
1. To collect the field blank, open an empty sample bottle using the “clean hands-dirty
hands” techniques described above. Also open the bottle containing the reagent water.
2. Pour the reagent water into the empty sample bottle. This is now the field blank.
3. Re-bag the field blank in the opposite order that it was removed using the “clean
hands-dirty hands” technique.