archery merit badge - lds camp · archery merit badge ... when retrieving your arrows from behind a...
TRANSCRIPT

Archery Merit Badge
RULE #1 and MOST IMPORTANT
“DON’T SHOOT THE RANGE MASTER”
Instructors:
Requirementsfrom the 2013 print of the Archery MB
• Do the following:
– State and explain the Range Safety Rules.
• Three safety rules when on the shooting line.
• Three safety rules when retrieving arrows.
• The four whistle commands used on a range and their related verbal commands.
– State and explain the general safety rules for archery. Demonstrate how to safely carry arrows in your hands.
– Tell about your local and state laws for owning and using archery tackle.
• Do the following:
– Name and point out the parts of an arrow.
– Describe three or more different types of arrows.
– Name the four principle materials for making arrow shafts.
– Make a complete arrow from a bare shaft using appropriate equipment available to you or demonstrate arrow repair, inspect the shafts and prepare and replace at least three vanes, one point and one nock. You may use as many arrows as necessary to do this. The repairs can be done on wood, fiberglass or aluminum arrows.
– Explain how to properly care for and store arrows.
• Do the following:
– Explain how to proper use, care, and storage of, as well as the reasons for using tabs, arm guards, shooting gloves, and quivers.
– Explain the following terms: cast, draw weight, string height (fistmele), aiming, spine, mechanical release, freestyle, and barebow.
– Make a bowstring. Using appropriate materials.
• Explain the following:
– The importance of obedience to a range officer or other person in charge of a range.
– The difference between an end and a round.
– The differences among field, target, and 3-D archery.
– How the five-color National Archery Association (NAA) or Federation Internationale de Tir a l'Arc (FITA) target is scored.
– How the National Field Archery Association (NFAA) black-and-white field targets and blue indoor targets are scored.
– The elimination system used in Olympic archery competition.

Requirements (continued)
• Do ONE of the following options:
– Option A - Using a Recurve Bow or Longbow
• Name and Point to the parts of the recurve or longbow you are shooting.
• Explain how to properly care for and store recurve bows and longbows.
• Show the 10 steps of good shooting for the bow you are shooting.
• Demonstrate the proper way to string a recurve bow or longbow.
• Using a bow square, locate and mark with dental floss, crimp-on, or other method, the nocking point on the bowstring of the bow you are using.
• Do ONE of the following:
– Using a recurve or longbow and arrows with a finger release, shoot a single round of ONE of the following BSA, USA Archery,or NFAA rounds:
» An NFAA field round of 14 targets and make a score of 60 points.
» A BSA Scout field round of 14 targets and make a score of 80 points.
» A Junior 900 round and make a score of 180 points.
» A FITA/USA Archery indoor* round I and make a score of 80 points.
» An NFAA indoor* round and make a score of 50 points.
– Shooting 30 arrows in five-arrow ends at an 80-centimeter (32-inch) five-color target at 10 yards and using the 10 scoring regions, make a score of 150.As a member of the USA Archery's Junior Olympic Development Program (JOAD), qualify as a Yeoman, Junior Bowman, and Bowman.
– As a member of the NFAA's Junior Division, earn a Cub or Youth 100-score Progression patch.
Requirements (continued)
– Option B - Using a Compound Bow
• Name and point to the parts of the compound bow you are shooting.
• Explain how to properly care for and store compound bows.
• Show the 10 steps of good shooting for the compound bow you are shooting.
• Explain why it is necessary to have the string or cable on a compound bow replaced at an archery shop.
• Locate and mark with dental floss, crimp-on, or other method, the nocking point on the bowstring of the bow you are using.
• Do ONE of the following:
– Using a compound bow and arrows with a finger release, shoot a single round of ONE of the following BSA, USA Archery, or NFAA rounds:
» An NFAA field round of 14 targets and make a score of 70 points.
» A BSA Scout field round of 14 targets and make a score of 90 points.
» A Junior 900 round and make a score of 200 points.
» A FITA/USA Archery indoor* round I and make a score of 90 points.
» An NFAA indoor* round and make a score of 60 points.
– Shooting at an 80-centimeter (32-inch) five-color target using the 10 scoring regions, make a minimum score of 160 accomplish this in the following manner: Shoot 15 arrows in 5 arrow ends at a distance of 10 yards and shoot 15 arrows in 5 arrow ends at a distance of 15 yards
– As a member of the USA Archery Junior Olympic Development Program (JOAD), qualify as a Yeoman, Junior Bowman, and Bowman.As a member of the NFAA's Junior Division, earn a Cub or Youth 100-score Progression patch.
• * The indoor rounds may be shot outdoors if this is more convenient.
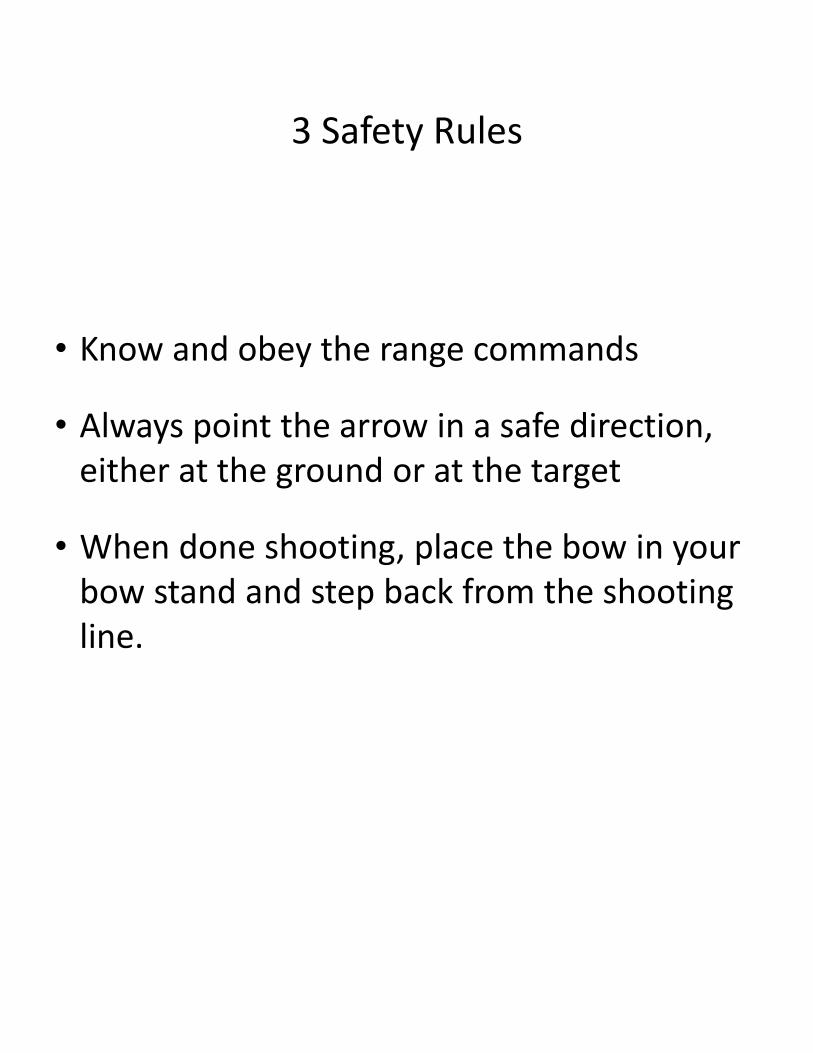
3 Safety Rules
• Know and obey the range commands
• Always point the arrow in a safe direction, either at the ground or at the target
• When done shooting, place the bow in your bow stand and step back from the shooting line.

Archery Range Commands
• Whistle: Two Blasts
– Archers to the Line
• Pickup bow and move into position, arrows in quiver
• Whistle: One Blast
– Begin Shooting
• Take arrows out of quiver and begin shooting
• Whistle: Three Blasts
– Walk forward and get your arrows
• Walk to target, prepare to pull arrows, pull arrows if not scoring
• Whistle: Four or More Blasts*– STOP, STOP SHOOTING, STOP
• Emergency on the range – Point arrow at ground while letting down, put arrows in quiver
*USA Archery/NFAA Five or more Blasts

3 RULES WHEN RETRIEVING ARROWS
• Retrieve arrows only when the shooting line is clear and the range officer signals “Retrieve Your Arrows”
• As you WALK forward to the target waiting line, pick up arrows on the ground (your own and all others as well)
• Only ONE archer may pull arrows from the target at a time; all others stand 6 feet back from the target at the target waiting line (you may retrieve arrows which went behind the target at this time, yours and all others)

Archery Range Procedures
• Stand behind the waiting line until you hear 2 whistles or “Archers to the shooting line”.
–Pick up your bow and straddle the shooting line.
• Keep your arrow in the quiver until you hear 1 whistle or “ Begin Shooting”
• After you have shot all your arrows, step back from the shooting line, set your bow on the rack, and wait behind the line.
• After everyone is done shooting and behind the line, the instructor will blow the whistle 3 times or announce “retrieve your arrows”
–Walk forward to get your arrows, stop at the target line.

Archery Range Rules
• Keep your arrows in the quiver until you are told to shoot.
• To carry arrows in your hands, carry them securely with both hands around the arrows and with your palms facing down. However, the best way to transport an arrow is safely in its quiver.
• Be sure the area around and beyond your target is clear before you shoot. Never draw a bow if anyone is in front of the shooting line.
• Always aim and shoot at a definite target, never shoot just for the sake of shooting. Be sure of your target and that it is safe to shoot at. If you are not sure, take a closer look. If after a closer look, you are still not sure, DO NOT SHOOT.
• Shoot only at targets that are thick enough to stop your arrow. Do not shoot if there is any chance your arrows might ricochet from the target or other object and hit someone.
• Use arrows that are the proper length for you.Arrows that are too short can cause serious injury.

Archery Range Rules Continued
• Never shoot an arrow up into the air
• Walk, do not run on the archery range If you run, you
might accidentally cross in front of another group of archers, step on arrows lying on the ground, or trip and fall into a target and be injured by the arrows sticking out of it.
• Lean your bow against the face of the target or stick an arrow in the top of the target with the fletching up, when retrieving your arrows from behind a target, particularly
on a field archery range or at an isolated target. This will warn other archers that you are behind the target.
• Always use proper safety equipment, including an arm
guard, a finger tab and a bow sling.
• Always inspect your equipment before shooting. Replace the bow string when it becomes worn
• NEVER DRYFIRE A BOW. Always have an arrow on the string
when shooting a bow. Dryfiring (shooting a bow without an arrow) can seriously damage a ow and possibly injure the archer.

Pulling Your Arrows
• Two archers at a time may go forward from the target line to pull their arrows.
– Other archers may search for lost arrows
• Stand on the SIDE of the target and make sure no one is standing behind your arrows
– One hand on the target, the other hand on the shaft close to the target.
• Pull the arrows out one at a time, put them in your quiver.
– If no quiver , cover the points with one hand, hold loosely near the fletching with the other.
• After you have pulled all your arrows, return to the waiting line.

10 Steps to the 10-Ring
1. STANCE - Comfortable, balanced, Feet shoulder width apart
2. NOCK – Arrow on rest, Index fletching away from bow
3. SET - bow hand on grip – web and meaty part of thumb, 3
finger around bow string relax
4. PRE-DRAW – Rotate bow arm elbow under, draw arm
elbow level with nose
5. DRAW - rotate draw arm shoulder until elbow behind arrow
6. ANCHOR – Draw bow smoothly without stopping. First
finger on corner of smile
7. TRANSFER/HOLD – At full draw transfer weight of
bow from arms and shoulders to back.
8. AIM/EXPAND – look at target through the sight, focus
on form line string up down center of the bow.
9. RELEASE – Begin slight expansion from center of chest, allow
string to leave fingers, pushing them out of the way, continue the expansion and
10. FOLLOW-THROUGH – drawing hand continues back
beside the neck with fingers relaxed, ending up behind your ear. Maintain focus on target until the arrow hits the target.
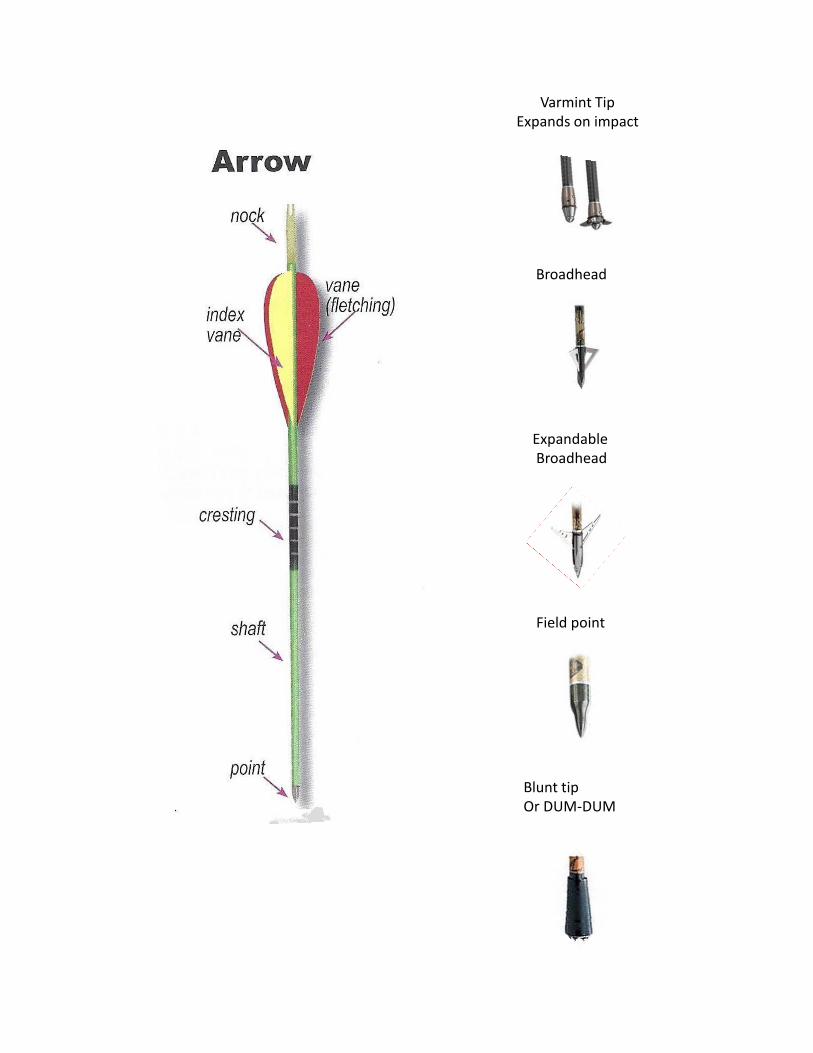
Varmint TipExpands on impact
Broadhead
ExpandableBroadhead
Field point
Blunt tip Or DUM-DUM

Thumb release
Trigger release
Compound Bow with whisker biscuit, 5-pin sight, peep, quiver, stabilizer and sling, and nock loop
LowerLimb
Cable guard slide
Limbpocket
UpperLimb

LongBow
Finger glove
Arm Guards
Finger tab


TERMS
CAST – Distance an arrow will fly from a given bow
SPINE – Flexibility of the arrow shaft
BARE BOW – Bow with nothing added (naked bow)
FREESTYLE BOW – Bow with accessories (stabilizer, sights, etc…)
FISTMELE – Old English term for string height measured using fist with raised thumb
STRING HEIGHT – Distance between bowstring and grip measured in inches
DRAWWEIGHT – Amount of weight used to draw the bow to the shooting position
MECHANICAL RELEASE – Device used to shoot arrows with some type of trigger mechanism to let string go
End – Number of arrows shot at a given time
Round – Total arrow shot at a given distance
(1 Round of 30 arrows shot in 5 arrow ends)

Making a Bow String
1. Get string jig, B-50 string and threader with thread
2. Adjust string jig to size of string to be made
3. Wrap B-50 string around top of jig appropriate number of times (10 for 25#, 12 for 35#)
4. Tie with knot which will leave small footprint but hold securely (Fisherman’s knot works well)
5. Adjust not so it is1.5 inches from end of jig.
6. Mark string 1.5” from end of jig. Area for loops.
7. Wax entire string with bees wax and resin, 3 to 1 ratio
8. Move marks from ends to center.
9. Separate strings using device with grooved ends.
10. Serve the strings, start with mark 3” from knot serve towards knot.
11. slide completed serving to end, check marks are on other end, return to center, separate lines
12. Serve other side of string
13. Slide servings to the end of Jig, to close loops. Serve string for 5” at each end.
14. Remove string from Jig, String on bow, mark string at 2” above arrow rest and 5 “ below. Serve area between marks on bow or restring on jig.
15. Restring on Bow, measure and add Nocking Point

Serving the Bow String

Making the Arrow
1. Select a shaft - Fiberglass or Wood
2. Find the appropriate tip and nock
3. Select an index vane and two vanes of a different color
4. If you have selected a wood shaft, sharpen the ends with a knife or arrow sharpener
5. Check to see if the tip fits the sharpened end
6. Check that the nock fits the other sharpened end
7. For both the fiberglass and wood shafts
8. Put glue on one end
9. Put the tip on the end and twist it so it goes all the way onto the shaft
10. The twist will spread the glue around the shaft and hold the tip more securely
11. Now put glue on the other end and put the nock on and twist it.
12. Wait five minutes for the glue to dry
13. Put the arrow in the jig – lining up the nock to put the index vane on first
14. Put the vane in the jig’s clamp
15. Put fletch-tite down the length of the vane
16. Attach the vane to the shaft
17. Wait five minutes for the fletch-tite to dry
18. Repeat process for other two vanes

FITA and Olympics
Olympics
Men shoot distance of __, __, __ & __ . Women Shoot distances of __, __, __ & __ .
How Many __ Rounds of __ ends.
___ Total number of Arrow
____ Total number of Points
Top __ go to single elimination tournament. To shoot __ Round(s) of __ ends at a
distance of ___.
__ Arrows shot for high score.
Ties __ arrow(s) shoot off till broken.
Are the distances in yards, feet, inches, meters?
1, 4, 12, 30, 32, 36, 50, 60, 70, 90, 144, 1440

Target Scoring
• 1 point for outer ring, increase by 1 point for each ring. Center X is 10 points
• 3 points for 2 outer rings, 4 points for the 2 inner black rings, and 5 points for the 2 center yellow rings.

Types of Archery
• Target Archery – Shooting at targets, can be at a given distance or could be several targets at varying distances. (what you are shooting on the archery range)
• Field Archery – Shooting at targets which are set up on a course. Walk to starting point shoot target, take bow to target, retrieve arrows and move to next starting point. (like playing a round of golf only shooting at targets)
• 3D Archery – Shooting at sillouettes of animals in 3 dimensions. (Turkey, Deer, Elk, Bear, etc…). Can be shot on a course which would make it 3D Field Archery

DRILLS
• Shoulder Shrug Drill
– Raise shoulders up towards ears
– Then push fingers toward the ground (repeat 5 times)
• 1-2-3 Alignment Drill
– Correct stance, raise arms to form T, palms down
– Turn Head toward target, keep it straight up and over center of the body
– Bring draw hand to face bending at elbow, chest and shoulders down, body in T position.
• 1-2-3 Release Motion Drill
- From full draw count 1-2-3, on 3 move release hand along side of face to the ear.

Finger Sling
Bow Sling
Arrow Puller
Bow Quiver