arduino: wireless communication with the …arduino uno and nano is minimal • add capacitor to...
TRANSCRIPT
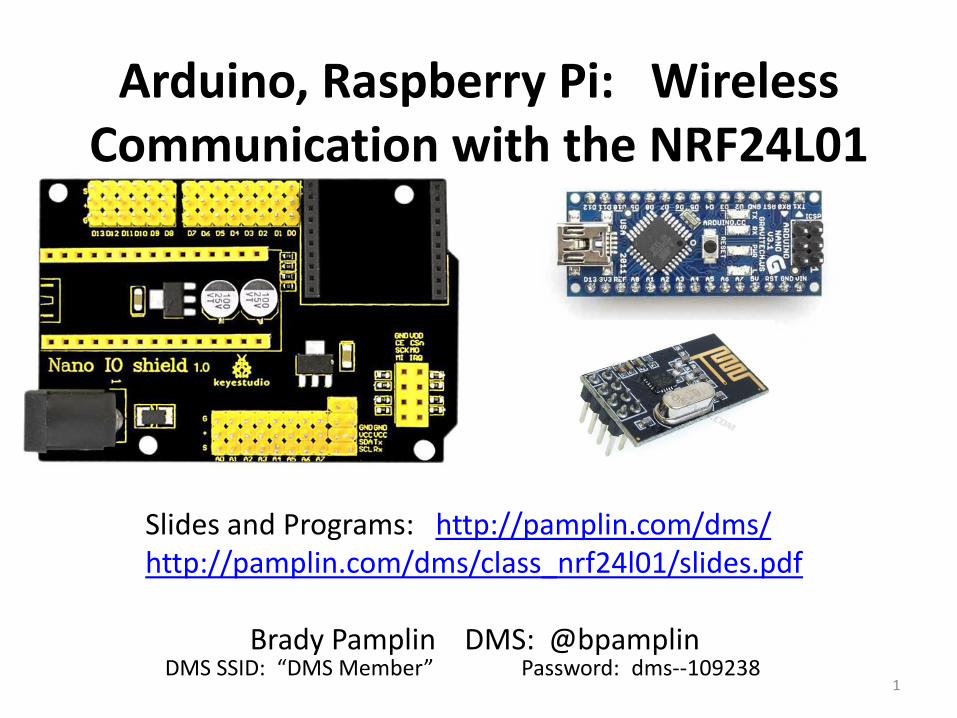
Arduino, Raspberry Pi: Wireless Communication with the NRF24L01
Slides and Programs: http://pamplin.com/dms/ http://pamplin.com/dms/class_nrf24l01/slides.pdf
Brady Pamplin DMS: @bpamplin
1 DMS SSID: “DMS Member” Password: dms--109238

Sensors, LCD Display, Buzzer,…
2

Robotale Nano IO Shield Closeup
3
WARNING
If the 5V, 3V3 or output data pins are shorted directly to ground, there is a danger of damaging the microcontroller or USB port of your computer. These circuits use 3.3 and 5 volts so there is no danger to a person. The IO shields have exposed contacts on the bottom. Be careful around metal objects.
4
Parts Kit
• Arduino Nano • NRF24L01 transceiver module • Nano IO Shield • Breadboard • KY-018 - Photoresistor module • Potentiometer – pot – 10k linear • Jumper wires m-m, f-f • USB cable
5
NRF24L01 – Pros and Cons Pros
• Very cheap • Easy to use in simple programs • Updated revision available – NRF24L01+ (use the new
one) • Much hobby level documentation • Nano IO Shield makes testing easy
Cons
• Range is limited • RFM69 family is considered better for range and wall
penetration • No provision for security
6
NRF24L01 - Improving the Range
• Lower the speed to 250k
• Adjust power as required
• Use short packets
• Provide clean 3.3V power – The 3.3V regulator on Arduino Uno and Nano is minimal
• Add capacitor to power leads
7
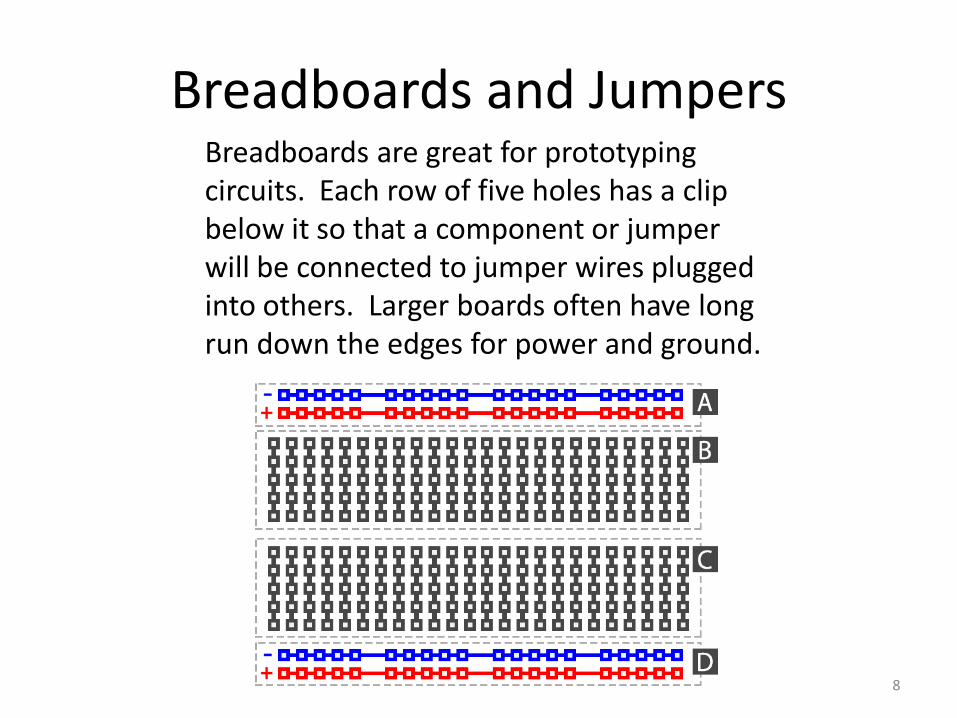
Breadboards and Jumpers Breadboards are great for prototyping circuits. Each row of five holes has a clip below it so that a component or jumper will be connected to jumper wires plugged into others. Larger boards often have long run down the edges for power and ground.
8
Exercises
9
• Blink
• Photoresistor – light sensor
• Simple transmit/receive
• Range testing
• All transmit to central control panel to simulate multiple sensors
Demo
10
• Arduino IDE • Tools
• Board: Arduino Nano • Port … • Programmer: “AVR ISP”
• File / Example / 01.Basics / Blink • Verify (compile), Upload • Tools: Serial monitor & serial plotter
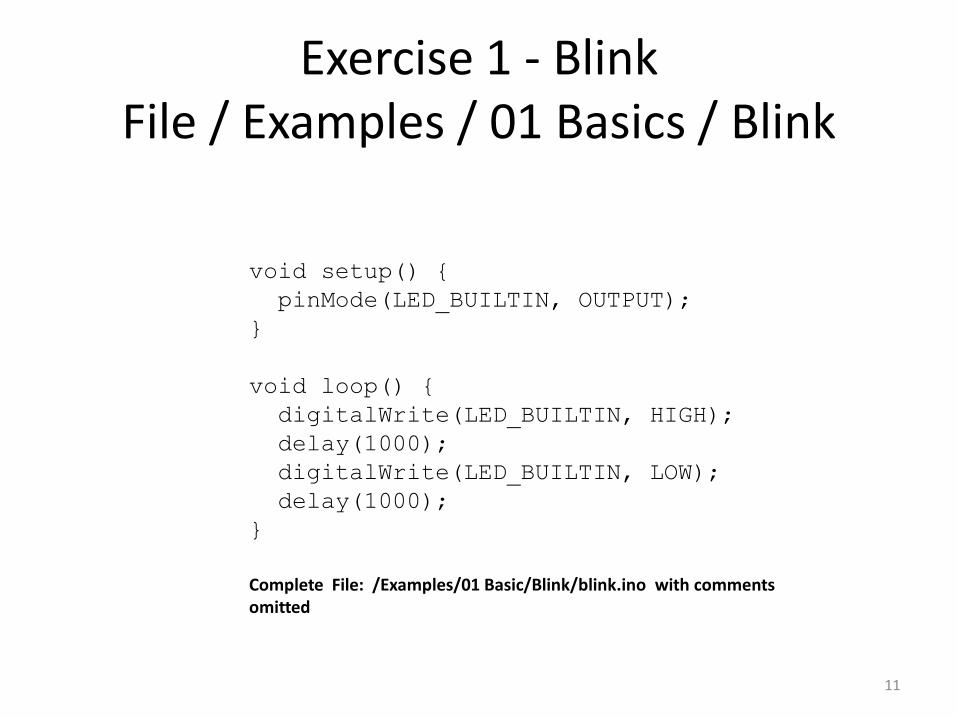
Exercise 1 - Blink File / Examples / 01 Basics / Blink
void setup() {
pinMode(LED_BUILTIN, OUTPUT);
}
void loop() {
digitalWrite(LED_BUILTIN, HIGH);
delay(1000);
digitalWrite(LED_BUILTIN, LOW);
delay(1000);
}
Complete File: /Examples/01 Basic/Blink/blink.ino with comments omitted
11

Blink Modifications
Be careful with the (, ), ; and other characters. Change the first delay time and see the results. What is the shortest time that is visible? Can you see a flash one one hundreth of a second (10ms)? Builtin LED is connected to pin 13. On is when the signal is High.
12
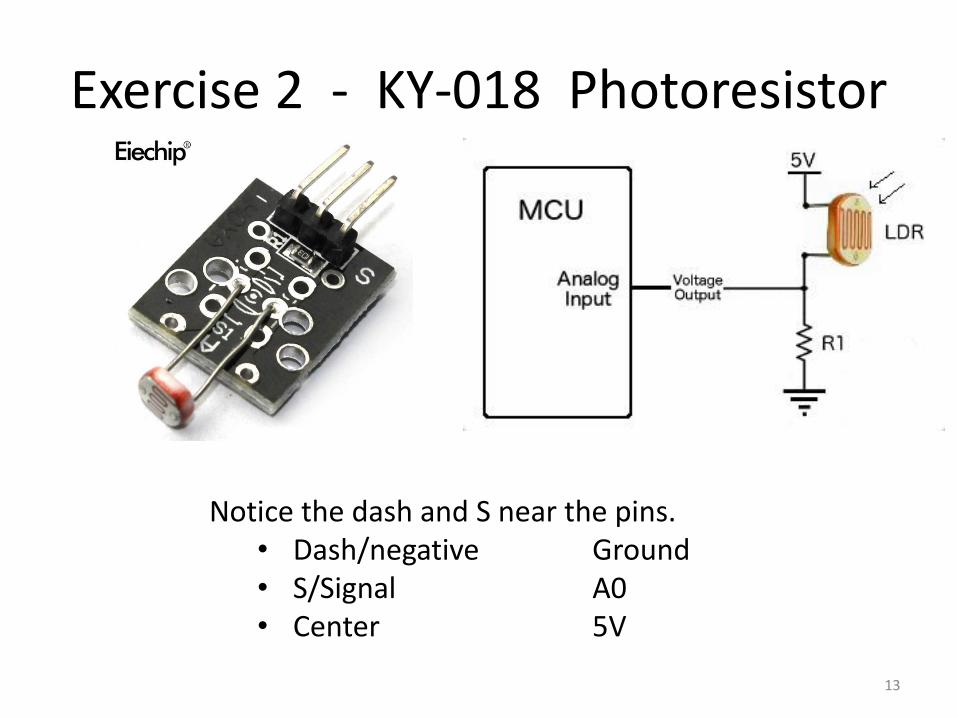
Exercise 2 - KY-018 Photoresistor
Notice the dash and S near the pins. • Dash/negative Ground • S/Signal A0 • Center 5V
13
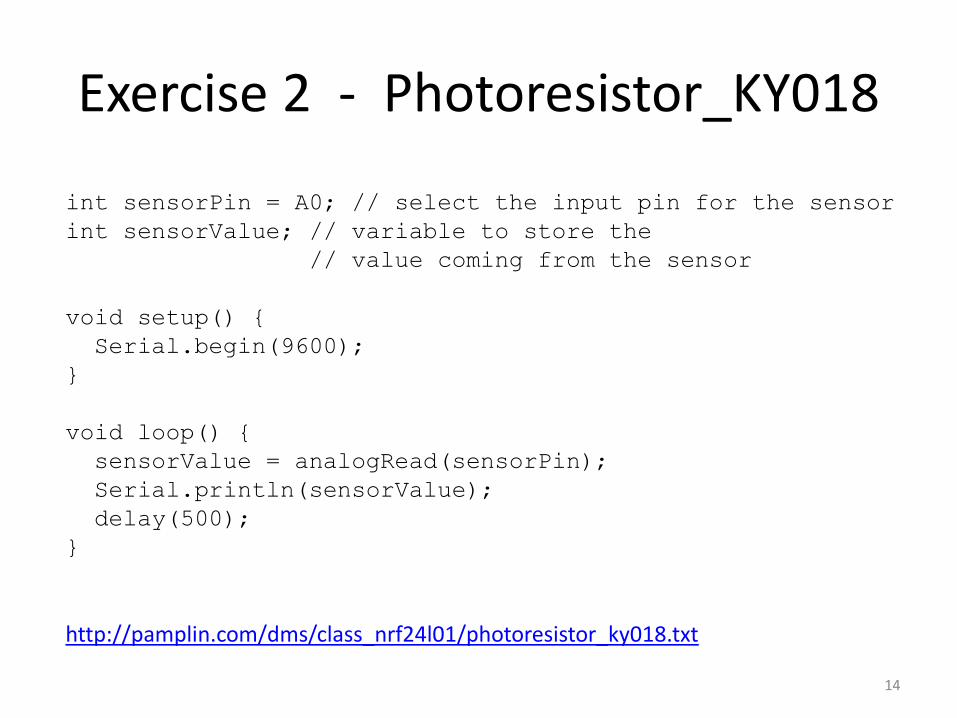
Exercise 2 - Photoresistor_KY018
int sensorPin = A0; // select the input pin for the sensor
int sensorValue; // variable to store the
// value coming from the sensor
void setup() {
Serial.begin(9600);
}
void loop() {
sensorValue = analogRead(sensorPin);
Serial.println(sensorValue);
delay(500);
}
http://pamplin.com/dms/class_nrf24l01/photoresistor_ky018.txt
14

Potentiometer - Pot
A potentiometer can be used instead of the
photoresistor module. Connect one outer lead
to 3.3V and the other to ground. The center
lead is the signal and goes to A0.
Same progam as above
15

Exercise 3 – nrf_simple…
These programs are of special interest because they will be the best starting base for future home projects. Students: nrf_simple_recv
Run the Serial Monitor Instructor: nrf_simple_xmit
16
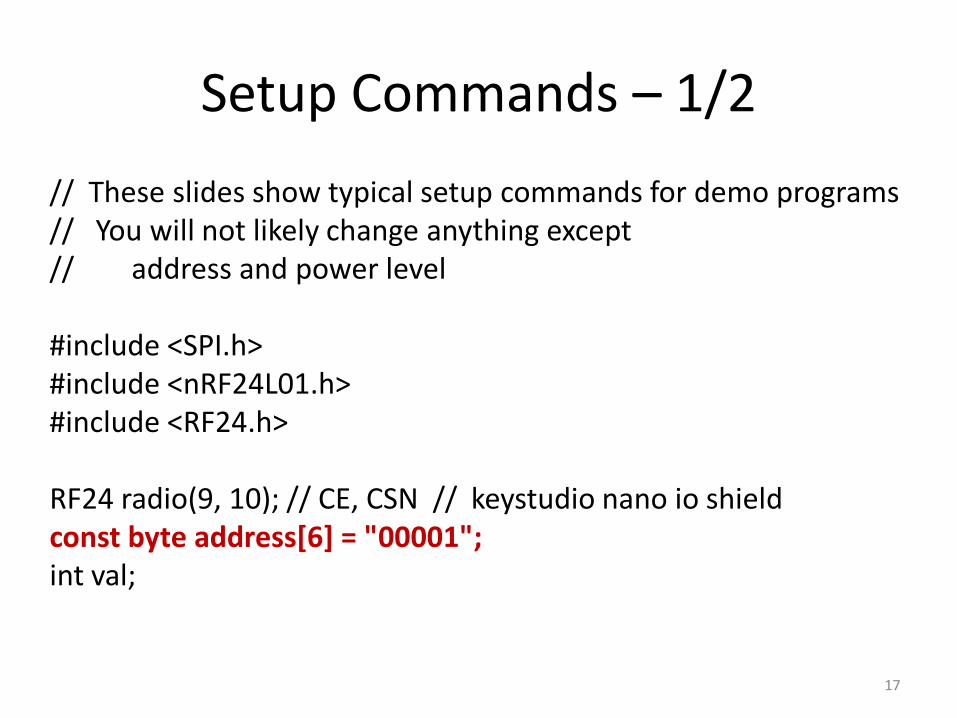
Setup Commands – 1/2
// These slides show typical setup commands for demo programs // You will not likely change anything except // address and power level #include <SPI.h> #include <nRF24L01.h> #include <RF24.h> RF24 radio(9, 10); // CE, CSN // keystudio nano io shield const byte address[6] = "00001"; int val;
17
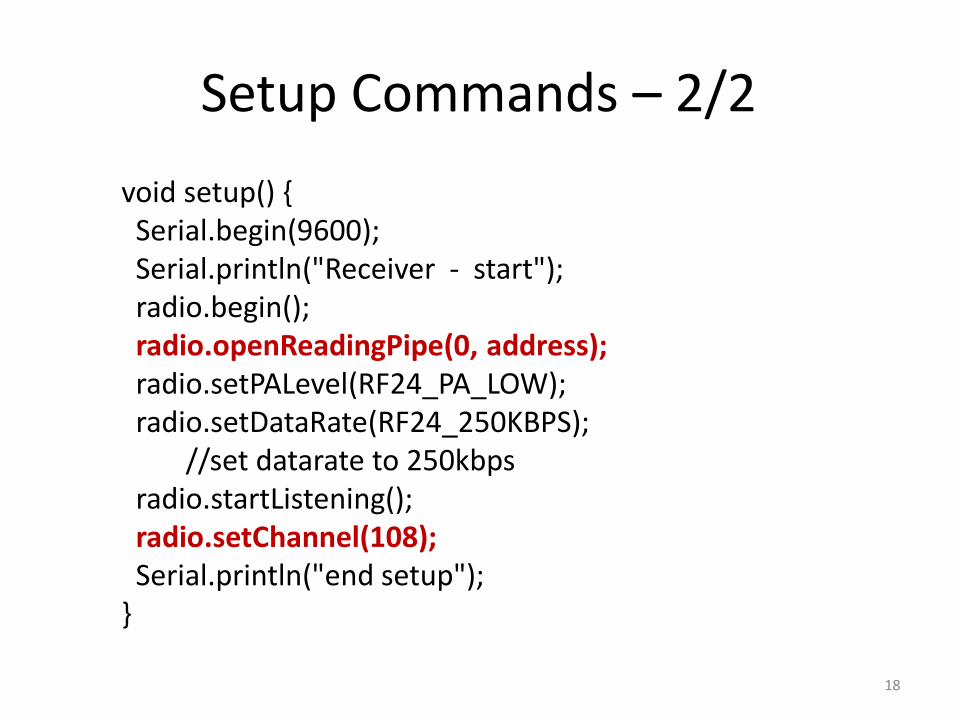
Setup Commands – 2/2
void setup() { Serial.begin(9600); Serial.println("Receiver - start"); radio.begin(); radio.openReadingPipe(0, address); radio.setPALevel(RF24_PA_LOW); radio.setDataRate(RF24_250KBPS); //set datarate to 250kbps radio.startListening(); radio.setChannel(108); Serial.println("end setup"); }
18

nrf_simple_... program excerpts
Main loop of nrf_simple_xmit void loop() {
ktr++;
radio.write(&ktr, sizeof(ktr));
Serial.println(ktr);
delay(1000); }
http://pamplin.com/dms/class_nrf24l01/nrf_simple_xmit.txt
Main loop of nrf_simple_receive void loop() {
if (radio.available()) {
radio.read(&val, sizeof(val));
Serial.println(val);
} }
http://pamplin.com/dms/class_nrf24l01/nrf_simple_recv.txt
19
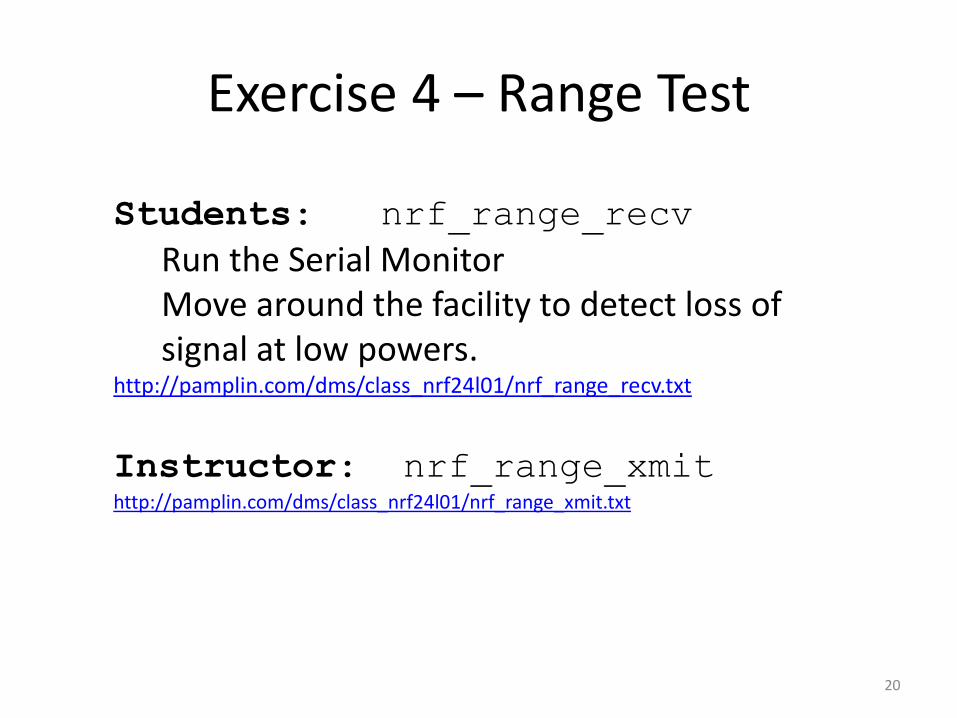
Exercise 4 – Range Test
Students: nrf_range_recv
Run the Serial Monitor Move around the facility to detect loss of signal at low powers.
http://pamplin.com/dms/class_nrf24l01/nrf_range_recv.txt
Instructor: nrf_range_xmit http://pamplin.com/dms/class_nrf24l01/nrf_range_xmit.txt
20

Exercise 5 All Transmit to Central Station
This uses a more advanced program to transmit four variables to a central station
• Userid • Value of light sensor analog input (0-255) • Incremental value (0,20,..180) • Random value (0..200)
The variable userid must be set to a unique value (1..10)
21
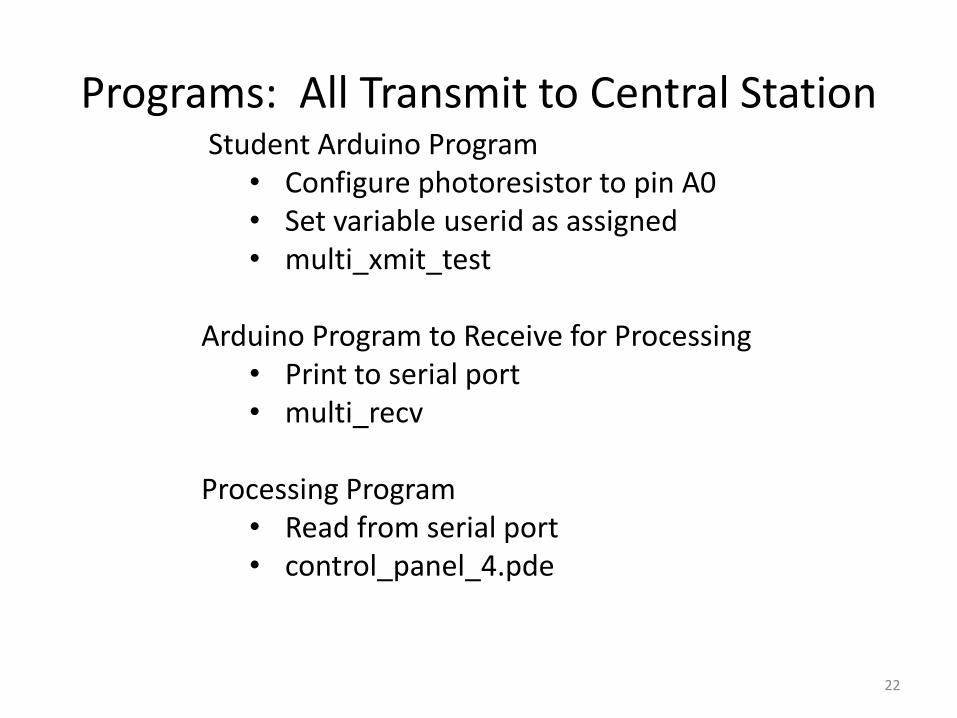
Programs: All Transmit to Central Station
22
Student Arduino Program • Configure photoresistor to pin A0 • Set variable userid as assigned • multi_xmit_test
Arduino Program to Receive for Processing
• Print to serial port • multi_recv
Processing Program
• Read from serial port • control_panel_4.pde
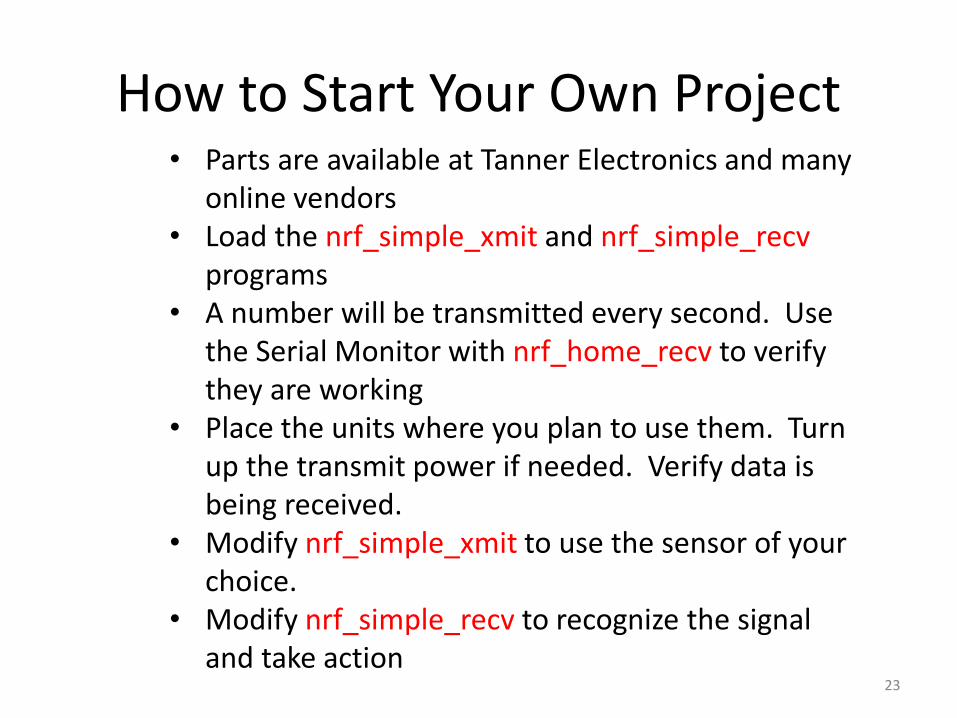
How to Start Your Own Project • Parts are available at Tanner Electronics and many
online vendors • Load the nrf_simple_xmit and nrf_simple_recv
programs • A number will be transmitted every second. Use
the Serial Monitor with nrf_home_recv to verify they are working
• Place the units where you plan to use them. Turn up the transmit power if needed. Verify data is being received.
• Modify nrf_simple_xmit to use the sensor of your choice.
• Modify nrf_simple_recv to recognize the signal and take action
23

Blynk into the Internet of Things! What is Portable Arduino? 1/2
The normal Arduino installation puts some files in the Documents directory and some in one of the Program Files directories. Adding libraries for this class could cause issues if a laptop has a previous installation. A portable installation stores all files in a single non-privileged directory. It can be used for a while, like during a class, and then deleted without effecting any other Arduino installation. It could also be copied to another system and all libraries and programs would go with it. https://www.arduino.cc/en/Guide/PortableIDE
24
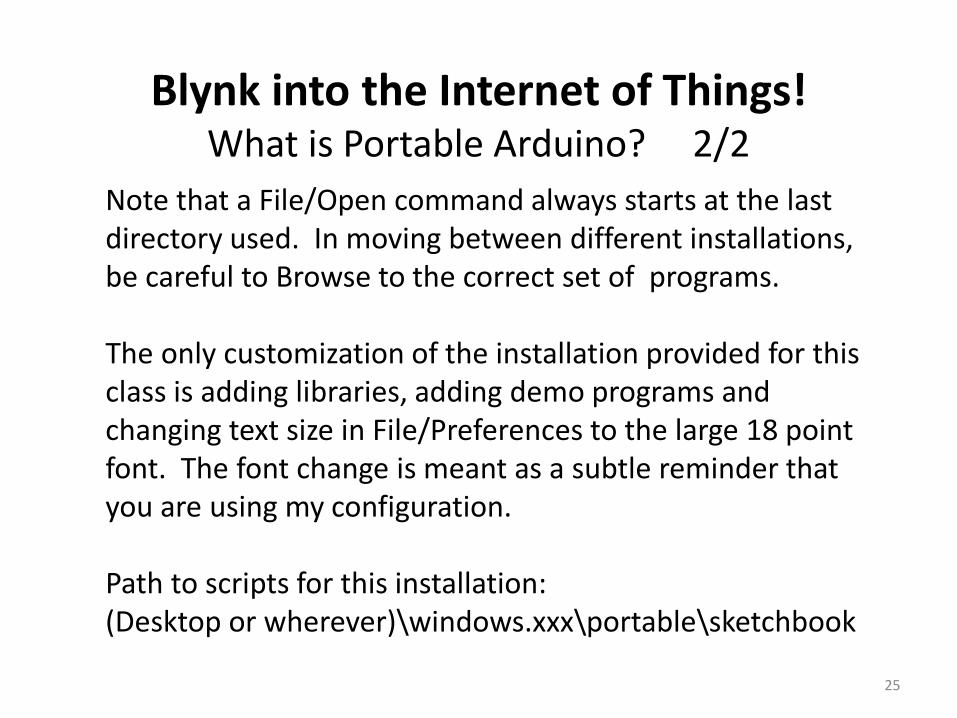
Blynk into the Internet of Things! What is Portable Arduino? 2/2
Note that a File/Open command always starts at the last directory used. In moving between different installations, be careful to Browse to the correct set of programs. The only customization of the installation provided for this class is adding libraries, adding demo programs and changing text size in File/Preferences to the large 18 point font. The font change is meant as a subtle reminder that you are using my configuration. Path to scripts for this installation: (Desktop or wherever)\windows.xxx\portable\sketchbook
25
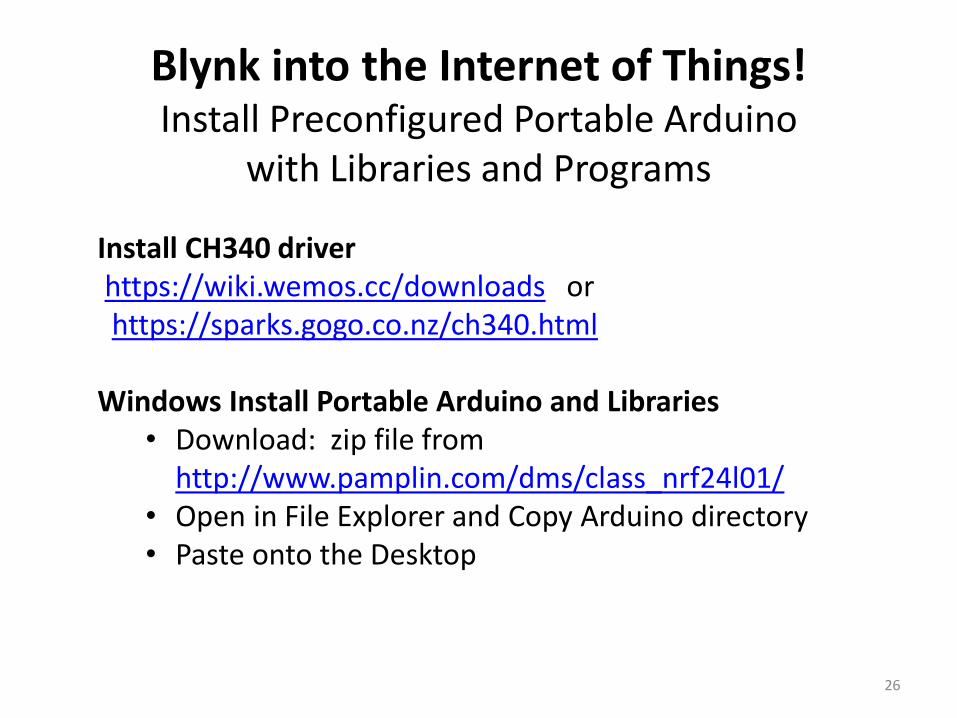
Blynk into the Internet of Things! Install Preconfigured Portable Arduino
with Libraries and Programs
Install CH340 driver https://wiki.wemos.cc/downloads or https://sparks.gogo.co.nz/ch340.html Windows Install Portable Arduino and Libraries
• Download: zip file from http://www.pamplin.com/dms/class_nrf24l01/
• Open in File Explorer and Copy Arduino directory • Paste onto the Desktop
26
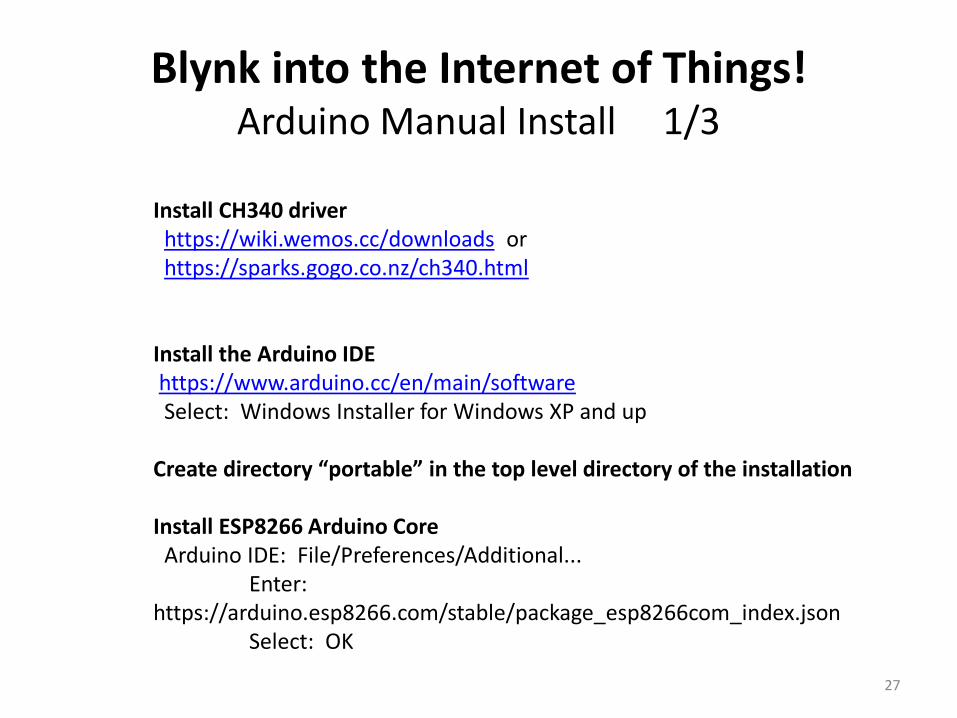
Blynk into the Internet of Things! Arduino Manual Install 1/3
Install CH340 driver https://wiki.wemos.cc/downloads or https://sparks.gogo.co.nz/ch340.html Install the Arduino IDE https://www.arduino.cc/en/main/software Select: Windows Installer for Windows XP and up Create directory “portable” in the top level directory of the installation Install ESP8266 Arduino Core Arduino IDE: File/Preferences/Additional... Enter: https://arduino.esp8266.com/stable/package_esp8266com_index.json Select: OK
27

Blynk into the Internet of Things! Arduino Manual Install 2/3
Arduino IDE: Tools/Board/Board Manager Search: ESP8266 Select: esp8266 by ESP8266 Community Select: Install / CloseInstall Blynk Library
• Arduino IDE: Tools/Manage_Libraries • Search: blynk • Select: Blynk by Volodymyr Shymanskyy
Install BMP280 Library - Supports BME280
• Download: https://github.com/farmerkeith/BMP280-library • Arduino IDE: Sketch/Include_Library/Add_.ZIP_Library - point to file in
Download directory Install OneWire Library
• Download: https://github.com/PaulStoffregen/OneWire • Arduino IDE: Sketch/Include_Library/Add_.ZIP_Library - point to file in
Download directory
28

Blynk into the Internet of Things! Arduino Manual Install 3/3
Install DS18B20 Temperature Sensor Library • Download: https://github.com/milesburton/Arduino-Temperature-Control-
Library • Arduino IDE: Sketch/Include_Library/Add_.ZIP_Library - point to file in
Download directory Install NRF24 Library
• Download: https://github.com/nRF24/RF24 • Arduino IDE: Sketch/Include_Library/Add_.ZIP_Library - point to file in
Download directory Install Class Programs
• Download pamplin.com/dms/class_nrf24l01 select programs.zip • Open with File Explorer • Copy top level directory • Paste into: (desktop)\arduino_1.8.10_a\portable\sketchbook
29
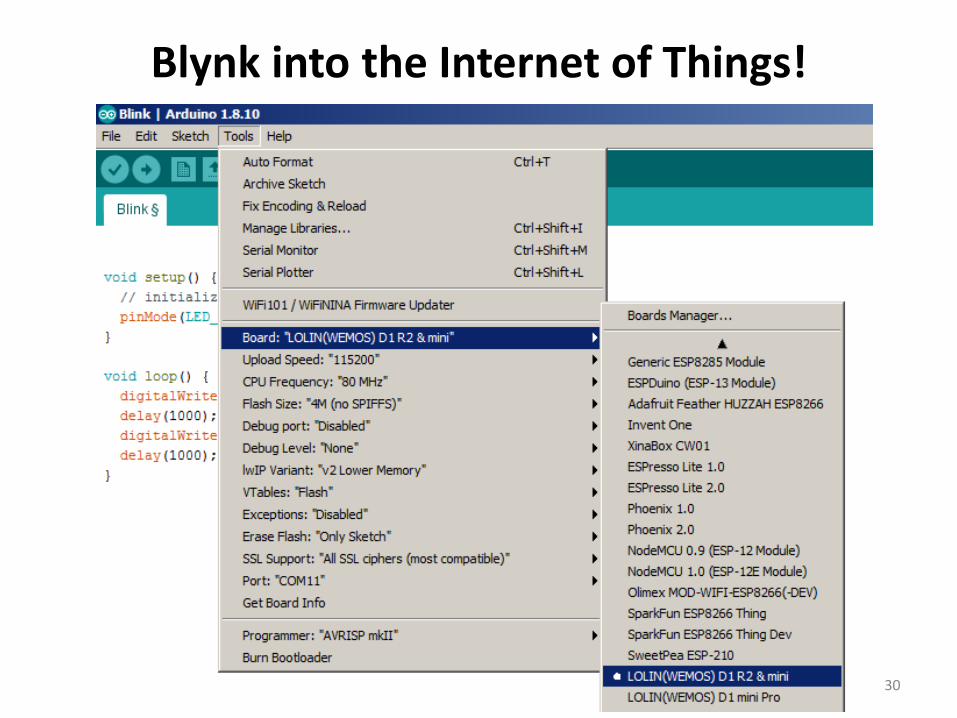
Blynk into the Internet of Things!
30
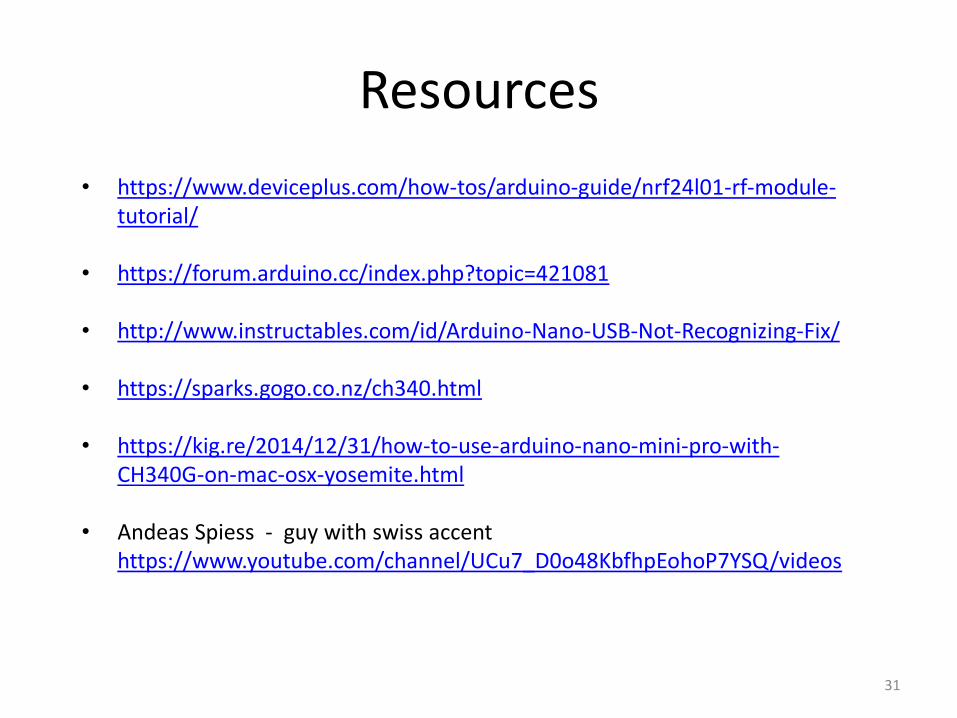
Resources
• https://www.deviceplus.com/how-tos/arduino-guide/nrf24l01-rf-module-tutorial/
• https://forum.arduino.cc/index.php?topic=421081
• http://www.instructables.com/id/Arduino-Nano-USB-Not-Recognizing-Fix/
• https://sparks.gogo.co.nz/ch340.html
• https://kig.re/2014/12/31/how-to-use-arduino-nano-mini-pro-with-CH340G-on-mac-osx-yosemite.html
• Andeas Spiess - guy with swiss accent https://www.youtube.com/channel/UCu7_D0o48KbfhpEohoP7YSQ/videos
31