art 7 - curriculum guide - final
TRANSCRIPT
ART 7 Summer 2017
WRITERS Nick Giordano Sarah Ritchie SUPERVISOR Cheryl Fontana
CENT
Assistan
BELTRAL
BOA
D
Mar John Jan
CENTR
Assi
nt Superinte
LLMOR HIGH
ARD OF201
Dr. Nancy Nina Lan
rion Blanen Ferrara et Goller
RAL AD
John DSuperint
Dr. MDeputy
Katistant Supe
Michaendent for C
N
RE-MEH SCHO
F EDUC17-2018
Kaplan, P
nci, Vice Pr
DMINI
DeTommtendent of S
Mara Bollet
Superinten
te Freemanerintendent f
ael HarringCurriculum
ERRICOOL D
CATIO8
President resident
Steven Wendy Gina
ISTRAT
maso Schools
ttieri ndent
n for Busines
gton m, Instructio
CK DISTRI
ON
Enella Gargiulo
a Piskin
TION
ss
on & Assess
ICT
sment
2

3
7th Grade Art Course Overview
Seventh Grade Art is a visual arts course that introduces students to
basic design and drawing skills. In this course students are exposed to a
broad base of concepts and skills necessary for creative expression and an
appreciation of successful design.
The goal of this 40-week every other day course is to introduce
students to the visual arts and guide them to becoming visually literate
adults. The visual arts employ students with the critical thinking and
problem solving skills needed in everyday life. Seventh Grade Art students
will develop an understanding of essential component of visual
communication such as the Principles of Design, the Elements of Art and
basic drawing and painting skills. This course will prepare students for a
continuation of art study in Eighth Grade Art/ Eighth Grade Advanced Art
as well as the various art courses they are exposed to at the high school level
and beyond.
This Curriculum Guide will present the concepts and skills that the
Bellmore-Merrick Central High School District requires each Seventh Grade
Art student to know and understand. Each unit includes sample lessons and
handouts that may be used to achieve the unit goals. Many of the included
sample lessons may achieve more than one curricular goal and may be used
across multiple units. The teacher is encouraged to explore Art History and
historical styles that demonstrate the concepts discussed in each unit. The
sample lessons are a starting point for dynamic student centered teaching
which allow the teacher flexibility in the development of new projects or
methods of teaching the curriculum utilizing his or her own passions and
creativity.

4
Content / Skills
Units of Instruction-
Observation Drawing o Contour line o Shading and Value o 3D Form
Design Theory o Principles of Design o Elements of Design
Color Theory o Color wheel o Color mixing o Color harmonies
Sketchbook H.W. o Ideas and Suggestions
Art Final: End of Course Assessment o Written Final Exam o Performance Based Final
Assessments/ Rubrics o Student curriculum questionnaire o Grading Rubric

5
Unit: Observation Drawing appx. 10 weeks
Overview: This unit introduces students to the basic Elements of Art and Design: Line, Shape, Form & Texture. Students will use contour line to draw objects from observation. They will explore how to create the illusion of 3D form by using only line. They will build upon this understanding of form when they are introduced to shading. Students will experiment with various shading pencils to create value scales as well as gradient scales. They will apply this knowledge to a shaded drawing from life. As they scaffold upon these drawing skills, students will also study the texture of 3D form. Unit Goals
Develop an understanding of the importance of direct observation and apply this understanding to honing skills when drawing from life
Explore drawing techniques such as contour line, blind contour line, and shading to create the illusion of 3D form in drawings from direct observation
Specific Unit Content/Terms
Direct Observation: “draw what you see, not what you know (or what you think you know)” Contour Line: using only line to map the outer edges of 3D from Blind Contour Line: drawing an object from direct observation, using only contour line and not looking at the paper Shape → Form: turning 2D shape into 3D form Value: the amount of light or dark in a shade Gradation: a smooth even transition from light to dark Categories of Light and Shadow: Highlight, Mid-tone, Core Shadow, Reflected Light, Cast Shadow Shading Techniques (4 Laws of Shading): Build in layers Change pressure Change direction of mark Change pencils (HB-6B)
TitleTim Obj- to - to - to Mot- dis- sho- hawithview- sh Con- Co
-Con
e: Contoume: 3 perio
jectives: introduceteach conencouragtivation scussion oow studen
ave studenh a hole inw of the dhow Picas
ntent: ontour - th
wand for
ntour is n
ur Drawods
e drawingntour as age student
of what cnt work nts do blinn the centdrawing sso’s cont
he illusionwell drawnrm not shade
Sam
ing
g skills at an essentits to LOO
contour is
nd contouter over th
tour draw
n of a linn contour
ed
mple Le
a very baal elemen
OK and SE
and why
ur drawinhe studen
wing
e enclosinr line com
essons
asic levelnt of the aEE what
y it is imp
ngs by plant’s penci
ng a formmmunicate
l artist’s skthey are
portant to
acing a pail obscurin
m. es volume
kills drawing
the artist
aper plateng the
e, space
6
t
e

7
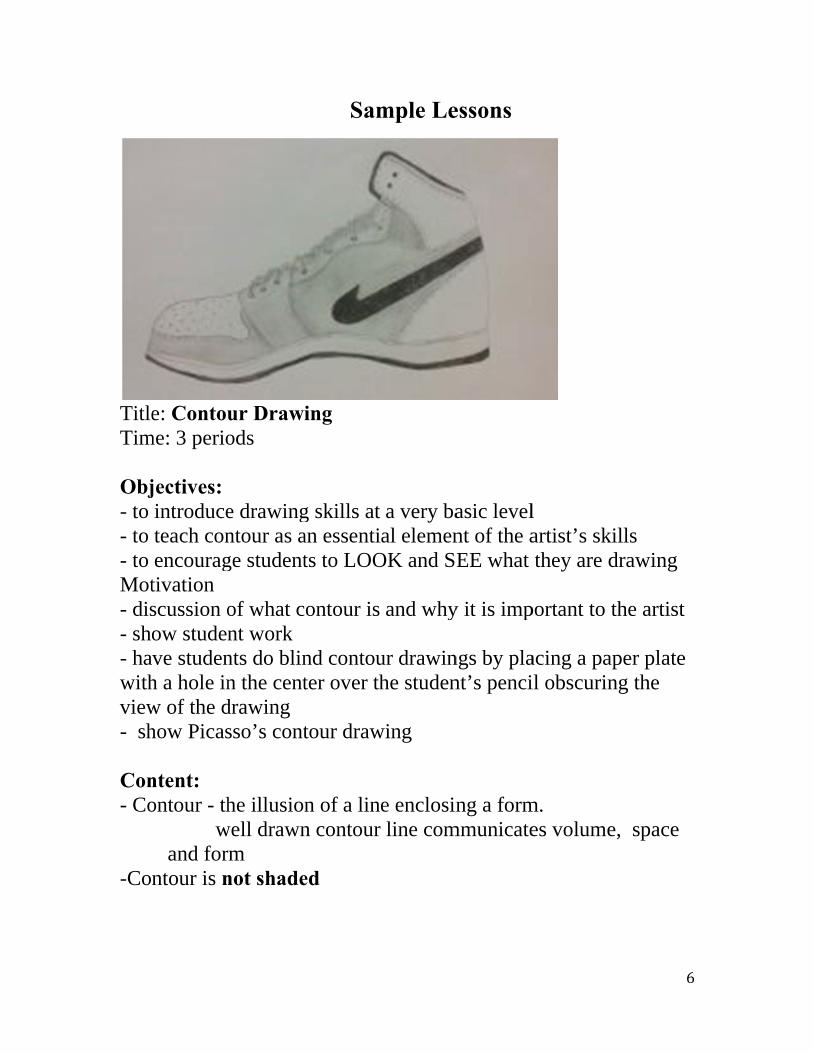
Art History: Picasso contour drawings
Process: students take off one shoe and place it on the table looking carefully at the shoe, draw the basic contour
(outline and the shapes within the shoe) details are then added such as stitching, laces, holes and
scrapes Materials/Resources: pencil sketchbook and 9”x12” white drawing paper
Homework:
draw two objects using only contour lines - no shading

TitlTim Goa
Lea
Mot(stuof 3 Mat
le: Shadinme: 5-7 cl
al: -Study create t
arning Ob-Define-Identif- Use dvalue scsketchb- IdentiHighligLight, C- Applylight ancone, cu
tivation: dent examD form w
terials: DrawinWhite EKneadeSketchbPrintedValue SVisualsSimple Categor
ng Simplasses
the basicthe illusio
bjectivese terms: sfy shading
drawing pcale and abook ify Categoght, MidtoCast Shady understand shadowube)
Look at emples andwas create
ng PencilsErasers ed Erasersbooks
d Value ScScale Tems Forms
ries of Li
le Forms
shading on of 3D f
: hape, forg techniqencils (Ha gradatio
ories of Lone, Coredow anding ofw to shadi
examplesd masters ed.
s (HB, 2B
s
cale (for smplate (1i
ight and S
s
techniqueform
rm, value,ques: HB-6B) to
on scale i
Light and e Shadow
f value, gring simpl
s of shadeworks) a
B, 4B, 6B
students rinx3in rec
Shadow w
es to
, gradatio
create a in their
Shadow:w, Reflecte
radation ale forms (
ed still lifand discus
B)
referencectangle o
worksheet
on
: ed
and categ(sphere, c
fe drawingss how th
e) f scrap pa
t
gories of cylinder,
gs he illusion
aper)
8
n

9
Procedure: 1. Introduce motivation 2. Define terms in sketchbook; shape, form, value, gradation 3. Trace value scale template into sketchbook and apply shading
techniques to create a value scale exploring varying values ranging from dark to light
Shading Techniques (4 Laws of Shading): Build in layers Change pressure Change direction of mark Change pencils (HB-6B)
4. Trace template a second time to create a gradation scale ranging from dark to light
5. Identify categories of light and shadow and apply this understanding along with shading techniques to drawing and shading simple forms in sketchbook
Homework: Draw a simple form found at home and apply understanding of shading 3D form
Closure: Turn in sketchbook at completion of lesson Assessment: Collect sketch book and use grading rubric to assess
students understanding of shading

110
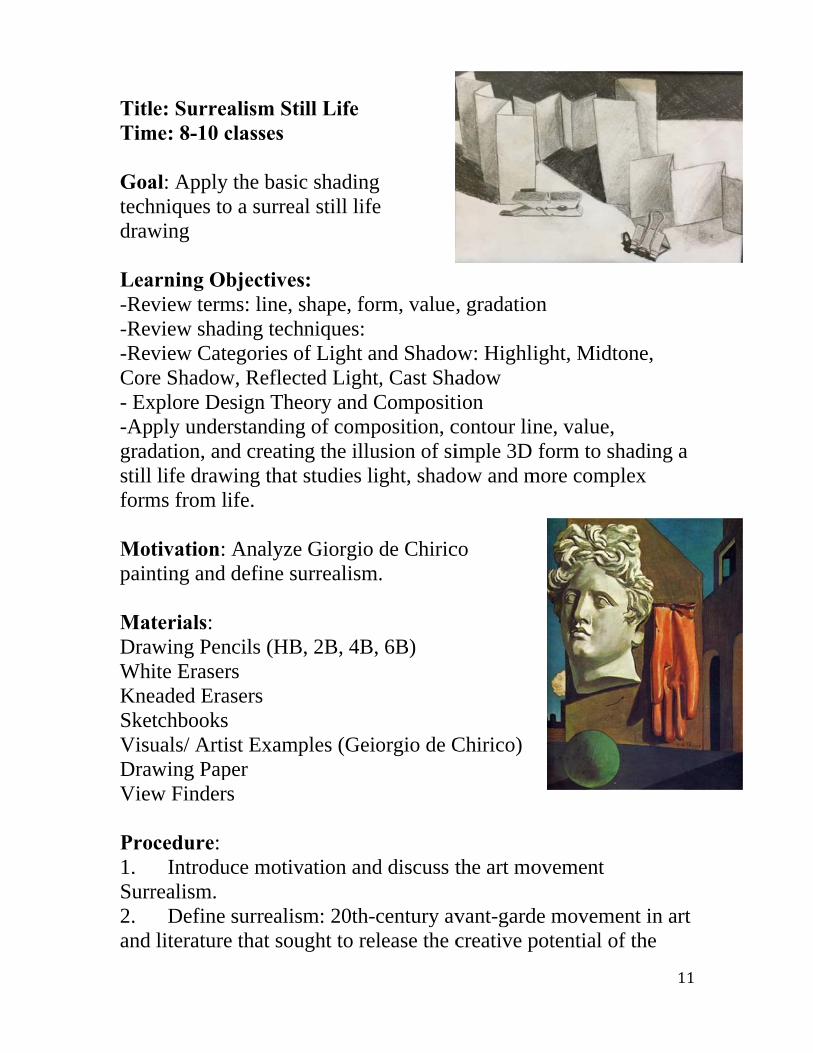
TitlTim Goatechdraw Lea-Rev-Rev-RevCor- Ex-Apgradstill form Motpain MatDrawWhiKneSketVisuDrawView Pro1. Surr2. and
le: Surreame: 8-10 c
al: Apply hniques towing
arning Obview termview shadview Catee Shadow
xplore Depply underdation, anlife draw
ms from li
tivation: nting and
terials: wing Penite Erasereaded Eratchbooksuals/ Artiwing Papw Finders
cedure: Introdu
realism. Define
literature
alism Sticlasses
the basico a surrea
bjectivesms: line, sding technegories o
w, Reflectesign Theorstanding
nd creatinwing that sife.
Analyze define su
ncils (HB,rs asers ist Exampper s
uce motiv
surrealisme that sou
ill Life
c shading al still life
: shape, forniques: f Light anted Light,ory and C
g of compng the illustudies lig
Giorgio durrealism.
, 2B, 4B,
ples (Geio
ation and
m: 20th-cught to rel
e
rm, value,
nd Shado, Cast ShaCompositposition, csion of sight, shad
de Chiric.
6B)
orgio de C
d discuss t
century avlease the c
, gradatio
ow: Highladow ion
contour liimple 3Dow and m
co
Chirico)
the art mo
vant-gardcreative p
on
ight, Mid
ne, value form to s
more com
ovement
de movempotential o
1
dtone,
e, shading a
mplex
ment in arof the
11
a
rt

12
unconscious mind, for example by the irrational juxtaposition of images. 3. Have students close their eyes and remember a vivid dream, discuss the juxtaposition they notice in their dreams. 4. Introduce homework: bring in a small object from home to juxtapose with classroom still life objects. 5. Show student examples of surreal still life drawings. 6. Practice drawing small objects in sketchbook. 7. Set up a still life of folded white paper/ simples forms at each table. Invite students to add their small objects to the still life. 8. Introduce Principles of Design such as Emphasis, Balance and Movement. Instruct students to use viewfinders to zoom in on the still life and draw various thumbnail drawings that explore successful composition using the Principles of Design. 9. Enlarge most successful thumbnail sketch to final copy paper. Apply understanding of contour line and shading to create surreal still life drawing. 10. Further the challenge by inviting students to add a pop of color and/or challenge themselves with a more complex object. Homework: Bring in a small object to draw from observation Closure/ Assessment: Students will turn in final drawing along with a reflection sheet. Use grading rubric to assess student’s success at meeting the lessons criteria.

113

14
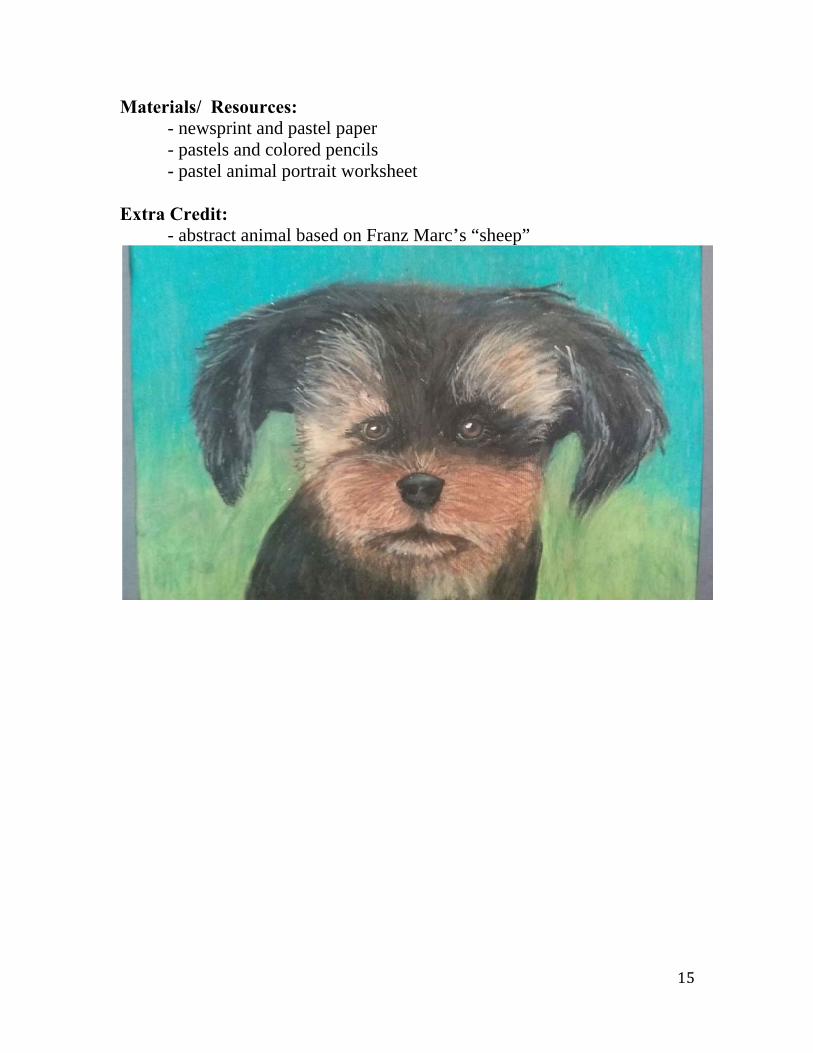
Title: Pastel Animal Portrait Time: 15-18 periods Objectives: at the conclusion of this lesson students should be able to: - draw a naturalistic / realistic drawing from a reference - create the illusion of texture on the picture plane - experiment with pastel as a medium - identify warm and cool colors Motivation: Prerequisite homework- students research and print a photograph of an animal of his/her choice focusing on composition and the texture of the animal. - demonstration on the techniques of using oil pastel - show student work and other examples of the project Content - contour drawing - texture - the surface qualities - warm colors - red, orange, yellow - cool colors - green, blue, violet Process: Day 1: - draw animal studies from reference on newsprint or in sketchbook paying close attention to texture and composition Day 2:- Oil pastel color/texture worksheet to learn oil pastel techniques and practice textures studied the day before that will be used on the final drawing. Day 3: - choose warm or cool colored pastel paper as dictated by the image - lightly draw contours on pastel paper Day 4 – color demonstration on the final drawing paper - students begin to add basic color blocking with pastel Days 5-completion - students continue to add color with pastel, defining details with colored pencil - teacher circulates the room checking for student understanding - teacher provides individualized instruction based upon student needs
Mat Extr
terials/ Re - newspr - pastels - pastel a
ra Credit: - abstrac
esources: rint and pas and coloreanimal por
ct animal b
astel papered pencilsrtrait work
based on Fr
sheet
ranz Marc’’s “sheep”
115

16
Title: Zen-tangle Animal Portrait
Time: 8-10 classes
Goal: Use observation skills to create a line drawing portrait of an animal.
Apply Zen-tangle designs to explore Design Theory as well as texture and the power of optical blending.
Objectives: -Review terms: line, line weight, shape, form, value... -Understand terms such as Zen-tangle, texture, optical blending,
objective/ non-objective drawing -Explore/ review understanding of Design Theory and Composition -Apply understanding of composition, contour line, Zen-tangle to
Zen-tangle Animal Portrait drawing -Use critical thinking skills to make sophisticated choices when
creating a stylized objective drawing that applies non-objective Zen-tangle designs
Motivation: Student examples of Zen-tangle Animal Portraits
Materials: Pencils White Erasers Sharpies Sketchbooks Visuals/ Artist Examples Final Copy Paper
Procedure:
1. Introduce motivation and homework; discuss the art technique of Zen-tangle and practice Zen-tangle techniques.
2. Use observation skills to draw the outline of animals from photo reference. Discuss anatomy proportions and the importance of looking at more unique contour line AFTER plotting basic shapes/ forms (skeletal, underlying structure).
3. Use pencil to divide outlined proportions into chunks based on the texture of the animal being drawn. Fill these chunks with Zen-tangle patterns. Consider the direction the fur/ feathers/

Hom
Clos
sclig
4. Uovva
5. Stco
mework: B
sure/ Assereflectiomeeting
cales whenght that ch
Use various ver patters arious line tudents canolor, and/o
Bring in a c
ssment: Ston sheet. U
the lesson
n choosing unk is whesharpies (uand furtheweight to
n push thisr a backgro
clear photo
tudents wise grading
ns criteria.
a pattern. Aen choosinultra fine p
er stylize thcreate the
s project fuound desig
reference
ll turn in fig rubric to a
Also, consng a patternpoint, fine his portraitillusion of
urther by apgn
of a portra
final drawinassess stud
sider how dn. point, etc.
t. Experimf 3D form pplying sh
ait of an an
ng along wdent’s succ
1
dark or
.) to go ent with and depth.ading,
nimal
with a cess at
17

1
18

19
Unit: Design Theory appx. 20 weeks
Unit Content In this unit students will be introduced to the Principles and Elements of Design and learn an understanding of successful compositions. Composition is an essential part of every style and media of art, and therefore is the basis of all art and design. The Principles and Elements are central to strong design and should be reinforced not only for the duration of the unit, but throughout the course. Unit Goals
To identify and define the Principles of Organization. To identify and define the Elements of Design. To define composition as how the Elements of Design are arranged. To gain an understanding of the importance of composition to design. To challenge students to creatively solve design problems by applying acquired
knowledge of the Principles of Organization.
Specific Unit Content/Terms
Design Theory A design is the organization of the ELEMENTS of ART into a unified composition, in
accordance with the PRINCIPLES of DESIGN. Composition - the placement or arrangement of visual Elements in a work of art
Elements of Design:
the “materials” used to create a design/ work of art. One, two, three or any number of the Elements may be used in such a way as to achieve the desired design.
LINE length- 1 dimension SHAPE height and width - 2 dimensional - a closed line
FORM height, width and depth- 3 dimensional TEXTURE surface quality
COLOR The name given to a specific wavelength of light

20
Principles of Design: the “rules” or guidelines to creating a successful/ strong work of art. The Principles are
the basis of all works of art, and are used in various ways in every style of art.
BALANCE - a sense of evenness
EMPHASIS - one or more parts of a design that stand out
RHYTHM - a sense of movement
MOVEMENT- the direction the viewer's eye moves through a work of art
UNITY - when all parts fit together to form a whole

21
Sample Lessons
Title: Introduction to the PRINCIPLES OF ORGANIZATION / DESIGN Time: 2 days Objectives: at the conclusion of this lesson students should be able to:
To identify and define the Elements of Design. To identify and define the Principles of Organization. To define composition as how the Elements of Design are arranged To challenge students to creatively solve design problems by applying acquired
knowledge of the Principles of Organization. Motivation: discussion of the principles using terms and ideas the students can relate to. Content: -see attached Design Theory handouts Art History: -every style of art uses the principles to create strong compositions. The teacher may draw upon his/her knowledge of art history to show examples of the Principles and Elements being used in painting, sculpture, fashion, automobiles, interior design, advertising, webpage design or any other visual media. Process: -discuss the principles in terms relevant to student’s lives. (Balance: riding a bike, Unity: sports teams wearing the same uniform, ect.) -show examples of each principle in a painting or other media and by drawing on the board using line and shapes. -students draw an example of each principle on a worksheet as mini abstracts or create cut paper designs like Matisse.

2
22

2
23
TitleTime
Objeat th- cre- add- und
Mot Con Art Proc
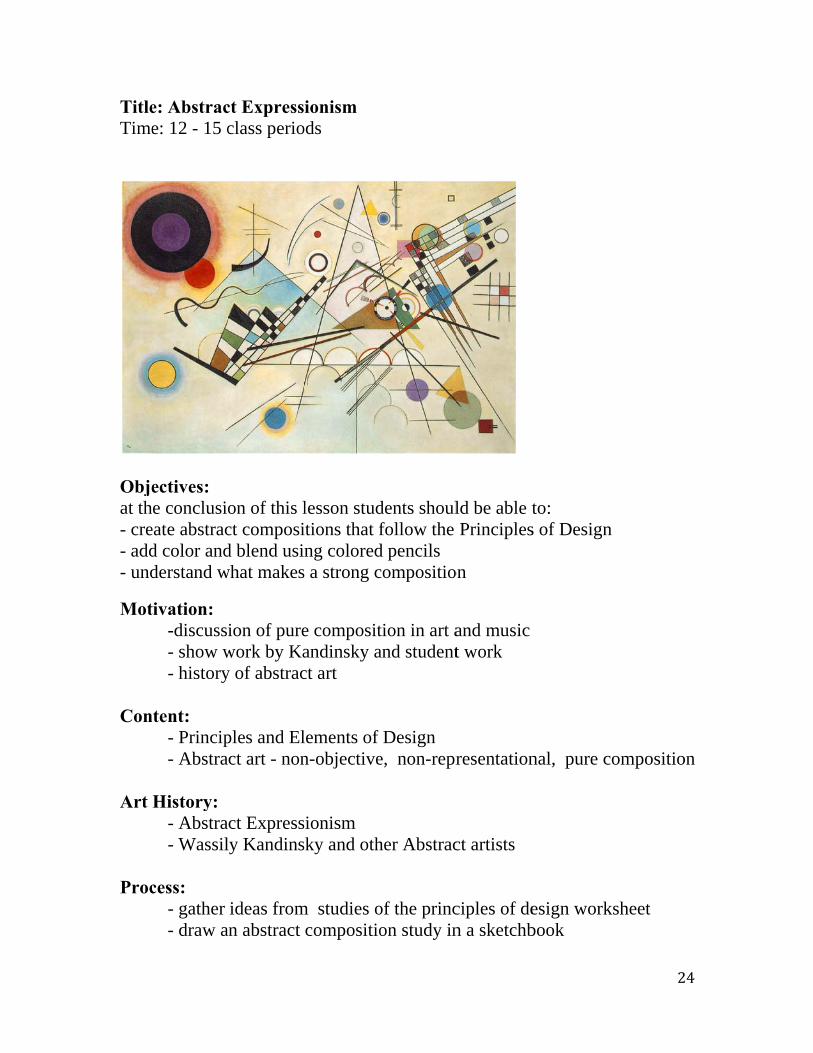
e: Abstrace: 12 - 15 c
ectives: e conclusio
eate abstracd color andderstand w
tivation:
-discuss - show w - history
ntent:
- Princip - Abstra
History:
- Abstra - Wassil
cess:
- gather - draw a
ct Expressclass perio
on of this lct composid blend usi
what makes
ion of purework by Kay of abstrac
ples and Elct art - non
ct Expressly Kandins
ideas froman abstract
ionism
ods
lesson studitions that fng colored
s a strong c
e compositandinsky act art
lements of n-objective
sionism
sky and oth
m studies ocompositio
dents shoulfollow the d pencils
compositio
tion in art aand student
Design
e, non-repr
her Abstrac
of the princon study in
ld be able tPrinciples
on
and musict work
resentation
ct artists
ciples of den a sketchb
to: s of Design
nal, pure c
esign workbook
2
n
compositio
ksheet
24
on

Mat
Extr
Stude
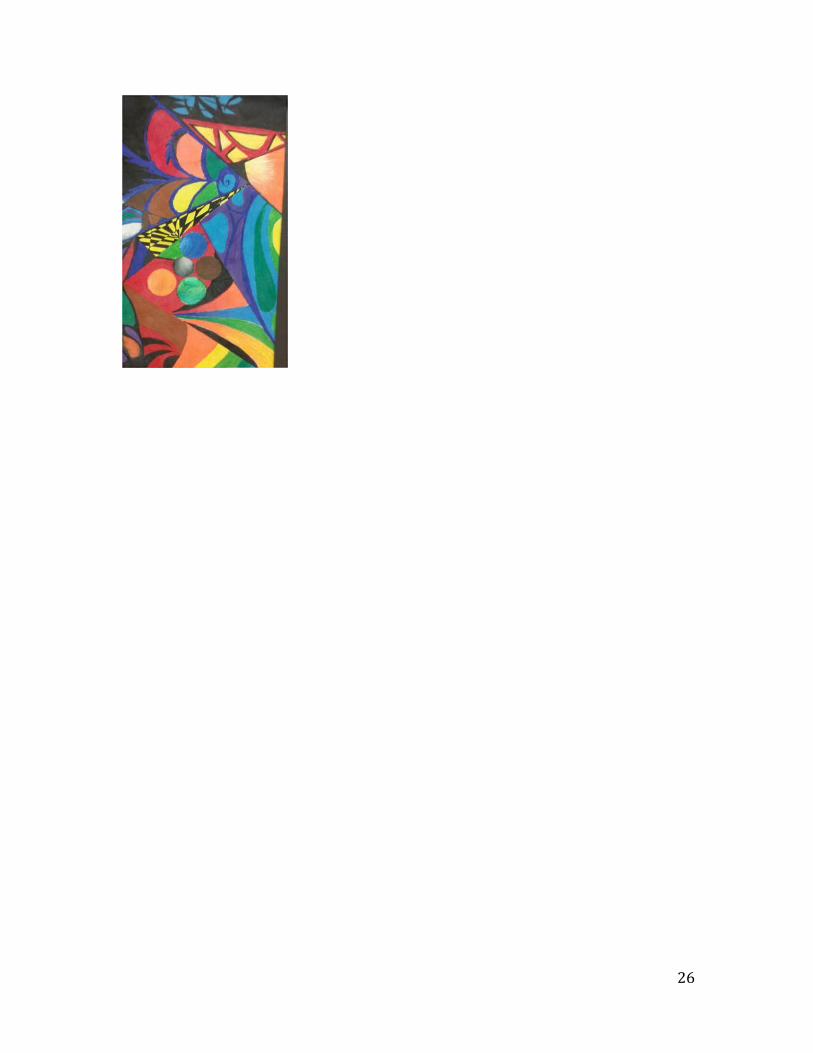
- transfe - teacher - add col
terials/ Re - 12x18 - prisma
ra Credit:
- abstrac
ent examples
er image tor demonstrlor using c
esources:
white drawacolor penc
ct design u
s:
12x18 whration of cocolored pen
wing papercils
sing only t
hite drawinolor mixingncils blend
r
the letters o
ng paper
g process
ding as desi
of your nam
ired
me
2
25
226

Title: Owith ConTime: 1
Objectiv· Analyt· Reviewskills
· Applyelementscomposit
MateriaVisual rePencils
NewspriFinal copSharpiesLightboxColored
MotivatGogh’s sdrawing
Procedu
1. Whatand howtheir facvarious aowners. interestin2.Contocontour,3. Plottilightly p4. Line Wdepth/ fo5. DesigPrinciple
Object Portntour Line0 Periods
ves: tically assew/ hone ob
y an unders of design tion
als/ Resoureferences (
int paper
py paper
s
x
pencils
tion: Obsershoe painti as “portra
ure:
t is a Portrw a portrace. Analyzartists. DisAssign hong “Self P
our Line: partial bli
ing “Portrplot where Weight: Eorm. Look
gn Theory es of Desig
trait Drawe Shoe Draw
ess works observed con
standing ofto the crea
rces:
(ex. Van G
rve and anings and di
aiture”
rait?: Discait of someze drawingscuss what omework toortrait”
Practice vaind, observrait”: Revithe object Experimenat successBackgrou
gn. Show e
wing (Canwing Lesso
of art ntour line d
f the princiation of a s
Gogh's Sho
nalyze Van iscuss still
cuss the cleone does ns/ paintingthese obje
o bring in a
arious contved. iew observgoes on th
nt with varisful exampund: Introdexamples o
n be linked on)
drawing
iples and strong final
e paintings
l life
lassic definnot need t
gs of objectects might an object th
tour line ap
vation technhe paper. ious line w
ples. duce/ Reviof composi
l
s)
nition of ato be an imts as “portrtell us abohat would
pproaches
niques and
weights to c
iew the Eleitions with
2
a portrait mage of raits” by
out the make an
; blind
d begin to
create more
ements andh strong
27
e
d

balance,of these successftheir drathat movuse a cireye arouthe otherthis desithose thashapes inor comp6. Extenfriend. Abackgrou
Homew
AssessmStudentsgrading criteria.
emphasis,principles
ful composawings studve horizontrcle-tracingund the pagr side of thign to the fat run throun followin
plementary nsion: DrawApply whatund of you
work: Bring
ment: s will turn rubric to a
, rhythm, m). Students
sitions usindent will dtally and vg tool to adge as well ahe paper. Sfront of theugh the obg a checkecolor schew a contout you knowur choice.
g in an obje
in final draassess stude
movement s create thung basic lindivide the pvertically acdd visual elas emphasitudents wi
e paper. Thbject drawinerboard patemes. ur line “porw about pri
ect to draw
awing alonent’s succe
and unity umbnail drne and shappage by dracross the plements thize where till use a lighey will trang. They wttern using
rtrait” of ainciples of
w.
ng with a reess at meet
(discuss sorawings thape. On the awing varipage. Theyhat move ththe shoe is
ght box to tace all lineswill then fig either an a
a family mef design to
eflection sting the les
2
ome or all at explore back of ous lines
y will also he viewers s placed ontransfer s except foill the analogous
ember or create a
heet. Use ssons
28
n
or

29
Unit: Color Theory appx. 10 weeks
Overview Color is the element that elicits an immediate emotional response from the viewer more than any other element. In this unit we will explore the element of color, the color wheel, color mixing and color harmonies. Unit Goals
Mix primary colors to make secondary and tertiary colors on a color wheel
Create color studies that demonstrates a knowledge and understanding of Color Theory
Apply knowledge of value to create tints, shades and tones
Specific Unit Content/Terms
Color -The name given to a specific wavelength of light
Hue – the basic color on the color wheel Value – the lightness or darkness of a color Intensity or Saturation – how much of the hue is in the color
Color Harmonies
Complementary Colors- Colors across from each other on the color wheel
Analogous Colors- Colors next to each other on the color wheel
Primary Colors- Colors that can not be made by mixing colors
(Red, Blue, & Yellow)
Secondary Colors- Colors that are made by mixing two primaries
(Green, Orange, & Violet)

30
Tertiary Colors (Intermediate)- Colors that are made by mixing a primary and secondary
Warm Colors- Red, Orange, & Yellow
Cool Colors- Blue, Green, & Violet
Monochromatic Colors- Different values of one color
Using tones, tints and shades. (Add white + black)
Neutral Colors (Grayscale)- Shades ranging from white to black

31
Sample Lessons:
Title: Mixing Primary Colors Found in the Everyday World: Introduction to Color Theory Time: 2 Periods Objectives:
Explore color variations/ relations Mix and create new colors (secondary, tertiary, shades, tints…) using the 3 primary
colors Review/ learn terms: Primary, secondary, tertiary, complimentary, contrasting,
value, gradation Materials/ Resources:
Color Ditto Color wheel Red drink, yellow drink, blue drink, clear drink Clear Cups Paper towels White Paper
Motivation: Mix a color wheel using red, blue and yellow fruit punch (Gatorade or food color) Activity/Procedure: 1. Review what students already know about color theory. Discuss the way we see color by looking at colors around the room. “What colors stand out? What colors blend in? Why?” 2. Introduce motivation: “Can we use red, blue and yellow fruit punch to make the color wheel? Why/ Why not?” 3. Demonstrate how mixing two primary colors will make a secondary, mixing a primary and secondary will make a tertiary, mixing compliments will make shades, mixing clear will make tints and so on…NOTE: Students seemed excited by the drinks. The next time the lesson is done the teacher should consider bringing in small Dixie Cups to allow students to sample color combinations. To reinforce this lesson, students can select a color combination they would like to sample by stating: the proper name of the color, if it is a primary/secondary/ tertiary/shade, and the colors used to mix it 4. Students will complete their own color mixing worksheet using colored pencils or paint

32
Assessment: Student question and answer opportunities. Student level of engagement and participation in the class debates and discussions. Student completion of color mixing worksheet

333

34
Title:Optical Illusions / Op Art Time: 5-6 periods Objectives: at the conclusion of this lesson students should be able to: - create an optical illusion based on a pattern - discover the effects of color on our perception - apply complimentary pairs to create a visual tension Motivation: - perception test - discuss complimentary colors - show examples of and discuss Op Art - show “the Magic Eye” books - talk about M.C. Escher and show his work (tessellations) Content: - illusions / perception - Complimentary colors - colors directly across from each other on the color wheel. - Analogous colors - colors next to each other on the color wheel Art History: - Op Art - 1960’s - Painting based on optical illusion, perception and their physical and psychological effects. Op Art is non-objective and hard-edge style. Process: - on 12”x12” white paper, students develop their own Op Art -it may in part be based on existing optical illusions - add color with complimentary colored markers Materials/ Resources: - 12”x12” white paper - rulers and compasses - colored markers Extra Credit: - a design using analogous or neutral colors

335

TT O--- M---A- C A P
Title: PoinTime: 10-1
Objectives- to introdu- to demon- to integra Motivation- build on t- examine w- compare Art - discuss op
Content: - con - opt
Art Histor - poi - Ge - pop - Ro
Process: - stu - dra - dem
ntillism
12 periods
s: uce pointillnstrate the tate contour
n: the lesson oworks by Gcomputer p
ptical mixi
ntour - the tical mixin
ry: intillism - iorges Seurp art - art oy Lichtens
udents bringaw contourmonstration
lism as a sttheories of r drawing in
of contourGeorges Seprinted and
ing and col
illusion ofng - colors
image painrat of and for tstein
g in imagers on whiten of “dotti
tudy of colf optical minto a new
r drawing eurat and sd newspap
lor printing
f a line encmixing in
nted entirel
the popular
for homewe drawing png” techni
lor ixing and cexperience
student woer images
g process
closing a fothe eye
ly of dots o
r culture.
work (landpaper iques
color separe
ork to pointilli
orm
of color
dscape or c
ration.
ism and Li
comic fram
3
ichtenstein
me)
36
n’s Pop
37
- students add color, mixing colors to achieve desired effect Materials/ Resources: - reference - pencil and fine tip colored markers - white drawing paper Extra Credit Option: - comic character in stipple

338
TT O
M
MC A
1. Dpfa
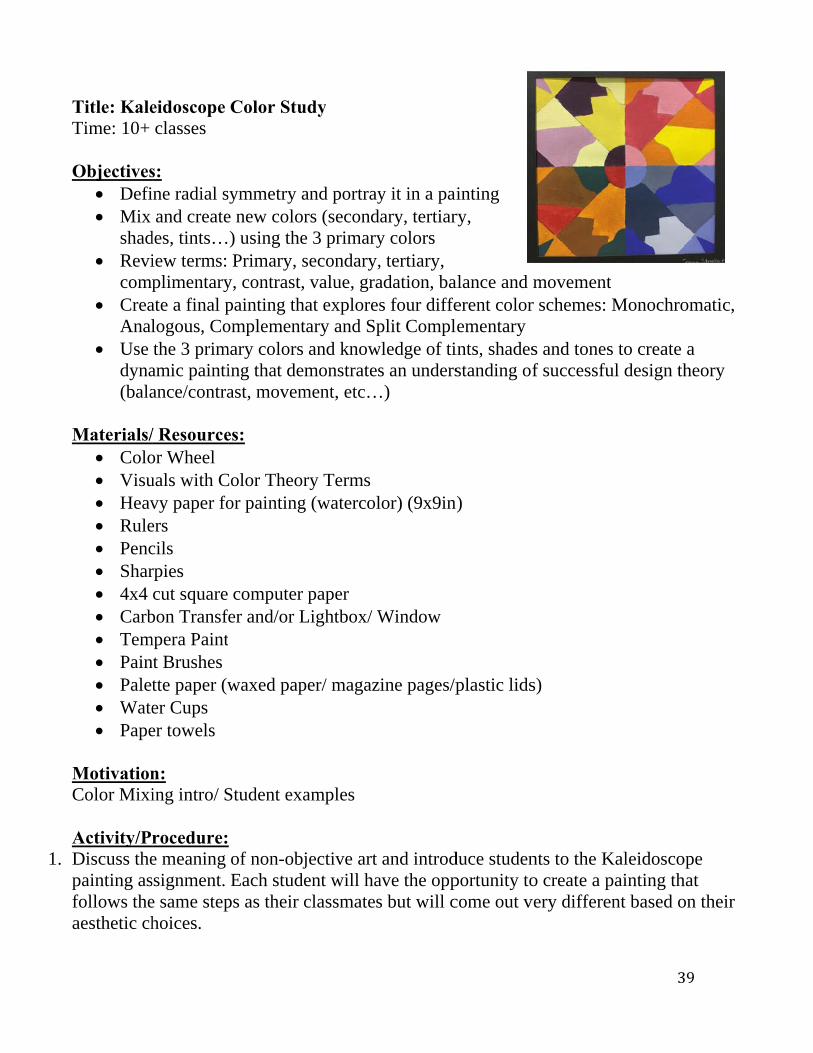
Title: KaleTime: 10+
Objectives Defi Mix
shad Revi
comp Crea
Anal Use
dyna(bala
Materials/ Colo Visu Heav Rule Penc Shar 4x4 Carb Tem Pain Palet Wate Pape
MotivationColor Mixi
Activity/PDiscuss thepainting asfollows theaesthetic ch
eidoscope classes
s: ine radial sand create
des, tints…iew terms: plimentary
ate a final plogous, Cothe 3 prim
amic paintiance/contra
/ Resourceor Wheel uals with Cvy paper foers cils rpies cut square
bon Transfmpera Paintnt Brushes tte paper (wer Cups er towels
n: ing intro/ S
rocedure:e meaning ssignment. e same stephoices.
Color Stu
symmetry ae new color) using thePrimary, s
y, contrast,painting thomplement
mary colors ing that deast, movem
es:
Color Theoror painting
computer fer and/or Lt
waxed pap
Student exa
of non-objEach stude
ps as their c
udy
and portrayrs (seconde 3 primarysecondary, value, gra
hat explorestary and Spand knowmonstrates
ment, etc…
ry Terms g (watercol
paper Lightbox/ W
per/ magaz
amples
jective art ent will haclassmates
y it in a paiary, tertiary colors , tertiary, adation, bas four diffeplit Compl
wledge of tis an unders
…)
lor) (9x9in
Window
ine pages/p
and introdave the opps but will c
inting ry,
alance and erent colorementaryints, shadesstanding of
n)
plastic lids
duce studenportunity tocome out v
movementr schemes:
s and tonesf successfu
s)
nts to the Ko create a p
very differe
3
t Monochro
s to create ul design th
Kaleidoscopainting thent based o
39
omatic,
a heory
ope hat on their

2. Sdqs
3. Sotdab
4. R5. S
ad
6. Sfo A
Students wdesigns. Thquadrant shshould be cStudents wof the quadthen used cdivided intaxis line. Oborder. Review/ inStudents wand split codynamic deStudents wfinished. Ifobjective c
Assessmen Stud Stud
discu Stud
will use the hey shouldhould haveclear).
will select odrants fromcarbon papo four part
Once the de
ntroduce pawill paint onomplementesign that h
will turn thef students acolor design
nt: dent questiodents’ levelussions
dents comp
Radial Symd aim to mae about 10-
one of the dm the designper or a lights. Each timesign is tra
ainting techne quadrantary. They has balanceir completare done ean using wa
on and ansl of engage
pletion of K
mmetry wake a desig-15 shapes
designs forn onto 4x4ht box to trme the desiansferred st
hniques annt at a time
will applye/contrast,ted work inarly they caatercolor pa
swer opporement and
Kaleidosco
orksheet togn that is bo
in each, w
r their final4 inch paperansfer it oign is transtudents can
nd discuss te, monochry their know movemenn along wian take a saint.
rtunities participati
pe assignm
o explore vold and us
we will be p
l painting. er. They wonto final csferred it sn measure
terms suchromatic, anwledge of nt, etc… th a reflect
small squar
ion in the c
ment and re
various quases few shapainting th
They will ill outline
copy paper hould be m(or eyebal
h as tints, shnalogous, ccolor mixi
tion sheet wre of paper
class debat
eflection sh
4
adratic radapes (each hese so the
enlarge onit in sharpithat they h
mirrored alll) a half in
hades and complemening to creat
when the wr to explore
tes and
heet
40
dial
edges
nly one ie and have long the nch
tones. ntary, te a
work is e a non-
41
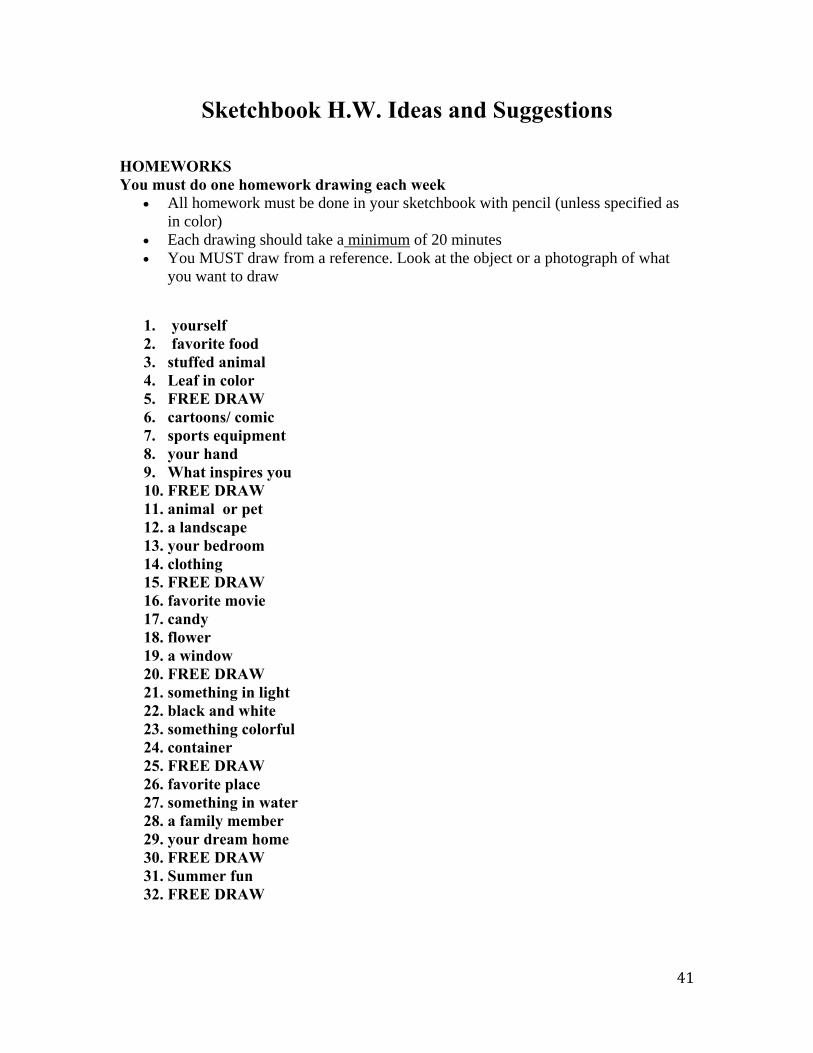
Sketchbook H.W. Ideas and Suggestions HOMEWORKS You must do one homework drawing each week
All homework must be done in your sketchbook with pencil (unless specified as in color)
Each drawing should take a minimum of 20 minutes You MUST draw from a reference. Look at the object or a photograph of what
you want to draw
1. yourself 2. favorite food 3. stuffed animal 4. Leaf in color 5. FREE DRAW 6. cartoons/ comic 7. sports equipment 8. your hand 9. What inspires you 10. FREE DRAW 11. animal or pet 12. a landscape 13. your bedroom 14. clothing 15. FREE DRAW 16. favorite movie 17. candy 18. flower 19. a window 20. FREE DRAW 21. something in light 22. black and white 23. something colorful 24. container 25. FREE DRAW 26. favorite place 27. something in water 28. a family member 29. your dream home 30. FREE DRAW 31. Summer fun 32. FREE DRAW

42
Final Assessment Suggestions
Teachers are encouraged to assess students’ learning by giving a final assessment. This may take the form of a written reflection, exam, a drawing or other assessment.
Written exam: sample questions-
19. Hue is: a. color on the color wheel b. the lightness or darkness of a color c. how much red is in a color d. all of the above 20. Composition is: a. a style of painting b. how the Elements of Design are arranged c. an artist from the Renaissance d. all of the above 21. Monochromatic colors are:
a. one color plus tints and shades b. colors next to each other on the color wheel c. colors across from each other on the color wheel d. all of the above

43
Sample drawing assessment #1: Draw your hand using contour lines. Draw it in an interesting and appropriate gesture.
*NO CREDIT will be given if drawn flat or traced. *Value rendering will be considered if used.
Sample drawing assessment #2:
2-3 Day Observed Drawing: On final copy paper you will demonstrate your understanding of shading 3D form on a 2D surface. Use what you know about the Elements and Principles of Design to make an interesting and dynamic composition. Apply techniques we have used throughout this year to make the drawing unique to you.
Requirements: Bring in a printed photograph or still life object of your choice Choose a subject that you feel confident will take about 2-3 days to
draw to the best of your ability
Students can review notes and reference classroom resources as they work independently on this final drawing assignment. Students should use all class time given. “Unfinished” work can still receive a passing grade so long as student used all of the class time given.

444

Sampple Assessmentss/ Rubriics:
445
446
447
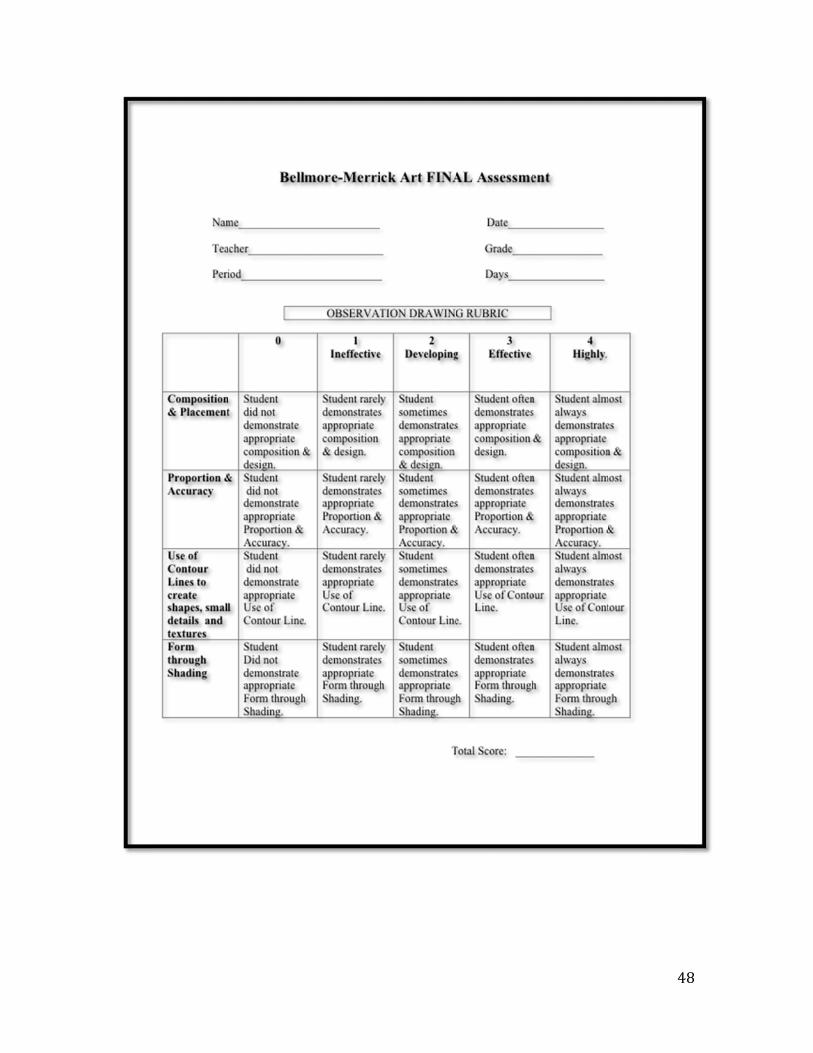
448