art of the apps may 2018 - s3.amazonaws.com · mobile app : project life page 1 of 28 ©2018 kelly...
TRANSCRIPT
Companion Handouts May 2018 : Art of the App Monthly Membershipwith Kelly SIll
Mobile App : Project Life
Page of 1 28©2018 Kelly Sill Design
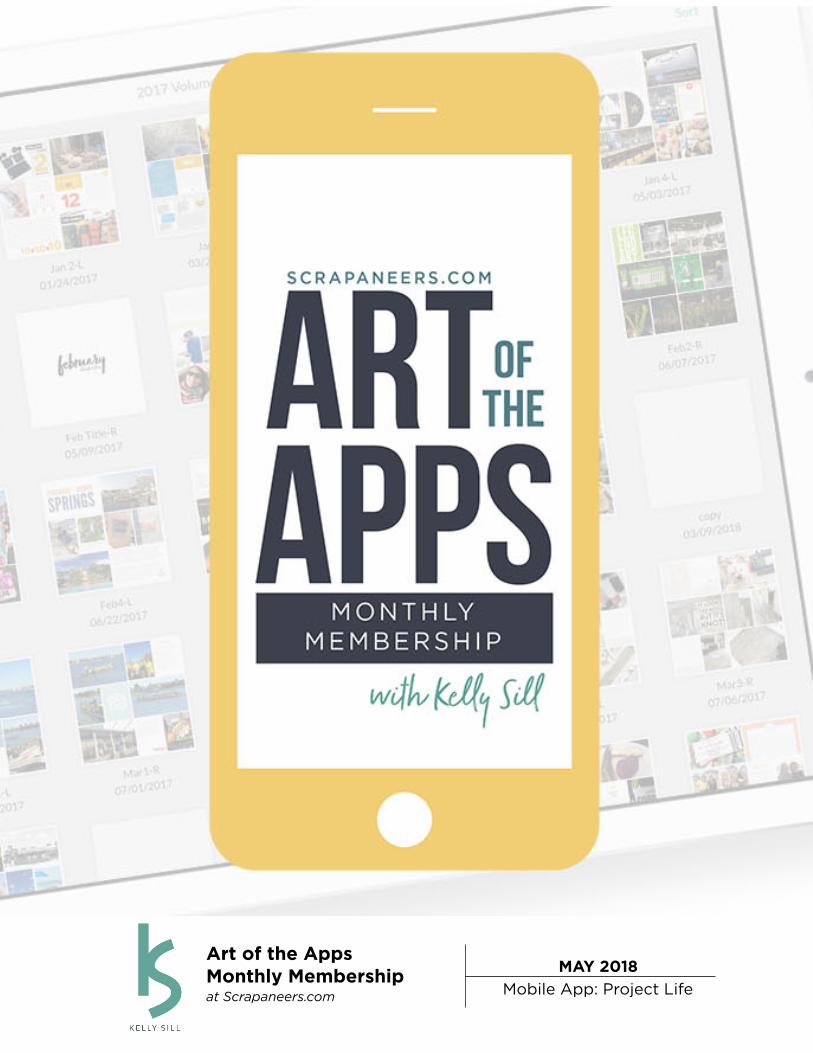
Art of the AppsMonthly Membership at Scrapaneers.com
MAY 2018 Mobile App: Project Life

Companion Handouts May 2018 : Art of the App Monthly Membershipwith Kelly SIll
Mobile App : Project Life
Table of Contents
2Table of Contents
Welcome to Art of the Apps Monthly Membership
3May 2018
4Introduction & Lesson 1: The Project Life User Interface
6Lesson 2: Creating Albums in iOS Native Photos App
8Lesson 3: Creating A Project Life App Layout
11Lesson 4: Folders and File Naming
12Lesson 5: Placing Filler and Journal Cards
15Lesson 6: Exporting Layout/Editable Backups
16Lesson 7: Printing Pages and Photo Books
18Lesson 8: Pro Tip One: Trading Spaces
19Lesson 9: Pro Tip Two: Overlays
21
Lesson 10: Pro Tip Three: Using Collages and Greeting Cards in
Page Templates
23Lesson 11: Pro Tip Four: Flipping Templates
25Lesson 12: Pro Tip Five: No Drop Shadow Layouts
26Lesson 13: Pro Tip Six: Free Form Text
Page of 2 28©2018 Kelly Sill Design

Companion Handouts May 2018 : Art of the App Monthly Membershipwith Kelly SIll
Mobile App : Project Life
Welcome to Art of the Apps Monthly Membership
May 2018
This month we will be exploring the Project Life App, by Becky Higgins LLC.
We’ll explore the following:
• The app’s user interface
• How to create pages, collages, and greeting cards
• How to create photo albums in iOS’s native Photos App
• How to create folders and name layouts
• Using the app’s photo editing and text tools
• Exporting editable backups
• How to place an order for prints and photo books
• Several advanced Pro Tips!
Let’s get started!
Kelly
Page of 3 28©2018 Kelly Sill Design

Companion Handouts May 2018 : Art of the App Monthly Membershipwith Kelly SIll
Mobile App : Project Life
Introduction & Lesson 1: The Project Life User Interface
The Project Life App was covered in Art of the Apps 1.0 back in May of 2016. There
have been so many updates to the app since then! And since the app is now available
for free in the the app store, there are many new friends wanting to give mobile
scrapbooking a try. So it just seemed to make sense to revisit the Project Life App in
your Monthly Membership.
In the first lesson/video we are going to explore the home screen of the Project Life
App. The home screen is your portal to creating pages, collages, purchasing kits,
making cards, setting preferences and ordering prints and books.
When you open the app and the animation ends, four colored quadrants appear in
the center of the screen.
A. Green Quadrant-this is your “get info” section
1. Send Love-rate the app in the App Store.
2. Question/Issue-use this to send a help ticket for the app to Becky’s
Customer Service.
3. Show Help Text-Turn this on to show helpful prompts.
4. Preferences-Select your own defaults for fonts/font size, templates,
drop shadows, rounded/squared corners.
B. Yellow Quadrant-this is your Library Section
Within the Yellow Quad, there are separate sections for your pages/
collages in progress, your completed pages, completed collages and your
folders. It also highlights the latest kits that were released in the last
update, displays the kits you own, and also has kits for purchase.
1. In Progress-houses the pages or collages that you are working on,
meaning you still have empty placeholders to fill.
2. Complete Pages & Completed Collages-contain all of the pages or
collages that have the placeholders filled. Keep in mind that even if you
Page of 4 28©2018 Kelly Sill Design

Companion Handouts May 2018 : Art of the App Monthly Membershipwith Kelly SIll
Mobile App : Project Life
have a journal cards in the placeholders but haven’t added text to it yet,
it will still be considered a “Completed Page” and will live in this section.
3. My Folders-create folders to organize your pages.
4. New Kits-displays all of the new kits released in the latest app update.
You can purchase kits by tapping on them.
5. My Kits-this section is home to all of the kits you have purchased.
6. More Kits-consider this section the “shop.” It is home to all of the kits
available in the app. Tap on them to purchase.
C. Orange Quadrant-this is the Collage Section
1. Collages are available in three sizes-4x6, 6x8, and 12x12.
2. Icon in the upper left corner is your collage picker. Tap it to reveal a
scroll bar with the available collage layouts.
3. Undo button is in the lower left corner.
4. Even though the templates in the scroll bar look as though there are
white borders dividing the placeholders, there are none. The collage
section does NOT put white borders between placeholders.
5. The export icon is in the lower right corner.
6. The “X” in the upper right corner will take you back to the home screen.
D. Blue Quadrant-this is your Make A Page Section
1. Icons in each corner work the same in the quadrant as they do in the
Collage Section (orange quad).
2. The template icon reveals a color bar in addition to the various
layouts to choose from.
a. The color bar shows the color palette of the last kit you used
in the app.
b. To change it, tap the three little lines and a screen with your
kits will appear. There are dots under each kit showing the
colors for that particular kit. Select a new color palette by
tapping the kit.
Page of 5 28©2018 Kelly Sill Design

Companion Handouts May 2018 : Art of the App Monthly Membershipwith Kelly SIll
Mobile App : Project Life
c. When you are brought back to the template screen you can
see that your colors have changed in the color bar.
d. Tap on any of the colors to change the background color of
your template.
e. The icon at the very end allows you to change the corners
from square to round or vice versa.
E. Greeting Card Banner (upper right corner of your home screen)
1. Large variety of 5x7 pre-designed, themed templates.
2. Each template has a placeholder for a photo and text.
F. Order Prints and Books
This is where you can order 4x6, 5x7, 6x8, and 12x12 prints and your 8x8,
10x10, and 12x12 hard or softcover photo books. You can also check your
recent orders, read printing FAQs, and there is even a link to one of
Becky’s blog posts with photo book printing tips.
Lesson 2: Creating Albums in iOS Native Photos App
Creating weekly or monthly albums in the Photos App on an iOS device before diving
in and creating pages will prove helpful in the long run!
A. To create an Monthly Album in Photos
1. Open Photos App and be sure you are in the “Albums” section by
tapping the “Albums” icon at the bottom of your screen.
2. Tap the “plus sign” in the upper left corner of the screen to create a new
album. Name your album and tap “done.”
3. To search for photos by month to place in your new album, tap the little
magnifying glass in the upper right corner of your screen. In the bar at
the top type in the month and year you wish to find photos.
4. Tap the results that appears in the bar. You will notice the number of
photos found in the result of the search.
Page of 6 28©2018 Kelly Sill Design

Companion Handouts May 2018 : Art of the App Monthly Membershipwith Kelly SIll
Mobile App : Project Life
5. Tap “select” in the upper right corner of the screen and tap the photos
you want to place in your new album.
6. When you are finishing selecting your photos, tap “add to” and from the
next screen that appears, tap the album you wish to place them in.
B. To Create a Weekly Album in Photos
Here is a little trick to figure out the date range of any particular week
during the year.
1. Go to your Settings on your device and navigate to “Calendar.”
2. In your Calendar preferences, toggle the “Week Numbers” on.
3. Now open your Calendar app on your phone and notice the small
numbers that appear in the upper left corner at the beginning of each
week. That number designates the week for the year. Pretty cool, huh?
Now use that little trick to create a Weekly Album in Photos:
4. Open the Photos App and instead of viewing your photos by “Albums,”
select the “Photos” icon instead.
5. At the top of your screen, you should notice that you are in “Moments.”
When scrolling, you will see that your photos are divided up by dates.
6. Scroll through your dates until you find the range of dates for the week
you wish to create a Weekly Album for.
7. Tap “Select” in the upper right corner and you should then see you have
the option to create a new album.
8. Create your new album, give it a name, and your selected photos will go
inside.
Now that you have photos in a few albums, let’s make some pages!
Page of 7 28©2018 Kelly Sill Design

Companion Handouts May 2018 : Art of the App Monthly Membershipwith Kelly SIll
Mobile App : Project Life
Lesson 3: Creating A Project Life App Layout
Creating layouts in the app is easy and fun! You are going to love having all of your
kits at your fingertips and there is no messy cleanup!
A. Setting Your Preferences
1. Tap the green quad and select preferences from the menu.
2. To set your Page or Collage Template default, tap the template at the
right and a rolling scroll bar will appear at the bottom of your screen.
Scroll through until you find your favorite to set as your default.
3. To set your Journaling Font and font size default, tap the text to at the
right and scroll through the list of fonts to select your favorite. Scroll
through the point sizes to set your default font size.
4. Toggle the Square Pocket Corners on or off for Rounded Corners.
5. Toggle the Pocket Drop Shadow on or off. NOTE: Toggling the drop
shadows off will turn the shadows off for those pages you PLAN to
create. It will NOT toggle the shadows off of those pages you already
created.
B. Placing Photos in Layout Templates
1. Change the background color of your layout if you’d like by tapping the
template icon in the upper left corner and selecting a color from the
color palette.
2. Tap a placeholder. Two icons in the top right hand corner of the
placeholder appears. The first is to select photo, The second to select a
filler or journal card. Tap the photo icon.
3. At the side or bottom of your screen a your photo library will appear
with all of your photo albums in your Photos App. You can select the
album you have your photos placed in, or scroll to the bottom of the list
and grab your photos from the Cloud or Dropbox if you have them
stored there (not covered in video). Or if you want to select your photos
Page of 8 28©2018 Kelly Sill Design

Companion Handouts May 2018 : Art of the App Monthly Membershipwith Kelly SIll
Mobile App : Project Life
directly from your camera roll, select “all photos”-the very first icon at
the top of your scroll bar.
4. You can also select photos using the “System Picker” option located in
the upper left corner of the photo library screen. Please see video for a
more in-depth explanation of choosing photos using this option.
5. When you find the photo you like, tap it and it will appear in your
placeholder. Keep tapping on the various placeholders you wish to put
photos in.
6. Pro Tip: Look at your layout in sections to tell stories of photos as a
group. Refer to Video Three for a more in-depth explanation.
C. Placing a Photo in Full Page Collage
There may be times when you want entire page to have just one photo. You
can do this in the Collage Section (orange quad) of the app.
1. Tap the orange quad and then tap the template icon in the upper left
corner of the screen
2. Select the 12x12 template. It is the first one in the scroll bar.
3. Tap anywhere in the gray workspace to zoom out then tap the photo
icon in the upper right corner of the placeholder.
4. Navigate to the area on your phone to where your photo is. Tap to place
it.
5. To save it to your Project Life Library, tap the “X” in the upper right
corner of the screen. You will be prompted and asked if you are done
editing a page. Tap “yes” and your layout will be saved in your library.
6. To see your full page 12x12 collage, tap the yellow quad and your full
page 12x12 layout will be in your “Completed Collages” section.
D. Editing Photos
More than likely, your photos/pages are going to print darker than they
appear on your screen. There are a few things you can do to lighten them
up and be thrilled with your printed photos and books!
Page of 9 28©2018 Kelly Sill Design

Companion Handouts May 2018 : Art of the App Monthly Membershipwith Kelly SIll
Mobile App : Project Life
1. Adjust the brightness of your screen. Double-click your home button
and make sure the brightness is in the middle of the bar. If it is too
bright, you may make your photos too dark when editing them. If the
brightness of the screen is too dark, you may lighten them too much.
2. Lighten up your photos a little bit using the photo editing tool in the
Project Life App.
a. Tap on one of the photos in your layout. A photo editing icon
appears in the upper left corner of your photo (it has sliders on
it).
b. Tap the icon and a photo editing tool bar will appear at the
bottom of your screen. You can adjust the brightness, contrast,
saturation of your photo as well as rotate it.
c. Tap on the rest of your photos to edit them if needed.
E. Saving An Incomplete Layout to Your Project Life Library
You can save your layout that is not finished yet in your PL Library.
1. In the upper right corner of your screen tap the “X”. You will be
prompted and asked if you are done editing a page. Tap “yes” and your
layout will be saved in your library.
2. To see your layout, tap on the yellow quadrant.
3. Because you still have placeholders to fill, your layout will appear in the
“In Progress” section at the top of your library.
Page of 10 28©2018 Kelly Sill Design

Companion Handouts May 2018 : Art of the App Monthly Membershipwith Kelly SIll
Mobile App : Project Life
Lesson 4: Folders and File Naming
Utilizing folders allows you to organize pages by projects, years, kids and more! Let
your imagination run wild! Placing them in folders is really the only way you can view
your pages side-by-side and it will help to see how things are flowing, too!
A. Creating a new folder
1. Open your Library (yellow quad) and navigate to your “My Folders”
section.
2. Tap “add folder” that is in right corner of that “my folders” bar.
3. Name your folder.
4. To add a page/collage, whether they are complete or in progress, tap
“more options” in the corner of any Library section.
5. Tap on any page/collage and select “Add to Folder” from the dialogue
box.
6. Tap the folder your wish to add the page/college to.
7. You can also add a page to a folder when you have it open by tapping
the export icon in the bottom right corner of the screen and select “add
to folder.”
8. Remove pages from folders by opening the folder and tapping a layout.
From the menu, tap “remove from folder.” You will only be removing the
page from the folder. You do not delete it from the app.
I. Naming Your Pages
You are able to name your pages/collages whatever you wish. It doesn’t
matter if you access your pages through the the In Progress, Completed
Pages/Collages Sections or in Folders, you can rename your pages from
whatever section you are in.
1. Tap on a layout/collage.
2. From the menu select “Update Page Info.”
3. Name you file whatever you wish. You can also give your page a new
date from here as well.
Page of 11 28©2018 Kelly Sill Design

Companion Handouts May 2018 : Art of the App Monthly Membershipwith Kelly SIll
Mobile App : Project Life
Come up with your own file-naming convention-something that will make it
easy for you to organize your pages when it comes time to print them. Be
sure to watch Video 4 for naming ideas and how to sort your pages within
the Library Sections and Folders.
Lesson 5: Placing Filler and Journal Cards
There are over 200 kits available in the app that are free or available for purchase.
You are sure to have fun browsing the shop and finding the perfect kit to help tell the
stories behind your photos!
A. Accessing Your Kits in a Layout
1. Open a layout you need to add cards to. Tap one of the empty
placeholders.
2. Select the card icon in the upper right hand corner (it is the one with
what looks like two pieces of paper. Two different screens may appear:
a. “Pick a Card Kit” Window. This window will appear if this is the
first time you are adding cards to this particular layout. Browse
your kits and select the one you wish to use. When you select a
kit, it will appear at the side or bottom of your screen
(depending on what device you are using and the orientation
you are holding your device).
b. Card Picker Window. If you have previously placed cards on the
page you opened, this window will appear at the side or bottom
of your screen (depending on what device you are using and the
orientation you are holding your device) with the kit that was
used on the page.
Page of 12 28©2018 Kelly Sill Design

Companion Handouts May 2018 : Art of the App Monthly Membershipwith Kelly SIll
Mobile App : Project Life
B. Exploring the Card Picker Screen
1. The cards from the kit that appear in the Card Picker Window are only
those that will fit in that particular space. So if a 3x4 vertical placeholder
is selected only the 3x4 vertical cards in the kit will appear for you to
choose from. If you select a 4x6 horizontal placeholder, you will notice
the cards in the Card Picker Window will change to 4x6 horizontal
cards.
2. The Card Picker Window is divided into sections: Filler Cards, Title
Cards, Journal Cards, First Page Cards, Last Page Cards. Title Cards,
FIrst/Last Page Cards are not included with every kit, so those card
options may not appear in your Card Picker Window.
C. Placing a FIller/Journal Card in a Layout
1. Once you have selected your kit, tap the card you wish to add to the
placeholder.
2. If you change your mind, simply tap another card.
3. To select a different kit, tap the name of the current kit you are using in
the upper left corner of the window. The “Pick A Card Kit” window will
appear. Select the kit you wish to change to.
4. You can tap on another empty placeholder while the Card Picker
Window is open to add a card to it.
5. To zoom out and close your Card Picker Window tap the “x” in the
upper right corner of your Card Picker Window or tap anywhere in the
gray space surrounding your layout, then tap the magnifying glass in the
lower right corner of your screen.
D. Adding Text to a Journal Card (native text box)
There are two way to add to your Journal Cards. One is by using the native
text box that is already pre-formatted for the card. The other is using the
new feature, Free Form Text. This new feature will be discussed in depth in
a later lesson. In this section we are focusing on using the native text box.
Page of 13 28©2018 Kelly Sill Design

Companion Handouts May 2018 : Art of the App Monthly Membershipwith Kelly SIll
Mobile App : Project Life
1. Tap on a journal card and then tap the text icon that appears in center
of the card. Your screen will zoom into the card and a cursor will blink
on your card and your keyboard will appear.
2. A Text Tool Bar appears directly above your keyboard. The icons include
(starting from the left):
a. Color Wheel-tap this icon to reveal the color swatches you can
choose for your text. The colors on the left are those from the kit
of that particular card. The colors toward the right are the neutral
colors. They will appear no matter which kit you use.
b. Font Icon (cursive letter “F”)-Tap this to select your font if you
wish to change from your default. If you scroll all the way to the
left, a “more” button appears. Here you can purchase additional
fonts. You are unable to install your own fonts into the App.
c. Font Size Icon (capital letter “A”)-Use this to change the size of
your font from your default size if you wish.
d. Line Spacing-This icon will allow you to change the spacing
between the lines of your text by using the slider or the “plus”
and “minus” sign at each end of the slider.
e. Vertical Offset-Use this to adjust the placement of text on your
card (centering it). Use the slider or the “plus” and “minus” sign at
each end of the slider to move the text up or down.
f. Justification-Left, Right, Center or Fully justify your text on your
journal card.
Just use the keyboard to type your text or use the microphone to the
left of the space bar and “talk text!”
Page of 14 28©2018 Kelly Sill Design
Companion Handouts May 2018 : Art of the App Monthly Membershipwith Kelly SIll
Mobile App : Project Life
Lesson 6: Exporting Layout/Editable Backups
There are two really important habits you should get into when creating layouts in
the Project Life App. The first is exporting your completed layout as a jpeg to your
camera roll or cloud-based storage. The second is exporting an editable backup of
that layout. Think of an editable backup as a layered file. If you have the Project Life
App on both your iPhone and iPad, your pages will not sync across both devices. If
you start a layout on one device and wish to finish it on another, you need to export
an editable backup and save it somewhere you could access it from the other device
to open it (like a cloud-based server). Creating an editable backup also puts your
mind at ease knowing you still have a way to access your pages in case something
happens to your mobile device. Let’s look at what each does:
A. Exporting a Completed Layout
1. Open one of your completed layouts by tapping on it and the selection
“view/edit page” from the menu.
2. Tap the export icon in the bottom right corner of your screen.
3. The app will then prompt you to select the size page you wish to export,
12x12, 10x10, or 8x8. NOTE: No matter what size you plan to print your
layouts or photo books at, ALWAYS opt to export at 12x12. You can
always print smaller from a larger size, but you can’t print larger from a
smaller size. Pixelation will occur.
4. Once you have selected your size, the app will prepare to export, and
then prompt you as to where you want to save that layout.
5. You can save it anywhere you wish. The top scroll bar gives you several
options to share to social media sites or copy the layout to other apps.
The bottom scroll bar has options to save it to your different cloud
storage accounts, as well as your camera roll (the “save image” icon
saves the layout to your camera roll).
B. Exporting an Editable Backup
1. While in your library, open one of your sections by tapping “more
options” in the upper right of the bar, OR open one of your folders
Page of 15 28©2018 Kelly Sill Design

Companion Handouts May 2018 : Art of the App Monthly Membershipwith Kelly SIll
Mobile App : Project Life
2. Tap on a layout and select “editable backup.”
3. The app will prepare your editable backup then prompt you as to where
you want to save it.
Please refer to Video 6 for a demonstration on how to open an editable
backup on a different device.
Lesson 7: Printing Pages and Photo Books
8x8, 10x10, and 12x12 Pages, 4x6 and 6x8 Photos, 5x7 greetings, and 8x8, 10x10, and
12x12 hard/soft-bound books can be printed through the app. All printing is done
through White House Custom Color.
A. Printing Photos Through the App
1. Tap the “order prints and photo books” button at the bottom of your
home screen.
2. The next screen shows you your account name, current print and book
ordered, recent orders and FAQs.
3. Tap “current prints order” and Step One screen will appear. If the pages
that are on the screen are not those you wish to select from to print, tap
next to “show” to select the name of the folder or “all completed pages”
to open that folder or area.
4. Tap a layout then select the size you wish to add to your order.
5. If you tap a collage or a 6x8 collage/layout, you will need to tap “add
4x6 to order” or “add 6x8 to order” at the bottom of your screen.
6. When you are through adding pages/prints to your order, tap “next” in
the upper right corner of your screen.
7. On the next screen you can adjust the number of copies of each item
you want printed. When you tap the number “1,” a rolling scroll bar will
at the bottom of your screen where you can adjust your numbers.
8. When you are finished selecting your prints tap “next.”
9. This is where you add your shipping/payment/promo info. Understand
that there is a $5 flat rate shipping fee.
Page of 16 28©2018 Kelly Sill Design

Companion Handouts May 2018 : Art of the App Monthly Membershipwith Kelly SIll
Mobile App : Project Life
NOTE: 5x7 greeting cards cannot be placed in the same order as
your prints. Greeting cards need to be placed in a separate order,
ordered in increments of 20, and come with envelopes.
B. Printing Photo Books Through the App
Placing a photo book order is a little different from placing prints or pages and
has to be ordered separately.
1. From the order screen, tap “create photo book” and then “start a
new photo book.”
2. On the next screen select your book size, paying attention to the “warning” at the top of the menu! It is also helpful to give your order a
name. NOTE: hard covered books have to have a minimum of 20
completed pages and no more than 60 completed pages. Soft covered
books have to have a minimum of 40 completed pages and no more
than 200 completed pages.
3. Tap “pages” to add pages to your album.
4. Tap the icon with the “plus” sign on it and navigate to the area in your
app from which you want to select your photos from by tapping on the
aqua-colored words following “show:” at the top of your screen.
5. You cannot add multiple pages at one time. When you tap on a photo a
large version appears on the next screen. This is helpful to check your
spelling, etc. Tap “add this page” at the bottom of your screen.
6. Keep repeating the process until you have all of the pages you want in
your book loaded.
7. If you see a page that is out of order and you need to move it, tap the
page and select “move back” and it will place it in front of the previous
page.
Once you have all of your pages selected, it is time to move on to the book
cover. Please note that if ordering a hard cover book, you can make the
book cover before adding the pages. However, if creating a soft cover book,
you must add your pages to the order first and then create your cover, as
the number of pages in your soft cover book can affect the cover options.
Page of 17 28©2018 Kelly Sill Design

Companion Handouts May 2018 : Art of the App Monthly Membershipwith Kelly SIll
Mobile App : Project Life
Creating a book cover is best explained while watching the video. Please
refer to Video 7 for a demonstration on how to create a book cover for hard
cover books. A demonstration on creating a book cover for a soft cover is
not available at this time.
Up until now the material covered has given you a solid understanding of the Project
Life App and how it works. Remember, the PL App is meant to keep scrapbooking
simple. But there are times we want to be a little more creative and push the limits of
the App to see if we can get the app to do what we want. The following lessons can
be considered intermediate or advanced techniques in the App. Let’s get creative!
Lesson 8: Pro Tip One: Trading Spaces
In an earlier lesson we learned the only cards that will appear for you to choose from
are those in the size of that particular placeholder selected. But what if you really
like a 4x6 filler card, yet want to place it in a 3x4 pocket? This is how it’s done:
A. Simple Space Swap (just a review)
1. If you wish to switch positions of two same size cards or photos simply
press and hold your finger on one of the placeholders and drag/
drop the card to a different placeholder. When you do, the images/
cards will switch spaces.
2. Use the undo button in the bottom left corner of your screen to switch
back if you change your mind.
B. Different Size Filler Card Swap
Say for instance you have a layout in progress with both 3x4 and 4x6
placeholders. You know there is a 3x4 card that you like a lot, but it isn’t
available in the 4x6 size. What’s a scrapper to do?
1. Place the 3x4 card in the 3x4 placeholder.
2. Press your finger on the placeholder and drag/drop into the 4x6
placeholder.
Page of 18 28©2018 Kelly Sill Design

Companion Handouts May 2018 : Art of the App Monthly Membershipwith Kelly SIll
Mobile App : Project Life
3. You will notice that the card will more than likely appear in the wrong
orientation. To change it, tap on the card and a rotate tool should
appear in the upper left corner. Tap the icon until your card is in the
credit orientation.
C. Different Size Journal Card Swap
Swapping journal cards from one size placeholder to another is a little bit
different than swapping a filler card, in that most of the time you will not be
able to rotate it. A 3x4 to 4x6 swap will be used as an example:
1. Place a 3x4 journal card in a placeholder, taking note of any borders or
design on the card.
2. Drag and drop the card to a 4x6 placeholder. Note how the card
rotated.
3. Even though you will not be able to rotate the card like you can for a
filler card, your text will be in the correct orientation when using the
native text box that is formatted with the card.
Remember to pay close attention to any borders or graphics on journal cards.
For example, if a 3x4 journal card has a border at the top of the card, when
dragged to 4x6 slot, that border is going to rotate. Same with any journal
cards with horizontal lines. While it is the correct orientation in a 3x4 slot, it
will more than likely rotate when dragging to a 4x6 so they will appear vertical.
Lesson 9: Pro Tip Two: Overlays
There are many kits in the Project Life App that are just Overlays. If you are not
familiar with what an overlay is, an overlay can be a piece of word art, a frame, a
pattern, a number or even a border that you layer on top of a photo or solid-colored
filler card. Most of them are white of black, but there are a few that may have a little
bit of color added to them or have a gold or silver foil effect to them. Keep in mind
that you are not able to change the color of any overlay.
Page of 19 28©2018 Kelly Sill Design

Companion Handouts May 2018 : Art of the App Monthly Membershipwith Kelly SIll
Mobile App : Project Life
A. Adding Overlays on Journal or Filler Cards
Once you have a journal or filler card placed in your layout you are able to
place an overlay on top of it. Some overlays work better on filler/journal cards
than others, just remember you are not able to change the color of the overlay.
Just like when you add a 3x4 card to a layout, only those overlays that will fit
in the selected placeholder will appear in your card picker window. I have not
found a way to trade placeholder sizes with overlays like you can with regular
filler or journal cards.
1. To add an overlay to a journal/filler card, tap a placeholder with a card in
it and then tap the filler/journal card icon in the upper right corner.
2. Select the overlay kit you wish to use and then tap the overlay.
3. You will notice the overlay has been placed on top of your card.
4. If you placed the overlay on a journal card you are able to still journal on
the card by tapping on the card after you placed the overlay and then
tapping the text icon in the middle of the card. Please note that you
don’t have to do these steps in order. You can add your text first and
then place an overlay on your journal card.
B. Adding Overlays Photos
1. This is done in the same way as adding an overlay to a journal/filler card.
2. Tap the photo and then select the filler/journal card icon in the upper
right corner.
3. Navigate to the overlay kit you wish to use and then select the overlay
to place it on the photo. Keep in mind that you are not able to move the
overlay around on the photo.
4. With the addition of Free Form Text (lesson coming up!) you are able to
add text to the photo as well by tapping the photo and then selecting
the text icon. Again, there is no particular order in which you need to do
this.
Page of 20 28©2018 Kelly Sill Design

Companion Handouts May 2018 : Art of the App Monthly Membershipwith Kelly SIll
Mobile App : Project Life
A few things to keep in when working with Overlays:
1. You cannot remove an overlay once you save your layout to your library.
If, for example, you saved it to your library and open it back up and
decided you didn’t want that overlay on a photo, you would have to
delete the entire photo from the place holder and then go through the
process of placing it back in.
2. You cannot change the colors of the overlays.
3. Now I haven’t tried every single overlay, but I have found that you are
unable to trade place holder sized with overlays like you can with the
regular filler and journal cards.
Lesson 10: Pro Tip Three: Using Collages and Greeting
Cards in Page TemplatesThis little trick is a simple one but may get overlooked sometimes. Creating a collage
or using a finished greeting card and placing it in a full template is a great way to get
an extra photo or two, along with some journaling in a template where you may not
have enough space.
A. Creating/Saving a Collage
1. Open the Collage Section of the App (orange quad).
2. Select the collage template you wish to use.
3. Add your photos or filler/journal cards to the collage.
4. Once finished, export and save your collage to your device (whether
that is your camera roll or other cloud-based storage.
B. Adding A Saved Collage to a Layout
1. Open the layout you wish to place your saved collage into.
2. Tap the placeholder and select the photo icon in the upper right corner.
3. Navigate to the area on your device to select the collage and place it on
your page.
Page of 21 28©2018 Kelly Sill Design

Companion Handouts May 2018 : Art of the App Monthly Membershipwith Kelly SIll
Mobile App : Project Life
Remember! You have 4x6 and 6x8 collage templates to work with! Use those
6x8 collage templates in the Big Shot Layout Templates!
C. Creating/Saving a Greeting Card
1. Navigate to the home screen of the app.
2. Tap the Greeting Card banner in the upper right corner of the screen.
Here you will find several pre-made greeting cards, everything from
Christmas cards to Thank You cards, to Graduation cards and more.
There are even coordinated wedding sets that include Save the Date
cards, an Invitation and Thank You cards. All of these cards are 5x7. You
can print them through the app, but the pricing is dependent upon the
number of cards you will be ordering.
You can treat these greeting cards just like you did with the collage
template and use them in your page layouts. It is best to use them in a 4x6
placeholder with minimal adjustments
3. Select the card you wish to use.
4. On the card template there is a blue-dashed line to place your photo
and a red-dashed line to add text. Tap within the blue-dash area and
navigate to the area on your device you wish to grab your photo from.
5. Add text if you like, taking note that we will have to do a little bit of
photo adjustment once we bring the saved greeting card into the page
template. Adding text to the card may or may not be a good idea
depending on where the text area is on the card.
6. Once finished, export and save your card to your device.
D. Adding A Saved Greeting Card to a Layout
1. Open the layout you wish to place your saved greeting card into.
2. Tap a 4x6 placeholder and select the photo icon in the upper
right corner.
3. Navigate to the area on your device to select the collage and place it on
your page.
Page of 22 28©2018 Kelly Sill Design

Companion Handouts May 2018 : Art of the App Monthly Membershipwith Kelly SIll
Mobile App : Project Life
4. Now because the ratios are different, you may have to play around with
the size of the photo in the slot by pinching your fingers in or out on the
screen.
Lesson 11: Pro Tip Four: Flipping Templates
This is a fairly advanced technique that will require minimal help from the app
PicTapGo. We are not doing a full-blown tutorial on this app at all. There is just one
tiny feature in this app that is needed to make this technique possible.
One of the things you cannot do in the Project Life App is rotate a template. But with
a few extra steps and a little help from PicTapGo, you will learn how to “fake it” and
you will get a lot more use out of your templates!The instructions below are brief. It is best to watch Video 11 for the full demonstration!
A. Prepping a Layout to be Flipped
1. Open a template and add photos to your layout like you would normally
do.
2. If you are adding a filler or journal card, you need to place these in a
collage template, export and save the collage to your camera roll and
then place it in your layout. Note: when you want to use 3x4 filler or
journal cards on a layout you wish to flip, just place them in the 4x6 C
collage template. When you bring them into your page layout, you
simply just move the photo within the placeholder to the area of the
collage you wish to view in that slot.
3. Once your placeholders are filled you will need to do the following
for each placeholder:
a. Tap a photo, journal or filler card.
b. Tap the photo edit icon in the upper left corner and select the
PicTapGo icon from the photo editing tool bar. The PL App will
open the PicTapGo App.
c. Tap the small crop tool symbol at the top center of your screen.
Page of 23 28©2018 Kelly Sill Design

Companion Handouts May 2018 : Art of the App Monthly Membershipwith Kelly SIll
Mobile App : Project Life
d. When the next screen appears, tap the arrows that are forming a
circle.
e. Tap the horizontal option icon. When finished, tap done in the
upper right corner of your screen.
f. Repeat this process for every single placeholder on your layout.
You may need to adjust any 3x4 placeholder where you placed a
collage.
g. When you are finished, everything on your page should look
backwards. This is what you want!
h. Export and save your layout to your device.
B. Flipping your layout
1. Open the Collage section of the app (orange quad).
2. Select the full page 12x12 template.
3. Tap the photo icon in the upper right corner of the placeholder.
4. Place your backwards collage you saved into the placeholder.
5. Tap the photo-editing icon in the upper left corner.
6. Tap the PicTapGo icon from the photo editing tool bar.
7. Flip your photo horizontally just as you did earlier on your layout.
8. Tap “done” when finished.
9. Ta-da! A flipped template!
Note: This page will appear in your “Completed Collages” section in
your Library.
Page of 24 28©2018 Kelly Sill Design

Companion Handouts May 2018 : Art of the App Monthly Membershipwith Kelly SIll
Mobile App : Project Life
Lesson 12: Pro Tip Five: No Drop Shadow LayoutsThe Project Life App has been around for a few years now and each update to the
app gets better than the last. One of those “nice to have” functions on a lot of
people’s wish lists was the ability to manipulate the drop shadows that appear behind
each of your photo placeholders. Some people liked them some didn’t. A few updates
ago, wishes were granted that would please both parties–we now can turn them off or on. Now I know there are still scrappers who wish for something in between, like to
have the ability to enlarge the shadow, make it stronger or softer. But we have to
settle for on or off right now.
A. Turning Drop Shadows On/Off
1. From the Home Screen, tap the green quad and select “preferences”
from the menu.
2. Toggle the drop shadow on or off
NOTE: When you toggle your drop shadows on or off, you are doing so for
the layouts you create moving forward. This does not turn them on or off
for the layouts your previously created. If, for example, you have a layout
you created several months ago with drop shadows turned on, and now
decide you want the shadows turned off, you will have to start from scratch
and redo the layout with the shadows toggled off.
B. Meagan Johnson-The Practical Scrapper
Meagan Johnson is a member of Becky Higgins 2018 Project Life Creative
Team and she has this “no drop-shadow thing” down pat. Several of her no
drop shadow layouts are featured in the Lesson 12 Video, but she has even
more creative inspiration on these social media outlets:
Blog: thepracticalscrapper.com
Instagram: thepracticalscrapper
Pinterest: Meagan Johnson
Page of 25 28©2018 Kelly Sill Design

Companion Handouts May 2018 : Art of the App Monthly Membershipwith Kelly SIll
Mobile App : Project Life
C. No Drop Shadow Tips
You can get pretty creative with your layouts by turning off your drop
shadows and it is best understood by watching the video. Please refer to
Video 12 for in-depth demonstrations. Here are some helpful tips:
1. Start to look at the filler/journal cards a little more closely. Don’t just
look at the card as a whole, look at it in pieces. Does it have a
border? Is it framed? What shapes are present on the card? How
would these things look repeated on a page?
2. Look at the various templates more closely as well. Which templates
would work well to have a card with a border repeated to create a
border on the page? Which templates would you utilize only one
placeholder for a photo and the rest would be white space for a
minimalistic design?
3. Don’t forget that you can change the background color of your
layout. Which cards would blend with your colored background?
4. No drop shadow pages are not only a beautiful addition to your
photo albums, but they also make gorgeous home decor! Print and
frame them for your home or office!
Lesson 13: Pro Tip Six: Free Form TextIn April of 2018, there was an EPIC update to the Project Life App: Free Form Text.
This update allows you to add multiple text boxes to journal cards, filler cards, and
yes, even photos. It was probably the most requested feature app scrappers had, and
it has now come to fruition. And we are so, so happy!
Free Form Text is a paid feature in the app. Yes, it costs $2.99, but when this
happened, the app itself became FREE in the store. That is so cool for people who
are just starting out in the mobile memory keeping journey.
A. Purchasing the Free Form Text Option
1. Once you have updated the app to the latest version, open a layout you
have started and tap on a filled placeholder.
Page of 26 28©2018 Kelly Sill Design

Companion Handouts May 2018 : Art of the App Monthly Membershipwith Kelly SIll
Mobile App : Project Life
2. In the upper left corner of the placeholder a text icon appears next to
the photo editing icon.
3. If you tap that text icon and you HAVE NOT purchased the Free Form
Text option, a dialogue box will appear with information on purchasing
the new feature. If you have already purchased this option and tap on
the text icon, a text box will appear in the center of your card/photo.
B. Using the Free Form Text Tool on a Photo or Filler Card
1. Select a placeholder with a photo or filler card and tap on the text tool
icon in the upper left corner. A text box will appear in the center of your
photo. NOTE: By default, Free Form Text will appear white when using it
on a photo. You can change the color using the color wheel in the tool
bar above your keyboard.
2.
There are two icons that appear on a Free Form Text box. The “x” in the
upper left corner is to delete the box. The icon with the dot in the lower
right corner allows you to increase/decrease the size of the box by
stretching it out/in. It also allows you to rotate the box.
NOTE: Free Form Text boxes do not “wrap text” within the box. Meaning
if you make your text box larger or smaller, the text is only going to
increase/decrease. It will not move text to a new line. You will have to
tap the “return” key on your keyboard to push the text to a new line.
3. Type your text. Again, Free Form Text will not push your text to a new
line. You need to use the return key to force the text to a new line.
4. You can move your text box to any position in your placeholder.
5. All of the text tools work the same as before. You can format the text to
your liking.
6. To add a new text box to the placeholder, simply tap the little “plus sign”
that is on the right side of the text tool bar above your keyboard.
Page of 27 28©2018 Kelly Sill Design

Companion Handouts May 2018 : Art of the App Monthly Membershipwith Kelly SIll
Mobile App : Project Life
C. Using the Free Form Text Tool on a Journal Card
1. Tap on a journal card and then tap the text tool icon in the center of the
card.
2. You will notice, like before, the cursor appears allowing you to add text.
This is for the native text box that is already formatted for the card.
3. If you wish to add a Free Form Text Box and not use the native box,
simply tap that plus sign in to the right of the text edit tool bar and a
new text box will appear in the center of your card.
4. By default, text in Free Form Text boxes added to journal cards is black
but this can be changed using the color wheel.
Please refer to Video 13 for some ideas on how you can creatively use Free Form
Text! This is a new update to the app and there are many other unique ways to use
this tool! Post your ideas in our classroom Facebook Group and share your ideas with
your fellow app-scrappers!
Page of 28 28©2018 Kelly Sill Design