assessment, communications and joining
TRANSCRIPT

Assessment, communications and joiningThis guide is for GFRP that has been converted to a qualifying workplace pension scheme.

When you’ve logged into GPZ, you’ll see your scheme home page. You can start any journey from this page.
PLEASE NOTE – If you have access to multiple schemes or sites, you will need to select the scheme/site before you continue to the journeys in this guide. If your scheme has multiple sites, you will also see slight differences throughout the guide.
Welcome to GPZ
Assessment, communications and joining 02

OverviewThis guide will help you assess and join your employees to your Qualifying Workplace Pension Scheme (QWPS) on Group Pension Zone (GPZ). Included in this guide are:
¬ Assessment, communications and joining
¬ Join
¬ New member communications
¬ Assessment only
¬ Existing member communications
¬ View files
Click on a building to get startedOverview
Suitable for auto‑enrolment
where employees will be assessed.
Suitable for sending regulatory enrolment
communications to employees.
Suitable for contract joining and for auto‑enrolment, where employees have already been assessed.
Suitable for auto‑enrolling
employees.
Assessment, communications
and joining
Join Assessment only Existing member
communications
Suitable for sending regulatory enrolment
communications to employees.
New member communications
View eligibility, communications &
join output files from the past year.
View files
Assessment, communications and joining 03
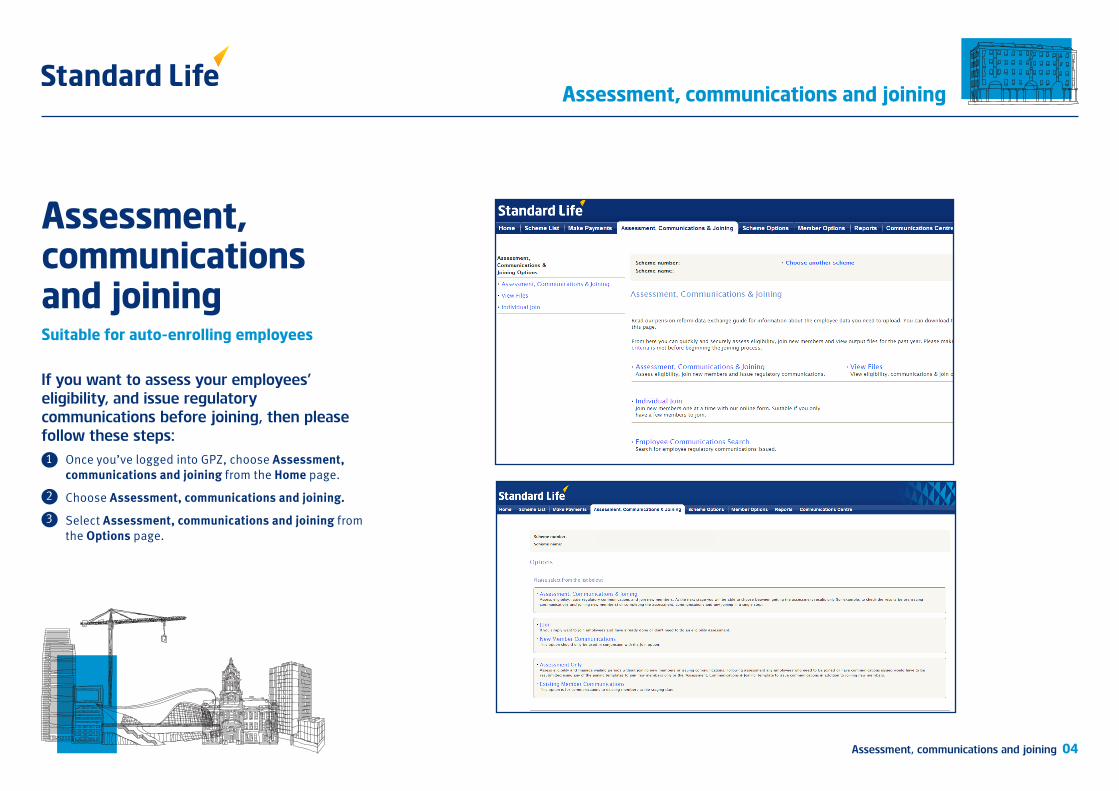
Assessment, communications and joiningSuitable for auto-enrolling employees
If you want to assess your employees’ eligibility, and issue regulatory communications before joining, then please follow these steps: Once you’ve logged into GPZ, choose Assessment,
communications and joining from the Home page.2 Choose Assessment, communications and joining.3 Select Assessment, communications and joining from
the Options page.
1
Assessment, communications and joining
Assessment, communications and joining 04
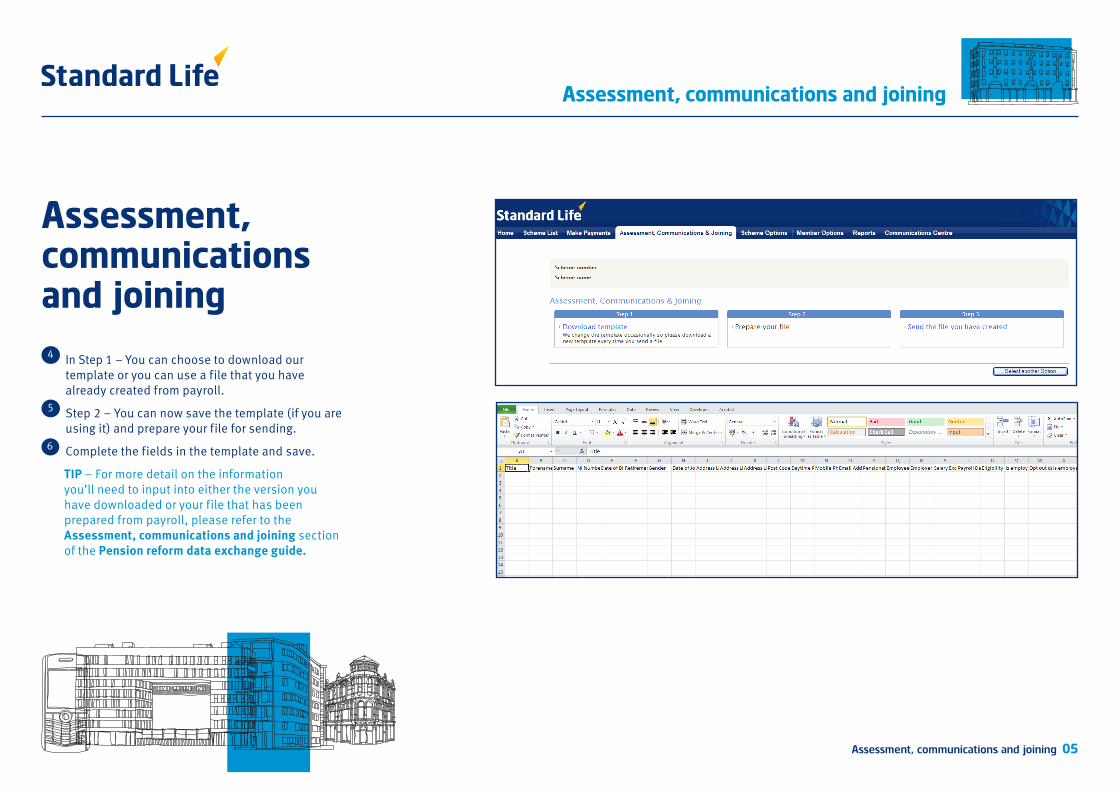
4 In Step 1 – You can choose to download our template or you can use a file that you have already created from payroll.
5 Step 2 – You can now save the template (if you are using it) and prepare your file for sending.
6 Complete the fields in the template and save.
TIP – For more detail on the information you’ll need to input into either the version you have downloaded or your file that has been prepared from payroll, please refer to the Assessment, communications and joining section of the Pension reform data exchange guide.
Assessment, communications and joining
Assessment, communications and joining
Assessment, communications and joining 05

7 Now you’re ready to send us your file. In Step 3, select Send the file you have created.
8 Read the Declaration, and when you’re happy to proceed click Accept.
Assessment, communications and joining
Assessment, communications and joining
Assessment, communications and joining 06

9 Complete the Confirm pay reference details, making sure you choose Assessment, issue communications and join members (not Assessment only) in the Type of assessment section. Then click Continue to submit file.
Assessment, communications and joining
Assessment, communications and joining
Assessment, communications and joining 07

10 Upload the file you’ve created by clicking Browse select your file. Click the box to confirm that eligible members will join automatically and then click Send file.
11 We will automatically attempt to align the headers. For any that we cannot match the column header will say ‘please confirm’.
12 Please select from the drop down menu an appropriate header. Or alternatively select ignore if this is data not required to complete the journey. Clarification of the information needed is shown in the data exchange guide.
Assessment, communications and joining
Assessment, communications and joining
Assessment, communications and joining 08

13 An error information screen may appear. Errors will either relate to the format or could highlight invalid data on your file. The data exchange guide shows the format to be used, and the error message will tell you what is wrong and what action you should take. You should open the original file and fix the errors and resubmit the file as shown in Step 7. Amend the relevant error on the file and resubmit. When you’re ready to upload your file, click Send file.
14 Once the column headers are aligned you will need to tell us what row the member data starts from.
15 An Acknowledgement screen will appear.
16 Click on Return to assessment, communication and joining button to move away from this screen.
17 You’ll shortly receive an email letting you know that your Eligibility Report is ready.
Assessment, communications and joining
Assessment, communications and joining
Please click http://library.adviserzone.com/letter12.pdf to see an example of our sample letters.
Assessment, communications and joining 09

18 To view your Eligibility Report, choose View files in the Assessment, communications and joining page.
19 Click on the report and choose Export. The Pension reform data exchange guide has more detail on what is included in your reports.
Assessment, communications and joining
Assessment, communications and joining
Assessment, communications and joining 10

20 If you’re returning to GPZ to continue your journey, select Assessment, communications and joining on your home page.
TIP – For more details on how to view files, please see page 29.
You’ve successfully sent your data joining eligible employees to your QWPS.
Assessment, communications and joining
Assessment, communications and joining
Assessment, communications and joining 11
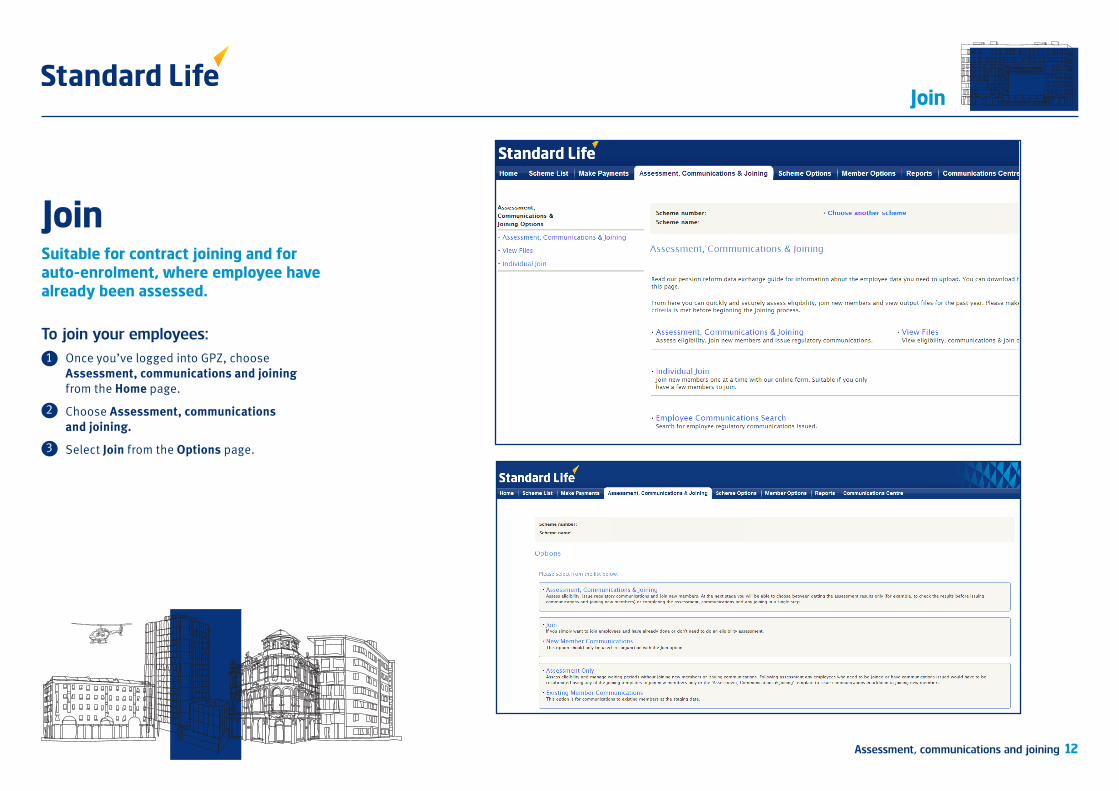
To join your employees: Once you’ve logged into GPZ, choose
Assessment, communications and joining from the Home page.
2 Choose Assessment, communications and joining.
3 Select Join from the Options page.
1
JoinSuitable for contract joining and for auto-enrolment, where employee have already been assessed.
Join
Assessment, communications and joining 12

4 In Step 1 – You can choose to download our template or you can use a file that you have already created from payroll.
5 Step 2 – You can now save the template (if you are using it) and prepare your file for sending.
6 Complete the fields in the template and save.
TIP – For more detail on the information you’ll need to input into the template, please refer to the Join section of the Pension reform data exchange guide.
Join
Join
Assessment, communications and joining 13

7 Now you’re ready to send us your file. In Step 3, select Send the file you have created.
8 Read the Declaration, and when you’re happy to proceed click Accept.
Join
Join
Assessment, communications and joining 14
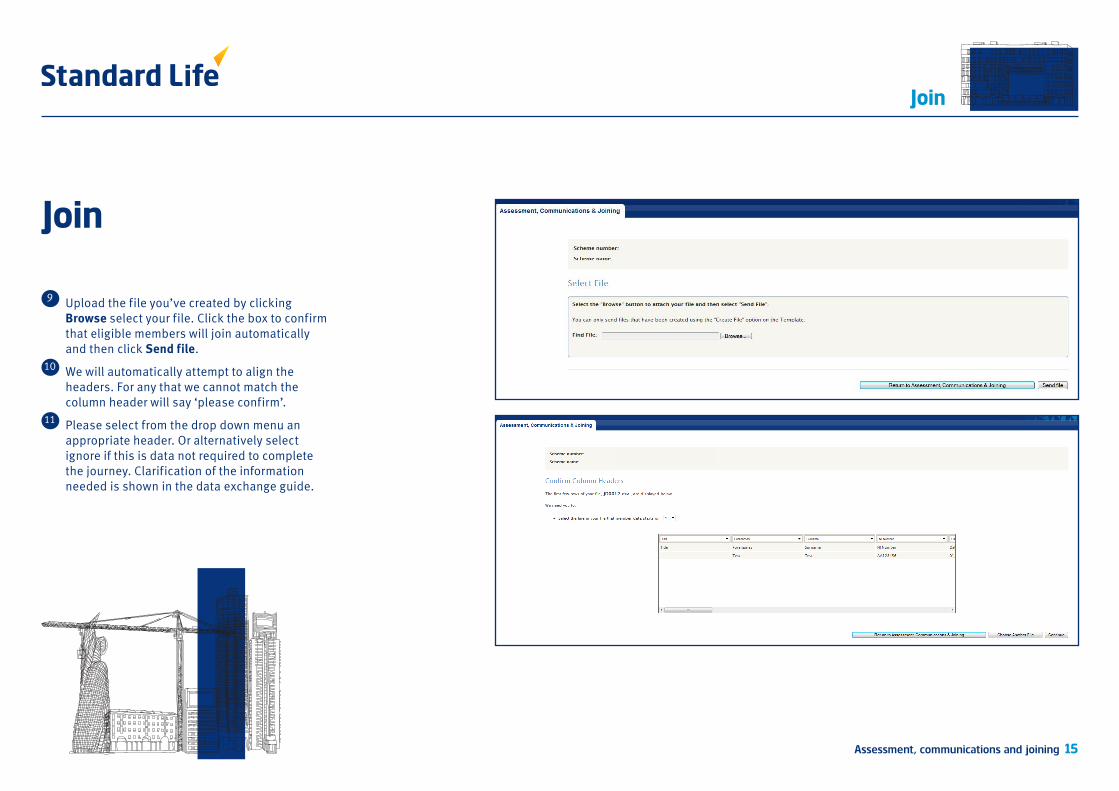
9 Upload the file you’ve created by clicking Browse select your file. Click the box to confirm that eligible members will join automatically and then click Send file.
10 We will automatically attempt to align the headers. For any that we cannot match the column header will say ‘please confirm’.
11 Please select from the drop down menu an appropriate header. Or alternatively select ignore if this is data not required to complete the journey. Clarification of the information needed is shown in the data exchange guide.
Join
Join
Assessment, communications and joining 15
Join
Join
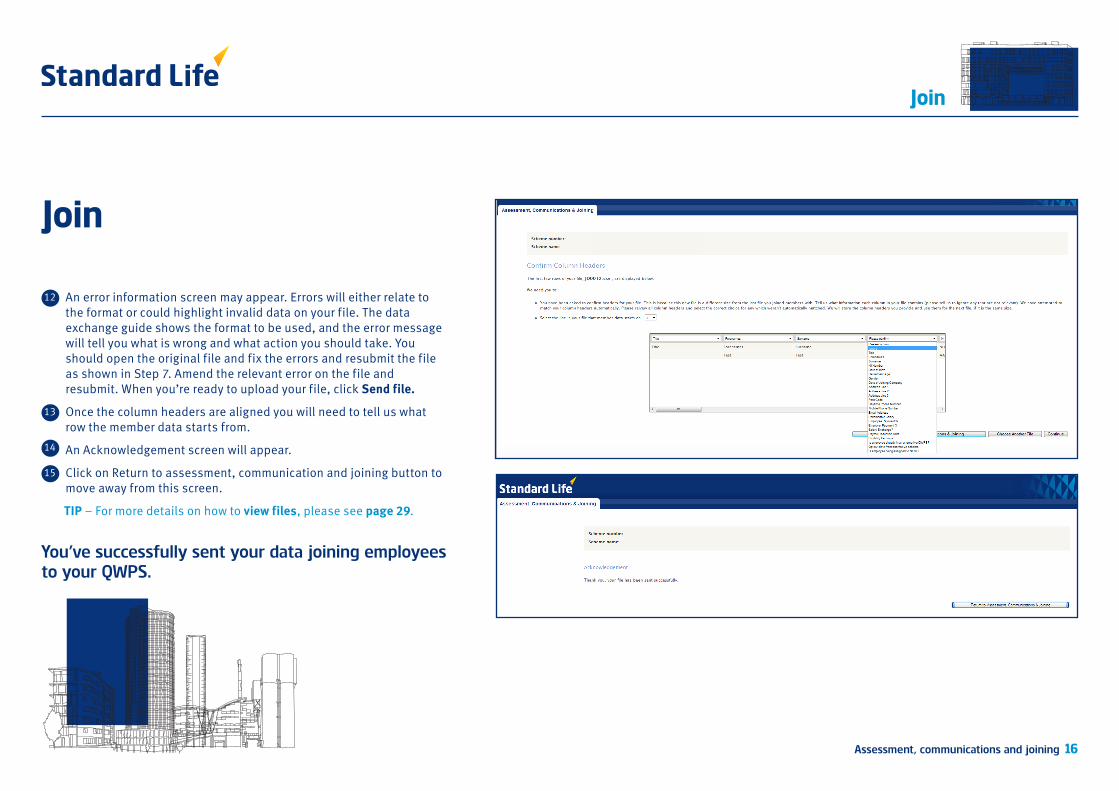
12 An error information screen may appear. Errors will either relate to the format or could highlight invalid data on your file. The data exchange guide shows the format to be used, and the error message will tell you what is wrong and what action you should take. You should open the original file and fix the errors and resubmit the file as shown in Step 7. Amend the relevant error on the file and resubmit. When you’re ready to upload your file, click Send file.
13 Once the column headers are aligned you will need to tell us what row the member data starts from.
14 An Acknowledgement screen will appear.
15 Click on Return to assessment, communication and joining button to move away from this screen.
TIP – For more details on how to view files, please see page 29.
You’ve successfully sent your data joining employees to your QWPS.
Assessment, communications and joining 16

This option should not be used in conjunction with the Assessment, communications and joining option. Once you’ve logged into GPZ, choose
Assessment, communications and joining from the Home page.
2 Choose Assessment, communications and joining.
3 Select New member communications from the Option page.
1
New member communicationsSuitable for sending regulatory communications to employees
New member communications
Assessment, communications and joining 17

4 In Step 1 – click the Download template button. A CSV template will be created.
5 Step 2 – You can now save the template and prepare your file for sending.
6 Complete the fields in the template and save.
TIP – For more detail on the information you’ll need to input into the template, please refer to the New member communications section of the Pension reform data exchange guide.
New member communications
New member communications
Assessment, communications and joining 18

New member communications
7 Now you’re ready to send us your file. In Step 3, select send the file you have created.
8 Read the Declaration, and when you’re happy to proceed click Accept.
New member communications
Assessment, communications and joining 19

9 Upload the file you’ve created by clicking Browse select your file then click Send file.
10 An error information screen may appear. Amend the relevant error on the file and resubmit. When you’re ready to upload your file, click Send file.
11 An Acknowledgement screen will appear. 12 Click on Return to assessment, communication and
joining button to move away from this screen.
TIP – For more details on how to view files, please see page 29.
You’ve successfully sent your data which will send letters to your employees.
New member communications
New member communications
Assessment, communications and joining 20

If you want to assess your employees without joining them, you can use Assessment only: Once you’ve logged into GPZ, choose
Assessment, communications and joining from the Home page.
2 Choose Assessment, communications and joining.
3 Select Assessment only from the Options page.
1
Assessment onlySuitable for auto-enrolment where employees will be assessed
Assessment only
Assessment, communications and joining 21

In Step 1 – click the Download template button. An Excel template will download.
5 Step 2 – You can now save the template and prepare your file for sending.
6 Complete the fields in the template.
TIP – For more detail on the information you’ll need to input into the template, please refer to the Assessment only section of the Pension reform data exchange guide.
7 Once you’ve completed the template, click Create eligibilty file. If there are any problems with the information you have entered, these will be highlighted in red. You can move to the next field by clicking on Go to next error. When you’ve changed all the highlighted fields, click Create eligibilty file again.
4
Assessment only
Assessment only
Assessment, communications and joining 22
Assessment only
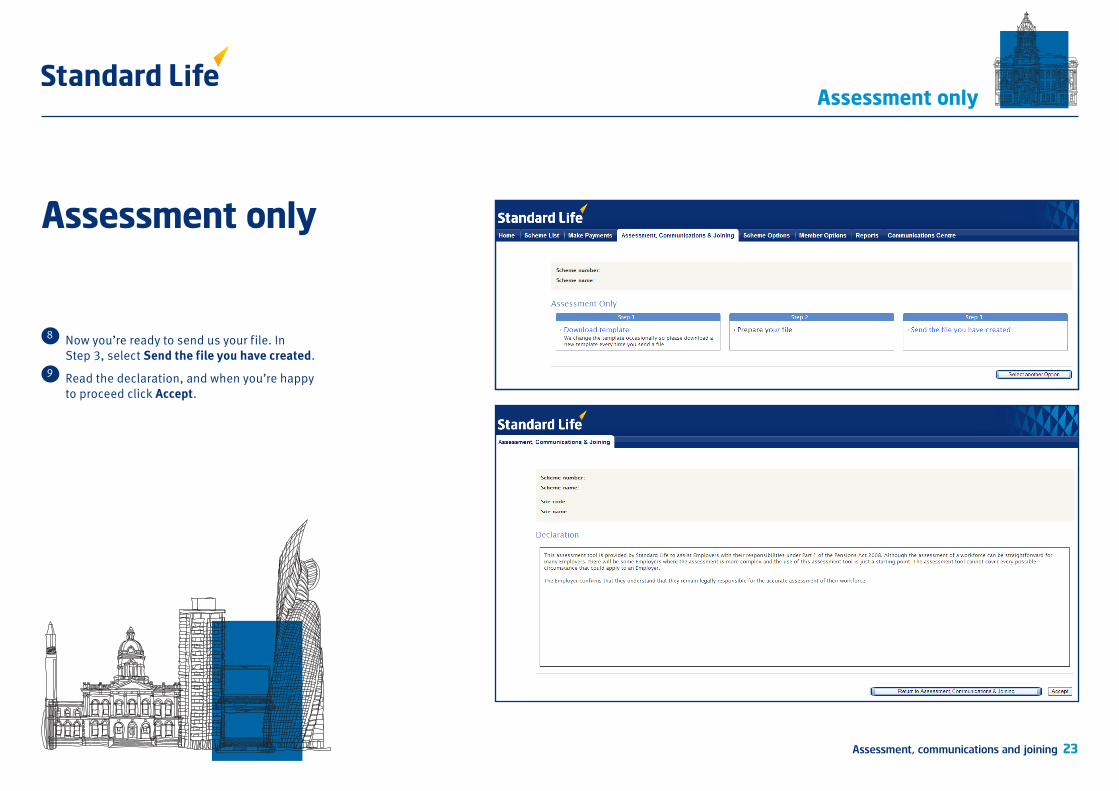
8 Now you’re ready to send us your file. In Step 3, select Send the file you have created.
9 Read the declaration, and when you’re happy to proceed click Accept.
Assessment only
Assessment, communications and joining 23
Assessment only
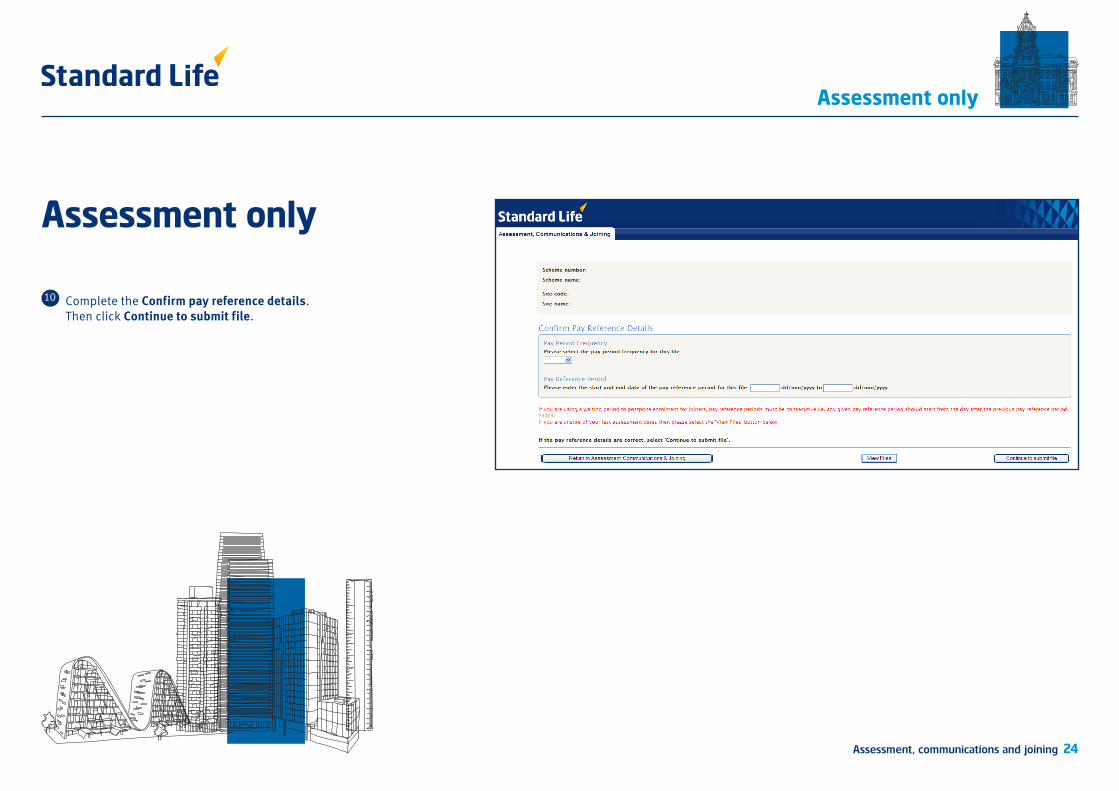
10 Complete the Confirm pay reference details. Then click Continue to submit file.
Assessment only
Assessment, communications and joining 24

Assessment only
11 Upload the file you’ve created by clicking Browse select your file then click Send file.
12 An error information screen may appear. Amend the relevant error on the file then resubmit. When you’re ready to upload your file, click Send file.
13 An Acknowledgement screen will appear. 14 Click on Return to assessment,
communication and joining button to move away from this screen.
15 You’ll shortly receive an email letting you know that your Eligibility Report is ready.
Assessment only
Assessment, communications and joining 25

Assessment only
16 To view your Eligibility Report, choose View files in the Assessment, communications and joining page.
17 Click on the report and choose Export. The Pension reform data exchange guide has more detail on what is included in your reports.
18 If you’re returning to GPZ to continue your journey, select Assessment, communications and joining on your home page.
TIP – For more details on how to view files, please see page 29.
You’ve successfully sent your data joining employees to your QWPS.
Assessment only
Assessment, communications and joining 26

Existing member communications
Existing member communicationsSuitable for sending regulatory enrolment communications to employees.
This option is for communications to existing members at the staging date. Once you’ve logged into GPZ, choose
Assessment, communications and joining from the Home page.
2 Choose Assessment, communications and joining.
3 Select Existing member communications from the Options page.
1
Assessment, communications and joining 27
Existing member communications
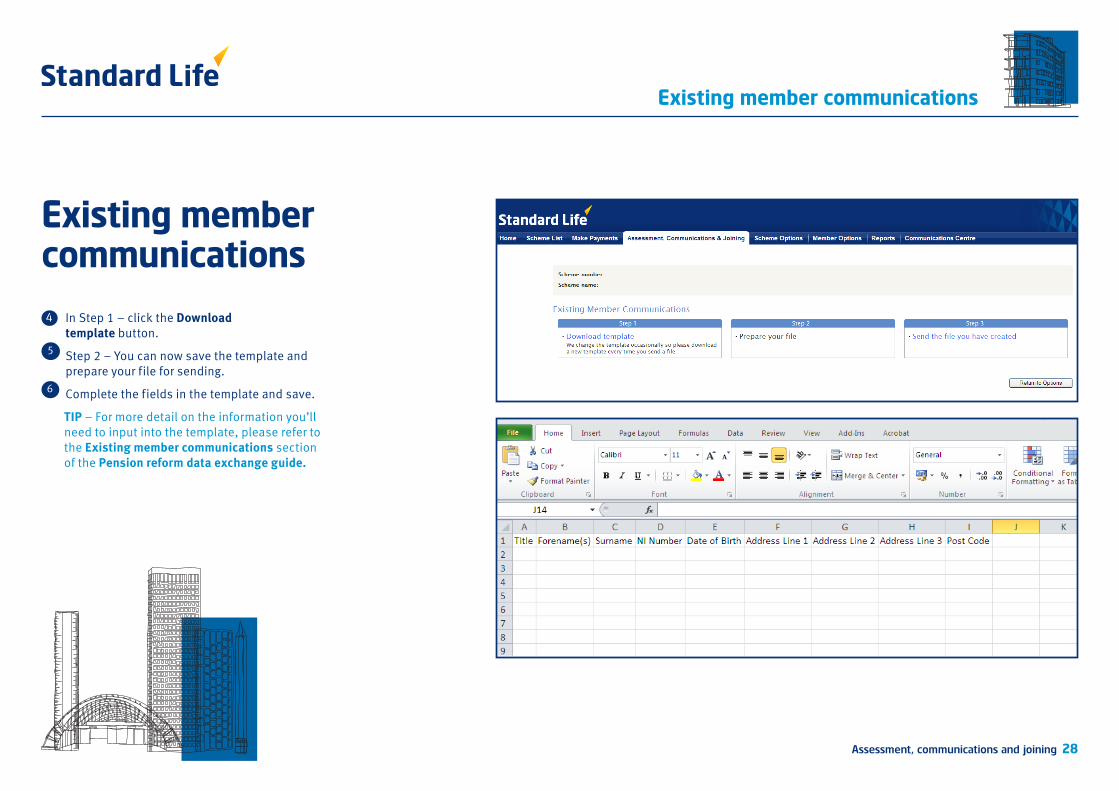
Existing member communications In Step 1 – click the Download
template button. 5 Step 2 – You can now save the template and
prepare your file for sending.6 Complete the fields in the template and save.
TIP – For more detail on the information you’ll need to input into the template, please refer to the Existing member communications section of the Pension reform data exchange guide.
4
Assessment, communications and joining 28

Existing member communications
7 Now you’re ready to send us your file. In Step 3, select Send the file you have created.
8 Read the Declaration, and when you’re happy to proceed click Accept.
Existing member communications
Assessment, communications and joining 29

Existing member communications
Existing member communications
9 Upload the file you’ve created by clicking Browse select your file then click Send file.
10 An error information screen may appear. Amend the relevant errors on your file and resubmit. When you’re ready to upload your file, click Send file.
11 An Acknowledgement screen will appear. 12 Click on Return to assessment,
communications and joining button to move away from this screen.
TIP – For more details on how to view files, please see page 29.
You’ve successfully sent your data which will send letters to your employees.
Assessment, communications and joining 30

View files
View files View eligibility, communications & join output files from the past year.
Once you’ve logged into GPZ, choose Assessment, communications and joining from the Home page.
2 Choose Assessment, communications and joining.
3 Select View files from the Options page.
1
Assessment, communications and joining 31

View files
View files
4 Click the button next to the report you wish to view.5 Once you have selected your file, click export.
TIP – Assessment and join files are typically available on the day you submit the file, while communications files are available on the working day after you have submitted the file.
Assessment, communications and joining 32

Find out moreFor more information on these processes, visit Frequently Asked Questions
To find out more, please speak to your adviser or call us on
0845 60 60 092
Standard Life Assurance Limited is registered in Scotland (SC286833) at Standard Life House, 30 Lothian Road, Edinburgh EH1 2DH. Standard Life Assurance Limited is authorised by the Prudential Regulation Authority and regulated by the Financial Conduct Authority and the Prudential Regulation Authority. www.standardlife.co.uk
GEN1968D 0914 ©2014 Standard Life