banner student api - southern utah university · banner student api 9.5 installation guide ... this...
TRANSCRIPT

Banner Student APIInstallation Guide
Release 9.5March 2016

Without limitation: Ellucian®, Banner®, Colleague®, and Luminis® are trademarks of the Ellucian group of companies that are registered in the U.S. and certain other countries; and Ellucian Advance™, Ellucian Course Signals™, Ellucian Degree Works™, Ellucian PowerCampus™, Ellucian Recruiter™, Ellucian SmartCall™, are also trademarks of the Ellucian group of companies. Other names may be trademarks of their respective owners.
© 2016 Ellucian.
Contains confidential and proprietary information of Ellucian and its subsidiaries. Use of these materials is limited to Ellucian licensees, and is subject to the terms and conditions of one or more written license agreements between Ellucian and the licensee in question.
In preparing and providing this publication, Ellucian is not rendering legal, accounting, or other similar professional services. Ellucian makes no claims that an institution's use of this publication or the software for which it is provided will guarantee compliance with applicable federal or state laws, rules, or regulations. Each organization should seek legal, accounting, and other similar professional services from competent providers of the organization's own choosing.
Ellucian4375 Fair Lakes CourtFairfax, VA 22033United States of America
Revision History
Publication Date Summary
March 2016 New version that supports Banner Student API 9.5 software.
Ba
Contents
Introduction. . . . . . . . . . . . . . . . . . . . . . . . . . . . . . . . . . . . . . . . . . . . . . . . . 7
Known database upgrade issues . . . . . . . . . . . . . . . . . . . . . . . . . . . . . . . . . . . . . . . 7
API issues . . . . . . . . . . . . . . . . . . . . . . . . . . . . . . . . . . . . . . . . . . . . . . . . . . . . . . . . . . 7
Hardware requirements . . . . . . . . . . . . . . . . . . . . . . . . . . . . . . . . . . . . . . . . . . . . . . . 7
Software requirements . . . . . . . . . . . . . . . . . . . . . . . . . . . . . . . . . . . . . . . . . . . . . . . . 7
Oracle Database. . . . . . . . . . . . . . . . . . . . . . . . . . . . . . . . . . . . . . . . . . . . . . . . . . . . . . 8
Application server . . . . . . . . . . . . . . . . . . . . . . . . . . . . . . . . . . . . . . . . . . . . . . . . . . . . . 8
Middle Tier (application server) platforms. . . . . . . . . . . . . . . . . . . . . . . . . . . . . . . . . . . 8
Ellucian software . . . . . . . . . . . . . . . . . . . . . . . . . . . . . . . . . . . . . . . . . . . . . . . . . . . . . 9
Java dependencies. . . . . . . . . . . . . . . . . . . . . . . . . . . . . . . . . . . . . . . . . . . . . . . . . . . 9
Deployment of multiple web applications . . . . . . . . . . . . . . . . . . . . . . . . . . . . . . . . 10
F5 load balancer configuration . . . . . . . . . . . . . . . . . . . . . . . . . . . . . . . . . . . . . . . . . 10
Upgrade the Database . . . . . . . . . . . . . . . . . . . . . . . . . . . . . . . . . . . . . . . . 11
Perform the Banner DB Upgrade steps . . . . . . . . . . . . . . . . . . . . . . . . . . . . . . . . . . 11
Update login.sql . . . . . . . . . . . . . . . . . . . . . . . . . . . . . . . . . . . . . . . . . . . . . . . . . . . . . 11
Verify that the required products are applied . . . . . . . . . . . . . . . . . . . . . . . . . . . . . 12
Verify the banproxy database account . . . . . . . . . . . . . . . . . . . . . . . . . . . . . . . . . . . 12
Verify Oracle user accounts to connect through banproxy . . . . . . . . . . . . . . . . . . 12
Migrate staged files to the permanent directories. . . . . . . . . . . . . . . . . . . . . . . . . . 13
Unix . . . . . . . . . . . . . . . . . . . . . . . . . . . . . . . . . . . . . . . . . . . . . . . . . . . . . . . . . . . . . . . 13
Windows . . . . . . . . . . . . . . . . . . . . . . . . . . . . . . . . . . . . . . . . . . . . . . . . . . . . . . . . . . . . 14
3nner Student API 9.5 Installation Guide | Contents

Ba
Update the version number . . . . . . . . . . . . . . . . . . . . . . . . . . . . . . . . . . . . . . . . . . . . 14
Define user privileges for API access . . . . . . . . . . . . . . . . . . . . . . . . . . . . . . . . . . . 15
Install Banner Student API . . . . . . . . . . . . . . . . . . . . . . . . . . . . . . . . . . . . 16
Undeploy the existing application . . . . . . . . . . . . . . . . . . . . . . . . . . . . . . . . . . . . . . 16
Tomcat . . . . . . . . . . . . . . . . . . . . . . . . . . . . . . . . . . . . . . . . . . . . . . . . . . . . . . . . . . . . . 16
Undeploy using the Tomcat Manager web application . . . . . . . . . . . . . . . . . . . . . . 16Undeploy using a manual procedure. . . . . . . . . . . . . . . . . . . . . . . . . . . . . . . . . . . . 17
WebLogic . . . . . . . . . . . . . . . . . . . . . . . . . . . . . . . . . . . . . . . . . . . . . . . . . . . . . . . . . . . 17
Customize the WAR file . . . . . . . . . . . . . . . . . . . . . . . . . . . . . . . . . . . . . . . . . . . . . . . 18
Unzip the release package . . . . . . . . . . . . . . . . . . . . . . . . . . . . . . . . . . . . . . . . . . . . . . 18
Prepare the installer . . . . . . . . . . . . . . . . . . . . . . . . . . . . . . . . . . . . . . . . . . . . . . . . . . . 19
Install into the product home directory . . . . . . . . . . . . . . . . . . . . . . . . . . . . . . . . . . . . . 19
Configure shared settings. . . . . . . . . . . . . . . . . . . . . . . . . . . . . . . . . . . . . . . . . . . . . . . 21
Configure application-specific settings . . . . . . . . . . . . . . . . . . . . . . . . . . . . . . . . . . . . . 21
Database proxy . . . . . . . . . . . . . . . . . . . . . . . . . . . . . . . . . . . . . . . . . . . . . . . . . . . . 21Cross Origin Resource Support (CORS). . . . . . . . . . . . . . . . . . . . . . . . . . . . . . . . . 21JMX MBean name. . . . . . . . . . . . . . . . . . . . . . . . . . . . . . . . . . . . . . . . . . . . . . . . . . 22Location of the logging file. . . . . . . . . . . . . . . . . . . . . . . . . . . . . . . . . . . . . . . . . . . . 22Logging level . . . . . . . . . . . . . . . . . . . . . . . . . . . . . . . . . . . . . . . . . . . . . . . . . . . . . . 22
Regenerate the WAR file . . . . . . . . . . . . . . . . . . . . . . . . . . . . . . . . . . . . . . . . . . . . . . 23
Configure and deploy the WAR file to a web application server . . . . . . . . . . . . . . 24
Tomcat . . . . . . . . . . . . . . . . . . . . . . . . . . . . . . . . . . . . . . . . . . . . . . . . . . . . . . . . . . . . . 24
Configure the Tomcat server . . . . . . . . . . . . . . . . . . . . . . . . . . . . . . . . . . . . . . . . . . 24Configure Java Management Extensions . . . . . . . . . . . . . . . . . . . . . . . . . . . . . . . . 27Deploy the WAR file to the Tomcat server. . . . . . . . . . . . . . . . . . . . . . . . . . . . . . . . 28
WebLogic . . . . . . . . . . . . . . . . . . . . . . . . . . . . . . . . . . . . . . . . . . . . . . . . . . . . . . . . . . . 30
Verify WebLogic prerequisites . . . . . . . . . . . . . . . . . . . . . . . . . . . . . . . . . . . . . . . . . 31Configure WebLogic server . . . . . . . . . . . . . . . . . . . . . . . . . . . . . . . . . . . . . . . . . . 31Create a WebLogic machine . . . . . . . . . . . . . . . . . . . . . . . . . . . . . . . . . . . . . . . . . . 33Create a WebLogic server. . . . . . . . . . . . . . . . . . . . . . . . . . . . . . . . . . . . . . . . . . . . 33Create an administrative datasource and connection pool . . . . . . . . . . . . . . . . . . . 34Create a self-service datasource and connection pool . . . . . . . . . . . . . . . . . . . . . . 36Deploy and start the application in the WebLogic server . . . . . . . . . . . . . . . . . . . . 37
4nner Student API 9.5 Installation Guide | Contents

Ba
WebLogic Troubleshooting . . . . . . . . . . . . . . . . . . . . . . . . . . . . . . . . . . . . 39
Disable WebLogic basic authentication . . . . . . . . . . . . . . . . . . . . . . . . . . . . . . . . . . 39
Change the WebLogic configuration for JPA 2.0 . . . . . . . . . . . . . . . . . . . . . . . . . . 39
Edit nodemanager.properties . . . . . . . . . . . . . . . . . . . . . . . . . . . . . . . . . . . . . . . . . . . . 40
Edit setDomainsEnv.sh. . . . . . . . . . . . . . . . . . . . . . . . . . . . . . . . . . . . . . . . . . . . . . . . . 40
Unix . . . . . . . . . . . . . . . . . . . . . . . . . . . . . . . . . . . . . . . . . . . . . . . . . . . . . . . . . . . . . 40Windows . . . . . . . . . . . . . . . . . . . . . . . . . . . . . . . . . . . . . . . . . . . . . . . . . . . . . . . . . 42
Appendix A - Ellucian Messaging Service Installation and Configuration. . . . . . . . . . . . . . . . . . . . . . . . . . . . . . . . . . . . . . . . . . . . . 44
Install and configure the Ellucian Messaging Service . . . . . . . . . . . . . . . . . . . . . . 44
Before you begin . . . . . . . . . . . . . . . . . . . . . . . . . . . . . . . . . . . . . . . . . . . . . . . . . . . . . 44
Installing on Linux . . . . . . . . . . . . . . . . . . . . . . . . . . . . . . . . . . . . . . . . . . . . . . . . . . . 45
Prepare the service components . . . . . . . . . . . . . . . . . . . . . . . . . . . . . . . . . . . . . . . . . 45
Install Erlang. . . . . . . . . . . . . . . . . . . . . . . . . . . . . . . . . . . . . . . . . . . . . . . . . . . . . . . . . 45
Install RabbitMQ . . . . . . . . . . . . . . . . . . . . . . . . . . . . . . . . . . . . . . . . . . . . . . . . . . . . . . 45
Configure AMQP . . . . . . . . . . . . . . . . . . . . . . . . . . . . . . . . . . . . . . . . . . . . . . . . . . . . . 45
Configure AMQP for SSL . . . . . . . . . . . . . . . . . . . . . . . . . . . . . . . . . . . . . . . . . . . . . . . 46
Verify the Messaging Service . . . . . . . . . . . . . . . . . . . . . . . . . . . . . . . . . . . . . . . . . . . . 47
Start the service. . . . . . . . . . . . . . . . . . . . . . . . . . . . . . . . . . . . . . . . . . . . . . . . . . . . 47
Verify the service . . . . . . . . . . . . . . . . . . . . . . . . . . . . . . . . . . . . . . . . . . . . . . . . . . . . . 47
Installing on Windows . . . . . . . . . . . . . . . . . . . . . . . . . . . . . . . . . . . . . . . . . . . . . . . . 48
Run the Ellucian Messaging Service installer. . . . . . . . . . . . . . . . . . . . . . . . . . . . . . . . 48
Configure AMQP for SSL . . . . . . . . . . . . . . . . . . . . . . . . . . . . . . . . . . . . . . . . . . . . . . . 48
Validating the messaging service . . . . . . . . . . . . . . . . . . . . . . . . . . . . . . . . . . . . . . . 49
The Admin Console . . . . . . . . . . . . . . . . . . . . . . . . . . . . . . . . . . . . . . . . . . . . . . . . . . . 49
Configure and Deploy the Ellucian Messaging Adapter . . . . . . . . . . . . . . . . . . . . . 51
Configure the Ellucian Messaging Adapter . . . . . . . . . . . . . . . . . . . . . . . . . . . . . . . . . 51
Prepare the service components. . . . . . . . . . . . . . . . . . . . . . . . . . . . . . . . . . . . . . . 51Configure the Ellucian Messaging Adapter WAR file . . . . . . . . . . . . . . . . . . . . . . . 51
5nner Student API 9.5 Installation Guide | Contents

Ba
Configure the Messaging Adapter settings in Banner (GORICCR) . . . . . . . . . . . . 52
AMQP settings . . . . . . . . . . . . . . . . . . . . . . . . . . . . . . . . . . . . . . . . . . . . . . . . . . . . . . . 53
API deployment settings. . . . . . . . . . . . . . . . . . . . . . . . . . . . . . . . . . . . . . . . . . . . . . . . 53
Business event settings . . . . . . . . . . . . . . . . . . . . . . . . . . . . . . . . . . . . . . . . . . . . . . . . 53
Message In/Out exchange settings . . . . . . . . . . . . . . . . . . . . . . . . . . . . . . . . . . . . . . . 53
Messaging adapter settings . . . . . . . . . . . . . . . . . . . . . . . . . . . . . . . . . . . . . . . . . . . . . 54
Integration Hub (iHUB) settings . . . . . . . . . . . . . . . . . . . . . . . . . . . . . . . . . . . . . . . . . . 54
Deploy the Ellucian Messaging Adapter. . . . . . . . . . . . . . . . . . . . . . . . . . . . . . . . . . . . 54
Deploy to Tomcat . . . . . . . . . . . . . . . . . . . . . . . . . . . . . . . . . . . . . . . . . . . . . . . . . . . . . 55
Deploy to WebLogic . . . . . . . . . . . . . . . . . . . . . . . . . . . . . . . . . . . . . . . . . . . . . . . . . . . 55
WebLogic SSL troubleshooting . . . . . . . . . . . . . . . . . . . . . . . . . . . . . . . . . . . . . . . . . . 56
Appendix B - Elevate Support . . . . . . . . . . . . . . . . . . . . . . . . . . . . . . . . . . 57
Forms restricted using FGAC . . . . . . . . . . . . . . . . . . . . . . . . . . . . . . . . . . . . . . . . . . 57
Courses . . . . . . . . . . . . . . . . . . . . . . . . . . . . . . . . . . . . . . . . . . . . . . . . . . . . . . . . . . . . 57
Sections . . . . . . . . . . . . . . . . . . . . . . . . . . . . . . . . . . . . . . . . . . . . . . . . . . . . . . . . . . . . 58
New packages . . . . . . . . . . . . . . . . . . . . . . . . . . . . . . . . . . . . . . . . . . . . . . . . . . . . . . . 58
SPKCMTH0/SPKCMTH1/ . . . . . . . . . . . . . . . . . . . . . . . . . . . . . . . . . . . . . . . . . . . . . . 58
SIKWKLD0/SIKWKLD1 . . . . . . . . . . . . . . . . . . . . . . . . . . . . . . . . . . . . . . . . . . . . . . . . 58
Elevate and Banner FGAC and VBS . . . . . . . . . . . . . . . . . . . . . . . . . . . . . . . . . . . . . 59
Guidelines for Oracle user that submits API. . . . . . . . . . . . . . . . . . . . . . . . . . . . . . . . . 59
Update scripts. . . . . . . . . . . . . . . . . . . . . . . . . . . . . . . . . . . . . . . . . . . . . . . . . . . . . . . . 59
1. sgtvintpi_080700.sql . . . . . . . . . . . . . . . . . . . . . . . . . . . . . . . . . . . . . . . . . . . . . . 602. sgorintgi_080700.sql . . . . . . . . . . . . . . . . . . . . . . . . . . . . . . . . . . . . . . . . . . . . . . 603. sgtvfdmni_080700.sql . . . . . . . . . . . . . . . . . . . . . . . . . . . . . . . . . . . . . . . . . . . . . 604. sgobfdmni_080700.sql . . . . . . . . . . . . . . . . . . . . . . . . . . . . . . . . . . . . . . . . . . . . 615. sgorfdpli_080700.sql . . . . . . . . . . . . . . . . . . . . . . . . . . . . . . . . . . . . . . . . . . . . . . 616. sgtvfgaci_080700.sql. . . . . . . . . . . . . . . . . . . . . . . . . . . . . . . . . . . . . . . . . . . . . . 697. sgtvfbpri_080700.sql . . . . . . . . . . . . . . . . . . . . . . . . . . . . . . . . . . . . . . . . . . . . . . 698. sgobfgaci_080700.sql . . . . . . . . . . . . . . . . . . . . . . . . . . . . . . . . . . . . . . . . . . . . . 699. sgorfbpri_0080700.sql . . . . . . . . . . . . . . . . . . . . . . . . . . . . . . . . . . . . . . . . . . . . . 6910. sgorfprdi_080700.sql . . . . . . . . . . . . . . . . . . . . . . . . . . . . . . . . . . . . . . . . . . . . . 7011. sgorfgbpi_080700.sql . . . . . . . . . . . . . . . . . . . . . . . . . . . . . . . . . . . . . . . . . . . . 7112. sgorfdplu_080700.sql . . . . . . . . . . . . . . . . . . . . . . . . . . . . . . . . . . . . . . . . . . . . 7213. sgorfbpri_sync_job.sql. . . . . . . . . . . . . . . . . . . . . . . . . . . . . . . . . . . . . . . . . . . . 72
FGAC tips . . . . . . . . . . . . . . . . . . . . . . . . . . . . . . . . . . . . . . . . . . . . . . . . . . . . . . . . . . . 72
Create/activate FGAC policies . . . . . . . . . . . . . . . . . . . . . . . . . . . . . . . . . . . . . . . . 72View Policy Data from SQL*Plus. . . . . . . . . . . . . . . . . . . . . . . . . . . . . . . . . . . . . . . 74
6nner Student API 9.5 Installation Guide | Contents

Ba
Introduction
This installation guide details the steps that are required to install Banner Student API 9.5. Before you install any components of the system, you should review this chapter thoroughly so you have a better understanding of what you are installing and where you will install it.
Known database upgrade issues
Before you install Banner Student API 9.5, refer to the article number 000035722, for Banner DB Upgrade 9.4 issues (banner-db-upgrade-90400u), on the Ellucian Support Center (http://www.ellucian.com/Solutions/Ellucian-Client-Support/) for any database upgrade issues that were reported after the release was posted.
API issues
Refer to the knowledge article number 000035640 for any known issues with the RESTful APIs in Banner Student API.
Hardware requirements
The application has the following CPU and memory requirements:
Software requirements
The application has the following software requirements.
• “Oracle Database” on page 8
• “Application server” on page 8
Recommended: Quad core CPU with 4 to 8 GB of memory for the application server
Minimum: Quad core CPU with 4 GB of memory for the application server
7nner Student API 9.5 Installation Guide | Introduction

Ba
• “Middle Tier (application server) platforms” on page 8
• “Ellucian software” on page 9
Oracle Database
This upgrade is recommended to be applied with Oracle Database Release 11.2.0.4.
Application server
The application is supported on the following application servers:
• Oracle Fusion Middleware 11gR1, 11gR2, and 12c using WebLogic 10.3.3, 10.3.4, 10.3.5, 10.3.6, and 12.1.3
• Apache Tomcat 7 and 8
Middle Tier (application server) platforms
The application is supported on the following application server and operating system combinations:
Note: Banner 9.x applications were tested on WebLogic using both the Classic Domain template and the Basic Domain template.
For WebLogic server environments, JPA 2.0 support must be enabled. WebLogic server does not enable JPA by default. To enable JPA, use the steps in the appropriate Oracle documentation:
WebLogic 10.3.3: http://docs.oracle.com/cd/E14571_01/web.1111/e13720/using_toplink.htm#i1221315
WebLogic 10.3.4: http://docs.oracle.com/cd/E17904_01/web.1111/e13720/using_toplink.htm#i1221315
Tomcat (64 bit) WebLogic (64 bit)
Red Hat Linux 5.3 Red Hat Linux 5.3
Windows Server 2008 Windows Server 2008
Solaris 10 Solaris 10
AIX 6.1 (JDK 1.6.0 SR10 or later) AIX 6.1 (JDK 1.6.0 SR10 or later)
HP-UX HP-UX 11iV3 (11.31)
8nner Student API 9.5 Installation Guide | Introduction

Ba
WebLogic 10.3.5: http://docs.oracle.com/cd/E21764_01/web.1111/e13720/using_toplink.htm#EJBAD1309
WebLogic 10.3.6:http://docs.oracle.com/cd/E23943_01/web.1111/e13720/using_toplink.htm#autold2
Weblogic 12.1.3 https://docs.oracle.com/middleware/1213/wls/EJBAD/using_toplink.htm#EJBAD1288
Ellucian software
Depending on the products that are licensed at your institution, the following product upgrades must be applied:
• Banner DB Upgrade 9.4
• (Optional) EMS v1.0.1
• (Optional) Banner Event Publisher (BEP) 1.2.3 or 2.0
• (Optional) INTCOMP 8.0.2.6
Note: EMS v1.0.1 and BEP 1.2.3 or 2.0 are needed for clients using HEDM APIs asynchronously and INTCOMP 8.0.2.6 is needed for ILP clients using grade-entries API.To access the grade-entries API that is used to submit mid-term and final grade for a student, you must install the INTCOMP 8.0.2.6 patch (pcr-000124801_int8000206).
Java dependencies
Java 7 (64-bit version) must be installed on the application server before you install the application. The application supports Java 7 JDK and JRE in run time.
The JDK bin directory must be defined in the PATH system property.
Banner XE Student API 9.5 is now certified on the following:
Compile Runtime Application Server
Java 7 Java 7 Tomcat 7
Java 7 Java 7 Weblogic 10.3.6
9nner Student API 9.5 Installation Guide | Introduction

Ba
Deployment of multiple web applications
The following diagram describes various scenarios of deploying multiple web applications:
In the first and second scenarios, you can deploy multiple web applications with different WAR file names on the same or different servers.
In the third scenario, if you want to deploy multiple web applications on the same server, the WAR file names must be different.
In the fourth scenario, you can deploy multiple web applications with the same WAR file name on different servers.
F5 load balancer configuration
The application was tested using an F5 load balancer configured with the following settings:
Load Balancing type = Round Robin
Note: Other configurations may be supported depending on Network Load Balancing (NLB).
Java 7 Java 7 Tomcat 8
Java 7 Java 7 Weblogic 12.1.3
Java 7 Java 8 Tomcat 8
Java 7 Java 8 Weblogic 12.1.3
Compile Runtime Application Server
10nner Student API 9.5 Installation Guide | Introduction

Ba
Upgrade the Database
The following steps are used to upgrade the database:
• “Perform the Banner DB Upgrade steps” on page 11
• “Update login.sql” on page 11
• “Verify that the required products are applied” on page 12
• “Verify the banproxy database account” on page 12
• “Verify Oracle user accounts to connect through banproxy” on page 12
• “Migrate staged files to the permanent directories” on page 13
• “Update the version number” on page 14
• “Define user privileges for API access” on page 15
Perform the Banner DB Upgrade steps
Some database upgrade steps are common to all Banner 9.x applications. These common database upgrade steps must be performed before you upgrade the database for Banner Student API.
Refer to the instructions in the Banner DB Upgrade Guide (Banner_db_upgrade_9.4_Upgrade_Guide.pdf) for the common database upgrade steps. The Banner DB Upgrade Guide is delivered in the banner-db-upgrade-90400d.trz file.
Update login.sql
You must edit login.sql to update the schema owner’s default password and to specify the path to create log files. To update the delivered login.sql script, perform the following steps:
1. Replace the #UPDATEME# string with the value of a particular schema owner’s password in your environment. Make this update in your environment for each Banner schema owner.
2. Set the value that gets assigned to splpref. The value can be set to the ORACLE_SID or to a directory name. Your options depend on the operating system.
11nner Student API 9.5 Installation Guide | Upgrade the Database

Ba
The splpref variable defines the file prefix that the installation process uses to generate listings or intermediate SQL routines. This feature allows you to segregate the generated output when the stage must be applied to more than one instance.
Verify that the required products are applied
To check that all prerequisite products are applied to the environment, perform the following steps:
1. Invoke SQL*Plus and run the following procedure:
sqlplus /nolog @ruappready
2. Review the ruappready listing.
Verify the banproxy database account
The banproxy account is used for database connections for administrative applications. The database upgrade process grants the BAN_DEFAULT_M role to banproxy. If this role is revoked, the application will not start successfully.
Verify Oracle user accounts to connect through banproxy
All Internet Native Banner (INB) or Oracle user accounts must connect using the banproxy privilege. To verify that Oracle user accounts can connect through banproxy, perform the following steps:
1. Access the Security Maintenance (GSASECR) page.
2. Enter a valid user name.
3. Click Alter.
4. Select the Authorize banproxy check box.
5. Click Save.
12nner Student API 9.5 Installation Guide | Upgrade the Database

Ba
Migrate staged files to the permanent directories
This release provides migration scripts for Unix and Windows platforms. These scripts expect your directory structure to match the directory structure created by the Banner installation process. If you choose a different directory structure, you must modify the scripts. The release does not include migration scripts for other platforms due to their highly customized structures. You can, however, use the file STUMIGR.TXT as a starting point for writing your own migration scripts.
Unix
The file STUMIGR.TXT lists all files that must be deleted from your permanent directories, and all files that should be copied from the staging directory to your permanent directories. The destination is indicated in UNIX format. The format is different on other platforms.
The file stumigr.shl does the appropriate removes, copies, and links. The local LN variable at the top of stumigr.shl determines the type of links that are used in the migration. If you want to use symbolic links, set LN=‘ln -s’ so that the command ${LN} file $BANNER_HOME/links is translated to ln -s file $BANNER_HOME/links. If you want to force the removal of any existing targets before linking files, set LN=‘ln -f’.
To run the migration script in background on a Unix platform, perform the following steps:
1. Ensure that the directory path names in stumigr.shl are correct.
2. Ensure that the environment variable $BANNER_HOME in stumigr.shl is set to the appropriate directory.
3. Sign on to an operating system account that has write permission into the target Banner directories.
4. If you are a cshell user (your operating system prompt is a percent sign), enter sh and press Enter to enter the Bourne shell.
5. Navigate to the staging directory for the product.
6. Run the migration script as follows:
sh stumigr.shl >stumigr.log 2>&1 &
7. If you were a cshell user and want to return to that mode, press CTRL-D or enter exit. Then press Enter.
8. Review stumigr.log. This file contains the results of the migration.
Note: Even if your directory structure matches the baseline perfectly, some link commands will fail (that is, where the link currently exists). Other link errors might indicate that you had two copies of an object when the migration script was executed. This condition must be corrected. The duplication is probably between links and the product subdirectory.
13nner Student API 9.5 Installation Guide | Upgrade the Database
Ba
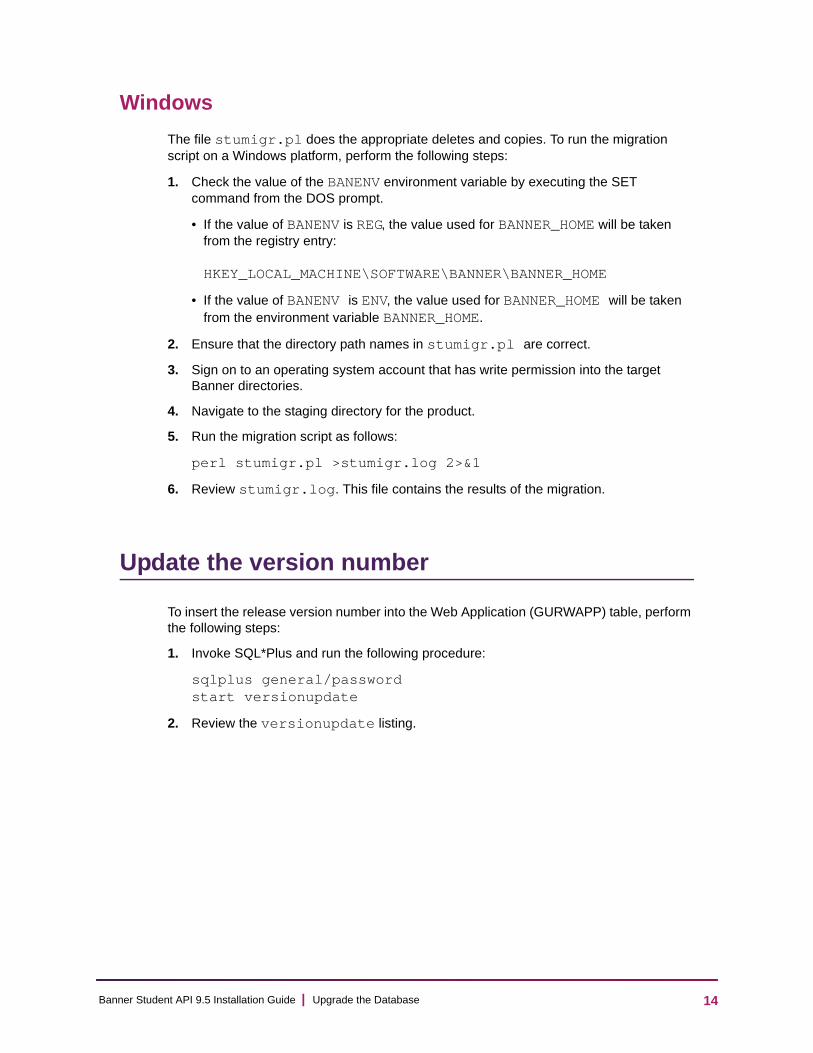
Windows
The file stumigr.pl does the appropriate deletes and copies. To run the migration script on a Windows platform, perform the following steps:
1. Check the value of the BANENV environment variable by executing the SET command from the DOS prompt.
• If the value of BANENV is REG, the value used for BANNER_HOME will be taken from the registry entry:
HKEY_LOCAL_MACHINE\SOFTWARE\BANNER\BANNER_HOME
• If the value of BANENV is ENV, the value used for BANNER_HOME will be taken from the environment variable BANNER_HOME.
2. Ensure that the directory path names in stumigr.pl are correct.
3. Sign on to an operating system account that has write permission into the target Banner directories.
4. Navigate to the staging directory for the product.
5. Run the migration script as follows:
perl stumigr.pl >stumigr.log 2>&1
6. Review stumigr.log. This file contains the results of the migration.
Update the version number
To insert the release version number into the Web Application (GURWAPP) table, perform the following steps:
1. Invoke SQL*Plus and run the following procedure:
sqlplus general/passwordstart versionupdate
2. Review the versionupdate listing.
14nner Student API 9.5 Installation Guide | Upgrade the Database

Ba
Define user privileges for API access
APIs must be submitted with an authorization header. The authorization header ID must use a valid Oracle ID with proxy access to the banproxy user. The ID must also have privileges to the Banner security objects.
Note: The Banner security objects for APIs are delivered with Banner Student 8.7. For guidelines on security objects, refer to the API documentation on the Ellucian XE Registry.
Security for accessing Banner 9.x APIs is similar to security for accessing Banner 8.x administrative forms. If the Oracle ID cannot access the Banner security object, the API does not run and returns an empty response.
To define privileges for the administrative account that accesses Banner Student APIs, perform the following steps:
1. Define the user’s default role to be the Oracle CREATE SESSION privilege or the USR_DEFAULT_CONNECT Oracle role.
2. Grant the BAN_DEFAULT_M Oracle role to the user. This role does not need to be the default role, because it is password protected.
3. Authorize banproxy access on the Security Maintenance (GSASECR) page or with the ALTER USER username GRANT CONNECT THROUGH BANPROXY command.
4. Define access to the General Menu (GUAGMNU) Banner security object by using the Security Maintenance (GSASECR) page.
Note: These are the minimum privileges for accessing Banner Student APIs.
15nner Student API 9.5 Installation Guide | Upgrade the Database

Ba
Install Banner Student API
The following sections detail the installation steps for Banner Student API 9.5:
• “Undeploy the existing application” on page 16
• “Customize the WAR file” on page 18
• “Regenerate the WAR file” on page 23
• “Configure and deploy the WAR file to a web application server” on page 24
Undeploy the existing application
Before you install Banner Student API 9.5, you must undeploy previous 9.x versions of Banner Student API. If no previous 9.x versions are installed, skip this section.
The following sections give the required steps to undeploy Banner Student API in Tomcat and WebLogic servers.
Tomcat
You can either use the Tomcat Manager web application to undeploy Banner Student API, or you can shut down Tomcat and manually remove the files.
Undeploy using the Tomcat Manager web application
Use the following procedure to undeploy Banner Student API using the Tomcat Manager web application:
1. Access the Tomcat Manager web application at one of the following URLs:
http://server:8080/manager
or
http://server:8080/manager/html
2. Access the deployment page using a valid user name and password.
3. Under the Commands area, click Stop to stop the existing application.
4. In the confirmation dialog box, click OK.
5. Under the Commands area, click Undeploy.
6. In the confirmation dialog box, click OK to undeploy the application.
16nner Student API 9.5 Installation Guide | Install Banner Student API
Ba
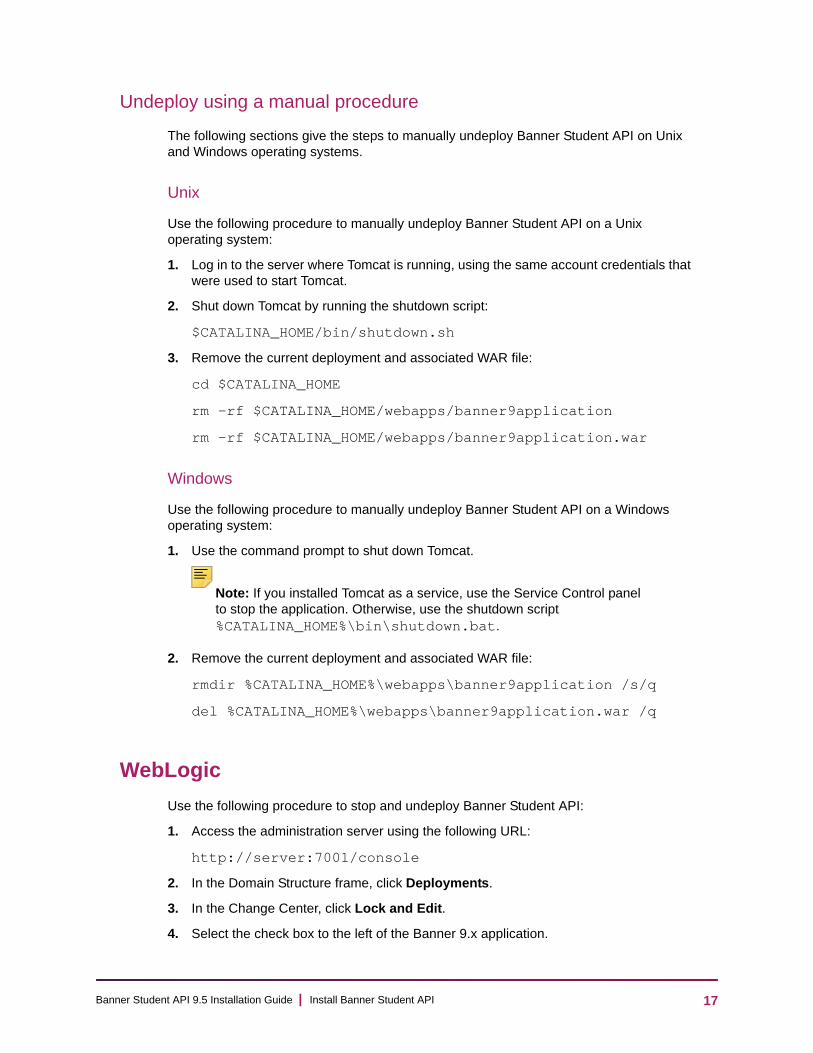
Undeploy using a manual procedure
The following sections give the steps to manually undeploy Banner Student API on Unix and Windows operating systems.
Unix
Use the following procedure to manually undeploy Banner Student API on a Unix operating system:
1. Log in to the server where Tomcat is running, using the same account credentials that were used to start Tomcat.
2. Shut down Tomcat by running the shutdown script:
$CATALINA_HOME/bin/shutdown.sh
3. Remove the current deployment and associated WAR file:
cd $CATALINA_HOME
rm -rf $CATALINA_HOME/webapps/banner9application
rm -rf $CATALINA_HOME/webapps/banner9application.war
Windows
Use the following procedure to manually undeploy Banner Student API on a Windows operating system:
1. Use the command prompt to shut down Tomcat.
Note: If you installed Tomcat as a service, use the Service Control panel to stop the application. Otherwise, use the shutdown script %CATALINA_HOME%\bin\shutdown.bat.
2. Remove the current deployment and associated WAR file:
rmdir %CATALINA_HOME%\webapps\banner9application /s/q
del %CATALINA_HOME%\webapps\banner9application.war /q
WebLogic
Use the following procedure to stop and undeploy Banner Student API:
1. Access the administration server using the following URL:
http://server:7001/console
2. In the Domain Structure frame, click Deployments.
3. In the Change Center, click Lock and Edit.
4. Select the check box to the left of the Banner 9.x application.
17nner Student API 9.5 Installation Guide | Install Banner Student API

Ba
5. Click Stop.
6. Click Force Stop Now.
7. In the Force Stop Application Assistant page, click Yes.
8. Select the check box to the left of the Banner 9.x application.
9. Click Delete.
10. In the Delete Application Assistant page, click Yes.
11. In the Change Center frame, click Activate Changes.
Customize the WAR file
The name of the release package is release-StudentApi-9.5.zip. This release package is moved to the Banner_Home\student\java subdirectory during the database upgrade. Use the following steps to unzip the release package and customize the WAR file for your institution.
Note: JDK 1.7 must be installed on your system. See the Java dependencies section for more information.
Unzip the release package
To unzip the release package into a temporary directory, perform the following steps:
1. Log in to the application server platform.
Note: You must have a valid application server account to deploy into the application server container (Tomcat or WebLogic).
2. Create a temporary directory. For example:
mkdir $HOME/ban9temp
3. Locate the release package release-StudentApi-9.5.zip.
4. Transfer this file in binary mode using File Transfer Protocol (FTP) file into the temporary directory. For example:
$HOME/ban9temp
5. Unzip release-StudentApi-9.5.zip into the temporary directory.
18nner Student API 9.5 Installation Guide | Install Banner Student API

Ba
Prepare the installer
To prepare the installer, perform the following steps:
1. Change the directory to the installer directory:
cd installer
2. Run the ant command, which will build the installation tool.
Note: For Unix, make sure the ant file is executable. For example, chmod +x ant.
Example:
ban9temp $ cd installerban9temp/installer $ ./ant
The message Build successful confirms a successful build.
Install into the product home directory
The product home directory supports the configuration and creation of a deployable WAR file. Although Banner 9.x web applications are modular and are installed independently, they share a common configuration. The package provides a common installer that creates consistent product home directory structures for all Banner 9.x applications.
Within a particular environment, you should place the product home directories for Banner 9.x applications in sibling directories. For example, the following directory structure includes two product home directories and a shared_configuration directory that support a common test environment.
TEST/
|--> StudentApi/
|--> Catalog/
|--> shared_configuration/
A product home directory is created for each deployment. For example, the home directory that is used for the application within a test environment is different than the home directory that is used for the production environment. When you are supporting different environments for multiple home directories for the same solution, this structure provides the necessary configuration, release level, and custom modification flexibility.
The following directory tree illustrates the product home directory that is created for the test environment:
19nner Student API 9.5 Installation Guide | Install Banner Student API

Ba
In addition to the application’s product home directory, a separate shared_configuration home directory contains cross-application configuration for the test environment. This directory holds the banner_configuration.groovy file, which contains the shared JNDI datasource configuration.
To install the installer into the product home directory, perform the following steps:
1. Ensure that the installer is prepared using ant.
2. Use the installer to install the release file into the product home directory.
Note: Your current working directory must be in the installer directory (ban9temp/installer) before executing the following commands.
On Unix:$ bin/install home
On Windows:> bin\install home
3. When prompted, enter the full path of the application home directory. The application will be installed within the current subdirectory within this home directory and the previous release will be archived.
On Unix:[]: Current_home_directory/banner_test_homes/StudentApi
On Windows:[]: c:\banner_test_homes\StudentApi
4. Enter the full path of the shared_configuration home directory. Banner 9.x applications that refer to this home directory share this configuration file.
On Unix:[]: Current_home_directory/banner_test_homes/shared_configuration
On Windows:[]: c:\banner_test_homes\shared_configuration
20nner Student API 9.5 Installation Guide | Install Banner Student API

Ba
Note: If an identified home directory or the shared_configuration home directory does not exist, the installer creates it. The name of a product home directory is not restricted. You can name it when prompted by the installer.
Configure shared settings
The shared_configuration home directory contains a cross-application configuration file called banner_configuration.groovy.
You can optionally change the datasource name in the configuration file to point to the JNDI datasource that is configured in your application server. For example, jndiName = "jdbc/bannerDataSource" is the default configuration. You can change this to match the JNDI datasource name in your environment. If you change the jndiName, you must regenerate the WAR file, even if you are using an external configuration.
Configure application-specific settings
The StudentApi\current\instance\config directory contains the StudentApi_configuration.groovy file. This application-specific configuration file contains settings that you can customize for your specific environment.
Database proxy
To improve API performance, set the apiOracleUsersProxied setting to false. If the setting is set to true, API database requests are sent through the slower bannerDataSource.
Note: When apiOracleUsersProxied is disabled (value is false), user audit trails are the username that is configured for bannerSsbDataSource.To know more about the configuration changes, refer to the StudentApi_configuration.groovy.example file that is shipped along with this release.
Cross Origin Resource Support (CORS)
By default, browsers do not allow JavaScript or Java applets to call APIs outside the origin site's domain. The cors.enabled setting can be used with the cors.allow.origin.regex setting to enable calls to APIs from client browsers if the origin sent in the request matches the cors.allow.origin.regex pattern set. This is accomplished by echoing the received matching origin in the allowed origin field of the response header.
21nner Student API 9.5 Installation Guide | Install Banner Student API
Ba
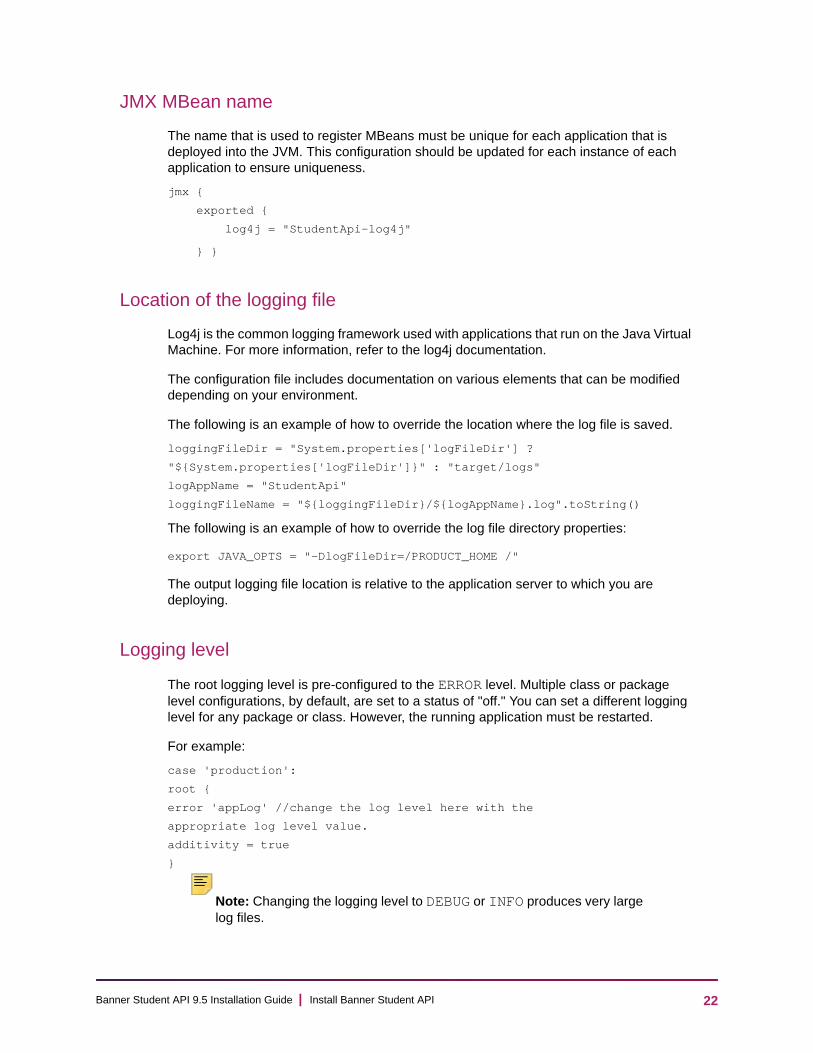
JMX MBean name
The name that is used to register MBeans must be unique for each application that is deployed into the JVM. This configuration should be updated for each instance of each application to ensure uniqueness.
jmx {
exported {
log4j = "StudentApi-log4j"
} }
Location of the logging file
Log4j is the common logging framework used with applications that run on the Java Virtual Machine. For more information, refer to the log4j documentation.
The configuration file includes documentation on various elements that can be modified depending on your environment.
The following is an example of how to override the location where the log file is saved.
loggingFileDir = "System.properties['logFileDir'] ?
"${System.properties['logFileDir']}" : "target/logs"
logAppName = "StudentApi"
loggingFileName = "${loggingFileDir}/${logAppName}.log".toString()
The following is an example of how to override the log file directory properties:
export JAVA_OPTS = "-DlogFileDir=/PRODUCT_HOME /"
The output logging file location is relative to the application server to which you are deploying.
Logging level
The root logging level is pre-configured to the ERROR level. Multiple class or package level configurations, by default, are set to a status of "off." You can set a different logging level for any package or class. However, the running application must be restarted.
For example:
case 'production':
root {
error 'appLog' //change the log level here with the
appropriate log level value.
additivity = true
}
Note: Changing the logging level to DEBUG or INFO produces very large log files.
22nner Student API 9.5 Installation Guide | Install Banner Student API

Ba
Changes to the StudentApi_configuration.groovy file require a restart of the application before those changes take effect.
Alternatively, you can use JMX to modify logging levels for any specified package or class, or even at the root level. When using JMX, the logging level changes only affect the running application. When you restart the application, changes that you made using JMX are lost. For more information on JMX configuration, see “Configure Java Management Extensions” on page 27.
Regenerate the WAR file
Once the shared and application-specific configurations are complete, the application WAR file can be regenerated to include your customizations and application-specific settings. The WAR file can then be deployed into your specific application server.
The systool is used to create the WAR file. To set up the systool and to create the WAR file, perform the following steps:
1. Change your current working directory to the product home directory:
StudentApi/current/installer
2. Run the ant command, which will build the systool module.
Note: For Unix, make sure the ant file is executable. For example, chmod +x ant.
Example:
$ cd StudentApi/current/installerStudentApi/current/installer $ ./ant
3. Use the systool module to create the WAR file.
Your current working directory must be in the StudentApi/current/installer directory before you execute the following command.
On Unix:$ bin/systool war
On Windows:> bin\systool war
The WAR file is created in the StudentApi/current/dist directory.
You can use external configuration files by setting appropriate system properties, although the configuration files are included in the WAR file to make the WAR file self-sufficient. For information on external configuration, see “Configure the Tomcat server” on page 24 or “Create a WebLogic server” on page 33.
23nner Student API 9.5 Installation Guide | Install Banner Student API

Ba
Configure and deploy the WAR file to a web application server
The following sections provides information on configuring the web application and deploying the WAR file to a web application server:
• “Tomcat” on page 24
• “WebLogic” on page 30
Tomcat
The following sections provide information on configuring the web application and deploying the WAR file to the Tomcat server.
Note: If you choose to install the application on a Tomcat server, you do not need to install it on WebLogic.
Note: Tomcat version 7 or 8 is required. To download and install the Tomcat see http://tomcat.apache.org.
Configure the Tomcat server
Use the following steps to configure the Tomcat server:
1. Locate the Oracle JDBC jar file (ojdbc6.jar) in the StudentApi\current\lib directory.
Note: Later in the Tomcat configuration process, you will copy the Oracle JDBC jar file into the \lib folder under the Tomcat installation directory.
The account that runs the Tomcat application server must configure environment settings to support the application.
2. On Linux, ensure CATALINA_HOME is defined to reference your Tomcat software installation location. For example, CATALINA_HOME=/opt/apache-tomcat-6.0.xx where xx indicates the point version of Tomcat you installed.
Warning! Do not perform this step on the Windows platform.
3. Define CATALINA_OPTS to configure JVM settings. The following settings are recommended:
CATALINA_OPTS=-server -Xms2048m -Xmx4g -XX:MaxPermSize=512m
24nner Student API 9.5 Installation Guide | Install Banner Student API

Ba
Note: If you are deploying multiple Banner 9.x applications to the same Tomcat server, increase the max heap (-Xmx) by 2g and -XX:MaxPermSize by 128m. You should deploy Banner 9.x administrative applications to one Tomcat server instance and Banner 9.x self-service applications to a separate Tomcat server instance.
You can define this variable in the account's profile startup script, or you can add this definition in $CATALINA_HOME/bin/catalina.sh for Linux or catalina.bat for Windows.
4. (Optional) If you install Tomcat as a Windows service, specify the JVM arguments as follows:
4.1. Select Configure Tomcat application from the Windows Start menu.
4.2. Select the Java tab.
4.3. In the Java Options field, add the following:
-XX:MaxPermSize=512m
4.4. Set the initial memory pool = 2048.
4.5. Set the maximum memory pool = 4096.
4.6. Save the settings.
4.7. Restart the Tomcat Windows service.
5. (Optional) To set up the Tomcat server to enable remote JMX connections, perform the steps in the "Configure Java Management Extensions" section. This is useful for debugging and logging.
6. Define the JNDI datasource resource name for the application as follows:
6.1. Edit $CATALINA_HOME/conf/context.xml.
6.2. Uncomment <Manager pathname="" /> to disable Tomcat session persistence. For example, change the following:
<!-- Uncomment this to disable session persistence across Tomcat restarts -->
<!--<Manager pathname="" />-->
to:
<!-- Uncomment this to disable session persistence across Tomcat restarts -->
<Manager pathname="" />
6.3. Add the following ResourceLink definitions inside the <Context> element:
<ResourceLink global="jdbc/bannerDataSource"
name="jdbc/bannerDataSource"
type="javax.sql.DataSource"/>
25nner Student API 9.5 Installation Guide | Install Banner Student API

Ba
<ResourceLink global="jdbc/bannerSsbDataSource"
name="jdbc/bannerSsbDataSource"
type="javax.sql.DataSource"/>
6.4. Save your changes in context.xml.
6.5. Edit $CATALINA_HOME/conf/server.xml to configure the database JNDI resource name and connection pool configuration.
6.6. Add the following Resource definitions inside the <GlobalNamingResources> element:
For Tomcat 7
<Resource name="jdbc/bannerDataSource" auth="Container"
type="javax.sql.DataSource"
driverClassName="oracle.jdbc.OracleDriver"
url="jdbc:oracle:thin:@//hostname:port/service_name"
username="banproxy" password="the_banproxy_password"
initialSize="5" maxActive="100" maxIdle="-1"
maxWait="30000"
validationQuery="select 1 from dual"
testOnBorrow="true"/>
<Resource name="jdbc/bannerSsbDataSource" auth="Container"
type="javax.sql.DataSource"
driverClassName="oracle.jdbc.OracleDriver"
url="jdbc:oracle:thin:@//hostname:port/service_name"
username="ban_ss_user" password="ban_ss_user_pasword"
initialSize="5" maxActive="100" maxIdle="-1"
maxWait="30000"
validationQuery="select 1 from dual"
testOnBorrow="true"/>
For Tomcat 8
<Resource name="jdbc/bannerDataSource" auth="Container"
type="javax.sql.DataSource"
driverClassName="oracle.jdbc.OracleDriver"
url="jdbc:oracle:thin:@//hostname:port/service_name"
username="banproxy" password="the_banproxy_password"
initialSize="5" maxTotal="100" maxIdle="-1"
maxWaitMillis="30000"
validationQuery="select 1 from dual"
accessToUnderlyingConnectionAllowed="true"
testOnBorrow="true"/>
<Resource name="jdbc/bannerSsbDataSource" auth="Container"
type="javax.sql.DataSource"
driverClassName="oracle.jdbc.OracleDriver"
26nner Student API 9.5 Installation Guide | Install Banner Student API

Ba
url="jdbc:oracle:thin:@//hostname:port/service_name"
username="ban_ss_user" password="ban_ss_user_pasword"
initialSize="5" maxTotal="100" maxIdle="-1"
maxWaitMillis="30000"
validationQuery="select 1 from dual"
accessToUnderlyingConnectionAllowed="true"
testOnBorrow="true"/>
For example, if your database server name is myserver.university.edu and the Oracle TNS Listener is accepting connections on port 1521 and your database service name is SEED, then the URL is jdbc:oracle:thin:@//myserver.university.edu:1521/SEED.
6.7. Save your changes in server.xml.
6.8. Copy the Oracle JDBC jar file (ojdbc6.jar) from the StudentApi/current/lib directory to the $CATALINA_HOME/lib directory.
6.9. Copy xdb6.jar from the StudentApi/current/lib directory to the $CATALINA_HOME/lib directory.
Note: The 6.9 step is not required for Tomcat 8.
6.10. Validate the configuration of the Tomcat server by starting the application server. To accomplish this, perform the following steps:
– Run $CATALINA_HOME/bin/startup.
For Linux:cd $CATALINA_HOME$ bin/startup.sh
For Windows:cd %CATALINA_HOME%> bin\startup.bat
– Browse http://servername:<port>.
To override the configuration that was added into the WAR file, you must set system properties to point to external configuration files. For example, to point to a configuration file residing in the PRODUCT_HOME directory, export JAVA_OPTS="-DBANNER_APP_CONFIG=/PRODUCT_HOME/shared_configuration/banner_configuration.groovy -DBANNER_STUDENT_API_CONFIG=/PRODUCT_HOME/studentApi/current/instance/config/StudentApi_configuration.groovy".
Configure Java Management Extensions
This is an optional step that is needed only if you want to monitor or debug the application. Java Management Extensions (JMX) is a Java technology that supplies tools for managing and monitoring applications, system objects, devices, and service oriented networks.
27nner Student API 9.5 Installation Guide | Install Banner Student API

Ba
Enabling JMX connections allows you to remotely monitor and debug the application server. To enable Java Management Extensions, perform the following steps:
1. Add the following options to the catalina.sh or catalina.bat file and then restart the Tomcat server:
set CATALINA_OPTS=-Dcom.sun.management.jmxremote
-Dcom.sun.management.jmxremote.port=8999
-Dcom.sun.management.jmxremote.ssl=false
-Dcom.sun.management.jmxremote.authenticate=false
-Djava.rmi.server.hostname=your.hostname.com
2. Change the java.rmi.server.hostname value to the hostname or IP address of the machine where Tomcat is installed. For example:
-Djava.rmi.server.hostname=prod.appserver1.com
or
-Djava.rmi.server.hostname=149.24.3.178
3. JMX does not define a default port number to use. If necessary, change com.sun.management.jmxremote.port=8999.
Note: It is recommended that you connect remotely to the Tomcat server using JMX.
Warning! Ensure that the jmxremote.authenticate parameter is not set to false in a production environment. If it is set to false, it does not require connections to be authenticated and will create a security threat in a production environment. For more information on Tomcat Remote JMX documentation, see http://tomcat.apache.org/tomcat-6.0-doc/monitoring.html#Enabling_JMX_Remote.
Deploy the WAR file to the Tomcat server
The systool that is used to create the WAR file can also be used to deploy the WAR file to a Tomcat container. You should deploy 9.x administrative applications and 9.x self-service applications to separate Tomcat servers to increase performance.
Note: The systool does not provide the capability to undeploy or redeploy an application. If you are redeploying the application, you must use the Tomcat Manager web application to undeploy the existing application.
The target supports deploying the dist/WAR file using the Tomcat Manager web application. Because environments vary significantly with respect to user privileges, clustering approach, web container version, operating system, and more, the target may or may not be suitable for your use.
28nner Student API 9.5 Installation Guide | Install Banner Student API

Ba
Note: You can also deploy the WAR file to the Tomcat server by copying the WAR file to the Tomcat webapps/ directory.
To use the target, you must provide the following information:
Username/password combinations are configured in your Tomcat user database <TOMCAT_HOME>\conf\tomcat-users.xml. For Tomcat 6.x, you must configure at least one username/password combination with the manager role. For example:
<user username="tomcat" password="tomcat" (your password) roles="manager-gui, manager"/>
Note: The roles in Tomcat server changed between point releases in version 6.x. Refer to the Tomcat documentation specific to your release for information on enabling access to provide the appropriate role to a user account for deployment.
To deploy the WAR file to the Tomcat server, perform the following steps:
1. Navigate to the StudentApi\current\installer directory.
2. Enter one of the following commands:
On Unix:$ bin/systool deploy-tomcat
On Windows:> bin\systool deploy-tomcat
3. Enter the following URL for the Tomcat Manager:
[]: http://localhost:8080/manager
This URL will be accessed to deploy the WAR file into the container.
4. Enter a valid Tomcat username to deploy the WAR file. For example:
[]: tomcat
Note: This user must have the manager-gui role.
URL This is the URL of the manager application in the Tomcat server. For example:
http://localhost:8080/manager
Username This Tomcat server username must have privileges to deploy WAR files.
Password This is the password of the Tomcat server user.
29nner Student API 9.5 Installation Guide | Install Banner Student API

Ba
5. Enter the Tomcat password for the user:
[]: password
Note: This password will not be persisted.
6. Test the Banner Student API 9.5 installation as follows:
6.1. Install a REST client application.
REST client is a plugin for Firefox and Google Chrome browsers. For example, Advance REST Client is provided for the Google Chrome browser.
6.2. In the URL field, enter the Student API URL:
http://<host>:<port>/StudentApi/api/about
6.3. Add a new header for Accept type.
6.4. Enter a value for Accept type. For example:
Accept = application/json
6.5. Click the GET option.
6.6. Click Send. The application prompts for user authentication.
6.7. Enter valid user credentials.
If the installation is successful, the following message is displayed:
Status: 200 OK
Response body looks similar to the following:
[
{
"applicationName": "StudentApi",
"applicationVersion": "9.5"
}
]
where applicationVersion is the version of StudentApi application running at institution.
WebLogic
The following sections provide information on configuring the web application and deploying the WAR file to the WebLogic server:
Note: If you choose to install the application on a WebLogic server, you do not need to install it on Tomcat.
30nner Student API 9.5 Installation Guide | Install Banner Student API
Ba
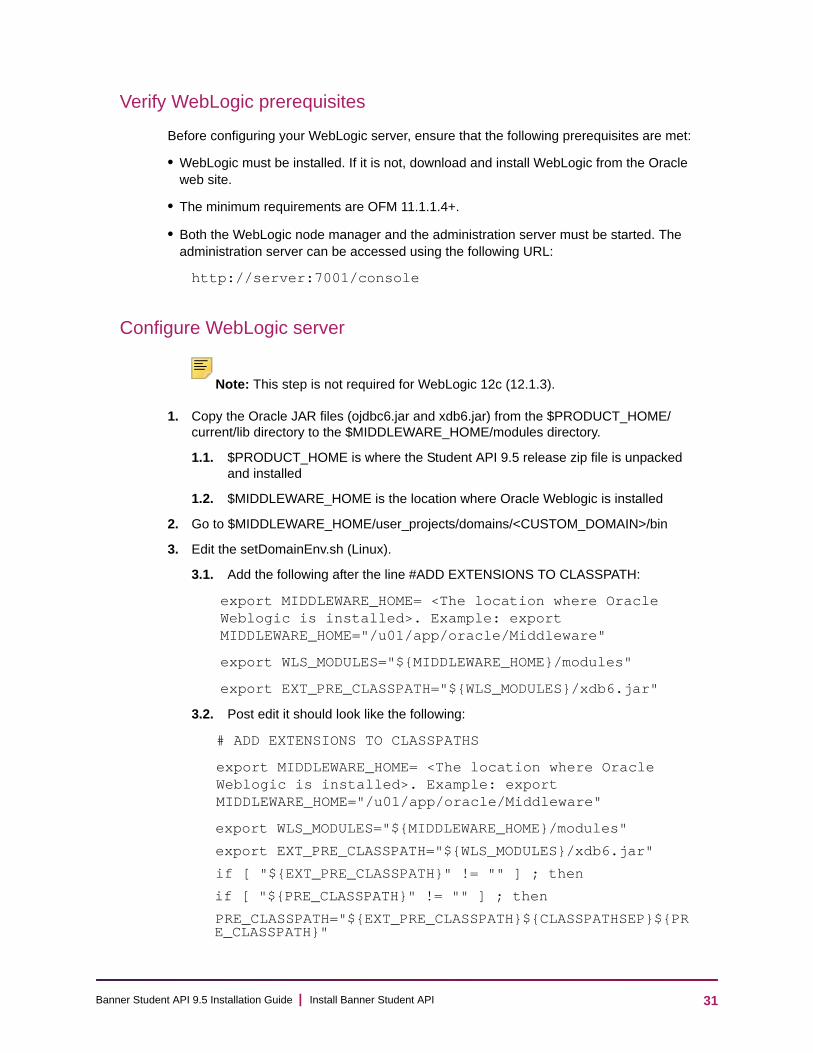
Verify WebLogic prerequisites
Before configuring your WebLogic server, ensure that the following prerequisites are met:
• WebLogic must be installed. If it is not, download and install WebLogic from the Oracle web site.
• The minimum requirements are OFM 11.1.1.4+.
• Both the WebLogic node manager and the administration server must be started. The administration server can be accessed using the following URL:
http://server:7001/console
Configure WebLogic server
Note: This step is not required for WebLogic 12c (12.1.3).
1. Copy the Oracle JAR files (ojdbc6.jar and xdb6.jar) from the $PRODUCT_HOME/current/lib directory to the $MIDDLEWARE_HOME/modules directory.
1.1. $PRODUCT_HOME is where the Student API 9.5 release zip file is unpacked and installed
1.2. $MIDDLEWARE_HOME is the location where Oracle Weblogic is installed
2. Go to $MIDDLEWARE_HOME/user_projects/domains/<CUSTOM_DOMAIN>/bin
3. Edit the setDomainEnv.sh (Linux).
3.1. Add the following after the line #ADD EXTENSIONS TO CLASSPATH:
export MIDDLEWARE_HOME= <The location where Oracle Weblogic is installed>. Example: export MIDDLEWARE_HOME="/u01/app/oracle/Middleware"
export WLS_MODULES="${MIDDLEWARE_HOME}/modules"
export EXT_PRE_CLASSPATH="${WLS_MODULES}/xdb6.jar"
3.2. Post edit it should look like the following:
# ADD EXTENSIONS TO CLASSPATHS
export MIDDLEWARE_HOME= <The location where Oracle Weblogic is installed>. Example: export MIDDLEWARE_HOME="/u01/app/oracle/Middleware"
export WLS_MODULES="${MIDDLEWARE_HOME}/modules"
export EXT_PRE_CLASSPATH="${WLS_MODULES}/xdb6.jar"
if [ "${EXT_PRE_CLASSPATH}" != "" ] ; then
if [ "${PRE_CLASSPATH}" != "" ] ; then
PRE_CLASSPATH="${EXT_PRE_CLASSPATH}${CLASSPATHSEP}${PRE_CLASSPATH}"
31nner Student API 9.5 Installation Guide | Install Banner Student API

Ba
export PRE_CLASSPATH
else
PRE_CLASSPATH="${EXT_PRE_CLASSPATH}"
export PRE_CLASSPATH
fi
fi
4. Edit the setDomainEnv.cmd (Windows)
4.1. Add the following after the line #ADD EXTENSIONS TO CLASSPATH:
set MIDDLEWARE_HOME= <The location where Oracle Weblogic is installed>. Example: set MIDDLEWARE_HOME=D:\Oracle\Middleware
set WLS_MODULES=%MIDDLEWARE_HOME%\modules
set EXT_PRE_CLASSPATH=%EXT_PRE_CLASSPATH%;%WLS_MODULES%\xdb6.jar
4.2. Post edit it should look like the following
@REM ADD EXTENSIONS TO CLASSPATH
set MIDDLEWARE_HOME= <The location where Oracle Weblogic is installed>. Example: set MIDDLEWARE_HOME=D:\Oracle\Middleware
set WLS_MODULES=%MIDDLEWARE_HOME%\modules
set EXT_PRE_CLASSPATH=%EXT_PRE_CLASSPATH%;%WLS_MODULES%\xdb6.jar
if NOT "%EXT_PRE_CLASSPATH%"=="" (
if NOT "%PRE_CLASSPATH%"=="" (
set PRE_CLASSPATH=%EXT_PRE_CLASSPATH%;%PRE_CLASSPATH%
) else (
set PRE_CLASSPATH=%EXT_PRE_CLASSPATH%
)
)
5. Restart the WebLogic server.
32nner Student API 9.5 Installation Guide | Install Banner Student API

Ba
Create a WebLogic machine
Note: If you previously created a WebLogic machine definition, you can skip this section.
To create a WebLogic machine, perform the following steps:
1. In the Change Center frame, click Lock & Edit.
2. In the Domain Structure frame, click (+) to expand and view the list of environments.
3. Click the Machines link.
4. Click New.
5. Enter a machine name and click Next.
6. Accept the defaults and click Finish.
7. In the Change Center frame, click Activate Changes.
Create a WebLogic server
Note: If you previously created a WebLogic server, you can skip this section.
Note: If you previously created a WebLogic server for the application, you can use the same server.
To create a WebLogic server, perform the following steps:
1. In the Change Center frame, click Lock & Edit.
2. In the Domain Structure frame, click (+) to expand and view the list of environments.
3. Click the Servers link.
4. Click New.
5. Enter a server name and server listen port. For example, you can have server name as Banner9 and server listen port as 8180.
6. Click Finish.
7. Click the newly created server link.
8. Under the General tab, assign the machine to this server.
9. Click Save.
33nner Student API 9.5 Installation Guide | Install Banner Student API

Ba
10. Select the Server Start tab.
11. Add the following to the Arguments text area:
If you are using Sun JVM, use the following parameters:
-server -Xms2048m -Xmx4g -XX:MaxPermSize=512m
Note: If you are deploying multiple Banner 9.x applications to the same WebLogic server, increase the max heap (-Xmx) by 2g and -XX:MaxPermSize by 128m. You should deploy Banner 9.x administrative applications to one WebLogic server instance and Banner 9.x self-service applications to a separate WebLogic server instance.
If you are using JRockit JVM, use the following parameters:
-Xms2048m -Xmx4g
Note: For JRockit, increase the max heap (-Xmx) by 2g for each Banner 9.x application that is deployed.
To override the configuration that was added into the WAR file, you can set system properties to point to external configuration files. Append the following to the arguments text area:
-DBANNER_APP_CONFIG=<full file path to banner_configuration.groovy>-DBANNER_STUDENT_API_CONFIG=<full file path to StudentApi_configuration.groovy>
12. Click Save.
13. In the Change Center frame, click Activate Changes.
14. In the Domain Structure frame, click the Servers link.
15. Select the Control tab.
16. Select the check box next to your new server definition.
17. Click Start.
Create an administrative datasource and connection pool
Note: If you previously created an administrative datasource, you can skip this section.
To create an administrative datasource and connection pool, perform the following steps:
1. In the Change Center frame, click Lock & Edit.
2. In the Domain Structure frame, click (+) to expand Services and then select Data Sources.
3. Click New.
34nner Student API 9.5 Installation Guide | Install Banner Student API

Ba
4. Select Generic DataSource.
5. Specify a name (for example, Banner9DS).
6. Specify the JNDI name (for example, jdbc/bannerDataSource).
7. Specify Oracle for Database Type and then click Next.
8. Select Oracle Driver (Thin) for Service Connections and then click Next.
9. Clear the Supports Global Transactions check box and then click Next.
10. Enter the database name, host name, port, user name, password, and password confirmation, and then click Next. For example:
11. Click Test Configuration.
12. Click Next for the connection test to be successful.
13. Select the server that you previously created to allow the datasource to be deployed and used by this server.
14. Click Finish.
15. Select the datasource link that you created.
16. Select the Connection Pool tab.
16.1. Set the Initial Capacity parameter to specify the minimum number of database connections to create when the server starts up. For example:
Initial Capacity = 5
16.2. Set the Maximum Capacity parameter to specify the maximum number of database connections that can be created. For example:
Maximum Capacity = 100
17. Change Statement Cache Type = Fixed.
18. Change Statement Cache Size = 0.
19. Click Save.
20. In the Change Center frame, click Activate Changes.
Database name: BAN9
Host name: yourhostname.yourdomain.com
Port: 1521
UserName: banproxy
Password: your_password
35nner Student API 9.5 Installation Guide | Install Banner Student API

Ba
Create a self-service datasource and connection pool
Note: If you previously created a self-service datasource, you can skip this section.
To create a self-service datasource and connection pool, perform the following steps:
1. In the Change Center frame, click Lock & Edit.
2. In the Domain Structure frame, click (+) to expand Services and then select Data Sources.
3. Click New.
4. Select Generic DataSource.
5. Specify a name (for example, Banner9SsbDS).
6. Specify the JNDI name (for example, jdbc/bannerSsbDataSource).
7. Specify Oracle for Database Type and then click Next.
8. Select Oracle Driver (Thin) for Service Connections and then click Next.
9. On the Transaction Options page, clear the Supports Global Transactions check box and then click Next.
10. Enter the database name, host name, port, user name, password, and password confirmation, and then click Next. For example:
11. Click Test Configuration.
12. Click Next for the connection test to be successful.
13. Select the server that you previously created to allow the datasource to be deployed and used by this server.
14. Click Finish.
15. Select the datasource link that you created.
16. Select the Connection Pool tab.
16.1. Set the Initial Capacity parameter to specify the minimum number of database connections to create when the server starts up. For example:
Initial Capacity = 5
Database name: BAN9
Host name: yourhostname.yourdomain.com
Port: 1521
UserName: ban_ss_user
Password: your_password
36nner Student API 9.5 Installation Guide | Install Banner Student API

Ba
16.2. Set the Maximum Capacity parameter to specify the maximum number of database connections that can be created. For example:
Maximum Capacity = 100
17. Change Statement Cache Type = LRU.
18. Change Statement Cache Size = 20.
19. Click Save.
20. In the Change Center frame, click Activate Changes.
Deploy and start the application in the WebLogic server
To deploy and start the web application in the WebLogic server, perform the following steps:
1. Change the name of the WAR file to remove the version number. For example, change:
StudentApi/current/dist/StudentApi-9.5.war
to
StudentApi/current/dist/StudentApi.war
2. Access the administration server at the following URL:
http://server:7001/console
3. In the Domain Structure frame, select the Deployments link.
4. In the Change Center frame, select Lock and Edit.
5. Click Install.
6. Select the WAR file to be deployed and then click Next. The file is located in the following directory:
StudentApi/current/dist
7. Select Install this deployment as an application and then click Next.
8. Select the target server on which to deploy this application (for example, Banner9) and then click Next.
9. Click Finish.
10. In the Change Center frame, click Activate Changes.
11. Select the deployed application and then click Start.
12. Select Servicing all request.
13. Access the application using the following URL format:
http://servername:<port>/<web application>
For example:
http://localhost:8080/StudentApi
37nner Student API 9.5 Installation Guide | Install Banner Student API

Ba
14. Test the Banner Student API 9.5 installation as follows:
14.1. Install a REST client application.
REST client is a plugin for Firefox and Google Chrome browsers. For example, Advance REST Client is provided for the Google Chrome browser.
14.2. In the URL field, enter the Student API URL:
http://<host>:<port>/StudentApi/api/about
14.3. Add a new header for Accept type.
14.4. Enter a value for Accept type. For example:
Accept = application/json
14.5. Click the GET option.
14.6. Click Send. The application prompts for user authentication.
14.7. Enter valid user credentials.
If the installation is successful, the following message is displayed:
Status: 200 OK
Response body looks similar to the following:
[
{
"applicationName": "StudentApi",
"applicationVersion": "9.5"
}
]
where applicationVersion is the version of StudentApi application running at institution.
38nner Student API 9.5 Installation Guide | Install Banner Student API

Ba
WebLogic Troubleshooting
If Banner Student API 9.5 is deployed on a WebLogic server, use this chapter to troubleshoot the WebLogic configuration for Java Persistence API (JPA).
Disable WebLogic basic authentication
If you receive a prompt for authentication from a WebLogic realm rather than the Banner REST API realm, use the following procedure to disable WebLogic's default basic authentication security for the domain:
1. Navigate to the config directory where WebLogic is configured. For example:
cd /MIDDLEWARE_HOME/user_projects/domains/base_domain/config
where MIDDLEWARE_HOME is /u01/app/oracle/middleware.
2. Open config.xml in a text editor.
3. Add the tag <enforce-valid-basic-auth-credentials>false</enforce-valid-basic-auth-credentials> to config.xml as follows:
• For WebLogic 10.3.5, add the tag before the <cross-domain-security-enabled>false</cross-domain-security-enabled> tag.
• For other WebLogic servers, add the tag before the closing </security-configuration> tag.
4. Save the file.
5. Restart the WebLogic server.
Change the WebLogic configuration for JPA 2.0
If the following error message is displayed after you start the application, you must change the WebLogic configuration for JPA 2.0.
ERROR context.GrailsContextLoader - Error initializing the application: Error creating bean with name 'transactionManagerPostProcessor': Initialization of bean failed; nested exception is org.springframework.beans.factory.BeanCreationException: Error creating bean with name 'trans actionManager': Cannot resolve reference to bean 'sessionFactory' while setting bean property 'sessionFactory'; nested exception is org.springframework.beans.factory.BeanCreationException: Error creating bean with name 'sessionFactory': Invocation of init method failed; nested exception is
39nner Student API 9.5 Installation Guide | WebLogic Troubleshooting

Ba
java.lang.NoSuchMethodError: javax.persistence.OneToOne.orphanRemoval()Z org.springframework.beans.factory.BeanCreationException: Error creating bean with name 'transactionManagerPostProcessor': Initialization of bean failed; nested exception is org.springframework.b eans.factory.BeanCreationException: Error creating bean with name 'transactionManage! r': Cannot resolve reference to bean 'sessionFactory' while setting bean property 'sessionFactory'; nested exc eption is org.springframework.beans.factory.BeanCreationException: Error creating bean with name 'sessionFactory': Invocation of init method failed; nested exception is java.lang.NoSuchMethodErr or: javax.persistence.OneToOne.orphanRemoval
Note: For more information on JPA 2.0 support documentation, see http://docs.oracle.com/cd/E17904_01/web.1111/e13720/using_toplink.htm#EJBAD1309.
To correct the error, you must edit the nodemanager.properties file and the setDomainsEnv.sh file.
Edit nodemanager.properties
Use the following procedure to edit the nodemanger.properties file:
1. Navigate to the nodemanager directory. For example:
cd /MIDDLEWARE_HOME/wlserver_10.3/common/nodemanager
where MIDDLEWARE_HOME is /u01/app/oracle/middleware.
2. Open nodemanager.properties in a text editor.
3. Change StartScriptEnabled=true.
If the StartScriptEnabled property is not available, add the property in the nodemanager.properties file.
4. Save the file.
Edit setDomainsEnv.sh
The following sections give the required steps to edit setDomainsEnv.sh for Unix and Windows environments.
Unix
Use the following procedure to edit setDomainsEnv.sh in a Unix environment:
1. Navigate to the bin directory where WebLogic is configured. For example:
cd /MIDDLEWARE_HOME/user_projects/domains/base_domain/bin
where MIDDLEWARE_HOME is /u01/app/oracle/middleware.
40nner Student API 9.5 Installation Guide | WebLogic Troubleshooting

Ba
2. Open setDomainsEnv.sh in a text editor.
3. Search for CLASSPATH="${PRE_CLASSPATH}${CLASSPATHSEP}${CLASSPATH}"
Note: Make sure the referenced javax.persistence_1.1.0.0_2-0.jar and com.oracle.jpa2support_1.0.0.0_2-1.jar exist in the MIDDLEWARE_HOME/modules directory. These .jar file versions are for WebLogic 10.3.6 and might be different for other WebLogic versions.
4. Replace the following if statement:
if [ "${PRE_CLASSPATH}" != "" ] ; then
CLASSPATH="${PRE_CLASSPATH}${CLASSPATHSEP}${CLASSPATH}"
export CLASSPATH
fi
with the following statement:
# MOD GOES HERE
# if [ "${PRE_CLASSPATH}" != "" ] ; then
# CLASSPATH="${PRE_CLASSPATH}${CLASSPATHSEP}${CLASSPATH}"
# export CLASSPATH
# fi
if [ "${PRE_CLASSPATH}" != "" ] ; then
CLASSPATH="${MIDDLEWARE_HOME}/modules/javax.persistence_1.1.0.0_2-0.jar${CLASSPATHSEP}${MIDDLEWARE_HOME}/modules/com.oracle.jpa2support_1.0.0.0_2-1.jar${CLASSPATHSEP}${PRE_CLASSPATH}${CLASSPATHSEP}${CLASSPATH}"
export CLASSPATH
else
CLASSPATH="${MIDDLEWARE_HOME}/modules/javax.persistence_1.1.0.0_2-0.jar${CLASSPATHSEP}${MIDDLEWARE_HOME}/modules/
41nner Student API 9.5 Installation Guide | WebLogic Troubleshooting

Ba
com.oracle.jpa2support_1.0.0.0_2-1.jar${CLASSPATHSEP}${CLASSPATH}"
export CLASSPATH
fi
# MOD ENDS HERE
5. Save the file.
This comments out (disables) the previous code and replaces the latest code.
Note: Make sure you are in the right directory. If the error message Directory not found is displayed, you must change your path.
6. Restart the WebLogic server for the changes to reflect.
Windows
Use the following procedure to edit setDomainsEnv.sh in a Windows environment:
1. Navigate to the bin directory where WebLogic is configured. For example:
cd /MIDDLEWARE_HOME/user_projects/domains/base_domain/bin
where MIDDLEWARE_HOME is D:\Oracle\Middleware.
2. Open setDomainsEnv.cmd in a text editor.
3. Search for CLASSPATH=%PRE_CLASSPATH%;%CLASSPATH%
Note: Make sure the referenced javax.persistence_1.1.0.0_2-0.jar and com.oracle.jpa2support_1.0.0.0_2-1.jar exist in the MIDDLEWARE_HOME\modules directory. These .jar file versions are for WebLogic 10.3.6 and might be different for other WebLogic versions.
4. Replace the following if statement:
if NOT "%PRE_CLASSPATH%"=="" (set CLASSPATH=%PRE_CLASSPATH%;%CLASSPATH%)
with the following statement:
@REM MOD GOES HERE
@REM if NOT "%PRE_CLASSPATH%"=="" (
@REM set CLASSPATH=%PRE_CLASSPATH%;%CLASSPATH%
@REM )
@REM - Change MIDDLEWARE_HOME value to match your environment
42nner Student API 9.5 Installation Guide | WebLogic Troubleshooting

Ba
set MIDDLEWARE_HOME=D:\Oracle\Middleware
if NOT "%PRE_CLASSPATH%"=="" (
set CLASSPATH=%MIDDLEWARE_HOME%\modules\javax.persistence_1.1.0.0_2-0.jar;%MIDDLEWARE_HOME%\modules\com.oracle.jpa2support_1.0.0.0_2-1.jar;%PRE_CLASSPATH%;%CLASSPATH%
) else (
set CLASSPATH=%MIDDLEWARE_HOME%\modules\javax.persistence_1.1.0.0_2-0.jar;%MIDDLEWARE_HOME%\modules\com.oracle.jpa2support_1.0.0.0_2-1.jar;%CLASSPATH%
)
5. Save the file.
This comments out (disables) the previous code and replaces the latest code.
Note: Make sure you are in the right directory. If the error message Directory not found is displayed, you must change your path.
6. Restart the WebLogic server for the changes to reflect.
43nner Student API 9.5 Installation Guide | WebLogic Troubleshooting

BaCo
Appendix A - Ellucian Messaging Service Installation and Configuration
To integrate Banner with Elevate, you must install the Ellucian Messaging Service.
The Ellucian Messaging Service is the messaging service that facilitates use of the Advanced Message Queuing Protocol (AMQP) standard and associated AMQP components. The Ellucian Messaging Service works as the intermediate system between Banner and Elevate. The tasks in this section will assist in the installation and configuration of the appropriate components and SSL setup on either a Linux or Windows operating system.
This section is intended for use by the IT system administrator.
The following details apply.
• You should install and configure the Ellucian Messaging Service components on the Banner Event Publisher (BEP) server. The Messaging Service includes Erlang and RabbitMQ 3.3.4.
• You can install the components on either a Linux or Windows operating system, depending on your institution's needs.
Install and configure the Ellucian Messaging Service
This information covers the installation and configuration of the Ellucian Messaging Service on either Windows or Linux, including setup for SSL.
Before you begin
The recommended installation platform is the Banner Event Publisher (BEP) server.
For Windows server installation, make sure to run the Ellucian Messaging Service installer while logged in as an Administrative user.
For Linux server installation, RHN must be enabled in the system.
Note: If Erlang or RabbitMQ are already installed for a prior product, they should not be re-installed. Multiple Ellucian products can and should use the same RabbitMQ installation, although sites may want different installations for production and non-production environments.
44nner Student API 9.5 Installation Guide | Appendix A - Ellucian Messaging Service Installation and nfiguration

BaCo
Installing on Linux
The Ellucian Messaging Service is delivered on a ZIP file that must be extracted onto a Windows system before being moved to the Linux host.
Prepare the service components
Unzip the EllucianMessagingService100-RHEL5.zip or EllucianMessagingService100-RHEL6.zip file to an empty directory (such as C:\ellucian\EMS-Linux) and navigate into it using Windows Explorer. The ZIP file will contain:
• a ConfigureEMS shell script
• an Erlang RPM file
• a RabbitMQ RPM file.
Transfer these files by FTP to the Linux host.
Install Erlang
As root, install Erlang (examples shown for RHEL 5 and 6 using yum or rpm)
• (RHEL 5): rpm -ivh erlang-R15B-02.1.el5.x86_64.rpm
• (RHEL 6): rpm -ivh erlang-R15B-02.1.el6.x86_64.rpm
• (RHEL 5): yum install erlang-R15B-02.1.el5.x86_64.rpm
• (RHEL 6): yum install erlang-R15B-02.1.el6.x86_64.rpm
Install RabbitMQ
As root, install RabbitMQ (examples shown using yum or rpm).
• rpm -ivh pivotal-rabbitmq-server-3.3.4-3.noarch.rpm
• yum install pivotal-rabbitmq-server-3.3.4-3.noarch.rpm
Configure AMQP
This information covers the configuration of the Ellucian Messaging Service using the delivered ConfigureEMS shell script.
1. Change permissions on the configuration script:
Example: chmod 700 ConfigureEMS
45nner Student API 9.5 Installation Guide | Appendix A - Ellucian Messaging Service Installation and nfiguration

BaCo
2. As root, run the configuration script with its three required command line arguments:
• Admin user name
• Admin password
• Virtual host name
Syntax: ConfigureEMS username password vhostname
Example:./ConfigureEMS ellucian rabbit EllucianMessaging
Configure AMQP for SSL
Install the SSL certificate, private key, and CA certificates that are required in order to configure RabbitMQ for SSL.
1. Configure RabbitMQ to use the SSL certificates.
mkdir /etc/rabbitmq/ssl
2. Copy and upload the key and certificate files into the SSL directory.
3. Create a rabbitmq.config file using a UNIX text editor, such as vi:
vi /etc/rabbitmq/rabbitmq.config
Add the following to the file, using the appropriate certificate file names:
[
{rabbit, [
{ssl_listeners, [5671]},
{ssl_options, [{cacertfile,"/etc/rabbitmq/ssl/ellucian_messaging_ca.crt"},
{certfile,"/etc/rabbitmq/ssl/ellucian_messaging.crt"},
{keyfile,"/etc/rabbitmq/ssl/ellucian_messaging.key"},
{verify,verify_peer},
{fail_if_no_peer_cert,false}]}
]}
].
Note: Ensure to include a period (.) at the end of the code snippet.
46nner Student API 9.5 Installation Guide | Appendix A - Ellucian Messaging Service Installation and nfiguration

BaCo
Verify the Messaging Service
Start the service
/sbin/chkconfig rabbitmq-server on
/etc/init.d/rabbitmq-server restart
or
service rabbitmq-server restart
Verify the service
Check that the RabbitMQ SSL Port 5671 is being listened on actively.
As root, grep listeners from rabbitmqctl status output:
/usr/sbin/rabbitmqctl status | grep listeners
Otherwise, as any user, grep 5671 from the netstat output:
netstat -tanp | grep 5671
47nner Student API 9.5 Installation Guide | Appendix A - Ellucian Messaging Service Installation and nfiguration

BaCo
Installing on Windows
Make sure to run the Ellucian Messaging Service installer while logged in as an
Administrative user.
Note: If Erlang or RabbitMQ are already installed for a prior product, they should not be re-installed. Multiple Ellucian products can and should use the same RabbitMQ installation, but you might want to use different installations for production and non-production environments.
Run the Ellucian Messaging Service installer
1. Run the EllucianMessagingService100Setup.exe installer and enter the following information when prompted:
• AMQP admin username
• AMQP admin password
• AMQP virtual host name, for example "EllucianMessaging"
2. As you follow the prompts, the installer will perform the following actions:
• Install Erlang and RabbitMQ
• Enable the RabbitMQ admin UI
• Configure RabbitMQ for the specified admin user
• Create the indicated virtual host
Configure AMQP for SSL
Follow these steps to install the SSL certificate, private key, and CA certificates required to configure RabbitMQ for SSL.
1. Create a directory to store the files required for SSL support, such as:
CD C:\Program Files\Ellucian\EllucianMessagingService\AMQP\rabbit
MKDIR SSL
2. Copy the two certificate files and one key file into the SSL directory.
3. Create or edit the file: %APPDATA%\RABBITMQ\rabbitmq.config
4. Add the following to the file, replacing the highlighted file names and locations with the correct information for your institution (use "/" to delimit the directories in the paths instead of the regular Windows "\" character):
[
{rabbit, [
{ssl_listeners, [5671]},
48nner Student API 9.5 Installation Guide | Appendix A - Ellucian Messaging Service Installation and nfiguration

BaCo
{ssl_options, [{cacertfile,"C:/Program Files/Ellucian/EllucianMessagingService/AMPQ/rabbit/ssl/certfile_ca.crt"},
{certfile,"C:/Program Files/Ellucian/EllucianMessagingService/AMPQ/rabbit/ssl/certfile.crt"},
{keyfile,"C:/Program Files/Ellucian/EllucianMessagingService/AMPQ/rabbit/ssl/certfile.key"},
{verify,verify_peer},
{fail_if_no_peer_cert,false}]}
]}
].
Note: Make sure to include a period (.) at the end of the code snippet.
5. Locate the RabbitMQ Server folder under Start > All Programs and select the "(Re)install Service" option.
6. Go to the Windows Services by running services.msc. Scroll down to the RabbitMQ service, which should be running.
7. Right-click on the service and restart it.
Validating the messaging service
This section discusses validating the message service.
The Admin Console
Use a browser to navigate to port 15672 of the server and confirm that the management
plugin is enabled.
1. Enter the credentials that were previously created. For example, Username=ellucian
Password=rabbit
The overview page should show the following:
• amqp::5672 and amqp/ssl::5671 as Listening ports
• Erlang and RabbitMQ version information
49nner Student API 9.5 Installation Guide | Appendix A - Ellucian Messaging Service Installation and nfiguration

BaCo
2. Select the Admin tab along the top of the Admin form, and then select the Virtual Hosts tab on the right-hand side of the form.
3. Confirm that the EllucianMessaging virtual host exists and that the ellucian user has access to it.
4. If the user does not exist, you can add one using the Add a user feature on the Users page, which can be reached by clicking Users on the right margin of the Admin page.
5. If the virtual host does not exist, you can add one using the Add a new virtual host feature on the Virtual Hosts page, which can be reached by clicking Virtual Hosts on the right margin of the Admin page.
50nner Student API 9.5 Installation Guide | Appendix A - Ellucian Messaging Service Installation and nfiguration

BaCo
6. If either a user or virtual host needs to be added, make sure to grant permissions to the user for the virtual host. Click on the username on the Users page to access the Permissions page, where you can set permissions to any of the defined virtual hosts. (Set default “.*” permissions for configure, write, and read).
Configure and Deploy the Ellucian Messaging Adapter
This section provides steps to configure the Ellucian Messaging Adapter component of the Ellucian Messaging Service and to review the deployment of the WAR file to either a Tomcat or WebLogic server.
• For Tomcat installations, make sure that the Tomcat Manager UI is configured and available.
• For WebLogic installations, make sure that the WebLogic Server Administration Console is configured and available.
Configure the Ellucian Messaging Adapter
The Ellucian Messaging Adapter is delivered in a ZIP file that must be extracted onto a
Windows system that has browser access to the target Tomcat or WebLogic server.
Prepare the service components
Unzip the EllucianMessagingAdapter101.zip file to an empty directory (such as
C:\ellucian\EMS-Adapter) and navigate into it using Windows Explorer.
The ZIP file contains:
• the Ellucian Messaging Adapter WAR file
• an emsConfig template file
• a ConfigureEMS batch file
Configure the Ellucian Messaging Adapter WAR file
1. Within the unzipped components directory (such as C:\ellucian\EMS-Adapter) double-click on the ConfigureEMS.bat file.
2. Launch for the WEB-INF\emsConfig.xml file using Notepad.
3. Update the XML values for the target Banner API installation as follows:
51nner Student API 9.5 Installation Guide | Appendix A - Ellucian Messaging Service Installation and nfiguration

BaCo
f
,
After saving and exiting from Notepad, the WAR file will be updated with the new WEB-INF\emsConfig.xml file. It is now ready for deployment.
Configure the Messaging Adapter settings in Banner (GORICCR)
This section provides information on setting the adapter configuration stored within Banner. You will need the values used in previous steps when setting up the AMQP server and your Banner API deployment.
In GORICCR, enter EMS-BANNER-ELEVATE as the Process, leave the Setting empty, and go to the next box. Descriptions of each available setting follow.
XML Attribute XML Value Descriptions
baseUrl https://server:port/apiPath The baseUrl will be the installation path othe Banner Web API.
username web user used to retrieve EMS configuration
The username/password credentials required to access the configuration API.password password of the web user
configId key of the configuration record being retrieved
The configId is the name of the configuration record to retrieve on startupsuch as EMS-BANNER-ELEVATE.
52nner Student API 9.5 Installation Guide | Appendix A - Ellucian Messaging Service Installation and nfiguration

BaCo
EMS
EMS 0
EMS
EMS l.
EMS ation.
EMS
EMS
EMS
EMS
EM calls.
EM
EMS EventTopic
EMS ntQueue
EMS ageInTopic
EMS :
EMS
AMQP settings
Note: The values of these settings are not optional and are case sensitive.
API deployment settings
Business event settings
Message In/Out exchange settings
.AMQP.AUTORECOVER Whether AMQP connection failures should auto-recover (Y or N).
.AMQP.HEARTBEAT Frequency of any keep-alive signal sent to AMQP (seconds). Example: 3
.AMQP.HOST The AMQP server host.
.AMQP.USERNAME The AMQP server username from the Ellucian Messaging Service instal
.AMQP.PASSWORD The AMQP server password from the Ellucian Messaging Service install
.AMQP.PORT The AMQP server port. Example: 5671 for secure, else 5672.
.AMQP.SECURE The AMQP SSL enabled setting (Y or N).
.AMQP.TIMEOUT The AMQP connection timeout (seconds). Example: 900
.AMQP.VIRTUALHOST The AMQP virtual host from the Ellucian Messaging Service installation.
S.API.USERNAME The oracle user with access to BAN_ELEVATE_API_C used for all API
S.API.PASSWORD The oracle password for the API user.
.EVENT.ERP.EXCHANGENAME Name of the BEP AMQP topic exchange. Example: Business
.EVENT.ERP.QUEUENAME Name of the BEP AMQP topic queue. Example: BusinessEve
.MESSAGE.IN.EXCHANGENAME Name of the AMQP inbound exchange. Example: Mess
.MESSAGE.IN.QUEUENAME Name of the AMQP inbound exchange queue. ExampleMessageInQueue
.MESSAGE.OUT.EXCHANGENAME Name of the AMQP outbound exchange. Example: MessageOutTopic
53nner Student API 9.5 Installation Guide | Appendix A - Ellucian Messaging Service Installation and nfiguration

BaCo
EM
EM ds).
Co
EM
EM
EM
EM
EM
EM
EM t is,
Messaging adapter settings
Integration Hub (iHUB) settings
Additional configuration settings must be configured for EMA to communicate with the Integration Hub.
Deploy the Ellucian Messaging Adapter
This section provides information on deploying the Ellucian Messaging Adapter WAR file to either a Tomcat or WebLogic server.
Warning! As soon as the adapter is deployed, it will call the Web API defined in its emsConfig.xml file for its configuration information and attempt to start processing messages. If Banner is not upgraded or configured to use the Ellucian Messaging Service, the adapter should not be deployed yet!
Warning! Deployment will initiate the asynchronous messaging exchange between systems and should therefore be one of the last steps in the activation of the integration.
S.LOGLEVEL The maximum detail level of any logging. Example: ERROR
S.GUID.LIFESPAN The length of time a record update will block reverse updates (seconExample: 30
nfiguration Settings Name Description
S.IHUB.USE Values available are:
Y: Use iHUB
N: Do not use iHUB
S.IHUB.APPLICATION.API.KEY API Key of the application from the hub admin UI.
S.IHUB.TOKEN.URL URL for the hub token service.
S.IHUB.PUBLISH.URL URL for the hub publish service.
S.IHUB.SUBSCRIBE.URL URL for the hub subscribe service
S.IHUB.ERROR.URL URL for the hub error reporting service
S.IHUB.MEDIATYPE The media type for messages getting published and retrieved (thaapplication/vnd.hedtech.change-notifications.v2+json)
54nner Student API 9.5 Installation Guide | Appendix A - Ellucian Messaging Service Installation and nfiguration

BaCo
Deploy to Tomcat
You can deploy the WAR file to a Tomcat web server using the Tomcat Web Application Manager GUI.
1. Log into the Tomcat Manager GUI (typically running on port 8080 on the web server).
2. Click Tomcat Manager in the “Administration” section in the left margin.
3. Scroll down to the “WAR file to deploy” section at the bottom of the form.
4. Use the browse button to navigate to C:\ellucian\EMS-Adapter
5. Select the newly configured WAR file.
6. Click Deploy.
Deploy to WebLogic
You can deploy the WAR file to a WebLogic server using the Administration Console.
1. Place the newly configured WAR file on the WebLogic server and then log into the WebLogic Administration Console.
2. Select Deployments in the “Domain Structure” section of the left margin.
3. Select Lock & Edit in the “Change Center” section of the left margin.
4. Select Install in the Deployments page.
5. Navigate to the path of the WAR file that you placed on the server.
6. Select the WAR file from the available list and click Next.
7. Select Install this deployment as an application and click Next.
8. Select the Server that the service should be deployed to and click Next.
9. Optionally, change the name of the deployment.
10. Leave the Security model set to “DD Only”, leave the Source accessibility set to “Use the defaults defined by the deployment’s targets”, and click Next.
11. Select No, I will review the configuration later, and click Finish.
12. The Summary of Deployments page should show the WAR file in a state of “distribute Initializing”.
13. To apply the changes and deploy the service, click Activate Changes in the Change Center in the left navigation. To reject the changes, click Undo All Changes.
55nner Student API 9.5 Installation Guide | Appendix A - Ellucian Messaging Service Installation and nfiguration
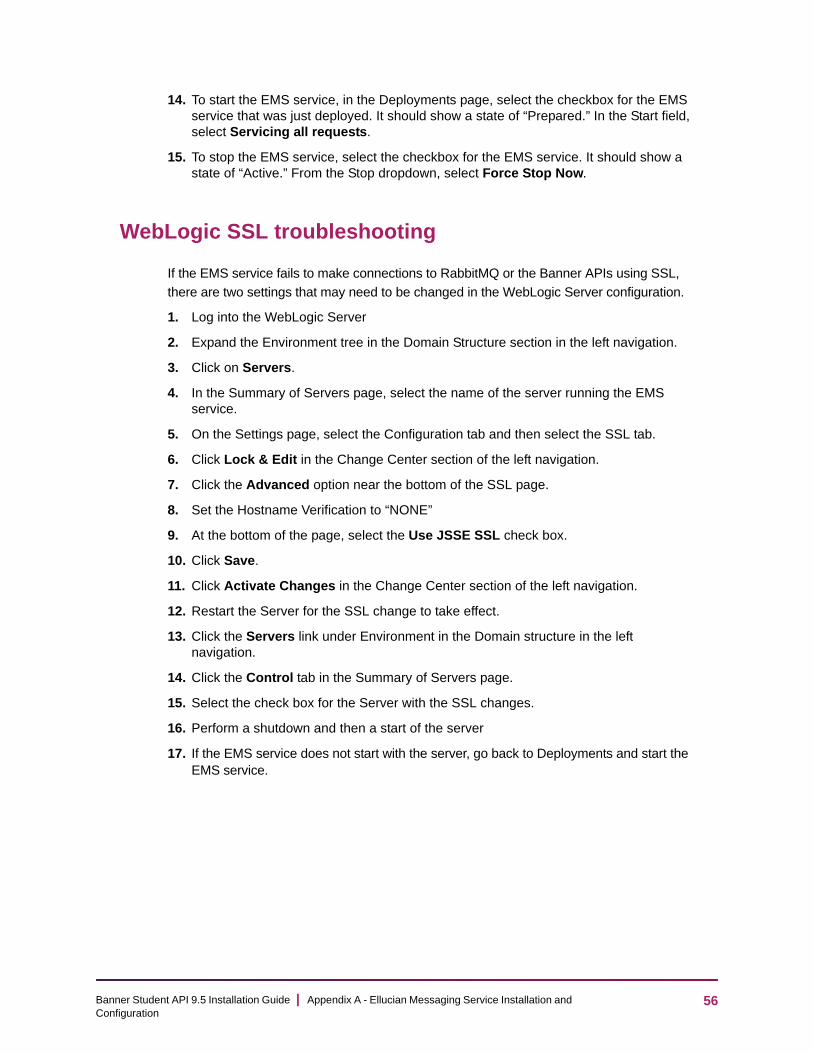
BaCo
14. To start the EMS service, in the Deployments page, select the checkbox for the EMS service that was just deployed. It should show a state of “Prepared.” In the Start field, select Servicing all requests.
15. To stop the EMS service, select the checkbox for the EMS service. It should show a state of “Active.” From the Stop dropdown, select Force Stop Now.
WebLogic SSL troubleshooting
If the EMS service fails to make connections to RabbitMQ or the Banner APIs using SSL,
there are two settings that may need to be changed in the WebLogic Server configuration.
1. Log into the WebLogic Server
2. Expand the Environment tree in the Domain Structure section in the left navigation.
3. Click on Servers.
4. In the Summary of Servers page, select the name of the server running the EMS service.
5. On the Settings page, select the Configuration tab and then select the SSL tab.
6. Click Lock & Edit in the Change Center section of the left navigation.
7. Click the Advanced option near the bottom of the SSL page.
8. Set the Hostname Verification to “NONE”
9. At the bottom of the page, select the Use JSSE SSL check box.
10. Click Save.
11. Click Activate Changes in the Change Center section of the left navigation.
12. Restart the Server for the SSL change to take effect.
13. Click the Servers link under Environment in the Domain structure in the left navigation.
14. Click the Control tab in the Summary of Servers page.
15. Select the check box for the Server with the SSL changes.
16. Perform a shutdown and then a start of the server
17. If the EMS service does not start with the server, go back to Deployments and start the EMS service.
56nner Student API 9.5 Installation Guide | Appendix A - Ellucian Messaging Service Installation and nfiguration

Ba
Appendix B - Elevate Support
Fine-Grained Access Control (FGAC) and Value-Based Security (VBS) are used to restrict
access to Elevate data to read only. Scripts and seed data are delivered for FGAC and VBS.
A course is considered to be an Elevate course when the integration partner value in the
SCRINTG_INTG_CDE field is ELEV8, or when the value in SCBCRSE_DATA_ORIGIN
field is Elevate.
A section is considered to be an Elevate course when the integration partner value in the SSBSECT_INTG_CDE field is ELEV8
Forms restricted using FGAC
This section lists the forms that are restricted to use FGAC.
Courses
You can view Elevate courses on the following forms. You cannot perform any inserts, updates, or deletions for Elevate courses.
• Basic Course Information (SCACRSE) form
• Course Detail Information (SCADETL) form
• Course Registration Restrictions (SCARRES) form
• Catalog Prerequisite and Test Score Restrictions (SCAPREQ) form
• Catalog Schedule Restrictions (SCASRES) form
• College and Department Text (SCATEXT) form
• Course Syllabus (SCASYLB) form
• Mutual Course Exclusion (SCAMEXC) form
57nner Student API 9.5 Installation Guide | Appendix B - Elevate Support

Ba
Sections
You can view Elevate sections on the following forms. You cannot perform any inserts,
updates, or deletions for Elevate sections.
• Faculty Assignment (SIAASGN) form
• Schedule (SSASECT) form
• Schedule Detail (SSADETL) form
• Schedule Restrictions (SSARRES) form
• Schedule Prerequisite and Test Score Restrictions (SSAPREQ) form
• Section Comment (SSATEXT) form
• Section Web Controls (SSAWSEC) form
• Schedule Evaluation (SSAEVAL) form
• Schedule Override (SSAOVRR) form
• Schedule Calendar (SSAACCL) form
• Schedule Processing Rules (SSARULE) form
• Section Syllabus (SSASYLB) form
New packages
The following packages have been added for integration.
SPKCMTH0/SPKCMTH1/
This package is a wrapper PLSQL package for the Person common matching rule. The package supports an API which is used to find duplicate persons in the system using the common matching rule.
SIKWKLD0/SIKWKLD1
This package is used to calculate the workload of a faculty member using his/her contract information.
58nner Student API 9.5 Installation Guide | Appendix B - Elevate Support

Ba
Elevate and Banner FGAC and VBS
Banner users are prevented from modifying Course Catalog and Class Schedule data that originates from the Elevate system. The Oracle ID that executes the API to post catalog course and schedule section entries from Elevate must still be able to insert, update, and delete data. Therefore, FGAC with VBS is used to control access to the data. Seed data and scripts are delivered to run the required processes, including defining the FGAC rule and predicates and enabling policies.
For more information on using FGAC with VBS, refer to the Banner General Data Security Handbook and the “Student System Management” chapter of the Banner Student User Guide.
Guidelines for Oracle user that submits API
The Oracle user should be able to log in to SQL*Plus but does not have any Banner table access. The Oracle user that is created and used in the authorization header of the API that posts catalog and schedule entries to Banner must have the following:
• Default proxy access to BAN_PROXY
• Default connect and ban_default_m access
• Access to security class for the BAN_ELEVATE_API_C Elevate API. This API includes objects for each individual API such as PERSONS, API_COURSES, etc.
Update scripts
Scripts and seed data are delivered to control access to Course Catalog and Class Schedule. Scripts are used to set up and populate the Business Profile and the FGAC and VBS rules, predicates, and restrictions. Users are listed in a Banner business profile, and the business profile is restricted on the FGAC predicate.
The following is a list of scripts, in the order in which they must be run. A description of each script follows.
1. sgtvintpi_080700.sql
2. sgorintgi_080700.sql
3. sgtvfdmni_080700.sql
4. sgobfdmni_080700.sql
5. sgorfdpli_080700.sql
6. sgtvfgaci_080700.sql
7. sgtvfbpri_080700.sql
8. sgobfgaci_080700.sql
9. sgorfbpri_080700.sql
59nner Student API 9.5 Installation Guide | Appendix B - Elevate Support

Ba
10. sgorfprdi_080700.sql
11. sgorfgbpi_080700.sql
12. sgorfdplu_080700.sql
13. sgorfbpri_sync_job.sql
1. sgtvintpi_080700.sql
This script is delivered as part of the DML directory and is used to create a record in the GTVINTP table for the integration partner code. The data is displayed on the Integration Partner System Code Validation (GTVINTP) form.
2. sgorintgi_080700.sql
This script is delivered as part of the DML directory and is used to create a record in the GORINTG table for the integration partner code. The data is displayed on the Integration System Partner Rules (GORINTG) form.
3. sgtvfdmni_080700.sql
This script is delivered as part of the DML directory and is used to insert new VBS domains for the Course Catalog module in the GTVFDMN table. This data is displayed on the FGAC Domain Validation (GTVFDMN) form.
Integration Partner System Description
ELEV8 Elevate Partner
Integration Partner System Description
Cross Referenced Partner System Description
ELEV8 Elevate ELEV8 Elevate Partner
VBS Domain Code Description Additional Information
SB_CATALOG_ELEVATE_VBS
Student Catalog Elevate VBS Security
Used for policy driven by the SCBCRKY table on all Catalog tables except SCRINTG
SB_SCRINTG_ELEVATE_VBS
Student Catalog Elevate VBS Security
Used for policy driven by the SCBCRKY table only on the SCRINTG table
60nner Student API 9.5 Installation Guide | Appendix B - Elevate Support

Ba
e PII
Dom
SB_ELE
KY WHERE
NUMB
UBJ_CODE
ct 1 from
SB_ELE
ct 1 from
SB_ELE
RKY WHERE
NUMB
UBJ_CODE
ct 1 from
SB_ELE
ct 1 from
4. sgobfdmni_080700.sql
This script is delivered as part of the DML directory and is used to insert the SCBCRKY driver table for the two new VBS domains into the GOBFDMN table.
5. sgorfdpli_080700.sql
This script is delivered as part of the DML directory and is used to insert table definitions for the Course Catalog tables defined for the SB_CATALOG_ELEVATE_VBS and SB_CATALOG_ELEVATE_VBS domains into the GORFDPL table.
Domain Code Table NameDomain Type Predicate Code Sys Req Enabl
SB_CATALOG_ELEVATE_VBS SCBCRKY VBS Y N
SB_SCRINTG_ELEVATE_VBS SCBCRKY VBS Y N
ain Code Table Name Sys Req Active Ind Driver SQL
SCRINTG_VATE_VBS
SCRINTG Y Y ' EXISTS (SELECT ''X'' FROM SCBCR
SCBCRKY_CRSE_NUMB = SCRINTG_CRSE_
AND SCBCRKY_SUBJ_CODE = SCRINTG_S
'
from dual where not exists ( selegorfdpl where gorfdpl_fdmn_code ='SB_SCRINTG_ELEVATE_VBS' and gorfdpl_table_name = 'SCRINTG');
SCRINTG_VATE_VBS
SCBCRKY Y Y from dual where not exists ( selegorfdpl where gorfdpl_fdmn_code ='SB_SCRINTG_ELEVATE_VBS' and gorfdpl_table_name = 'SCBCRKY');
CATALOG_VATE_VBS
SCRINTG Y Y ' EXISTS (SELECT ''X'' FROM SCBC
SCBCRKY_CRSE_NUMB = SCRINTG_CRSE_
AND SCBCRKY_SUBJ_CODE = SCRINTG_S
'
from dual where not exists ( selegorfdpl where gorfdpl_fdmn_code ='SB_CATALOG_ELEVATE_VBS' and gorfdpl_table_name = 'SCRINTG');
CATALOG_VATE_VBS
SCBCRKY Y Y from dual where not exists ( selegorfdpl where gorfdpl_fdmn_code ='SB_CATALOG_ELEVATE_VBS' and gorfdpl_table_name = 'SCBCRKY');
61nner Student API 9.5 Installation Guide | Appendix B - Elevate Support

Ba
SB_ELE
RKY WHERE
NUMB
UBJ_CODE
ct 1 from
SB_ELE
RKY WHERE
NUMB
UBJ_CODE
ct 1 from
SB_ELE
KY WHERE
NUMB
UBJ_CODE
ct 1 from
SB_ELE
KY WHERE
NUMB AND
CODE '
ct 1 from
SB_ELE
KY WHERE
NUMB
UBJ_CODE
ct 1 from
Dom
CATALOG_VATE_VBS
SCBCRSE Y Y ' EXISTS (SELECT ''X'' FROM SCBC
SCBCRKY_CRSE_NUMB = SCBCRSE_CRSE_
AND SCBCRKY_SUBJ_CODE = SCBCRSE_S
'
from dual where not exists ( selegorfdpl where gorfdpl_fdmn_code ='SB_CATALOG_ELEVATE_VBS' and gorfdpl_table_name = 'SCBCRSE');
CATALOG_VATE_VBS
SCBDESC Y Y ' EXISTS (SELECT ''X'' FROM SCBC
SCBCRKY_CRSE_NUMB = SCBDESC_CRSE_
AND SCBCRKY_SUBJ_CODE = SCBDESC_S
'
from dual where not exists ( selegorfdpl where gorfdpl_fdmn_code ='SB_CATALOG_ELEVATE_VBS' and gorfdpl_table_name = 'SCBDESC');
CATALOG_VATE_VBS
SCBSUPP Y Y ' EXISTS (SELECT ''X'' FROM SCBCR
SCBCRKY_CRSE_NUMB = SCBSUPP_CRSE_
AND SCBCRKY_SUBJ_CODE = SCBSUPP_S
'
from dual where not exists ( selegorfdpl where gorfdpl_fdmn_code ='SB_CATALOG_ELEVATE_VBS' and gorfdpl_table_name = 'SCBSUPP');
CATALOG_VATE_VBS
SCRATTR Y Y ' EXISTS (SELECT ''X'' FROM SCBCR
SCBCRKY_CRSE_NUMB = SCRATTR_CRSE_
SCBCRKY_SUBJ_CODE = SCRATTR_SUBJ_
from dual where not exists ( selegorfdpl where gorfdpl_fdmn_code ='SB_CATALOG_ELEVATE_VBS' and gorfdpl_table_name = 'SCRATTR');
CATALOG_VATE_VBS
SCRCLBD Y Y ' EXISTS (SELECT ''X'' FROM SCBCR
SCBCRKY_CRSE_NUMB = SCRCLBD_CRSE_
AND SCBCRKY_SUBJ_CODE = SCRCLBD_S
'
from dual where not exists ( selegorfdpl where gorfdpl_fdmn_code ='SB_CATALOG_ELEVATE_VBS' and gorfdpl_table_name = 'SCRCLBD');
ain Code Table Name Sys Req Active Ind Driver SQL
62nner Student API 9.5 Installation Guide | Appendix B - Elevate Support
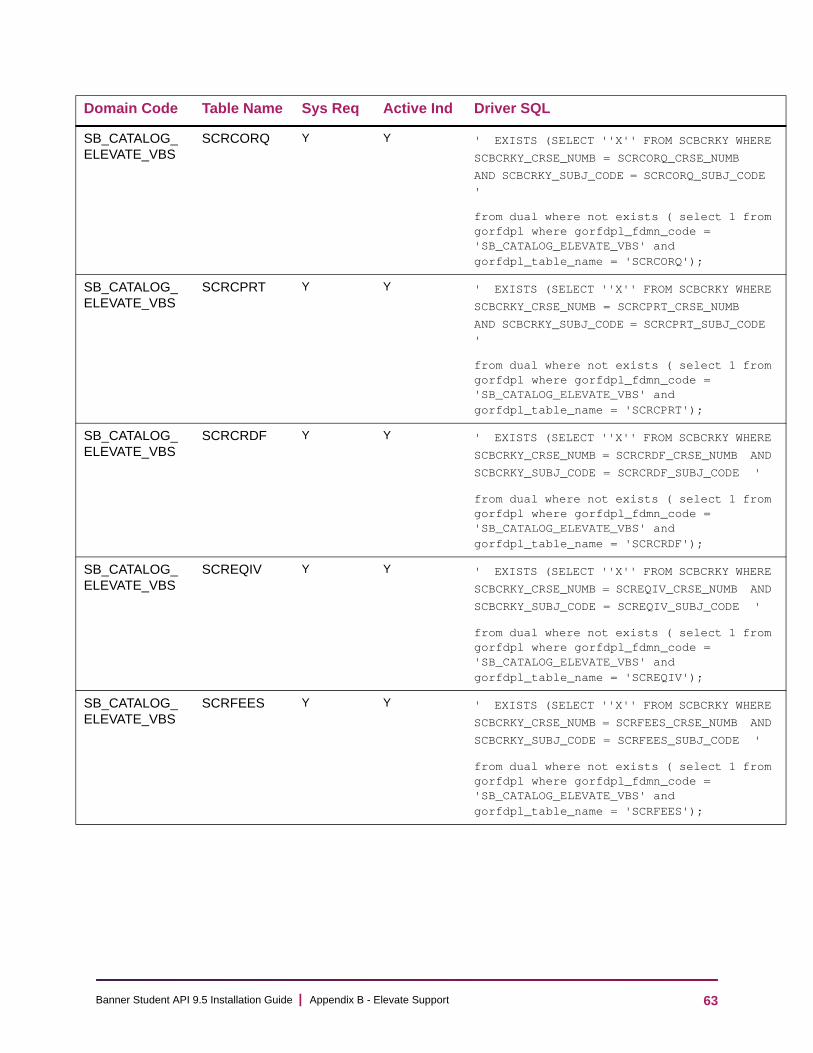
Ba
SB_ELE
RKY WHERE
NUMB
UBJ_CODE
ct 1 from
SB_ELE
RKY WHERE
NUMB
UBJ_CODE
ct 1 from
SB_ELE
RKY WHERE
NUMB AND
CODE '
ct 1 from
SB_ELE
RKY WHERE
NUMB AND
CODE '
ct 1 from
SB_ELE
RKY WHERE
NUMB AND
CODE '
ct 1 from
Dom
CATALOG_VATE_VBS
SCRCORQ Y Y ' EXISTS (SELECT ''X'' FROM SCBC
SCBCRKY_CRSE_NUMB = SCRCORQ_CRSE_
AND SCBCRKY_SUBJ_CODE = SCRCORQ_S
'
from dual where not exists ( selegorfdpl where gorfdpl_fdmn_code ='SB_CATALOG_ELEVATE_VBS' and gorfdpl_table_name = 'SCRCORQ');
CATALOG_VATE_VBS
SCRCPRT Y Y ' EXISTS (SELECT ''X'' FROM SCBC
SCBCRKY_CRSE_NUMB = SCRCPRT_CRSE_
AND SCBCRKY_SUBJ_CODE = SCRCPRT_S
'
from dual where not exists ( selegorfdpl where gorfdpl_fdmn_code ='SB_CATALOG_ELEVATE_VBS' and gorfdpl_table_name = 'SCRCPRT');
CATALOG_VATE_VBS
SCRCRDF Y Y ' EXISTS (SELECT ''X'' FROM SCBC
SCBCRKY_CRSE_NUMB = SCRCRDF_CRSE_
SCBCRKY_SUBJ_CODE = SCRCRDF_SUBJ_
from dual where not exists ( selegorfdpl where gorfdpl_fdmn_code ='SB_CATALOG_ELEVATE_VBS' and gorfdpl_table_name = 'SCRCRDF');
CATALOG_VATE_VBS
SCREQIV Y Y ' EXISTS (SELECT ''X'' FROM SCBC
SCBCRKY_CRSE_NUMB = SCREQIV_CRSE_
SCBCRKY_SUBJ_CODE = SCREQIV_SUBJ_
from dual where not exists ( selegorfdpl where gorfdpl_fdmn_code ='SB_CATALOG_ELEVATE_VBS' and gorfdpl_table_name = 'SCREQIV');
CATALOG_VATE_VBS
SCRFEES Y Y ' EXISTS (SELECT ''X'' FROM SCBC
SCBCRKY_CRSE_NUMB = SCRFEES_CRSE_
SCBCRKY_SUBJ_CODE = SCRFEES_SUBJ_
from dual where not exists ( selegorfdpl where gorfdpl_fdmn_code ='SB_CATALOG_ELEVATE_VBS' and gorfdpl_table_name = 'SCRFEES');
ain Code Table Name Sys Req Active Ind Driver SQL
63nner Student API 9.5 Installation Guide | Appendix B - Elevate Support

Ba
SB_ELE
RKY WHERE
NUMB AND
CODE '
ct 1 from
SB_ELE
RKY WHERE
NUMB AND
CODE '
ct 1 from
SB_ELE
RKY WHERE
NUMB AND
CODE '
ct 1 from
SB_ELE
RKY WHERE
NUMB AND
CODE '
ct 1 from
SB_ELE
RKY WHERE
NUMB
UBJ_CODE
ct 1 from
SB_ELE
RKY WHERE
NUMB AND
CODE '
ct 1 from
Dom
CATALOG_VATE_VBS
SCRGMOD Y Y ' EXISTS (SELECT ''X'' FROM SCBC
SCBCRKY_CRSE_NUMB = SCRGMOD_CRSE_
SCBCRKY_SUBJ_CODE = SCRGMOD_SUBJ_
from dual where not exists ( selegorfdpl where gorfdpl_fdmn_code ='SB_CATALOG_ELEVATE_VBS' and gorfdpl_table_name = 'SCRGMOD');
CATALOG_VATE_VBS
SCRLEVL Y Y ' EXISTS (SELECT ''X'' FROM SCBC
SCBCRKY_CRSE_NUMB = SCRLEVL_CRSE_
SCBCRKY_SUBJ_CODE = SCRLEVL_SUBJ_
from dual where not exists ( selegorfdpl where gorfdpl_fdmn_code ='SB_CATALOG_ELEVATE_VBS' and gorfdpl_table_name = 'SCRLEVL');
CATALOG_VATE_VBS
SCRMEXC Y Y ' EXISTS (SELECT ''X'' FROM SCBC
SCBCRKY_CRSE_NUMB = SCRMEXC_CRSE_
SCBCRKY_SUBJ_CODE = SCRMEXC_SUBJ_
from dual where not exists ( selegorfdpl where gorfdpl_fdmn_code ='SB_CATALOG_ELEVATE_VBS' and gorfdpl_table_name = 'SCRMEXC');
CATALOG_VATE_VBS
SCRRARE Y Y ' EXISTS (SELECT ''X'' FROM SCBC
SCBCRKY_CRSE_NUMB = SCRRARE_CRSE_
SCBCRKY_SUBJ_CODE = SCRRARE_SUBJ_
from dual where not exists ( selegorfdpl where gorfdpl_fdmn_code ='SB_CATALOG_ELEVATE_VBS' and gorfdpl_table_name = 'SCRRARE');
CATALOG_VATE_VBS
SCRRATT Y Y ' EXISTS (SELECT ''X'' FROM SCBC
SCBCRKY_CRSE_NUMB = SCRRATT_CRSE_
AND SCBCRKY_SUBJ_CODE = SCRRATT_S
'
from dual where not exists ( selegorfdpl where gorfdpl_fdmn_code ='SB_CATALOG_ELEVATE_VBS' and gorfdpl_table_name = 'SCRRATT');
CATALOG_VATE_VBS
SCRRCAM Y Y ' EXISTS (SELECT ''X'' FROM SCBC
SCBCRKY_CRSE_NUMB = SCRRCAM_CRSE_
SCBCRKY_SUBJ_CODE = SCRRCAM_SUBJ_
from dual where not exists ( selegorfdpl where gorfdpl_fdmn_code ='SB_CATALOG_ELEVATE_VBS' and gorfdpl_table_name = 'SCRRCAM');
ain Code Table Name Sys Req Active Ind Driver SQL
64nner Student API 9.5 Installation Guide | Appendix B - Elevate Support

Ba
SB_ELE
RKY WHERE
NUMB AND
CODE '
ct 1 from
SB_ELE
RKY WHERE
NUMB AND
CODE '
ct 1 from
SB_ELE
RKY WHERE
NUMB AND
CODE '
ct 1 from
SB_ELE
RKY WHERE
NUMB AND
CODE '
ct 1 from
SB_ELE
RKY WHERE
NUMB AND
CODE '
ct 1 from
SB_ELE
RKY WHERE
NUMB AND
CODE '
ct 1 from
Dom
CATALOG_VATE_VBS
SCRRCHR Y Y ’ EXISTS (SELECT ''X'' FROM SCBC
SCBCRKY_CRSE_NUMB = SCRRCHR_CRSE_
SCBCRKY_SUBJ_CODE = SCRRCHR_SUBJ_
from dual where not exists ( selegorfdpl where gorfdpl_fdmn_code ='SB_CATALOG_ELEVATE_VBS' and gorfdpl_table_name = 'SCRRCHR');
CATALOG_VATE_VBS
SCRRCLS Y Y ' EXISTS (SELECT ''X'' FROM SCBC
SCBCRKY_CRSE_NUMB = SCRRCLS_CRSE_
SCBCRKY_SUBJ_CODE = SCRRCLS_SUBJ_
from dual where not exists ( selegorfdpl where gorfdpl_fdmn_code ='SB_CATALOG_ELEVATE_VBS' and gorfdpl_table_name = 'SCRRCLS');
CATALOG_VATE_VBS
SCRRCMP Y Y ' EXISTS (SELECT ''X'' FROM SCBC
SCBCRKY_CRSE_NUMB = SCRRCMP_CRSE_
SCBCRKY_SUBJ_CODE = SCRRCMP_SUBJ_
from dual where not exists ( selegorfdpl where gorfdpl_fdmn_code ='SB_CATALOG_ELEVATE_VBS' and gorfdpl_table_name = 'SCRRCMP');
CATALOG_VATE_VBS
SCRRCOL Y Y ' EXISTS (SELECT ''X'' FROM SCBC
SCBCRKY_CRSE_NUMB = SCRRCOL_CRSE_
SCBCRKY_SUBJ_CODE = SCRRCOL_SUBJ_
from dual where not exists ( selegorfdpl where gorfdpl_fdmn_code ='SB_CATALOG_ELEVATE_VBS' and gorfdpl_table_name = 'SCRRCOL');
CATALOG_VATE_VBS
SCRRDEG Y Y ' EXISTS (SELECT ''X'' FROM SCBC
SCBCRKY_CRSE_NUMB = SCRRDEG_CRSE_
SCBCRKY_SUBJ_CODE = SCRRDEG_SUBJ_
from dual where not exists ( selegorfdpl where gorfdpl_fdmn_code ='SB_CATALOG_ELEVATE_VBS' and gorfdpl_table_name = 'SCRRDEG');
CATALOG_VATE_VBS
SCRRDEP Y Y ' EXISTS (SELECT ''X'' FROM SCBC
SCBCRKY_CRSE_NUMB = SCRRDEP_CRSE_
SCBCRKY_SUBJ_CODE = SCRRDEP_SUBJ_
from dual where not exists ( selegorfdpl where gorfdpl_fdmn_code ='SB_CATALOG_ELEVATE_VBS' and gorfdpl_table_name = 'SCRRDEP');
ain Code Table Name Sys Req Active Ind Driver SQL
65nner Student API 9.5 Installation Guide | Appendix B - Elevate Support

Ba
SB_ELE
RKY WHERE
NUMB AND
CODE '
ct 1 from
SB_ELE
RKY WHERE
NUMB AND
CODE '
ct 1 from
SB_ELE
RKY WHERE
NUMB AND
CODE '
ct 1 from
SB_ELE
RKY WHERE
NUMB AND
CODE '
ct 1 from
SB_ELE
RKY WHERE
NUMB AND
CODE '
ct 1 from
SB_ELE
RKY WHERE
NUMB AND
CODE '
ct 1 from
Dom
CATALOG_VATE_VBS
SCRRLVL Y Y ' EXISTS (SELECT ''X'' FROM SCBC
SCBCRKY_CRSE_NUMB = SCRRLVL_CRSE_
SCBCRKY_SUBJ_CODE = SCRRLVL_SUBJ_
from dual where not exists ( selegorfdpl where gorfdpl_fdmn_code ='SB_CATALOG_ELEVATE_VBS' and gorfdpl_table_name = 'SCRRLVL');
CATALOG_VATE_VBS
SCRRMAJ Y Y ' EXISTS (SELECT ''X'' FROM SCBC
SCBCRKY_CRSE_NUMB = SCRRMAJ_CRSE_
SCBCRKY_SUBJ_CODE = SCRRMAJ_SUBJ_
from dual where not exists ( selegorfdpl where gorfdpl_fdmn_code ='SB_CATALOG_ELEVATE_VBS' and gorfdpl_table_name = 'SCRRMAJ');
CATALOG_VATE_VBS
SCRRPRG Y Y ' EXISTS (SELECT ''X'' FROM SCBC
SCBCRKY_CRSE_NUMB = SCRRPRG_CRSE_
SCBCRKY_SUBJ_CODE = SCRRPRG_SUBJ_
from dual where not exists ( selegorfdpl where gorfdpl_fdmn_code ='SB_CATALOG_ELEVATE_VBS' and gorfdpl_table_name = 'SCRRPRG');
CATALOG_VATE_VBS
SCRRTRM Y Y ' EXISTS (SELECT ''X'' FROM SCBC
SCBCRKY_CRSE_NUMB = SCRRTRM_CRSE_
SCBCRKY_SUBJ_CODE = SCRRTRM_SUBJ_
from dual where not exists ( selegorfdpl where gorfdpl_fdmn_code ='SB_CATALOG_ELEVATE_VBS' and gorfdpl_table_name = 'SCRRTRM');
CATALOG_VATE_VBS
SCRRTST Y Y ' EXISTS (SELECT ''X'' FROM SCBC
SCBCRKY_CRSE_NUMB = SCRRTST_CRSE_
SCBCRKY_SUBJ_CODE = SCRRTST_SUBJ_
from dual where not exists ( selegorfdpl where gorfdpl_fdmn_code ='SB_CATALOG_ELEVATE_VBS' and gorfdpl_table_name = 'SCRRTST');
CATALOG_VATE_VBS
SCRSBGI Y Y ' EXISTS (SELECT ''X'' FROM SCBC
SCBCRKY_CRSE_NUMB = SCRSBGI_CRSE_
SCBCRKY_SUBJ_CODE = SCRSBGI_SUBJ_
from dual where not exists ( selegorfdpl where gorfdpl_fdmn_code ='SB_CATALOG_ELEVATE_VBS' and gorfdpl_table_name = 'SCRSBGI');
ain Code Table Name Sys Req Active Ind Driver SQL
66nner Student API 9.5 Installation Guide | Appendix B - Elevate Support

Ba
SB_ELE
RKY WHERE
NUMB AND
CODE '
ct 1 from
SB_ELE
RKY WHERE
NUMB AND
CODE '
ct 1 from
SB_ELE
RKY WHERE
NUMB AND
CODE '
ct 1 from
SB_ELE
RKY WHERE
NUMB AND
CODE '
ct 1 from
SB_ELE
RKY WHERE
NUMB AND
CODE '
ct 1 from
SB_ELE
RKY WHERE
NUMB AND
CODE '
ct 1 from
Dom
CATALOG_VATE_VBS
SCRSCHD Y Y ' EXISTS (SELECT ''X'' FROM SCBC
SCBCRKY_CRSE_NUMB = SCRSCHD_CRSE_
SCBCRKY_SUBJ_CODE = SCRSCHD_SUBJ_
from dual where not exists ( selegorfdpl where gorfdpl_fdmn_code ='SB_CATALOG_ELEVATE_VBS' and gorfdpl_table_name = 'SCRSCHD');
CATALOG_VATE_VBS
SCRSYLN Y Y ' EXISTS (SELECT ''X'' FROM SCBC
SCBCRKY_CRSE_NUMB = SCRSYLN_CRSE_
SCBCRKY_SUBJ_CODE = SCRSYLN_SUBJ_
from dual where not exists ( selegorfdpl where gorfdpl_fdmn_code ='SB_CATALOG_ELEVATE_VBS' and gorfdpl_table_name = 'SCRSYLN');
CATALOG_VATE_VBS
SCRSYLO Y Y ' EXISTS (SELECT ''X'' FROM SCBC
SCBCRKY_CRSE_NUMB = SCRSYLO_CRSE_
SCBCRKY_SUBJ_CODE = SCRSYLO_SUBJ_
from dual where not exists ( selegorfdpl where gorfdpl_fdmn_code ='SB_CATALOG_ELEVATE_VBS' and gorfdpl_table_name = 'SCRSYLO');
CATALOG_VATE_VBS
SCRSYRM Y Y ' EXISTS (SELECT ''X'' FROM SCBC
SCBCRKY_CRSE_NUMB = SCRSYRM_CRSE_
SCBCRKY_SUBJ_CODE = SCRSYRM_SUBJ_
from dual where not exists ( selegorfdpl where gorfdpl_fdmn_code ='SB_CATALOG_ELEVATE_VBS' and gorfdpl_table_name = 'SCRSYRM');
CATALOG_VATE_VBS
SCRSYTR Y Y ' EXISTS (SELECT ''X'' FROM SCBC
SCBCRKY_CRSE_NUMB = SCRSYTR_CRSE_
SCBCRKY_SUBJ_CODE = SCRSYTR_SUBJ_
from dual where not exists ( selegorfdpl where gorfdpl_fdmn_code ='SB_CATALOG_ELEVATE_VBS' and gorfdpl_table_name = 'SCRSYTR');
CATALOG_VATE_VBS
SCRTEXT Y Y ' EXISTS (SELECT ''X'' FROM SCBC
SCBCRKY_CRSE_NUMB = SCRTEXT_CRSE_
SCBCRKY_SUBJ_CODE = SCRTEXT_SUBJ_
from dual where not exists ( selegorfdpl where gorfdpl_fdmn_code ='SB_CATALOG_ELEVATE_VBS' and gorfdpl_table_name = 'SCRTEXT');
ain Code Table Name Sys Req Active Ind Driver SQL
67nner Student API 9.5 Installation Guide | Appendix B - Elevate Support

Ba
SB__VB
ECT WHERE
CODE'
T 1 FROM
SB__VB
ECT WHERE
CODE'
T 1 FROM
SB__VB
ECT WHERE
CODE'
T 1 FROM
SB__VB
ECT WHERE
CODE'
T 1 FROM
SB__VB
ECT WHERE
CODE'
T 1 FROM
SB__VB
ECT WHERE
CODE'
T 1 FROM
Dom
SCHEDULES
SIRASGN Y Y ' EXISTS (SELECT ''X'' FROM SSBS
SSBSECT_CRN = SIRASGN_CRN AND
SSBSECT_TERM_CODE = SIRASGN_TERM_
FROM dual WHERE NOT EXISTS (SELECgorfdpl WHERE GORFDPL_FDMN_CODE ='SB_SCHEDULE_VBS' AND GORFDPL_TABLE_NAME='SIRASGN');
SCHEDULES
SSRRATT Y Y ' EXISTS (SELECT ''X'' FROM SSBS
SSBSECT_CRN = SSRRATT_CRN AND
SSBSECT_TERM_CODE = SSRRATT_TERM_
FROM dual WHERE NOT EXISTS (SELECgorfdpl WHERE GORFDPL_FDMN_CODE ='SB_SCHEDULE_VBS' AND GORFDPL_TABLE_NAME='SSRRATT');
SCHEDULES
SSBWLSC Y Y ' EXISTS (SELECT ''X'' FROM SSBS
SSBSECT_CRN = SSBWLSC_CRN AND
SSBSECT_TERM_CODE = SSBWLSC_TERM_
FROM dual WHERE NOT EXISTS (SELECgorfdpl WHERE GORFDPL_FDMN_CODE ='SB_SCHEDULE_VBS' AND GORFDPL_TABLE_NAME='SSBWLSC');
SCHEDULES
SSRCLBD Y Y ' EXISTS (SELECT ''X'' FROM SSBS
SSBSECT_CRN = SSRCLBD_CRN AND
SSBSECT_TERM_CODE = SSRCLBD_TERM_
FROM dual WHERE NOT EXISTS (SELECgorfdpl WHERE GORFDPL_FDMN_CODE ='SB_SCHEDULE_VBS' AND GORFDPL_TABLE_NAME='SSRCLBD');
SCHEDULES
SSRRCHR Y Y ' EXISTS (SELECT ''X'' FROM SSBS
SSBSECT_CRN = SSRRCHR_CRN AND
SSBSECT_TERM_CODE = SSRRCHR_TERM_
FROM dual WHERE NOT EXISTS (SELECgorfdpl WHERE GORFDPL_FDMN_CODE ='SB_SCHEDULE_VBS' AND GORFDPL_TABLE_NAME='SSRRCHR');
SCHEDULES
SSRRDEP Y Y ' EXISTS (SELECT ''X'' FROM SSBS
SSBSECT_CRN = SSRRDEP_CRN AND
SSBSECT_TERM_CODE = SSRRDEP_TERM_
FROM dual WHERE NOT EXISTS (SELECgorfdpl WHERE GORFDPL_FDMN_CODE ='SB_SCHEDULE_VBS' AND GORFDPL_TABLE_NAME='SSRRDEP');
ain Code Table Name Sys Req Active Ind Driver SQL
68nner Student API 9.5 Installation Guide | Appendix B - Elevate Support

Ba
6. sgtvfgaci_080700.sql
This script is delivered as part of the DML directory and is used to insert the VBS rule code used to identify the Elevate rules into the GTVFGAC table. This data is displayed on the FGAC Group Validation (GTVFGAC) form.
7. sgtvfbpri_080700.sql
This script is delivered as part of the DML directory and is used to create the business profile code in the GTVFBPR table. The data is displayed on the FGAC Business Profile Validation (GTVFBPR) form.
8. sgobfgaci_080700.sql
This script is delivered as part of the DML directory and is used to insert the header record into the GOBFGAC table. The header record stores the Active indicator setting and the Effective Date value. The data is displayed on the FGAC Group Rules (GOAFGAC) form for the Group value in the Key Block.
9. sgorfbpri_0080700.sql
This script is delivered as part of the DML directory and is used to populate the business profile with users in the GORFBPR table. The data is displayed on the FGAC Business Profile Assignments (GOAFBPR) form for the FGAC Business Profile Code value and the associated Fine-Grained Access User ID values.
FCAC Code Description
ELEVATE Elevate Restrictions
FGAC Business Profile Code Description
ELEVATE Restrict Users from Elevate Data
FGAC Code Active Indicator Effective Date
ELEVATE Y SYSDATE
FGAC User ID Business Profile Code
a.username ELEVATE
69nner Student API 9.5 Installation Guide | Appendix B - Elevate Support

Ba
t 1 de =
ntg
'' )'
t 1
de =
10. sgorfprdi_080700.sql
This script is delivered as part of the DML directory and is used to create the predicates. The predicates state that the user assigned to the rule can insert, update, and delete data, when the selects are true.
Entries are created for catalog (SB_CATALOG_ELEVATE_VBS), (SB_SCRINTG_ELEVATE_VBS), and schedule (SB_SCHEDULE_VBS) in the GORFPRD table where the GORFPRD_FGAC_CODE is ELEVATE. (Entries use the VBS domains that are part of the existing baseline seed data.)
The data is displayed on the FGAC Group Rules (GOAFGAC) form.
FGAC Code Domain Code Sys Num Predicate
ELEVATE SB_SCHEDLE_VBS 1 select 'ELEVATE',
'SB_SCHEDULE_VBS',
1,
sysdate,
user,
'nvl(SSBSECT_INTG_CDE,''x'') !=
''ELEV8'''
from dual where not exists ( selecfrom gorfprd where gorfprd_fgac_co'ELEVATE' and gorfprd_fdmn_code = 'SB_SCHEDULE_VBS');
ELEVATE SB_CATALOG_VBS 2 select 'ELEVATE',
'SB_CATALOG_ELEVATE_VBS',
2,
sysdate,
user,
' not exists ( select 1 from scri
vbs where vbs.scrintg_subj_code =
scbcrky_subj_code
and vbs.scrintg_crse_numb =
scbcrky_crse_numb
and vbs.scrintg_intg_cde = ''ELEV8
from dual where not exists ( selec
from gorfprd where gorfprd_fgac_co
'ELEVATE' and gorfprd_fdmn_code =
'SB_CATALOG_ELEVATE_VBS');
70nner Student API 9.5 Installation Guide | Appendix B - Elevate Support

Ba
rse
''X''
t 1
de =
FGACode
Delete Ind
ELEV Y
ELEV Y
ELEV Y
11. sgorfgbpi_080700.sql
This script is delivered as part of the DML directory and is used to insert access definition/restrictions for the three domains on the Elevate VBS rule into the GORFGBP table. Access is through the business profile. The ability to select, insert, update, and delete data is determined by the predicate. The settings for the GORFGBP_SELECT_IND, GORFGBP_INSERT_IND, GORFGBP_UPDATE_IND, and GORFGBP_DELETE_IND are displayed on the FGAC Group Rules (GOAFGAC) form.
ELEVATE SB_SCRINTG_VBS 3 select 'ELEVATE',
'SB_SCRINTG_ELEVATE_VBS',
3,
sysdate,
user,
' not exists ( select 1 from scbc
vbs where vbs.scbcrse_subj_code =
scbcrky_subj_code
and vbs.scbcrse_crse_numb =
scbcrky_crse_numb
and
upper(nvl(vbs.scbcrse_data_origin,
)) = ''ELEVATE'' )'
from dual where not exists ( selec
from gorfprd where gorfprd_fgac_co
'ELEVATE' and gorfprd_fdmn_code =
'SB_SCRINTG_ELEVATE_VBS');
C Domain Code
Predicate Seq Num
FBPR Code
Select Ind
Insert Ind
Update Ind
ATE SB_SCHEDULE_VBS 1 ELEVATE N Y Y
ATE SB_CATALOG_ELEVATE_VBS
2 ELEVATE N Y Y
ATE SB_SCRINTG_ELEVATE_VBS
3 ELEVATE N Y Y
FGAC Code Domain Code Sys Num Predicate
71nner Student API 9.5 Installation Guide | Appendix B - Elevate Support
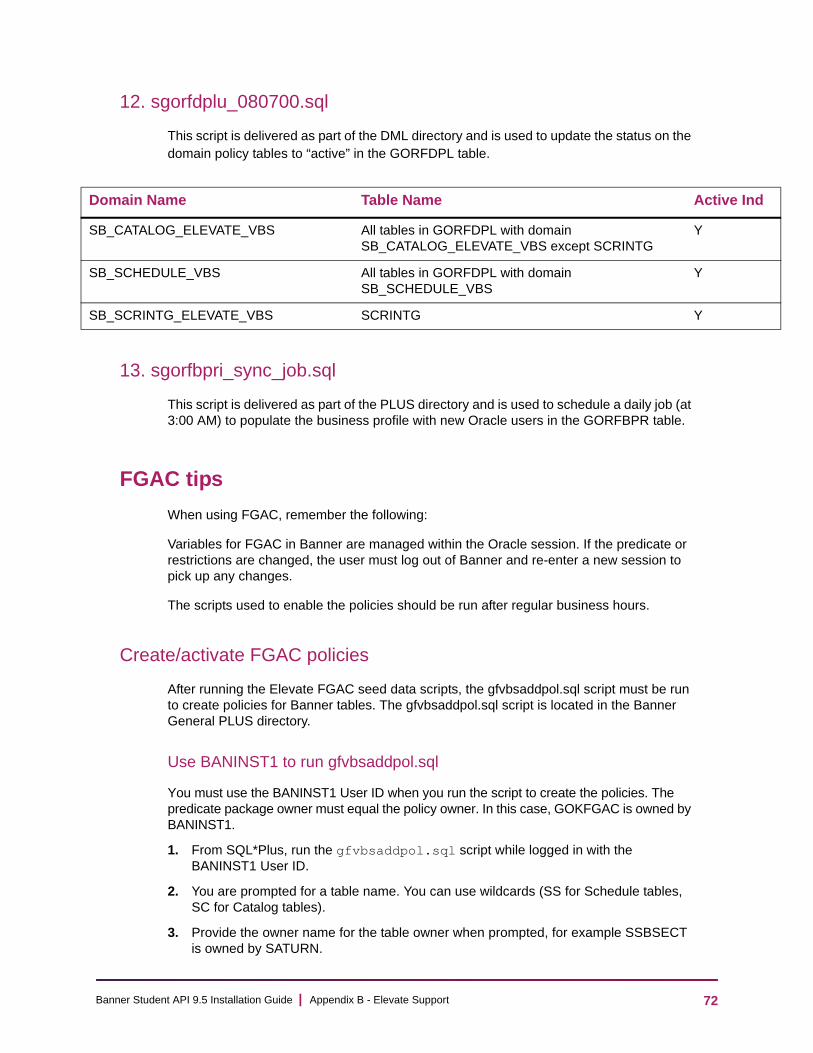
Ba
Do tive Ind
SB_
SB_
SB_
12. sgorfdplu_080700.sql
This script is delivered as part of the DML directory and is used to update the status on the domain policy tables to “active” in the GORFDPL table.
13. sgorfbpri_sync_job.sql
This script is delivered as part of the PLUS directory and is used to schedule a daily job (at 3:00 AM) to populate the business profile with new Oracle users in the GORFBPR table.
FGAC tips
When using FGAC, remember the following:
Variables for FGAC in Banner are managed within the Oracle session. If the predicate or restrictions are changed, the user must log out of Banner and re-enter a new session to pick up any changes.
The scripts used to enable the policies should be run after regular business hours.
Create/activate FGAC policies
After running the Elevate FGAC seed data scripts, the gfvbsaddpol.sql script must be run to create policies for Banner tables. The gfvbsaddpol.sql script is located in the Banner General PLUS directory.
Use BANINST1 to run gfvbsaddpol.sql
You must use the BANINST1 User ID when you run the script to create the policies. The predicate package owner must equal the policy owner. In this case, GOKFGAC is owned by BANINST1.
1. From SQL*Plus, run the gfvbsaddpol.sql script while logged in with the BANINST1 User ID.
2. You are prompted for a table name. You can use wildcards (SS for Schedule tables, SC for Catalog tables).
3. Provide the owner name for the table owner when prompted, for example SSBSECT is owned by SATURN.
main Name Table Name Ac
CATALOG_ELEVATE_VBS All tables in GORFDPL with domain SB_CATALOG_ELEVATE_VBS except SCRINTG
Y
SCHEDULE_VBS All tables in GORFDPL with domain SB_SCHEDULE_VBS
Y
SCRINTG_ELEVATE_VBS SCRINTG Y
72nner Student API 9.5 Installation Guide | Appendix B - Elevate Support

Ba
This task is performed once per module to create policies for SC% and SS% tables as identified in the GORFDPL table. The script will create a policy for each table. This task does not need to be repeated if the gorfdpl_driver.sql script changes, the table is added to another domain, or there is any change to the domain and table.
Note: The gfvbsaddpol.sql script is can be rerun and restarted. The process will not try to recreate a policy. If the policy exists, the task to add the policy is skipped.
Run gfvbsaddpol.sql.for the following tables:
SCBCRKY SCRRDEG
SCBCRSE SCRRDEP
SCBDESC SCRRLVL
SCBSUPP SCRRMAJ
SCRATTR SCRRPRG
SCRCLBD SCRRTRM
SCRCORQ SCRRTST
SCRCPRT SCRSBGI
SCRCRDF SCRSCHD
SCREQIV SCRSYLN
SCRFEES SCRSYLO
SCRGMOD SCRSYRM
SCRINTG SCRSYTR
SCRLEVL SCRTEXT
SCRMEXC SIRASGN
SCRRARE SSBWLSC
SCRRATT SSRCLBD
SCRRCAM SSRCLBD
SCRRCHR SSRRATT
SCRRCLS SSRRCHR
SCRRCMP SSRRDEP
SCRRCOL
73nner Student API 9.5 Installation Guide | Appendix B - Elevate Support
Ba
View Policy Data from SQL*Plus
GORFDPL creates four policies per table, one each for the insert, update, delete and select
items. All have the package defined as GOKFGAC and must be owned by BANINST1.
Policy names
The gokfgac.f_get_policy_name function ensures that the policy name created is less than 30 characters in length.
If the table name length is less than 19 characters, the policy name will use the following pattern: GOKFGAC_tablename_INS (INS, UPD, DEL, SEL)
If the table name length is 19 or more characters, the policy name will use the following pattern: tablename_I (I, U, D, S)
Drop a policy
To drop a policy, run the gfgacdroppol.sql script from the Banner General PLUS directory using the BANINST1 ID. This script accepts wildcards for the table name prompt.
Schedule a daily job to populate the business profile
A sgorfbpri_sync_job.sql script is delivered with this release and can be found in the PLUS directory. It is run using the SATURN ID. It is used to schedule the synchronization process for the user IDs that adds new Oracle users to the Elevate group business profile.
Automation of the synchronization process ensures that newly created users are not able to modify any data related to Elevate courses and sections. The default synchronization is performed each day at 3:00 AM. The default value can be changed according to your site-specific synchronization interval requirements.
74nner Student API 9.5 Installation Guide | Appendix B - Elevate Support