basic disaster preparedness - berkeley, … manual...basic disaster preparedness quick reference!...
TRANSCRIPT

BASIC DISASTER
PREPAREDNESS
Quick Reference!
WHAT TO DO IN AN EARTHQUAKE… Page 2 WHAT TO DO IN A WILDFIRE… Page 4 WHAT TO DO IN A PANDEMIC FLU OUTBREAK… Page 5 TABLE OF CONTENTS… Page 6
City of Berkeley Off ice of Emergenc y Services
Berkeley F ire Depa rtmen t
2100 Martin Luther King Jr. Way Berkeley, CA 94704
(510) 981-5605
January 2008

2
WWWHHHAAATTT TTTOOO DDDOOO IIINNN AAANNN EEEAAARRRTTTHHHQQQUUUAAAKKKEEE
In a Building
STAY INDOORS until the shaking has stopped. Trying to leave a building is very risky, and falling debris outside accounts for many injuries.
Move away from heavy standing objects such as bookcases, china cabinets, filing
cabinets or freestanding closets. Don’t try to hold things up.
Move away from glass doors and windows that can shatter.
Duck, cover and hold. Try to get underneath a sturdy object such as a kitchen table, a desk, or a chair.
Be careful in choosing to stand in a doorway. Be sure there isn’t a door that could
slam shut during the earthquake.
If you are in bed, stay in bed and cover your head. In a Car
Stay in your car.
Move to the shoulder of the highway and away from power lines and large buildings as quickly as is safe.
Avoid stopping under an overpass. Move beyond the overpass and make room for
others when you pull over. Outdoors
If possible duck, cover and hold. Get under a picnic table, bus bench or other sturdy object.
Move away from brick walls, power lines, trees and chimneys.
In a Wheelchair
Stay in the chair. Move to a safe place away from glass, tall bookcases, etc. Whether indoors or outdoors lock the wheels and cover your head with your arms to protect yourself from falling debris.
3
Once the Shaking Stops Check for injuries (check yourself first) and administer first aid.
Check for fires. Put out small fires.
If you smell gas, turn the gas off at the meter. Turn the electricity off.
Do not light a match, or turn on a light switch. Use a flashlight or lightstick.
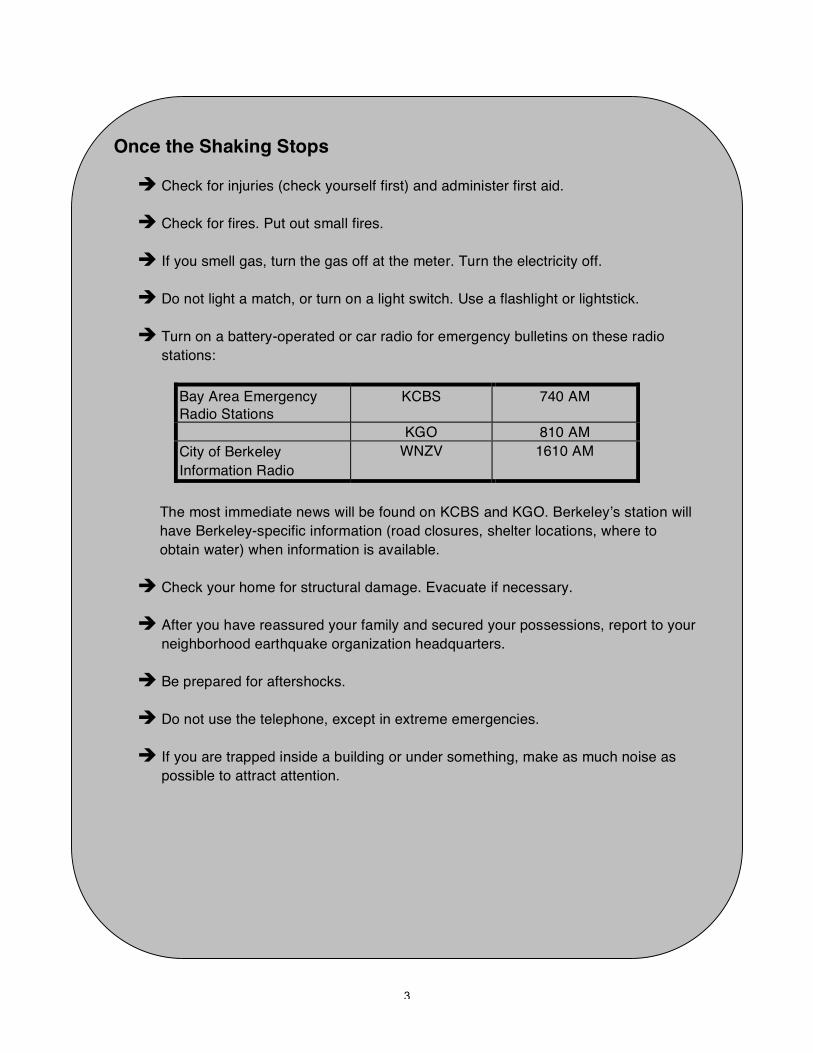
Turn on a battery-operated or car radio for emergency bulletins on these radio
stations:
Bay Area Emergency Radio Stations
KCBS 740 AM
KGO 810 AM City of Berkeley Information Radio
WNZV 1610 AM
The most immediate news will be found on KCBS and KGO. Berkeley’s station will have Berkeley-specific information (road closures, shelter locations, where to obtain water) when information is available.
Check your home for structural damage. Evacuate if necessary.
After you have reassured your family and secured your possessions, report to your neighborhood earthquake organization headquarters.
Be prepared for aftershocks.
Do not use the telephone, except in extreme emergencies.
If you are trapped inside a building or under something, make as much noise as
possible to attract attention.
4
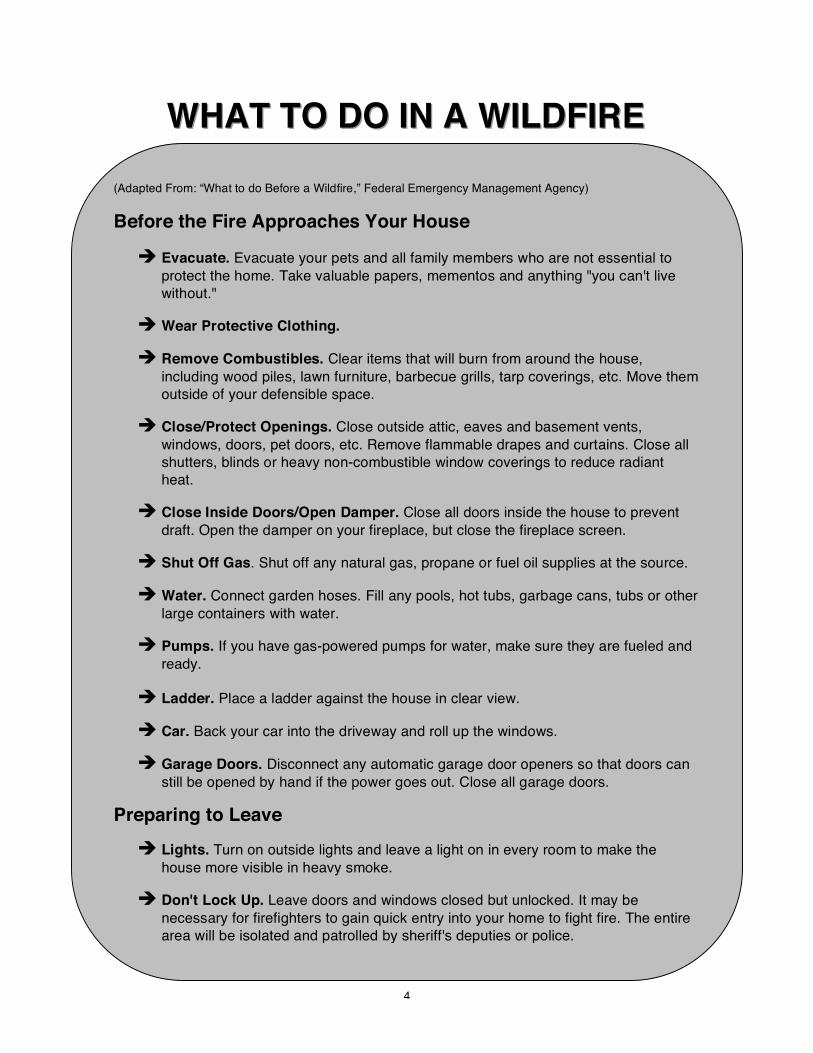
WWWHHHAAATTT TTTOOO DDDOOO IIINNN AAA WWWIIILLLDDDFFFIIIRRREEE
(Adapted From: “What to do Before a Wildfire,” Federal Emergency Management Agency) Before the Fire Approaches Your House
Evacuate. Evacuate your pets and all family members who are not essential to protect the home. Take valuable papers, mementos and anything "you can't live without."
Wear Protective Clothing.
Remove Combustibles. Clear items that will burn from around the house, including wood piles, lawn furniture, barbecue grills, tarp coverings, etc. Move them outside of your defensible space.
Close/Protect Openings. Close outside attic, eaves and basement vents, windows, doors, pet doors, etc. Remove flammable drapes and curtains. Close all shutters, blinds or heavy non-combustible window coverings to reduce radiant heat.
Close Inside Doors/Open Damper. Close all doors inside the house to prevent draft. Open the damper on your fireplace, but close the fireplace screen.
Shut Off Gas. Shut off any natural gas, propane or fuel oil supplies at the source.
Water. Connect garden hoses. Fill any pools, hot tubs, garbage cans, tubs or other large containers with water.
Pumps. If you have gas-powered pumps for water, make sure they are fueled and ready.
Ladder. Place a ladder against the house in clear view.
Car. Back your car into the driveway and roll up the windows.
Garage Doors. Disconnect any automatic garage door openers so that doors can still be opened by hand if the power goes out. Close all garage doors.
Preparing to Leave
Lights. Turn on outside lights and leave a light on in every room to make the house more visible in heavy smoke.
Don't Lock Up. Leave doors and windows closed but unlocked. It may be necessary for firefighters to gain quick entry into your home to fight fire. The entire area will be isolated and patrolled by sheriff's deputies or police.

5
WWWHHHAAATTT TTTOOO DDDOOO DDDUUURRRIIINNNGGG AAA PPPAAANNNDDDEEEMMMIIICCC FFFLLLUUU OOOUUUTTTBBBRRREEEAAAKKK
(Adapted From: “Your Guide to Preparing for Pandemic Flu,” Santa Clara County Public Health Department) Throughout a pandemic flu you may be asked or required to do things to help hold back the spread of the disease. If local public health officials or your healthcare provider ask you to take certain actions, follow those instructions. What You May be Asked or Required to do:
When you are sick, stay home. Children should not go to school if they are sick. Staying home will be absolutely necessary during a pandemic flu to limit the spread of the disease.
Even though you may be healthy, you could be asked to stay away from gatherings of people such as sporting events, movies and festivals. During a pandemic flu, these kinds of events could be cancelled because large gatherings of people help spread the flu virus. Isolation and quarantine are public health actions used to contain the spread of a contagious disease. If asked, it will be important to follow isolation and/or quarantine instructions.
Isolation and Quarantine:
ISOLATION is for people who are already ill. When someone is isolated, they are separated from people who are healthy. Having the sick person separated from others can help to slow or stop the spread of disease. People who are isolated can be cared for in their homes, in hospitals, or in other healthcare facilities. Isolation is usually voluntary, but local, state and federal government have the power to require the isolation of sick people to protect the public.
QUARANTINE is for people who have been exposed to the disease but are not sick. When someone is placed in quarantine, they are also separated from others. Even though the person is not sick at the moment, they were exposed to the disease and may still become infectious and then spread the disease to others. Quarantine can help to slow or stop this from happening. States generally have the power to enforce quarantines within their borders.

6
BASIC DISASTER PREPAREDNESS
TTTAAABBBLLLEEE OOOFFF CCCOOONNNTTTEEENNNTTTSSS
WHAT TO DO IN AN EARTHQUAKE 2
WHAT TO DO IN A WILDFIRE 4
WHAT TO DO IN A PANDEMIC FLU 5
I. GET READY: HOW TO PREPARE YOUR FAMILY 10
ACTIVITY: MAKE A FAMILY REUNION PLAN 10 INVOLVE THE WHOLE FAMILY IN DISASTER PLANNING 11 MAKE PLANS FOR THE ELDERLY AND DISABLED 11 ACTIVITY: MAKE A FAMILY EVACUATION PLAN 13 EVACUATION PRIORITY LIST 13 ACTIVITY: COMPILE YOUR FAMILY'S VITAL DOCUMENTS 15
II. GET READY: PREPARE YOUR HOME 18
ACTIVITY: EARTHQUAKE HAZARD HUNT 18 UTILITIES AND EARTHQUAKES 20 ACTIVITY: RETROFIT YOUR HOME 22 STEP 1: CHECK YOUR HOME’S FOUNDATION 22 STEP 2: SECURE YOUR HOME TO ITS FOUNDATION 22 STEP 3: REINFORCE CRIPPLE WALLS 23 ACTIVITY: MAKE NON-STRUCTURAL PREPARATIONS 25 STEP 1: FIX TALL OR TOP-HEAVY FURNITURE IN PLACE 25 STEP 2: SECURE PICTURES, MIRRORS, AND HANGING OBJECTS 25 STEP 3: SECURE APPLIANCES AND CABINETS 26

7
STEP 4: BRACE YOUR WATER HEATER 26 STEP 5: PROPERLY STORE TOXIC SUBSTANCES 26
III. GET READY: YOUR EMERGENCY SUPPLIES 28
ACTIVITY: BUILD A HOME DISASTER SUPPLY KIT 28 USING EMERGENCY FOOD 28 STORING EMERGENCY FOOD 28 OTHER ITEMS TO STORE 29 EMERGENCY WATER 30 MAKING WATER SAFE TO DRINK 30 OTHER WATER SOURCES IN THE HOME 31 FIRST AID INFORMATION 32 FIRST AID SUPPLIES 32 FIRE EXTINGUISHERS 34 LIGHTING 34 COOKING DEVICES 34 SANITATION SUPPLIES FOR YOUR KIT 35 OTHER SUPPLIES FOR YOUR KIT 36 PET SUPPLIES FOR YOUR KIT 36 SUPPLY STORAGE SUGGESTIONS 37 ACTIVITY: BUILD A CAR/WORK MINI-SURVIVAL KIT 38
IV. GET READY: NEIGHBORHOOD PREPAREDNESS 39
ACTIVITY: HELP ORGANIZE YOUR NEIGHBORHOOD 41 GETTING STARTED 41 NEIGHBORHOOD PLANNING 41 MAKING LISTS AND MAPS 42 SAMPLE NEIGHBORHOOD LIST 43 SAMPLE UTILITY MAP 44 SAMPLE FAMILY INFORMATION CHECKLIST 45 SAMPLE SKILLS AND EQUIPMENT CHECKLIST 46 ACTIVITY: MAKE A NEIGHBORHOOD INVENTORY LIST 47 LIGHTING 47 EMERGENCY WATER SUPPLY 47 COMMUNICATION 47 WORK TOOLS 48 COOKING 48 SHELTER 48 ACTIVITY: ESTABLISH A NEIGHBORHOOD SUPPLY BOX 49 SAMPLE DAMAGE ASSESSMENT SURVEY FORM 50 ACTIVITY: MAKE AN E-MAIL LIST OR PHONE TREE 51

8
ACTIVITY: MAKE A NEIGHBORHOOD DISASTER PLAN 52 SAMPLE DAY OF DISASTER CHECKLIST 54
V. GET INVOLVED: NEIGHBORHOOD PREPAREDNESS LEADERSHIP ROLES 57
BLOCK CAPTAIN/DISASTER COORDINATOR 57 NEIGHBORHOOD COMMUNICATOR 58 SEARCH AND RESCUE COORDINATOR 59 FIRST AID/MEDICAL COORDINATOR 60 FIRE SUPPRESSION/UTILITY COORDINATOR 61
VI. GET READY: TEST YOUR BLOCK’S READINESS 63
DRILLS AND EXERCISES 63 SETTING GOALS 63 ACTIVITY: CONDUCT A TABLETOP EXERCISE 64 ACTIVITY: CONDUCT A FULL DISASTER DRILL 64
VII. GET BACK ON YOUR FEET: RECOVERING AFTER A DISASTER 66
RECOVERY 66 ENERGY NEEDS 66 SHELTERS 66 SECURITY 67 CLEANING UP 67 PSYCHOLOGICAL CONSIDERATIONS 67 TIPS FOR PSYCHOLOGICAL RECOVERY 68 HELPING YOUR CHILD AFTER A DISASTER 68 WHAT NEIGHBORHOODS CAN DO 69
APPENDIX A: MORE TIPS FOR PEOPLE WITH DISABILITIES 70
COMMON NEEDS OF ALL PEOPLE WITH DISABILITIES 71 SPECIFIC NEEDS OF PEOPLE WHO ARE DEAF OR HARD OF HEARING 74 SPECIFIC NEEDS OF PEOPLE WITH MULTIPLE CHEMICAL SENSITIVITIES 75 SPECIFIC NEEDS OF PEOPLE WHO ARE VISUALLY IMPAIRED 76 SPECIFIC NEEDS OF PEOPLE WHO ARE MOBILITY IMPAIRED 78
APPENDIX B: GENERATORS AND EMERGENCY PREPAREDNESS 80
GENERAL CONSIDERATIONS 80 READ AND UNDERSTAND THE OWNER’S MANUAL 80

9
PREVENT CARBON MONOXIDE HAZARDS 81 PREVENT ELECTRIC SHOCK HAZARDS 81 PREVENT FIRE AND BURN HAZARDS 81 MAINTAIN AS INSTRUCTED 82 STORE FUEL SAFELY 82 ENERGIZE ELECTRICAL EQUIPMENT PROPERLY 83 GENERATOR ALTERNATIVES 83
APPENDIX C: GUIDANCE FOR SEARCH AND RESCUE TEAMS 84
BUILDING MARKING 84 EQUIPMENT FOR SEARCH AND RESCUE TEAMS 84
APPENDIX D: AMATEUR RADIO AND DISASTER RESPONSE 86
COMMUNITY RESOURCES 87
Family and neighborhood cooperation is key to better disaster preparedness. Whenever you see the symbol at left, it’s an indicator of a group activity to help you and your neighbors get ready.
This symbol appears throughout this book to indicate an especially helpful tip or caution.
10
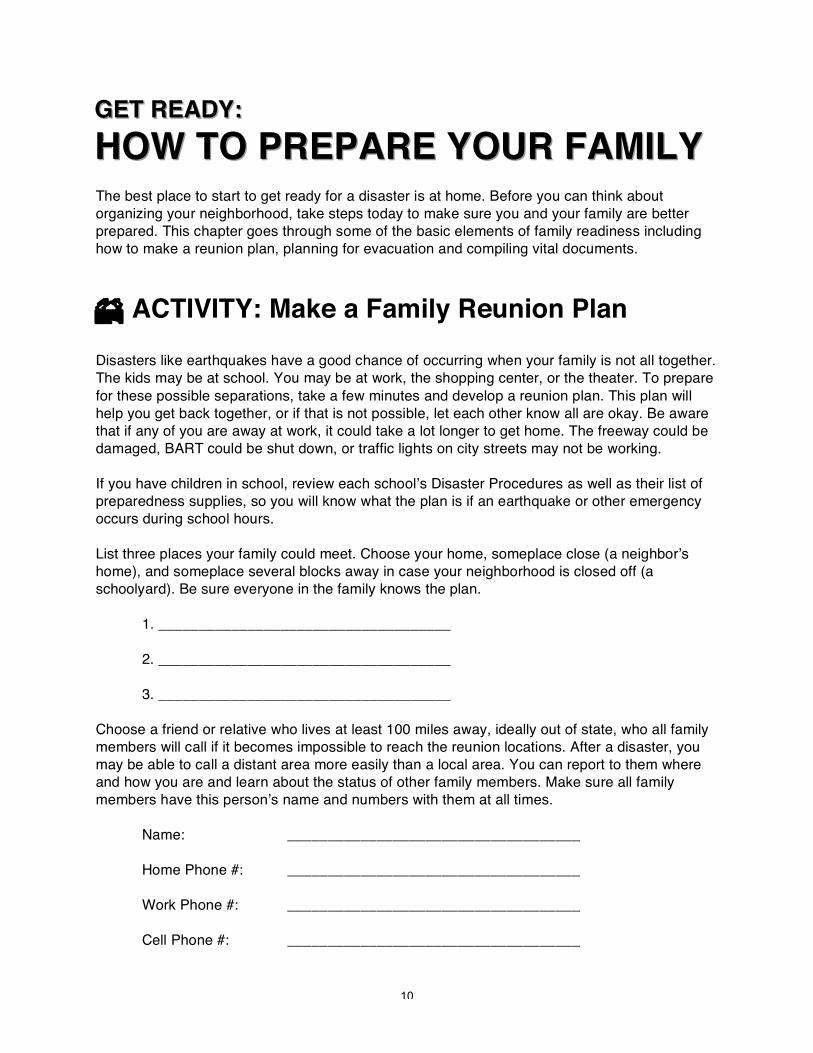
GGGEEETTT RRREEEAAADDDYYY::: HHHOOOWWW TTTOOO PPPRRREEEPPPAAARRREEE YYYOOOUUURRR FFFAAAMMMIIILLLYYY The best place to start to get ready for a disaster is at home. Before you can think about organizing your neighborhood, take steps today to make sure you and your family are better prepared. This chapter goes through some of the basic elements of family readiness including how to make a reunion plan, planning for evacuation and compiling vital documents.
ACTIVITY: Make a Family Reunion Plan Disasters like earthquakes have a good chance of occurring when your family is not all together. The kids may be at school. You may be at work, the shopping center, or the theater. To prepare for these possible separations, take a few minutes and develop a reunion plan. This plan will help you get back together, or if that is not possible, let each other know all are okay. Be aware that if any of you are away at work, it could take a lot longer to get home. The freeway could be damaged, BART could be shut down, or traffic lights on city streets may not be working. If you have children in school, review each school’s Disaster Procedures as well as their list of preparedness supplies, so you will know what the plan is if an earthquake or other emergency occurs during school hours. List three places your family could meet. Choose your home, someplace close (a neighbor’s home), and someplace several blocks away in case your neighborhood is closed off (a schoolyard). Be sure everyone in the family knows the plan.
1. ____________________________________ 2. ____________________________________ 3. ____________________________________ Choose a friend or relative who lives at least 100 miles away, ideally out of state, who all family members will call if it becomes impossible to reach the reunion locations. After a disaster, you may be able to call a distant area more easily than a local area. You can report to them where and how you are and learn about the status of other family members. Make sure all family members have this person’s name and numbers with them at all times.
Name: ____________________________________
Home Phone #: ____________________________________ Work Phone #: ____________________________________ Cell Phone #: ____________________________________

11
Involve the Whole Family in Disaster Planning Walk through your home with your family:
Identify hazards using the guide on non-structural hazards on pages 25-27. Make a plan to correct hazards by filling out the Hazard Worksheet on pages 18-19.
Discuss where and how you can protect yourselves in each room. Practice by physically placing yourselves in these locations.
Hold periodic earthquake drills to practice what you have learned. Every once in a
while, call out “Earthquake!” Discuss what each family member did and should have done.
Make Plans for the Elderly and Disabled Falling objects pose some of the greatest hazards in an earthquake. Disabled and older people may not be as agile or as mobile as they once were, making it difficult or impossible to “duck, cover and hold.”
Securely anchor any medical equipment, heavy appliances, bookcases, or other items that may fall. If you use life support equipment, such as oxygen, have someone fasten the large tank securely to a wall or support to prevent it from falling over in an earthquake.
Place heavy objects on low shelves.
Move beds away from windows.
Tell your neighbors now if you cannot move well or quickly in an emergency and
make arrangements for someone to check on you.
People who are blind should keep an extra cane at home and at work. After an earthquake, your service animal may be injured or too frightened to help.
Know where the safest places are in each room of your home, such as under a
sturdy desk or table, in a doorway, or in the corner of an inside wall. If you use a wheelchair, walker, crutches, canes or other type of walking aid, keep it near you at all times. If possible, have extra walking aids available in different locations throughout your home.
Place a security light in each room. These lights plug into any electrical wall outlet and
light up automatically if there is a loss of electricity. They will continue to operate for four to six hours and can be turned on and off manually.

12
Have a whistle to signal for help.
If you use battery-operated equipment, store extra batteries and replace them annually. If you use a hearing aid, keep an extra supply of batteries with your emergency supplies.
If your life support equipment requires electricity, buy an emergency generator.
Have a smoke detector and fire alarm system installed. If you have difficulty hearing, install a system that has flashing strobe lights to get your attention.
If you wear glasses, keep an extra pair with your emergency supplies.
If you require medication on a regular basis, keep at least one week’s supply in your emergency supply kit.
Figure out how you can get out of each room if the doorway is blocked. See Appendix A, More Tips for Persons With Disabilities for additional suggestions and guidance.

13
ACTIVITY: Make a Family Evacuation Plan In the event of major devastation or threat to your home, you need to be prepared to evacuate quickly and efficiently. By planning and practicing what to do, you help yourself and your family react correctly and instinctively at the first sign of danger.
Evacuation Priority List If you are told that you need to evacuate immediately, you have little time to think about what to do. To help you be prepared to respond, take a few minutes now to complete this list. Photographs are often the most cherished possessions. However, you can make copies of your favorites and store them or give them to an out-of-area friend or relative for safe keeping.
List the most important items to be taken with you (only those that can be hand carried).
List items to be removed by car or truck if one is available.
List the things to do if time permits; for example, locking the doors and windows, turning off the utilities, etc.

14
TIP Be prepared to evacuate your home: 1. Always have a full tank of gas in case you need to evacuate by vehicle. 2. If you must evacuate, post a message indicating where you have gone. This will help family and emergency workers find you. 3. Take vital documents, emergency supplies and equipment and extra medication with you. 4. In case of an earthquake, confine pets in the basement, garage, or bathroom and make sure that they have plenty of water, as pets (other than service animals) are not allowed in designated Red Cross shelters. 5. If you are leaving because your house is too damaged to live in, turn off all utilities (electricity, gas and water) to prevent them from suffering further damage during aftershocks.

15
ACTIVITY: Compile Your Family’s Vital Documents After a major disaster, you may need financial assistance and will want to document any property loss for insurance and income tax purposes. Having ready access to the documents necessary for completing application forms, as well as those that could be difficult to replace, will eliminate delay and frustration.
Take the time NOW to record your vital family information. Make two copies. Keep one in a safe place in your home—fire-resistant if possible (i.e., watertight plastic bags in the freezer). Keep another copy off the premises in a safety deposit box or at a relative’s or friend’s home outside the area.
Store deeds, wills, tax records for the past three years, birth certificates and other vital
documents. Duplicates should be kept in a safe place in another location. Alternatively, these documents should be in an accessible place and listed on the MOST important list to take in case of evacuation.
Videotape or take photographs of all valuables for documentation for insurance claims.
If you have a computer, store this information electronically in multiple locations.
1. Name and social security number of all family members: Name: ____________________________ SSN: ____________________________ Name: ____________________________ SSN: ____________________________ Name: ____________________________ SSN: ____________________________ 2. School information: Child’s name: _______________________ Child’s school: _______________________ School Address: ___________________ Phone: _______________________
School policy is to hold/release child (circle one). Child’s name: _______________________ Child’s school: _______________________ School Address: ___________________ Phone: _______________________
School policy is to hold/release child (circle one).
TIP Be sure to update schoo l in formation as your chi ldren change schoo ls.

16
3. Adult family member’s contact information: Adult #1 name: _________________ Employer: ______________________ Work Address: ______________________ Work Phone: ___________________ Mobile Phone: _______________________ Email: ________________________ Adult #2 name: _________________ Employer: ______________________ Work Address: ______________________ Work Phone: ___________________ Mobile Phone: _______________________ Email: ________________________ Adult #3 name: _________________ Employer: ______________________ Work Address: ______________________ Work Phone: ___________________ Mobile Phone: _______________________ Email: ________________________ 4. Legal and medical contacts: Doctor #1: _______________ For Family Member(s): ______________ Address: _________________ Phone: _________________ Doctor #2: _______________ For Family Member(s): ______________ Address: _________________ Phone: _________________ Attorney: ____________________________________ Address: _________________ Phone: _________________ 5. Health insurance information: Insurer #1: __________________ Policy number: _____________ For Family Member(s): _____________ Insurer #2: __________________ Policy number: _____________ For Family Member(s): _____________ 6.Pertinent medical information: Allergies: Name: Type: Name: Type: Regular medications: Name: Type: Name: Type:

17
7. Bank Accounts and Insurance Policies:
Account Type Account Holder Institution Account /Policy
Number Checking Account Mary E. Davis First Berkeley Bank 00021334-77 Savings Account Phillip Davis First Berkeley Bank 00031665-81 Homeowner’s Insurance Policy
Mary E. Davis and Phillip Davis
Berkeley Assurance 11877221A
8. Car, boat, RV (etc.) license and vehicle identification number (VIN): Vehicle #1 Make/Model/Year: ________________ License: ________________________ VIN: ___________________________ Vehicle #2 Make/Model/Year: ________________ License: ________________________ VIN: ___________________________

18
GGGEEETTT RRREEEAAADDDYYY::: PPPRRREEEPPPAAARRREEE YYYOOOUUURRR HHHOOOMMMEEE An earthquake of magnitude 7.5 or greater will be stronger than most people have ever experienced. Anything not properly secured will move (i.e. houses off foundations, pictures off walls, belongings off shelves and out of cupboards). Utility lines will break and phones will not work. The areas that will be most affected are those in hazard areas, liquefaction zones, inundation and landslide areas. Imagine what would happen if your home had wheels and was speeding down a twisting, bumpy road. A major earthquake will have a similar effect. Take 30 minutes to walk through your home. Identify potential hazards by using this worksheet. Set dates to correct problems. Consider including your children in your hazard hunt. Sometimes their young eyes spot hazards that adults miss!
ACTIVITY: Earthquake Hazard Hunt
Check your water heater. Securely fasten it to the wall with a heater strap. Strap heater. DATE TO DO____________________
Check gas appliances and the water heater to make sure they are connected to fuel sources with flexible lines. Install flexible connectors on all gas appliances and the water heater. DATE TO DO_________________
Identify top-heavy, freestanding furniture that could topple in an earthquake, such as bookcases and china cabinets.
Secure to wall. DATE TO DO__________________
Identify heavy or breakable objects on high shelves or in cabinets.
Securely fasten or move. DATE TO DO______________________
Identify electronic equipment and appliances that might slide off their shelves (TVs, stereos, computers, microwaves, toasters, blenders, etc.). Secure with industrial strength Velcro or provide a restraining edge on the cabinet or shelf. DATE TO DO _____________________
Identify appliances that could move enough to rupture gas or electrical connections. Secure, move or fasten down. DATE TO DO _____________________

19
Identify hanging plants, especially those in heavy baskets, and hanging lights that
are near windows. Secure, move or fasten down. DATE TO DO________________________
Identify mirrors, heavily framed pictures, etc., that are over beds, couches and chairs. Relocate or securely mount them. DATE TO DO___________________
Identify latches on kitchen and bathroom cabinets that will not hold the door closed
during heavy shaking. Install more secure latches or hooks. DATE TO DO__________________
Inspect the foundation of your house. If your house is not securely bolted and shear
walled, contact a resource person. Secure foundation. DATE TO DO_________________
Check your chimney and roof for loose tiles and bricks. If there is work to do,
contact a resource person. Secure chimney and roof. DATE TO DO_____________________
Identify poisons, toxics, or solvents in breakable containers that are located in high or
dangerous locations. Dispose of and/or rearrange. DATE TO DO_____________________

20
Utilities and Earthquakes A major earthquake will break some gas pipes, electric lines and water lines. All of these can cause major problems. One of the most devastating results of an earthquake is a gas-fed fire. Broken water pipes can cause water damage to your home. Sparks from electric lines can also cause fires.
Locate your gas, water and electric utilities. Show your neighbors where your meters are and make arrangements with them to turn off your utilities if you are not home.
Know how to turn the utilities off.
Teach all family members how to shut off all utilities and when to do so.
Gas
Attach to or bury near the gas meter an adjustable wrench or special gas turn-off bar. (You will not want to take time to find one after an earthquake).
After a major disaster, shut off the gas immediately ONLY if you smell gas, or if you
notice the dials on the gas meter turning quickly.
The main shut-off valve is located next to the meter on the inlet pipe. Use a wrench to turn the valve so that the slot in the valve is across the pipe (see diagram).
TIP To differentiate between the utilities, color code them with colored duct tape: RED for the gas shut-off valve. Put red duct tape above and below the valve and also on the gas shut-off tool. YELLOW for the electric panel where the circuit breakers/fuses are located. Put two or more short pieces of yellow duct tape on the panel. BLUE for the water shut off. If the valve is confusing then tape above and below is recommended. If an older house does not have a water shut-off, then a tool to shut off the water at the street should be considered.

21
Do not use matches, lighters, or open flame appliances, or operate electrical switches, until you are sure no gas leaks exist. Sparks from electrical switches can ignite gas, causing an explosion.
Once the gas is turned off, do not turn it back on. Only PG&E should turn the gas back
on! They will check for broken pipes or leaks before turning it back on to be sure it is safe to do so.
Electricity
After a major earthquake, shut off the electricity at the panel or box (turn the circuit breakers or the main switch off or pull out the cartridge fuses).
Use battery operated flashlights until all danger of an explosion and/or fire is over.
Water
If water pipes break, there is a possibility of water damage to the house.
If there is a major earthquake, turn the water off at the main meter or at the water main leading into the house.
Locate the water main leading into the house and attach a label to it for quick
identification.

22
ACTIVITY: Retrofit Your Home Next to loss of life, the loss of your home would be the greatest personal catastrophe to occur in an earthquake. It is difficult to make suggestions that will apply to every situation. Earthquake strengthening can be expensive. However, the cost of retrofitting is minimal compared to the cost of repairing or replacing your house. One estimate is that the cost of picking up a house and setting it back on its foundation is 13 times greater than the cost of preventive retrofitting! The most important things you can do to mitigate the effects of an earthquake are:
Maintain your home and insure its structural integrity by having regular inspections for pests and decay;
Improve the building’s resistance to earthquake damage by keeping the retrofitting up to
seismic standards.
STEP 1: Check Your Home’s Foundation
Be sure that you have a good, strong foundation.
Check to see that the mudsill is not rotted.
The house should be securely fastened to the foundation with expansion bolts. If your home was built before 1950, it probably does not have bolts securing the wood structure to the concrete foundation. There should be a bolt at each end of a section of mudsill and one every four feet in between.
STEP 2: Secure Your Home to its Foundation Follow these tips to secure your home to the foundation. You may want to hire a professional contractor to ensure the work is completed properly and safely:
TIP The Ci ty o f Berkeley has tax rebate programs to help homeowners of fset the cost of structural improvements to withstand ear thquakes. For more in format ion, cal l the Bu i ld ing and Safety Div ision at (510) 981-7440.

23
Use 1/2” diameter bolts located on six-foot centers for a typical one-story house.
Drill holes through the existing sill into the concrete foundation for 8-1/2” long expansion
bolts, using carbide drill bits.
Use a right angle drill for tight access places where the crawl space is limited.
Blow all the dust out of the drilled holes using a rubber tube. Wear goggles and a dust mask or respirator for protection from dust and debris.
Insert expansion bolts with the washer and nut attached. Leave the nut at the top of the
bolt when tapping the bolt into place to protect the threads.
After tapping the bolts in place, tighten them by turning the nut. Do not over-tighten or the bolt will be damaged.
STEP 3: Reinforce Cripple Walls
The space between the foundation and the framing is called the cripple wall. Even if a foundation is bolted it is possible for the house to collapse in this area if a connection is not made between the mudsill, studs and plate. Install shear walls to brace the connection between mudsill, studs and plate.
5/8” plywood panels are nailed with 8d common nails every 4” around the horizontal members and every 6” down the studs.
The shear wall panels should be installed around the perimeter of the house. They are
most needed at the corners, eight feet in each direction from each corner in a one-story house, 16 feet in each direction in a two-story house.
Reinforce the attic surrounding the chimney with 3/4” plywood nailed to ceiling joists. Put
down plywood in every place that the chimney might fall.
Do not brace the chimney to the roof. Rods connecting the chimney to the roof cause the chimney to fall through the ceiling as a unit which is far more damaging than if the chimney merely cracks and falls in pieces.
Be sure to have the chimney checked, and repaired, if needed, before using it after an
earthquake.
TIP Many hardware stores have “Earthquake” sections, provide sel f-help assistance and of fer contractor re ferra ls. The Ci ty of Berke ley ’s Bui ld ing and Safety Div ision and the Berkeley Public Library also have resources on retro fi tt ing.

24
You may need to do additional structural work to protect your house, such as adding
blocking between the joists, using additional holddowns on corners of the building, etc. Please consult with a structural engineer for specifics on your home.

25
ACTIVITY: Make Non-Structural Preparations There are many hazards inside the house that could cause serious injury as well as cause havoc to the interior. It is estimated that one-third of the total damage cost in an earthquake is due to nonstructural damage to furniture, equipment, supplies, etc. Do a walk through of your home to identify hazards and solutions. Set aside a few weekends to correct nonstructural hazards and protect your belongings.
STEP 1: Fix Tall or Top-Heavy Furniture in Place
Attach furniture to the wall using “L” brackets, corner brackets or anodized aluminum molding.
Attach a wooden or metal guardrail on open shelves to keep items from sliding or falling
off.
Fishing line can be used as a less visible means of securing an item.
Place heavy and/or large objects on lower shelves.
STEP 2: Secure Pictures, Mirrors, and Hanging Objects
When a major earthquake strikes, you may be severely injured by falling and flying objects. Consider removing heavily framed pictures and mirrors from above beds, couches and chairs. Determine whether the full swing of your hanging plants and lamps will strike a window and, if they will, consider moving them.
Secure hanging objects by closing the opening in the hook.
Secure pictures and/or mirrors by placing angle screws on the sides, top and bottom.
Then screw these into the studs.
Attach industrial strength Velcro to the perimeter of frames to hold pictures to the wall (NOTE: if the plaster on your walls is very old, it may crack and fall after a quake).
Consider replacing picture glass with plastic that won’t break as easily as glass or leave
dangerous shards on the floor.
26
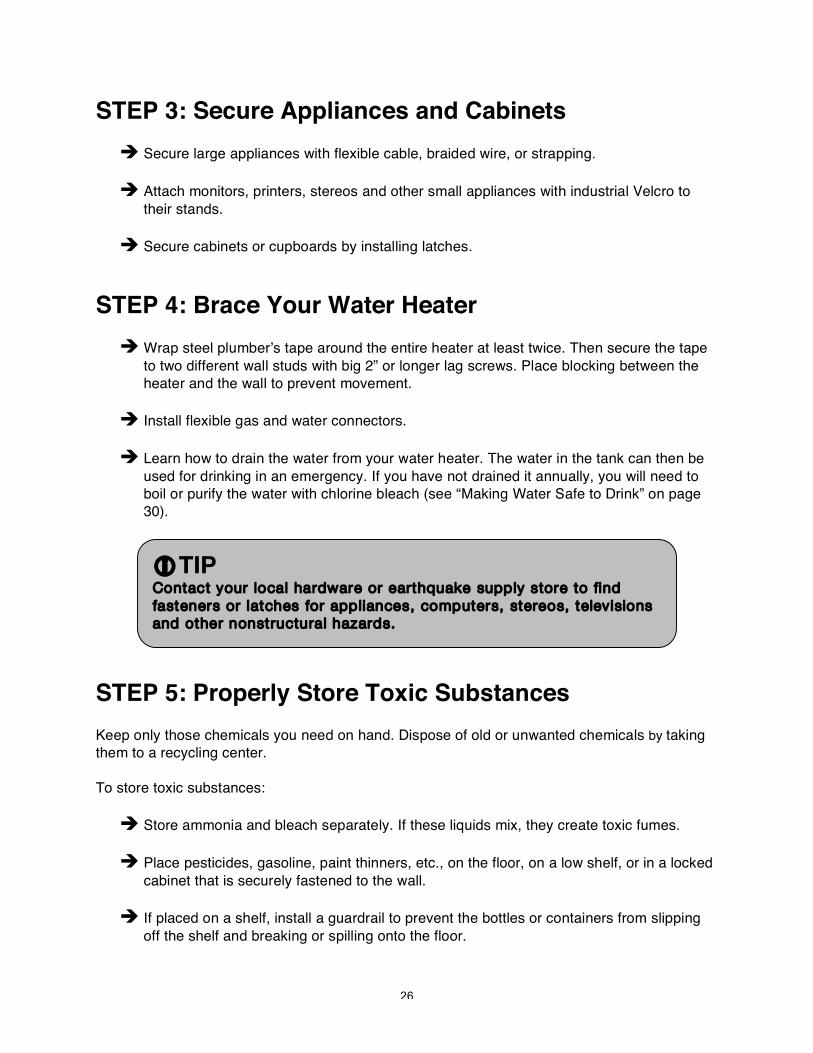
STEP 3: Secure Appliances and Cabinets
Secure large appliances with flexible cable, braided wire, or strapping.
Attach monitors, printers, stereos and other small appliances with industrial Velcro to their stands.
Secure cabinets or cupboards by installing latches.
STEP 4: Brace Your Water Heater
Wrap steel plumber’s tape around the entire heater at least twice. Then secure the tape to two different wall studs with big 2” or longer lag screws. Place blocking between the heater and the wall to prevent movement.
Install flexible gas and water connectors.
Learn how to drain the water from your water heater. The water in the tank can then be
used for drinking in an emergency. If you have not drained it annually, you will need to boil or purify the water with chlorine bleach (see “Making Water Safe to Drink” on page 30).
STEP 5: Properly Store Toxic Substances Keep only those chemicals you need on hand. Dispose of old or unwanted chemicals by taking them to a recycling center. To store toxic substances:
Store ammonia and bleach separately. If these liquids mix, they create toxic fumes.
Place pesticides, gasoline, paint thinners, etc., on the floor, on a low shelf, or in a locked cabinet that is securely fastened to the wall.
If placed on a shelf, install a guardrail to prevent the bottles or containers from slipping
off the shelf and breaking or spilling onto the floor.
TIP Contact your loca l hardware or earthquake supp ly store to f ind fasteners or latches for app liances, computers, stereos, telev isions and other nonstructura l hazards.

27
Close lids tightly on all containers.
Store gasoline in vapor-proof containers.

28
GGGEEETTT RRREEEAAADDDYYY::: YYYOOOUUURRR EEEMMMEEERRRGGGEEENNNCCCYYY SSSUUUPPPPPPLLLIIIEEESSS It can take 72 hours or longer for basic services to be restored after an earthquake. Experts recommend families have enough food, water, medical and safety provisions on hand to support themselves for five to seven days.
ACTIVITY: Build a Home Disaster Supply Kit A disaster can dramatically disrupt the food supply at any time, so plan to maintain at least a five to seven day supply of food beyond your normal requirements. Choose foods that:
your family will enjoy, especially the kids;
are familiar and comforting, especially in stressful times;
require little or no cooking or refrigeration in case utilities are disrupted;
come in cans or packages with portions small enough for one meal so the food will not be wasted;
need little or no water for preparation in case water service is disrupted;
will not increase thirst;
meet the needs of family members who are on special diets.
Using Emergency Food Use perishable food in your refrigerator or freezer before using food in your emergency kit. Be sure any food that has been stored for long periods of time is safe. Discard cans that bulge at the end or are leaking.
Storing Emergency Food
The ideal location is a cool, dry, dark place. The best temperature is 40 to 60 degrees Fahrenheit.

29
Keep food away from petroleum products. Some food products absorb their odors.
Protect food from rodents and insects. Items stored in boxes or in paper cartons will keep longer if they are heavily wrapped in plastic or aluminum foil or stored in metal containers.
Keep your earthquake food supply in one place so that it is easily accessible. Check it
twice a year and rotate items. A good way to remember to check your food supply is to do it when you turn your clocks forward and back for Daylight Savings Time.
Thanksgiving is a good time to give food items away and replace them.
Other Items to Store
Paper plates and cups
Plastic eating utensils
A manual can and bottle opener
TIP When shopping for your emergency k it , choose small cans because there wil l not be any refr igeration to preserve perishable food. Here is a sample shopping l ist for one person for f ive days:
5 cans of tuna, chicken or turkey
5 cans of soup that are ready to eat (no water required)
2 six-packs of juice (vegetable or fruit juice)
5 small cans of fruit or vegetables (mandarin oranges, corn, green beans)
2 small boxes of dry milk
2 tins of crackers (save a tin box and put a mixture of crackers in it)
2 jars of dry roasted low salt peanuts
1 jar of jam or jelly
a treat of some kind: tin of cookies, hard candy

30
Emergency Water Water is one of the most important survival necessities after an earthquake or other major disaster. A person can survive weeks without food, but only a few days without water. How Much is Enough? Be sure to have one gallon each per person per day for 5-7 days. If you have three people in your family, you will need to store a minimum of 15 gallons of water. Pets need one ounce per animal pound per day and more if they eat dry food (see page 36, “Pet Supplies for Your Kit”). How to Store Water: Water should be stored in sturdy plastic bottles, preferably opaque ones. If you buy bottled water, it will last at least a year. You may also fill soda bottles and store them in your freezer (leave enough room in the bottles for the water to expand). Water that you bottle yourself should be changed every six months and must be purified before you use it. Chlorine bleach bottles will work if well rinsed. Plastic juice and milk containers are less desirable as they tend to crack and leak more readily.
Making Water Safe to Drink
Purchase an eyedropper to add bleach to water. Keep it in your first aid kit and use it for this purpose only.
To purify water, strain out any sediment or particles from the water by pouring it through
several layers of cheesecloth or coffee filters. Purify by boiling for 5 minutes or by adding chlorine bleach (5.25% sodium hypochlorite) in the following amounts:
Amount of Water Amount of Chlorine Bleach if Water is Cloudy
Amount of Chlorine Bleach
if Water is Clear 1 quart 4 drops 2 drops
1 gallon 16 drops 8 drops
5 gallons 1 teaspoon 1/2 teaspoon
TIP Avoid placing water containers where toxic substances, such as gasoline and pesticides, are present. These vapors can penetrate the plastic.

31
Other Water Sources in the Home
Melted ice cubes.
Water drained from the hot water heater may be used provided the hot water heater
remains upright (water will drain easier if a faucet in the home is turned on).
Water dipped from the flush tank of the toilet. Purify this water before using it. Use the bowl water for pets. Do not use chemical “blue” water.
Canned fruit, vegetable juice and the liquids from other canned goods.
Water from swimming pools or hot tubs. Use this water only after other sources of pure
water are exhausted.
TIP Using purification tablets is another safe way to make water drinkable. However, tablets are generally not recommended as emergency supplies because of their short shelf life.
TIP Do not use water from hot water boilers, home heating systems, radiators, or waterbeds.

32
First Aid Information
Take a Disaster First Aid course
Buy a first aid book; an excellent choice is Standard First Aid and Personal Safety from the American Red Cross.
Review Section B at the front of the telephone white pages, First Aid and Survival
Guide.
First Aid Supplies
Buy a first aid kit from the American Red Cross or other source.
Add one week’s supply of your family’s prescription medications.
Place an old pair of glasses in the first aid kit in case your glasses break.
Add useful nonprescription items such as aspirin, antacids, diarrhea medicine, or laxatives.
Do not skimp on first aid supplies; get as large a kit as you can afford. You may
collaborate with your neighbors to collect medical appliances, such as crutches, splints, etc.

33
TIP Suggested supplies to be kept in a 72-hour home first aid kit:
Medications taken on a regular basis, a list of prescriptions, a list of doctors, and an extra pair of glasses.
Gloves (latex and garden types) Roller bandage (4 rolls) to use as a wrap over dressings and to
secure splints Duct tape Gauze pads 4” x 4” (10-20 pads) used to cover lacerations and
abrasions Sanitary napkins (box of 12) used to control excessive bleeding
and pad splints Cloth or plastic adhesive tape - one each of 1” and 2” used to
secure dressings and bandages. Change once a year if unused. Band-Aids (one box) standard size plus extra large Box of large safety pins Chemical ice packs (two packs) used to reduce swelling of
strains and sprains Sterile normal saline solution (one quart) used to flush wounds
and cool burns Antiseptic solution (one bottle) used to cleanse abrasions; do not
use on deep wounds or punctures Triangular or “sling” bandage (two bandages) used to secure
broken arms, shoulder dislocation, or as a wrap for splints; can be purchased or made from any cloth
Bandage strips – make from washed, bleached sheets Scissors, tweezers and sterile needles (one each) for splinters Ace bandage (one bandage) used for wrapping sprains Aluminized Mylar space blanket (at least one blanket for each
family member) used to protect against cold, heat and exposure to weather
Penlight, mini or large flashlight Battery-powered lantern Eyedropper to add chlorine bleach to drinking water supplies Thermometer Roll of plastic sheeting (garden groundcover – 12’ x 30’ roll) Name tags, pens, pencils, paper and clipboards Paper bags used to control hyperventilation Trash bags used to clean-up triage area Hat (such as baseball cap) Whistle (such as lifeguard whistle) used to signal and get
attention of others

34
Fire Extinguishers
Keep fire extinguishers where they are very accessible.
An ABC type is effective for all three classes of fires: A—fires involving ordinary combustibles such as wood, paper, or cloth B—fires from oil, grease and gasoline C—fires in electrical equipment and appliances
Extinguishers should be checked periodically to be sure they are fully charged and ready
for use.
Never use water to put out an electrical (Class C) or an oil, grease, or gas (Class B) fire.
Lighting
Keep flashlights in several places throughout your home, including next to your bed. Flashlights are safe to use immediately after an earthquake.
Store extra batteries and bulbs (batteries stay fresh longer if stored in the refrigerator).
Lightsticks are short-term safety lights. They need no source of ignition and are safe
for children.
Camping lanterns provide an excellent source of light. Do not use them until you are sure there are no gas leaks.
Cooking Devices
Camp stoves, barbecues and hibachis are useful.
TIP It is better to have several smaller extinguishers well distributed throughout the house (kitchen, garage, etc.) than one large one that is hard to get to quickly.
TIP Never burn charcoal indoors. Cooking in an inadequately ventilated site can cause carbon monoxide poisoning.

35
Sanitation Supplies for Your Kit Solid waste (feces) can be a serious health problem and must be dealt with carefully. Whenever possible, bury feces to dispose of it. Urine is sterile (germ free), so it is less of a health problem than an odor problem.
To build a latrine: Dig a rectangular pit 2 feet long, 6 inches wide and as deep as possible (minimum 2 feet).
Provide toilet paper, a scoop and powdered household chlorine bleach or pow-
dered agricultural lime (available in garden supply stores) in a covered container. After each use of the latrine, sprinkle a small amount of the powder over the feces, then sprinkle a small amount of dirt over the powder. Wash hands.
Portable camp toilets, sturdy buckets, or small trash cans with tight-fitting lids can
be used as emergency toilets.
Store a supply of plastic bag liners, twist ties, toilet paper and disinfectant nearby.
To use: Line a bucket or other container having a tight-fitting cover with two heavy-duty plastic garbage bags. Put absorbent material (kitty litter, shredded newspaper) in the inner bag to absorb waste products. Cover the container when not in use. To use, uncover it, fold the bags down over the sides and defecate directly into the inner bag. Sprinkle powdered household bleach or agricultural lime directly onto the feces. Use toilet paper sparingly. Put all used toilet paper into the same bag. Replace the cover, taking care not to tear the plastic bags. Wash hands. To change bags: Close each of the two bags in the bucket with twist ties one at a time, inner bag first. Expel the air before closing the bags to avoid tearing them. Put the bags into a closed container (like a garbage can) that has been lined with one or two heavy-duty plastic bags and marked as “human waste.” Then put two fresh bags in the emergency toilet, one inside the other. Until the waste can be disposed of properly, keep it well away from human activity. Mark it clearly and protect it from breaking or spilling. Never urinate into the bag. Urine weakens plastic. Urinate before using the emergency toilet. Urinate into a bucket that can be tightly covered. Empty the bucket where it won’t offend anyone.

36
Other Supplies for Your Kit
Shelter: waterproof tarp, tent, sleeping bags, blankets
Clean-up tools: axe, shovel, broom, heavy gloves, crow bar
Personal care items: wipes, bar soap, tissues, safety pins, etc.
Pet Supplies for Your Kit Prepare emergency supplies for all your pets, just as you would for yourself. Items to include are:
Water: 1 ounce per animal pound per day, i.e. 32 ounces of water for a 32 pound dog. If your pet eats only dry food, provide extra water.
Food: Enough for at least five days
An extra leash
Pet carrier
Poop bags and scooper: especially important if you are camping in your backyard
Be aware that pets (other than service animals) are not allowed in Red Cross emergency shelters. Make arrangements with neighbors or a friend to leave your pets with them in case your house is severely damaged. If you plan to camp out in your backyard if your house is damaged, have your dogs or cats already accustomed to sleeping in an airline carry-on kennel. The carriers can then be moved into the yard, providing your pets with a familiar refuge in a time of uncertainty and confusion. Keep pets carefully secured after an earthquake and only walk them on leashes. Many animals panic and run during or after an earthquake; more importantly, broken glass and other debris can lead to badly cut feet and other injuries. Cordura nylon booties are available at most pet stores. Cats have a tendency to hide and hole up for long periods of time after an emergency. Be patient and keep putting out food and calling to them. They will come back. Make sure your pets wear ID tags. A microchip, implanted in advance by your veterinarian, is another way to identify your pet if you get separated.

37
Supply Storage Suggestions Locate your supplies with care. They will do you little good if you cannot get to them or they are destroyed or damaged during the disaster. One method of storage is to place supplies in a large, covered trash container with wheels, which can be outside in a cool, sheltered location. Put the contents inside moisture-proof bags before placing them in the can. The diagram below offers some suggestions on how to store your supplies in a trash container.

38
ACTIVITY: Build a Car/Work Mini-Survival Kit Most people spend many hours in their cars each week. A major disaster could force you to rely on your car for short-term shelter and survival. Many of us stand a 33% chance of being at work when a disaster strikes. Because the freeways could be damaged and traffic lights not working on city streets, it could be many hours before you reach home. A mini-survival kit can make those hours safer and more comfortable. The following items are essential materials and supplies to have in an emergency kit. You can order ready-made kits, but you can put one together yourself at considerable savings. You may wish to get together with your neighbors to buy supplies in quantity. Items you will want to include in a mini-survival kit if you make it yourself:
Snack type food
Water
Small first aid kit with essential medications
Mylar “space” blanket
Flashlight and extra batteries or lightstick
Battery operated AM radio
Comfortable shoes
Ziploc bags and toilet tissue
Pair of heavy work gloves
Pocket knife
Camera and film to record damage

39
GGGEEETTT RRREEEAAADDDYYY::: NNNEEEIIIGGGHHHBBBOOORRRHHHOOOOOODDD PPPRRREEEPPPAAARRREEEDDDNNNEEESSSSSS Neighborhoods need to be organized and ready to function as a group, independent of any outside help, for at least five days following a major disaster. That is how long it may be before police, fire and ambulance services are able to respond. It may be longer before phone, gas, water, sewer and/or electrical services are restored. Organizing now as a neighborhood will help everyone react more quickly and effectively in a disaster. Experience shows that neighbors naturally come together to help each other after a disaster, but neighborhoods that are already organized are better prepared to act right away. With preparation, you and your neighbors can save lives, reduce the severity of injuries, and lessen property damage. Neighbors should begin organizing by determining who will provide the following services:
Neighborhood Coordinator/Block Captain
First Aid
Fire Suppression
Light Search and Rescue
Damage Assessment
Communication Coordination
Child/Senior Care
Food Preparation

40
TIP The City of Berkeley offers Community Emergency Response Training (CERT) classes to provide information needed for self-reliance in the event of a disaster. These classes are free to anyone who lives or works in Berkeley. Brief summaries of classes offered are below. For more information, contact the Office of Emergency Services at (510) 981-5605 or check out the website at www.cityofberkeley.info/fire/oes.html for details. Basic Personal Preparedness This two-hour class covers in detail the five critical steps to take to prepare for an earthquake: have a plan, a long distance phone contact, emergency supplies, prepare your home, and know your neighbors. Fire Suppression Taught by the Berkeley Fire Department, this three-hour class covers fire prevention, fire suppression and general fire safety. Participants receive hands-on experience using a fire extinguisher. Disaster First Aid This three-hour class is specially designed for injuries encountered after an emergency: cuts, burns, fractures and crush injuries (does not include CPR). Light Search and Rescue The emphasis in this four-hour class is on damage assessment and light search and rescue. It is a basic course in which safety is emphasized. Participants receive hands-on experience in cribbing. Disaster Mental Health This three-hour class focuses on how to cope with the normal feelings and reactions after a disaster.

41
ACTIVITY: Help Organize Your Neighborhood Neighborhoods organize for many reasons. People may want to request city services, such as a traffic light, or a response to an increase in crime in their area, or they may want to get together for a summer potluck. The primary concern of Berkeley’s Office of Emergency Services (OES) is to have neighborhoods organized to function as a group, independent of any outside help, for at least five days following a major disaster and to continue to support one another during the extended recovery period. We want to give you as much information about neighborhood organization as possible. We hope that you will use it, make maps, develop telephone trees and build a friendly neighborhood. To make the most of participating in a neighborhood disaster plan, first follow the suggestions in this handbook to prepare yourself, your family and your home.
Getting Started The first thing you need to do is determine how big your group should be. Geography is one of the factors that will help you determine the best size. If you live in an apartment house with eight units or more, you may organize your group there. If you live in a hilly area on a very long block, you may want to organize only half the block. And if you are in a residential neighborhood of single-family homes one block may do very nicely. If you start with too large a group, it is difficult to do some of the things needed for disaster planning. If you have a large group you may wish to divide into clusters. If you start small you can always band together to form a larger group. Consider involving faith-based and local community organizations in your disaster plans.
Neighborhood Planning Everything you do to organize ahead of time will make your response on the day of disaster go more smoothly. Here are some important tasks to complete in advance:
Meet with your neighbors and discuss possible scenarios. Share this information with others. Do a tabletop exercise in which you discuss what you would do given several scenarios, i.e. a fire, a landslide, several severely damaged homes. See page 64 for a sample tabletop exercise.
Make a neighborhood list. Who lives where? Who has special needs? Where are the tools? Who has special skills, i.e. construction, medical, ham radio operator, etc. A sample checklist is on page 46.
Map your neighborhood.
Identify hazards and areas where those hazards will occur. Identify utility shut-off locations. If you can, determine possible search areas depending on who is home, what time of day the event occurs, etc. Determine evacuation routes and try to have everyone take them.

42
Learn how to assess damage.
Be sure that several of your neighbors understand the importance of the damage assessment survey and know how to fill it out. A sample survey form is on page 50.
Making Lists and Maps We suggest that at your first meeting, you create a list of the names, addresses and work and home telephone numbers of the residents of your neighborhood group. Copy the list and distribute it to everyone or to a limited number of people on the block. Some people may not want to be listed. That’s fine. Non-participants may eventually come around. Ask people to list anything they believe the neighborhood should be aware of. Examples of information that could be important for disaster planning would be a disability, whether there are pets that will need care, whether or not the person lives alone, if the person is home all day, or if family members are non-English speakers and what languages they speak. This will help the group set priorities on whom to help when the disaster happens and how to help them. To help you plan we have included a sample neighborhood that is very diverse. Look it over and determine whom you would set as a priority in a search and rescue scenario. Whom might you check with to see if they need help turning off the gas?
TIP “Not everyone has the time or the interest to come to organization meetings. There’s dinner, the kids’ homework, or folks are just plain tired. Then there are people who are just afraid to face a disaster and what it means to plan. But don’t worry, you get 100% participation the day of the earthquake!” —Capt. Duane Gabriel, Coalinga Fire Department
TIP People move in and out, family circumstances and contact information change often. Plan to update your neighborhood list once a year.

43
Sample Neighborhood List 100 Sally Smith (h) xxx-xxxx (w) xxx-xxxx [email protected] Billy Jean (2-15-93) Sammy (1-20-97) 102 Winifred Williams (h) xxx-xxxx [email protected] Retired, at home 104 Eugene/Nancy Brown (h) xxx-xxxx (w) xxx-xxxx (c) xxx-xxxx [email protected] Dog-Hissy 106 Xavier/Rosa Jimenez (h) xxx-xxxx (w) xxx-xxxx [email protected] Estrella (12-18-01) Maria (2-1-03) Spanish speaking 108 A John Sturgeon, Alberta, Donald, Stuart Cox (h) xxx-xxxx Students 110 Maxine St. James [email protected] (h) xxx-xxxx Disabled, wheelchair 112 Brendan/Rosie Roarke (h) xxx-xxxx (w) xxx-xxxx Rosie is deaf 114 Stacy Cooper (h) xxx-xxxx (w) xxx-xxxx
101 Herman/Donna Bingham (h) xxx-xxxx (w) xxx-xxxx (w) xxx-xxxx Sanford (7-4-90) Lavay (3-20-02) Daycare provider in home 103 Janey Pierce [email protected] (h) xxx-xxxx James Day (9-10-90) Darelle Day (11-26-93) Marelle Day (11-26-03) Dorita Day (3-4-96) Janey retired, at home 105 Gene/Betty Jones (h) xxx-xxxx (w) xxx-xxxx (c) 415 xxx-xxxx 111 Jennifer Moore, Denise Step (h) xxx-xxxx (c) xxx-xxxx Denise retired, at home 2 indoor cats Patches, Twitch 113 Andres/Mobie Permalis (h) xxx-xxxx (w) xxx-xxxx Mobie at home days 115 William/D’nay Wiley (h) xxx-xxxx (w) xxx-xxxx Josh (4-2-99) Dog-Rover 117 Doug/Doe Read (h) xxx-xxxx (w) xxx-xxxx (c) xxx-xxxx 119 A-I Manager Jeff Cheng [email protected] (h) xxx-xxxx (c) xxx-xxxx High turnover (students)

44
Sample Neighborhood Map Make a map of the neighborhood and, in as much detail as possible, mark where the gas meters, electrical boxes, main water turn-offs and water spigots are. On a nice Sunday afternoon walk around the neighborhood and see where everyone’s utility turn-offs are. As many people as possible should take the walk because you will never know who will be home and who will end up being responsible for taking care of utility shutoff.

45
Sample Family Information Checklist
Today’s Date _____________ Please complete one per household and give a copy to the Neighborhood Coordinator. Address: Home Phone: Adult #1: Work Phone: Cell Phone: Email: Employer: Work Hours: Adult #2: Work Phone: Cell Phone: Email: Employer: Work Hours: Adult #3: Work Phone: Cell Phone: Email: Employer: Work Hours:
Children’s names and schools: Name: DOB: School: Name: DOB: School: Name: DOB: School: School(s) policy for release of children after disaster: We have made arrangements for (name and phone #) to pick up our children if we are unable to do so: Pets: Name: Type: Name: Type: Medical Information Please list important medical information for your family. Include their names, medications they may be on, equipment they may use and special needs they may have: In case of an emergency, please contact: Name: Relationship: Address: Phone: Name: Relationship: Address: Phone:

46
Sample Skills and Equipment Checklist Please complete one per household and give a copy to the Neighborhood Coordinator. Address: Phone: Write the names of those in your household who have any of following skills and are willing to help provide the following services in an emergency.
First Aid
Search and Rescue
Fire Suppression
Amateur Radio/CB Operator
Stress Management
Damage Assessment
Construction Skills
Food Preparation
Child Care
Other skills to share: Indicate what equipment or resources you would have available to share with your neighbors. ___ First aid supplies ___ Emergency water supply ___ Water pump
(for fires: swimming pool, well) ___ Spare blankets, bedding, tents ___ Charcoal grill, camp stove ___ 4-wheel drive vehicle ___ Boat
___ Ham radio, CB ___ Work tools ___ Cellular phone ___ Generator ___ Chain saw ___ Lantern, 12 volt ___ Spotlight ___ Other: ___________

47
ACTIVITY: Make a Neighborhood Inventory List Find out what supplies and resources you have in your group and write the information down and distribute it. Here are some of the items to include in your neighborhood survey:
Lighting
Kerosene camp lights Spotlight Generator
Emergency Water Supply
Hot tub Swimming pool Reserve tank Well (for washing) Water pump (to utilize swimming pool water for fires)
Communication
Cellular phone Ham radio CB Battery operated walkie-talkie Battery operated AM/FM radio
TIP Every household shou ld have their own basic emergency supplies. Don’t substi tute ne ighborhood preparations for your fami ly’s efforts to get ready as a family .

48
Work Tools
Good general tool kit (multiple types and sizes of screw drivers, saws, hammers, crescent wrench, etc.)
Ladders Shovels Crowbar Jacks Wheelbarrow Buckets
Cooking
Charcoal grill Propane stove
Shelter
Tents Tarps

49
ACTIVITY: Establish a Neighborhood Supply Box Many neighborhoods in Berkeley like to establish a community supply box in the neighborhood where donated or purchased items may be stored. The location of the supply box should be easily accessible but not so obvious as to attract vandalism or theft. It should be located where it won’t be destroyed or damaged during the disaster. Each group should decide for itself which of the following items to include in the box.
Flashlights, lightsticks and batteries Generator Heavy gloves Markers Screw drivers Hammers Chain saw Crowbars Buckets Shovels Rakes Brooms Sledgehammers Crescent wrench Saws Fire extinguisher Aspirin Bandages Safety glasses Dust masks
TIP In recent years, the City of Berkeley has helped neighborhoods that meet qualifying training and organization criteria obtain emergency supplies at no charge. For more information, contact the Berkeley Fire Department’s Office of Emergency Services at (510) 981-5605.

50
Sample Damage Assessment Survey Form This information should be communicated to the local fire station by hand following a disaster. Neighborhood Area:__________________________________________________ Number of People Names and Ages: Dead: Missing: Homeless: Number of Structures Destroyed Major Damage Minor Damage Houses: Apartments: Businesses: Utilities not working Major Problems___________________ Water Gas Electricity Telephone Sewage Report made: __________________________________________________________________________ Date Time Agency Person Reporting
Make several copies of this form.
DEFINITIONS Destroyed: A home or apartment is beyond repair. Major damage: A home or apartment is not habitable until extensive repairs are made. Examples include damaged foundations, twisted or cracked walls or ceilings, and structural, wall, or roof damage. Minor damage: A home or apartment where the family can live in now or could live in once it is cleaned and minor repairs are made. Examples include lost shingles or other roof covering, minor buckling of floors or walls, broken windows, and flooded basements.

51
ACTIVITY: Make an E-Mail List or Phone Tree The Internet is a valuable tool to help neighbors share information and stay connected. Be sure to get neighbors’ email addresses when you collect other contact information. Develop an email list and stay in touch. Remember that some people cannot or do not use email. Develop a system that keeps everyone informed. A Phone Tree is another helpful tool to pass on information like burglaries, earthquake drills and neighborhood meetings. Neighbor #1 calls neighbor #2, neighbor #2 calls neighbor #3, and so on. The Phone Tree keeps any one person from getting burned out.
TIP Ideas to Keep Your Organization Going Neighbors get organized when there is a need. After the situation is resolved or memories fade, it is often difficult to keep the interest of the group. Here are some suggestions on “how to keep it going”:
Have at least two meetings a year. Set these at times when most people can come. Often holidays are not a good time to plan a meeting because many people may be out of town.
Invite a special speaker to a meeting. Call EBMUD, PG&E,
your Berkeley Council Member, a fire person or police person. Invite a seismologist from UC Berkeley to a meeting.
Have a block yard sale. Use the money to buy a generator or
other tools or supplies for the block.
Get a dumpster from Berkeley’s Public Works Department and have a clean up day. Share labor on those hard to do jobs. Take a day to secure bookshelves, appliances, computers, stereos, etc.
Have several people go shopping together and buy
“earthquake” supplies. Divide the cost and have everyone come by and pick up lightsticks, batteries, candles, leather-palmed gloves, first aid items, etc.

52
ACTIVITY: Make a Neighborhood Disaster Plan There are several key tasks that commonly need to be performed in communities as part of an organized response to a major earthquake. These are:
Basic neighborhood organization
Fire suppression
Utility control
First aid and search and rescue
To carry out these tasks it is necessary to have a neighborhood plan. At a minimum, your plan should indicate:
Who has what skills
Where resources are located
Where you will meet
Some basic ground rules for how you will proceed Remember, the definition of a disaster is that you will not have the resources to meet all needs. Things will be chaotic. But the more you do now the better it will be later. Keep your neighborhood plan where you can access it easily in an emergency.

53
TIP Tips for successful disaster planning:
Keep your plan simple. Copy it onto bright colored paper and distribute it to every household or designated neighbors.
Designate an area to meet after the disaster. This may be an
open space, home or garage that is seismically safe.
Your disaster plan should include an evacuation plan. If your area is vulnerable to landslides, uncontrolled fires, or hazardous material spills, which way would you leave your neighborhood? Make maps and distribute them to every house. Depending on what happens the day of the event, determine if you need to evacuate and plan how you are going to do it.
In a disaster, bring a copy of the plan with you to the
meeting point. Do a roll call to account for members of your neighborhood group. If there are families that are not accounted for, assign people (your search and rescue team) to check on them. Any problems should be reported at the central meeting place to the people assigned to work on them.
Priorities marked on your neighborhood maps (disabled
people, the elderly, or homes with several small children) should be checked first.
Advise group members that a white cloth affixed to the
outside of the house advises neighbors that everything is alright. This assists in assessing the situation and frees the search and rescue team to move to the next home.
Keep track of who has been sent to do what and record
actions taken. For example, “No one is home at 130 Main St.; utilities shut off at 11:30 p.m.” By recording the status and actions taken it will prevent duplication of efforts and allow you to inform those who are away of the status of their home (when the phones are working).

54
Sample Day of Disaster Checklist 1. CHECK YOUR HOME (if it is safe to do so) Is anyone seriously injured?
If yes – go to neighborhood headquarters. Any fire?
Small, campfire size? If yes, extinguish it.
Large fire (door size or larger)? If yes – Implement your evacuation plan. A large hot fire demands evacuation. If it’s realistic, fight the fire after evacuation.
Smell gas?
If yes – Don’t use matches, candles, electrical switches or plugs, flashlights, or other spark producers; go outside to turn off the gas at the meter only if there’s a gas smell; turn off the electricity from outside if possible.
If no – do not turn off the gas at meter. This will keep your pilot lights on and your
service intact. Water (plumbing) leaks?
If yes – shut off the water at the main (Caution! Sewer damage in the hills above you threatens your water purity. You can fill your tubs, etc., then shut down the system).
Everything is OK and you will be staying at home?
Hang a white flag out in front. Go to #2. You will be leaving your home?
Hang a green flag out in front. This means you’ve gone. Turn off the electricity at the meter before you leave (when power is restored, forgotten electrical appliances that have fallen or were left on start the majority of fires in evacuated homes).
Post a note on your front door telling rescue workers how to contact you. The Search
and Rescue team will take the note to your disaster headquarters.
Go to #2 – check in at the designated assembly point and leave another contact note on the community bulletin board.
If there is time and you can safely retrieve some of these items, bring with you:

55
o Tools (chainsaw, crowbar, axe, fire extinguishers, etc.)
o Work clothing (heavy boots, work gloves, hardhat, kerchief, safety glasses,
dust masks, etc.)
o Extra first aid supplies and nonprescription medicines (bandages, crutches, aspirin, etc.)
2. GATHER AT THE DESIGNATED ASSEMBLY POINT
This will be your self-help center. Here you can find neighbors to help you with injuries, rescues, etc. Bring your neighborhood maps, your household information forms and any vital information on neighbors with special needs.
Help set up a community bulletin board at the assembly point.
3. HELP THE FOLLOWING NEIGHBORHOOD VOLUNTEERS ORGANIZE THEIR TASKS
Block Captain ______________________________________________________ Responsible for overall coordination of neighborhood plan, both before and after the disaster. Neighborhood Communicator ____________________________________ Responsible for establishing and maintaining communications within the neighborhood and with officials at the neighborhood fire station. Search and Rescue/Safety and Security Coordinators ___________________________________________________ Responsible for directing a systematic search of homes in the neighborhood and rescue of trapped and injured persons. Also, oversees utility shutdown, looter patrol, identifying hazards, traffic control and pet location. First Aid/Medical Coordinator _____________________________________________ Establishes a neighborhood first aid station and identifies those who require skilled medical care. Fire Suppression/Utility Coordinator ________________________________________ Helps neighbors extinguish small fires. Forms teams to check on utilities and assist with shutoffs. Sets up and maintains generator. Damage Assessment Coordinator _________________________________________

56
Preferably someone with knowledge of structures to pair up with the Search and Rescue team and direct a systematic survey of the neighborhood; reports preliminary habitability to homeowners and damage estimates to officials. Shelter/Child-Senior Care Coordinator _________________________________________ Identifies households able to shelter the homeless and ensures each child and senior has an assigned caretaker.

57
GGGEEETTT IIINNNVVVOOOLLLVVVEEEDDD::: NNNEEEIIIGGGHHHBBBOOORRRHHHOOOOOODDD PPPRRREEEPPPAAARRREEEDDDNNNEEESSSSSS LLLEEEAAADDDEEERRRSSSHHHIIIPPP RRROOOLLLEEESSS Block Captain/Disaster Coordinator This is usually the person who organizes your group, calls your meetings and keeps track of your lists, etc. At the time of the disaster it will be someone who is home and knows what to do. Consider a back-up neighborhood headquarters in case the designated one is not habitable. Before the Disaster
Make a list of the names, addresses and phone numbers of everyone on the block. Make a map indicating utility shutoffs for gas, electricity, water and water spigots.
Make a list of equipment, who has what and where it is stored.
When someone new comes to the neighborhood, orient him or her to the evacuation
plan and update the list.
Organize at least two meetings a year to build neighborhood ties and increase skills. After the Disaster
Go to the designated assembly point and begin assessment. Organize response by forming teams and keeping track of assignments.
Coordinate with Neighborhood Communicator to be sure the Damage Assessment
Survey is sent to the fire station.
Maintain a status report and help with neighborhood communication.
TIP Block Captain/Disaster Coordinator is a big job. Try to rotate it every two years. The more people who are in a position to take the lead, the better prepared your group will be.

58
Neighborhood Communicator The Neighborhood Communicator is the principal team member responsible for establishing and maintaining communications within the neighborhood and with officials at the fire station.
Before the Disaster A status board helps keep track of what has been checked and what needs to be done. Plan how and where you are going to set up the status board. The status board may be made beforehand; list the address, status, problem and action. Or you may merely designate an area where you are going to post information, such as a garage door and use what is on hand at the time.
Sample Status Board
ADDRESS STATUS PROBLEM ACTION COMMENTS 110 Main Okay Needs help with utilities Gene Brown/ Bill Wiley
2:10 Okay
102 Main No white flag Uncertain SR went to see 2:10 104 Main Okay 106 Main Rosa alone Needs help with utilities Gene Brown/
Bill Wiley went 2:20 Okay
108 Main Okay 111 Main No one home Utilities Team sent/done House okay Locate one or two phones (include a cell phone) that may be used in an emergency. Phones may not be working immediately after the event, but by designating two phones to use for the block, you will save circuits and help clear the line. Designate one phone for outgoing calls and one phone for incoming calls. Locate the nearest AT&T pay phone for your neighborhood. AT&T pay phones will return to service first. This will help neighbors call their emergency contacts. Identify amateur radio operators, and CB operators.
After the Disaster
Establish a bulletin board. Post information about who needs help, who was sent to do what and what happened. Note the time and date, and keep information updated.
Monitor commercial radio stations and post conditions for neighbors.
Set up an emergency phone system.
As time goes on, keep track of people who leave the area, where they are going, when they will return, and how to contact them.
Amateur radio operators will be available at the fire stations and can pass neighborhood assessments to the City’s Emergency Operations Center. Plan to send your written assessment by hand to the local fire station. Identify people who can serve as “runners” to deliver these messages.

59
Search and Rescue Coordinator The Search and Rescue Coordinator is responsible for directing a systematic search of homes in the neighborhood and rescue of trapped and injured persons. He/she also oversees utility shutdown, looter patrol, identifying hazards, traffic control and pet location. Before the Disaster
Take the Community Emergency Response Training (CERT) Light Search and Rescue class.
Share information from Light Search and Rescue class with your group at a meeting.
Walk possible evacuation routes and make maps.
Locate resources: ladders, tools, etc.
Walk around the neighborhood and familiarize yourself with homes, possible problems and hazards.
Know your neighbors and those who may need help. After the Disaster
Assess the situation.
Identify problems and develop teams to solve problems.
If someone is trapped and you can safely rescue him or her, do so.
Identify unsafe buildings, evacuate people and tag the outside of the building as unsafe to occupy.
Continue to reassess the situation as aftershocks cause things to change or worsen.
Help set up alternate shelters, latrines or sanitation systems and help with community needs.
Clear the road for emergency vehicles, remove fallen trees and debris.
Plan neighborhood security measures.

60
First Aid/Medical Coordinator The First Aid/Medical Coordinator is responsible for establishing a neighborhood first aid station and helping those who need skilled medical care to get it. Before the Disaster
Take the Community Emergency Response Training (CERT) Disaster First Aid class.
Have a meeting and present some of the things you learned in the CERT class.
Identify and maintain a list of residents who have medical skills and/or medical needs.
Collect various medical appliances such as crutches, slings, etc., in a community kit.
Urge neighbors to have a good first aid kit.
After the Disaster
Go to the designated assembly point and form teams to provide first aid to those who need assistance.
If injured people are not safe at home decide where they can be moved and move them, if possible.
Tag everyone you assist and keep a record of what was wrong, what you did, any change in condition, and any medication administered. If the person is sent to a First Aid station or Casualty Collection point, be sure a record accompanies them.
Provide encouragement and support to those traumatized by the event.
Establish safe, sanitary conditions. Determine best placement for latrines or port-a-potties, and maintain them in safe condition.

61
Fire Suppression/Utility Coordinator Helps neighbors extinguish small fires. Forms teams to check on utilities and assist with shutoffs. Sets up and maintains generator. Before the Disaster
Take the Community Emergency Response Training (CERT) Fire Suppression class.
Share information from the Fire Suppression class with neighbors.
Maintain a list of the utility shutoff locations and water spigots for all residences in the neighborhood.
Organize a walk around the neighborhood so people learn where shutoff locations and water spigots are.
Encourage everyone to have smoke detectors and fire extinguishers (sell batteries to encourage people to change batteries in smoke detectors).
Encourage everyone to have emergency lighting such as flashlights or lightsticks, kerosene lanterns and candles.
Consider having the neighborhood buy a generator, learn how to use and maintain it, and test it twice a year.
After the Disaster
Form teams and check the status of utilities. Do they need to be turned off? If so, do so.
Identify any downed power lines and cordon them off. If possible, have people monitor the area.
Set up a generator and a schedule for generator maintenance. In Case of Fire
Small fires (a small fire is low in intensity, low in heat, and is no larger than a door): Evacuate people.
Put out small fires. Large fires (If safe…): Move vehicles away from blaze, taking care not to block access for emergency vehicles.

62
Turn off utilities.
Wet down surrounding area.
Close windows of surrounding homes.
Take down curtains.
Board up windows.
Other tasks as warranted by events.

63
GGGEEETTT RRREEEAAADDDYYY::: TTTEEESSSTTT YYYOOOUUURRR BBBLLLOOOCCCKKK’’’SSS RRREEEAAADDDIIINNNEEESSSSSS Drills and Exercises Many groups are interested in holding a drill so people can practice the disaster response. Below are two good ways to do this. One is a tabletop exercise. This is a very easy drill to do at one of your meetings. It takes advanced planning but the exercise itself requires only a pencil and paper. The other is a full disaster drill in which people role-play and actually go through the motions of responding to an incident. In both exercises it is important to determine ahead of time exactly what your goals are and discuss the experience afterwards so it is a learning experience.
Setting Goals
Set specific and narrow goals for your exercise. Here are three examples of disaster drill goals: 1. The goal of our exercise is to be sure everyone knows what to do in their home before coming to the neighborhood meeting place. Specific objectives for this goal include:
a. Checking on gas leaks by going to the stove, water heater and furnace to smell for gas. b. Checking under the sink in the kitchen, bathrooms and basement for water leaks. c. Knowing where and how to turn off gas, electricity and water mains.
2. The goal of our exercise is to demonstrate that we know our neighborhood plan. Specific objectives for this goal include:
a. People know that a white flag means everyone is all right, the household is not in need of immediate help, and people are staying home. A green flag means that everything is okay but people have left.
b. People know where to meet after securing their own home. c. People know who and where “priority” people are who may need help. d. People can identify where the utility turn-offs are for every household in the group.
3. The goal of our exercise is to demonstrate that we know where neighborhood resources are located. Specific objectives for this goal include:
a. Determine where ladders, spotlight, garden hoses, and wheelbarrows are.
64
b. Determine if keys are necessary to get at tools in a garage and where the keys kept. c. Determine who the specially skilled people are to take care of:
a medical emergency? someone stuck in a back room? removing a tree that has fallen across the road?
ACTIVITY: Conduct a Tabletop Exercise: In a tabletop exercise the Coordinator and several other volunteers write up a scenario. Everyone at the meeting gets a copy, pencil and paper. After reading the scenario everyone lists specifically what he or she would do in response to the situation presented. After a given amount of time, say 10 minutes, call on people to read their list. People can check what they forgot to do and benefit from other people’s lists. Be careful that this doesn’t become a test. It is a learning experience and a reminder. When: What day and time did the event occur? For your first drill, pick a time everyone is home (2 am Sunday morning). How long and how strong: Is this a small earthquake or the big one? Conditions: What is the weather like? Did the power go off? Pick some incidents to describe, such as a power line falling across the street, or a tree falling across the road.
ACTIVITY: Conduct a Full Disaster Drill In a disaster drill the Coordinator and several other volunteers write up a scenario. These scenarios are a little more complex and include problems that people are to respond to. Different people get different scripts. Look at the neighborhood list. Pick several people who have listed special concerns to be “in trouble.” They will not put out a white flag. Neighbors gathering at the meeting place should recognize the need to check on these people and take care of any concerns. Sample Scenario #2: When the earthquake occurred (it does not have to be the time you are holding the drill) How long and how strong was the earthquake? Conditions (power, weather, etc.) Concerns of individuals

65
In a disaster drill at the appointed time people will “go into action.” You may signal this by using a telephone tree, blowing whistles, etc. People should literally walk around the neighborhood and do the things they would do after an event.
Learning From Drills Disaster drills and tabletop exercises can be great learning experiences. It is important that you discuss the exercise afterwards. Review the event to find out what people did and what they forgot. Be sure to do something fun afterward as these exercises can produce a lot of anxiety. You want to emphasize the learning and not the “drill.” Again, you may not have 100% participation, but that is alright. Those of you who participate will save the day when the day comes.

66
GGGEEETTT BBBAAACCCKKK OOONNN YYYOOOUUURRR FFFEEEEEETTT::: RRREEECCCOOOVVVEEERRRIIINNNGGG AAAFFFTTTEEERRR AAA DDDIIISSSAAASSSTTTEEERRR The recovery process following a major earthquake will require the concerted efforts of all members of the community. Individuals, families and neighborhoods will need to assist each other, government and voluntary agencies in restoring the community to normal. Your family will need to:
Take an inventory of your home. List and photograph all losses and damage.
Keep receipts for emergency repairs and purchases of repair supplies and equipment.
Compile tax records, insurance policies and photographs of damage for assistance
applications and insurance claims.
Recovery For many, the weeks and months of recovery after a disaster can be even more traumatic than the catastrophe itself. As you develop your personal and neighborhood plans, consider what it will be like for your neighborhood two weeks to two months after the disaster.
Energy Needs
Plan to cook together to save resources Consider building several solar cookers Establish sites for latrines or port-a-potties and learn how to maintain them Set up a neighborhood plan for waste collection. Refuse collection may be disrupted
since crews will be responsible for removing unusual amounts of debris citywide. Shelters People do not like staying in shelters. If your home were uninhabitable, could you live in your yard in a tent or a trailer? Do you have a tent? Is there someone in your neighborhood whose house may be in better shape with whom you could stay and be close to your home and its contents?

67
Security Following a major disaster, there are people who will take advantage of the situation. Uninhabited homes and unlighted areas invite looters and thieves. As soon as you determine that access to your street is not needed by emergency vehicles, park cars across the ends of the street and post people there to monitor people coming through your block. Merely having someone there to ask, “whom are you visiting?” may deter unwanted visits. The fact that the block is being watched works in much the same way as Neighborhood Watch deters crime. Neighbors watching out for neighbors works! Neighbors may sign up for watches until lighting is restored and an air of normalcy prevails.
Cleaning Up It is difficult to go into your own home and see cherished belongings broken and your comfort zones a terrible mess. Buddy up and help one another with cleaning up. Set a work time to clear the street, sidewalk and areas for common use.
Psychological Considerations Having just experienced the shock and pain of a disaster, you will be very busy during the following days or weeks. Caring for your immediate needs, perhaps finding a new place to stay, planning for clean up and repairs and filing claim forms may occupy the majority of your time. As the immediate shock wears off, you will start to rebuild and put your life back together. There are normal reactions we may all experience as a result of a disaster. Generally, these feelings don’t last long, but it is common to feel let down and resentful many months after the event. Some feelings or responses may not appear until weeks or even months after the disaster. Some common responses are:
irritability/anger fatigue loss of appetite inability to sleep nightmares sadness headaches or nausea hyperactivity lack of concentration increase in alcohol or drug consumption
Many victims of a disaster will have at least one of these responses. Acknowledging your feelings and stress is the first step to feeling better.

68
Tips for Psychological Recovery
Talk about your disaster experiences. Sharing your feelings, rather than holding them in, will help you feel better about what happened.
Take time off from cares, worries and home repairs. Take time for recreation,
relaxation or a favorite hobby. Getting away from home for a day or a few hours with close friends helps.
Pay attention to your health, maintain a good diet and get adequate sleep.
Relaxation exercises may help if you have difficulty sleeping.
Prepare for possible future emergencies to lessen feelings of helplessness and to bring peace of mind.
Rebuild personal relationships in addition to repairing other aspects of your life.
Couples should make time to be alone together, both to talk and to have fun.
If stress, anxiety, depression, or physical problems continue, utilize the post-disaster services provided by the local mental health center or your insurance provider.
Helping Your Child After a Disaster Children may be especially upset about the disaster. These reactions are normal and usually will not last long. Here are some common reactions you may see in your children:
excessive fear of darkness, separation, or being alone clinging to parents, fear of strangers worry increased immature behaviors not wanting to go to school changes in eating/sleeping behaviors increased aggressive behavior or shyness bed-wetting or thumbsucking persistent nightmares stomachaches, headaches, or other physical complaints
Here are some helpful things you can do to help your child recover:
Talk with your child about his/her feelings about the disaster. Share your feelings, and give your child information he/she can understand.
Reassure your child that you are safe and together. You may need to repeat this
reassurance often.

69
Hold and touch your child often.
Spend extra time with your child at bedtime.
Allow your child to mourn or grieve over the loss of a toy, blanket, home or pet.
Talk to your child’s teacher if your child is having problems at school, so you can work
together to help your child.
What Neighborhoods Can Do
Start cleanup and remove debris from streets and yards.
Determine the need for and sources of drinking water.
Organize sanitation disposal.
Help neighbors locate disaster assistance centers and obtain the relief they are entitled to.

70
AAAPPPPPPEEENNNDDDIIIXXX AAA::: MMMOOORRREEE TTTIIIPPPSSS FFFOOORRR PPPEEEOOOPPPLLLEEE WWWIIITTTHHH DDDIIISSSAAABBBIIILLLIIITTTIIIEEESSS Adapted from: “Needs of Persons with Disabilities and Guidelines for Assisting Them” By Matthew Wangeman and Jean Nandi
Experience of a Real Disaster In 1994 a major earthquake struck Northridge, CA. The disabled community had many problems in addition to those suffered by the non-disabled populace. Trash and glass were everywhere. It was hard to get around, especially for wheelchair users and the visually impaired. Many attendants were unavailable. In many cases people simply had to wait. Because people with disabilities are the most impoverished group in the United States, most lived in multi-unit buildings, which were the most damaged during and after this major earthquake. Elevators stopped functioning in these buildings. This fact, along with minimal transportation availability (most of it non-accessible), made it nearly impossible for most people with disabilities to get to shelters. Once they were in shelters, disabled people had access problems, especially to restrooms and showers. Guide dogs or service animals were not allowed in any emergency shelters. One of the most pressing needs after the earthquake was water. Recovery activities were hard for many because of the need to stand in line for up to seven hours to receive services. Many disabled people were unable to do this. Many services normally available to disabled people were generally unavailable or inadequate at Northridge. For example, people could not get extra attendant hours allowed for cleanup or in-home support help. Finding accessible replacement housing was very difficult. The Red Cross and other local emergency preparedness plans either didn’t include people with disabilities at all or were inadequate. Although this inadequacy has since been eased with the creation of CARD (Collaborating Agencies Responding to Disasters), disabled persons may not be able to expect the kind of help they really need if a disaster does strike. Disabled people need to prepare individually for a disaster as best they can. Members of the disabled community also need to consider development of a “registry of disabled persons” for those who wish to be so identified. People wishing to register with the Berkeley Police and Fire Department Voluntary Emergency Registry can do so on-line at www.cityofberkeley.info/police/disabledform.html. This will enable emergency personnel to look for and/or locate people in case of a major disaster. The need for a dedicated, centrally located (or distributed) source of oxygen in Berkeley is vital for many disabled persons; so is the need for emergency electrical power via generators or other resources at one or more central locations and/or on a mobile unit. Additionally, there is a need for a legal requirement that landlords retrofit their property to ensure seismic safety, or to allow renters to do retrofits with some portion of payback.

71
Common Needs of People with Disabilities This section contains information for persons with any type of disability and is also very useful for elderly persons who may need assistance from neighbors or family members. In addition, check below under other headings for further specific suggestions for people with Hearing Impairments, Multiple Chemical Sensitivities, Visual Impairments or Mobility Impairments. Before the Disaster In addition to the preparatory steps in this manual that apply to everyone, you should:
Get to know your neighbors and tell them now if you won’t be able to move well or quickly in an emergency and make arrangements for someone to check on you. Belonging to a neighborhood disaster preparedness group is of particular value for disabled persons. If there is no such group, start one! Be sure to inform neighbors of your special needs and have someone in the neighborhood ready to check on you after the disaster.
Consider getting a medical alert system that will allow you to call for help if you are
immobilized in an emergency.
Team up with a neighbor or other available person who can assist you with standing in lines and/or otherwise obtaining needed resources and services after a disaster.
Make a family plan and have a long distance phone number to contact. Make sure you
have at least three places to meet family/housemates after the disaster. Include your personal care assistants in your family planning. Remember that phones may not be available at all, especially ones with TDD. Post emergency phone numbers near telephones.
Locate AT&T public pay telephones in your area. Include quarters for pay phones in your
pack.
Every effort will be made to have a ham radio operator at every Berkeley fire station. Know where the nearest fire station is both at work and at home. Determine the locations of wheelchair accessible shelters.
Although all shelters should accept service animals with their disabled owners, be sure
to confirm their acceptability before a disaster occurs.
Be sure also to prepare for the requirements of a working service animal, if you use one. Dogs will need food, water, booties for the feet, vaccination records, etc. You can place a sandwich bag of dry dog food in your pack. Cordura nylon booties will protect a dog's feet from broken glass. Vaccination records may need to be shown to the manager of an accessible shelter.

72
Have a radio with batteries. Determine the frequency of emergency radio stations (740 AM, 810 AM, 1610 AM) to be able to tune in for information in the event of a disaster.
Prepare a mini-survival kit or “go pack” to keep in your home or vehicle with the essential
items you will need after a disaster. Be sure to include a 5-day supply of all medications. Include medical information, such as a list of the style and serial numbers of medical devices such as pacemakers, names and locations of doctors, diagnosis if relevant, special food requirements or allergies, etc., along with your emergency supply of medicine and other needs, such as an extra pair of glasses, money, first aid kit and a portable radio. Be sure to rotate your medicines. Have oxygen, catheters and other medical or special equipment on hand.
Store backup equipment, such as a manual wheelchair, at a neighbor’s home, school, or
workplace.
Have a flashlight between the mattress and box spring of your bed. Keep shoes, wheelchair, cane – whatever you need (including any mobility devices) to get out of bed and move around the house/apartment – located within reach of the bed.
Have a whistle attached to your flashlight, and one in your survival kit. This will help
attract attention to your location.
Keep the shut-off switch for oxygen equipment near your bed or chair, so you can get to it quickly if there is a fire.
Know where the safer places are in each room of your home, such as under a sturdy
desk or table, in a doorway, or in the corner of an inside wall. Make sure you do “drills” to familiarize yourself with the area.
Figure out how you can get out of each room if the doorway is blocked.
If you live in an apartment, ask the management to identify and mark accessible exits.
Make necessary modifications to your home or rental unit.
During and Immediately After the Disaster
If you are in bed when the shaking begins, STAY there!
Turn in to an emergency radio or TV station for emergency information. The first announcement to air is prerecorded. Depending on the severity of the disaster it may take a short time before information is available.
Once the shaking stops, get the flashlight, clean off the wheelchair seat, find shoes
(clean them out), and find a robe or clothes.

73
Take a deep breath and collect yourself. If forced to leave your home, grab your “go pack,” if you can do so safely. Be aware that carefully arranged furniture may have moved, making it difficult to maneuver.
Wait for the dial tone on your phone or use AT&T public pay phones (they get a restored
dial tone more quickly than residential phones).
If you are hurt and/or cannot get out of your home, use your whistle to attract attention to your location.
If you smell gas, shut off the gas if you are able to do so. If you cannot do this yourself,
ask the first person on the scene to do it.
TIP Guidelines for Assisting People with Disabilities Wherever possible, allow the person to guide you in assisting him/her.

74
Specific Needs of People who are Deaf or Hard of Hearing Before the Disaster
Have paper and pen available for communication after the disaster. Make sure to have contact information for translators and a pen in your “go pack.”
Have extra hearing aid and batteries in your pack.
Information should also be disseminated via computers. If Internet service and power are available after the emergency, computers will be a great resource for the deaf community. However, it is likely that some computers and networks will not be functioning or updated after a major disaster.
TIP Guidelines for assisting people who are deaf or hard of hearing:
The hearing impaired need to communicate face-to-face with you. Face the person directly and get as close you comfortably can.
Maintain eye contact when speaking to a deaf person. If you look
away, the individual will think that the conversation is over.
Do not position yourself directly in front of a light source, such as a window or lamp, as your face will be difficult to read if silhouetted in a bright light.
Keep your hands away from your face when talking. Eating,
smoking or adjusting your eyeglasses obscures your mouth and makes your speech difficult to understand.
Don’t hesitate to use paper and pencil.
Keep your language simple and draw pictures if necessary.
When the deaf person responds in writing, be aware that he/she may use unusual sentence structure and syntax.
If a deaf person is with an interpreter, speak directly to the deaf person, not to the interpreter.
75
Specific Needs of People with Multiple Chemical Sensitivities Before the Disaster
Work with your neighborhood’s Search and Rescue and First Aid teams, OES and other emergency personnel to make sure that people know what your needs and symptoms may be after a disaster. Medical triage teams must be educated to recognize MCS symptoms.
Make sure to keep enough supplies to take care of your specific sensitivity. Chemical
free food and water may be extremely hard to obtain after a disaster. Try to link up with other individuals with the same needs and pool certain supplies. This is something that changes with each individual and would be hard to stockpile at a central location.
During and Immediately After the Disaster
Be prepared to “shelter in place” in your own backyard. Have camping equipment ready.
Team up with a neighbor, family member or friend who can stand in line for access to services for them and you.

76
Specific Needs of People who are Visually Impaired Before the Disaster
Organize the household. Things need to be in a predictable place, inasmuch as memory is a big part of your life. Be aware, however, that carefully positioned furniture may move and make maneuvering difficult.
Know where the safer places are in each room of your home, such as under a sturdy
desk or table, in a doorway, or in the corner of an inside wall. Do “drills” to familiarize yourself with these areas.
In addition to a flashlight between your mattress and box spring, put an extra collapsible
cane by the bed. Attach a whistle to the cane to use to attract attention. Keep an extra cane at work as well.
People who are visually impaired are dependent upon radio for information in an emergency. Help publicize KGO (810 AM), KCBS (740 AM) and 1610 AM!
During and Immediate After the Disaster
Tune in to an emergency radio station for emergency messages.
Be aware that your seeing eye dog may be injured or too frightened to help you.

77
TIP Guidelines for Assisting People who are Visually Impaired
If a blind person seems to need assistance, identify yourself and offer help.
Speak directly to blind individuals and give clear directions as to
what they are to do or where they are to go. Don’t shout. Don’t avoid words like “look” and “see.” There are no reasonable substitutes.
When you are going to leave tell the blind person that you are
leaving.
A guide dog is responsible for its master’s safety. Do not pet or otherwise distract a service animal.
To guide a blind person:
Let him/her take your elbow and follow the motion of your body. Walk about one-half step head and identify steps, curbs or other
obstacles as you approach them. Pause briefly at steps or curbs. Go up or down stairs one step
ahead of the person being guided. In areas too narrow for walking two abreast, tell the person
about the situation and indicate that the blind person should get behind you by bending your arm backward so that your hand is partly behind your back. This position, when held, extends your elbow behind you and automatically puts the person being guided more directly behind you. If circumstances make such a position impractical, improvise by having the blind person hold on to your shoulder.
When a blind person is to enter a car, guide his/her hand to the
leading object – door handle or edge of door – and let the person you are guiding do the rest.
When helping a blind person to a chair, simply guide his/her
hand to the chair arm or back. Keep doors closed or wide open. A partially closed door is one
of the most dangerous obstacles a blind person can encounter.

78
Specific Needs of People who are Mobility Impaired Before the Disaster
If living in a unit with an elevator, make sure one or more neighbors knows how to safely evacuate you and your chair and teach them how to use emergency electrical equipment.
Secure furniture so that there will be a path available to you after the shaking has
stopped.
Make sure to have more than one wheelchair-accessible exit available, in case the primary exit is blocked.
Keep wheelchair, walker, or other mobility device by your bed at night.
Have extra wheels for flats from broken glass. If possible, have extra batteries or a
manual wheelchair available.
Store backup equipment, such as a manual wheelchair, at a neighbor's home, school, or workplace.
Keep the shut-off switch for oxygen equipment near your bed or chair, so you can get to
it quickly if there is a fire.
Try to arrange access to an emergency generator or other source of emergency power for your ventilator and your chair battery, if you use either. Learn how to use these emergency electrical power sources.
If you use a personal care assistant obtained from an agency, check to see if the agency
has special provisions for emergencies. Determine if the agency provides service at another location if evacuation is necessary. Work out an emergency plan with your own personal care assistants.
During and Immediately After the Disaster
If you are in a wheelchair, stay in the chair. Move to a safer place away from glass, tall bookcases, etc. Lock the wheels and cover your head with your arms to protect yourself from falling glass.
Be sure to check the chair seat for broken glass after the shaking has stopped.

79
TIP
Guidelines for Assisting People who are Mobility Impaired
Many wheelchair users do not depend on others for assistance in daily activities. Environmental modifications and adaptive equipment make it possible for even those with severe mobility impairment to help themselves in almost every way. Offer your services, but do not presume that they are needed.
If the person needs assistance, he/she will appreciate your offer
and will tell you exactly what actions will be helpful. Be sure to listen to the instructions carefully.
Remember that a mobility-impaired person may be able to
transfer himself or herself to a car or piece of furniture with little or no assistance. Ask if help is needed.
Remember, in any rescue or evacuation situation, if at all
possible do not abandon the wheelchair. The user’s mobility depends on the availability of the chair.
Keep your toes out from under the wheelchair!
If a conversation will take more than a few minutes, sit down to
speak at eye level. It is very uncomfortable to a seated person to look up for a long period of time.
It is important to remember that a person in a wheelchair may be
paralyzed in one or more parts of the body, resulting in lost pain perception in those areas. He or she could be unaware of a serious injury.

80
AAAPPPPPPEEENNNDDDIIIXXX BBB::: GGGEEENNNEEERRRAAATTTOOORRRSSS AAANNNDDD EEEMMMEEERRRGGGEEENNNCCCYYY PPPRRREEEPPPAAARRREEEDDDNNNEEESSSSSS Many residents and neighborhoods concerned about disaster preparedness consider the purchase of a gasoline powered electrical generator at some point in their readiness discussions. The following issues are raised to help these families and groups consider whether they are prepared to responsibly own and maintain one of these devices. As convenient and appealing as an individual, stand alone electrical generator seems, the decision to produce electricity through the combustion of gasoline is not a one time event; it is a long term commitment to maintenance safety and to neighborhood consideration.
General Considerations Electricity is dangerous. Decisions to use it for emergency preparedness must be made with care. Manufacturers provide general guidance with regard to the size of the generator (usually expressed in watts or kilowatts) that is appropriate, based on the demand posed by the appliances to be operated. Normal household appliances require 110 volts AC: some power tools require 220 volts AC. Some generators provide outputs at either or both of these common voltage levels. The power required by an appliance is found by multiplying the supply voltage by the current it draws. The power requirements of multiple appliances can be added together to determine the power demand. (Most generators designed for residential/consumer use provide AC current at 60 hertz, the U.S. standard.) In general, more powerful generators are also heavier, require more fuel, and may be less convenient to maintain. Gasoline powered devices create exhausts that are hazardous Do not run a generator in a confined space where carbon monoxide can build up and present life threatening risks.
Read and Understand the Owner’s Manual Generators are designed to give safe and dependable service if operated according to he instructions. Read and understand the owner’s manual before operating a generator. Accidents can be prevented by being familiar with the generator’s controls and by observing safe operating procedures.
Know how to stop the generator quickly in case of emergency.

81
Understand the use of all generator controls, output receptacles and connections.
Be sure that anyone who operates the generator receives proper instruction. Do not let children operate the generator without parental supervision.
Prevent Carbon Monoxide Hazards Exhaust contains poisonous carbon monoxide, a colorless and odorless gas. Breathing exhaust can cause loss of consciousness and may lead to death. If the generator is run in a confined area, the air could contain a dangerous amount of exhaust gas. To keep exhaust gas from building up, provide adequate ventilation.
Prevent Electric Shock Hazards The generator produces enough electric power to cause a serious shock or electrocution. Using a generator or electrical appliance in wet conditions, such as rain or snow, near a pool or sprinkler system, or when hands are wet, could result in electrocution. Keep the generator dry. If the generator is stored outdoors, unprotected from the weather, check all electrical components on the control panel before each use. Moisture or ice can cause a malfunction or short circuit in electrical components that could result in electrocution. Do not connect to a building’s electrical system unless a qualified electrician has installed an isolation switch. Prevent Fire and Burn Hazards The exhaust system gets hot enough to ignite some materials.
Keep the generator at least three feet away from buildings and other equipment during operation
Do not enclose the generator in any structure
Keep flammable materials away from the generator
The muffler becomes very hot during operation and remains hot for a while after the engine stops. Be careful not to touch the muffler while it is hot. Let the engine cool before storing the generator indoors. Gasoline is extremely flammable and explosive under certain conditions. Do not smoke or allow

82
flames or sparks when the generator is refueled or where gasoline is stored. Refuel in a well-ventilated area with the engine off. Fuel vapors are extremely flammable and may ignite after the engine has started. Make sure that any spilled fuel has been wiped up before starting the generator.
Maintain as Instructed Most manufacturers recommend regular operation of the generator to ensure that it will start and operate reliably under full load. Many users find that starting and running the generator monthly is essential to assure that the unit is ready to operate during an emergency. Just as regular operation is important, so is a regular “tune up” by a qualified mechanic to make sure that it will operate reliably for the hours, and perhaps days, that you will need it. Following the manufacturer’s recommendations for maintenance is essential to ensure reliable operation. Regular operation of the generator does create noise that may be of concern to neighbors. If the generator is maintained for community benefit, having its maintenance assigned to an individual in the neighborhood is an important step. Combining the generator’s routine operation with a regular meeting may be a way of keeping its noise from becoming a neighborhood nuisance and provide a chance for several people to become familiar with its use.
Store Fuel Safely Storing enough gasoline to run a generator for several hours, let alone days, requires planning. Gasoline is a very dangerous material to store in the home or neighborhood. Berkeley fire regulations permit up to two gallons of gasoline to be stored in an approved container and five gallons to be contained in a storage cabinet. Keeping the cans in a well-ventilated space, away from sources of ignition such as pilot lights (furnace or water heater) is essential. Gasoline does not have a long storage life. If you wish to store gasoline in the generator’s fuel tank and/or in auxiliary cans for longer than several months, you will need to provide an additive that will prevent the gasoline from gelling and becoming useless as fuel. (If this occurs in the generator’s tank, it may also require major engine cleaning to restore operation.) Some find regular cycling of stored gasoline into their automobiles a convenient way of rotating the fuel and keeping it from becoming a disposal problem. Remember that spilled gasoline is a fire hazard and a source of pollution. Refueling an operating generator raises specific concerns related to exposing gasoline liquid and vapors to a hot engine. Extreme care is necessary to prevent flash fires and personal injury. Follow the manufacturer’s instructions explicitly. Waiting for the engine to cool before refueling is safer.

83
Energize Electrical Equipment Properly The simplest way to use the electricity produced by a generator is to connect it directly to the desired appliance through an extension cord. Make sure that the extension cord is rated for the current required by the appliance(s) on the line, and that appropriate fuses are in place. Be careful to place the generator, extension cords, and all connections in such a way that you and your neighbors are not endangered if there is rain or heavy dew that could cause unsafe conditions.
Generator Alternatives Cars have a 12-volt DC battery, which can be useful in generating modest amounts of electricity. Converter units that plug into the cigarette lighter outlet are available that produce 110 volts AC, sufficient to run small appliances such as radios, computers, televisions, etc. These can be used with few of the risks associated with generators. These devices are commonly not capable of running high current devices such as refrigerators, freezers, and hot plates. A 12-volts DC battery is sufficient to power lights (and don’t forget the car’s lights!). Recharging the automobile battery occurs normally when the car is operated. Deep cycle batteries (RV/Marine) also can be used as described above, but do require some maintenance to keep them fully charged. Such batteries are filled with sulfuric acid so they must be kept in an acid-proof battery box. Charging batteries can produce explosive levels of hydrogen gas; therefore, charging should be done in a well-ventilated area. These batteries are capable of producing very high currents that can cause burns, fires and other hazards.
CAUTION Never apply the generator’s output directly to house wiring. Such a practice endangers the safety of the crews trying to restore electrical power. The utility company has assured them that the segment on which they are working is “off line.” Putting the generator’s power into the circuit energizes it and can produce life threatening danger to the utility workers.

84
AAAPPPPPPEEENNNDDDIIIXXX CCC::: GGGUUUIIIDDDAAANNNCCCEEE FFFOOORRR SSSEEEAAARRRCCCHHH AAANNNDDD RRREEESSSCCCUUUEEE TTTEEEAAAMMMSSS
Building Marking Searchers should mark buildings that they have searched. This will prevent duplication of effort, help rescuers find victims and help in reassessments. Searchers should carry some type of marker with them. This may be an indelible marker, spray paint, or a sheet of paper with thumbtacks. The building mark should be in a conspicuous place. When entering a building draw a diagonal on the building in a prominent spot. When coming out draw an opposite diagonal marking an x. Then fill in the quadrants with the appropriate information:
Date/Time. By marking the date and time that you finished your search, the next party will have a reference point. If it has been several days and there have been considerable aftershocks the condition of the building may have changed significantly.
Degree of Search. Briefly describe how well you were able to search. (i.e. “full search,”
or “partial search, unable to go into basement due to failed stairway.”)
Important Information. Victim in kitchen, v-shaped collapse in in-law apartment in basement.
Names of People Who Did the Search. Important for reference at later time. In apartment houses be sure to mark every apartment door. In going through a house you may wish to mark each door with the two diagonal marks to be sure that you cover the entire house.
Equipment for Search and Rescue Teams Every searcher should have:
Protective clothing. Sturdy long pants, long sleeve shirt, sturdy shoes, hardhat, leather gloves, latex gloves, safety goggles or glasses
Flashlight and extra batteries

85
Marker. This may be an indelible marker, sheets of paper with thumbtacks, lipstick, a spray can, carpenters crayon, crayons.
Portable Radio In addition, know who in your neighborhood has the following items if needed:
Car jack Pipe Hammer Screwdriver Bucket for clearing debris Rakes 2 x 4s Wrecking bar Pry bar Sledgehammer Cribbing material Broom Shovel Wheelbarrow

86
AAAPPPPPPEEENNNDDDIIIXXX DDD::: AAAMMMAAATTTEEEUUURRR RRRAAADDDIIIOOO AAANNNDDD DDDIIISSSAAASSSTTTEEERRR RRREEESSSPPPOOONNNSSSEEE There are over 300 licensed Amateur Radio operators in our community. The Federal Communications Commission issues amateur radio licenses through a structured testing program that includes radio technology, regulations, operating procedures and, for higher-level licenses, Morse code. Many of our Amateur Radio Operators volunteer their skills, time and equipment to provide emergency communications support for local public service events, assistance organizations and local governments. The Northern Alameda County Amateur Radio Emergency Services (NALCO ARES), our local emergency communications group, is a part of the American Radio Relay League (ARRL) field services program. The ARRL is the largest national organization of amateur radio operators. The ARRL maintains agreements with the American Red Cross, the Salvation Army and other national humanitarian organizations to provide communications support. In addition, NALCO ARES has formal agreements with the City of Berkeley, City of Albany and University of California at Berkeley to provide support to local governments during times of emergency. These agreements establish NALCO as a Radio Amateur Civic Emergency Service or RACES organization under the Federal Communications Act (Title 47 of the Code of Federal Regulations, Section 97.161). Registered ARES/ RACES operators are recognized Disaster Service Workers when our local governments request support. Amateur radio operators who register for the NALCO ARES/RACES program participate in training and orientation that prepares them to more efficiently and effectively provide local communications services. Neighborhood identification and encouragement of licensed operators to participate in the local ARES/RACES program is important to continue building and maintaining this community resource. Additional information about NALCO ARES is available at www.pdarrl.org/ebsec/nalco.

87
CCCooommmmmmuuunnniiitttyyy RRReeesssooouuurrrccceeesss Berkeley Fire/Office of Emergency Services 2100 Martin Luther King Jr., Way, 2nd floor Berkeley, CA 94704 510-981-5605 www.ci.berkeley.ca.us/fire/oes City of Berkeley, Building Permit Center 2120 Milvia Street Berkeley, CA 94704 510-981-7500 www.ci.berkeley.ca.us/planning/PSC/default.html Berkeley Unified School District 2134 Martin Luther King Jr. Way Berkeley, CA 94704 510-644-6348 www.berkeley.k12.ca.us City of Oakland, Office of Emergency Services 1605 Martin Luther King Jr. Way Oakland, CA 94612 510-238-3938 http://www.oaklandnet.com/oakweb/fire/oes/oes.htm Association of Bay Area Governments (ABAG) 101 Eighth Street Oakland, CA 94607 510-464-7900 www.abag.ca.gov American Red Cross Alameda County Chapter 3901 Broadway Oakland, CA 94611 510-595-4400 www.redcross.org Governor’s Office of Emergency Services 3650 Schriever Avenue Mather, CA 95655 916-845-8510 www.oes.ca.gov For contractors, structural engineers, engineering geologists and soil engineers check the Yellow Pages and hire a licensed, experienced professional. Ask for references and past

88
experience. Check with their professional associations to confirm licenses and check for outstanding complaints. Structural Engineers Association of Northern California 575 Market Street, Suite 2125 San Francisco, CA 94105 415-974-5174 www.seaonc.org State Board of Registration for Geologists and Geophysicists 2535 Capitol Oaks Drive, Suite 300A Sacramento, CA 95833 916-263-2113 www.geology.ca.gov California Board for Professional Engineers and Land Surveyors 2535 Capitol Oaks Drive, Suite 300 Sacramento, CA 95833-2944 Toll Free Number: 1-866-780-5370 (no charge to the calling party) www.dca.ca.gov/pels