blackbaud web purchasing training session 1. agenda what is blackbaud web purchasing? how to login...
TRANSCRIPT

2
Agenda
• What is Blackbaud Web Purchasing?• How to login to Blackbaud Web Purchasing• Create a purchase requisition by adding a new
product• Create a purchase requisition using an existing
product• Add new products

3
What is Blackbaud Web Purchasing
• Web based purchasing program that is fully integrated with the Business Office operating system– More timely/efficient recognition of expenses incurred
through the procurement process• More accurate budget reports• Streamlined approval process

4
Log In to the Blackbaud System
Go to: https://ike.adrian.edu/WebPurchasing
– Please note that it is important to type the EXACT address above. – You will want to save this address as a favorite.
• Username and password will be provided by Nicole

5
Log In Screen

6
Initial Screen upon Successful Login

7
To See your Account SettingsClick on My Account
Click Home to go back to initial screen
Click Update my Account if you make changes to this screen

8
Options for creating a purchase requisition
• add a one time product purchase or
• add a product that you will be purchasing frequently
or
• choose a product that is already in the list

9
Blackbaud Web Purchasing
Process to create a purchase requisition by adding a one time product purchase

10
Process to create a purchase requisition by adding a one time product purchase
Click on Request One-time Product

11
Add A Product Description, Quantity, Unit of Measure and Unit Price
There is no place for Product ID/Vendor Part #Therefore:Use Product Description FieldPut Product ID first, then Product Description

12
Click in Select a Vendor, Click the Binoculars iconor
type in the Vendor Information
Type in any of the search criteria (here the user typed ”office” in the Vendor name field), then click Search. You can use * as a wildcard to searchORYou can type in a vendor name other information using the text boxes. If you create a new vendor, put the remit to address in the address box

13
Once this is all filled in, click Add to Cart
Then click View My Cart if you done adding products

14
At this point, you can:
Create another One-time ProductAdd New ProductUse the Product ListOrCreate Requisition

15
Click Create Requisitionand review, then click Submit Requisition
You can Save the requisition without Submitting if you want to finish it later
Click Edit to Distribute the Product Cost to the appropriate account(s)
This description field is a reference name of the PO for the creator – you should fill it in

16
Screen to Distribute the Product Cost to the Appropriate Account(s)
1. Click Add
2. Click the binoculars icon to see a list of accounts
3. Option: Click to add a Project Code

17
Enter the Amount of that purchase to go to that account – click Distribute Evenly to put it all on that account or split evenly between accounts
You can also click Check Budget, then Actual, to see what has been used of your budget
Click Save When you are done
Then Return to Requisition to Continue with the next item
Type something here that you would like Heather to see –
Type something here that you would like the vendor to see. One time, One line –
Click here to copy information so you don’t have to enter it for each item in your cart
18
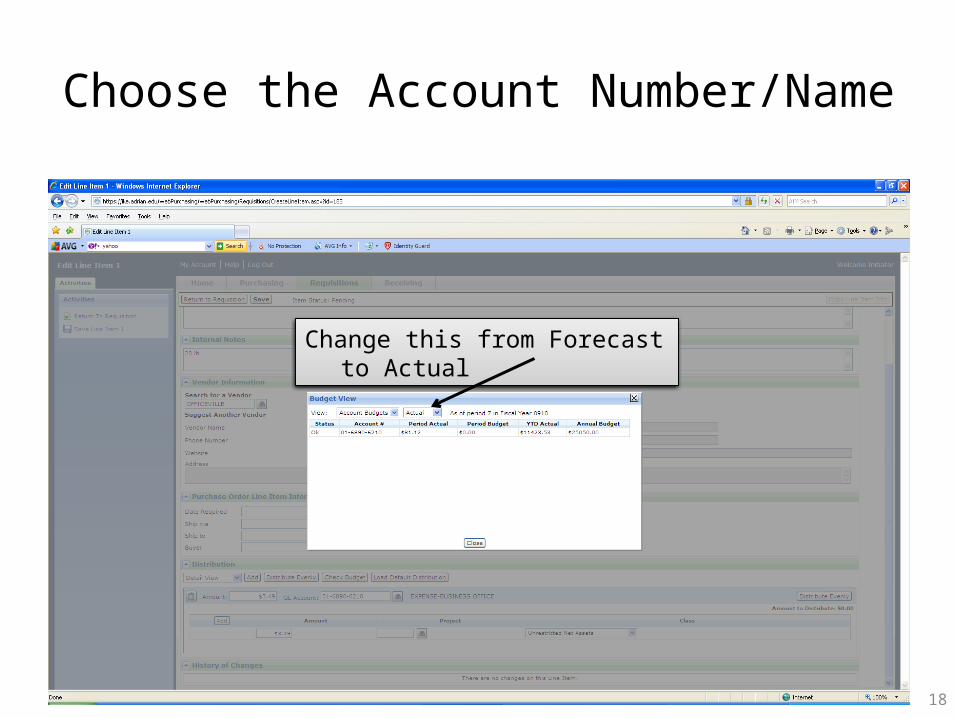
Choose the Account Number/Name
Change this from Forecast to Actual

19
When you are finished adding items, click Submit Requisition to send it to Purchasing
Approval Rule:Allows you to change which “track” the PO will follow for approval. The default is set in My Account

20
Process to add a product you will purchase frequently to the “Go Shopping List”

21
From This Screen, click on New Product
From This Screen, click on Add New Product

22
Fill in Product Information
Click Save when complete – you can edit or delete the product later
Fill in the Product ID and the Vendor Part # with the same info
Also, the Description is required!
Please Note: This process does not add the product to your cart, only to the list. If you want it in your cart, you need to Go Shopping after you add it.

23
Blackbaud Web Purchasing
Process to select an existing product from the “Go Shopping” list

24
Click Go Shopping

25
Search for a product, then Add to Cart

26
You will see the Cart Items Number change
From here you can:•Continue to Shop•View My Cart•Add a New Product•Request a One-time Product

27
When finished Shopping and Adding Products:Create RequisitionThen, back to the same as Slide 14 for Distribution to AccountsAndSubmit Requisition