bluebeam revu mac
TRANSCRIPT

Feature Overview
Bluebeam Revu Mac

Getting Started
MultiView™ and Split Documents
Markup Tools
Tool Chest™
Markups List
Bluebeam Studio™
Overlay Pages
Measurement Tools
Tips and Tricks
Table of Contents
3
4
5
6
7
8
9
10
11

Getting StartedRevu's intuitive interface makes it easy to find exactly what you want. Click on the menu at the top of the interface to display groups of related
buttons on the Command bar.
At the left, right and bottom are panels that can be opened and closed to
expose tabs such as File Access™, Bookmarks, Thumbnails, Tool Chest™,
Properties, Search, Bluebeam Studio™, Markups List, Measurements and
Layers. Use MultiView™ technology to split your screen up to 16 times and
sync tabs to pan and zoom in unison. Or, drag a file or feature tab to
another monitor to maximize your viewing space. How easy is that?
3
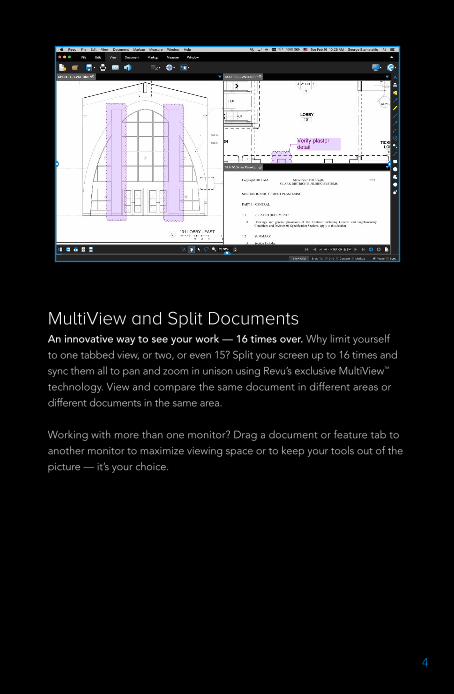
MultiView and Split DocumentsAn innovative way to see your work — 16 times over. Why limit yourself
to one tabbed view, or two, or even 15? Split your screen up to 16 times and
sync them all to pan and zoom in unison using Revu’s exclusive MultiView™
technology. View and compare the same document in different areas or
different documents in the same area.
Working with more than one monitor? Drag a document or feature tab to
another monitor to maximize viewing space or to keep your tools out of the
picture — it’s your choice.
4

Markup ToolsAdding markups has never been easier. Point, click and release – that’s all
it takes. Select from markup tools such as text, notes, lines, clouds, stamps,
images and more. Change the color, fill, opacity, line type or font to suit
your mood. Place images from your media library as markups and provide
team members with the details they need to get the job done. Give your
documents the stamp of approval by importing and applying custom
stamps to your drawings.
Display a layout grid over your PDF and toggle snap-to behavior on and
off for precise markup placement. Or enable layers to better organize the
content in a PDF; just toggle layers on or off to control the visibility of all
content and markups on that layer.
Finally, flatten all or individual markups to make them a permanent part of
the PDF. Simple enough? We think so.
5

Tool ChestStop creating the same annotation over and over again. Revu’s patented
Tool Chest™ keeps track of your markups as you create them, and lets
you save them for easy reuse. After you add and customize a markup,
drag it from Recent Tools and drop it into any tool set for future sessions.
Separate your markups into different tool sets to help categorize and share
them with project partners, keeping everyone's annotations consistent.
Double-click on one of your saved markups to toggle from “Drawing
Mode” to "Properties Mode” and create brand-new markups using that
same style. How easy is that?
6

Markups ListFor once, being tracked is a good thing. Want to know who said what, when?
Pull up the Markups list to see an annotation’s author, date, time, status and
more. Sort and filter data, or use Search to find the exact markup information
you need. Import and export markups with ease as you append another
reviewer’s comments to yours for a composite overview.
When all is said and done, generate a comprehensive markup report from your
PDF that displays all the information in your Markups list. Export as a CSV file
or PDF Summary, which can be appended and hyperlinked to the original PDF.
What can't the Markups list do?
7

Bluebeam StudioMake Revu your Studio. Bluebeam Studio is the ultimate document-based
digital collaboration solution, allowing you to manage projects digitally
from start to finish anywhere, at any time, from your desktop, Windows
tablet or iPad.
There are two sides to Studio: Projects and Sessions. Store, manage and
invite project partners to check out and edit an unlimited number of PDFs
and any other file type in the cloud (for free!) or on your local server using
Studio Projects. Collaborate on the fly by uploading PDFs into online Studio Sessions, where you and your selected attendees can comment on the
same PDFs together in real time or separately on your own. Project PDFs
can be uploaded into a Session, allowing you to check in markups and edits
as you make them in real time.
Even if your colleagues don't have Revu, they can simply download
Bluebeam's free PDF viewer, Bluebeam Vu for Windows and iPad, to join
Studio and participate in the live collaboration Sessions. You also have the
flexibility to send password-protected links to a Project file to anyone,
whether or not they have a Studio account. There are no limits to what you
can do when leveraging the combined power of Revu and Studio.
8
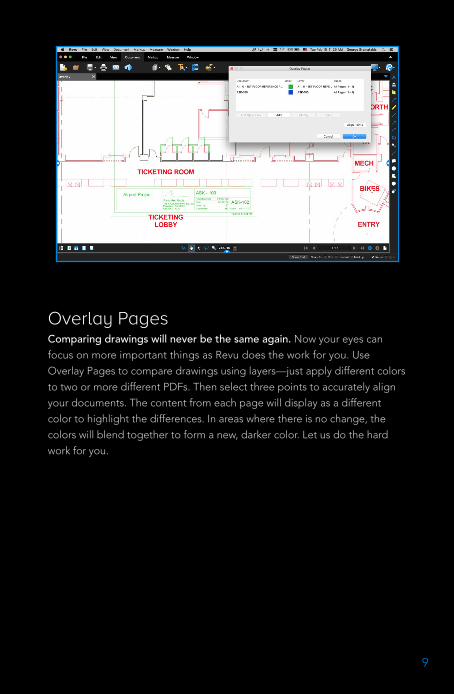
Overlay PagesComparing drawings will never be the same again. Now your eyes can
focus on more important things as Revu does the work for you. Use
Overlay Pages to compare drawings using layers—just apply different colors
to two or more different PDFs. Then select three points to accurately align
your documents. The content from each page will display as a different
color to highlight the differences. In areas where there is no change, the
colors will blend together to form a new, darker color. Let us do the hard
work for you.
9
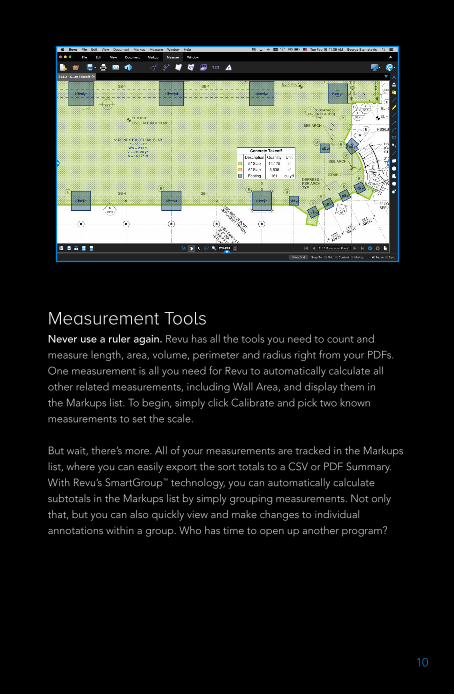
Measurement ToolsNever use a ruler again. Revu has all the tools you need to count and
measure length, area, volume, perimeter and radius right from your PDFs.
One measurement is all you need for Revu to automatically calculate all
other related measurements, including Wall Area, and display them in
the Markups list. To begin, simply click Calibrate and pick two known
measurements to set the scale.
But wait, there’s more. All of your measurements are tracked in the Markups
list, where you can easily export the sort totals to a CSV or PDF Summary.
With Revu’s SmartGroup™ technology, you can automatically calculate
subtotals in the Markups list by simply grouping measurements. Not only
that, but you can also quickly view and make changes to individual
annotations within a group. Who has time to open up another program?
10

Cloud+ combines the convenience of clouds and the clarity of
callouts into a single markup tool, including the ability to customize
the appearance properties for both components independently.
Combine, reorder, insert, delete, copy, extract, number and rotate
pages from the Thumbnails panel. Reorder pages within the panel by
using a simple drag and drop. Copy pages and paste them to a new
location, or access other page assembly options by right-clicking on
the thumbnail view.
Attach a file into a PDF itself so that it has a visible icon on the
document, creating a complete package of documents.
Zoom versus scroll: In One Full Page mode, the mouse wheel defaults
to zoom in/out. But if you select Scrolling Pages mode, the center
mouse wheel defaults to page scroll. You can set either of these as
your default preference.
Click on the Snapshot tool to copy an area of a PDF. The content is
saved to your clipboard, maintaining the vector data and image
quality of the original. Paste the snapshot in another area of the PDF
or another PDF.
Select multiple markups by using the Lasso tool or left-click, hold
and drag while in Selection mode.
Grid shows the grid on the workspace. Snap will snap markup end
points to the grid. Content will snap to the underlying content
(vector). Markup snaps to other markups in the PDF. Reuse will
eliminate the need to select the same tool over and over again.
Sync will synchronize all split views so that you can pan and zoom
multiple views of the same file at the same time.
Add curves to polylines and polygons by right-clicking on a line or
control point and selecting Convert to Arc. Add and subtract control
points, too.
Right-click on a callout and select Add Leader to create one callout
annotation with multiple leader lines.
Option Key mode lets you view each individual element in a grouped
markup. All you have to do is press Alt.
Rotate markups and captions by grabbing the orange control point
at the top of a markup. Hold the Shift key to rotate to an exact point.
Import premade tool sets from our frequently updated Tool Sets Extensions page.
Tips and Tricks
11

45°
Cloud+ combines the convenience of clouds and the clarity of
callouts into a single markup tool, including the ability to customize
the appearance properties for both components independently.
Combine, reorder, insert, delete, copy, extract, number and rotate
pages from the Thumbnails panel. Reorder pages within the panel by
using a simple drag and drop. Copy pages and paste them to a new
location, or access other page assembly options by right-clicking on
the thumbnail view.
Attach a file into a PDF itself so that it has a visible icon on the
document, creating a complete package of documents.
Zoom versus scroll: In One Full Page mode, the mouse wheel defaults
to zoom in/out. But if you select Scrolling Pages mode, the center
mouse wheel defaults to page scroll. You can set either of these as
your default preference.
Click on the Snapshot tool to copy an area of a PDF. The content is
saved to your clipboard, maintaining the vector data and image
quality of the original. Paste the snapshot in another area of the PDF
or another PDF.
Select multiple markups by using the Lasso tool or left-click, hold
and drag while in Selection mode.
Grid shows the grid on the workspace. Snap will snap markup end
points to the grid. Content will snap to the underlying content
(vector). Markup snaps to other markups in the PDF. Reuse will
eliminate the need to select the same tool over and over again.
Sync will synchronize all split views so that you can pan and zoom
multiple views of the same file at the same time.
Add curves to polylines and polygons by right-clicking on a line or
control point and selecting Convert to Arc. Add and subtract control
points, too.
Right-click on a callout and select Add Leader to create one callout
annotation with multiple leader lines.
Option Key mode lets you view each individual element in a grouped
markup. All you have to do is press Alt.
Rotate markups and captions by grabbing the orange control point
at the top of a markup. Hold the Shift key to rotate to an exact point.
Import premade tool sets from our frequently updated Tool Sets Extensions page.
12

A NEMETSCHEK COMPANY