bluedata epic installation guide - amazon s3 · 2 - installing epic 2.1 - downloading the epic...
TRANSCRIPT
BlueData EPIC Installation Guide
VERSION 2.2

BlueData EPIC Installation Guide
ii Copyright © 2016, BlueData Software, Inc. ALL RIGHTS RESERVED.
NoticeBlueData Software, Inc. believes that the information in this publica-
tion is accurate as of its publication date. However, the information is
subject to change without notice. THE INFORMATION IN THIS
PUBLICATION IS PROVIDED “AS IS.” BLUEDATA SOFTWARE,
INC. MAKES NO REPRESENTATIONS OR WARRANTIES OF
ANY KIND WITH RESPECT TO THE INFORMATION IN THIS
PUBLICATION, AND SPECIFICALLY DISCLAIMS IMPLIED WAR-
RANTIES OF MERCHANTABILITY OR FITNESS FOR A PARTIC-
ULAR PURPOSE.
Use, copying, or distribution of any BlueData software described in
this publication requires an applicable software license.
For the most up-to-date regulatory document for your product line,
please refer to your specific agreements or contact BlueData Tech-
nical Support at [email protected].
The information in this document is subject to change. This manual is
believed to be complete and accurate at the time of publication and
no responsibility is assumed for any errors that may appear. In no
event shall BlueData Software, Inc. be liable for incidental or conse-
quential damages in connection with or arising from the use of this
manual and its accompanying related materials.
Copyrights and TrademarksPublished June, 2016. Printed in the United States of America. Copy-
right 2016 by BlueData Software, Inc. All rights reserved. This book
or parts thereof may not be reproduced in any form without the writ-
ten permission of the publishers.
EPIC, EPIC Lite, and BlueData are trademarks of BlueData Software,
Inc. All other trademarks are the property of their respective own-
ers.
Contact InformationBlueData Software, Inc.
3979 Freedom Circle, Suite 850
Santa Clara, California 95054
Email: [email protected]
Website: www.bluedata.com

Table of Contents
1 - Preface ........................................................................ 11.1 - About This Manual ........................................................... 3
1.1.1 - Organization ............................................................ 3
1.1.2 - Formatting Conventions ........................................ 3
1.2 - Additional Information .................................................... 5
1.2.1 - Related Documentation ......................................... 5
1.2.2 - Contact Information .............................................. 5
1.2.3 - End User License Agreement .............................. 5
2 - Installing EPIC ............................................................ 72.1 - Downloading the EPIC Software ................................... 9
2.2 - Phase One: Command Line Installation ....................... 11
2.2.1 - Pre-Installation Checks ....................................... 12
2.3 - Phase Two: Completing the Installation .......................14
2.4 - Phase Three: Adding Worker Hosts ............................17
2.5 - External Storage Parameters ......................................22
2.5.1 - Gluster .................................................................22
2.5.2 - HDFS ...................................................................22
2.5.3 - NFS .....................................................................22
3 - Upgrade Information ................................................. 233.1 - Upgrading EPIC .............................................................24
3.2 - App Store Upgrades ....................................................25
3.2.1 - Manually Updating an App Store Image .............25
A - Troubleshooting .......................................................A-1A.1 - Pre-Installation Errors ............................................... A-2
A.1.1 - Large File Support ............................................ A-2
A.1.2 - Not Enough Space on Root File System ......... A-2
A.1.3 - Host Name Does Not Resolve .......................... A-3
A.1.4 - Enabling SELinux .............................................. A-3
A.1.5 - Not Enough Physical Disks .............................. A-3
A.1.6 - Normal Console Message ................................. A-3
A.2 - Installation Errors ...................................................... A-4
A.2.1 - YUM MultiLib Version Errors ........................... A-4
A.2.2 - RPM Version Error 1 ....................................... A-5
B - Support ...................................................................B-1B.1 - Support ....................................................................... B-2
B.1.1 - Bundle and OS Support .................................... B-2
B.1.2 - Bundle Extraction Options ............................... B-2
iiiCopyright © 2016, BlueData Software, Inc. ALL RIGHTS RESERVED.

BlueData EPIC Installation Guide
This page intentionally left blank.
iv Copyright © 2016, BlueData Software, Inc. ALL RIGHTS RESERVED.

1 - Preface
Copyright © 2016, BlueData Software, Inc. ALL RIGHTS RESERVED. 1

BlueData EPIC Installation Guide
Please see the About EPIC Guide for detailed information about EPIC,
including:
• Key features and benefits
• Hadoop, Spark, and other application support
• Definitions
• Architecture
• Storage
• Users
• System requirements
Note: Please see the EPIC Lite Installation Guide for instruc-
tions on installing EPIC Lite, as that procedure is different
than the full install described here.
2 Copyright © 2016, BlueData Software, Inc. ALL RIGHTS RESERVED.

1 - Preface
1.1 - About This Manual
This section describes the formatting conventions and information
contained in this manual.
1.1.1 - Organization
This manual contains the following chapters:
• 1 - Getting Started: Describes how this manual is formatted and
organized.
• 2 - Installing EPIC: Guides you through installing EPIC on the
Controller and Worker hosts.
This manual also contains the following appendices:
• A - Troubleshooting: Helps you resolve issues that may arise
while installing EPIC. Please see the User/Administrator Guide for
information on troubleshooting while running EPIC.
• B - Support: Describes the BlueData Software, Inc. technical
support policy for EPIC and includes contact information for
obtaining support.
1.1.2 - Formatting Conventions
This manual uses several formatting conventions to present
information of special importance.
Lists of items, points to consider, or procedures that do not need to
be performed in a specific order appear in bullet format:
• Item 1
• Item 2
Procedures that must be followed in a specific order appear in
numbered steps:
1. Perform this step first.
2. Perform this step second.
Specific keyboard keys are depicted in square brackets and are
capitalized, for example: [ESC]. If more than one key should be
pressed simultaneously, the notation will appear as [KEY1]+[KEY 2],
for example [ALT]+[F4].
Interface elements such as document titles, fields, windows, tabs,
buttons, commands, options, and icons appear in bold text.
Specific commands appear in standard Courier font. Sequences
of commands appear in the order in which you should execute them
and include horizontal or vertical spaces between commands.
Plain-text responses from the system appear in bold Courier font.
3Copyright © 2016, BlueData Software, Inc. ALL RIGHTS RESERVED.

BlueData EPIC Installation Guide
This manual also contains important safety information and
instructions in specially formatted callouts with accompanying
graphic symbols. These callouts and their symbols appear as follows
throughout the manual:
The Note and Caution icons are blue in the main chapter, and gray in
the appendices.
CAUTION: CAUTIONS ALERT YOU TO THE POSSIBILITY
OF A SERIOUS ERROR, DATA LOSS, OR OTHER
ADVERSE CONDITION.
Note: Notes provide helpful information.
4 Copyright © 2016, BlueData Software, Inc. ALL RIGHTS RESERVED.

1 - Preface
1.2 - Additional Information
This section lists related documentation and provides information on
contacting BlueData, Inc.
1.2.1 - Related Documentation
Please refer to the following documents for additional information:
• About EPIC Guide: This guide explains the EPIC architecture,
features, and benefits. It also contains the End User License
Agreement.
• EPIC Lite Installation Guide: This guide helps you install EPIC
Lite, the free demonstration version of EPIC, on a single host.
• User/Administrator Guide: This guide describes the EPIC
interface for Site Administrator, Tenant Administrator, and
Member users.
• Running Applications in EPIC: This guide provides a brief
overview of how to input data, run jobs, and access job output
within EPIC.
• Deployment Guide: Certain platforms have additional
requirements and/or procedures for installing and running EPIC.
• App Store Image Authoring Guide: Describes how Site
Administrators can author new images and make them available
in their local instance of the EPIC App Store.
1.2.2 - Contact Information
You may contact BlueData Software, Inc. at the following addresses:
BlueData Software, Inc.
3979 Freedom Circle, Suite 850
Santa Clara, California 95054
Email: [email protected]
Website: www.bluedata.com
1.2.3 - End User License Agreement
Please review the EPIC End User License Agreement (EULA), which
is included in the About EPIC Guide.
5Copyright © 2016, BlueData Software, Inc. ALL RIGHTS RESERVED.

BlueData EPIC Installation Guide
This page intentionally left blank.
6 Copyright © 2016, BlueData Software, Inc. ALL RIGHTS RESERVED.

2 - Installing EPIC
Copyright © 2016, BlueData Software, Inc. ALL RIGHTS RESERVED. 7

BlueData EPIC Installation Guide
This manual describes how to install the full version of EPIC on the
Controller and Worker hosts. For instructions on how to install the
EPIC Lite demonstration version on a single host (including
VirtualBox and Amazon EC2), please see the EPIC Lite Installation
Guide.
Installing EPIC on your Controller and Worker hosts consists of the
following three phases:
• Phase One - Command Line Installation: The first phase of the
EPIC installation process occurs at the command line. This is
where EPIC installs onto the Controller host.
• Phase Two - Completing the Installation: After the command
line installation completes, the next step is to access the
Controller host via a Web browser to complete the installation by
specifying the Controller IP address, the primary and (if used)
secondary network interface(s) to use for the EPIC platform, and
the disk to use for High Availability (HA).
• Phase Three - Adding Worker Hosts: The final phase of EPIC
installation occurs once EPIC has been fully installed on the
Controller host. In this phase, you log into EPIC and add one or
more Worker host(s).
Note: Before installing EPIC, see “Bundle and OS Support”
on page B-2 and “Bundle Extraction Options” on page B-2
for information about EPIC bundles, OS support, and
extraction/verification options.
8 Copyright © 2016, BlueData Software, Inc. ALL RIGHTS RESERVED.

2 - Installing EPIC
2.1 - Downloading the EPIC Software
The following EPIC installer types are available:
• CentOS full-release: This installer is designed for offline
installation. It does not support yum updates before or after
installing EPIC.
• CentOS minimal-release: This installer is designed for online
installation. It will support yum updates before and after installing
EPIC.
• RHEL minimalplus: This installer is designed for online
installation. It will support 'yum updates' before and after
installing EPIC.
If you did not receive the EPIC software on a USB drive, then you
may download the EPIC software using the following procedure:
1. Ensure that the host to which you will be downloading the EPIC
software meets the following requirements:
- Internet access.
- At least 50GB of free storage space.
- The wget, gpg, and md5sum programs must already be
installed.
- Linux operating system (CentOS, RHEL, or Ubuntu).
2. You will receive a copy of the EPIC downloader script. Make this
script executable using the following command:
chmod a+x bluedata-epic-<type>-<os>-<flavor>-release-<version>-<build>.bin.downloader
Where:
- <type> can be either entdoc (for EPIC) or onedoc (for
EPIC Lite)
- <os> is the operating system supported by this .bin file. This
can be either centos (for CentOS) or rhel (for Red Hat
Enterprise Linux).
- <flavor> is the EPIC package type, or flavor. This will be
either eval (EPIC Lite), full (CentOS with all App Store
images and OS packages included), or minimalplus
(RHEL with all App Store images included).
- <version> is the EPIC version being downloaded.
- <build> is the specific EPIC build number being
downloaded.
3. Run the EPIC downloader.
4. The downloader will download the EPIC software from the
specified URL. The software is broken into 1GB chunks to
minimize disruption. If the download is interrupted, running the
downloader script again will resume the download from the last
intact chunk that was received.
9Copyright © 2016, BlueData Software, Inc. ALL RIGHTS RESERVED.

BlueData EPIC Installation Guide
5. Copy the binary file to the machine that you will use as the
Controller host. This file has the name bluedata-epic-<type>-<os>-<release>-<version>-<build>.bin.
Please see Step 2 for a description of the filename options.
10 Copyright © 2016, BlueData Software, Inc. ALL RIGHTS RESERVED.

2 - Installing EPIC
2.2 - Phase One: Command Line Installation
This section guides you through the first phase of installing EPIC on
the Controller host via the command line. Before beginning the
installation, verify that all requirements described in the About EPIC
Guide have been met for each of the following categories:
• General
• Hosts
• Operating system
• Network
• High Availability (if you are configuring this option)
To install EPIC from the command line:
1. Install Red Hat Enterprise Linux 6.6/6.7 or CentOS 6.6/6.7 on
the hosts that you will use for the Controller and Worker hosts.
2. Log into the host that you will be using as the Controller host
using either the root account and password or your assigned
username and password (see the About EPIC Guide).
3. Download the EPIC Enterprise binary (.bin) from BlueData
Software, Inc. to the host that you will use as the Controller host.
The size of the download will depend on the distribution(s)
included and the flavor of the .bin file.
4. Make the .bin file executable by executing the command
chmod a+x bluedata-epic-<type>-<os>-<flavor>-release-<version>-<build>.bin
Where:
- <type> can be either entdoc (for EPIC) or onedoc (for
EPIC Lite)
- <os> is the operating system supported by this .bin file. This
can be either centos (for CentOS) or rhel (for Red Hat
Enterprise Linux).
- <flavor> is the EPIC flavor. This will be either eval
(EPIC Lite), full (CentOS with all App Store images and
OS packages included), or minimalplus (RHEL with all
App Store images included).
- <version> is the EPIC version being downloaded.
- <build> is the specific EPIC build number being
downloaded.
5. Run the executable binary from the Linux console as the root
user by typing ./<epic>.bin --floating-ip <address/range> --ssl-cert <path> --ssl-priv-key <path>, where:
CAUTION: INSTALLING EPIC ON ANY HOST THAT DOES
NOT MEET ALL APPLICABLE REQUIREMENTS MAY
LEAD TO UNPREDICTABLE BEHAVIOR AND/OR DATA
LOSS.
11Copyright © 2016, BlueData Software, Inc. ALL RIGHTS RESERVED.

BlueData EPIC Installation Guide
- <epic> is the full name of the .bin file (see Step 4, above).
- <address/range> is the CIDR to use, such as
192.168.25.10/24. This range of addresses allows
network access from outside the EPIC platform to the virtual
nodes that EPIC will create as part of future clusters.
- --ssl-cert <path> is the absolute path to the SSL
certificate to use. This parameter is only required if you plan
to access EPIC via HTTPS and not HTTP.
- --ssl-priv-key <path> is the absolute path to the
SSL private key to use. This parameter is only required if you
plan to access EPIC via HTTPS and not HTTP.
The installer checks the integrity of the EPIC bundle and then
extracts the bundle contents and performs pre-installation
checks. See “Pre-Installation Checks” on page 12. Skip to Step 8.
6. The End User License Agreement (EULA) appears. Read through
the EULA, pressing [SPACE] to page through the content. Once
you have viewed the entire EULA, press y to accept it and
continue installing EPIC.
7. EPIC installs on the Controller host. A series of messages appear
during the installation. The following message appears once the
installation is complete:
Figure 2.1: Installation complete
This concludes the first phase of the EPIC installation. Note the URL
provided, as you will use this to continue configuring EPIC. Please
proceed to “Phase Two: Completing the Installation” on page 14.
2.2.1 - Pre-Installation Checks
All EPIC software bundles include pre-install checks that execute
before the actual installer to verify that the EPIC platform meets all
requirements for installing EPIC software. Each test displays results
and may also display some additional text that explains the issue and
how to resolve it, as follows:
• PASSED: The EPIC platform passed the particular test.
• WARNING: A problem was found but installation can continue.
• FAILED: The EPIC platform does not meet the requirement and
installation cannot continue. A failure will include text indicating
the cause and potential resolution(s). Resolve all FAILED tests
before installing EPIC.
For example, the installer checks to see which network interface
card(s) (NIC) have Internet connectivity.
- If multiple NICs can connect to the Internet, then a prompt
appears asking you to select the NIC to use.
- If only one NIC can connect to the Internet, then the installer
bypasses this step.
CAUTION: DO NOT PLACE THE SSL CERTIFICATE OR
PRIVATE KEY UNDER THE ROOT DIRECTORY.
Note: Please see “Troubleshooting” on page A-1 if you expe-
rience any errors during the installation.
12 Copyright © 2016, BlueData Software, Inc. ALL RIGHTS RESERVED.

2 - Installing EPIC
- If no NICs can connect to the Internet, the installer asks for
the IP address of the proxy server being used for your
network.
If prompted, enter either the number corresponding to the NIC to use
to connect to the Internet or the IP address of the proxy server, and
then press [ENTER].
13Copyright © 2016, BlueData Software, Inc. ALL RIGHTS RESERVED.

BlueData EPIC Installation Guide
2.3 - Phase Two: Completing the Installation
The next step of the EPIC installation process is to configure EPIC
using a Web browser to access the application. To do this:
1. Open a Web browser and navigate to the URL provided at the
end of the command line installation process.
The EPIC Enterprise - Setup screen appears.
Figure 2.2: EPIC Enterprise - Setup screen
2. The floating IP address and range that you entered in Step 5 of
the command line installation appears in the Floating IP Addr
and CIDR fields. This range of addresses allows network access
from outside the EPIC platform to the virtual nodes that EPIC will
create as part of future clusters. You may modify these values if
needed.
3. The read-only Public network interface field displays the NIC
that you selected for Internet access during the command line
installation. Each host in the EPIC platform must use the same
NIC to access the Internet. For example, if you selected the eth0
NIC on the Controller host, then the eth0 NIC on each Worker
host must also be able to reach the Internet.
4. The Domain Name field defines the DNS domain name that will
be used for virtual nodes. For example, the domain name
bdlocal will contain virtual nodes named bluedata-1.bdlocal, bluedata-2.bdlocal, etc. You may either
accept the offered default or specify some other syntactically-
valid domain name.
5. Use the Node Storage field to select one or more disk(s) to use
for node storage. Clicking this field opens a pull-down menu that
lists the available drive(s). If you make a mistake, click the
Remove icon (X) for the disk(s) you want to remove.
6. Use the Tenant Storage pull-down menu to select the type of
system storage to use for EPIC tenants. The available options
are:
- If the hosts each have a second or third hard drive as
described in the About EPIC Guide and you want to create
Note: Multiple EPIC platforms operating on the same net-
work should each be configured with a unique domain
name.
14 Copyright © 2016, BlueData Software, Inc. ALL RIGHTS RESERVED.

2 - Installing EPIC
local tenant storage using HDFS with Kerberos protections,
then select Create HDFS from local disks for Tenant
Storage.
- To use an existing external GlusterFS file system as tenant
storage, select Use existing GlusterFS for Tenant Storage
and then enter the parameters described in “Gluster” on
page 22.
- To use an existing external HDFS file system as tenant
storage, select Use existing HDFS for Tenant Storage and
then enter the parameters described in “HDFS” on page 22.
- To use an existing external NFS file system as system
storage, select Use existing NFS for System Storage and
then enter the parameters described in “NFS” on page 22.
7. If you are creating local HDFS system storage, then select one or
more hard drive(s) to use for this storage in the Select one or
more available disk(s) for HDFS field. Clicking this field opens
a pull-down menu that lists the available drive(s). If you make a
mistake, click the Remove icon (X) for the disk(s) you want to
remove.
8. If you are creating local HDFS system storage, then checking the
Kerberos Protected checkbox enables Kerberos protection for
that storage.
9. Click Submit to finish installing EPIC on the Controller host.
EPIC displays a popup indicating that the installation process has
started successfully.
Figure 2.3: Installation Started popup
This popup is soon replaced by a status summary as the
installation completes. If you like, you may click the green Details
button to open a popup that displays additional information about
the installation. Please allow about 20 minutes for this process to
complete (actual time will vary depending on various factors).
Figure 2.4: Completing the EPIC installation
15Copyright © 2016, BlueData Software, Inc. ALL RIGHTS RESERVED.

BlueData EPIC Installation Guide
10. The Bluedata software setup completed successfully popup
appears when the installation process is completed. Click the
Close button to exit to the EPIC Login screen,
Figure 2.5: Installation completed
Please proceed to the next section to begin adding the Worker
host(s).
16 Copyright © 2016, BlueData Software, Inc. ALL RIGHTS RESERVED.

2 - Installing EPIC
2.4 - Phase Three: Adding Worker Hosts
Once you have finished installing EPIC on the Controller host, the
final step is to add the Worker host(s) to the EPIC platform. Each
host must conform to the system requirements listed in the About
EPIC Guide and any applicable Deployment Guide.
To add one or more Worker host(s):
1. Access the EPIC Login screen by opening a Web browser and
navigating to the Controller IP address.
Figure 2.6: EPIC Login screen
2. Enter your username and password in the appropriate fields and
then click the red Login button.
3. In the main menu, select Installation.
The Cluster Installation screen appears.
Figure 2.7: Cluster Installation screen
4. Enter the IP address(es) of the Worker host(s) that you wish to
add to the EPIC platform in the Worker IP field. You may enter
IP addresses as follows, being sure not to add any spaces:
- Single IP address: Enter a properly formatted IP address,
such as 10.10.1.1.
- Multiple IP addresses: Enter the first three octets of the IP
addresses, and then separate each digit of the fourth octet
Note: This section provides a high-level overview intended
to help you get up and running with EPIC as quickly as pos-
sible. Please see the User/Admin Guide for information
about this screen and any applicable Deployment Guide for
further directions.
17Copyright © 2016, BlueData Software, Inc. ALL RIGHTS RESERVED.

BlueData EPIC Installation Guide
with a commas, such as 10.10.1.1,2,5,8. In this
example, EPIC will install four Worker hosts with IP
addresses of 10.10.1.1, 10.10.1.2, 10.10.1.5, and 10.10.1.8.
- Multiple IP addresses: Enter multiple IP addresses
separated by commas, such as
10.10.1.1,10.10.1.2,10.10.1.5,10.10.1.8. In this example, EPIC
will install four Worker hosts with the same IP addresses as
the previous example.
- IP address range: Enter an IP address range, such as
10.10.1.1-8. In this example, EPIC will install eight
Worker hosts with IP addresses from 10.10.1.1 to 10.10.1.8.
- Combination: Use a combination of the above methods, such
as 10.10.1.1,10.10.1.2,5,8,10.10.1.9-12.
5. Select how to access the Worker host(s). Your available options
are:
- Password access: Check the Password Access radio
button. The User name field will display the name of the user
who installed EPIC. Enter the password for this user in the
Password field. The selected user must already exist on
each Worker node being added..
Figure 2.8: Password Access information
- SSH Key: If the Worker host(s) have a public key installed to
allow password-free access, then you may check the SSH
Key based Access radio button. Upload the private key by
clicking the Private Key field to open a standard File Upload
dialog that allows you to browse for and select the key file. If
the key requires a pass phrase, enter that phrase in the
Passphrase field. The uploaded private key will only be used
for initial access to the Worker host(s) and will not be
permanently stored.
Figure 2.9: SSH Key information
6. Click the blue Add Workers button to install the selected Worker
host(s).
18 Copyright © 2016, BlueData Software, Inc. ALL RIGHTS RESERVED.

2 - Installing EPIC
EPIC will prepare the selected Worker host(s). A series of
colored indicator bars in the Worker(s) Status table will display
the installation progress for each Worker host, as follows:
Figure 2.10: Worker host installation progress
- Connecting: EPIC is attempting to connect to the listed
Worker host(s) using the public network interface that you
selected earlier.
- Running bundle: EPIC has successfully connected to the
listed Worker host(s) and is preparing those host(s).
- Bundle completed: EPIC has completed installing on the
listed Worker host(s), which are ready to be added to the
EPIC platform. If you added a host by mistake, you may
remove them by clicking the red Delete icon (trash can). You
may also delete multiple hosts by selecting them and then
clicking the red Delete button above the table.
See the About EPIC Guide and the User/Administrator Guide for
more information about High Availability functionality and how to
enable High Availability protection within EPIC.
7. If you do not need to select one or more hard drive(s) to add to
local HDFS system storage, then skip to Step 8. Otherwise, click
the blue Edit icon next to a Worker host to open the Advanced
Worker settings popup for that host.
Figure 2.11: Advanced Worker settings popup
8. Select the drive(s) to use for node and HDFS storage, and then
click the Set button. Repeat Steps 6 and 7 for any remaining
Worker host(s).
CAUTION: YOU WILL NOT BE ABLE TO REMOVE A
MISTAKENLY-ADDED WORKER HOST OR HOSTS FROM
THE EPIC PLATFORM ONCE YOU PROCEED TO THE
NEXT STEP.
19Copyright © 2016, BlueData Software, Inc. ALL RIGHTS RESERVED.

BlueData EPIC Installation Guide
9. Place EPIC into Lockdown mode by opening the Quick Access
menu and then selecting Enter site lockdown.
Figure 2.12: Entering Lockdown mode
The Lockdown the system popup appears.
10. Enter a descriptive reason for the lockdown in the Enter Reason
field (such as Adding new worker hosts), and then click
the Submit button.
11. Finish adding the Worker host(s) to the EPIC platform by
checking the checkbox(es) corresponding to the host(s) you
want to add and then clicking the blue Install button above the
Worker(s) Status table.
12. The blue Install Scheduled and then the green Installing bar
appear in the Worker(s) Status table for the selected Worker
host(s) while EPIC finishes adding the host(s) to the EPIC
platform. This status then changes to Rebooting while EPIC
reboots the Worker host to complete the addition.
Figure 2.13: Finishing the Worker installation
13. Once this process is completed, the added host(s) will appear as
Installed in the Worker(s) Status table.
Figure 2.14: Worker hosts successfully added
14. Exit Lockdown mode by opening the Quick Access menu and
then selecting Exit site lockdown.
20 Copyright © 2016, BlueData Software, Inc. ALL RIGHTS RESERVED.

2 - Installing EPIC
Once you have finished adding Worker host(s), you may view the
status of each host by clicking Dashboard in the main menu to open
the Dashboard screen, and then selecting the Services tab, which
presents detailed status information for each Worker host.
Figure 2.15: Site Admin Dashboard screen - Service Status tab
Note: You may only perform one set of Worker host installa-
tions to one or more host(s) at once. To save time, consider
adding all of the Worker hosts at once by entering multiple
IP addresses as described above.
Note: Verify that the Worker host(s) have finished rebooting
before attempting to create a virtual cluster. Check the Ser-
vice Status tab of the Dashboard screen to ensure that all
services are green before proceeding.
21Copyright © 2016, BlueData Software, Inc. ALL RIGHTS RESERVED.

BlueData EPIC Installation Guide
2.5 - External Storage Parameters
This section describes the parameters used by EPIC when selecting
external (existing) storage using the EPIC Enterprise - Setup
screen.
2.5.1 - Gluster
If you selected Use existing GlusterFS for System Storage, then
enter the following parameters:
• Host: Enter the name or IP address of the GlusterFS storage
host in the Host field.
• Port: Enter the host port number in the Port field. Leave blank to
use the default GlusterFS port.
• Volume: Enter the name of the volume containing the desired
directory in the Volume field.
• Path: Enter the directory under the volume to use for system
storage in the Path field. Leave blank to use the root of the
specified volume.
2.5.2 - HDFS
If you selected Use existing HDFS for System Storage, then enter
the following parameters:
• Host: Enter either the hostname or IP address of the HDFS
namenode in the Host field.
• Standby namenode: Enter the hostname or IP address of the
HDFS standby namenode, if any, in this field.
• Port: Enter the namenode port number in the Port field. Leave
blank to use the default HDFS namenode port
• Path: Enter the HDFS directory to use for system storage in the
Path field. Leave blank to use the HDFS file system root.
2.5.3 - NFS
If you selected Use existing NFS for System Storage, then enter
the following parameters:
• Host: Enter either the hostname or IP address of the file system
host in the Host field.
• Share: Enter the name of the share in the Share field.
• Path: Enter the directory under the share to use for system
storage in the Path field. Leave blank to use the root of the
specified share.
22 Copyright © 2016, BlueData Software, Inc. ALL RIGHTS RESERVED.

3 - Upgrade Information
Copyright © 2016, BlueData Software, Inc. ALL RIGHTS RESERVED. 23

BlueData EPIC Installation Guide
3.1 - Upgrading EPIC
EPIC uses lightweight (LW) upgrade bundles that are tailored for
upgrading to a specific releases and not designed for full product
installation. Full product installation requires one of the full
installation bundles. EPIC no longer supports upgrades using full
installation bundles; you must upgrade EPIC using the appropriate
upgrade bundle.
24 Copyright © 2016, BlueData Software, Inc. ALL RIGHTS RESERVED.

3 - Upgrade Information
3.2 - App Store Upgrades
LW bundles do not include App Store upgrades. If your EPIC
installation can access S3, then you can visit the App Store screen
as a Site Administrator and upgrade individual apps as needed. An
offline workflow is also supported for EPIC installations that do not
have access to S3 or where a manual app upgrade is preferred.
3.2.1 - Manually Updating an
App Store Image
To manually upgrade an App Store image:
1. Download all the required catalog bundles and place them in the
/srv/bluedata/ directory on the Controller Node.
2. Download the appstore refresh script and place it in the /tmp
directory on the Controller node. You must do this as the same
user who installed BlueData EPIC. If the script was downloaded
on a Windows machine, please use the dos2unix utility to
remove any windows line terminations.
3. Log in to the current Primary Controller node and execute each
of the catalog bundles that you downloaded in Step 1.
4. Execute chmod +x /tmp/appstore_refresh.sh; /tmp/appstore_refresh.sh.
5. Log in to the EPIC web UI as the Site Administrator and then go
to the App Store screen.
6. Follow the installation/upgrade instructions for all of the App
Store entries that you installed in Step 3. You may then delete
the bundles that you downloaded in Step 1.
Note: If HA is configured, then follow these instructions on
the current Primary Controller node.
25Copyright © 2016, BlueData Software, Inc. ALL RIGHTS RESERVED.

BlueData EPIC Installation Guide
This page intentionally left blank.
26 Copyright © 2016, BlueData Software, Inc. ALL RIGHTS RESERVED.

A - Troubleshooting
Copyright © 2015, BlueData Software, Inc. ALL RIGHTS RESERVED. 11Copyright © 2016, BlueData Software, Inc. ALL RIGHTS RESERVED.

BlueData EPIC Installation Guide
A.1 - Pre-Installation Errors
This section contains instructions that may help you if you run into
problems while installing EPIC. See the User/Administrator Guide for
information on troubleshooting post-installation problems with
hardware or software.
A.1.1 - Large File Support
Bundle files can only be executed from file systems that support
large files and allow execution. The following image displays an error
that may occur when attempting to install EPIC on a file system
without large file support.
Resolution: Move the bundle to a file system that supports large files
and allows execution. Please refer to your file system documentation
for instructions.
A.1.2 - Not Enough Space on Root File
System
You may receive one of the following errors
• Singe file system does not have enough free space EPIC Lite
only):
• Multiple file systems have free space available, but the root file
system does not have sufficient free space (EPIC Lite only):
• The file system chosen (either automatically or by the user) does
not have enough free space (EPIC Lite only):
• Stricter free space enforcement for the Enterprise SKU:
Resolution:
• If more space is available at some other mount point and you use
logical volumes, then reallocate the space from one of the other
logical volumes to the root file system.
• If you don’t use logical volumes, you will have to either:
2 Copyright © 2016, BlueData Software, Inc. ALL RIGHTS RESERVED.

A - Troubleshooting
- Find another means of expanding the partition on which the
root file system exists, or
- Reinstall the OS with appropriately-sized root file system.
A.1.3 - Host Name Does Not Resolve
The host name does not resolve to the IP address of the Public/
Management interface.
Resolution: You can install EPIC with this configuration; however, the
host name of the server must never change once the software is
successfully installed.
A.1.4 - Enabling SELinux
If SELinux is disabled, then the bundle script will display the warning
message SElinux is disabled. This does not affect EPIC's
functionality. However, if EPIC is installed with SELinux disabled, you
must leave SELinux disabled in order for EPIC to continue to
function.
A.1.5 - Not Enough Physical Disks
EPIC requires at least two physical disks on the server.
Resolution: You must add another physical disk to continue. At the
moment, we do not support Logical Volumes and software raids. You
may configure your physical server’s RAID controller to create
another volume or disk for the operating system.
A.1.6 - Normal Console Message
The following console message is expected during bundle
installations:
3Copyright © 2016, BlueData Software, Inc. ALL RIGHTS RESERVED.

BlueData EPIC Installation Guide
A.2 - Installation Errors
Installation failures start with the following error message:
Alternatively, Worker host installation may fail with the following
error:
All installation logs are written to the /srv/bluedata directory on the
Controller host for both Controller and Worker host installation using
the web-based interface.
Sub-component log directories will have log files for each sub-
component's execution, which will provide more information.
A.2.1 - YUM MultiLib Version Errors
There are many reasons why YUM may throw a multilib version
error. Please refer to the Red Hat documentation at https://
access.redhat.com/solutions/57783 for help resolving these problems.
Use the yum-config-manager to set the required options (and work
around the issues displayed in the previous image).
4 Copyright © 2016, BlueData Software, Inc. ALL RIGHTS RESERVED.
A - Troubleshooting
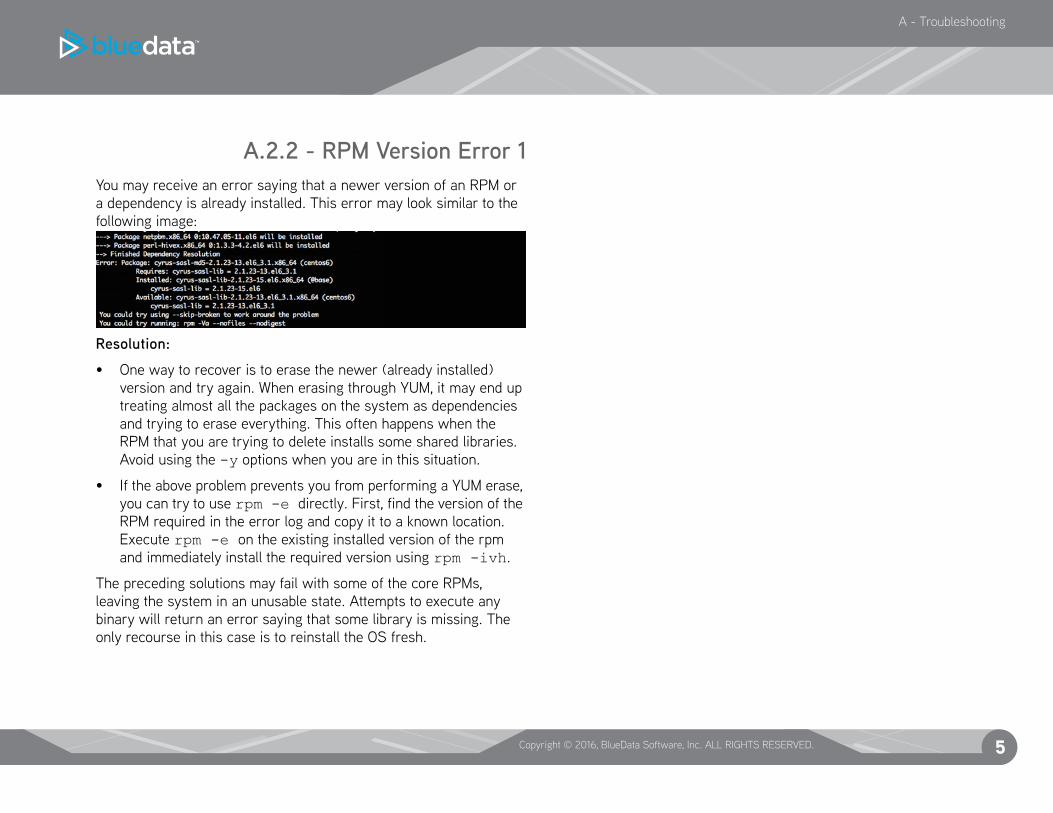
A.2.2 - RPM Version Error 1
You may receive an error saying that a newer version of an RPM or
a dependency is already installed. This error may look similar to the
following image:
Resolution:
• One way to recover is to erase the newer (already installed)
version and try again. When erasing through YUM, it may end up
treating almost all the packages on the system as dependencies
and trying to erase everything. This often happens when the
RPM that you are trying to delete installs some shared libraries.
Avoid using the -y options when you are in this situation.
• If the above problem prevents you from performing a YUM erase,
you can try to use rpm -e directly. First, find the version of the
RPM required in the error log and copy it to a known location.
Execute rpm -e on the existing installed version of the rpm
and immediately install the required version using rpm -ivh.
The preceding solutions may fail with some of the core RPMs,
leaving the system in an unusable state. Attempts to execute any
binary will return an error saying that some library is missing. The
only recourse in this case is to reinstall the OS fresh.
5Copyright © 2016, BlueData Software, Inc. ALL RIGHTS RESERVED.

BlueData EPIC Installation Guide
This page intentionally left blank.
6 Copyright © 2016, BlueData Software, Inc. ALL RIGHTS RESERVED.

B - Support
Copyright © 2015, BlueData Software, Inc. ALL RIGHTS RESERVED. 11Copyright © 2016, BlueData Software, Inc. ALL RIGHTS RESERVED.

BlueData EPIC Installation Guide
B.1 - Support
If you experience any problems with EPIC, please email
[email protected]. We will respond as soon as possible.
BlueData never receives your actual data when you send logs or
SOS reports to us.
B.1.1 - Bundle and OS Support
EPIC is available in the following bundles:
• Minimimalplus: This bundle type includes the following:
- RHEL 6.6/6.7 Support: Yes
- CentOS 6.6/6.7 Support: No
- Bundle size: Approximately 10GB
• Offline: This bundle type supports the following:
- RHEL 6.6/6.7 Support: No
- CentOS 6.6/6.7 Support: Yes
- Bundle size: Approximately 20GB
B.1.2 - Bundle Extraction Options
EPIC installation bundles offer the following extraction/verification
options:
• -x/--extract: Extract the bundle and exit.
• --verify-only: Verify bundle integrity and exit.
• -n/--no-verify: Skip bundle checksum verification.
2 Copyright © 2016, BlueData Software, Inc. ALL RIGHTS RESERVED.

B - Support
This page intentionally left blank.
3Copyright © 2016, BlueData Software, Inc. ALL RIGHTS RESERVED.

EPIC Installation Guide, version 2.2 (06/2016)
This book or parts thereof may not be reproduced in any form with-
out the written permission of the publishers. Printed in the United
States of America. Copyright 2016 by BlueData Software, Inc. All
rights reserved.
Contact Information:
BlueData Software, Inc.
3979 Freedom Circle, Suite 850
Santa Clara, California 95054
Email: [email protected]
Website: www.bluedata.com