bluetooth gps with navigation software - iogear.com software manual.pdf5 welcome thank you for...
TRANSCRIPT
Bluetooth™ GPSwith Navigation SoftwareSoftware User Manual (GBGPS201)

©2004 IOGEAR. All Rights Reserved. PKG-M0129
IOGEAR, the IOGEAR logo, MiniView, VSE are trademarks or registered trademarks of IOGEAR, Inc. Microsoft andWindows are registered trademarks of Microsoft Corporation. IBM is a registered trademark of International BusinessMachines, Inc. Macintosh, G3/G4 and iMac are registered trademarks of Apple Computer, Inc. IOGEAR makes nowarranty of any kind with regards to the information presented in this document. All information furnished here is forinformational purposes only and is subject to change without notice. IOGEAR, Inc. assumes no responsibility for anyinaccuracies or errors that may appear in this document.

Welcome
System Requirement
Software Features
Software Installation
Loading Maps
Configure Software to Use with GPS Unit
Verify GPS Satellite Connection
Introduction - Getting Started
Part I - File Menu
Part II - Tools Menu
Part III - View Menu
Troubleshooting
05
06
07
09
17
23
37
41
48
88
103
110
○ ○ ○ ○ ○ ○ ○ ○ ○ ○ ○ ○ ○ ○ ○ ○ ○ ○ ○ ○ ○ ○ ○ ○ ○ ○
○ ○ ○ ○ ○ ○ ○ ○ ○ ○ ○ ○ ○ ○ ○ ○ ○ ○ ○ ○ ○
○ ○ ○ ○ ○ ○ ○ ○ ○ ○ ○ ○ ○ ○ ○ ○ ○ ○ ○ ○ ○ ○
○ ○ ○ ○ ○ ○ ○ ○ ○ ○ ○ ○ ○ ○ ○ ○ ○ ○ ○ ○ ○ ○
Table of Contents Table of Contents
○ ○ ○ ○ ○ ○ ○ ○ ○ ○ ○ ○ ○ ○ ○ ○ ○ ○ ○ ○ ○ ○ ○ ○
○ ○ ○ ○ ○ ○ ○ ○ ○ ○ ○ ○ ○ ○
○ ○ ○ ○ ○ ○ ○ ○ ○ ○ ○ ○ ○ ○ ○ ○ ○
○ ○ ○ ○ ○ ○ ○ ○ ○ ○ ○ ○ ○ ○ ○ ○ ○ ○
○ ○ ○ ○ ○ ○ ○ ○ ○ ○ ○ ○ ○ ○ ○ ○ ○ ○ ○ ○ ○ ○ ○
○ ○ ○ ○ ○ ○ ○ ○ ○ ○ ○ ○ ○ ○ ○ ○ ○ ○ ○ ○ ○ ○
○ ○ ○ ○ ○ ○ ○ ○ ○ ○ ○ ○ ○ ○ ○ ○ ○ ○ ○ ○ ○ ○
○ ○ ○ ○ ○ ○ ○ ○ ○ ○ ○ ○ ○ ○ ○ ○ ○ ○ ○ ○ ○ ○ ○
2
Specification
Technical Support
Radio & TV Interference Statement
Limited Warranty
Table of Contents
○ ○ ○ ○ ○ ○ ○ ○ ○ ○ ○ ○ ○ ○ ○ ○ ○ ○ ○ ○ ○ ○ ○ ○
○ ○ ○ ○ ○ ○ ○ ○ ○ ○ ○ ○ ○ ○ ○ ○ ○ ○ ○ ○ ○ ○
○ ○ ○ ○ ○ ○ ○ ○ ○ ○ ○ ○ ○ ○ ○
○ ○ ○ ○ ○ ○ ○ ○ ○ ○ ○ ○ ○ ○ ○ ○ ○ ○ ○ ○ ○
113
115
116
117

5
Welcome
Thank you for purchasing the IOGEAR Bluetooth GPS System. This BluetoothGPS unit is a real-time navigation system. The Bluetooth GPS receiver allows youto receive positioning data from satellites and deliver the data to mobile computingdevices wirelessly via Bluetooth. It provides pinpoint accuracy and thoroughlyreliable tracking capabilities. The ultra low-power design and long-life recharge-able battery gives you 25 hours of continuous usage and eliminates constantrecharging between uses. It is portable and lightweight, so you can put it on thedashboard or any other location that provides a direct line of sight to the sky.
You will never get lost again!

6
System Requirement
Laptop/Desktop:
Windows ME/2000/XPA minimum of 256MB system RAM and at least 512MB of free hard disk spaceMust be Bluetooth-enabled and support serial port profile
PDA (Pocket PC):
Requires Microsoft Pocket PC 2002 or laterPDA must have at least 266 MHz processor with at least 64MB of free main memoryAt least 64 MB storage card to load additional maps is recommendedMust be Bluetooth-enabled and support serial port profile
7
Software Features
• Turn-by-turn voice prompts help you to stay focused on the road
• Automatic rerouting help you to get to your destination even if you make a
wrong turn
• Quickest, shortest, local, major, carpool route options
• Auto Maneuver guidance screen
• Real time map display
• Auto full screen
• Detailed map display w/ street names
• Automatic day and night color scheme
8
• 3-D bird eye view
• Hot keys option for command shortcut through your PDA’s buttons
• Special safety features include speed and fog alert
• Large Points of Interest (POI) database
• Favorite and recent destinations
• Easily accessible status box displays ETA, distance, and speed
• Record and playback track
• Demo mode gives you a driving simulation of your trip
• Navteq map database
Software Features
9
Software Installation
Checklist
Before proceeding, please check the following:
• This guide assumes you already have Microsoft ActiveSync installed and configured to transfer data between your PDA and computer.
• Connect your PDA to the computer via its cradle or synchronization cable
10
Software Installation
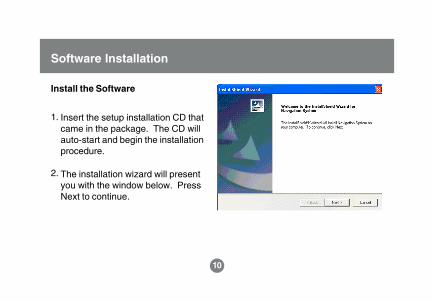
Install the Software
The installation wizard will presentyou with the window below. PressNext to continue.
1.
2.
Insert the setup installation CD thatcame in the package. The CD willauto-start and begin the installationprocedure.

11
Software Installation
If you accept the licenseagreement, click Yes.
3.
12
Software Installation
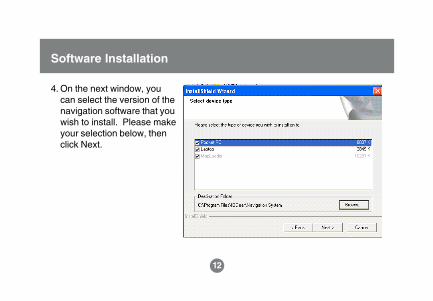
On the next window, youcan select the version of thenavigation software that youwish to install. Please makeyour selection below, thenclick Next.
4.
13
Software Installation
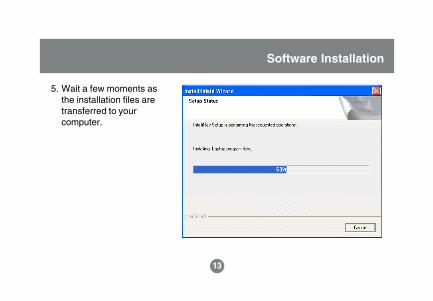
Wait a few moments asthe installation files aretransferred to yourcomputer.
5.
14
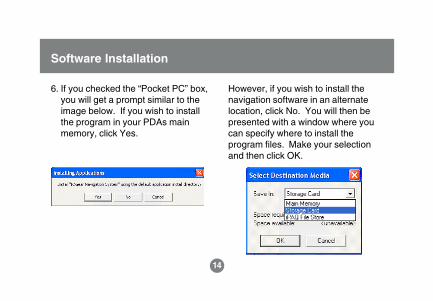
If you checked the “Pocket PC” box,you will get a prompt similar to theimage below. If you wish to installthe program in your PDAs mainmemory, click Yes.
Software Installation
However, if you wish to install thenavigation software in an alternatelocation, click No. You will then bepresented with a window where youcan specify where to install theprogram files. Make your selectionand then click OK.
6.

15
Software Installation
The software will prepare the files tobe installed on your PDA.
Check your PDA for additional stepsto complete program installation.
7. 8.

16
Click Finish to complete theinstallation and proceed tothe next section.
Software Installation
9.

17
Loading Maps
1. Once you have loaded the mapsoftware, you can select the mapsthat you wish to install on yourdevice. There are two methods toinstall your maps – by region, or bycity. If you have less than 64MB ofstorage, it is recommended to installmaps “By City.” However, if you havesufficient storage space, you caninstall your maps using the option ByRegion.
If you look on the right-hand side, youcan select the Target Location whereyou want to load the maps (on yourPDA or computer). You can also see
here the available storage space ofyour selected location, and the size inmegabytes of your selected maps.
Note: When you select the map areas to install,the navigation software builds a map joining allthese areas together. If you wish to add moreareas at a later time, the navigation software willneed to reconstruct the entire map; therefore,you need to select all your previous maps, plusthe one you are adding.
Method 1 - By Region:

18
Loading Maps
Using this option you can installmaps for an entire state. If thestate of your choice has a “+”sign next to it, it means that youcan choose to install onlyportions of that state (asillustrated by the image below).To load the entire state map,simply make sure that any boxesbelow the “+” sign are checked.
Once you have selected alldesired maps, click on “GenerateMap” to begin map installation.

19
Method 2 - By City:
First select a Region (state) foryour desired map. Next selectthe city, and the map radius inwhich you plan to use the GPSsystem.
Under Target Location, specifywhere you want to load themaps. When you’re ready tobeing map installation, click on“Generate Map.”
Loading Maps

20
Loading Maps
The installation software will now begininstalling your maps.
2.

21
Loading Maps
3. Depending on your selections, youmay be prompted to insert the CD whereyour map data is located. Please do soand click OK to continue.
Note: Please be patient as mapinstallation may take up to 30minutes, depending on the size of themaps being loaded.
22
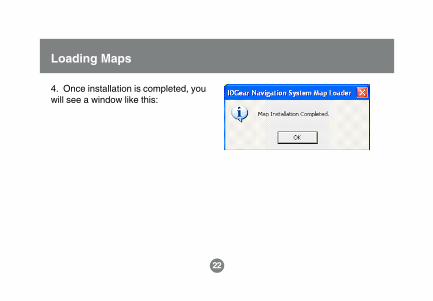
Loading Maps
4. Once installation is completed, youwill see a window like this:

23
Configure Software to Use with GPS Unit
Checklist
Before proceeding, please check the following:
• Bluetooth unit is ON and has an unobstructed view to the sky
• Your Computer/PDA has established a
• Make sure you have installed the Navigation software on your device
• Make sure you have installed all your desired maps
24
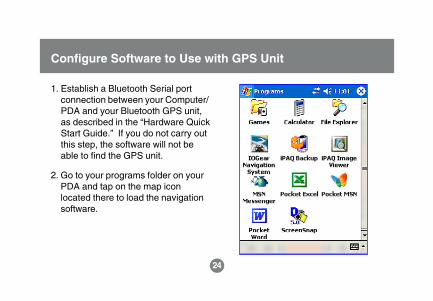
Establish a Bluetooth Serial portconnection between your Computer/PDA and your Bluetooth GPS unit,as described in the “Hardware QuickStart Guide.” If you do not carry outthis step, the software will not beable to find the GPS unit.
1.
Configure Software to Use with GPS Unit
Go to your programs folder on yourPDA and tap on the map iconlocated there to load the navigationsoftware.
2.
25
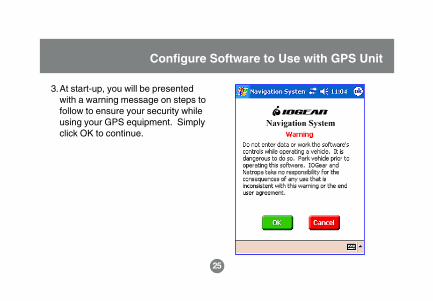
At start-up, you will be presentedwith a warning message on steps tofollow to ensure your security whileusing your GPS equipment. Simplyclick OK to continue.
3.
Configure Software to Use with GPS Unit
26
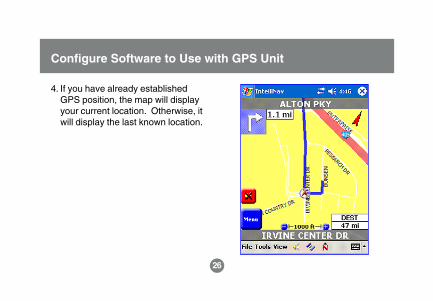
4. If you have already establishedGPS position, the map will displayyour current location. Otherwise, itwill display the last known location.
Configure Software to Use with GPS Unit
27
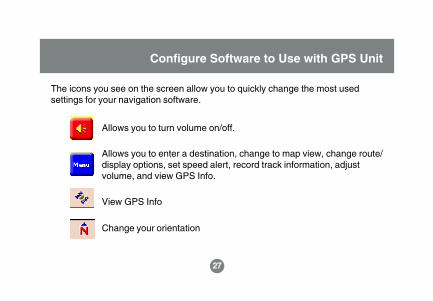
The icons you see on the screen allow you to quickly change the most usedsettings for your navigation software.
Allows you to turn volume on/off.
Allows you to enter a destination, change to map view, change route/display options, set speed alert, record track information, adjustvolume, and view GPS Info.
View GPS Info
Change your orientation
Configure Software to Use with GPS Unit

28
At the bottom of the screen, there arethree menu options: File, Tools, andMenu. For a detailed explanation anddiscussion of these menus, please goto page 48.
Configure Software to Use with GPS Unit
29
Configure Software to Use with GPS Unit
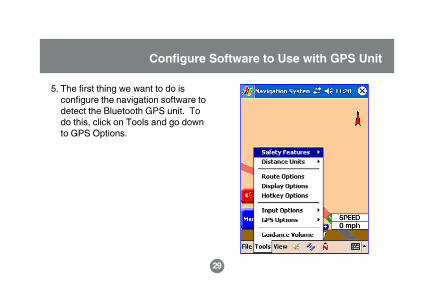
The first thing we want to do isconfigure the navigation software todetect the Bluetooth GPS unit. Todo this, click on Tools and go downto GPS Options.
5.

30
Configure Software to Use with GPS Unit
Now, select Auto Detect.6.
42
31
Configure Software to Use with GPS Unit
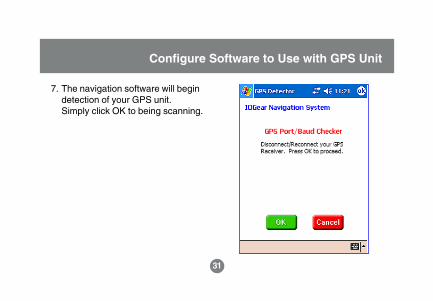
The navigation software will begindetection of your GPS unit.Simply click OK to being scanning.
7.

32
Configure Software to Use with GPS Unit
At this point, if your PDA has notestablished a connection with yourBluetooth GPS, you may get awindow displaying all the Bluetoothdevices in your range. If so, pleaseselect the Bluetooth GPS and clickOK. However, if after severalattempts the navigation softwarecannot find your GPS, please makesure that you have followed theprocedure indicated on the HardwareQuick Start Guide to establish aSerial port connection between yourdevice and the GPS unit.
8.
33
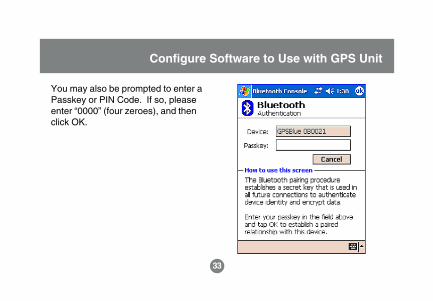
You may also be prompted to enter aPasskey or PIN Code. If so, pleaseenter “0000” (four zeroes), and thenclick OK.
Configure Software to Use with GPS Unit
34
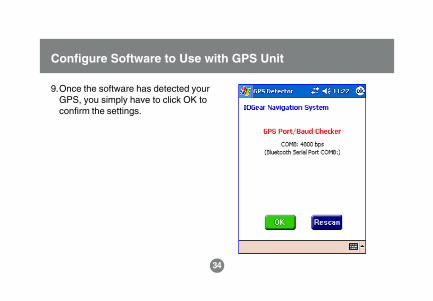
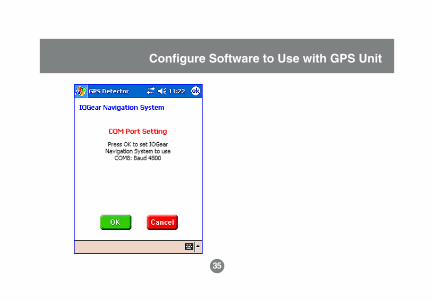
9.Once the software has detected yourGPS, you simply have to click OK toconfirm the settings.
Configure Software to Use with GPS Unit
35
Configure Software to Use with GPS Unit

36
Once you have establishedconnection to the GPS unit, you willbe taken to the map view. Pleaseproceed to the next section “VerifyGPS Satellite Connection.”
10.
Configure Software to Use with GPS Unit
37
Verify GPS Satellite Connection
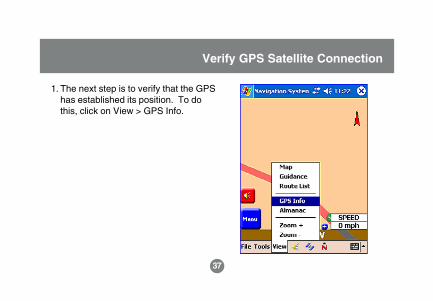
The next step is to verify that the GPShas established its position. To dothis, click on View > GPS Info.
1.

38
If the GPS unit has established itsposition, you will see somethingsimilar to the window below. Thegreen bars indicate the satellites towhich the GPS unit is linked to. Thered bars indicate that a link to thatparticular satellite has not beenestablished. In order to use the GPS,you need to be connected to at leastthree (3) satellites.
2.
GPS Position Established:
In this case, you can see that theGPS is connected to 5 out of 8satellites:
Verify GPS Satellite Connection

39
Verify GPS Satellite Connection
GPS Position Unknown:
In this case, you can see that theGPS unit has not established its GPSposition and is not linked to anysatellites (indicated by the red bars).
40
Verify GPS Satellite Connection
If your GPS unit has problems linkingto satellites, please try the following:
• Move the GPS away from any tallbuildings/structures
• Move GPS away from any objectthat can interfere with wireless signals
• Place the GPS in a location where ithas a clear view to the sky (preferablyoutdoors)

41
Introduction - Getting Started
Map View
Turn to make
Next Street
Distance untildestination
Current location
42
Shortcut Icons
As you can see on the image above, there are a number of shortcut icons onyour screen that allow you to easily access the most common tasks associatedwith your navigation software. To access all the features of the software, click onthe File, Tools, and View menu on the bottom of the screen (explained later inthe manual).
Introduction - Getting Started
43
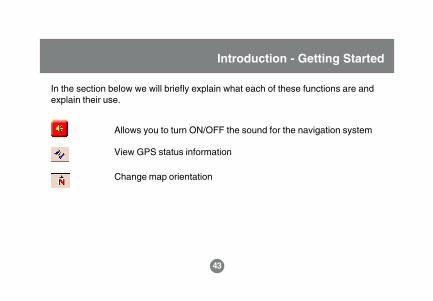
In the section below we will briefly explain what each of these functions are andexplain their use.
Introduction - Getting Started
Allows you to turn ON/OFF the sound for the navigation system
View GPS status information
Change map orientation

44
Introduction - Getting Started
GPS Status IconsThese icons are displayed on the map area and represent the following:
GPS Status: Linked to satellites
GPS Status: Attempting reconnection
GPS Status: Not linked to sufficient satellites

45
Map Option
Introduction - Getting Started
These icons allow you to do the following:
Displays the surrounding area of selected destination on the map
Displays your current position on the map
To set an address as a Favorite, click on this button
46
Introduction - Getting Started
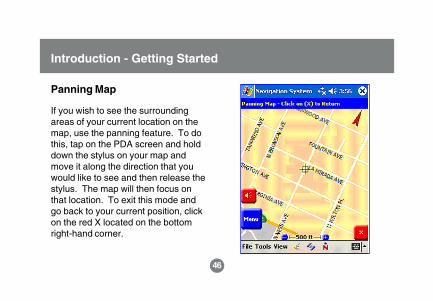
If you wish to see the surroundingareas of your current location on themap, use the panning feature. To dothis, tap on the PDA screen and holddown the stylus on your map andmove it along the direction that youwould like to see and then release thestylus. The map will then focus onthat location. To exit this mode andgo back to your current position, clickon the red X located on the bottomright-hand corner.
Panning Map

47
Introduction - Getting Started
Tapping on the menu icon will takeyou to the main menu shown below
48
Part I - File Menu
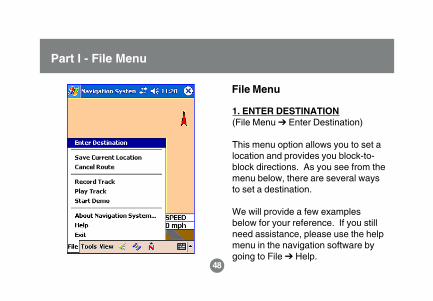
1. ENTER DESTINATION(File Menu ➔ Enter Destination)
This menu option allows you to set alocation and provides you block-to-block directions. As you see from themenu below, there are several waysto set a destination.
We will provide a few examplesbelow for your reference. If you stillneed assistance, please use the helpmenu in the navigation software bygoing to File ➔ Help.
File Menu
49
Part I - File Menu
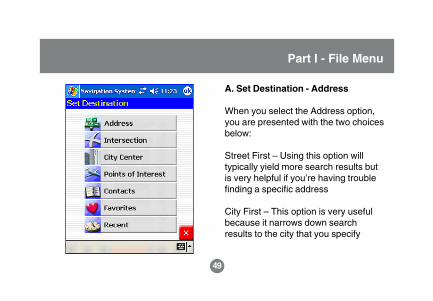
A. Set Destination - Address
When you select the Address option,you are presented with the two choicesbelow:
Street First – Using this option willtypically yield more search results butis very helpful if you’re having troublefinding a specific address
City First – This option is very usefulbecause it narrows down searchresults to the city that you specify

50
Part I - File Menu
51
Part I - File Menu
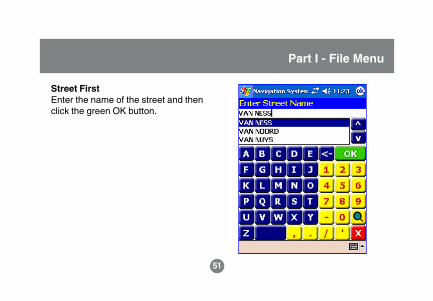
Street FirstEnter the name of the street and thenclick the green OK button.
52
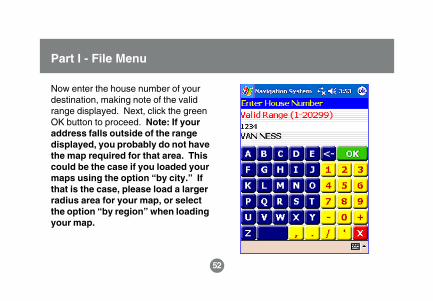
Now enter the house number of yourdestination, making note of the validrange displayed. Next, click the greenOK button to proceed. Note: If youraddress falls outside of the rangedisplayed, you probably do not havethe map required for that area. Thiscould be the case if you loaded yourmaps using the option “by city.” Ifthat is the case, please load a largerradius area for your map, or selectthe option “by region” when loadingyour map.
Part I - File Menu

53
Part I - File Menu
The navigation software will now displaya list of the matching addresses. Asmentioned earlier, using the “street first”option will typically yield severalmatching addresses. Select youraddress, and then click OK on the topright-hand corner.

54
Part I - File Menu
City FirstEnter the name of the city and thenclick the green OK button.

55
Now, enter the name of the street andthen click OK
Part I - File Menu
56
Part I - File Menu
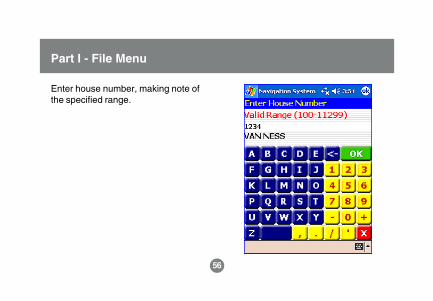
Enter house number, making note ofthe specified range.

57
The navigation software will displaythe matching addresses found. Asyou can see below, using the “cityfirst” option helped to narrow downsearch results. Select desiredaddress, and click OK on the top right-hand corner.
Part I - File Menu
58
Part I - File Menu
B. Set Destination - Intersection
Using this option, you can enter thenames of two intersecting streets asyour destination
Street FirstIt is not suggested to select this optionfor an intersection because most ofthe time it will yield too many results.However, if you only loaded a smallmap section on your device, you willnot encounter this problem.

59
Part I - File Menu
Enter the name of the first street andthen click OK
60
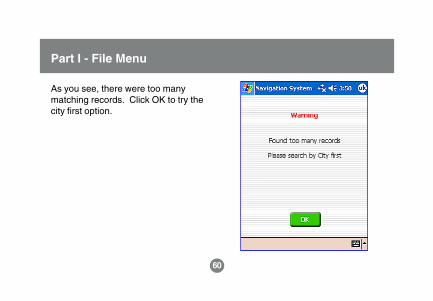
As you see, there were too manymatching records. Click OK to try thecity first option.
Part I - File Menu

61
Part I - File Menu
City FirstEnter the name of the city and thenclick OK

62
Enter the name of the first street andthen click OK
Part I - File Menu
63
Part I - File Menu
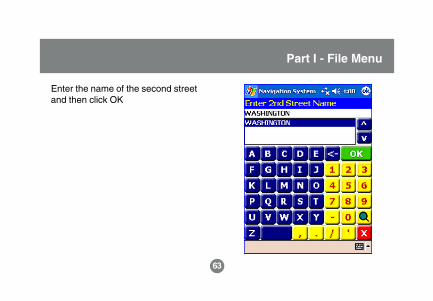
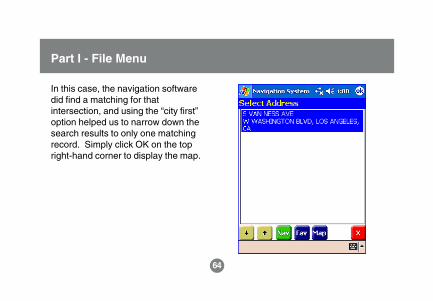
Enter the name of the second streetand then click OK
64
In this case, the navigation softwaredid find a matching for thatintersection, and using the “city first”option helped us to narrow down thesearch results to only one matchingrecord. Simply click OK on the topright-hand corner to display the map.
Part I - File Menu

65
Part I - File Menu
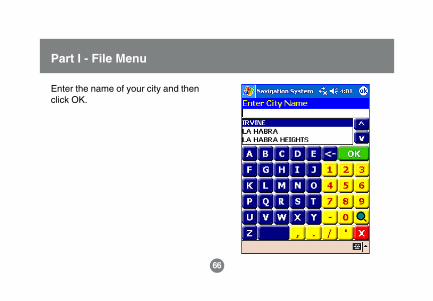
C. Set Destination – City Center
This will find the center of your city.
As an example, we will choose theAlphabetical option.
66
Part I - File Menu
Enter the name of your city and thenclick OK.
67
Part I - File Menu
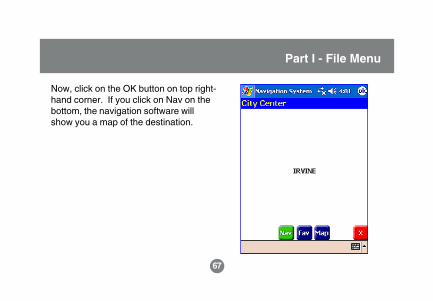
Now, click on the OK button on top right-hand corner. If you click on Nav on thebottom, the navigation software willshow you a map of the destination.
68
Part I - File Menu
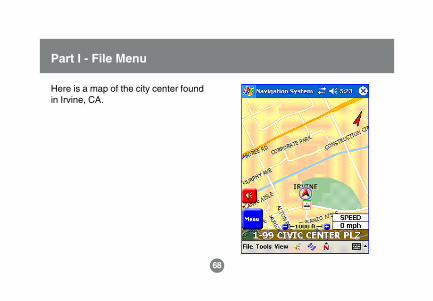
Here is a map of the city center foundin Irvine, CA.
69
Part I - File Menu
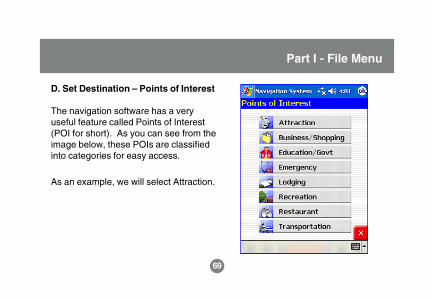
D. Set Destination – Points of Interest
The navigation software has a veryuseful feature called Points of Interest(POI for short). As you can see from theimage below, these POIs are classifiedinto categories for easy access.
As an example, we will select Attraction.
70
Part I - File Menu
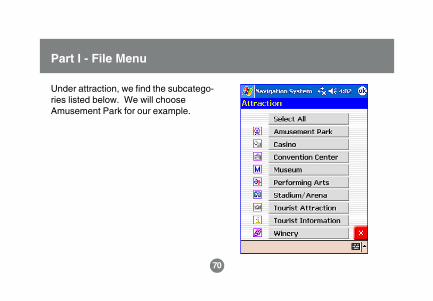
Under attraction, we find the subcatego-ries listed below. We will chooseAmusement Park for our example.
71
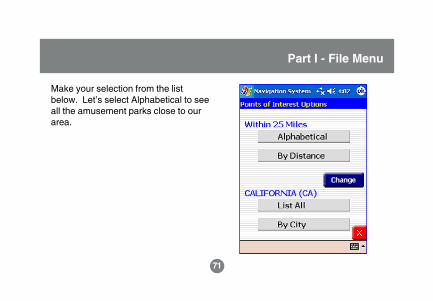
Make your selection from the listbelow. Let’s select Alphabetical to seeall the amusement parks close to ourarea.
Part I - File Menu

72
Part I - File Menu
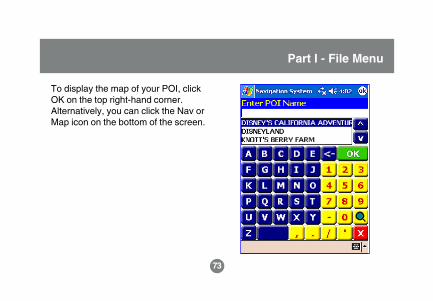
From the list below, make your selection,and then click OK.
73
To display the map of your POI, clickOK on the top right-hand corner.Alternatively, you can click the Nav orMap icon on the bottom of the screen.
Part I - File Menu

74
Part I - File Menu
E. Set Destination – ContactsYou can also set a destination fromsomeone in your contact book forwhom you have entered an address.Please note that the address of thecontact needs to be in a properformat in order for this feature towork. For assistance on this,please consult your PDA manual/user documentation.
Also, if your contact book is empty,you will get an empty window likebelow when you click on this.

75
If you do have someone in your contactbook, their information will be displayed.Please make your selection and thenclick OK.
Part I - File Menu

76
Click on your contact to display theiraddress.
Part I - File Menu
77
Part I - File Menu
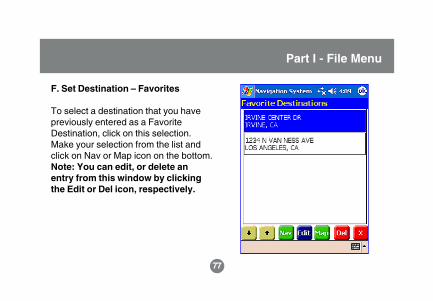
F. Set Destination – Favorites
To select a destination that you havepreviously entered as a FavoriteDestination, click on this selection.Make your selection from the list andclick on Nav or Map icon on the bottom.Note: You can edit, or delete anentry from this window by clickingthe Edit or Del icon, respectively.
78
Part I - File Menu
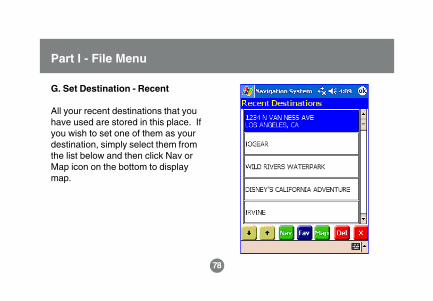
G. Set Destination - Recent
All your recent destinations that youhave used are stored in this place. Ifyou wish to set one of them as yourdestination, simply select them fromthe list below and then click Nav orMap icon on the bottom to displaymap.
79
Part I - File Menu
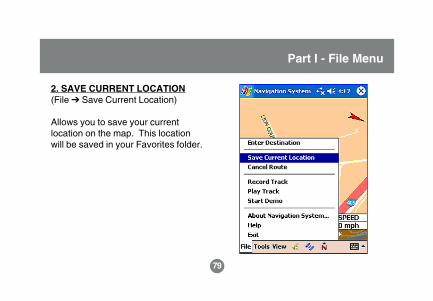
2. SAVE CURRENT LOCATION(File ➔ Save Current Location)
Allows you to save your currentlocation on the map. This locationwill be saved in your Favorites folder.

80
Part I - File Menu
81
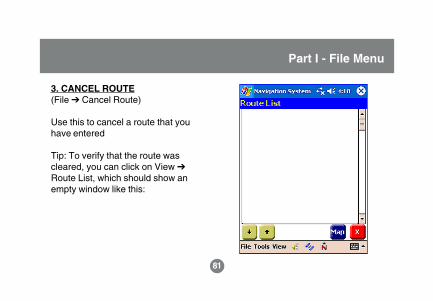
3. CANCEL ROUTE(File ➔ Cancel Route)
Use this to cancel a route that youhave entered
Tip: To verify that the route wascleared, you can click on View ➔Route List, which should show anempty window like this:
Part I - File Menu
82
Part I - File Menu
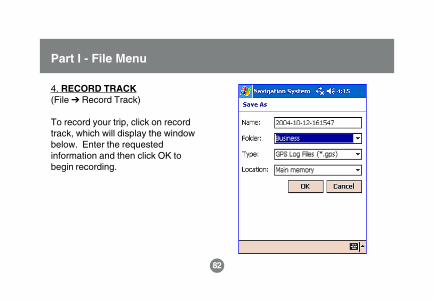
4. RECORD TRACK(File ➔ Record Track)
To record your trip, click on recordtrack, which will display the windowbelow. Enter the requestedinformation and then click OK tobegin recording.
83
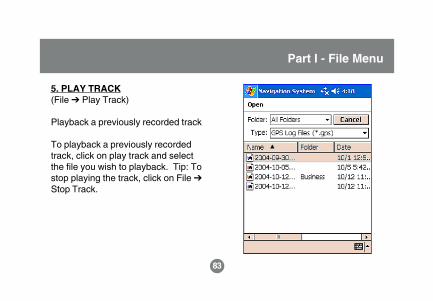
5. PLAY TRACK(File ➔ Play Track)
Playback a previously recorded track
To playback a previously recordedtrack, click on play track and selectthe file you wish to playback. Tip: Tostop playing the track, click on File ➔Stop Track.
Part I - File Menu
84
Part I - File Menu
6. START DEMO(File ➔ Start Demo)
One of the most useful features ofthe navigation software is the Demofeature, which allows you to view ademo of your actual route for thespecified destination. This is veryuseful in case you need to adjust/change settings on your PDA asyou can comfortably do so beforeyou begin driving.
Tip: If you tap on Start Demo andnothing happens, please keep inmind that you first need to specifya destination.
85
Part I - File Menu
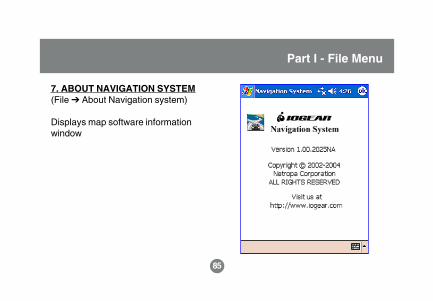
7. ABOUT NAVIGATION SYSTEM(File ➔ About Navigation system)
Displays map software informationwindow

86
Part I - File Menu
8. Help(File ➔ Help)
Displays the built-in help content of thenavigation software.
This is a very useful feature if you needa quick explanation on how to performcertain tasks in the navigation software.
87
Part I - File Menu
9. Exit(File ➔ Exit)
Quits the program and unloads it fromyour PDA’s memory
88
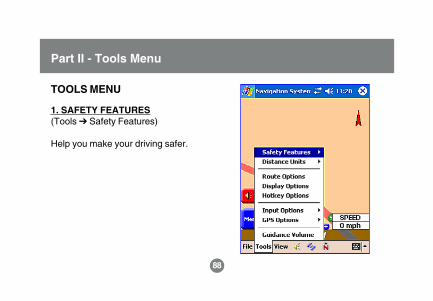
1. SAFETY FEATURES(Tools ➔ Safety Features)
Help you make your driving safer.
TOOLS MENU
Part II - Tools Menu

89
A. Speed AlertIf you wish to receive a sound alertwhen you reach a certain speed limit,enable speed alert. If you set it to Auto,the navigation software determines thespeed limit based on the type of roadyou are in (street, freeway, etc.).However, this alert is only provided foryour convenience and is not guaranteedto be accurate. We advise you to obeyall speed limits, traffic laws and alwaysuse good judgment when using thisfeature.
Part II - Tools Menu

90
Part II - Tools Menu
B. Fog DrivingIf you enable this option, the softwarewill notify you when an intersection isapproaching.
91
Part II - Tools Menu
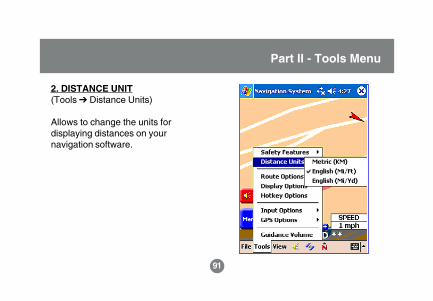
2. DISTANCE UNIT(Tools ➔ Distance Units)
Allows to change the units fordisplaying distances on yournavigation software.
92
Part II - Tool Menu
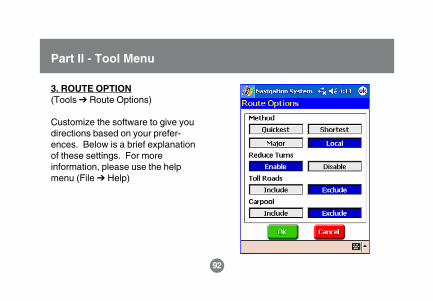
3. ROUTE OPTION(Tools ➔ Route Options)
Customize the software to give youdirections based on your prefer-ences. Below is a brief explanationof these settings. For moreinformation, please use the helpmenu (File ➔ Help)
93
Part II - Tools Menu
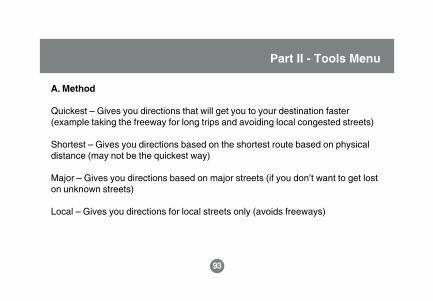
A. Method
Quickest – Gives you directions that will get you to your destination faster(example taking the freeway for long trips and avoiding local congested streets)
Shortest – Gives you directions based on the shortest route based on physicaldistance (may not be the quickest way)
Major – Gives you directions based on major streets (if you don’t want to get loston unknown streets)
Local – Gives you directions for local streets only (avoids freeways)
94
Part II - Tools Menu
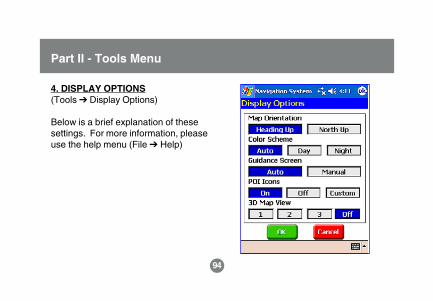
4. DISPLAY OPTIONS(Tools ➔ Display Options)
Below is a brief explanation of thesesettings. For more information, pleaseuse the help menu (File ➔ Help)
95
Part II - Tools Menu
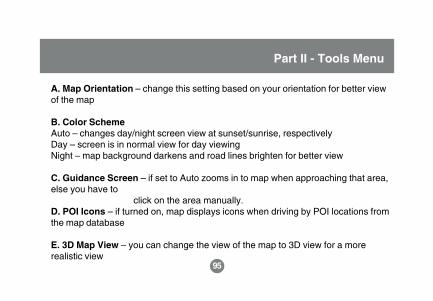
A. Map Orientation – change this setting based on your orientation for better viewof the map
B. Color SchemeAuto – changes day/night screen view at sunset/sunrise, respectivelyDay – screen is in normal view for day viewingNight – map background darkens and road lines brighten for better view
C. Guidance Screen – if set to Auto zooms in to map when approaching that area,else you have to click on the area manually.D. POI Icons – if turned on, map displays icons when driving by POI locations fromthe map database
E. 3D Map View – you can change the view of the map to 3D view for a morerealistic view

96
Part II - Tools Menu
5. HOTKEY OPTIONS(Tools ➔ Hotkey Options)
Assign a button on your PDA to aspecific task
This is a very useful feature of thesoftware as it allows you to assignany of your PDA’s buttons to performsome of the navigation softwarefunctions by simple push of a button.
Simply select a function from the list,and then click the button on your PDAthat you would like to perform that
function. Upon doing this, you shouldsee the button # displayed under thetab called “button.” If you want to undoit, you can click Clear Key to do this forthe selected function, or “Clear All” toclear all assigned buttons.
97
Part II - Tools Menu
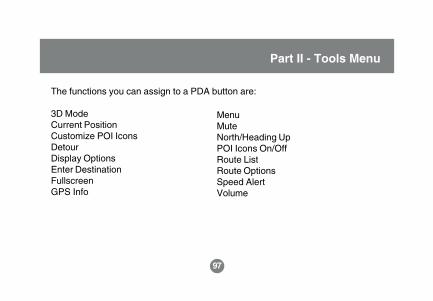
The functions you can assign to a PDA button are:
3D ModeCurrent PositionCustomize POI IconsDetourDisplay OptionsEnter DestinationFullscreenGPS Info
MenuMuteNorth/Heading UpPOI Icons On/OffRoute ListRoute OptionsSpeed AlertVolume

98
6. INPUT OPTIONS(Tools ➔ Input Options)
Allows you to define how to enterinformation for the navigation system
Part II - Tools Menu
Pocket PC Keyboard – all user inputneeds to be done through yourPDA’s on-screen keyboard (in thiscase by tapping on the keyboardicon you see on the bottom right-hand corner of the image below).
99
Part II - Tools Menu
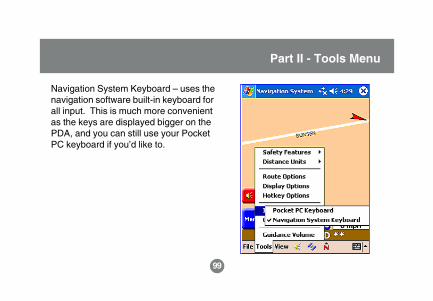
Navigation System Keyboard – uses thenavigation software built-in keyboard forall input. This is much more convenientas the keys are displayed bigger on thePDA, and you can still use your PocketPC keyboard if you’d like to.

100
Part II - Tools Menu
7. GPS OPTIONS(Tools ➔ GPS Options)
Manually select the settings for yourGPS unit or set to Auto Detect
101
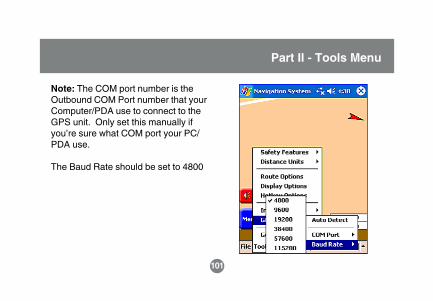
Note: The COM port number is theOutbound COM Port number that yourComputer/PDA use to connect to theGPS unit. Only set this manually ifyou’re sure what COM port your PC/PDA use.
The Baud Rate should be set to 4800
Part II - Tools Menu
102
Part II - Tools Menu
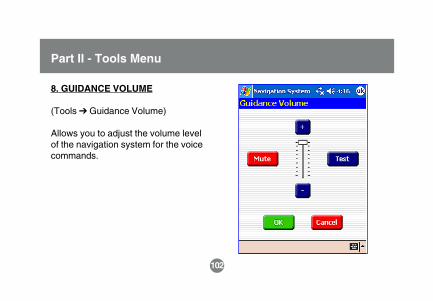
8. GUIDANCE VOLUME
(Tools ➔ Guidance Volume)
Allows you to adjust the volume levelof the navigation system for the voicecommands.
103
Part III - View Menu
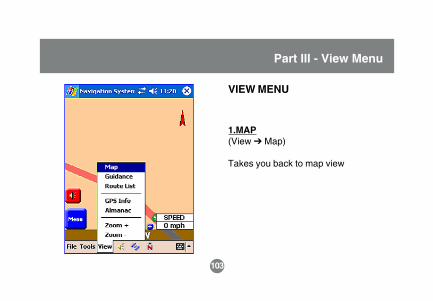
VIEW MENU
1.MAP(View ➔ Map)
Takes you back to map view
104
Part III - View Menu
2. GUIDANCE(View ➔ Guidance)
Zooms in to your current positionand informs you the next maneuver(ex: turn left/right).
Tip: By default, this is doneautomatically by the navigationsystem. If you wish to change this,go to: Tools ➔ Display Options ➔Guidance Screen ➔ Auto/Manual.
105
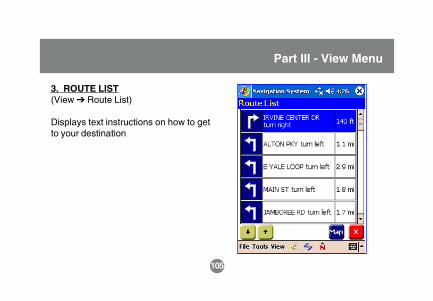
3. ROUTE LIST(View ➔ Route List)
Displays text instructions on how to getto your destination
Part III - View Menu
106
NMEA - National Marine ElectronicsAssociation. The informationdisplayed under this window displayssome of the information received bythe GPS unit.
Part III - View Menu
4. GPS INFO(View ➔ GPS Info)
Displays GPS status information andother useful information
UTC Time – Coordinated UniversalTime
Local Time – The time in your area
Under Location, you can also see yourLatitude, Longitude, and Altitude.

107
Part III - View Menu

108
Part III - View Menu
5. ALMANAC(View ➔ Almanac)
Displays Sun/Moon information
109
Part III - View Menu
6. Zoom in/Zoom out(View ➔ Zoom +/Zoom -)
Click on this to zoom in/out of an area.Alternatively, you can use the blue +/-icons on the bottom of the map.

110
Troubleshooting
For a more complete list of troubleshooting/FAQs, please see the Troubleshoot-ing and Frequently Asked Questions section in the navigation system software(File ➔ Help).
1. During map installation, I get a file write error.This can be caused by insufficient memory space on your Computer/PDA.Please install maps in an alternate location or install more memory on yourdevice.
2. My IOGEAR Bluetooth GPS cannot establish position.Please make sure that you have the unit in an outdoor area, away from tallbuildings/structures or any objects that may cause interference. Also, make surethe GPS is fully-charged (it takes about 3 hours to achieve full charge).
111
If you still cannot establish position, reset the GPS as instructed in the HardwareQuick Start Guide.
3. My PDA becomes unresponsive or very slow after I load the NavigationSystem.First, make sure your PDA meets the minimum system requirements. You alsomay want to check all the Running Programs on your PDA. If you have too manyprograms running on the background, they may be consuming your systemmemory; thus slowing down the PDA.
4. The navigation software does not load on my PC/PDA.Please make sure your device meets the minimum software system require-ments.
Troubleshooting
112
5. I’m having trouble establishing Bluetooth communication between myPC/PDA and GPS unit.Please consult the Hardware Quick Start guide for instructions on how to do this.If you still have trouble, please consult the user manual for your Bluetooth device.
Troubleshooting

113
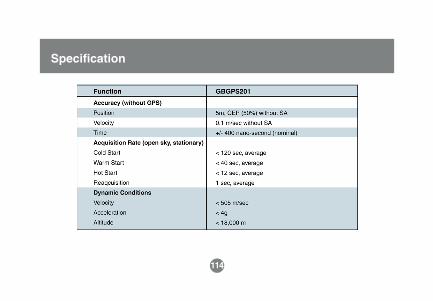
Specification
114
Specification
115
If you need technical support, please check out our IOGEAR Tech Info Library(T.I.L.) at www.iogear.com/support for the latest tips, tricks, and troubleshoot-ing. The IOGEAR T.I.L. was designed to provide you with the latest technicalinformation about our products. Most of the answers to your questions can befound here, so please try it out before contacting technical support.
Technical support is available Monday through Friday from 7:30 am to 5:30 pmPST and can be reached at (949) 453-8782 or by email [email protected].
Technical Support
116
Radio & TV Interference statement
WARNING!!! This equipment generates, uses and can radiate radio frequencyenergy and, if not installed and used in accordance with the instruction manual,may cause interference to radio communications. This equipment has beentested and found to comply with the limits for a Class B computing devicepursuant to Subpart J of Part 15 of FCC Rules, which are designed to providereasonable protection against such interference when operated in a commercialenvironment. Operation of this equipment in a residential area is likely to causeinterference, in which case the user at his own expense will be required to takewhatever measures may be required to correct the interference.
117
Limited Warranty
IN NO EVENT SHALL THE DIRECT VENDOR’S LIABILITY FOR DIRECT,INDIRECT, SPECIAL, INCIDENTAL OR CONSEQUENTIAL DAMAGESRESULTING FROM THE USE OF THE PRODUCT, DISK OR ITS DOCUMENTA-TION EXCEED THE PRICE PAID FOR THE PRODUCT.
The direct vendor makes no warranty or representation, expressed, implied, orstatutory with respect to the contents or use of this documentation, and especiallydisclaims its quality, performance, merchantability, or fitness for any particularpurpose.
The direct vendor also reserves the right to revise or update the device ordocumentation without obligation to notify any individual or entity of such revisions,or updates. For further inquires please contact your direct vendor.

23 Hubble Irvine, CA 92618 (P) 949.453.8782 (F) 949.453.8785 www.iogear.com
Contact info.