bone controller asset version 0 - ootii · bone controller asset version 0.1 – rev 1 ootii ... ...
TRANSCRIPT

BONE CONTROLLER ASSET VERSION 0.1 – REV 1
ootii |www.ootii.com 1
Foreword Thank you for purchasing the Bone Controller!
I’m an independent developer and your feedback and support really means a lot to me. Please don’t ever
hesitate to contact me if you have a question, suggestion, or concern.
The latest version of the documentation can be found online: http://www.ootii.com/Unity/BoneController/BCQuickStart.pdf
I’m also on the forums throughout the day: http://forum.unity3d.com/threads/229900-Bone-Controller
Purpose My documentation tends to get a little long because I try to be as thorough as possible. This document is meant
for people who just want to get things up and running as quickly as possible. So, start here. When you’re ready
to move on, head over to the Bone Controller User’s Guide.
Beta Remember, this is beta. There are 100’s of 1,000’s of artists creating characters and skeletons out there. This
tool is meant to be able to handle most (if not all) of them. However, if you have a model that isn’t loading
correctly, please let me know. I want to help!
Contents Foreword ....................................................................................................................................................................1
Purpose .......................................................................................................................................................................1
Beta .............................................................................................................................................................................1
Running the Demo ......................................................................................................................................................2
Your First Scene ..........................................................................................................................................................9
Character Controllers .............................................................................................................................................. 13
Adding Foot IK ..................................................................................................................................................... 13
Character Controller Adjustment .................................................................................................................... 16
Motion Controller Adjustment ........................................................................................................................ 17
Wrap-Up .................................................................................................................................................................. 18
Support .................................................................................................................................................................... 18

BONE CONTROLLER ASSET VERSION 0.1 – REV 1
ootii |www.ootii.com 2
Running the Demo 1. Load a new Unity project
2. Download the latest Bone Controller package
3. Import that package into your Unity project
4. In the project hierarchy, open the Assets\ootii\BoneController\Demos\Scenes folder.
Unity won’t copy the scenes into the Build Settings automatically. So, if we want to run the demo like I have it on
the web we need to do this manually.
5. Open the Build Settings using File | Build Settings…
6. Select all the scenes in the Scenes folder and drag them into the Build Settings window
7. Close the window.
As Unity imports, you may see a couple of these errors. You can ignore them. They come from the
models I’m using in the demo and don’t effect the actual Bone Controller.

BONE CONTROLLER ASSET VERSION 0.1 – REV 1
ootii |www.ootii.com 3
8. Find the LookAtMotor scene and open it.
9. Press play.
Look At Motor The look at motor allows you to define bones that will “look at” a target object or position. These bones would
typically be the head, neck, chest, spine, etc. You can control how much each bone tries to look at the target as
well as things like offsets.
Use the Toggle Motors button to see what happens if the motor wasn’t running.

BONE CONTROLLER ASSET VERSION 0.1 – REV 1
ootii |www.ootii.com 4
Swing At Motor The look at motor is really the same as the Look At Motor. However we typically give more weight to the spine
and add more bones to the chain. Having it as a second motor allows us to enhance it in the future.
Foot Placement Motor This motor controls the upper-leg, lower-leg, and foot of a typical humanoid. The motor not only adjusts the
leg’s bending, it also rotates the foot so that it matches the incline of the ground.
Settings allows you to determine when the foot matches the ground incline.

BONE CONTROLLER ASSET VERSION 0.1 – REV 1
ootii |www.ootii.com 5
Bone Chain Drag Motor Using this motor, you can take an existing chain of bones or create a totally new chain with other objects. Then,
by changing the physics properties of the chain, we can drag it around and have it respond to gravity and
surfaces.
Limb Reach Motor The Limb Reach motor uses a two-bone system and IK to bend and twists the bones in order to reach a target.
This could be an upper-arm and lower-arm, upper-leg and lower-leg, or two other bones. Used with joints, you
can define how the bones bend.

BONE CONTROLLER ASSET VERSION 0.1 – REV 1
ootii |www.ootii.com 6
Pose Motor Using the Pose motor, you can actually pose your character in to different positions and then blend those
positions with the current animation. This lets you control things dynamically. For example, you could open a
mouth, force the head to turn, or twist the body.
Finger Pose Motor Similar to the Pose motor, but this motor gives you simple access to a character’s hands and fingers. This is great
for up-close shots for when the character switches weapons.

BONE CONTROLLER ASSET VERSION 0.1 – REV 1
ootii |www.ootii.com 7
Impact Motor This motor is used to simulate hits from bullets or other weapons. Using the defined skeleton colliders, a ray can
be shot into the character. If it hits a bone, the bone and it’s children (as you define) will react to the impact.
Joint Limits Joints can play a pretty big role in controlling your camera. By assigning a joint to the bone, we can control if it
bends, how it bends, and how far it bends. This is a great way of ensuring an elbow doesn’t bend backward
unnaturally.

BONE CONTROLLER ASSET VERSION 0.1 – REV 1
ootii |www.ootii.com 8
Rotation Motors Rotation motors allow you to rotate bones over time. Think of turrets or gears that you want to move in the
scene. This is a great way to add automated movement to objects. Use with joints to limit the rotation.

BONE CONTROLLER ASSET VERSION 0.1 – REV 1
ootii |www.ootii.com 9
Your First Scene Now that you got the demo running, let’s create your first scene.
1. Create a new scene.
2. Drag the Unity character in. You can find him under Assets\ootii\BoneController\Demos\
Characters\Human.
3. Let’s give him a simple idle animation. Drag the Human Idle animator from
Assets\ootii\BoneController\Demos\Characters to his animator’s Controller property.
4. Add a directional light so we can see.
5. On the character, let’s add a Bone Controller
Unity Menu: Component | ootii | Bone Controller
At this point, your scene should look something like this:

BONE CONTROLLER ASSET VERSION 0.1 – REV 1
ootii |www.ootii.com 10
6. Tell the Bone Controller about the character’s root by dragging the root bone over to the Root Transform
property.
Typically the
character’s root is its
hip transform.
It’s really the first
bone that was
created in Maya or
some other content
creation too.
What the Bone Controller will do is process each of the bones and set them up so we can use them in our
motors. This also gives us a starting point for adding joint limits and colliders.
Once done, you can see the bone number has increased.

BONE CONTROLLER ASSET VERSION 0.1 – REV 1
ootii |www.ootii.com 11
The bones will be visible by default.
7. Let’s add a simple Finger Pose Motor. Click on the triangle to the left of Show bone motors. The motors
panel will open.
8. Under IK Motors, select Finger Pose Motor and then press the + sign.
Once added, the motor is selected and you’ll see the motor properties below:

BONE CONTROLLER ASSET VERSION 0.1 – REV 1
ootii |www.ootii.com 12
9. For now, we just want to enable the motor to run in
the editor. So, click Run In Editor.
10. Grab the Right Hand slider and move it back and
forth.
You should see the right hand clenching and releasing
This motor is a little special. Since it relies on the Unity Humanoid rig, you don’t actually need to assign any
bones. With other motors, you may need to.
What if you have a creature that isn’t humanoid, but you want to do something similar? No problem, just build a
new motor. See the Motor Builder’s Guide for more details.
BONE CONTROLLER ASSET VERSION 0.1 – REV 1
ootii |www.ootii.com 13
Character Controllers The Bone Controller was built to be used with a character controller. It’s important to realize that the Bone
Controller isn’t a character controller. It’s not really built to make a character move or jump. That’s what a
character controller would do.
The Motion Controller is an advanced character controller that allows you to walk, run, jump, climb, and create
new motions as you need. The Motion Controller is a great foundation for the Bone Controller. Whether you use
the Motion Controller or another character controller, the steps to add the Bone Controller are the same.
Just follow the steps found under Your First Scene.
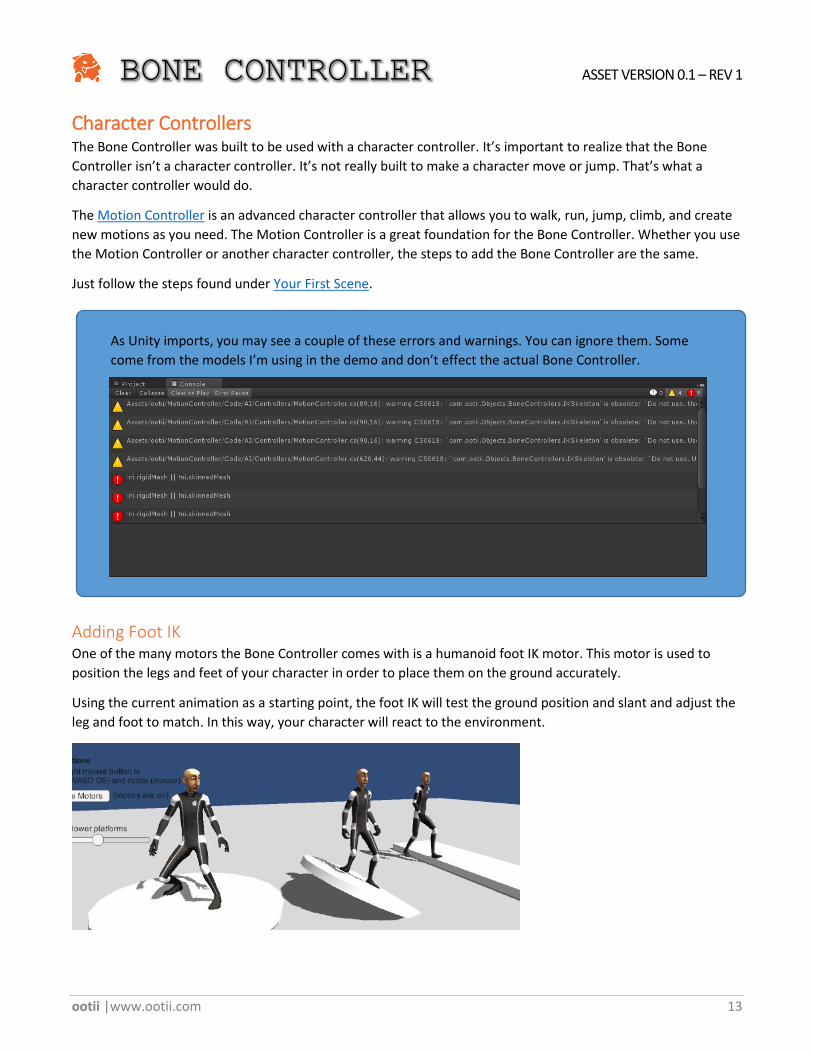
Adding Foot IK One of the many motors the Bone Controller comes with is a humanoid foot IK motor. This motor is used to
position the legs and feet of your character in order to place them on the ground accurately.
Using the current animation as a starting point, the foot IK will test the ground position and slant and adjust the
leg and foot to match. In this way, your character will react to the environment.
As Unity imports, you may see a couple of these errors and warnings. You can ignore them. Some
come from the models I’m using in the demo and don’t effect the actual Bone Controller.

BONE CONTROLLER ASSET VERSION 0.1 – REV 1
ootii |www.ootii.com 14
To add foot IK to your character, simply do the following:
1. Ensure the Bone Controller is setup per the previous instructions.
2. Click the triangle next to “Show bone motors” to display the active motors. If you’re just starting, there won’t
be any.
3. Select “Foot to Ground 2 Bone Motor” in the dropdown and press the “+” button.
You’re actually going to do this twice. Once for the left leg and once for the right.
3. Select the motors by pressing the selection dots and change the name of the motors so we know which is
which.
4. Select the left leg and scroll down a little until you see the “Auto-Generate Humanoid”. These button will set
everything up for a standard Unity humanoid character. Just press “Left Leg”.
5. Select the right leg and press the “Right Leg” button.
If your character was imported with a Unity humanoid rig, you’ll see the bones listed and set for each leg. It will
look something like this:

BONE CONTROLLER ASSET VERSION 0.1 – REV 1
ootii |www.ootii.com 15
With that, you’re done setting up the Bone Controller.

BONE CONTROLLER ASSET VERSION 0.1 – REV 1
ootii |www.ootii.com 16
Character Controller Adjustment Depending on the character controller you use, you may need to adjust the character controller’s capsule
collider. If your character controller doesn’t have a capsule collider, you can ignore this section.
The reason this is important is because the capsule collider typically
covers the whole character. When this happens, the feet don’t hit
the ground.
If you look at the picture to the left, you can see exactly what I
mean. The bottom part of the capsule collider is controlling the
position of the character and not allowing the feet to actually touch
the ground.
You can also see this when your character is on an incline. The capsule
collider (when covering the feet) will touch the ramp, but not let the feet.
To compensate for this, shift your capsule collider up to allow the feet to independently touch the ground. As
you do this, the feet will be able to reach the ground and plant themselves correctly.
How exactly you do this will depend on the character controller you’re using.

BONE CONTROLLER ASSET VERSION 0.1 – REV 1
ootii |www.ootii.com 17
Motion Controller Adjustment The latest version of the Motion Controller allows for the kind of adjustment I mentioned in the previous section
as well as automatically shifting the capsule collider to compensate for ramps.
1. Adjust the capsule collider so that there’s a clearing for the
feet. The setting above work well for a standard character
that is 1.8 meters tall.
As you can see, doing this provides some clearance for the feet.
2. Set the Motion Controller to handle ramps and steps.
Max Slide Sink The max distance the character will sink down into
ramps in order to force foot placement.
Once the Min Slide Angle is hit, the character will
start to sink. As the angle heads towards 45 degrees,
the character will sink to the Max Slide Sink value.
Step Up Lerp Determines how slowly the character moves up
steps.
Step Down Lerp Determines how slowly the character moves down
steps.
Both of these settings help with the illusion that the character is “moving” up the steps like a normal person as
opposed to popping up steps based purely on the capsule collider.

BONE CONTROLLER ASSET VERSION 0.1 – REV 1
ootii |www.ootii.com 18
With the Motion Controller and these settings, you character will walk up steps and ramps much more
realistically.
(Note: there are still limits to how far the foot will rotate to orient to the ground. Otherwise, we can get into
some odd looking situations).
Wrap-Up Remember, this was just a quick document to get you started. Check out the User’s Guide for more information
about how bones work and a detailed description of each motor.
Check out the User’s Guide at:
http://www.ootii.com/unity/BoneController/BCGuide.pdf
Support If you have any comments, questions, or issues, please don’t hesitate to email me at [email protected]. I’ll help
any way I can.
Thanks!
Tim