building user interfaces react 2
TRANSCRIPT
Building User Interfaces
React 2Building w/ ReactProfessor Yuhang Zhaoadapted from Prof. Mutlu's slides
© Building User Interfaces | Professor Mutlu | Lecture 07: React 2 — Building w/ React
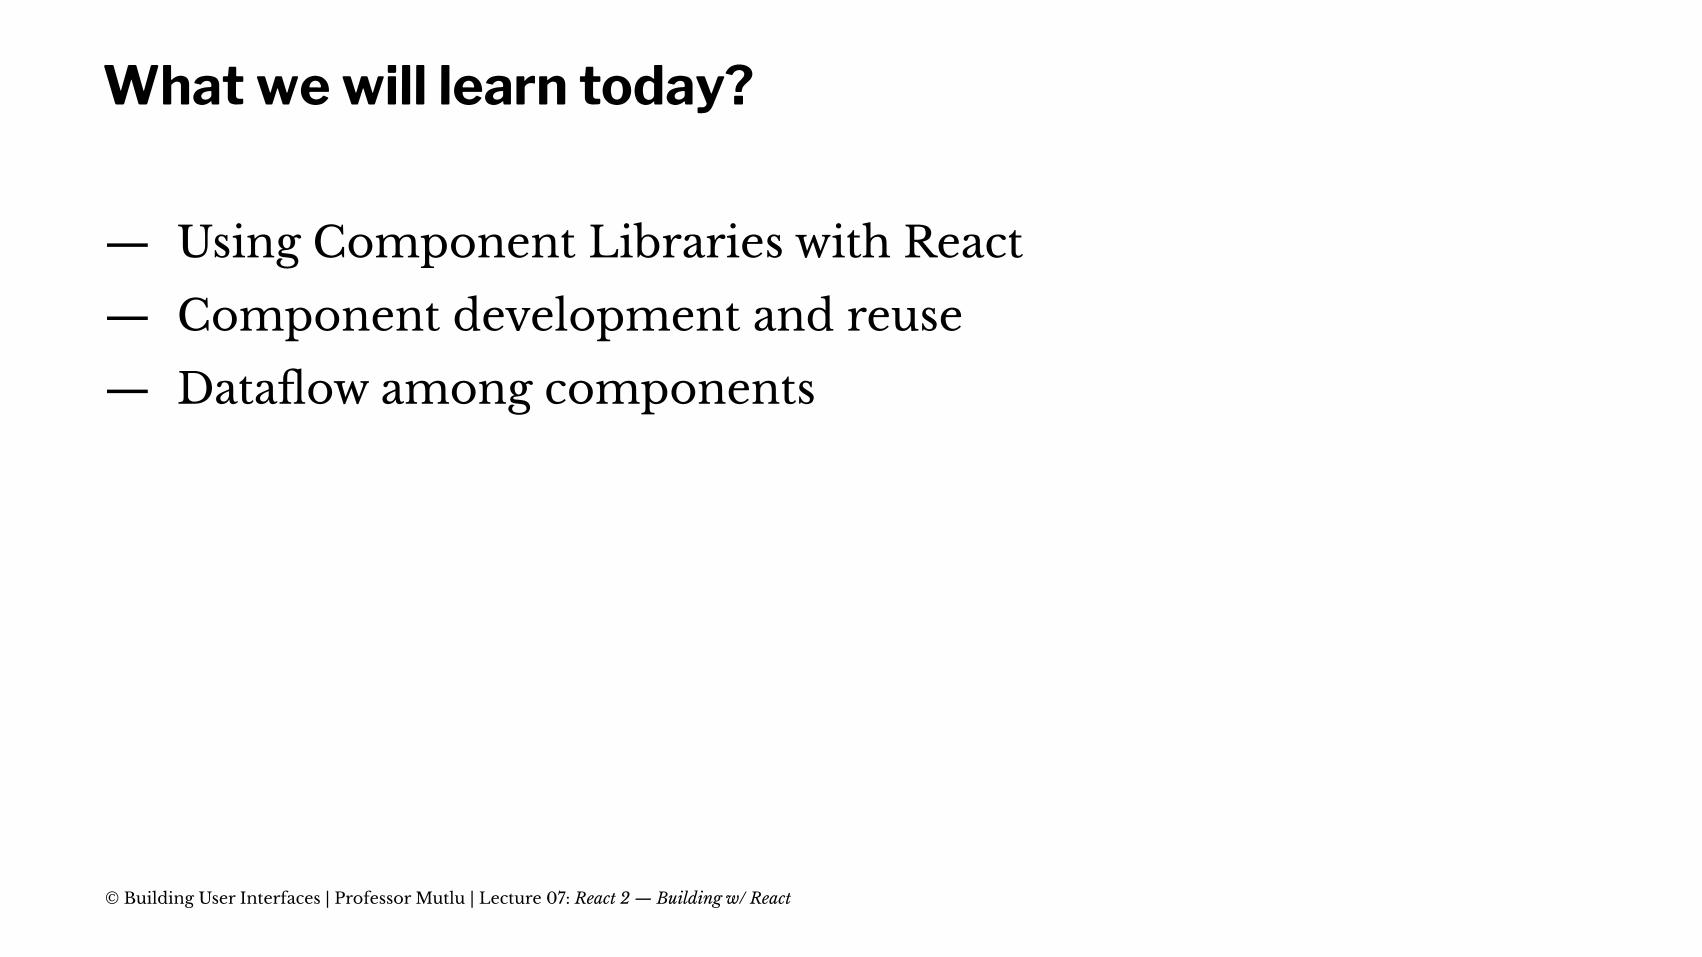
What we will learn today?
— Using Component Libraries with React
— Component development and reuse
— Dataflow among components
© Building User Interfaces | Professor Mutlu | Lecture 07: React 2 — Building w/ React
Using Component Libraries with React
© Building User Interfaces | Professor Mutlu | Lecture 07: React 2 — Building w/ React
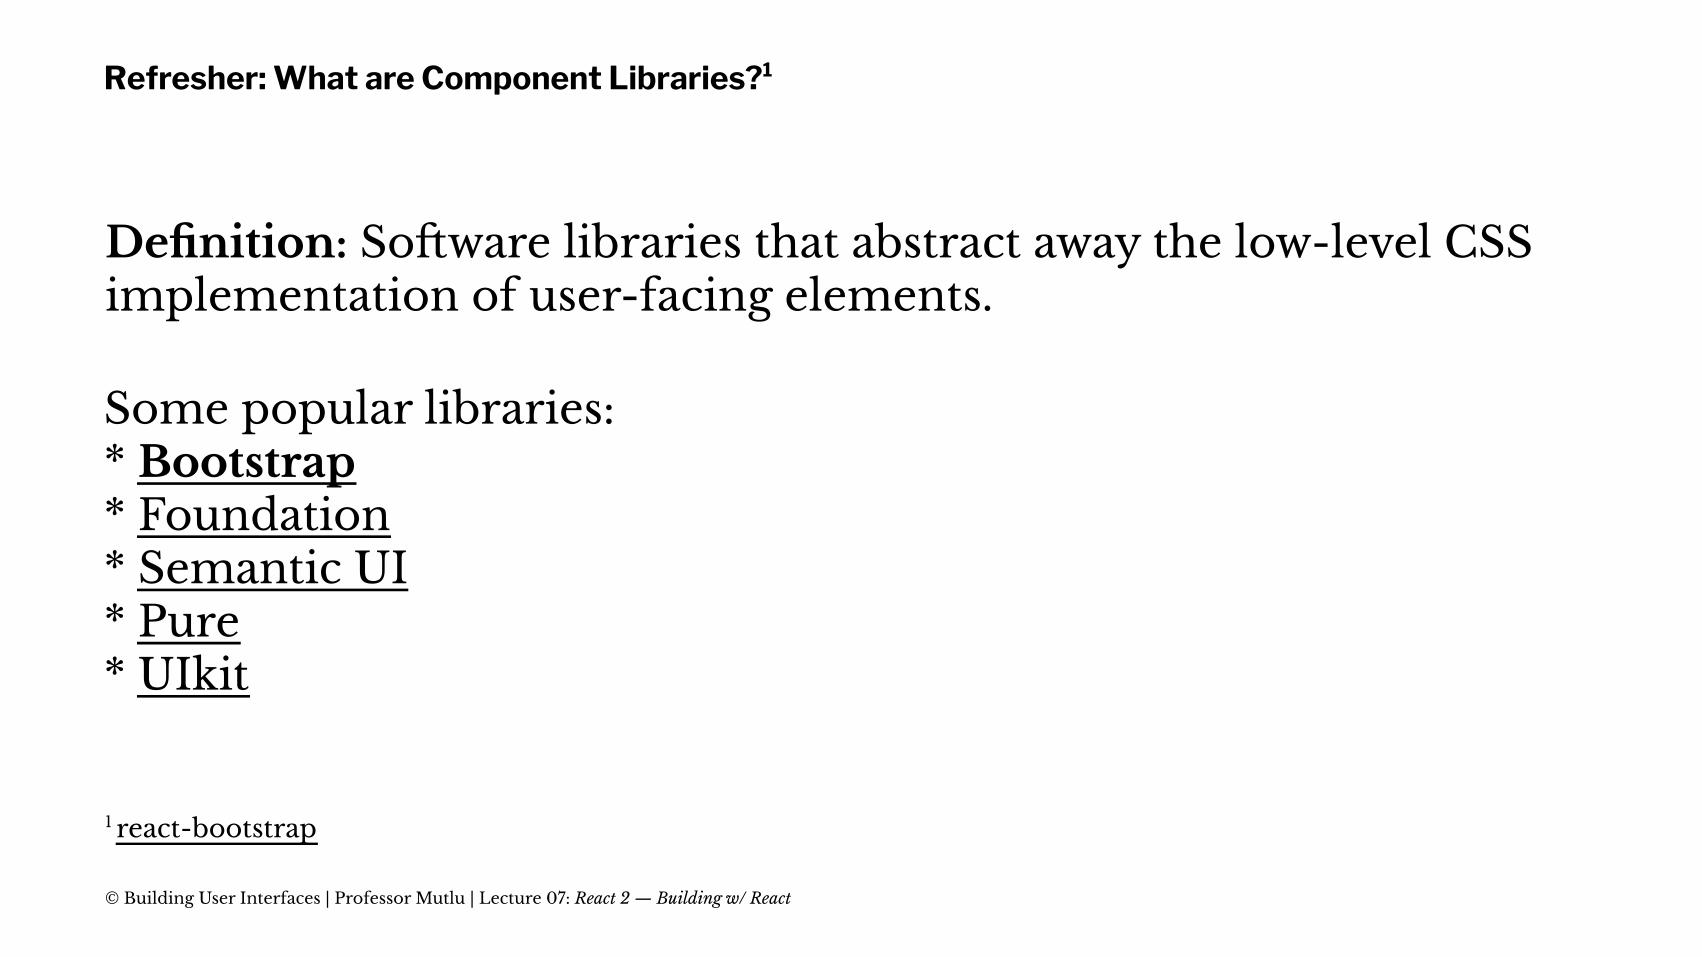
Refresher: What are Component Libraries?1
Definition: So!ware libraries that abstract away the low-level CSS implementation of user-facing elements.
Some popular libraries:* Bootstrap* Foundation* Semantic UI* Pure* UIkit
1 react-bootstrap
© Building User Interfaces | Professor Mutlu | Lecture 07: React 2 — Building w/ React
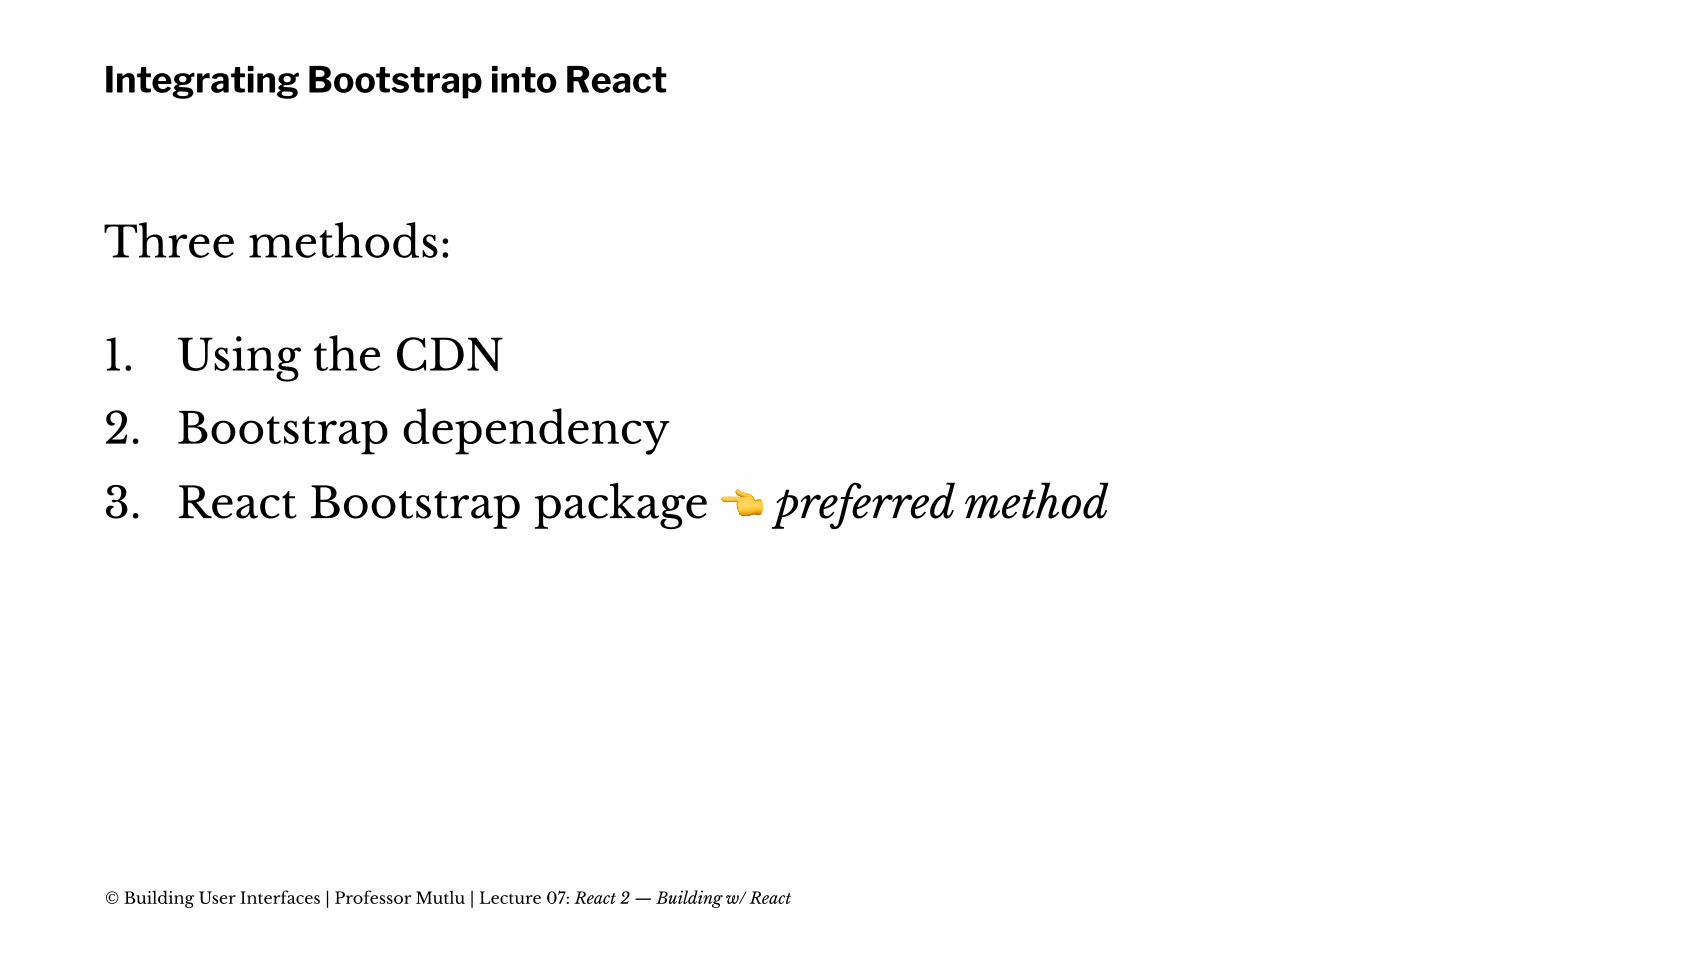
Integrating Bootstrap into React
Three methods:
1. Using the CDN
2. Bootstrap dependency
3. React Bootstrap package
!
preferred method
© Building User Interfaces | Professor Mutlu | Lecture 07: React 2 — Building w/ React
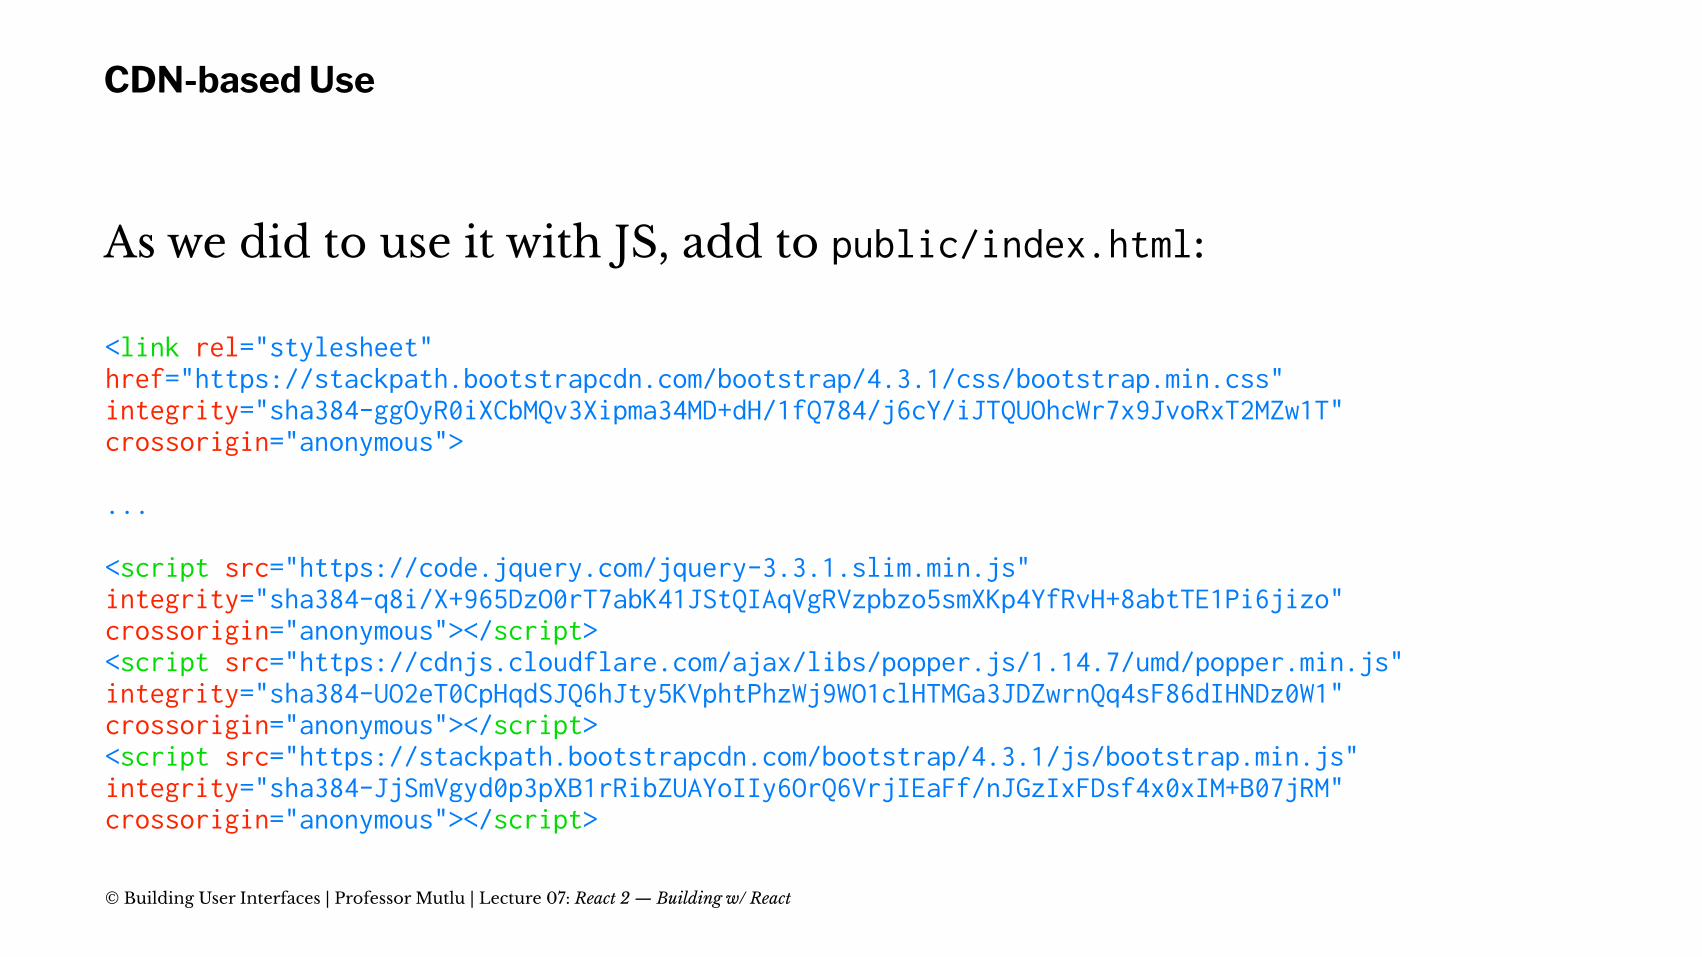
CDN-based Use
As we did to use it with JS, add to public/index.html:
<link rel="stylesheet" href="https://stackpath.bootstrapcdn.com/bootstrap/4.3.1/css/bootstrap.min.css" integrity="sha384-ggOyR0iXCbMQv3Xipma34MD+dH/1fQ784/j6cY/iJTQUOhcWr7x9JvoRxT2MZw1T" crossorigin="anonymous">
...
<script src="https://code.jquery.com/jquery-3.3.1.slim.min.js" integrity="sha384-q8i/X+965DzO0rT7abK41JStQIAqVgRVzpbzo5smXKp4YfRvH+8abtTE1Pi6jizo" crossorigin="anonymous"></script><script src="https://cdnjs.cloudflare.com/ajax/libs/popper.js/1.14.7/umd/popper.min.js" integrity="sha384-UO2eT0CpHqdSJQ6hJty5KVphtPhzWj9WO1clHTMGa3JDZwrnQq4sF86dIHNDz0W1" crossorigin="anonymous"></script><script src="https://stackpath.bootstrapcdn.com/bootstrap/4.3.1/js/bootstrap.min.js" integrity="sha384-JjSmVgyd0p3pXB1rRibZUAYoIIy6OrQ6VrjIEaFf/nJGzIxFDsf4x0xIM+B07jRM" crossorigin="anonymous"></script>
© Building User Interfaces | Professor Mutlu | Lecture 07: React 2 — Building w/ React
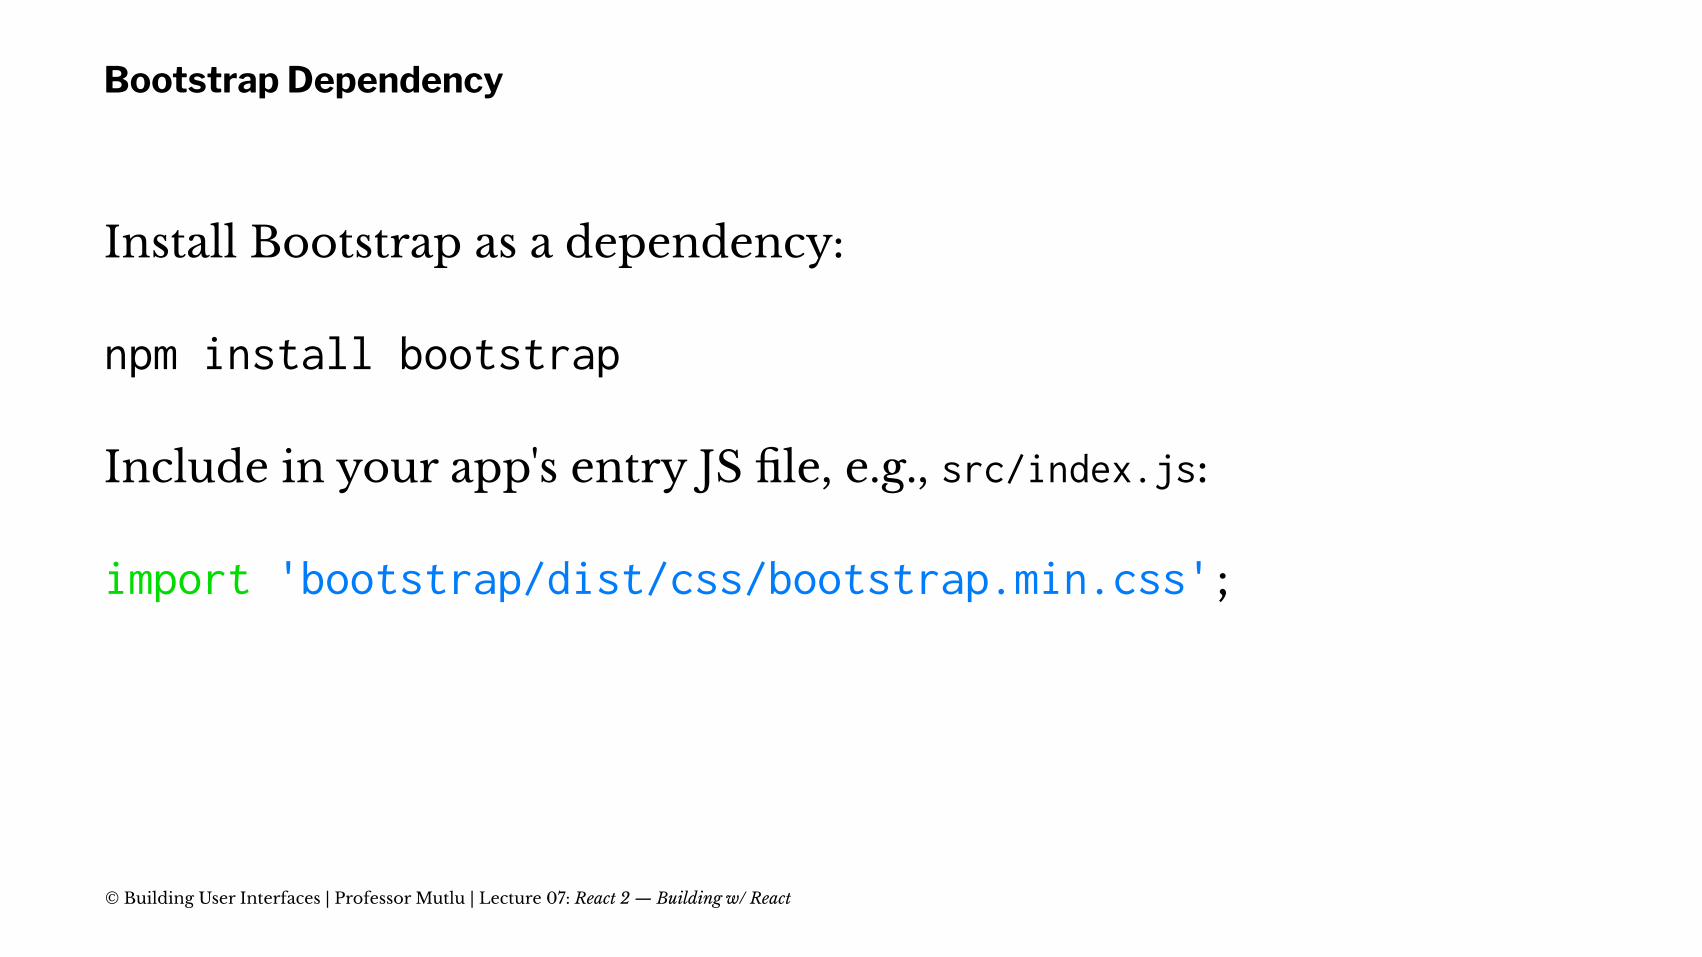
Bootstrap Dependency
Install Bootstrap as a dependency:
npm install bootstrap
Include in your app's entry JS file, e.g., src/index.js:
import 'bootstrap/dist/css/bootstrap.min.css';
© Building User Interfaces | Professor Mutlu | Lecture 07: React 2 — Building w/ React
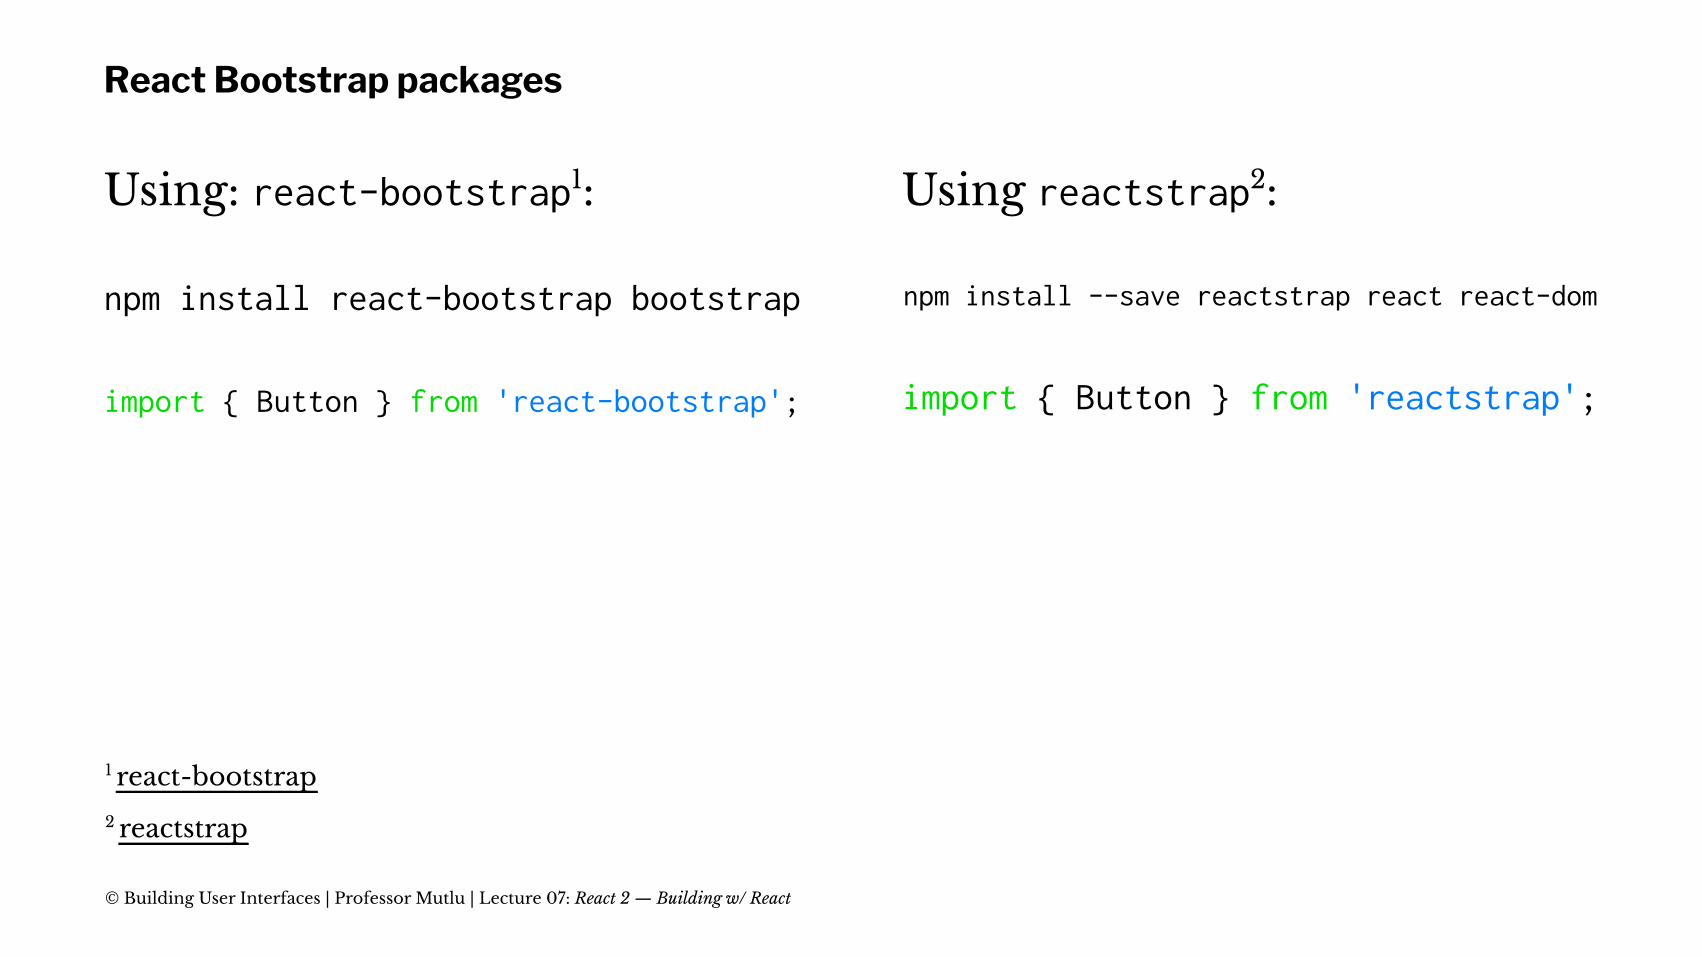
React Bootstrap packages
Using: react-bootstrap1:
npm install react-bootstrap bootstrap
import { Button } from 'react-bootstrap';
Using reactstrap2:
npm install --save reactstrap react react-dom
import { Button } from 'reactstrap';
2 reactstrap
1 react-bootstrap
© Building User Interfaces | Professor Mutlu | Lecture 07: React 2 — Building w/ React
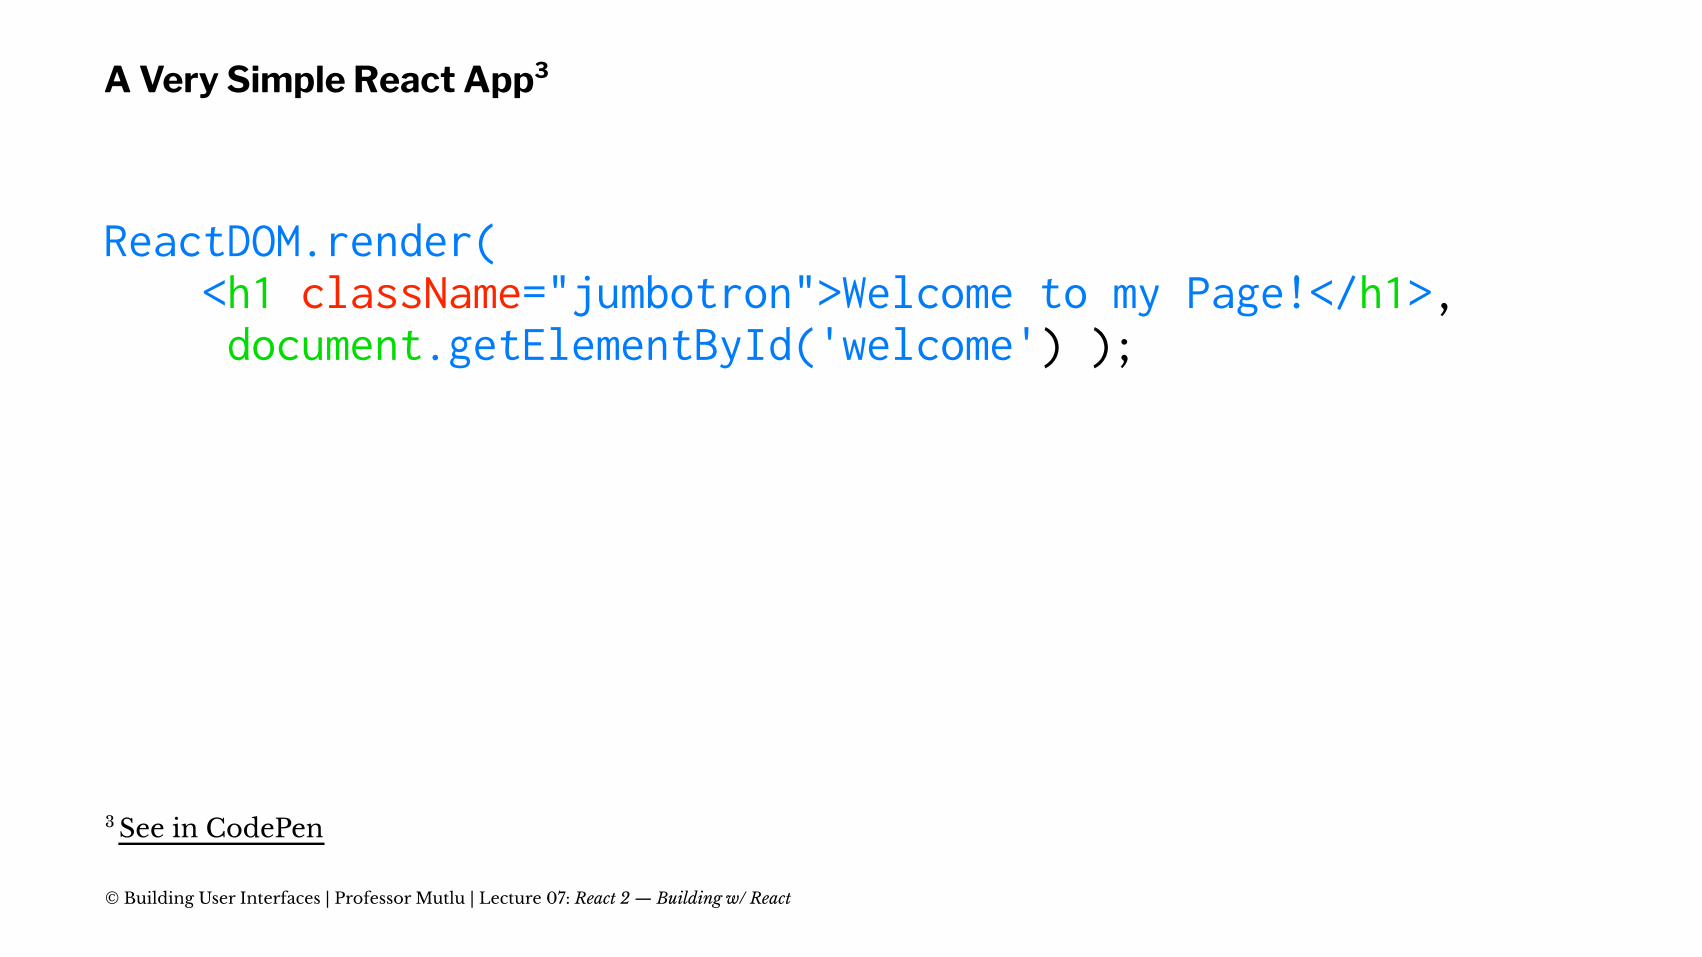
A Very Simple React App3
ReactDOM.render( <h1 className="jumbotron">Welcome to my Page!</h1>, document.getElementById('welcome') );
3 See in CodePen
© Building User Interfaces | Professor Mutlu | Lecture 07: React 2 — Building w/ React
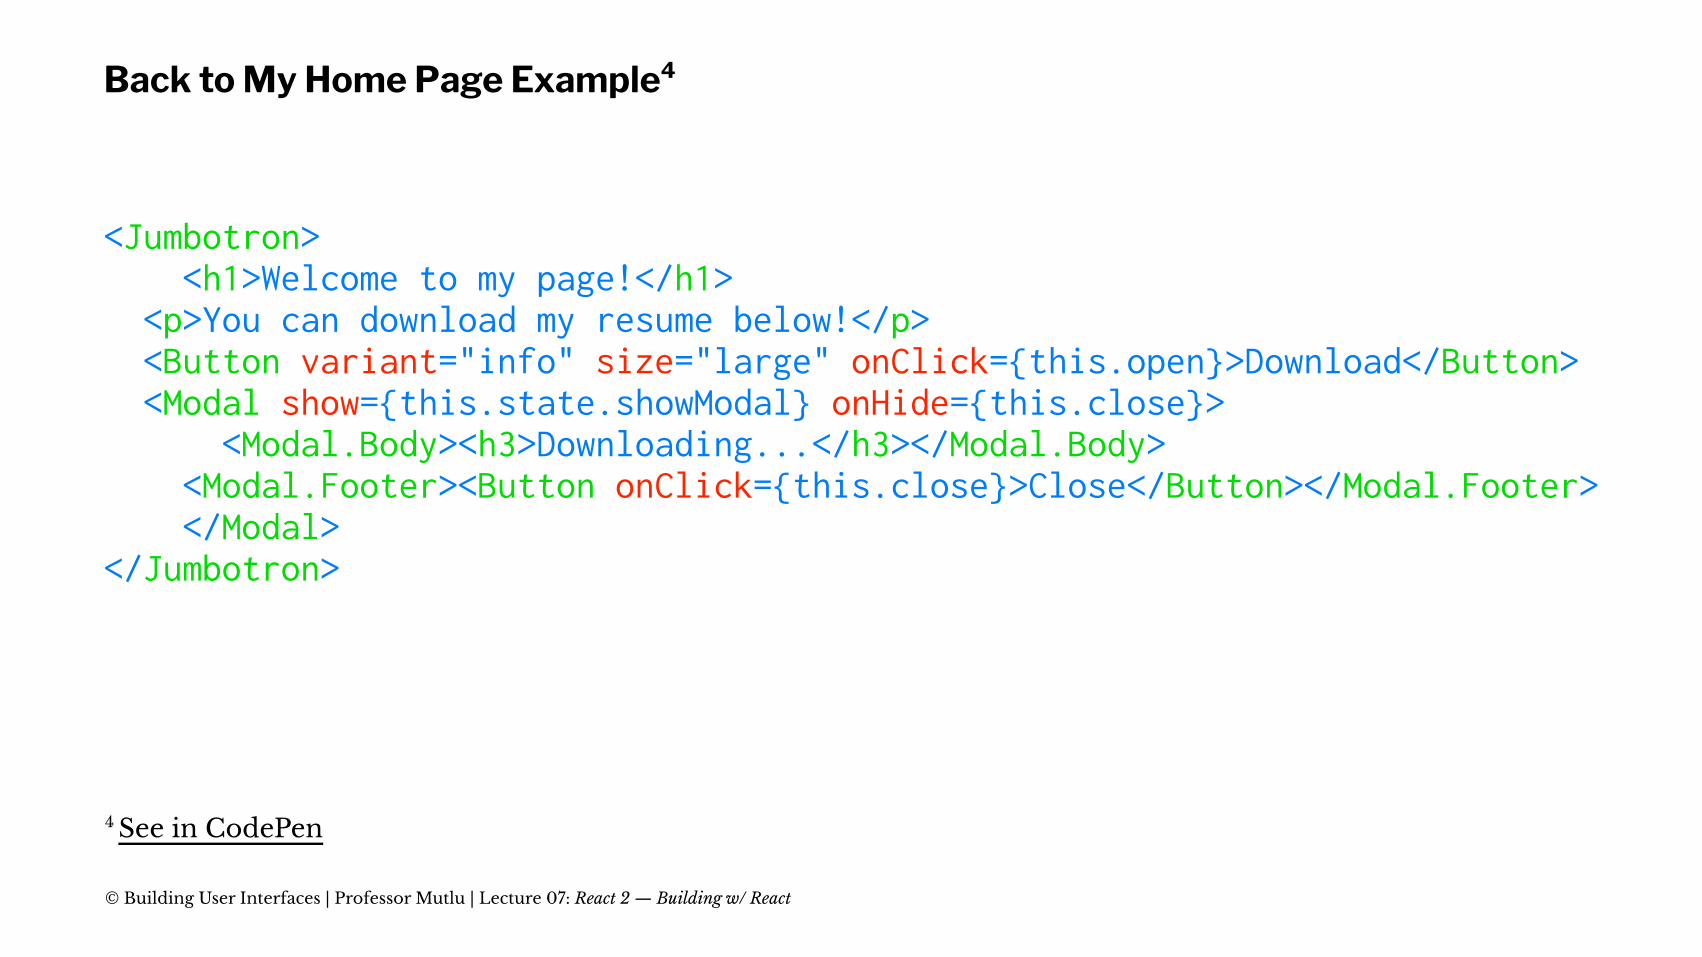
Back to My Home Page Example4
<Jumbotron> <h1>Welcome to my page!</h1> <p>You can download my resume below!</p> <Button variant="info" size="large" onClick={this.open}>Download</Button> <Modal show={this.state.showModal} onHide={this.close}> <Modal.Body><h3>Downloading...</h3></Modal.Body> <Modal.Footer><Button onClick={this.close}>Close</Button></Modal.Footer> </Modal></Jumbotron>
4 See in CodePen
© Building User Interfaces | Professor Mutlu | Lecture 07: React 2 — Building w/ React
Component Development and Reuse
© Building User Interfaces | Professor Mutlu | Lecture 07: React 2 — Building w/ React
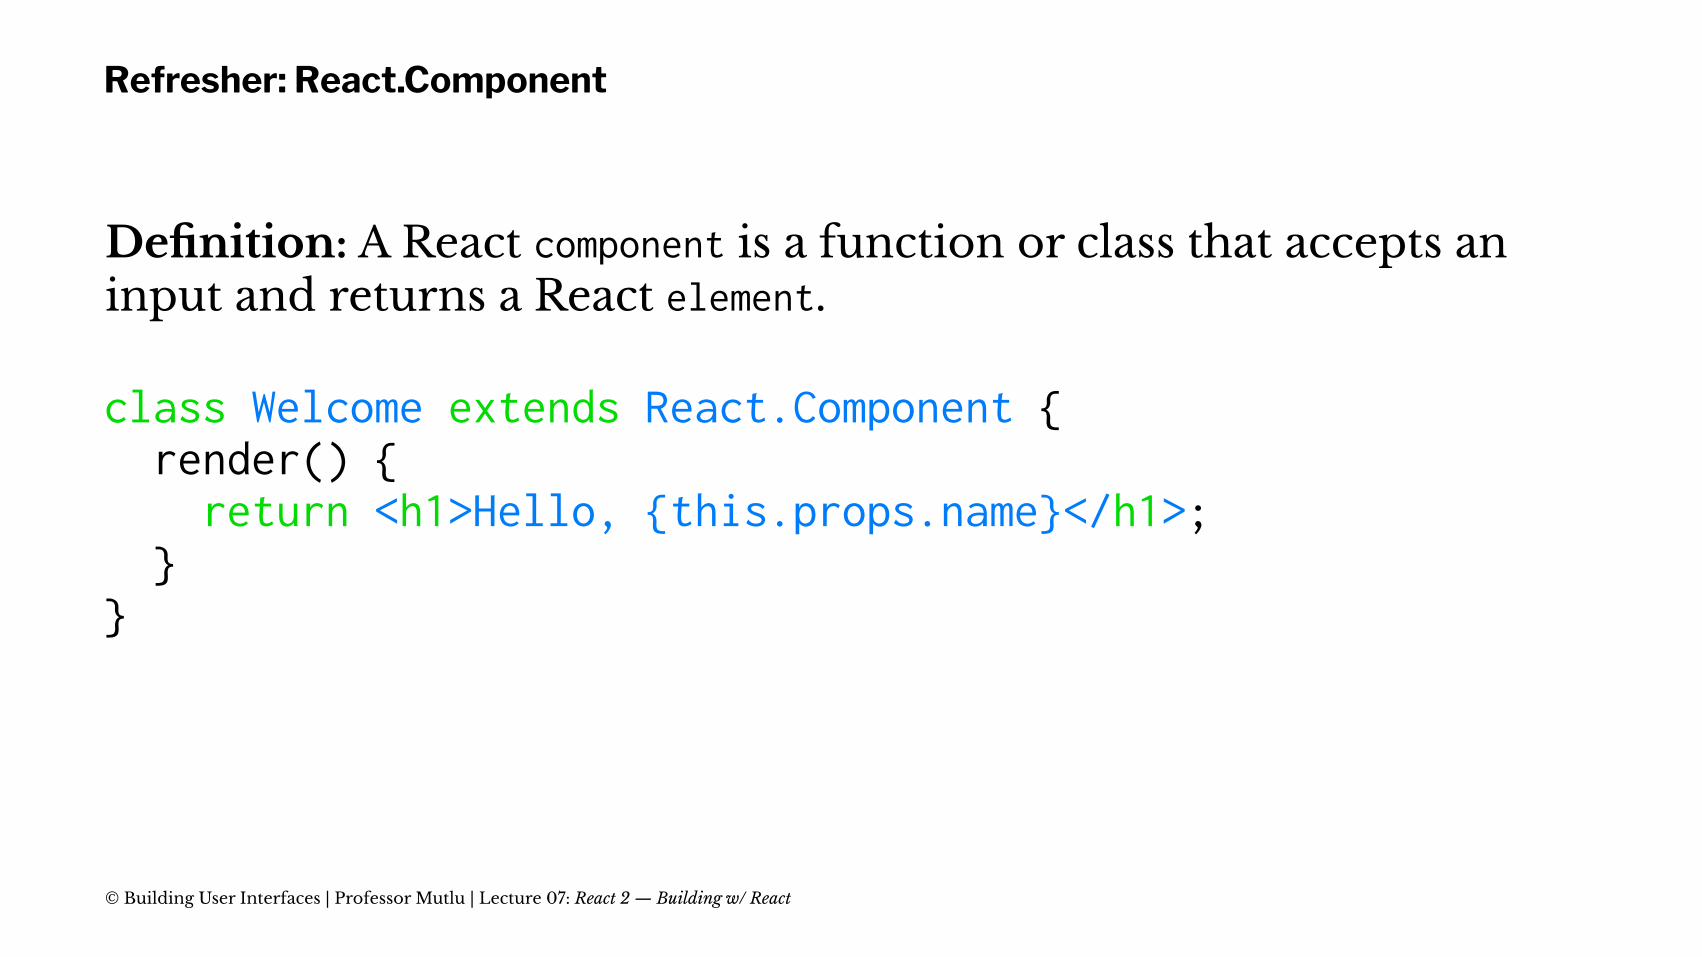
Refresher: React.Component
Definition: A React component is a function or class that accepts an input and returns a React element.
class Welcome extends React.Component { render() { return <h1>Hello, {this.props.name}</h1>; }}
© Building User Interfaces | Professor Mutlu | Lecture 07: React 2 — Building w/ React
Refresher: React.Component, Continued
Components work like JS functions; they accept props and return React elements that correspond to what will be rendered in the DOM.
Each component is encapsulated (one component per file) and can operate independently, affording modularity.
© Building User Interfaces | Professor Mutlu | Lecture 07: React 2 — Building w/ React
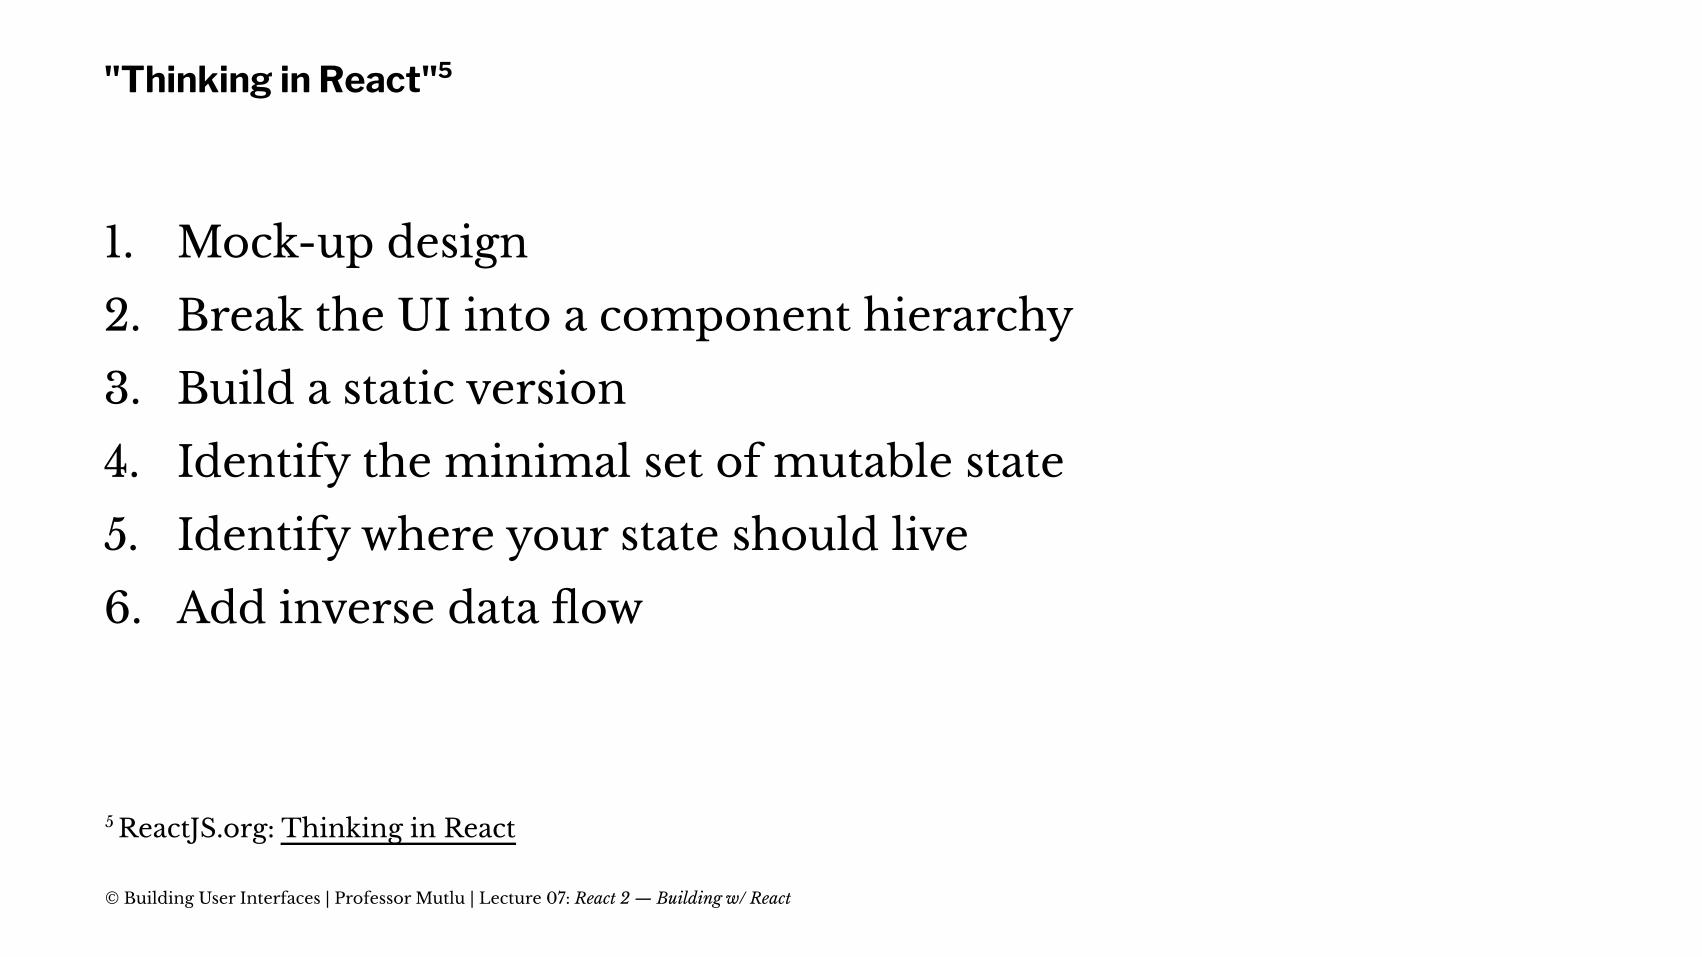
"Thinking in React"5
1. Mock-up design
2. Break the UI into a component hierarchy
3. Build a static version
4. Identify the minimal set of mutable state
5. Identify where your state should live
6. Add inverse data flow
5 ReactJS.org: Thinking in React
© Building User Interfaces | Professor Mutlu | Lecture 07: React 2 — Building w/ React
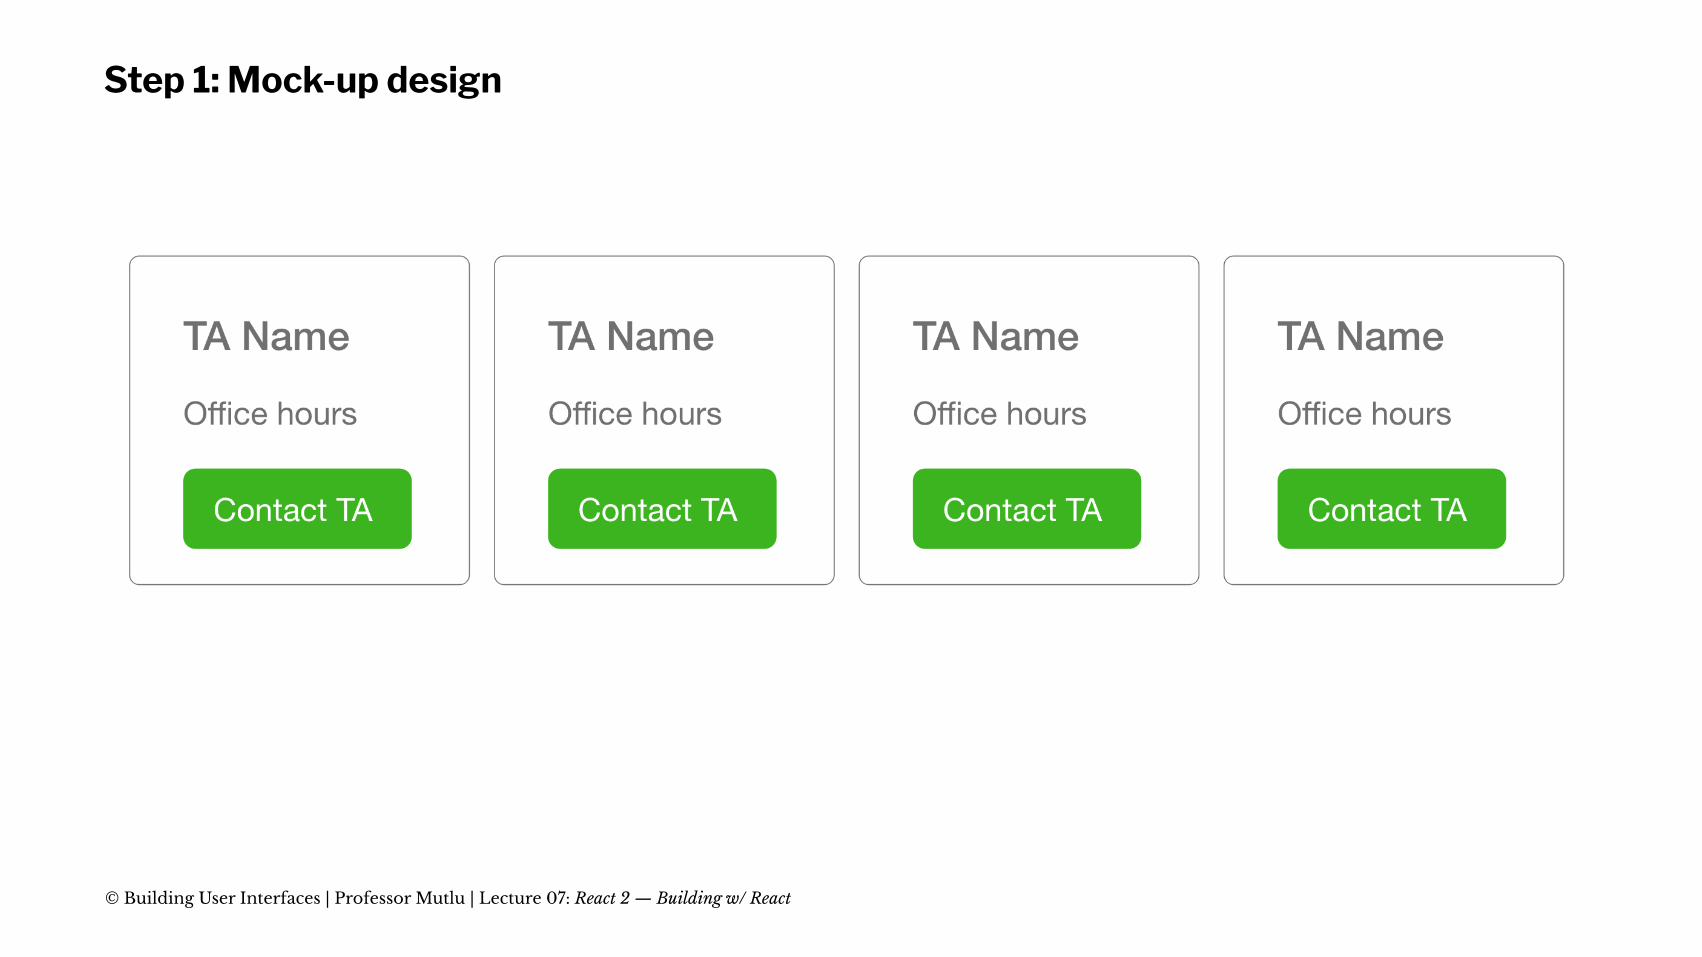
Step 1: Mock-up design
© Building User Interfaces | Professor Mutlu | Lecture 07: React 2 — Building w/ React
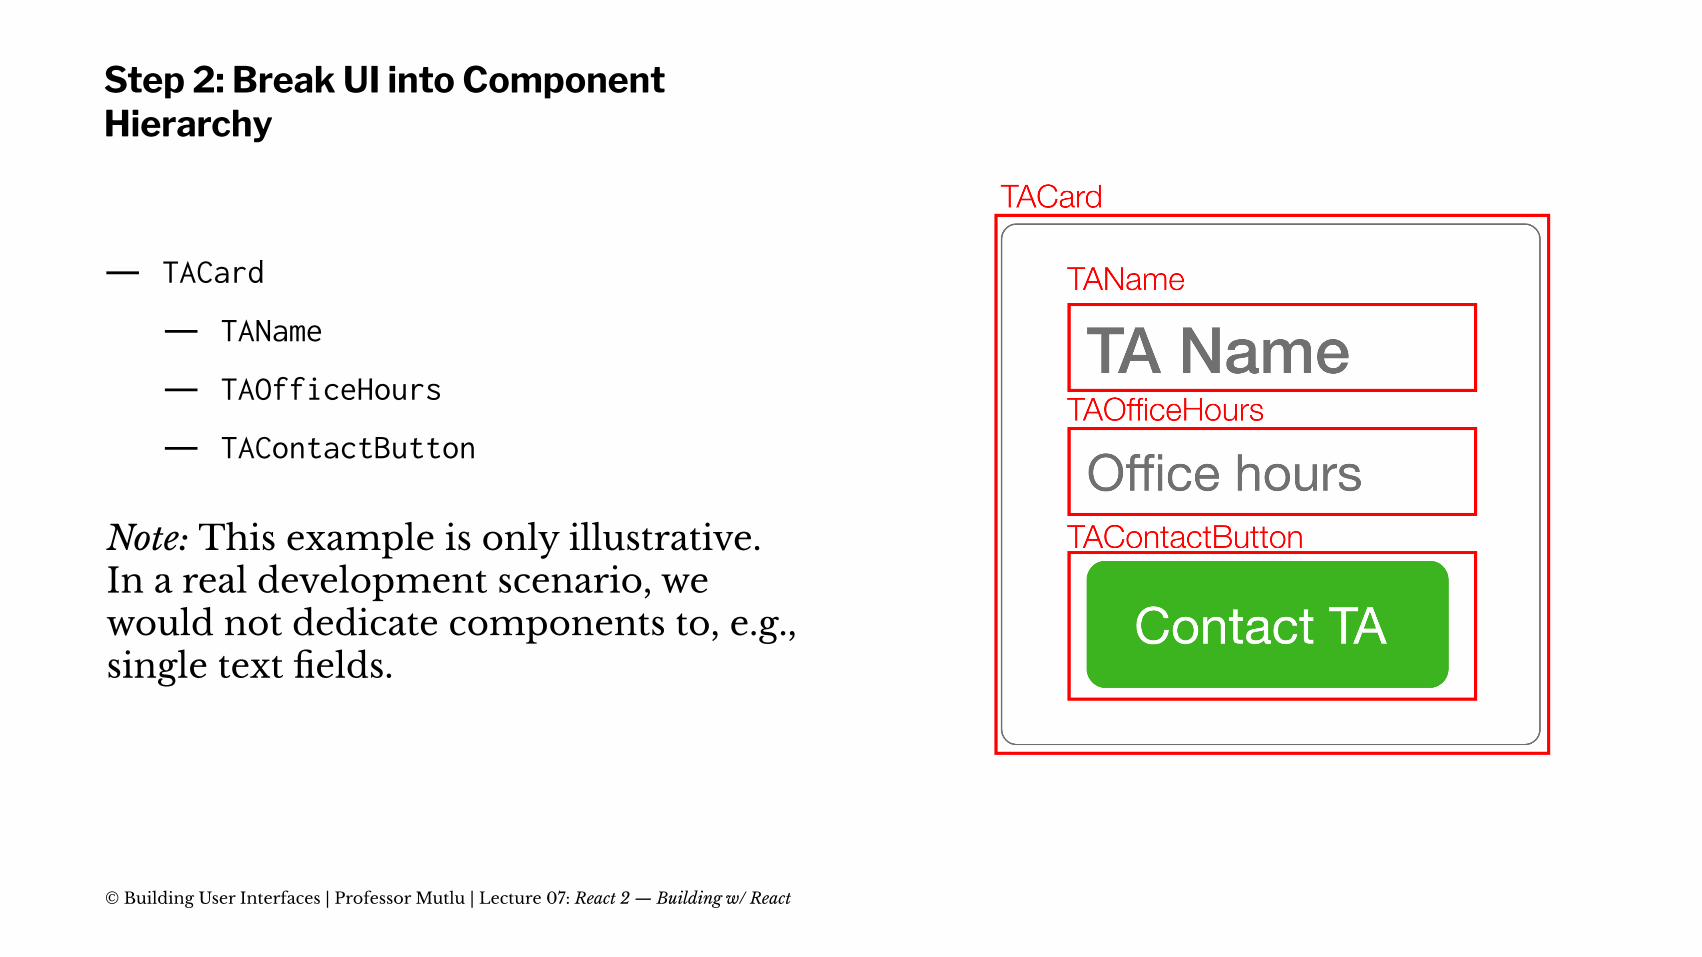
Step 2: Break UI into Component Hierarchy
— TACard
— TAName
— TAOfficeHours
— TAContactButton
Note: This example is only illustrative. In a real development scenario, we would not dedicate components to, e.g., single text fields.
© Building User Interfaces | Professor Mutlu | Lecture 07: React 2 — Building w/ React
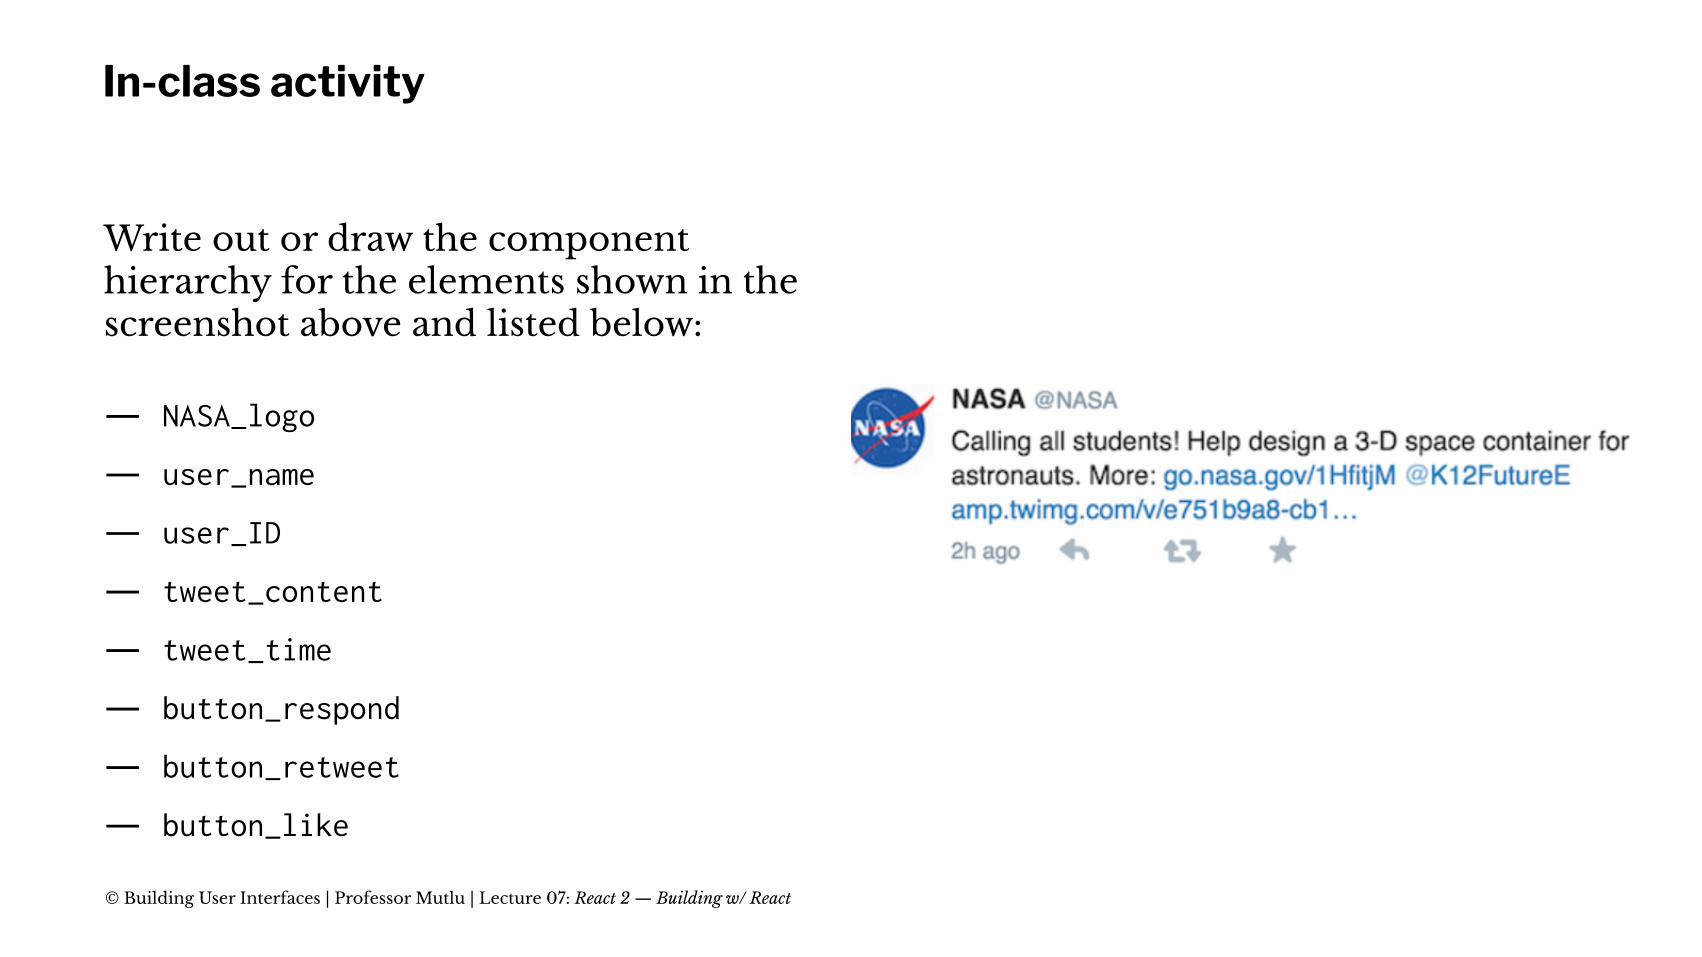
In-class activity
Write out or draw the component hierarchy for the elements shown in the screenshot above and listed below:
— NASA_logo
— user_name
— user_ID
— tweet_content
— tweet_time
— button_respond
— button_retweet
— button_like
© Building User Interfaces | Professor Mutlu | Lecture 07: React 2 — Building w/ React
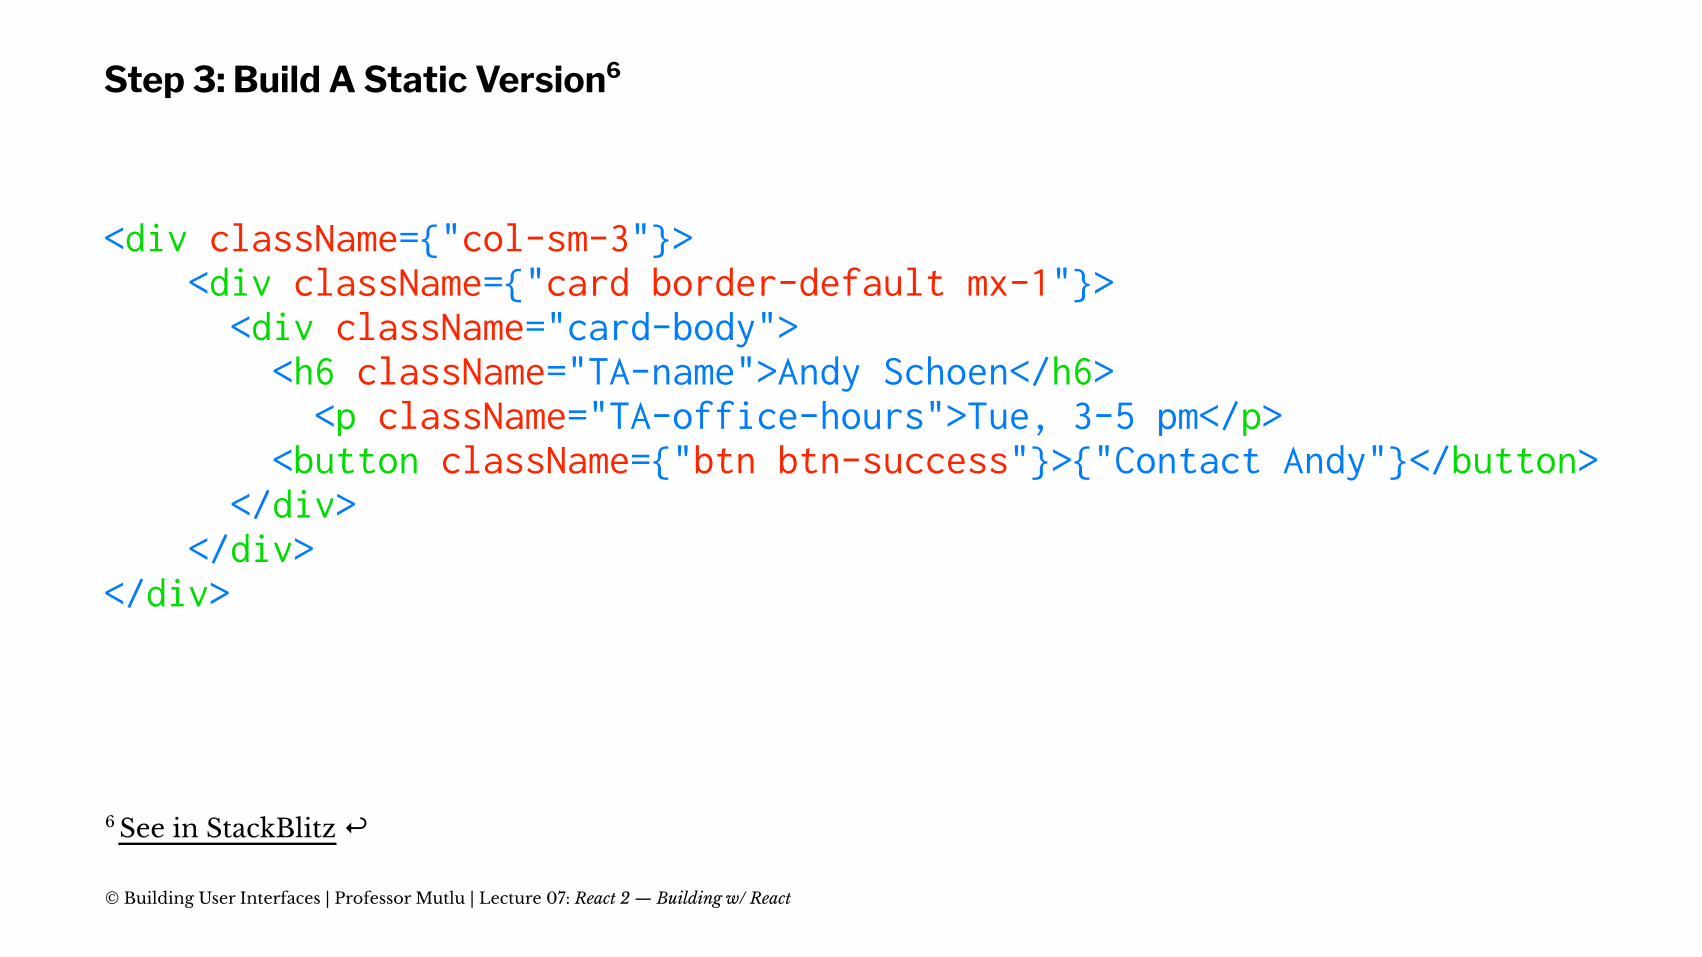
Step 3: Build A Static Version6
<div className={"col-sm-3"}> <div className={"card border-default mx-1"}> <div className="card-body"> <h6 className="TA-name">Andy Schoen</h6> <p className="TA-office-hours">Tue, 3-5 pm</p> <button className={"btn btn-success"}>{"Contact Andy"}</button> </div> </div></div>
6 See in StackBlitz ↩
© Building User Interfaces | Professor Mutlu | Lecture 07: React 2 — Building w/ React
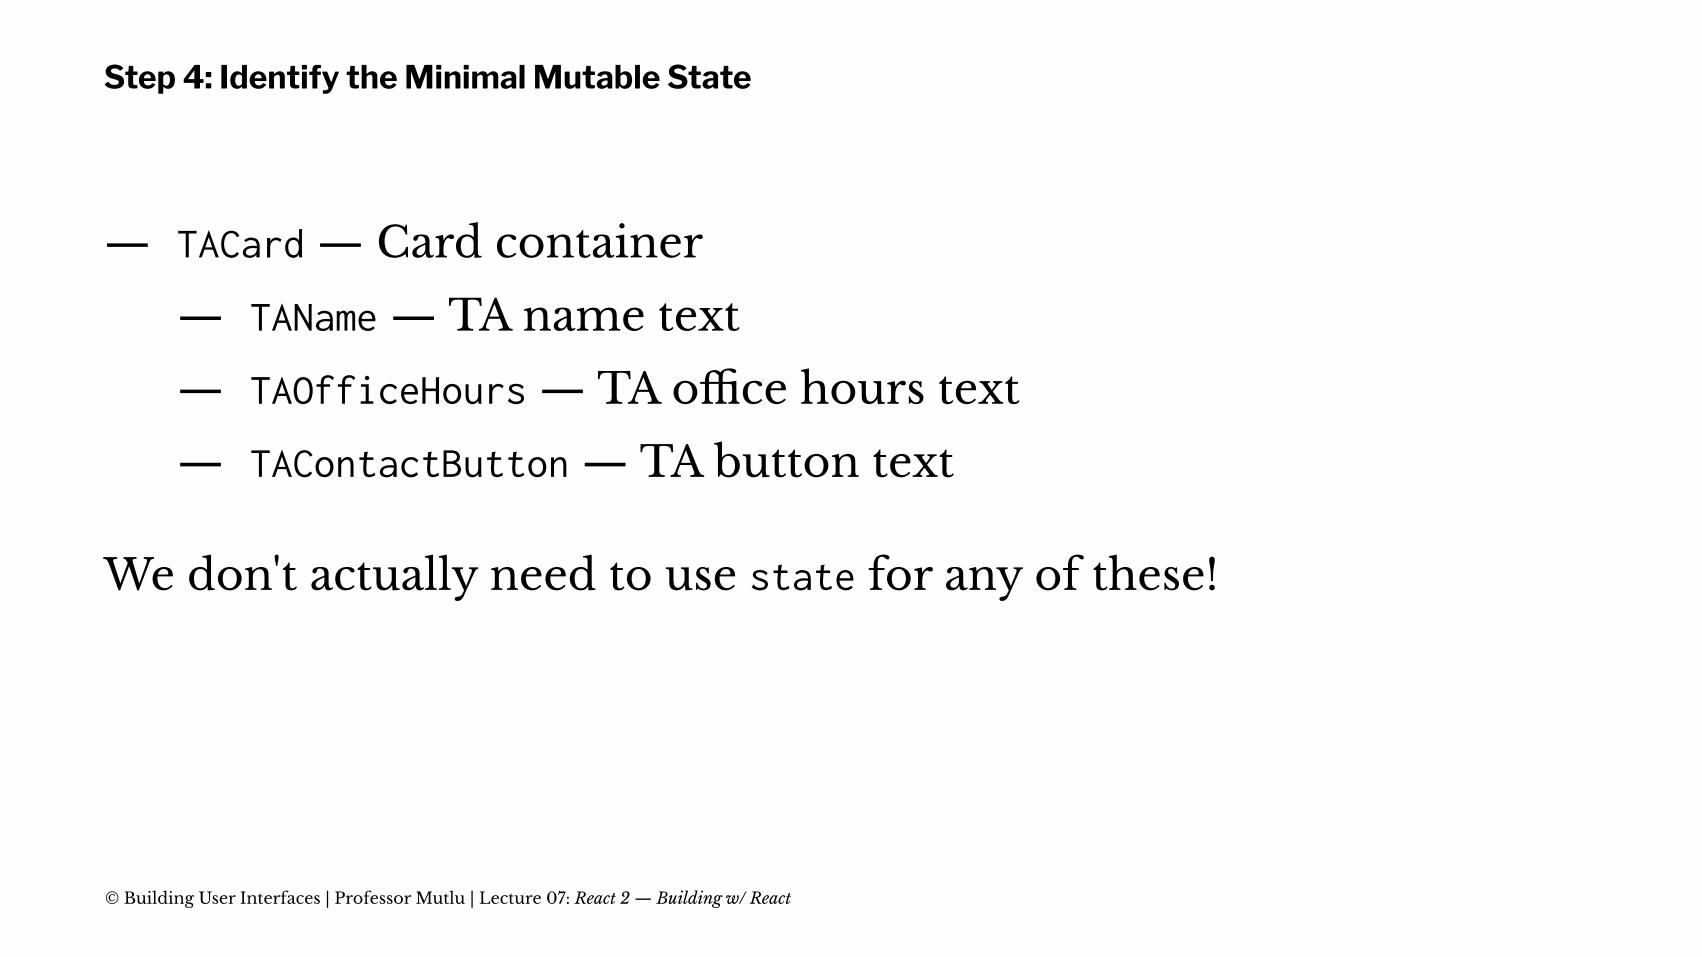
Step 4: Identify the Minimal Mutable State
— TACard — Card container
— TAName — TA name text
— TAOfficeHours — TA office hours text
— TAContactButton — TA button text
We don't actually need to use state for any of these!
© Building User Interfaces | Professor Mutlu | Lecture 07: React 2 — Building w/ React
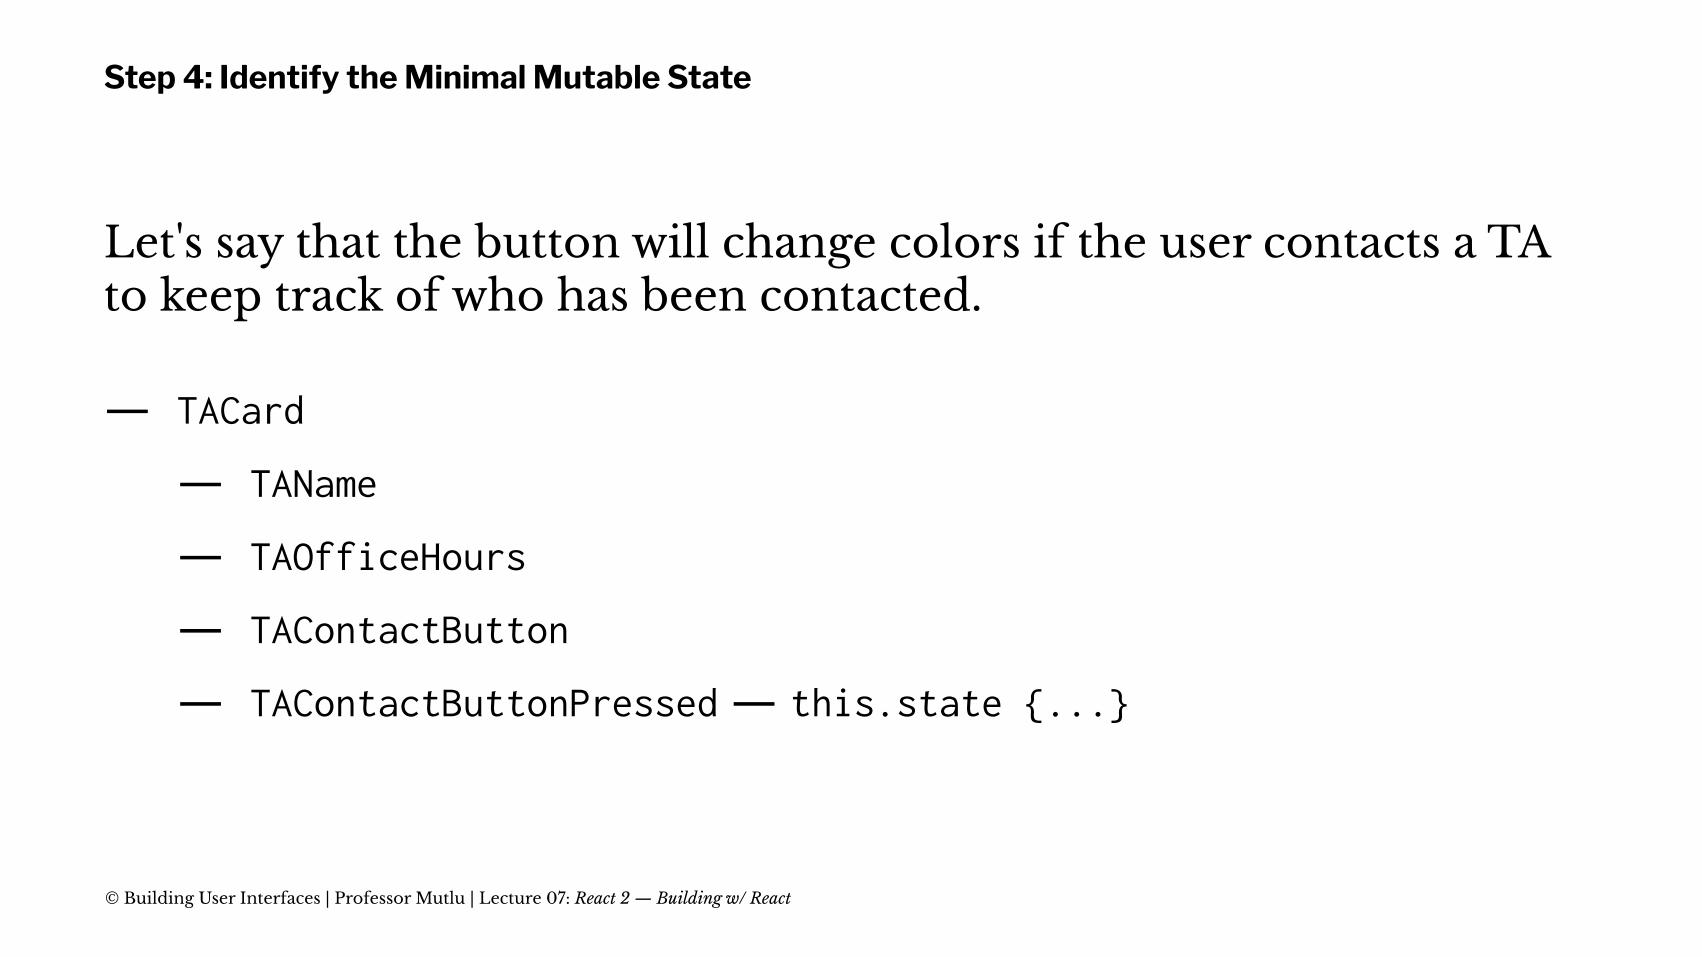
Step 4: Identify the Minimal Mutable State
Let's say that the button will change colors if the user contacts a TA to keep track of who has been contacted.
— TACard
— TAName
— TAOfficeHours
— TAContactButton
— TAContactButtonPressed — this.state {...}
© Building User Interfaces | Professor Mutlu | Lecture 07: React 2 — Building w/ React

Step 5: Identify Where the State Should Live
There are three options:
1. App keeps track of the button state for each TAContactButton
2. TACard keeps track of the button state for its TAContactButton
3. A dedicated TAContactButton component tracks its own state
All options will work, #3 is most aligned with the React way.
© Building User Interfaces | Professor Mutlu | Lecture 07: React 2 — Building w/ React
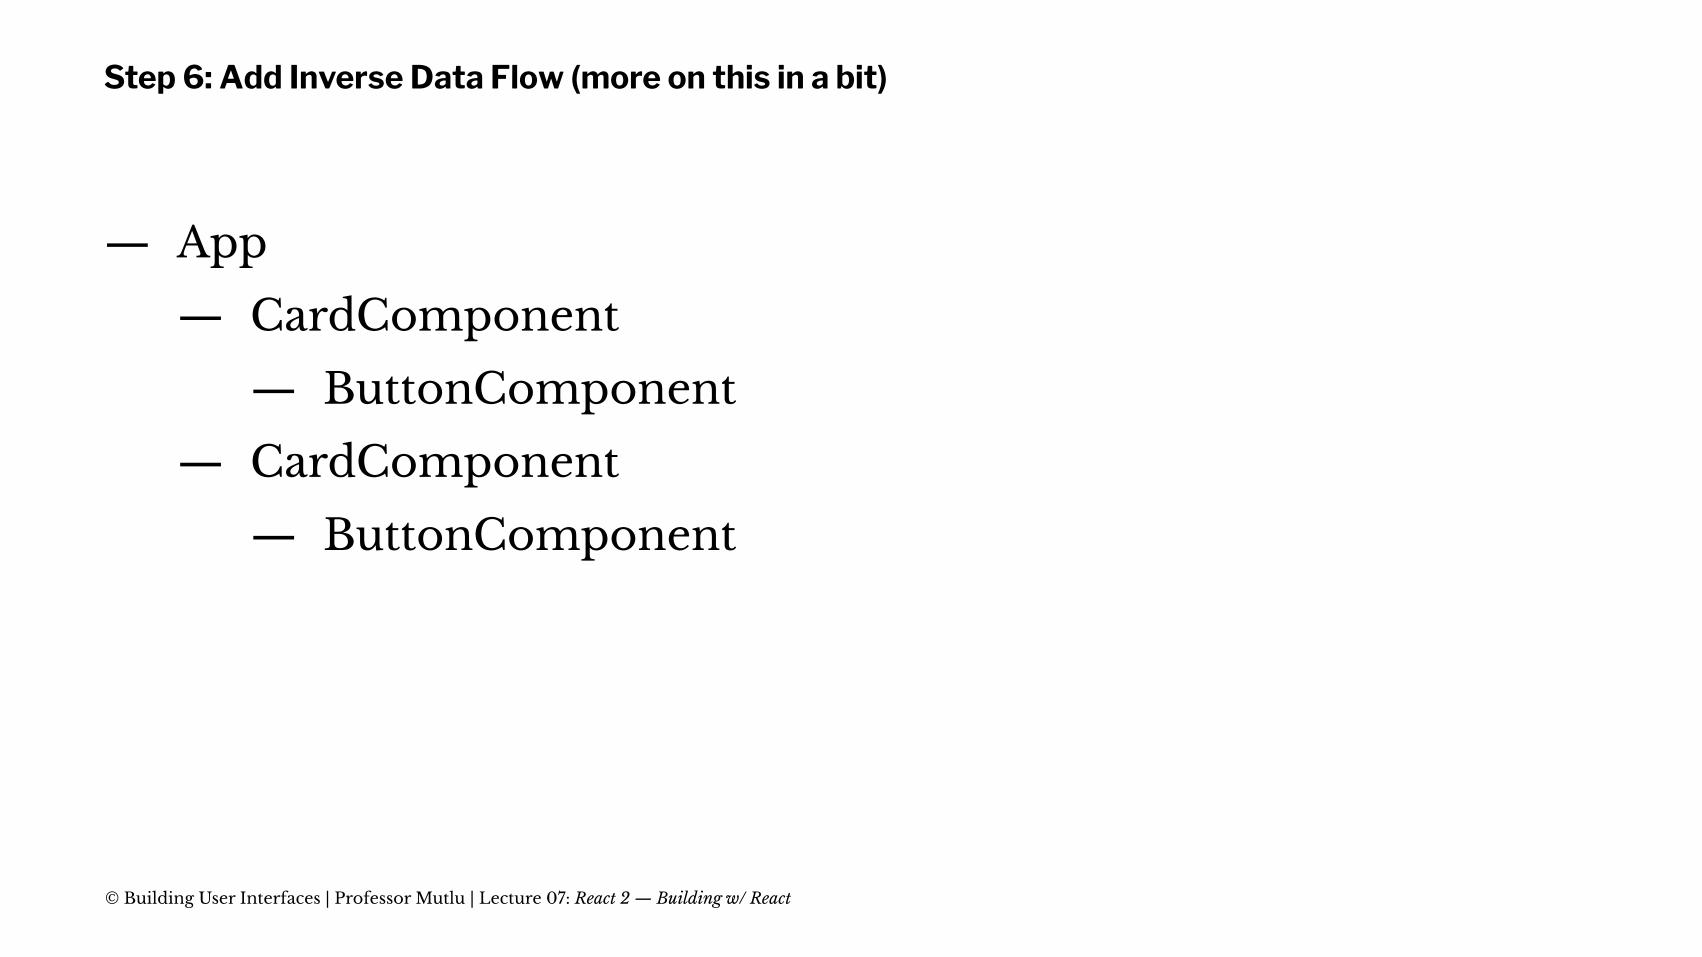
Step 6: Add Inverse Data Flow (more on this in a bit)
— App
— CardComponent
— ButtonComponent
— CardComponent
— ButtonComponent
© Building User Interfaces | Professor Mutlu | Lecture 07: React 2 — Building w/ React
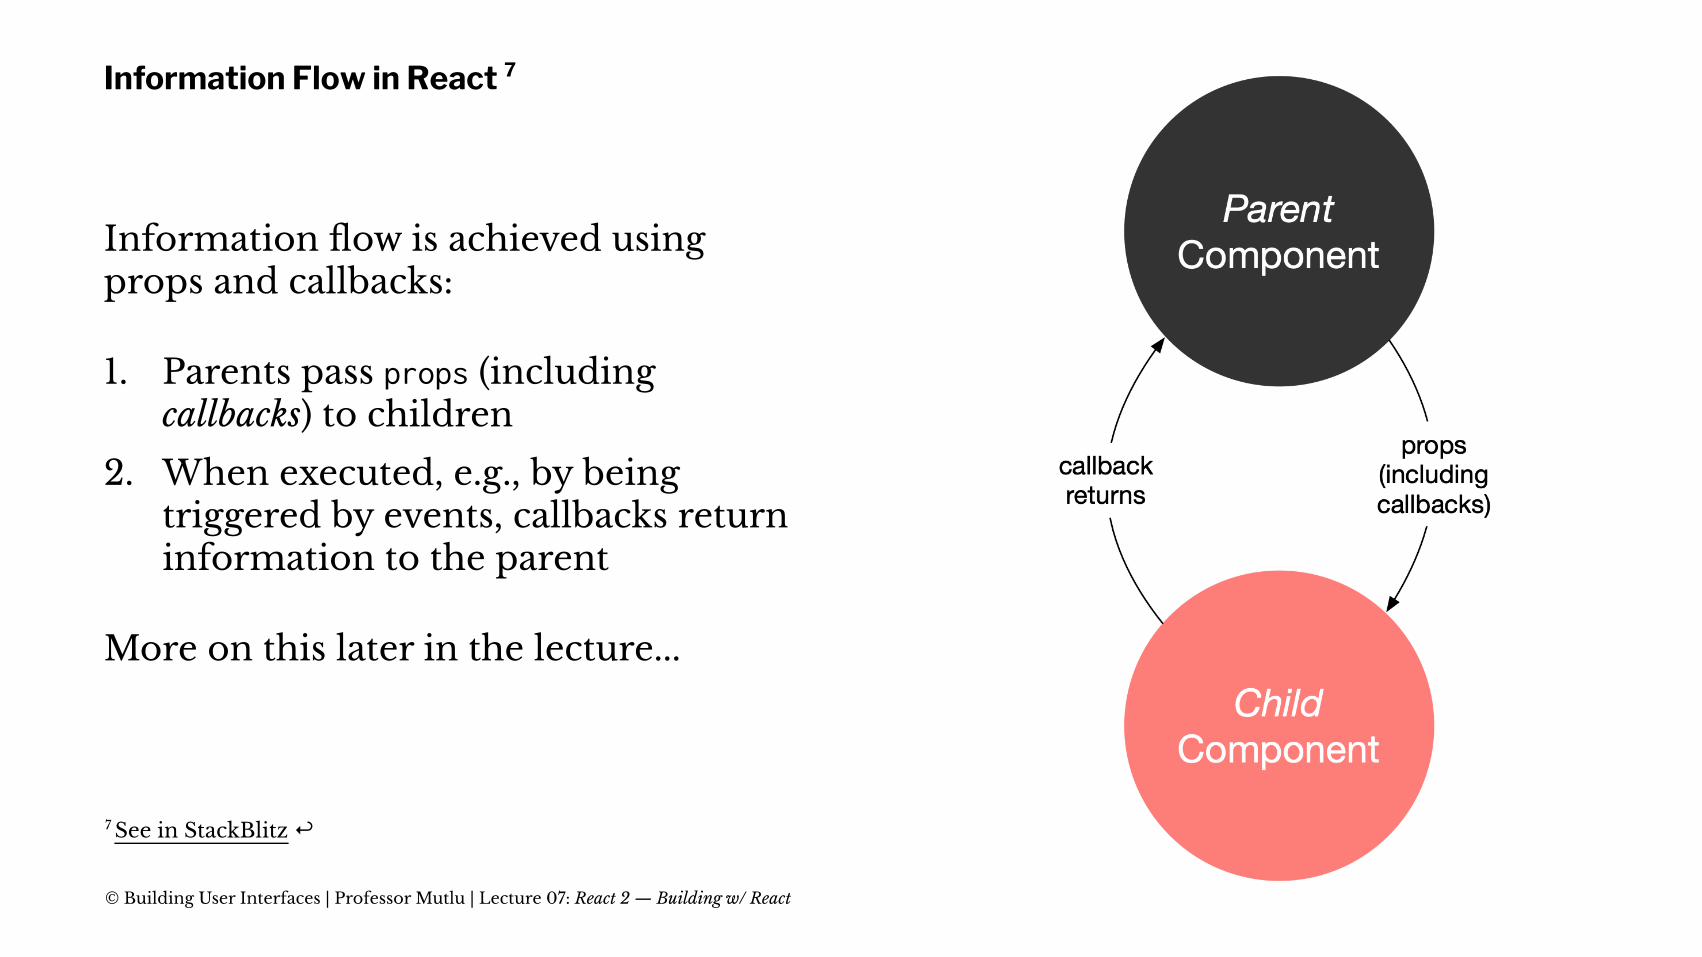
Information Flow in React 7
Information flow is achieved using props and callbacks:
1. Parents pass props (including callbacks) to children
2. When executed, e.g., by being triggered by events, callbacks return information to the parent
More on this later in the lecture...
7 See in StackBlitz ↩
© Building User Interfaces | Professor Mutlu | Lecture 07: React 2 — Building w/ React

Parent (CardComponent) callback:
<ButtonComponent TAContectButtonText={this.state.TAContectButtonText} callbackFromCard={this.buttonCallback}/>
buttonCallback = () => { this.setState({ buttonCallBackMessage : "Connecting..." })}
Child (ButtonComponent) response (called by onClick):
this.props.callbackFromCard(this.state.TAContectButtonPressed);
© Building User Interfaces | Professor Mutlu | Lecture 07: React 2 — Building w/ React
More on Components
— Class vs. functional components
— Fragments
— Passing methods through props
© Building User Interfaces | Professor Mutlu | Lecture 07: React 2 — Building w/ React
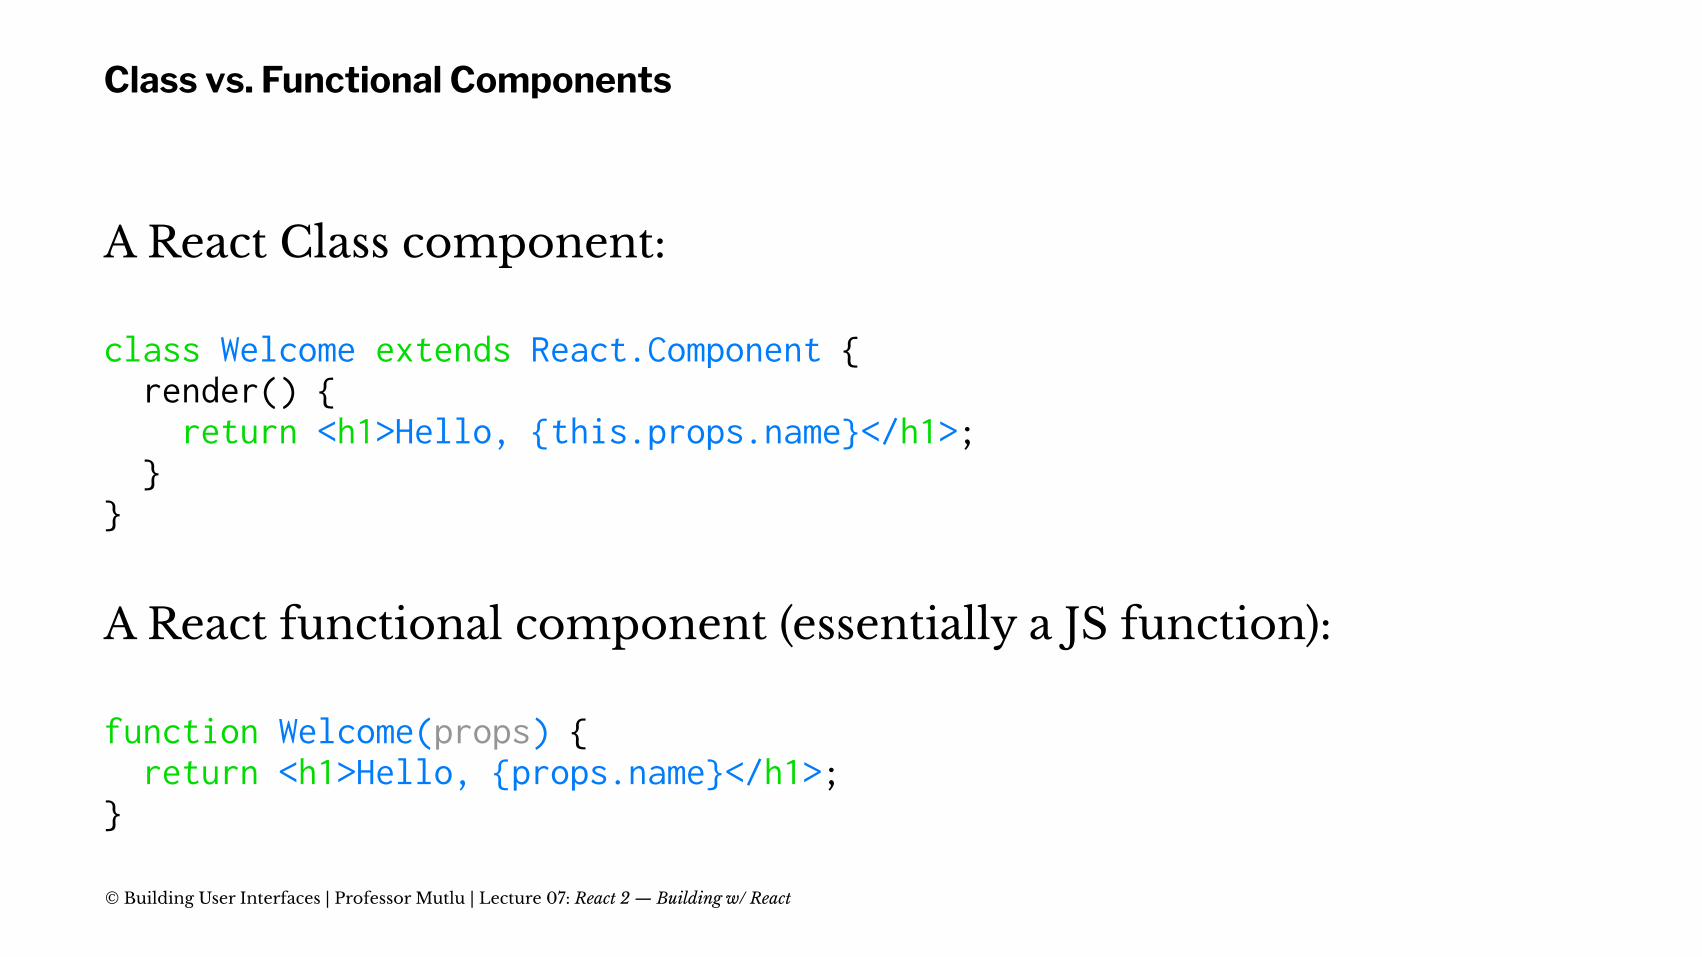
Class vs. Functional Components
A React Class component:
class Welcome extends React.Component { render() { return <h1>Hello, {this.props.name}</h1>; }}
A React functional component (essentially a JS function):
function Welcome(props) { return <h1>Hello, {props.name}</h1>;}
© Building User Interfaces | Professor Mutlu | Lecture 07: React 2 — Building w/ React
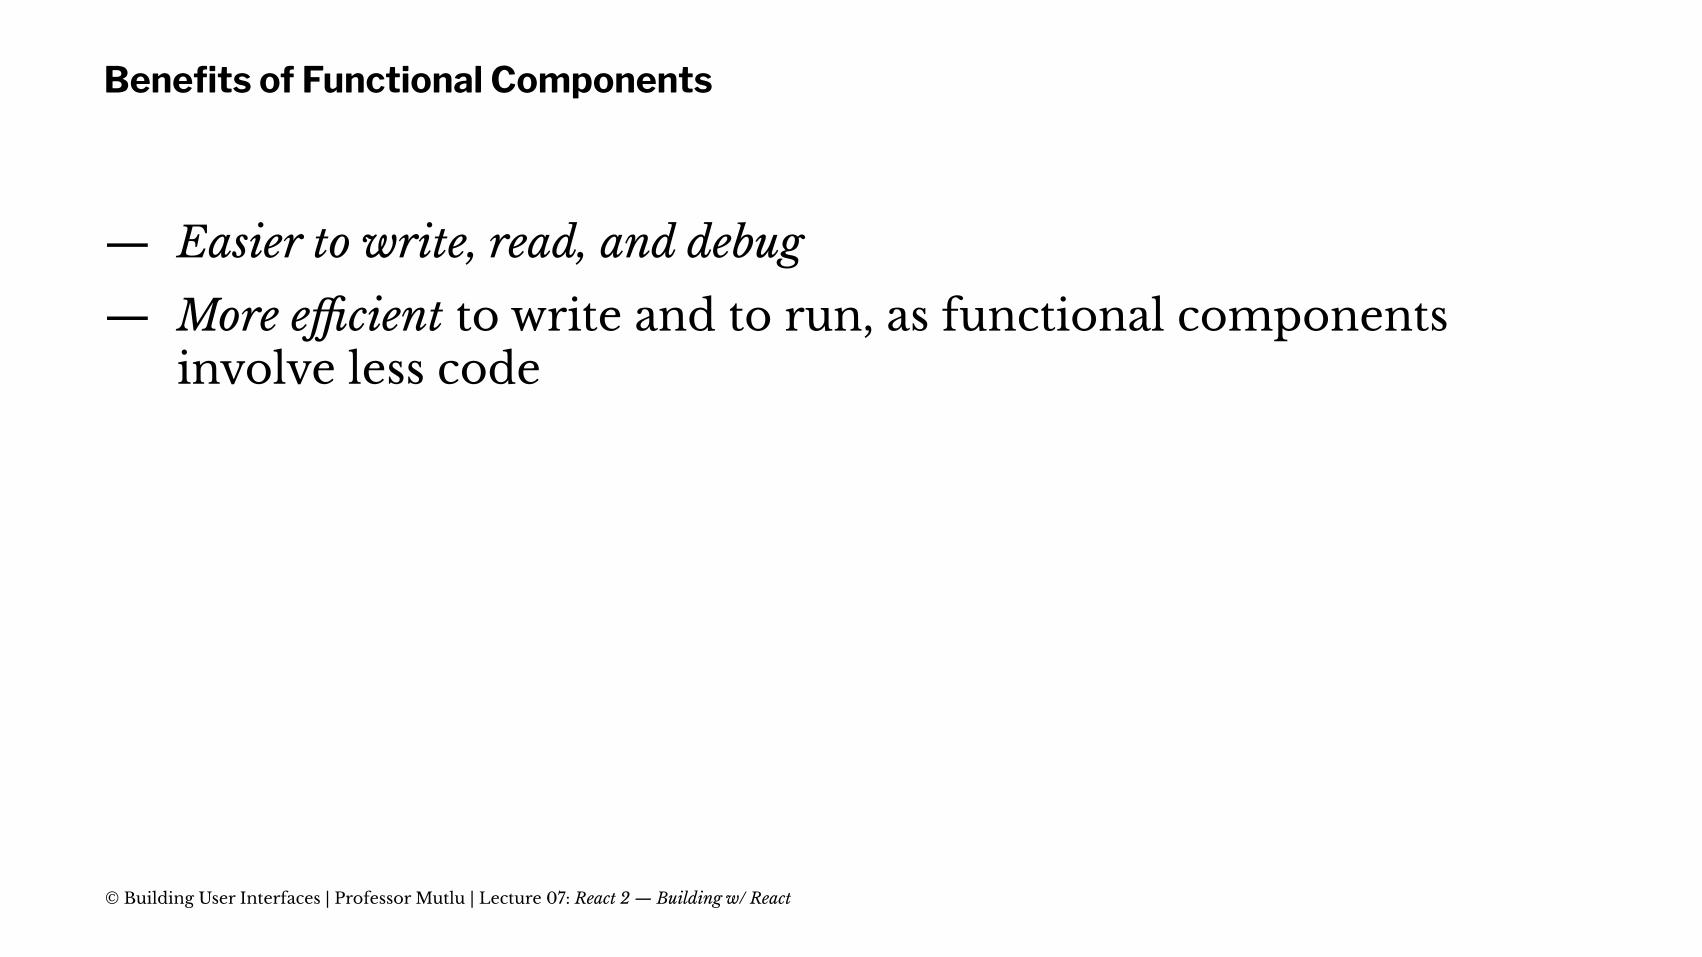
Benefits of Functional Components
— Easier to write, read, and debug
— More efficient to write and to run, as functional components involve less code
© Building User Interfaces | Professor Mutlu | Lecture 07: React 2 — Building w/ React
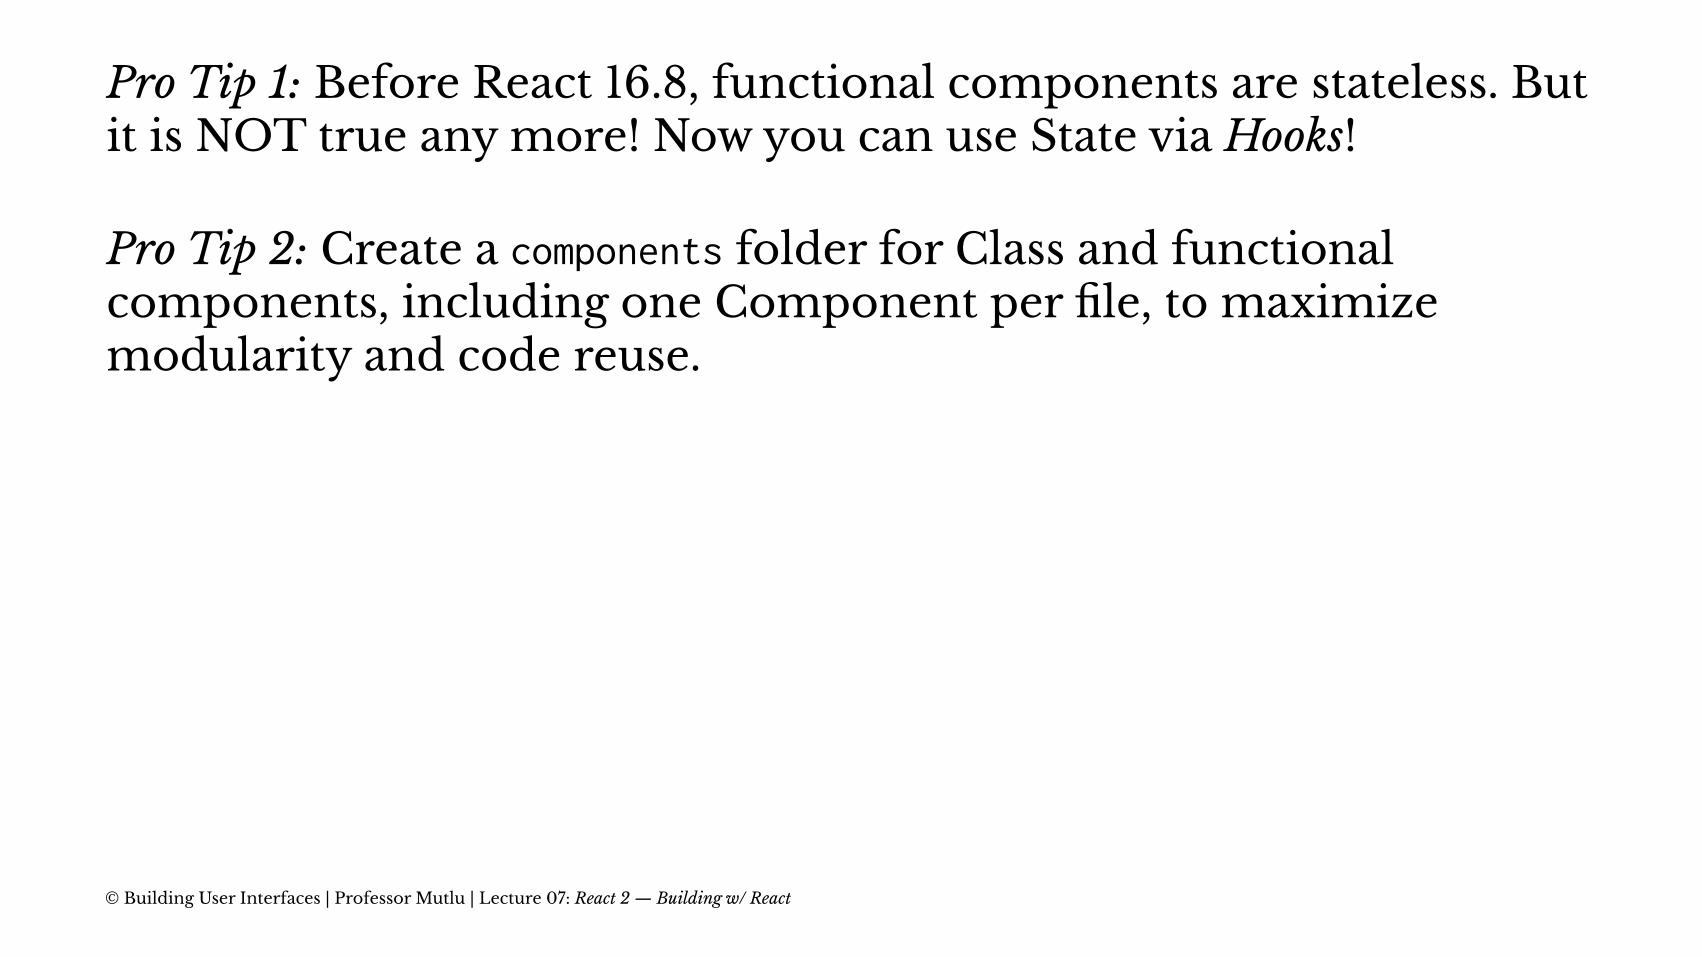
Pro Tip 1: Before React 16.8, functional components are stateless. But it is NOT true any more! Now you can use State via Hooks!
Pro Tip 2: Create a components folder for Class and functional components, including one Component per file, to maximize modularity and code reuse.
© Building User Interfaces | Professor Mutlu | Lecture 07: React 2 — Building w/ React
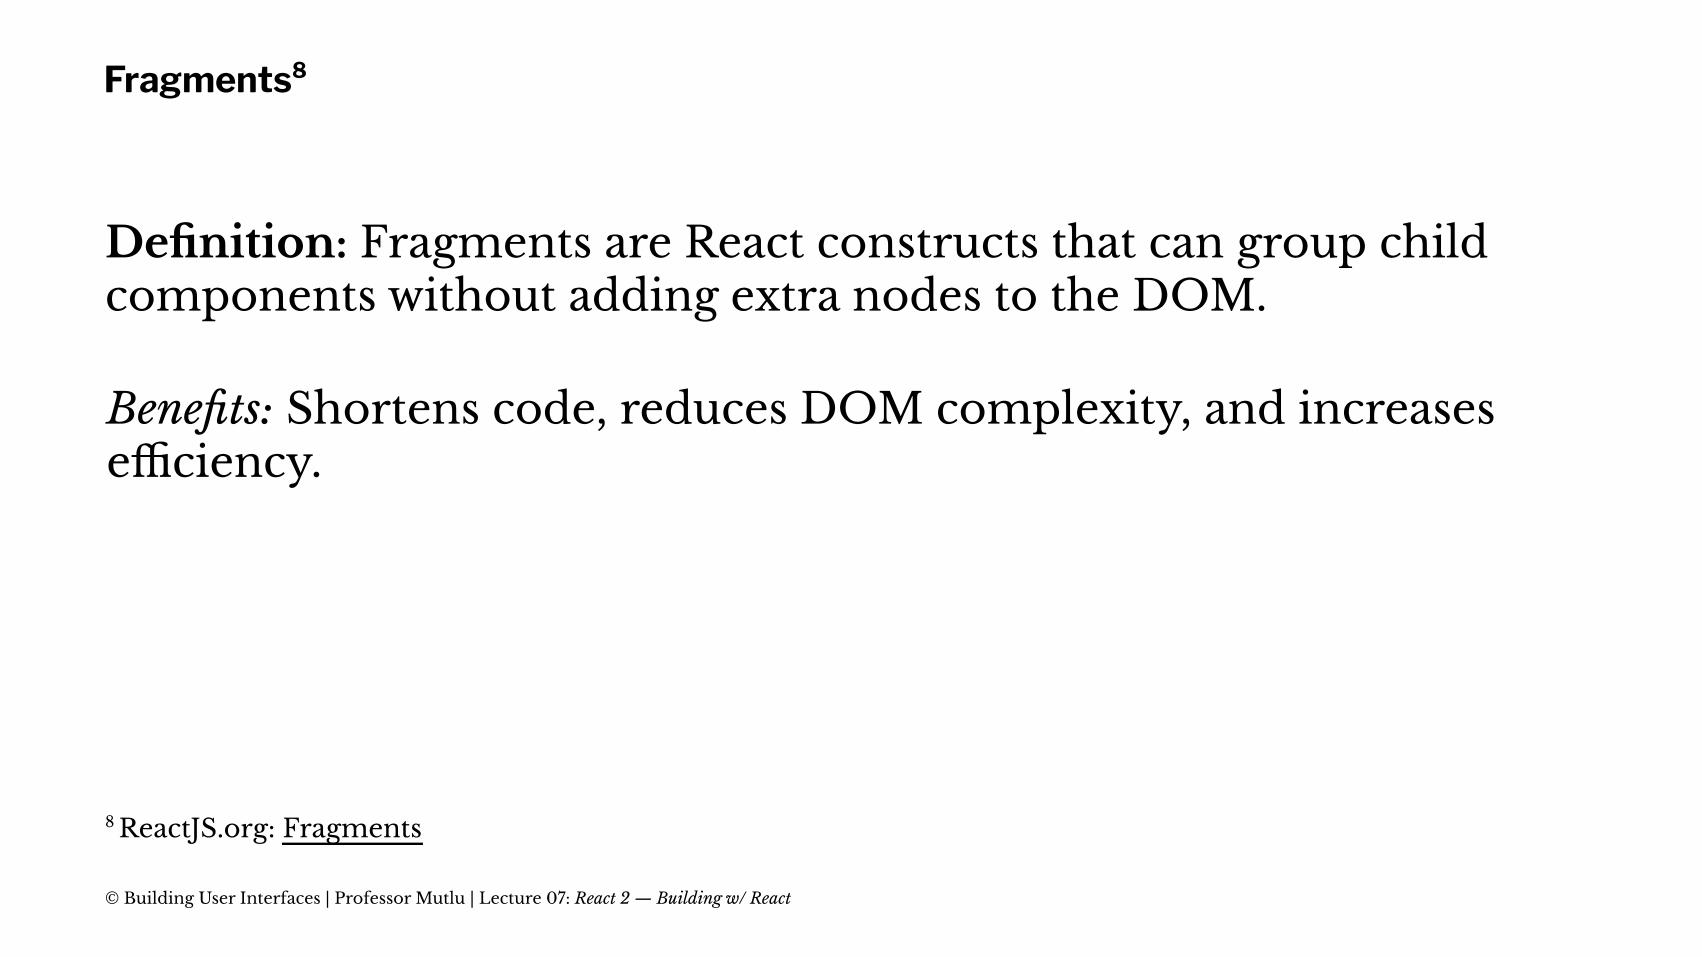
Fragments8
Definition: Fragments are React constructs that can group child components without adding extra nodes to the DOM.
Benefits: Shortens code, reduces DOM complexity, and increases efficiency.
8 ReactJS.org: Fragments
© Building User Interfaces | Professor Mutlu | Lecture 07: React 2 — Building w/ React
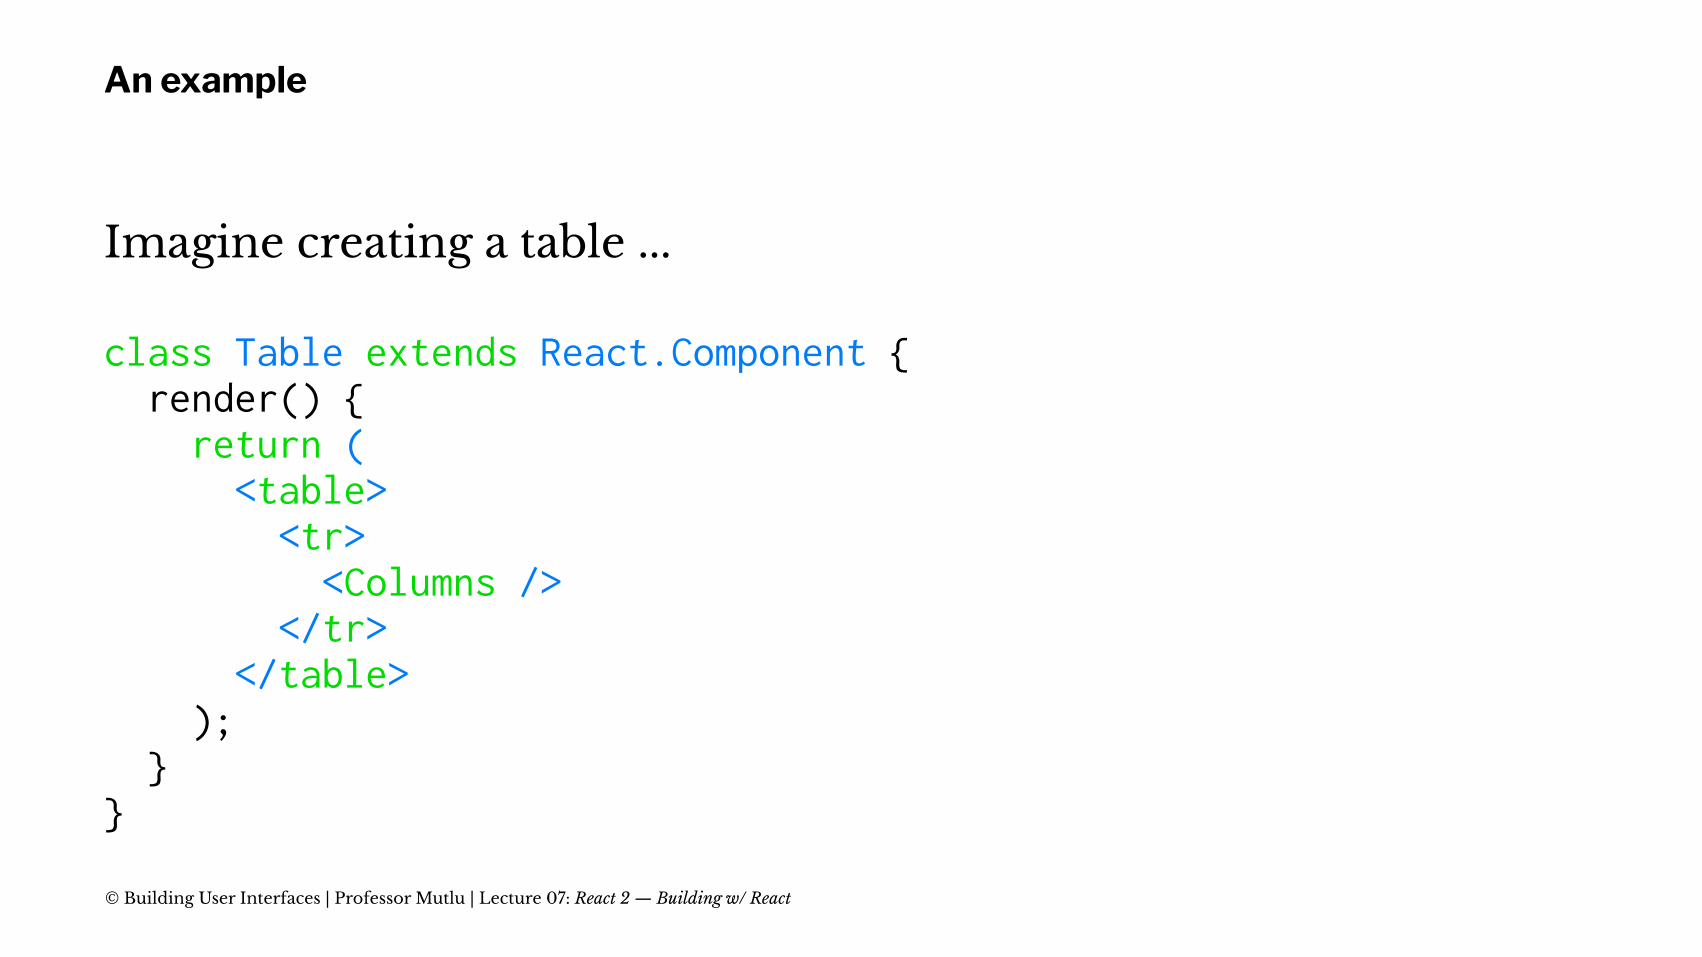
An example
Imagine creating a table ...
class Table extends React.Component { render() { return ( <table> <tr> <Columns /> </tr> </table> ); }}
© Building User Interfaces | Professor Mutlu | Lecture 07: React 2 — Building w/ React
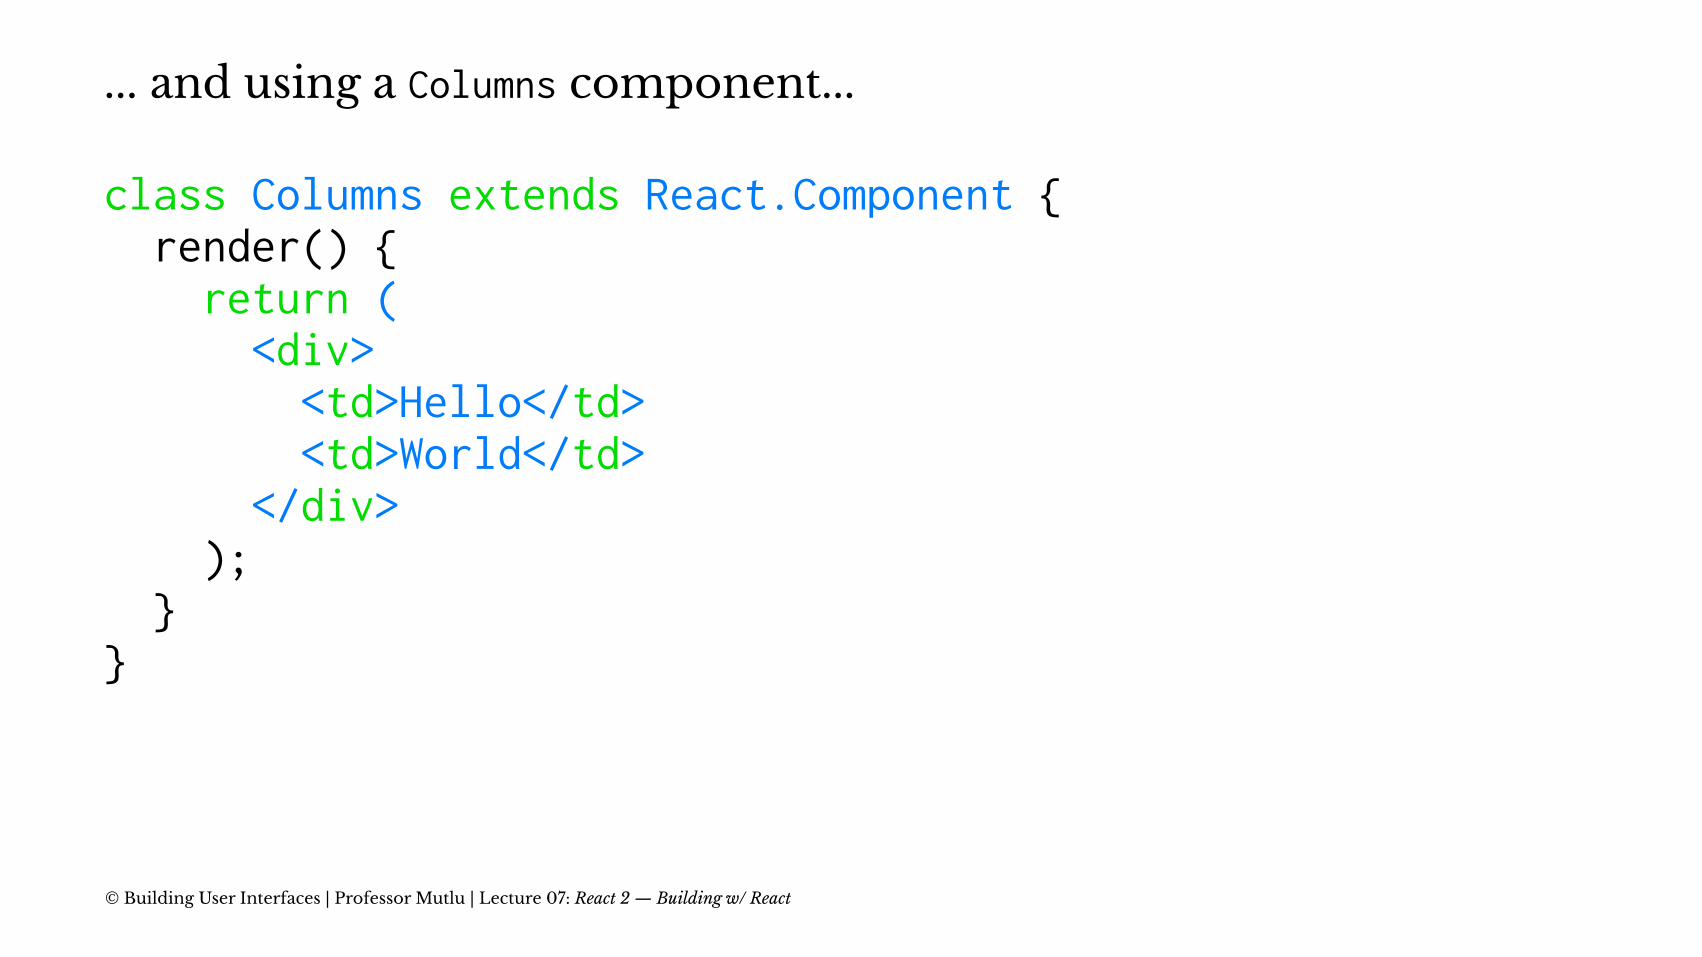
... and using a Columns component...
class Columns extends React.Component { render() { return ( <div> <td>Hello</td> <td>World</td> </div> ); }}
© Building User Interfaces | Professor Mutlu | Lecture 07: React 2 — Building w/ React
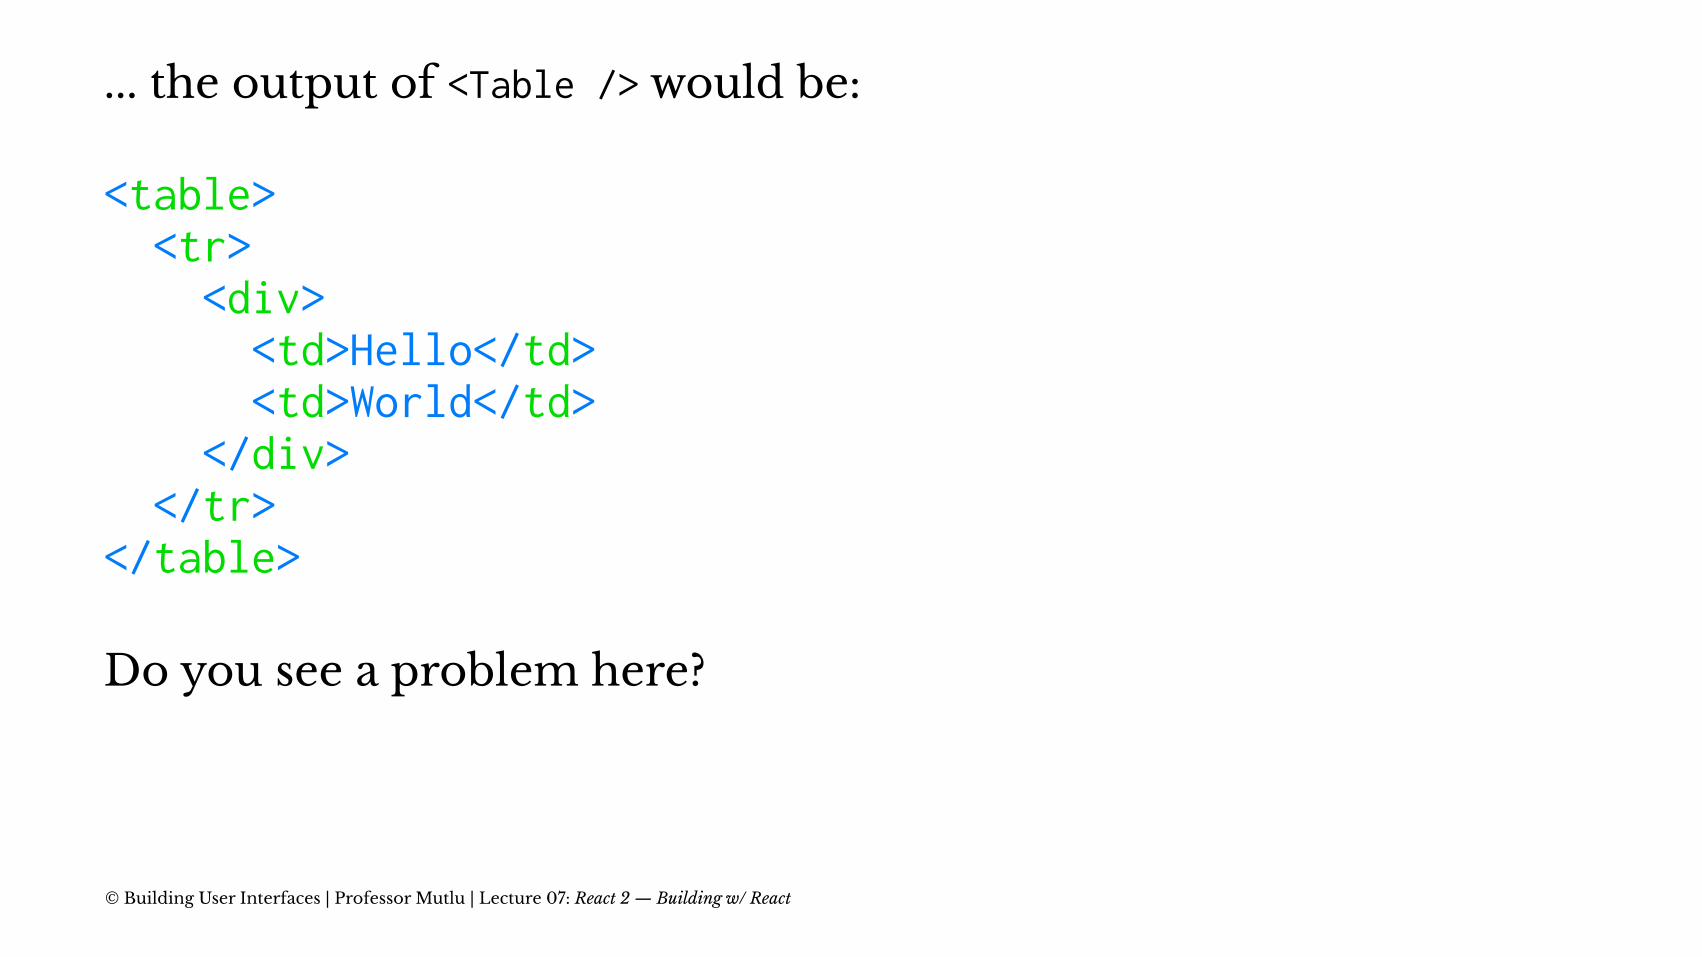
... the output of <Table /> would be:
<table> <tr> <div> <td>Hello</td> <td>World</td> </div> </tr></table>
Do you see a problem here?
© Building User Interfaces | Professor Mutlu | Lecture 07: React 2 — Building w/ React
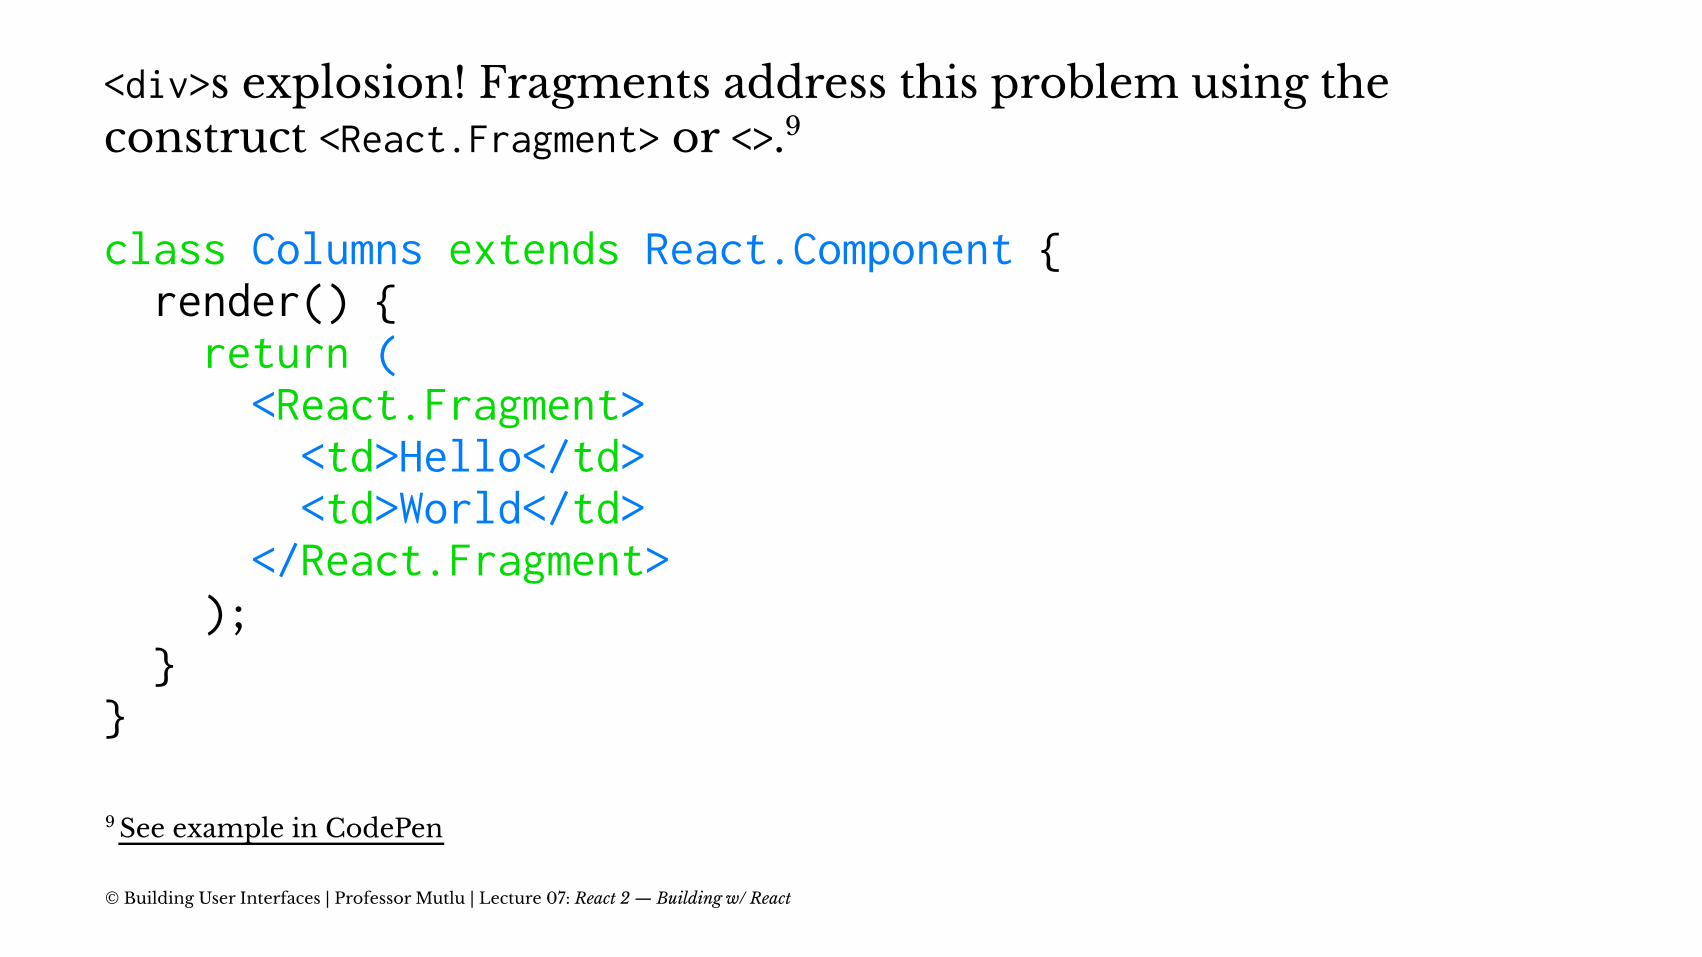
<div>s explosion! Fragments address this problem using the construct <React.Fragment> or <>.9
class Columns extends React.Component { render() { return ( <React.Fragment> <td>Hello</td> <td>World</td> </React.Fragment> ); }}
9 See example in CodePen
© Building User Interfaces | Professor Mutlu | Lecture 07: React 2 — Building w/ React
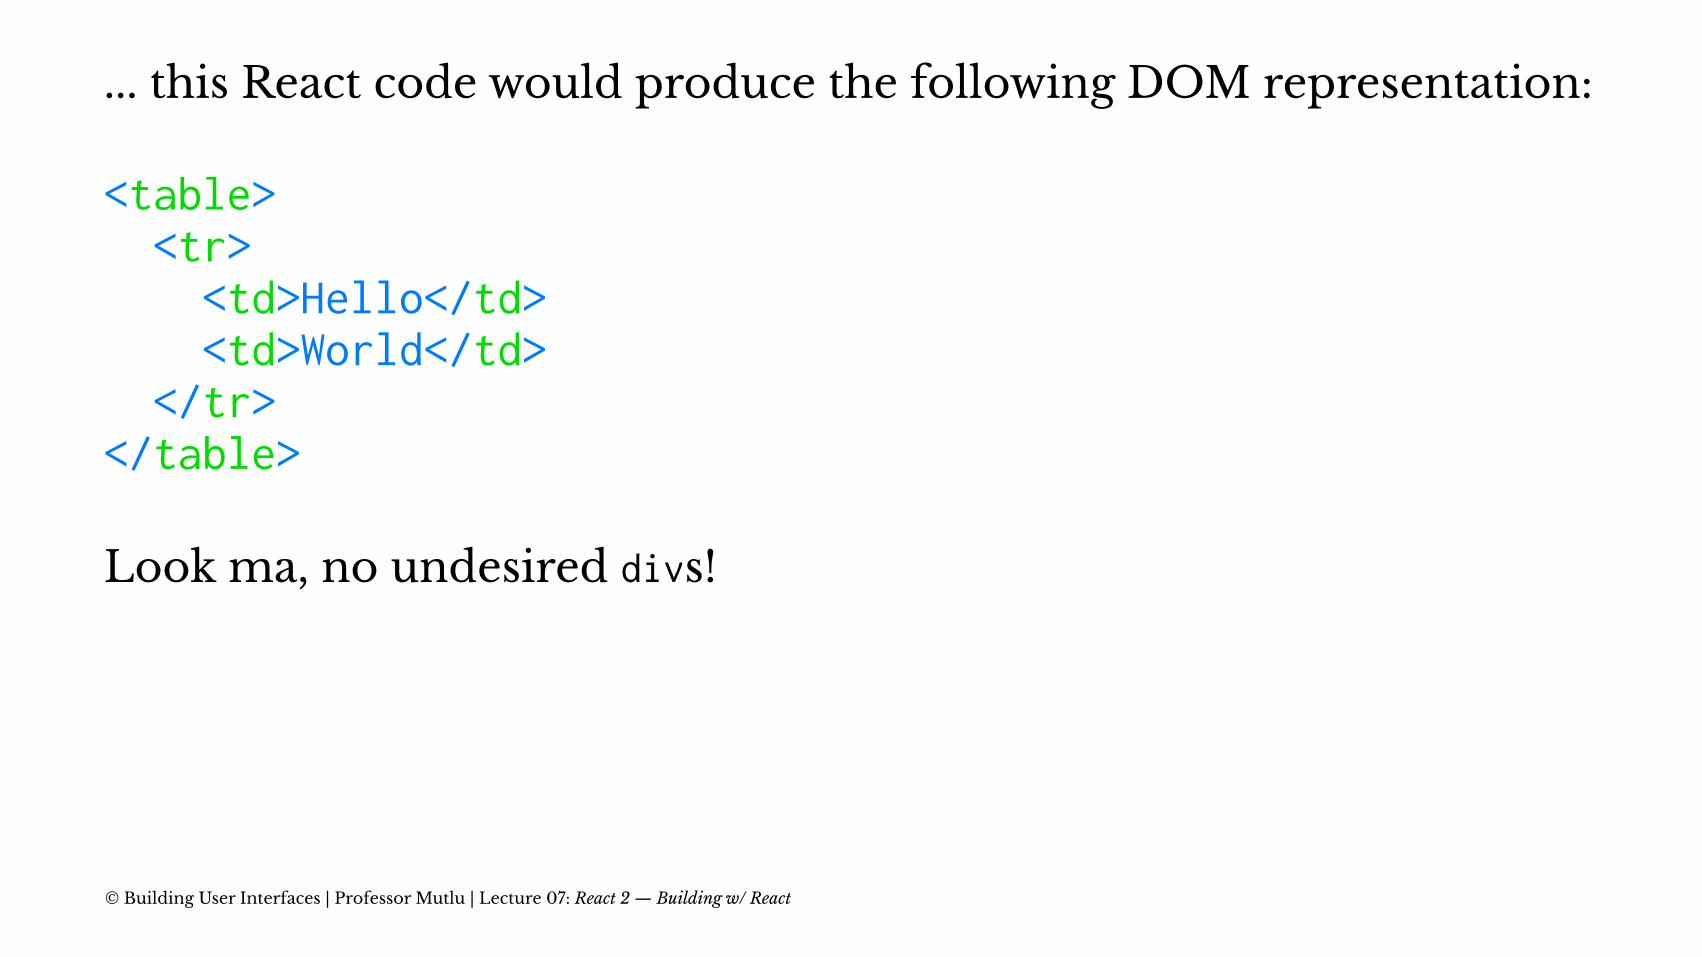
... this React code would produce the following DOM representation:
<table> <tr> <td>Hello</td> <td>World</td> </tr></table>
Look ma, no undesired divs!
© Building User Interfaces | Professor Mutlu | Lecture 07: React 2 — Building w/ React
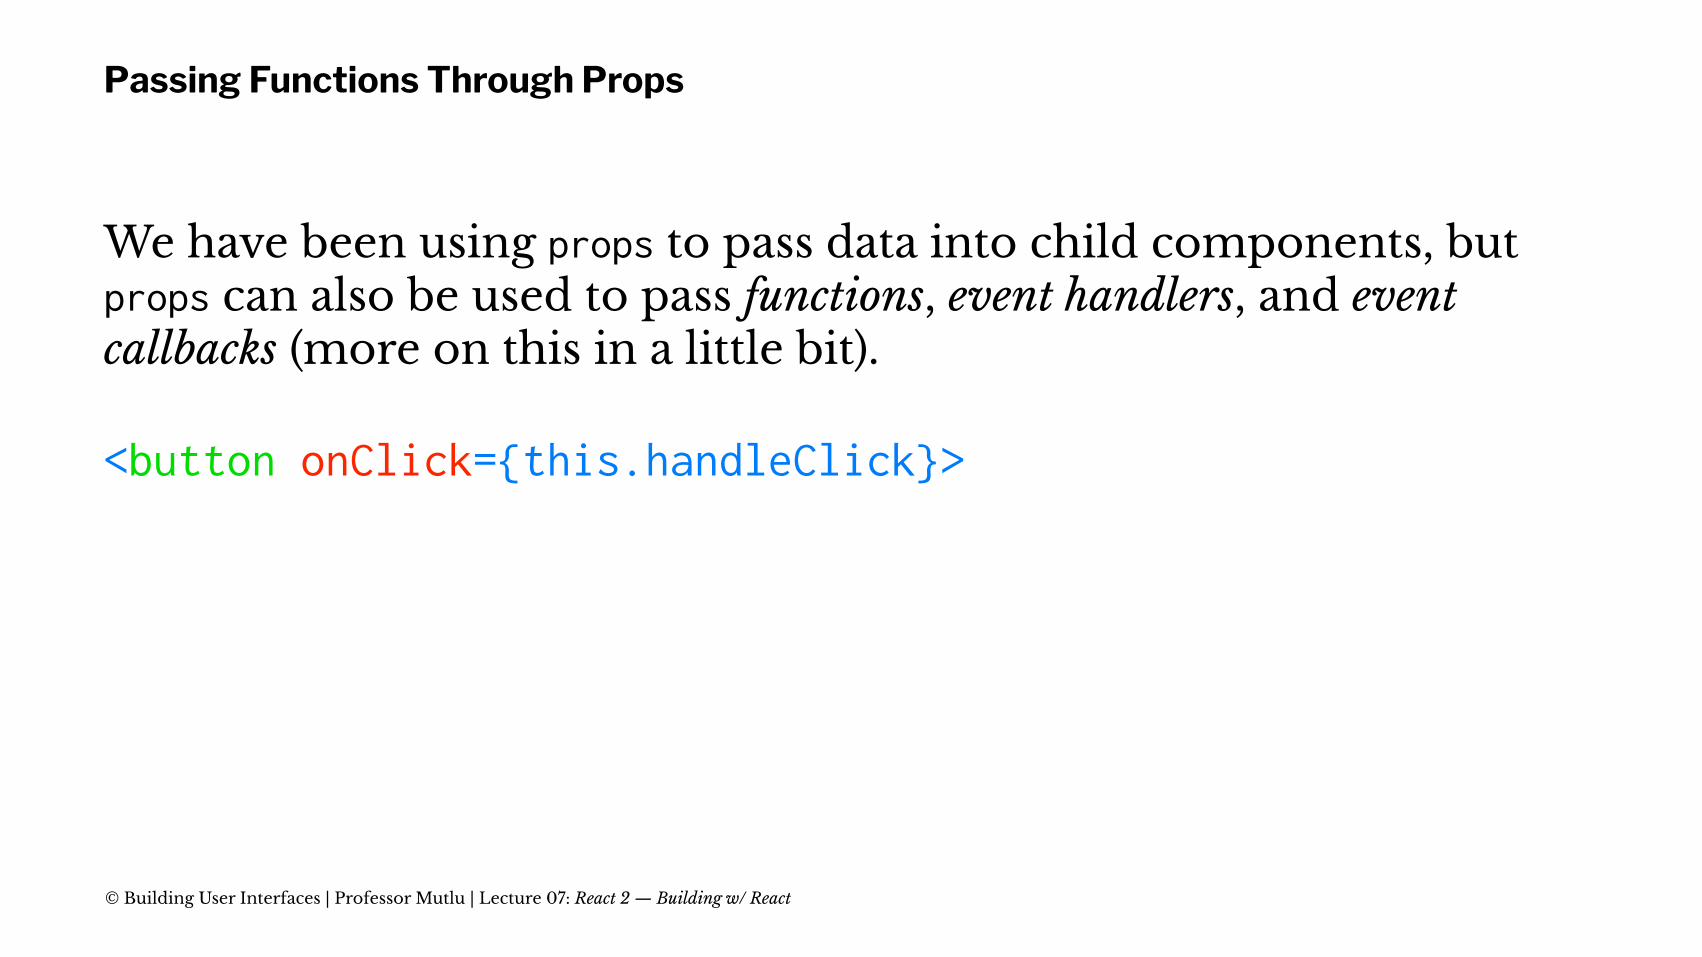
Passing Functions Through Props
We have been using props to pass data into child components, but props can also be used to pass functions, event handlers, and event callbacks (more on this in a little bit).
<button onClick={this.handleClick}>
© Building User Interfaces | Professor Mutlu | Lecture 07: React 2 — Building w/ React
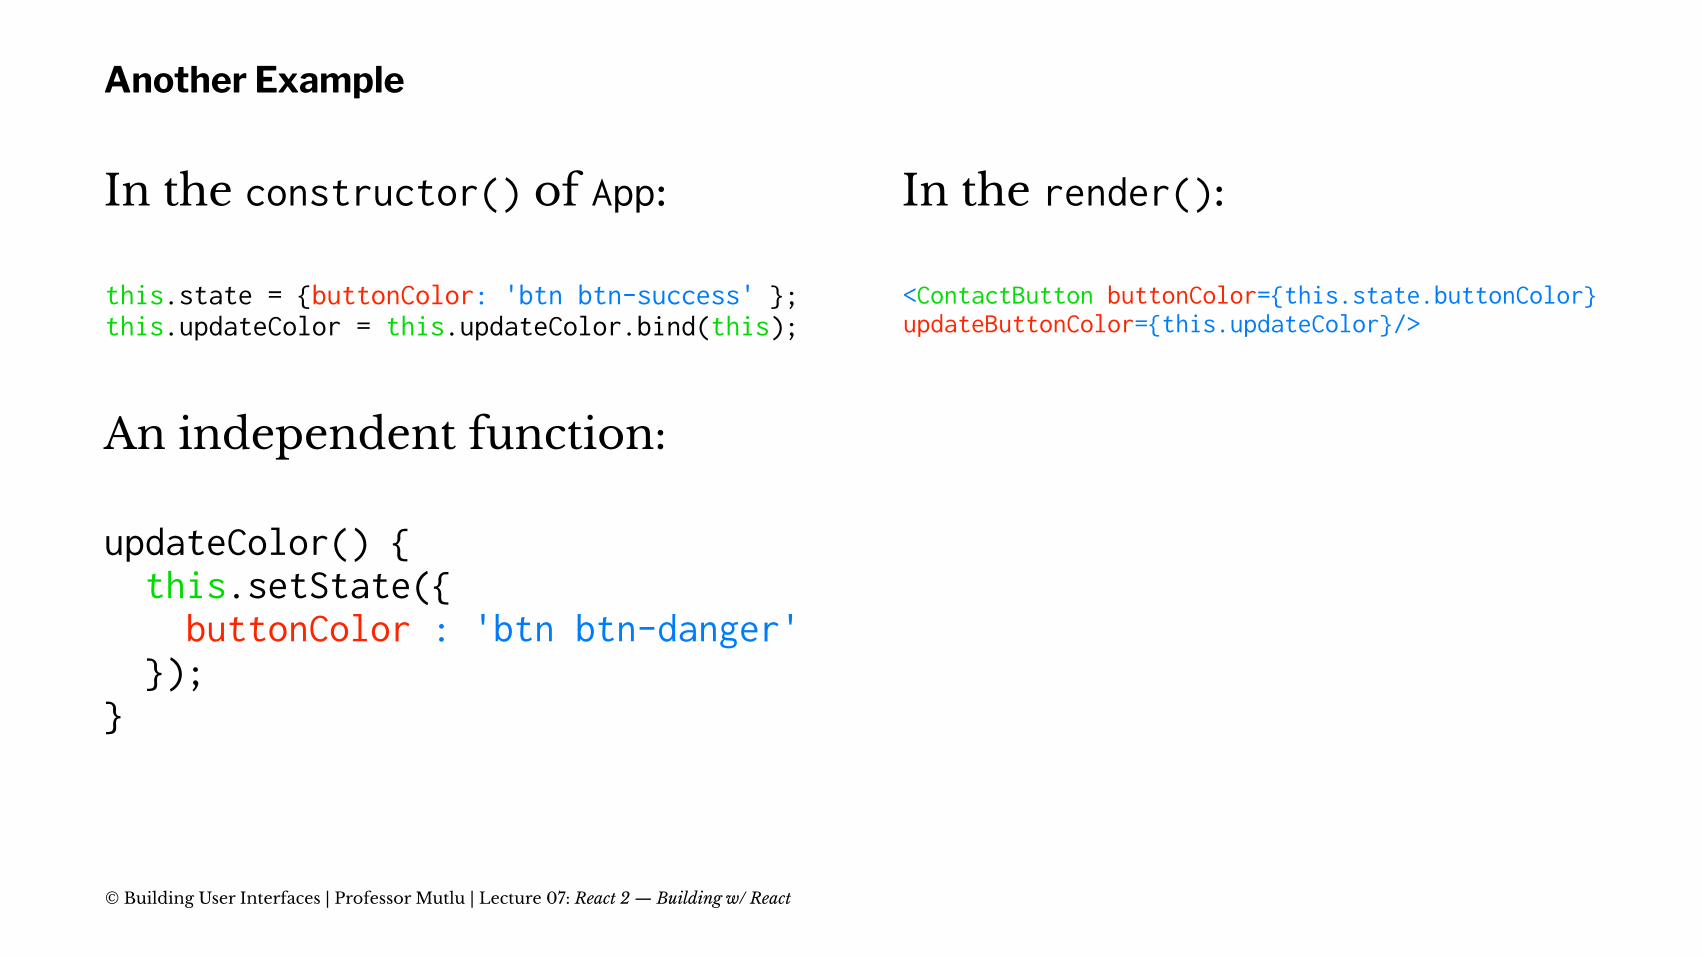
Another Example
In the constructor() of App:
this.state = {buttonColor: 'btn btn-success' };this.updateColor = this.updateColor.bind(this);
An independent function:
updateColor() { this.setState({ buttonColor : 'btn btn-danger' }); }
In the render():
<ContactButton buttonColor={this.state.buttonColor}updateButtonColor={this.updateColor}/>
© Building User Interfaces | Professor Mutlu | Lecture 07: React 2 — Building w/ React
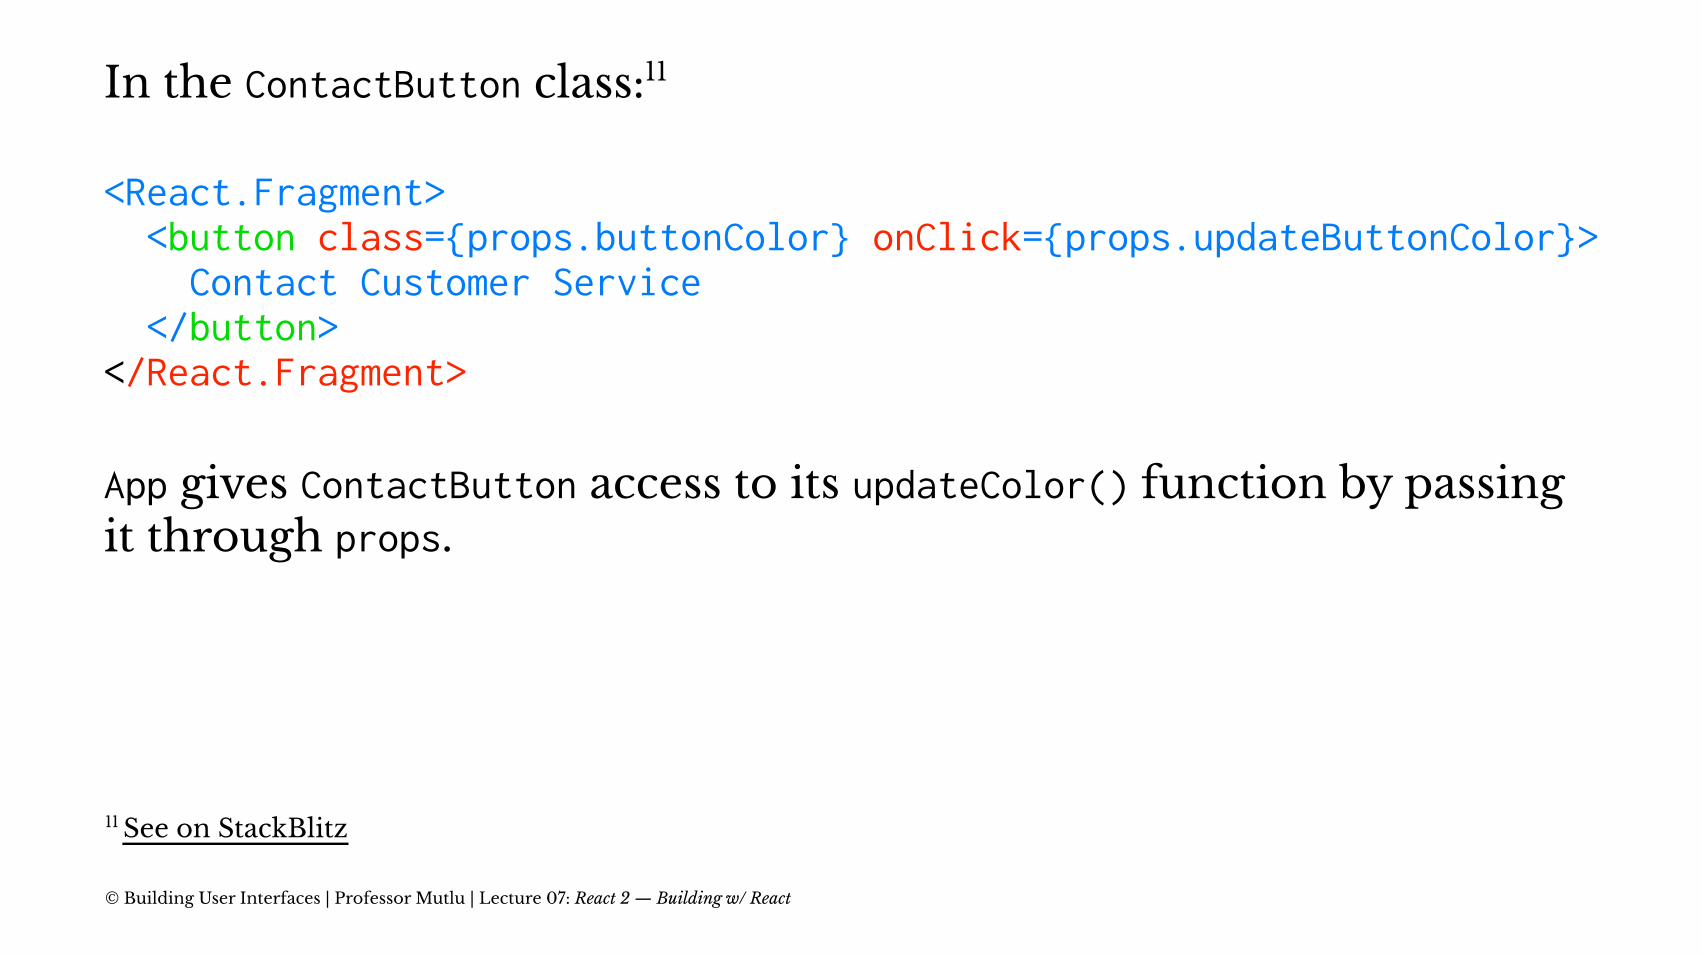
In the ContactButton class:11
<React.Fragment> <button class={props.buttonColor} onClick={props.updateButtonColor}> Contact Customer Service </button></React.Fragment>
App gives ContactButton access to its updateColor() function by passing it through props.
11 See on StackBlitz
© Building User Interfaces | Professor Mutlu | Lecture 07: React 2 — Building w/ React
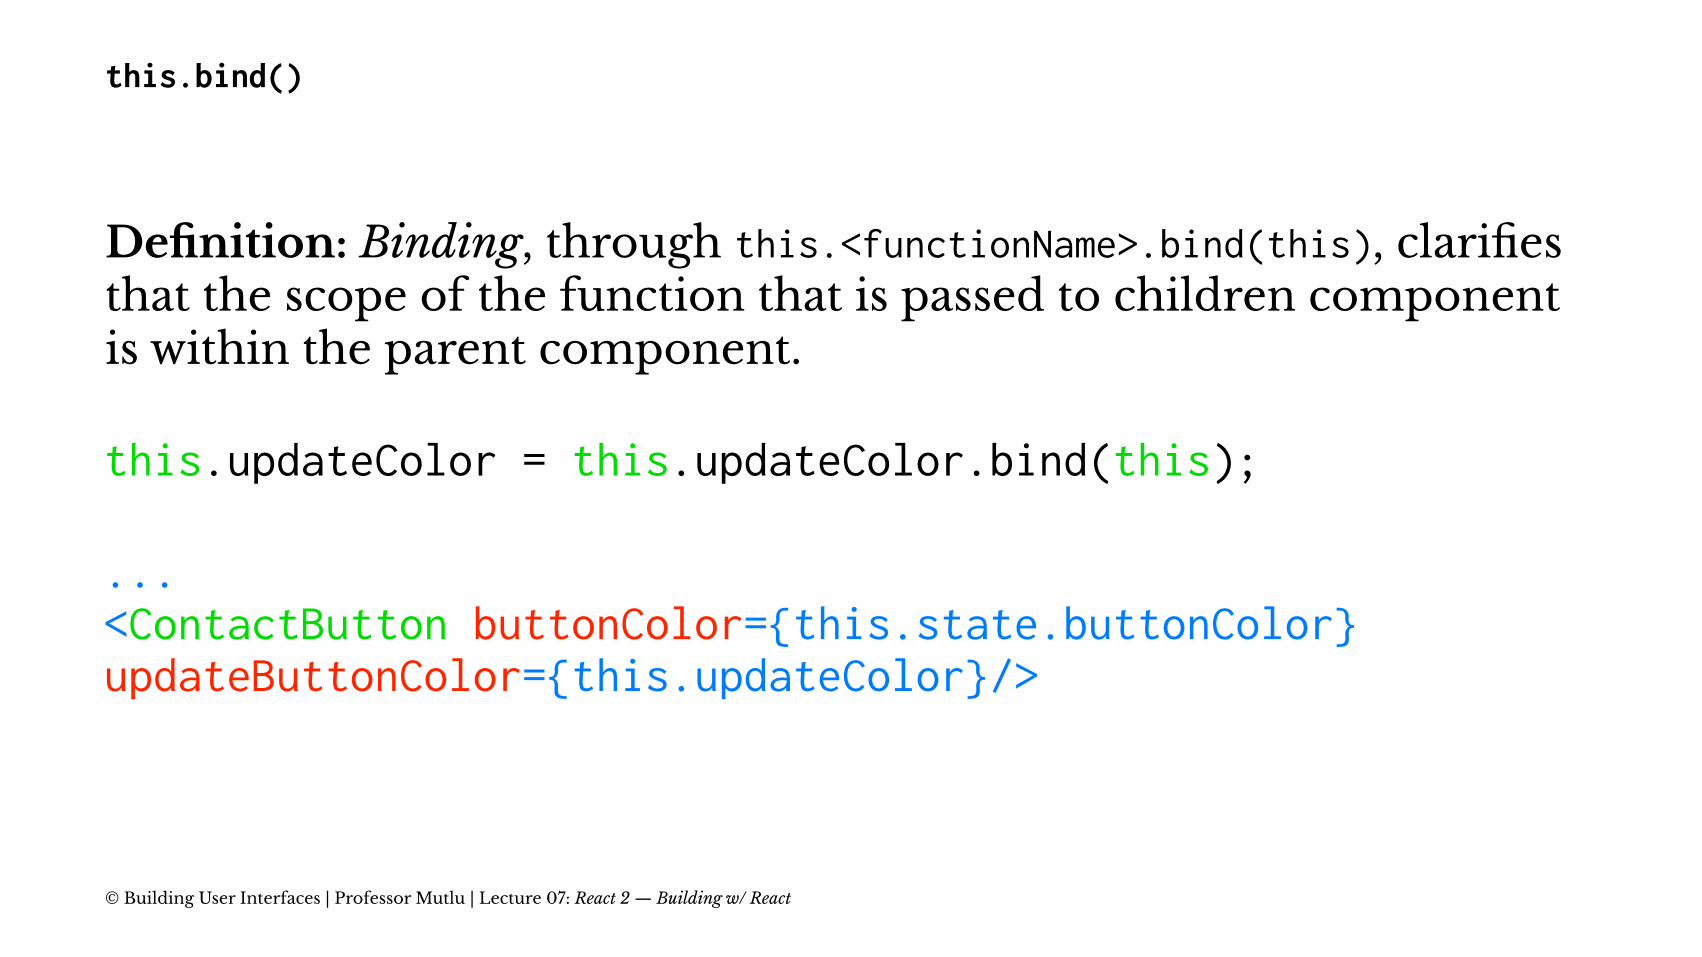
this.bind()
Definition: Binding, through this.<functionName>.bind(this), clarifies that the scope of the function that is passed to children component is within the parent component.
this.updateColor = this.updateColor.bind(this);
...<ContactButton buttonColor={this.state.buttonColor}updateButtonColor={this.updateColor}/>
© Building User Interfaces | Professor Mutlu | Lecture 07: React 2 — Building w/ React
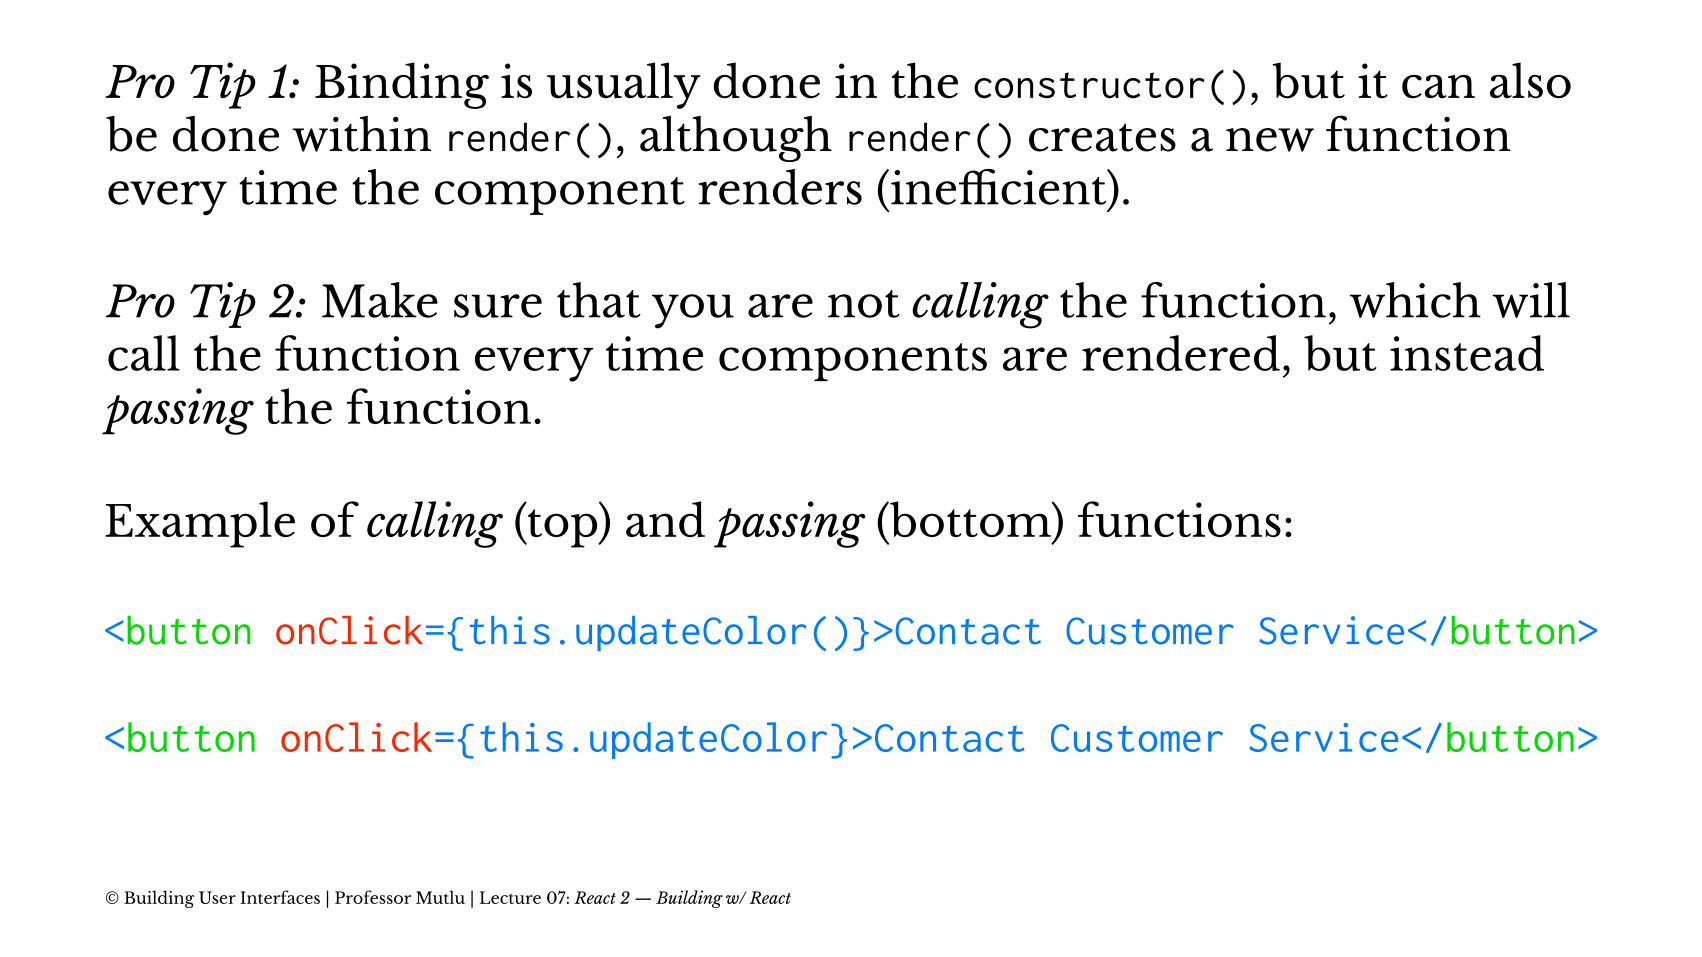
Pro Tip 1: Binding is usually done in the constructor(), but it can also be done within render(), although render() creates a new function every time the component renders (inefficient).
Pro Tip 2: Make sure that you are not calling the function, which will call the function every time components are rendered, but instead passing the function.
Example of calling (top) and passing (bottom) functions:
<button onClick={this.updateColor()}>Contact Customer Service</button>
<button onClick={this.updateColor}>Contact Customer Service</button>
© Building User Interfaces | Professor Mutlu | Lecture 07: React 2 — Building w/ React
Dataflow between Components
© Building User Interfaces | Professor Mutlu | Lecture 07: React 2 — Building w/ React
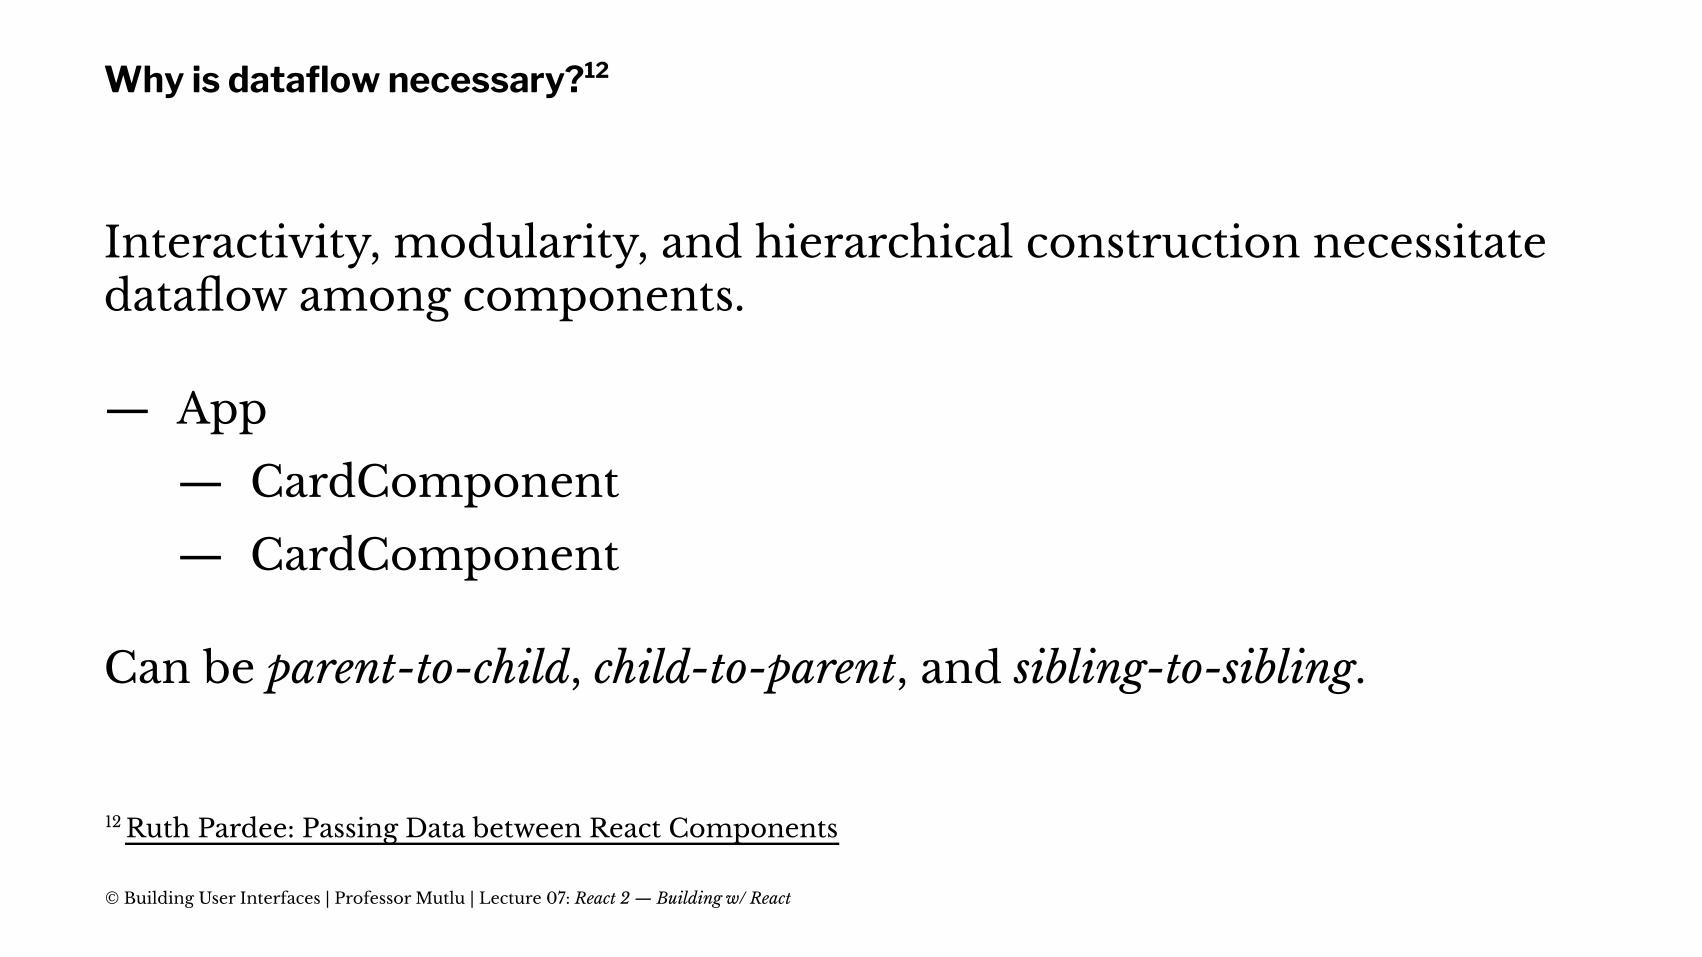
Why is dataflow necessary?12
Interactivity, modularity, and hierarchical construction necessitate dataflow among components.
— App
— CardComponent
— CardComponent
Can be parent-to-child, child-to-parent, and sibling-to-sibling.
12 Ruth Pardee: Passing Data between React Components
© Building User Interfaces | Professor Mutlu | Lecture 07: React 2 — Building w/ React
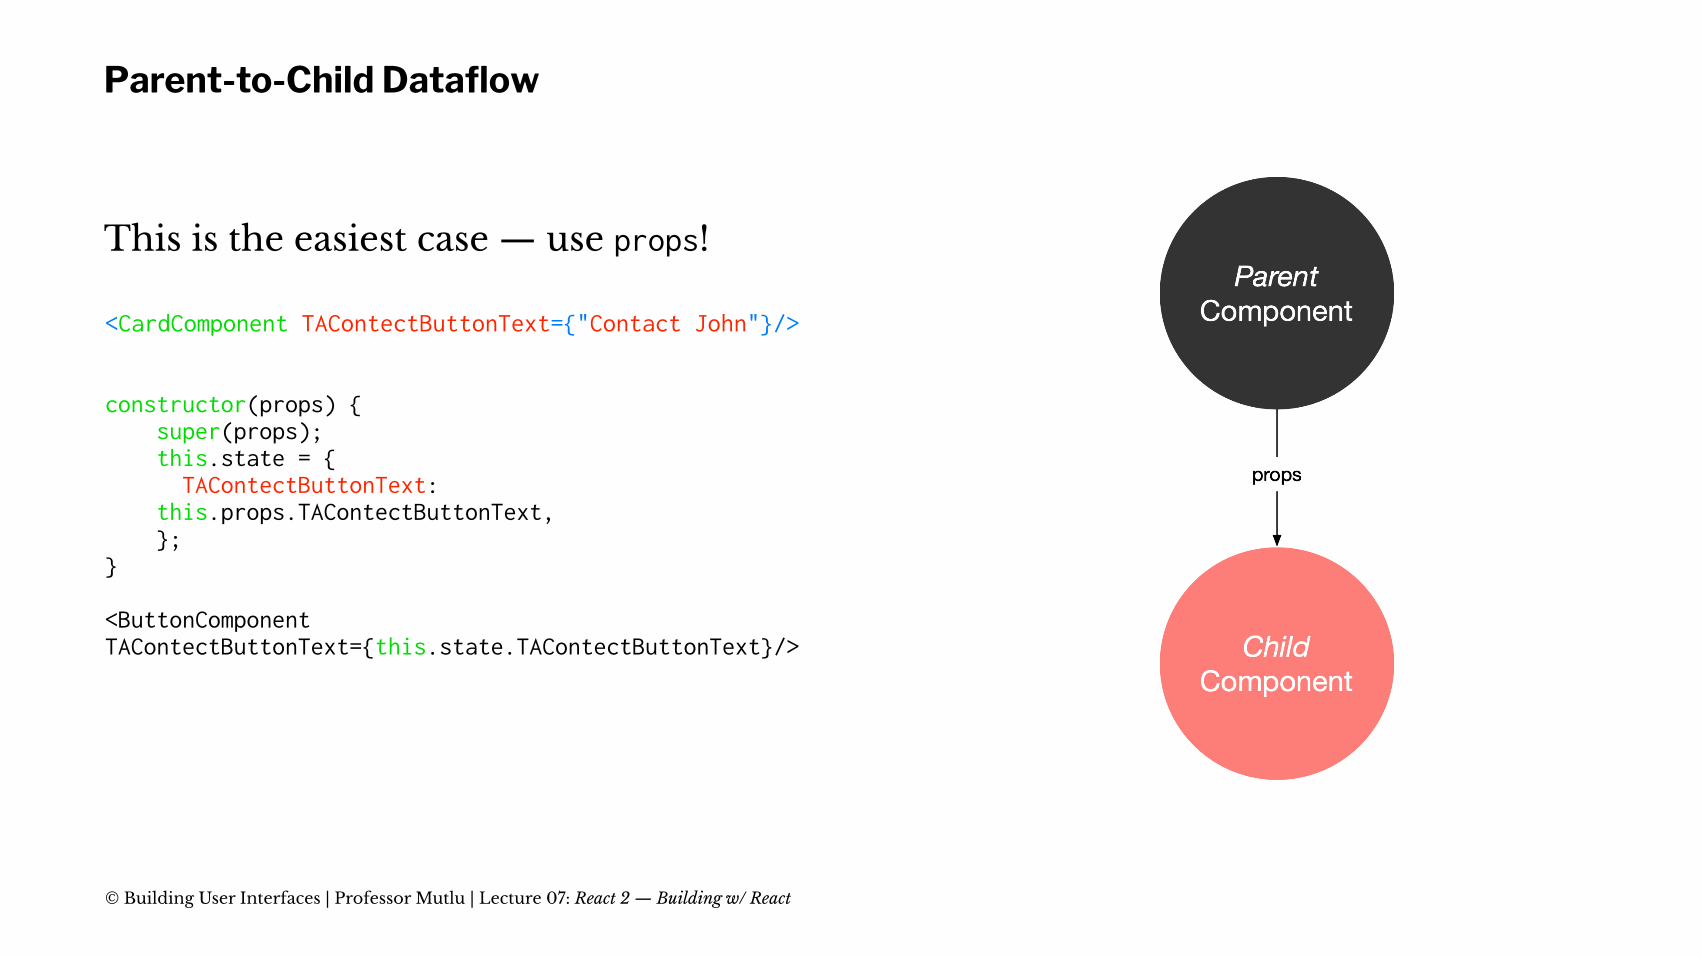
Parent-to-Child Dataflow
This is the easiest case — use props!
<CardComponent TAContectButtonText={"Contact John"}/>
constructor(props) { super(props); this.state = { TAContectButtonText: this.props.TAContectButtonText, };}
<ButtonComponent TAContectButtonText={this.state.TAContectButtonText}/>
© Building User Interfaces | Professor Mutlu | Lecture 07: React 2 — Building w/ React
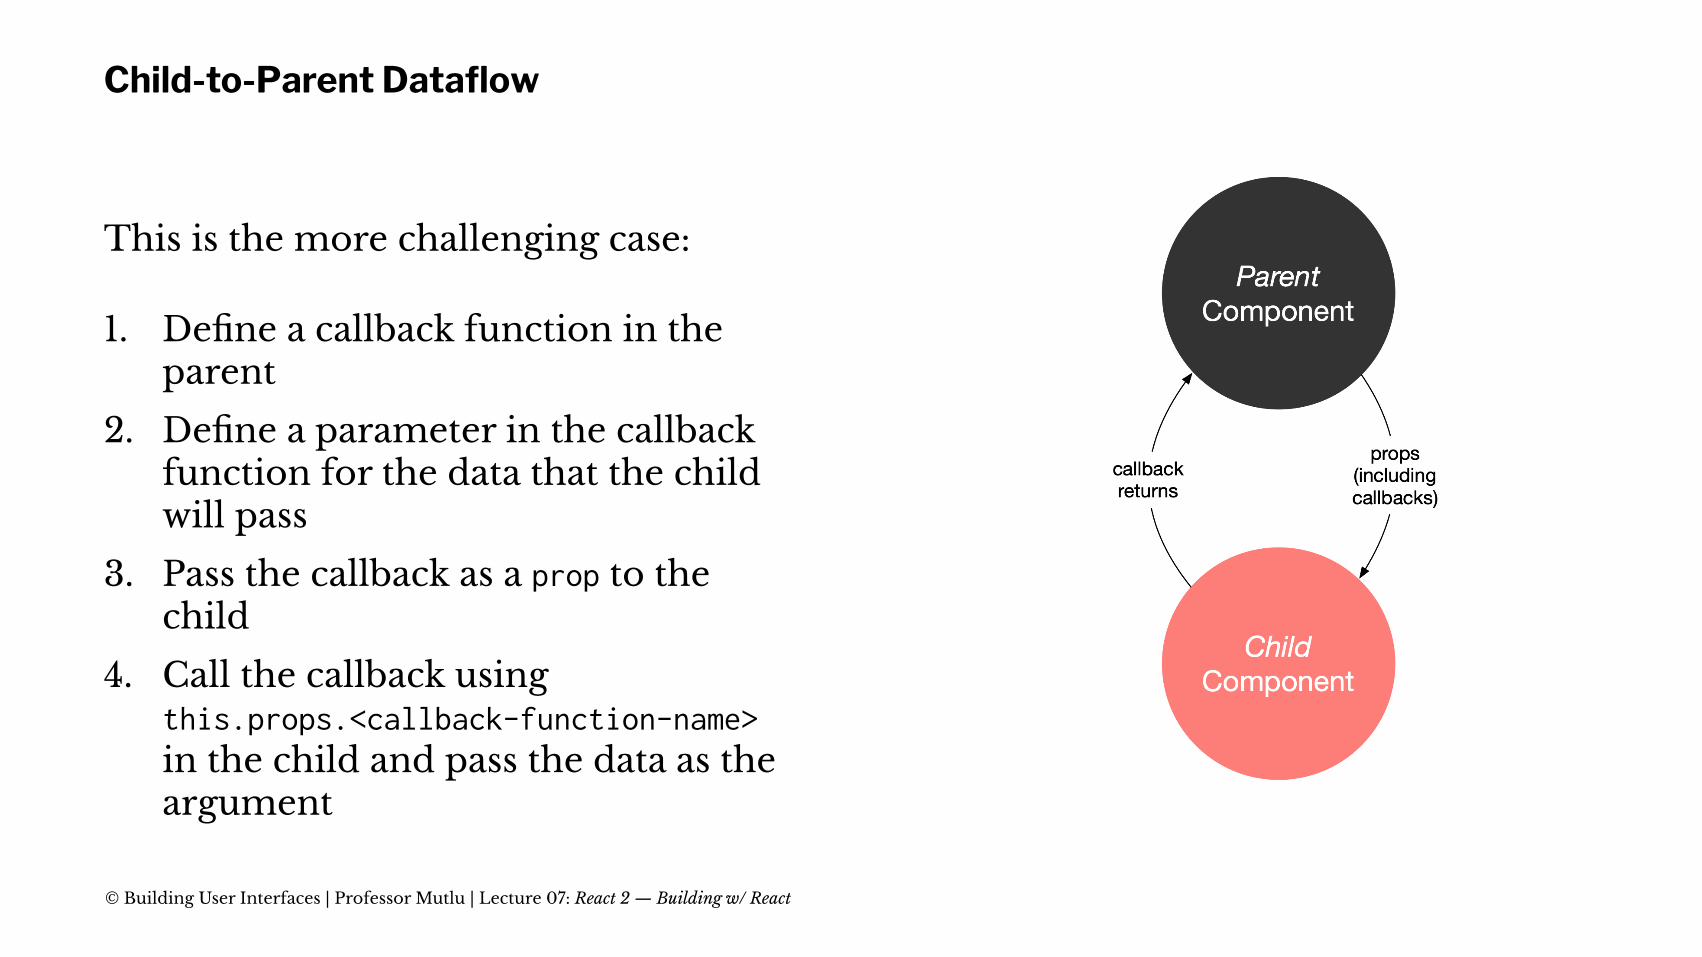
Child-to-Parent Dataflow
This is the more challenging case:
1. Define a callback function in the parent
2. Define a parameter in the callback function for the data that the child will pass
3. Pass the callback as a prop to the child
4. Call the callback using this.props.<callback-function-name> in the child and pass the data as the argument
© Building User Interfaces | Professor Mutlu | Lecture 07: React 2 — Building w/ React
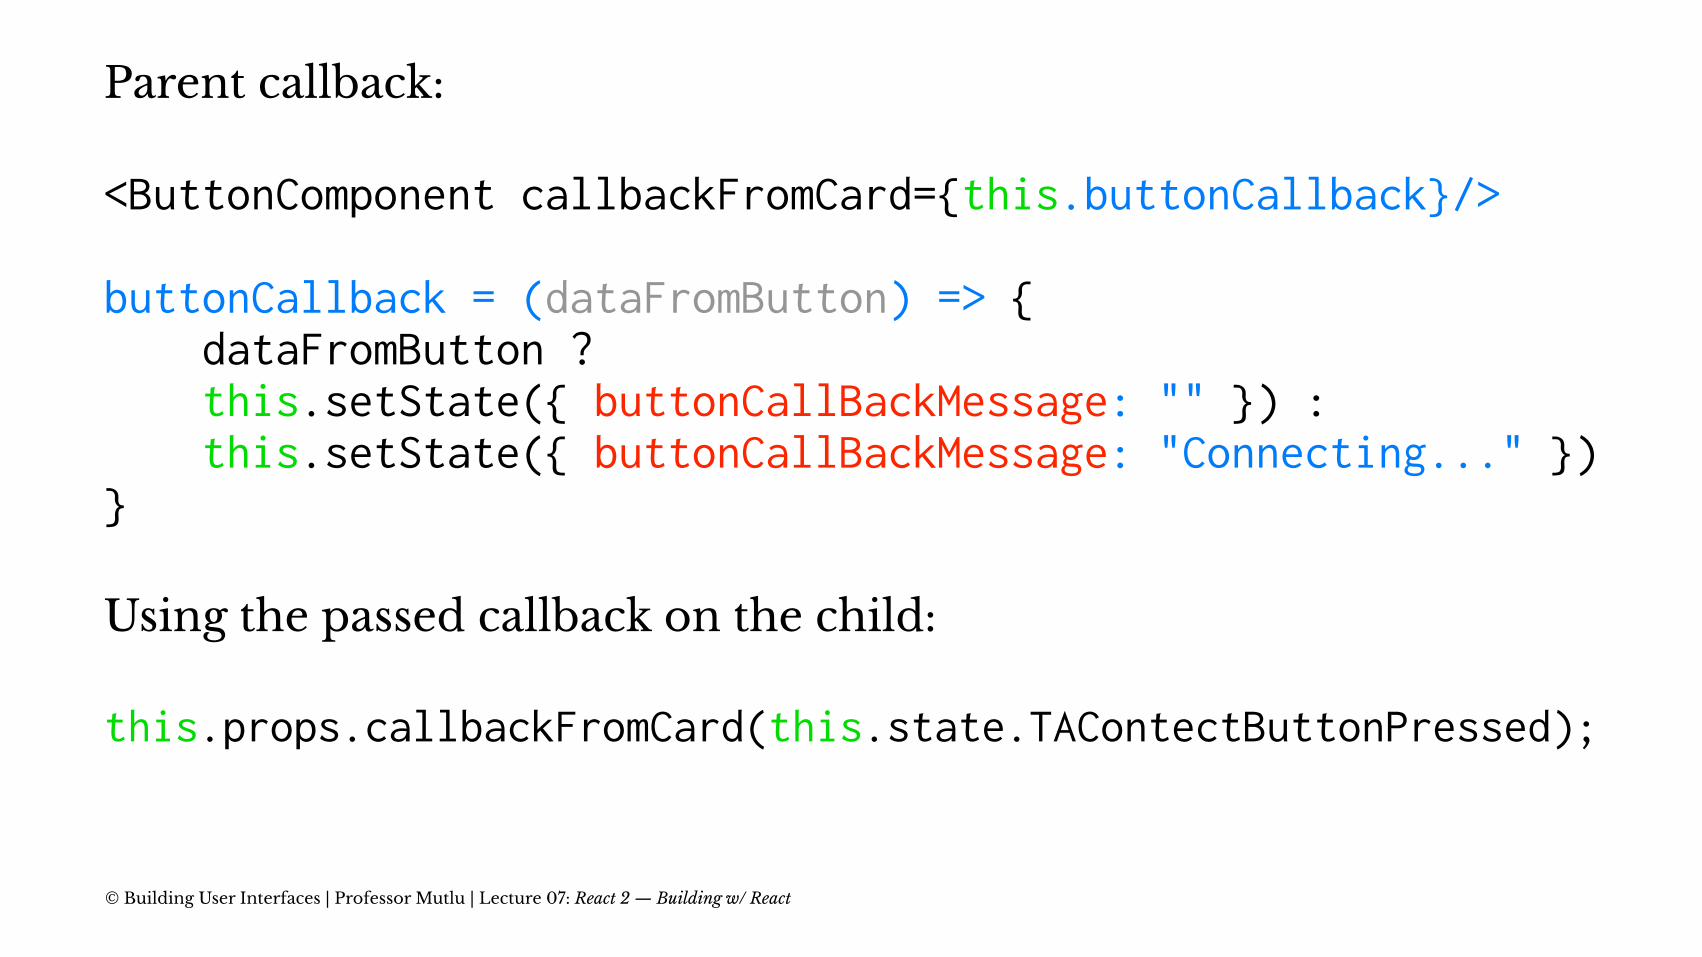
Parent callback:
<ButtonComponent callbackFromCard={this.buttonCallback}/>
buttonCallback = (dataFromButton) => { dataFromButton ? this.setState({ buttonCallBackMessage: "" }) : this.setState({ buttonCallBackMessage: "Connecting..." })}
Using the passed callback on the child:
this.props.callbackFromCard(this.state.TAContectButtonPressed);
© Building User Interfaces | Professor Mutlu | Lecture 07: React 2 — Building w/ React
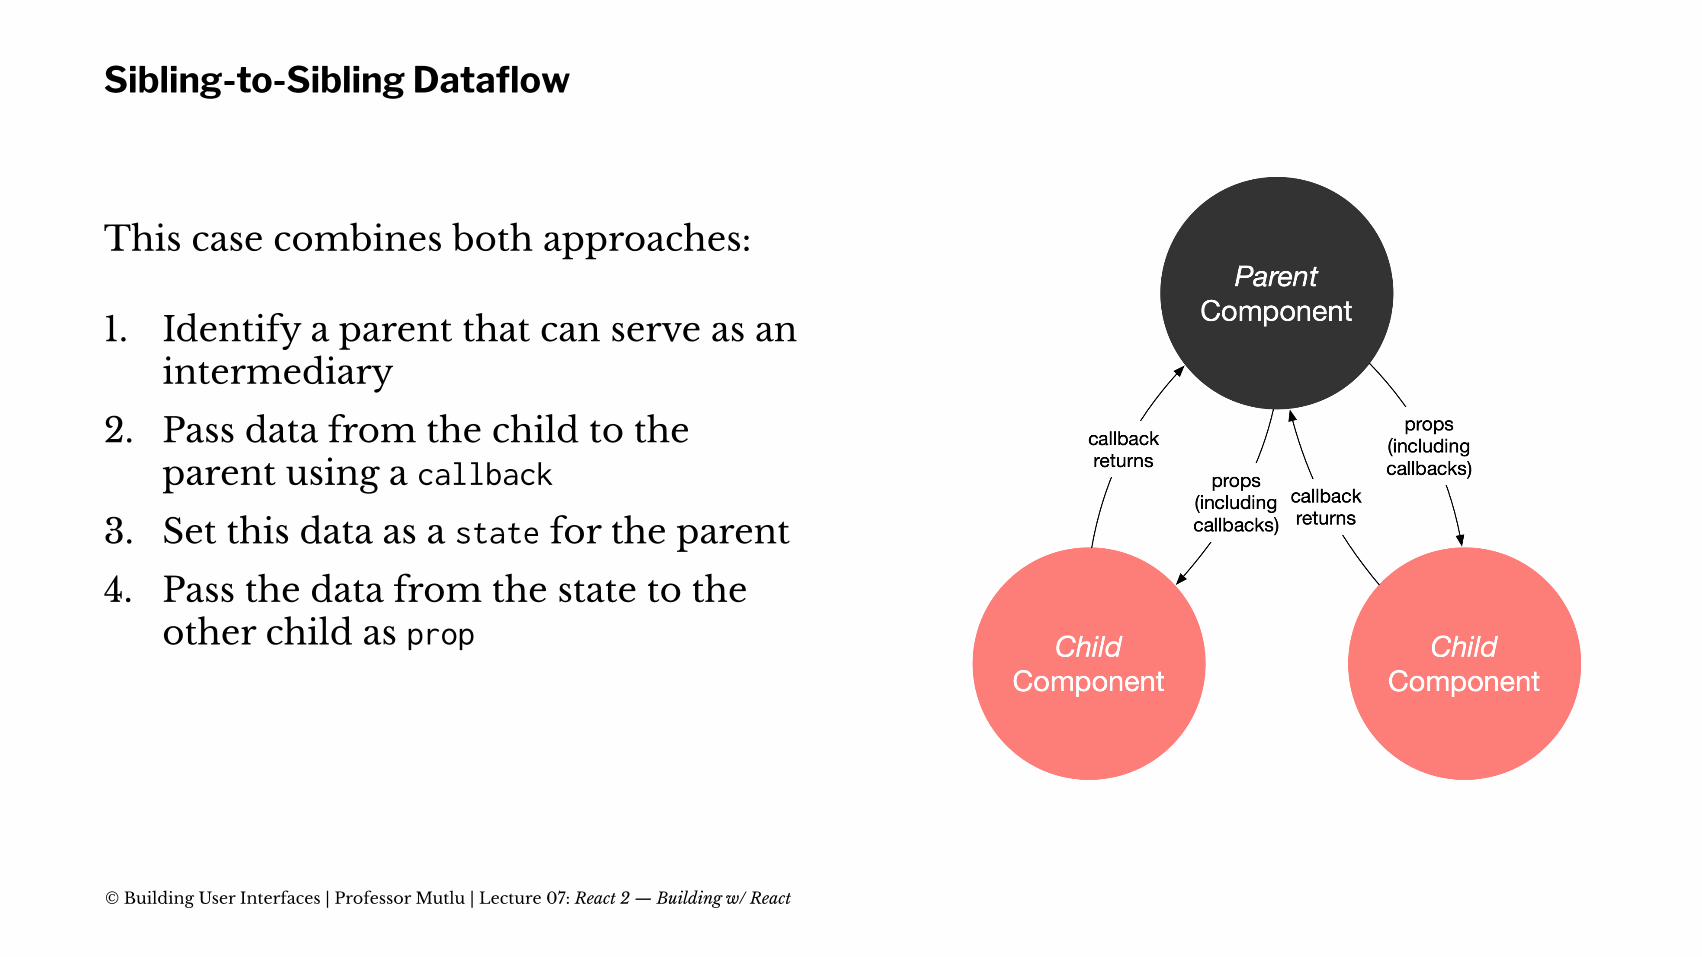
Sibling-to-Sibling Dataflow
This case combines both approaches:
1. Identify a parent that can serve as an intermediary
2. Pass data from the child to the parent using a callback
3. Set this data as a state for the parent
4. Pass the data from the state to the other child as prop
© Building User Interfaces | Professor Mutlu | Lecture 07: React 2 — Building w/ React
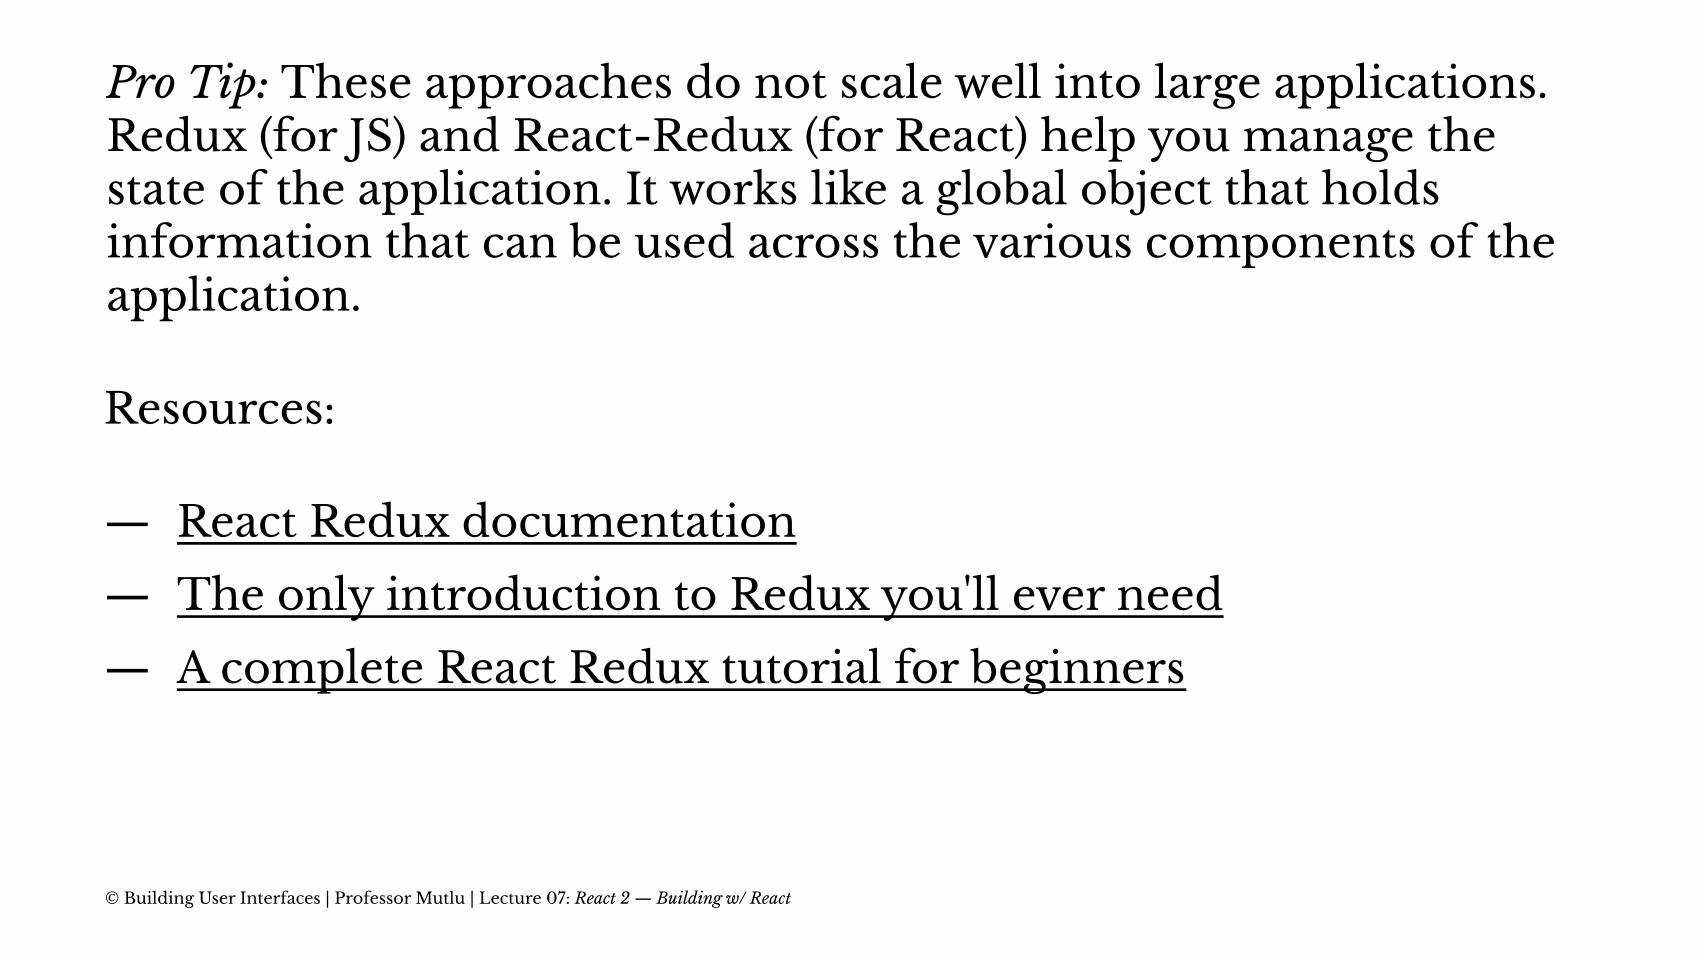
Pro Tip: These approaches do not scale well into large applications. Redux (for JS) and React-Redux (for React) help you manage the state of the application. It works like a global object that holds information that can be used across the various components of the application.
Resources:
— React Redux documentation
— The only introduction to Redux you'll ever need
— A complete React Redux tutorial for beginners
© Building User Interfaces | Professor Mutlu | Lecture 07: React 2 — Building w/ React
What we learned today:
— Using Component Libraries with React
— Component development and reuse
— Dataflow among components
© Building User Interfaces | Professor Mutlu | Lecture 07: React 2 — Building w/ React