by mike gilley - fox river systems look & review: fluke ti400 thermal imager (part 1) by mike...
TRANSCRIPT

First Look & Review: Fluke Ti400 Thermal Imager (Part 1) By Mike Gilley
For more information on this product, contact Fox River Systems at (630) 365-4030 or visit on the web at www.FoxRiverSystems.com.
An innovative autofocus system, straight forward user interface, flexible storage options, and wireless connectivity choices add up to improve usability and enable users to apply Fluke thermal imagers in new ways. When I first got our hands on Fluke's new Ti400 thermal imager, it was hard to put it down! The performance and usability of the Ti400 is so good that I felt just as excited about rediscovery of the thermal world as I did when I learned to use a thermal imager for the first time! Autofocus Reimagined The consistently excellent, in-‐focus images I was able to capture with the Ti400 was exciting because of the ease of getting good focus and the speed of getting it. The new imagers feature Fluke's new LaserSharp™ autofocus system that uses an integrated laser distance meter and automatic lens control to establish the focus distance and then get the lens into position rapidly. Competing solutions use other techniques that take educated guesses at what the target interest area is, but sometimes they make mistakes. Getting a focused image is critical to making measurements and it's challenging for many new users, so I welcomed this new time saving and image quality improving capability.
A focused image (Left) of a target located beyond a fence. Some thermal imaging autofocus systems have problems capturing this image since the imager sees both the fence and what’s behind it, but doesn’t know which to put into focus. Fluke's LaserSharp™ system focuses where you aim the laser.
A mocked up image of a Ti400 laser pointed at a tank
First Look & Review: Fluke Ti400 Thermal Imager (Part 1) By Mike Gilley
For more information on this product, contact Fox River Systems at (630) 365-4030 or visit on the web at www.FoxRiverSystems.com.
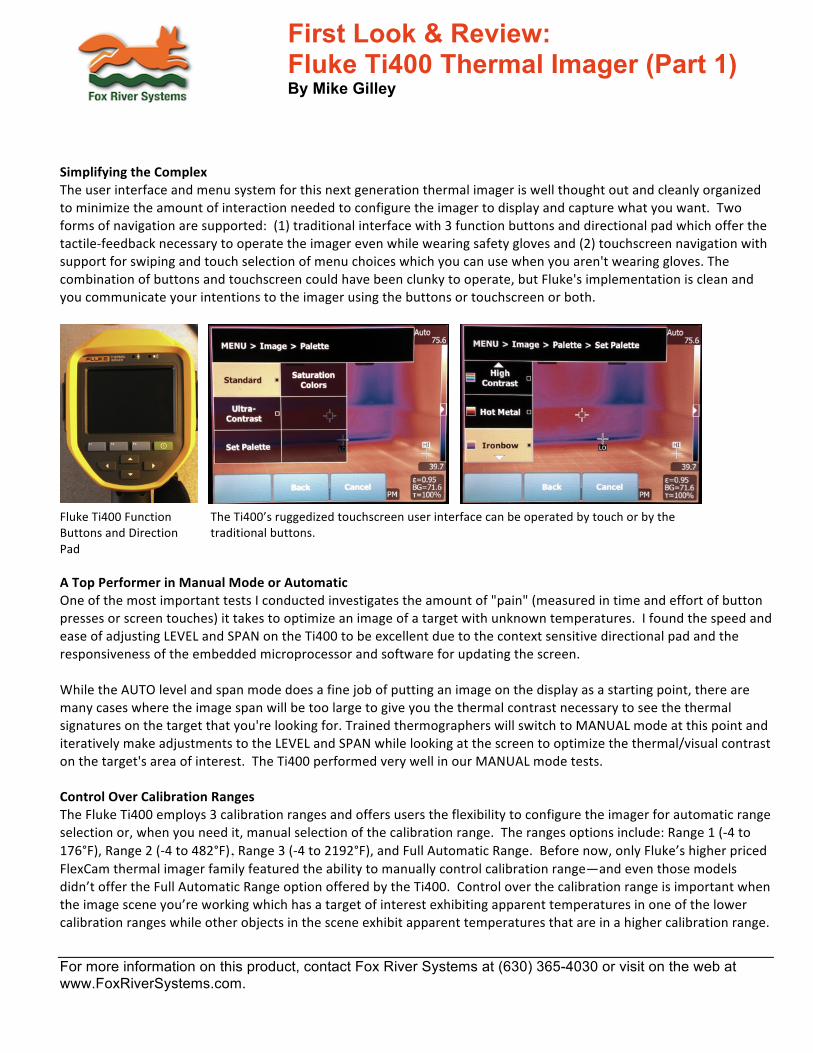
Simplifying the Complex The user interface and menu system for this next generation thermal imager is well thought out and cleanly organized to minimize the amount of interaction needed to configure the imager to display and capture what you want. Two forms of navigation are supported: (1) traditional interface with 3 function buttons and directional pad which offer the tactile-‐feedback necessary to operate the imager even while wearing safety gloves and (2) touchscreen navigation with support for swiping and touch selection of menu choices which you can use when you aren't wearing gloves. The combination of buttons and touchscreen could have been clunky to operate, but Fluke's implementation is clean and you communicate your intentions to the imager using the buttons or touchscreen or both.
Fluke Ti400 Function Buttons and Direction Pad
The Ti400’s ruggedized touchscreen user interface can be operated by touch or by the traditional buttons.
A Top Performer in Manual Mode or Automatic One of the most important tests I conducted investigates the amount of "pain" (measured in time and effort of button presses or screen touches) it takes to optimize an image of a target with unknown temperatures. I found the speed and ease of adjusting LEVEL and SPAN on the Ti400 to be excellent due to the context sensitive directional pad and the responsiveness of the embedded microprocessor and software for updating the screen. While the AUTO level and span mode does a fine job of putting an image on the display as a starting point, there are many cases where the image span will be too large to give you the thermal contrast necessary to see the thermal signatures on the target that you're looking for. Trained thermographers will switch to MANUAL mode at this point and iteratively make adjustments to the LEVEL and SPAN while looking at the screen to optimize the thermal/visual contrast on the target's area of interest. The Ti400 performed very well in our MANUAL mode tests. Control Over Calibration Ranges The Fluke Ti400 employs 3 calibration ranges and offers users the flexibility to configure the imager for automatic range selection or, when you need it, manual selection of the calibration range. The ranges options include: Range 1 (-‐4 to 176°F), Range 2 (-‐4 to 482°F), Range 3 (-‐4 to 2192°F), and Full Automatic Range. Before now, only Fluke’s higher priced FlexCam thermal imager family featured the ability to manually control calibration range—and even those models didn’t offer the Full Automatic Range option offered by the Ti400. Control over the calibration range is important when the image scene you’re working which has a target of interest exhibiting apparent temperatures in one of the lower calibration ranges while other objects in the scene exhibit apparent temperatures that are in a higher calibration range.

First Look & Review: Fluke Ti400 Thermal Imager (Part 1) By Mike Gilley
For more information on this product, contact Fox River Systems at (630) 365-4030 or visit on the web at www.FoxRiverSystems.com.
Ultimately, the biggest impact of working in too high of a range is that the image quality can suffer since small temperature differences are not as detectable when working in the higher ranges. You can maximize the quality of your image and improve accuracy of measurement by manually selecting the lowest temperature calibration range possible to detect the apparent temperatures of your target. For example, if you were inspecting the inside of a building envelope to assess insulation performance and a 500°F boiler was operating and located within the thermal image scene that you are about to capture, a Ti400 in Full Automatic Ranger would select to operate in calibration Range 3 and you could now manually select to operate in calibration Range 1 since the building envelope temperatures should be well under 176°F! High Temperature Measurements Range 1 will be the most common range to operate in for a building envelope inspection, but what about high temperature manufacturing processes? These applications demand Range 3 and beyond. Fluke's foundry and mill customers will appreciate the support that the Ti400 offers for high temperature applications up to 2192°F. The high temperature capabilities address a gap that Fluke has had in its thermal imager product line ever since the Ti45HT high temperature thermal imager was discontinued several years ago. In Part 2 of the Ti400 First Look & Review, I'll report on the wireless connectivity options, the SmartView 3.4 update (for Windows PC), and the introduction of the SmartView Mobile App (for Apple iPhone and iPad).